Challenge 5 : Concept Modeling of Car Bumper
CONCEPT MODELLING OF CAR BUMPERS
Objective: To design Front and rear bumpers of a car from orthographic views
Introduction:
In this project, I will be modeling the surface forms of car bumpers by referring to the given orthographic reference views of an Abarth 500 car. The model will be analyzed for flows of surfaces using visualization techniques to ensure maximum continuity.
Design methodology/approach
Setting up the workspace
↓
Importing canvas images
↓
Curve structure generation
↓
Surface formation with continuities
↓
Analyzing the model by visualization
↓
Finishing the work
Description
Assignment 1: Front bumper
The whole model is needs to be made up in a dimension box that has the length, width, height same as the reference images. we use a simple cube for this and make changes to it's dimensions using information windows. then assign it to a layer and make it inactive.
For setting up the reference image, first it need to cutout the different views from the reference and open those as canvas images.
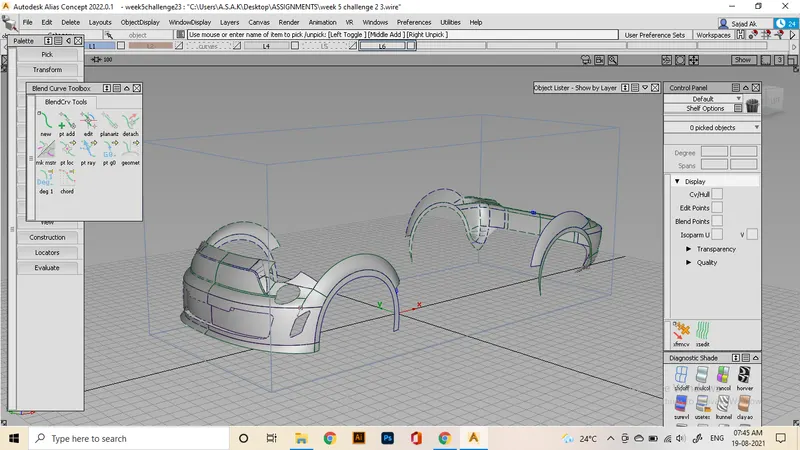
The main process starts usually as tracing the curves from the front fender side view and making place surface with skin tool. Other main curves are created based on these fender curves by using snapping option. then the curves will be moved outward from the center portion by referring to the front views and arranges as required.
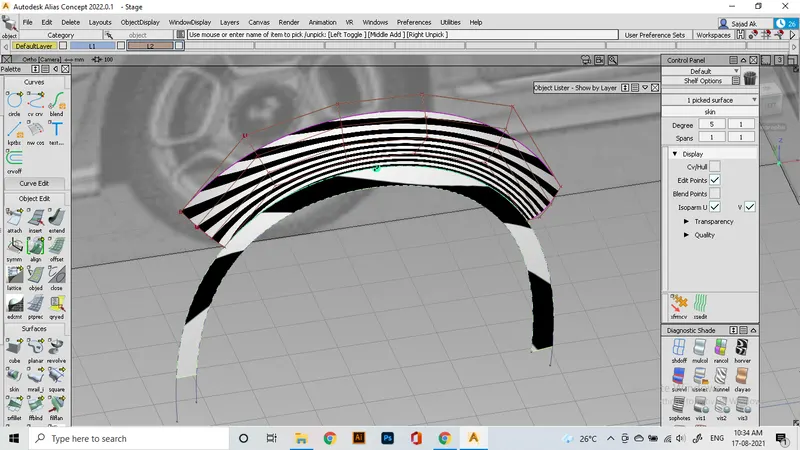
Here we can see the initial structure formed from the fender part and visualize the pattern of flow. By following the method, i will be generating the remaining portion of the front bumper using cvcurv, blend tool for curve making and skin, rail, square tools for surface generation.
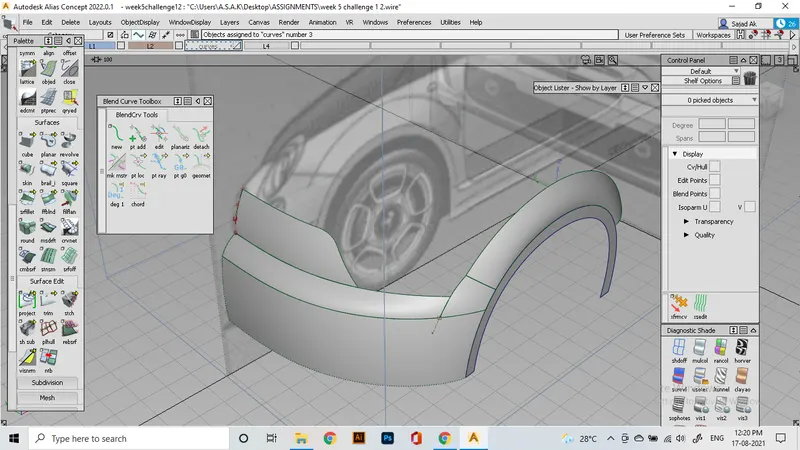
for ensuring continuity, we make the edges of surfaces as G2 curvature for continuous flow, and G0 positional for edge alignment. that can be assigned when creating surfaces or after by by using queryedit tool.
Sometimes for getting continous curve flows, we use the method of projecting curves on surfaces and aline the curves on cos.
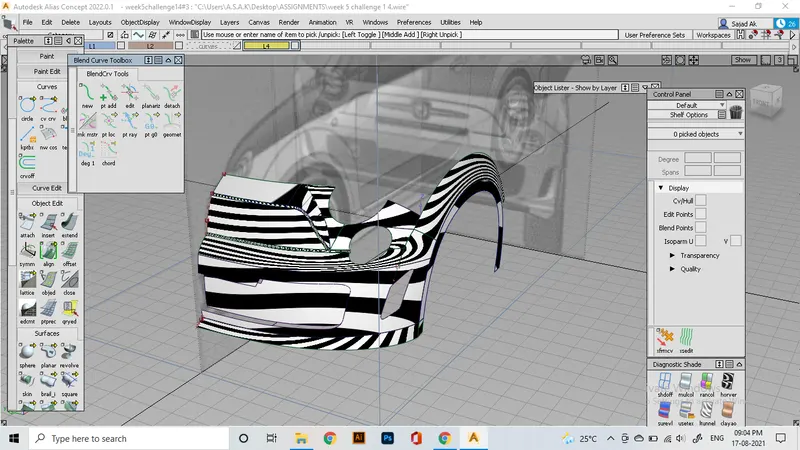
For the areas between the headlight and the front shape, we use intersecting option and trim command for getting those edges.
Later add srfillet tool to make fillets on the sharp edges for removing sharp edges. Srfillet with the settings of chord, makes a smooth curved surface between 2 slanted edges. those curves can be manipulated to achieve the required flow. usually, an edge will form at the ends of each fillet that needs to be trimmed and connected to the near surface for ensuring the flow.
After that, we can add details of the headlight areas using circles, and then projecting and trimming as shown.
We use symmetry to project the other half of the model about the respective axis. This is the flow of surface i'm able to achieve in my Model.
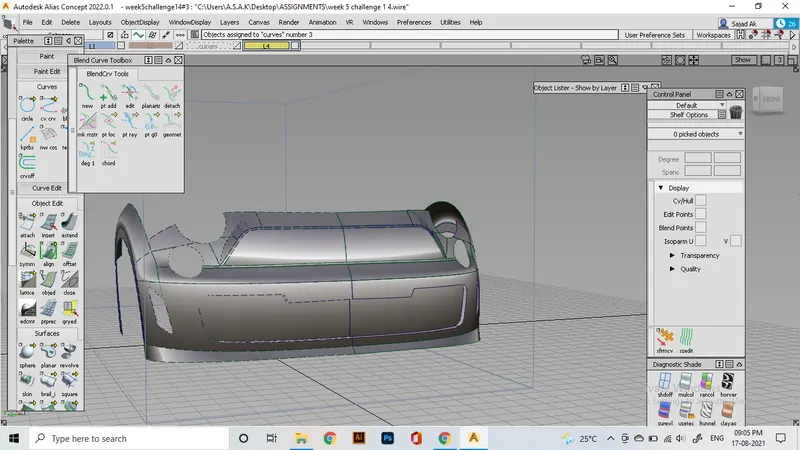
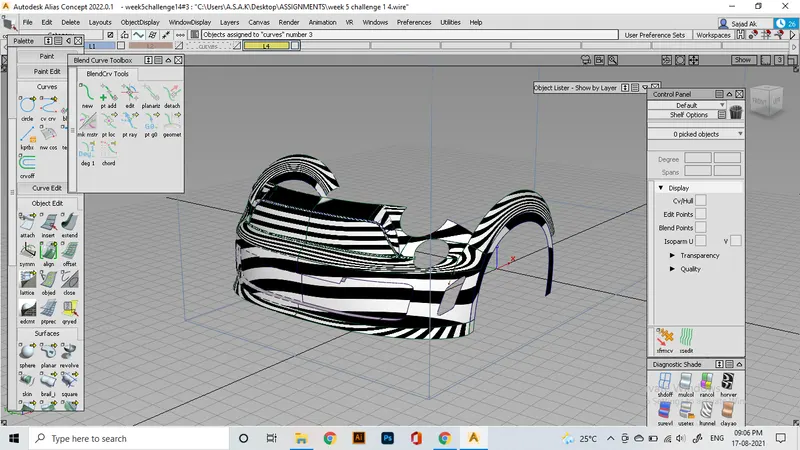
ASSIGNMENT 2: Rear bumper
By using the similar approach, The rear bumper of the car is also built on the same workspace by referring to the rear view canvas image and same side view.
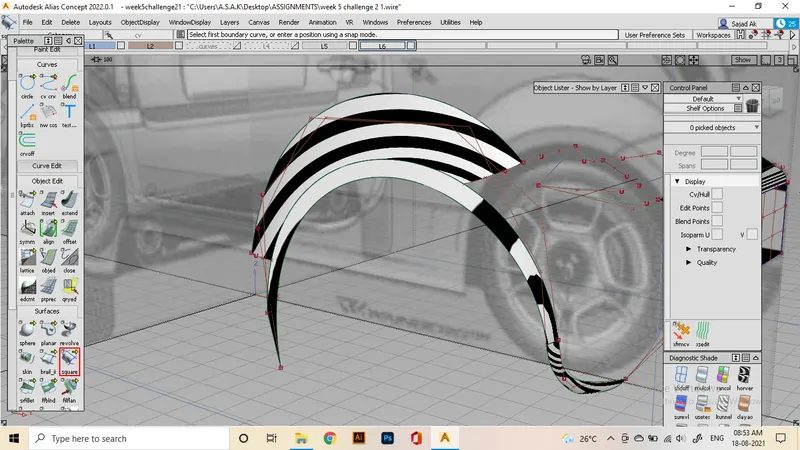
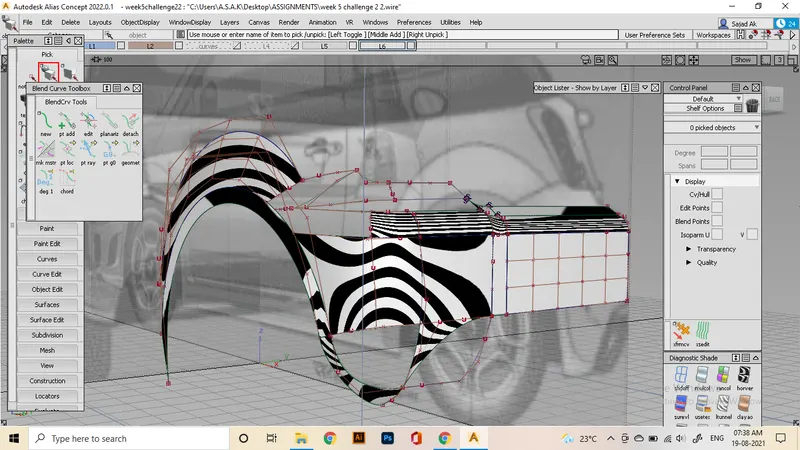
The bottom part of the bumper is tricky since there is a portion that needs to make a surface between 3 curves. So i split one of the curves to get 4 sides, then used square command to fill up the region.
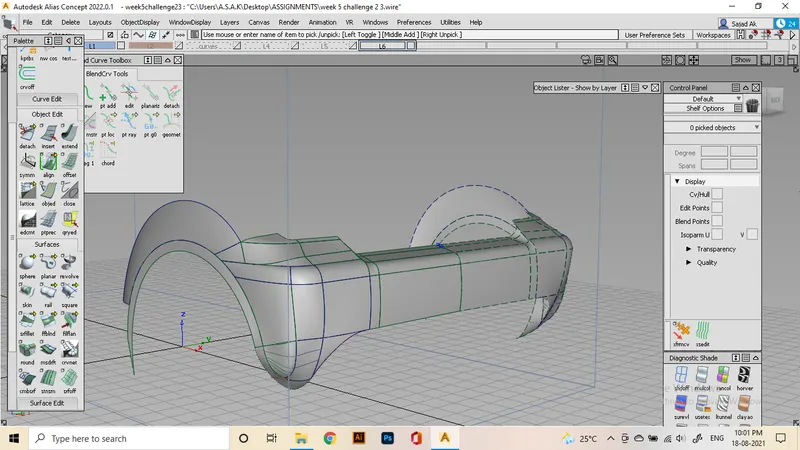
Conclusion:
Studied the forms and Detailed surfacing of a car bumper using alias and built front and rear bumpers of abarth 500 car. Also studied tools For filleting and advanced surface curvature alignments.