Week - 8 - Morphing
AIM:
To practice and apply the Morphing techniques on the given models and morph the model as given in the question.
PROCEDURE:
We haven been given two models in the challange, so in the first model we have to practice the morphing techniques as we show in the video.
STEP 1:
First we have to import the CAD model to the ANSA software to practice.
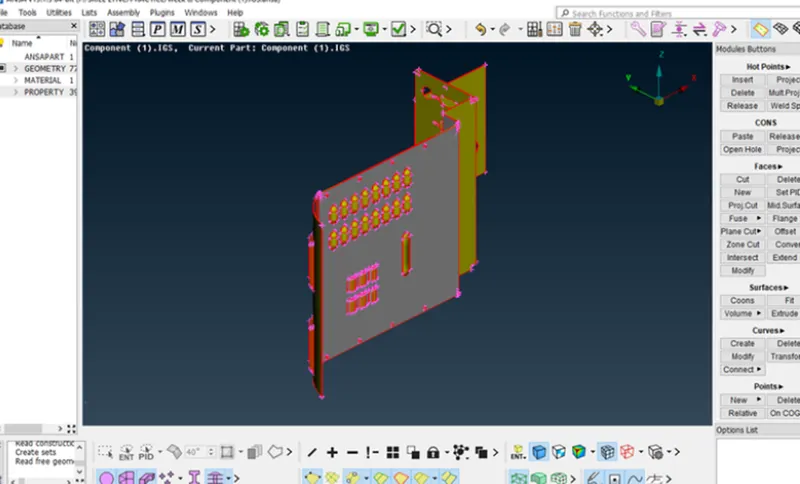
("IMAGE 1:Importing the model ")
As we already know , after the model is imported to ansa we have to perform the topo logical cleaup on the model.
Aftre the cleanup we have to do the geometry check in the checks manager which is present in the tools modules
After the geometry check is completed, we have to check the orentation of the model.
Then the length of the perimetres need to assigined in the mesh modules perimeter option.
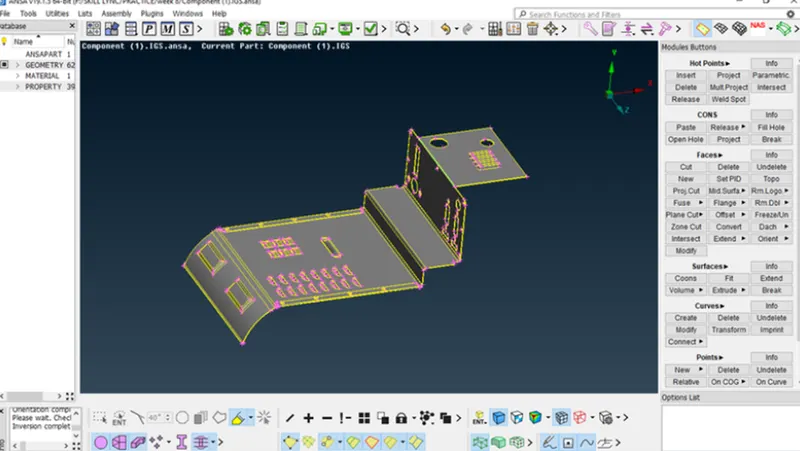
("IMAGE 2 :Model 1 after geometry and topo cleanup ")
STEP 2:
Then switch to MORPH MODULE, for creating a box ,as we have to first create a box to morph the model.
To create a box go to NEW command in the BOXES option which is in the MORPH MODULE.
After going into NEW we will be directed to another NEW MORPH.
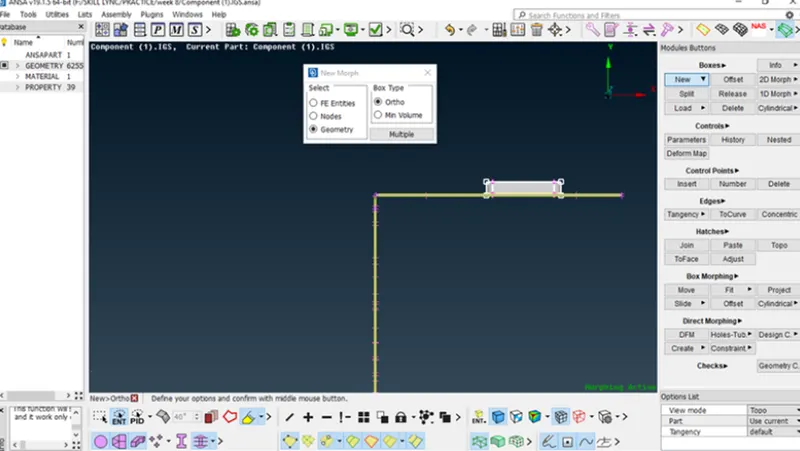
("IMAGE 3: Creating BOX for a area in model 1 ")
In new morph wiondo we have to select ORTHO and As we have geometry we have to select GEOMETRY to create a BOX. Apart from this we also have NODES and FE ENTITIES for FE models and Mid surfaces.
MORPH MODULE<BOXES<NEW<ORTHO<GEOMETRY<select the area in the geometry < BOX is created by conforming.
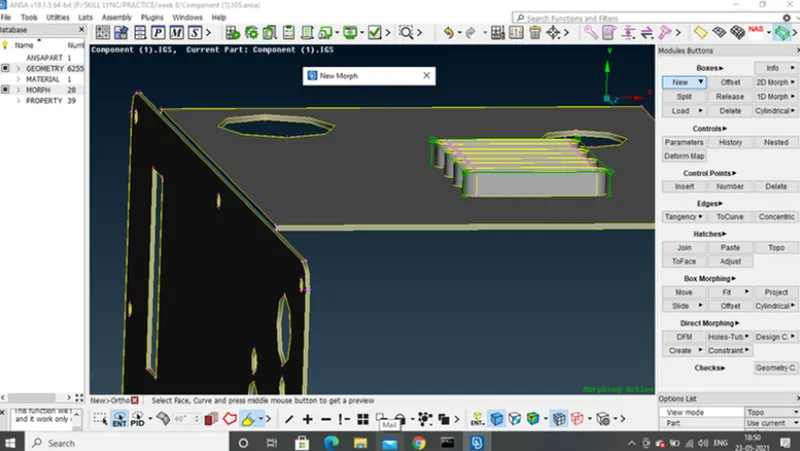
("IMAGE 4: BOX is created in a area selected in model 1 ")
STEP 3:
After the box is created , We have SPLIT command in BOXES where we can split the which we have created so that it helps the user to morph the model according to the user.
MORPHE MODULE<BOXES<SPLIT<click on the box entities to split.
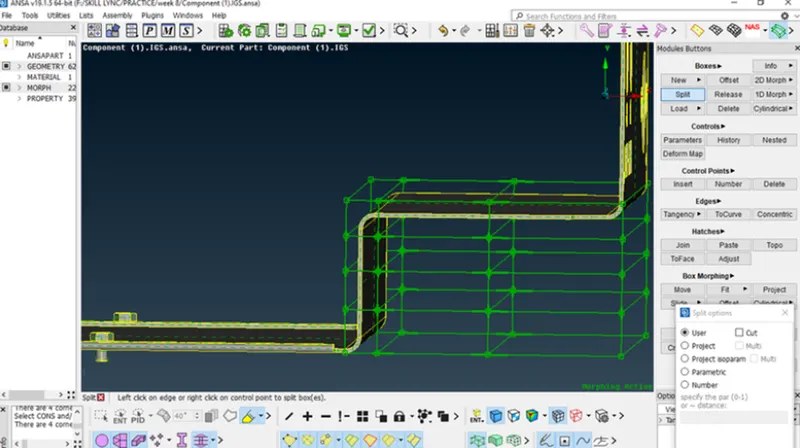
("IMAGE 5: SPLITS are on the BOX created in a area selected in model 1 ")
STEP 4:
After creating the box, To change the length of any particular part in the model we have go to BOX MORPHING OPTION In MORPH MODULE.
In BOX MORPHING we have a command called MOVE which helps to change the length of the geometry in the partiular part where the box is created.
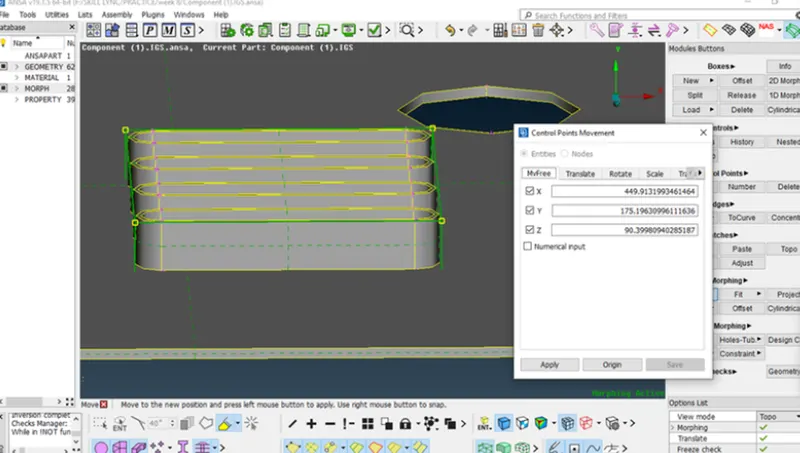
("IMAGE 6: Using MOVE command and changing length of the area selected in model 1 ")
(MORPH MODULE< BOX MORPHING<MOVE<ENTITIE<select the entities ofthe box created and by comforming and moving the mouse we can change the lenght of the selected area in the box according the global axis)
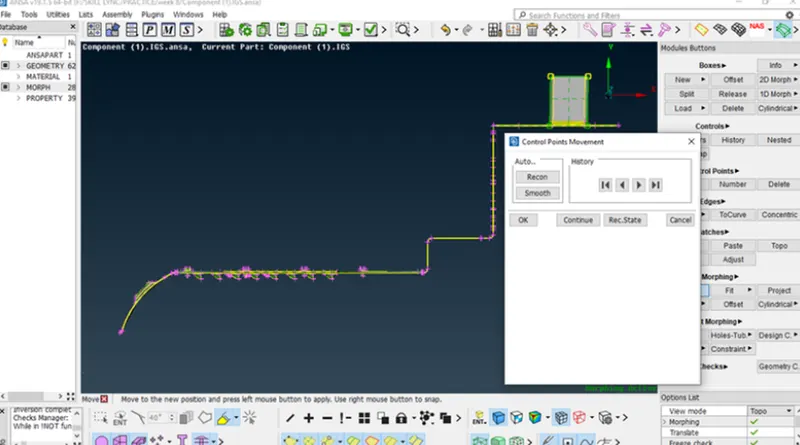
("IMAGE 7: Model 1 After changing length in selected area ")
Finally we have morphed or changed the Length of the given model 1 by creating BOX and SPLITING THE BOX and MOVING accoring to the user working on it.
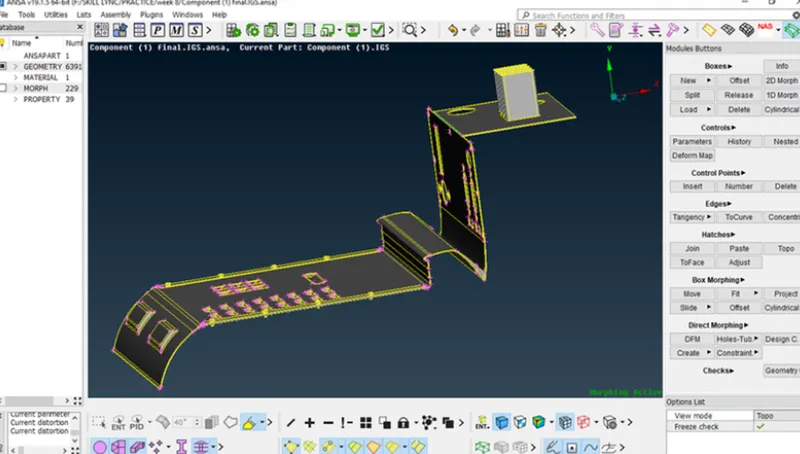
("IMAGE 8: Model 1 After MORPHING ")
2. In the given second model of the Challenge we have to morphe and increase the Height of the Dog houses and Ribs which are given in the sample image below.
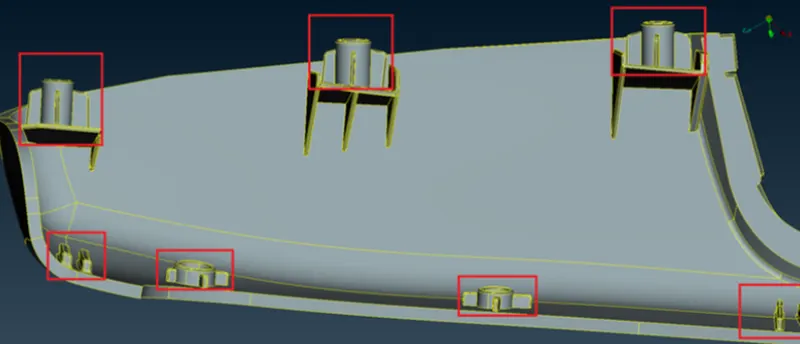
("IMAGE 9: Areas which need to be morphed in model 2 ")
Follow all the Abve Steps from Step 1 to Step 4 accordingly.
First we have to import the CAD model to the ANSA software to practice.
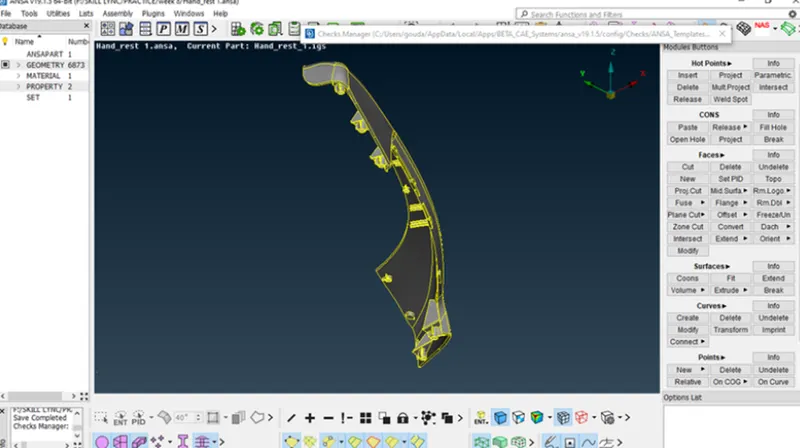
("IMAGE 10: Importing the model 2 ")
Do topological and geometry cleanup on the model 2.
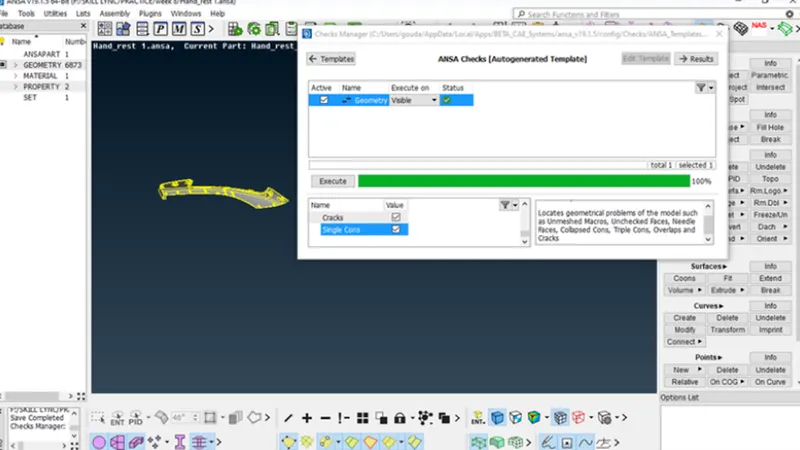
("IMAGE 11: Geometry check on model 2 ")
Now, switch to MORPH MODULE to create boxes in the areas which are need to morphed in model 2. i.e, the height of the dogs houses and the ribs in the model 2which are showed in the image 9.
Before that , measue and store the length of the dog houses and ribs in model 2 to check whether the length is changed or not.
Now, follow step 2 to create the box.
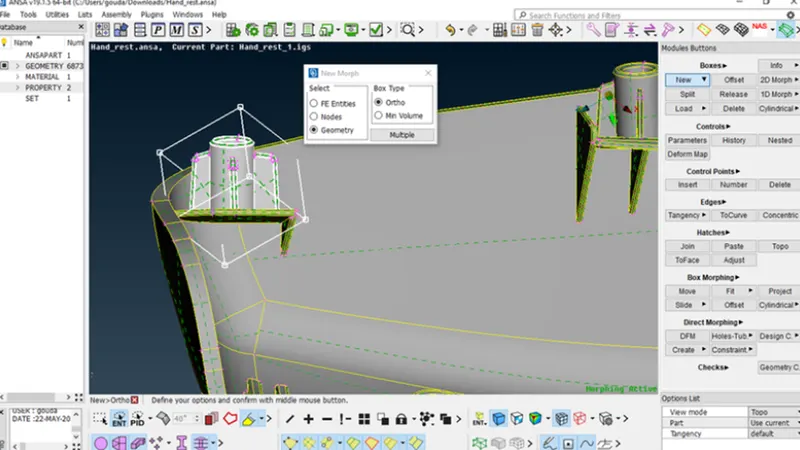
("IMAGE 12: Creating a Box for one of the dog house which is marked in model 2 ")
Like wise create for all the marked areas as given
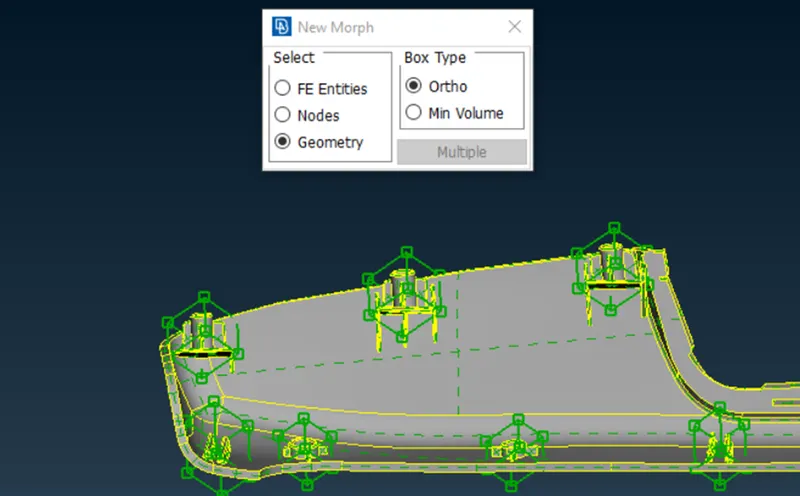
("IMAGE 13: Boxes for all areas which are marked in model 2 ")
Now, follow Step 4 and change the length or height if the given dog houses and ribs in the model 2 by using move command in BOX morphing option in MORPHE MODULE.
(MORPH MODULE< BOX MORPHING<MOVE<ENTITIE<select the entities ofthe box created and by comforming and moving the mouse we can change the lenght of the selected area in the box according the global axis)
Finally the height of the dog houses and the ribes are changed by morphing.
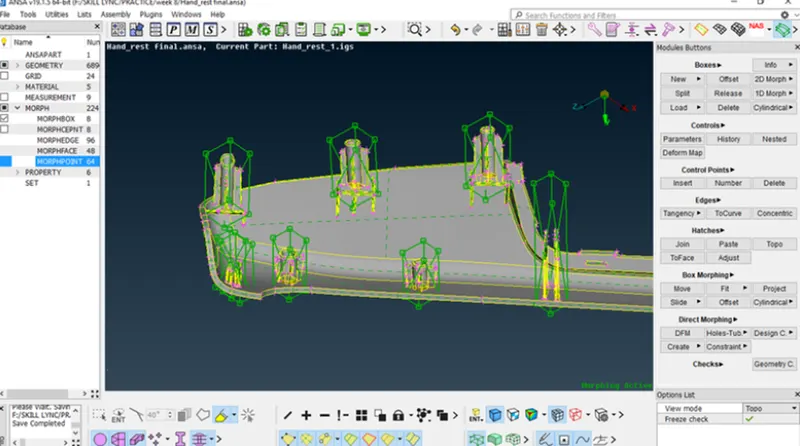
("IMAGE 14: Model 2 after Morphing")
CONCLUSION:
Successfully achieved, MORPHING on Model 1 and Changed the Height if the dog houses and ribes which are maked by creating Boxes and MORPHING.
LEARNING OUTCOMES:
Learned how to import the geometry.
Learned how to do geometry check and clean the geometry.
Learned how to change the oreantation of the model.
Learned how to create a new box for morphing.
Learned how to split the box created.
Learned how to how to change the lenght of the area in the geometry where box is created by wsing MOVE command and entities of the box.
Learned how to how to morph the FE MODEL.