Week 8-3D Tetra Meshing Challenge
AIM-
To create a TETRA MESH on the given cad models by following the given quality criteria.
OBJECTIVE-
Creating the tetra mesh on the given cad models by using different tetra mesh generation methods which satisfy the given quality criteria as mentioned below: -
a. Model 1-
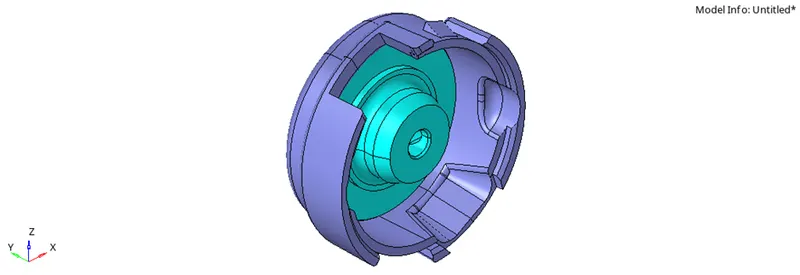
Image 1- model components
Tetra mesh generation method – 2D to 3D conversion method.
Quality criteria- (Element size- Min 2 units, MAX 7 units, Target size- 5 units, Tet collapse- 0.15)
b. Model 2-
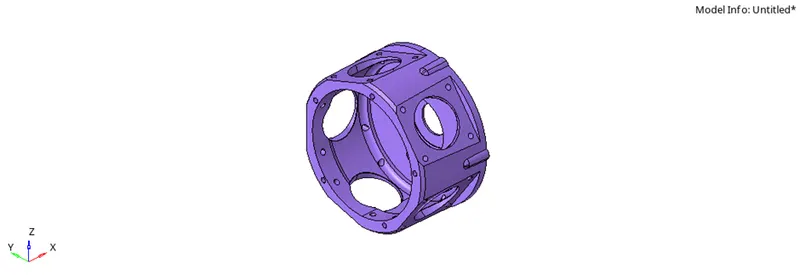
Image 2- model 2 geometry
Tetra mesh generation method – Quick tetra mesh/ Volume tetra mesh method.
Quality criteria- (Element size- Min 2 units, MAX 7 units, Target size- 3 units, Tet collapse-0.15)
c. Model 3-
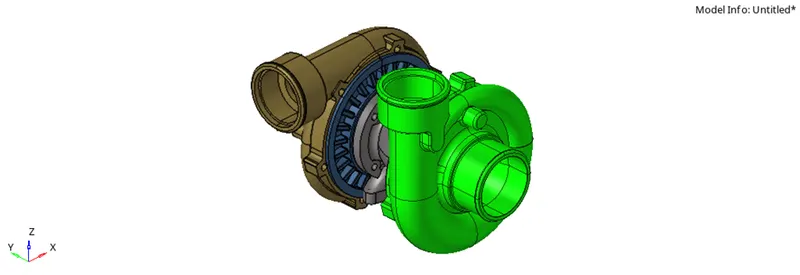
Image 3- model 3 components
Tetra mesh generation method – Quick tetra mesh/ Volume tetra mesh method
Quality criteria- (Element size- Min 2 units, MAX 7 units, Target size- 4 units, Tet collapse- 0.15)
Procedure –
1. Generation of tetra mesh by 2D to 3D conversion method.
a. Import the given cad model by using the import geometry option.
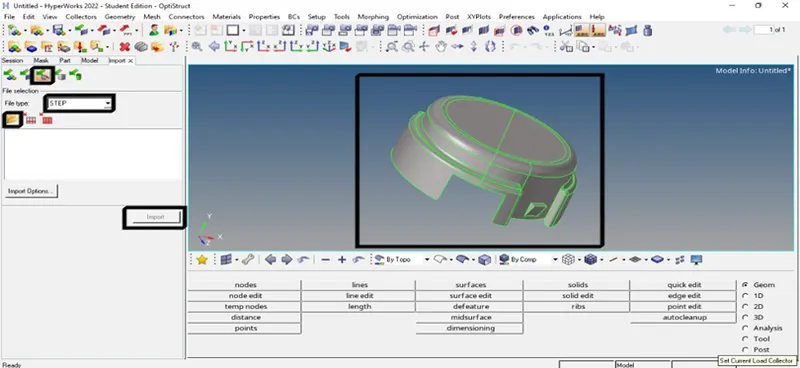
Image 4- importing the geometry
b. After importing the geometry change the geometry view into the TOPO view and if u can see that solid components are present then go to the delete option and change the option to solids and select the solids from the model and click on delete after deleting the solids now, we can see only surfaces present in the GIUI screen.
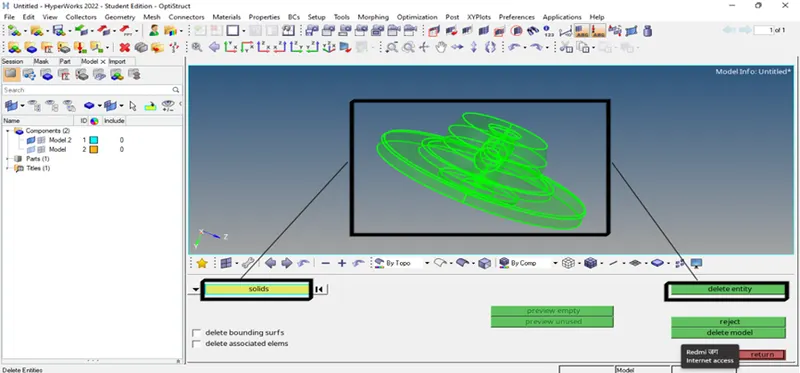
Image 5- deleting the solids from the model
c. After deleting the solids now go for the geometrical clean-up by using the quick edit tool from the tool panel and clean the unwanted lines, sharp edges, and surfaces.
d. After cleaning the geometry now, we have to do the 3D meshing by using the 2D to 3D conversion method. This model contains two components that have to mesh one by one.
(2D->auto mesh->element size-> mesh type-> only trias-> select surfaces -> mesh)
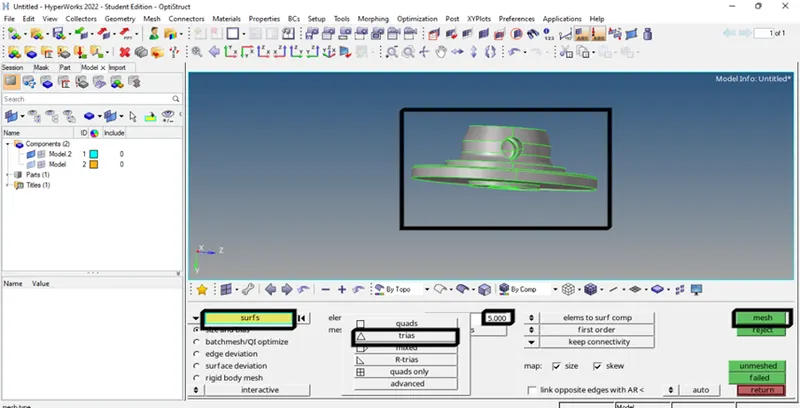
Image 6- generating 2D tria mesh on the component- 1 of the model

Image 7- component has meshed with 2D tria elements.
e. After generating the 2d mesh now we have to convert the 2d mesh to 3d mesh by using the 3d tetra mesh tool option. After selecting the option set the tetra mesh parameters as per the given criteria.
(3D-> tetramesh-> teramesh parameters)
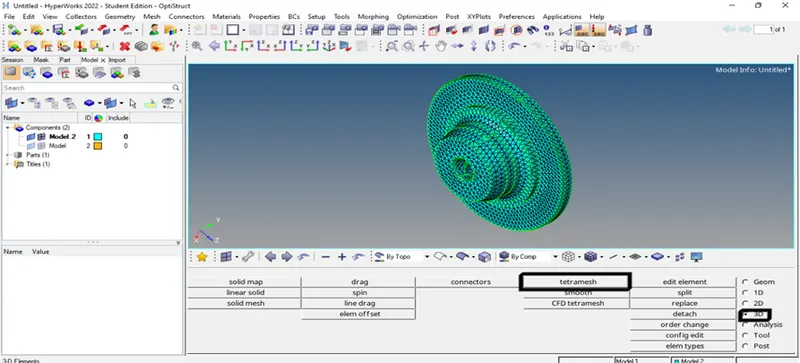
Image 8- conversion of 2D mesh to 3D tetra mesh.
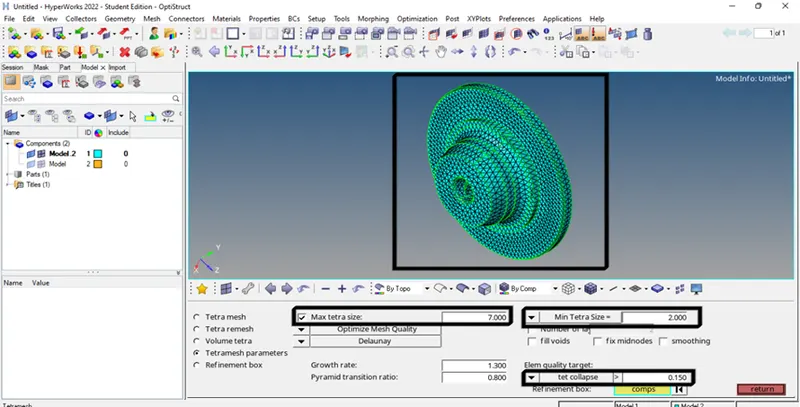
Image 9- setting the tetra mesh
f. After setting the parameters click on the tetra mesh option and select the surfaces and click on the mesh.
(3D-> tetramesh-> tetramesh parameters-> set the parameters-> tetramesh -> select surfaces -> mesh)
g. After generating the 3D tetra mesh now to verify the 3D mesh, we can mask some of the elements and check the mesh.
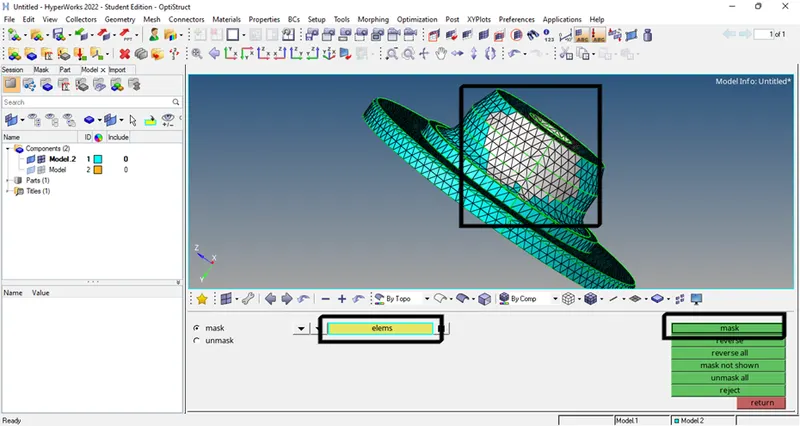
Image 10- verifying 3Dmesh using mask tool
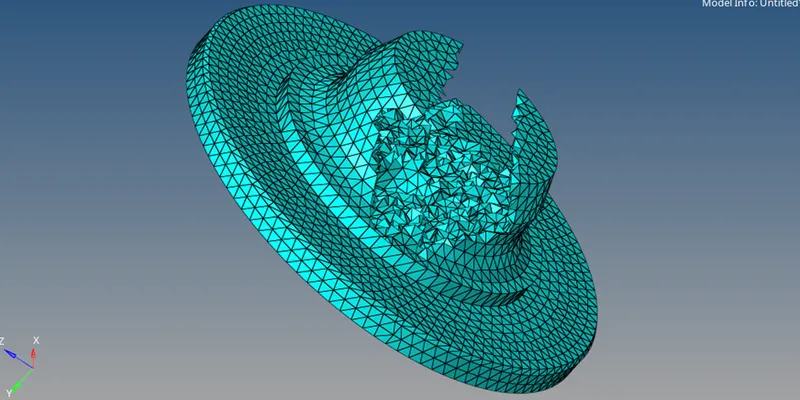
Image 11- proper 3D tetra mesh has been achieved
h. After generating the 3d mesh now we have to check the quality and the Tet collapse value using the element check-up tool.
(Tools-> check elements-> 3D-> Tet collapse)
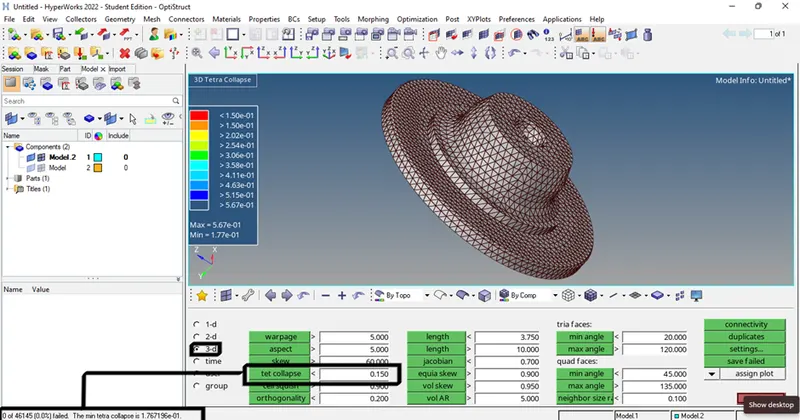
Image 12- checking element quality and Tet collapse.
i. Repeat the same procedure for the second component and check the quality if elements are failing repeat the geometrical clean-up procedure again to get accurate results.
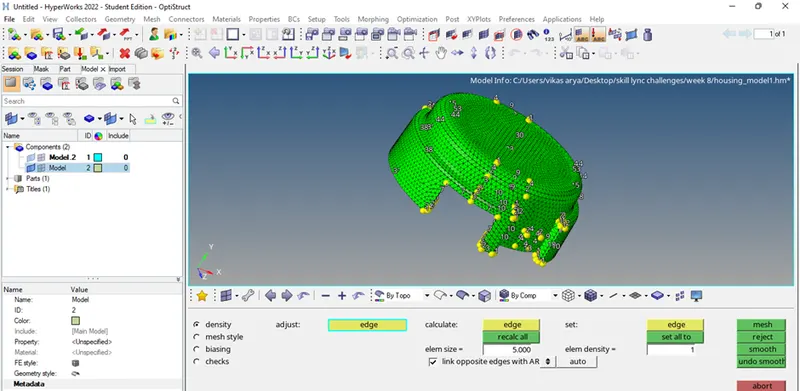
Image 13- generation of 2D mesh.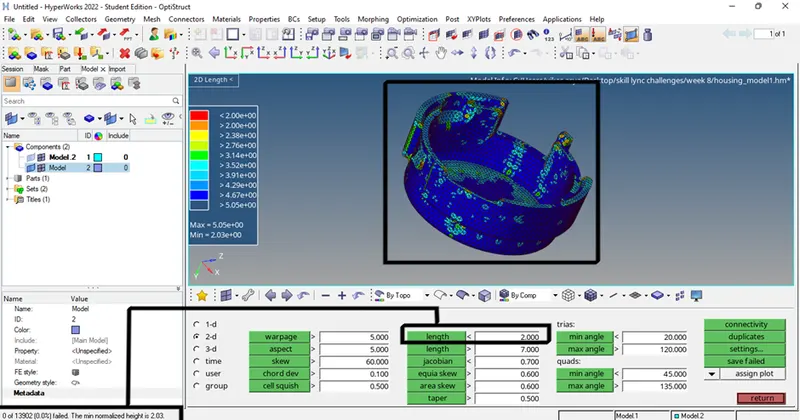
Image 14- checking for min element length
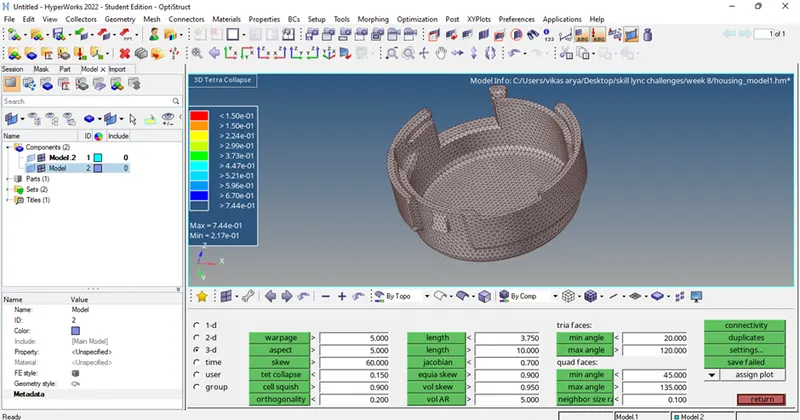
Image 15- checking element quality and Tet collapse
Procedure-
Model 2- Generation of tetra mesh on the given model by quick tetra mesh method.
a. Import the required geometry using the import geometry option and change the format to IGES and import the IGES file.
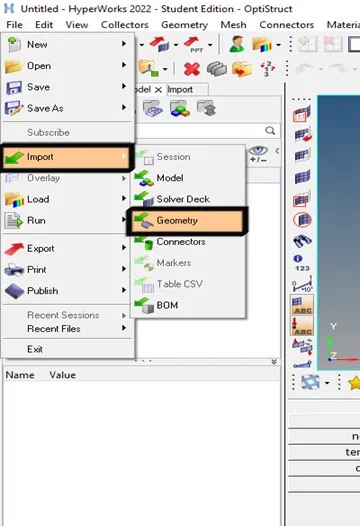
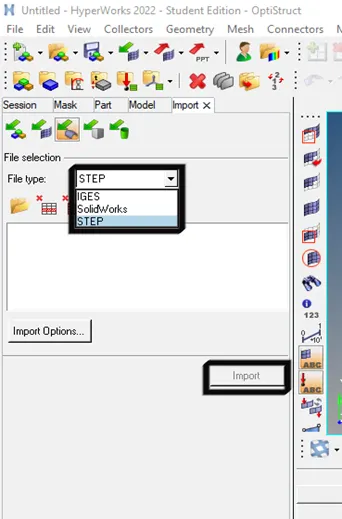
Image 16- importing the second model.
b. After importing the geometry change the geometry view into TOPO view and if u can see that solid components are present then go to the delete option and change the option to solids and select the solids from the model and click on delete after deleting the solids now, we can see only surfaces present in the GIUI screen.
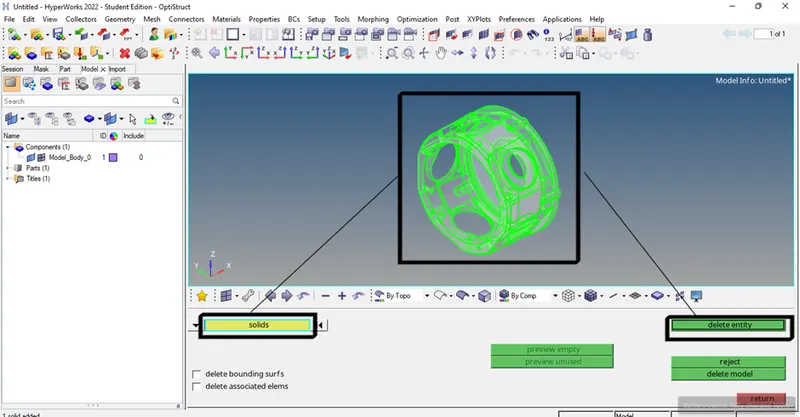
Image 17- deleting the solids
c. After deleting the solids now go for the geometrical clean-up by using quick edit tool from the tool panel and clean the unwanted lines, sharp edges, and surfaces.
d. After cleaning the geometry now, we have to create 3D tetra mesh using quick mesh method. To create the quick mesh, go to the view option in the title bar and menu bar then click on the browser option then go to the hypermesh and click on the utility option.
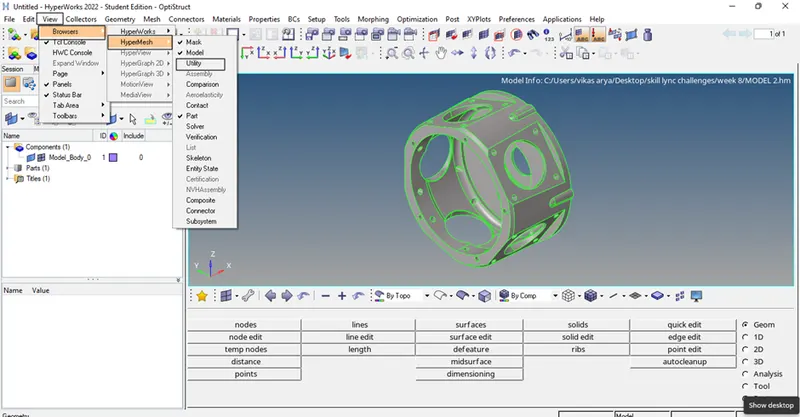
Image 18- process to generate quick tetra mesh
e. After opening the utility go to the geo/mesh option in the TAB BAR and then click on the option quick tetra mesh. Set the required parameters as per the given criteria and click on the mesh.
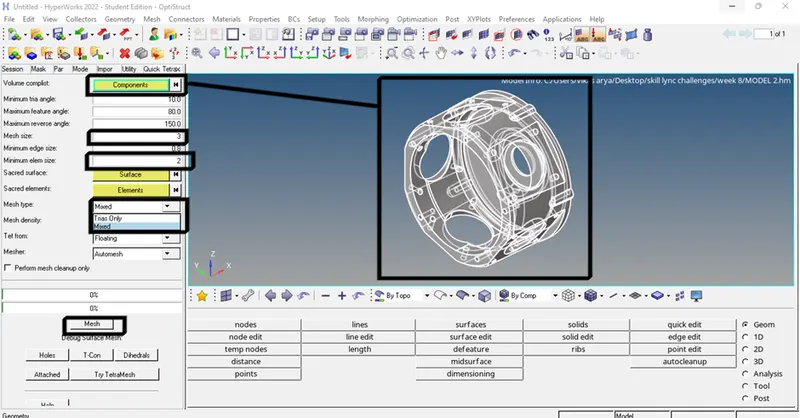
Image 19- setting up the parameters
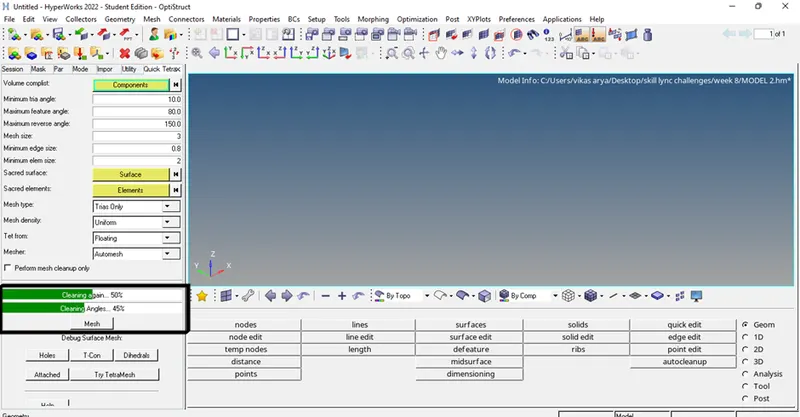
Image 20 – meshing in progress
f. After generating the 3D tetra mesh now to verify the 3D mesh, we can mask some of the elements and check the mesh.
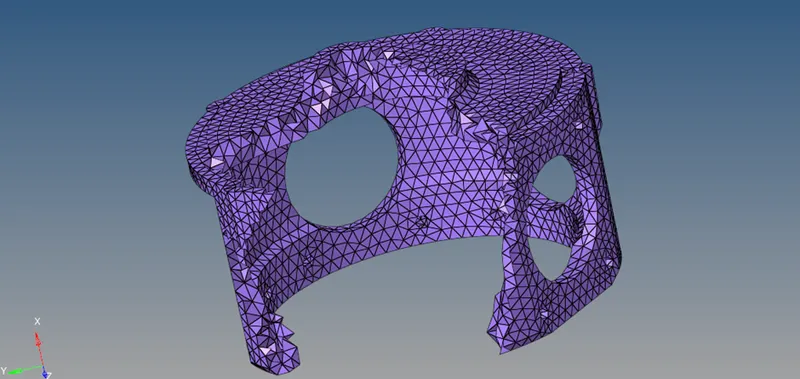
Image 21- proper 3d mesh has been achieved
g. After generating the 3d mesh now we have to check the quality and the Tet collapse value using the element check-up tool.
(Tools-> check elements-> 3D-> Tet collapse)
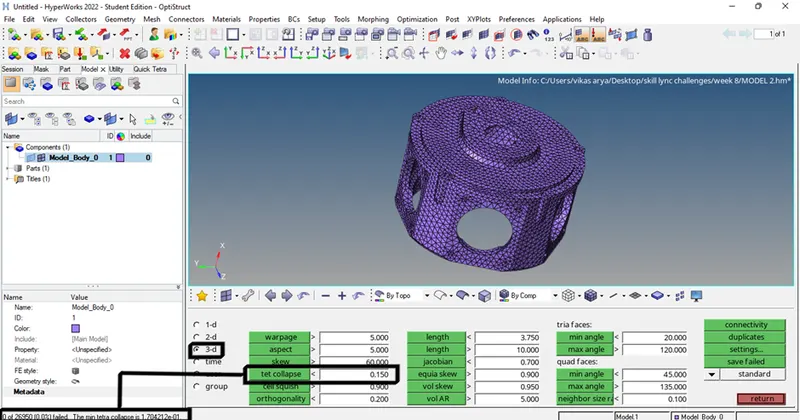
Image 22- checking element quality and Tet collapse.
Procedure –
3. Model 3- Generating 3D tetra mesh on the given model by using the volume tetra mesh method.
a. Import the required geometry using the import geometry option and change the format to IGES and import the IGES file.
b. After importing the geometry change the geometry view into the TOPO view and if u can see that solid components are present then go to the delete option and change the option to solids and select the solids from the model and click on delete after deleting the solids now, we can see only surfaces present in the GIUI screen.
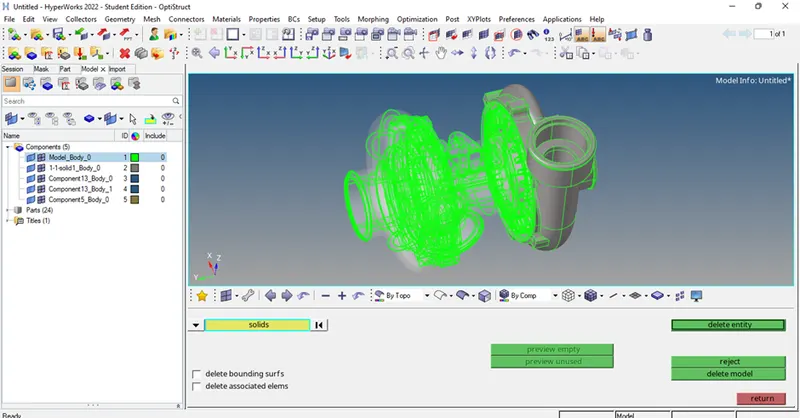
Image 23- deleting the solids from the given model.
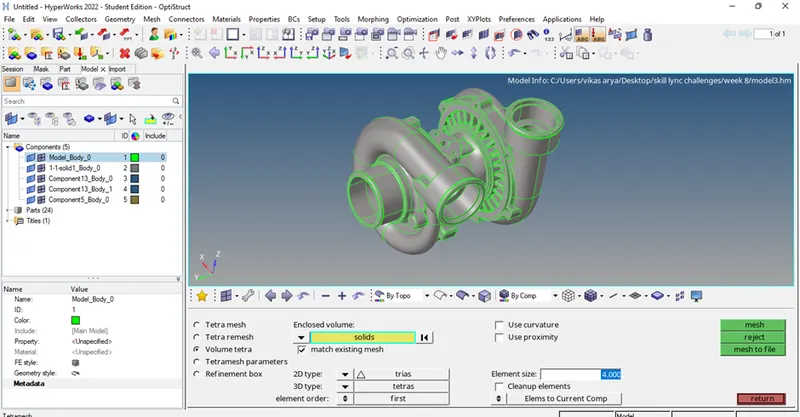
Image 24 – after deleting solids surface has been achieved
c. After deleting the solids now go for the geometrical clean-up by using the quick edit tool from the tool panel and clean the unwanted lines, sharp edges, and surfaces.
d. After cleaning the geometry now, we have to create a 3D tetra mesh using the volume tetra mesh method. To create the quick mesh, go to the 3D on the tool panel and click on the tetramesh option and set the tetramesh parameters as per given quality criteria then go to the volume tetramesh option in the same panel and set the required element size and change the selection option to the surface and select the all surtface to be mesh and click on the mesh.
(3D-> tetramesh-> tetramesh parametres -> volume tetramesh-> surfaces -> element size->mesh)
e. After doing the 3d tetra mesh now we check the mesh quality and tetcollapse. To check the quality of mesh go to the Tools option in the tool panel in the main menu bar and click on the check element option and change the setting from 2D to 3D and check for the tetcollapse value.
(Tools->check elements->3D->tetcollapse)
f. If elements are not failing for the tetcollapse value then the mesh is good as per the criteria, but if the elements are failing for the tetcollapse value then again we have to repeat the geometrical cleanup procedure.
g. To check the elements which are failing we can use the save failed option in the check element tool and after saving the failed elements use the mask option to see the elements.
(Tools->check elements->3D->tetcollapse->save faild->mask->elements->retrive->mask->reverse)
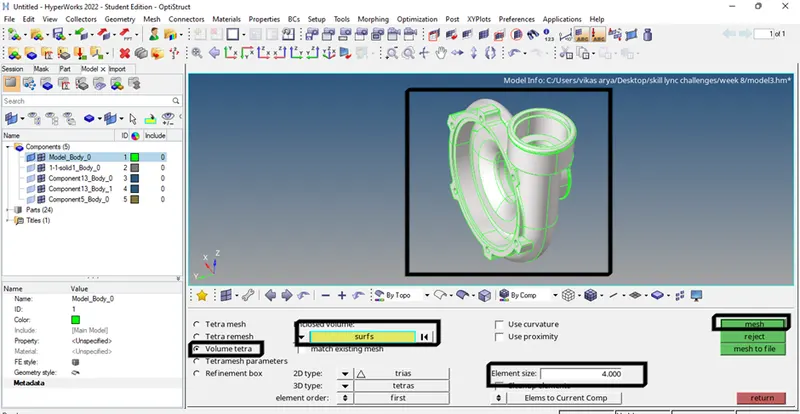
Image 25- generating volume tetra mesh on the 1st component
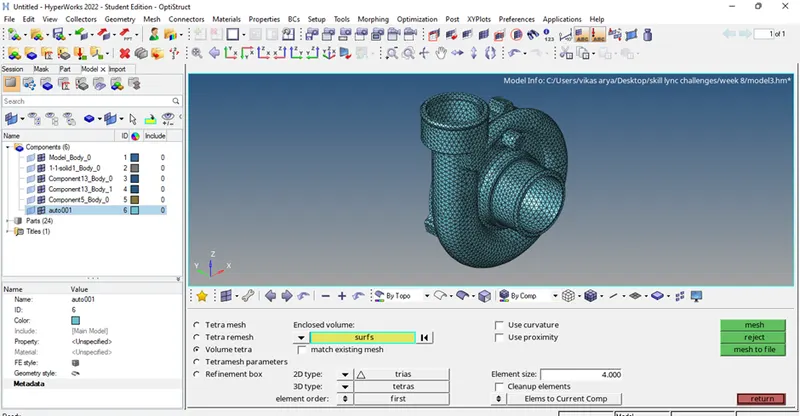
Image 26- volume tetra mesh has been generated
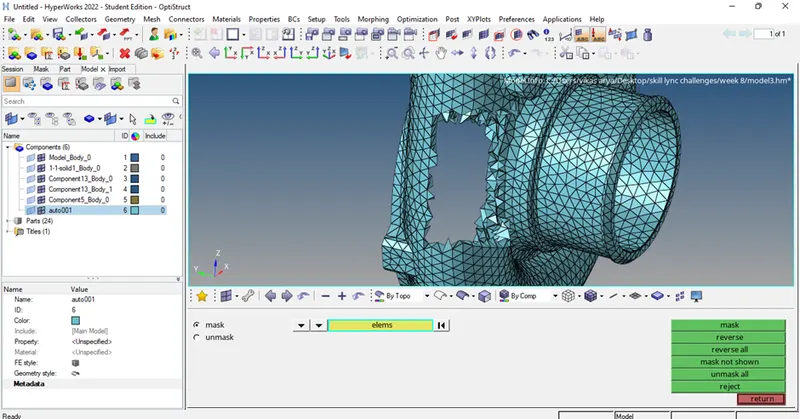
Image 27- verifying the 3D tetra mesh
h. Repeat the same procedure for meshing other components of this model.
Conclusion-
3D tetra mesh has been generated on the given components by using different methods of 3D tetra meshing.
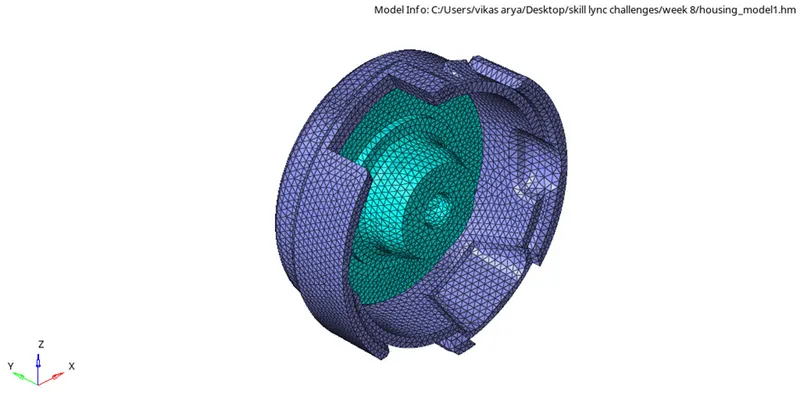
Image 28- 3d tetra mesh has been generated on model 1
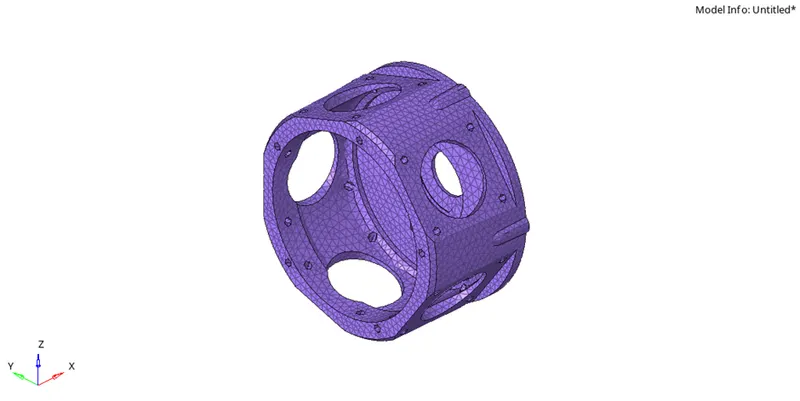
Image 29- 3d tetra mesh has been generated on model 2
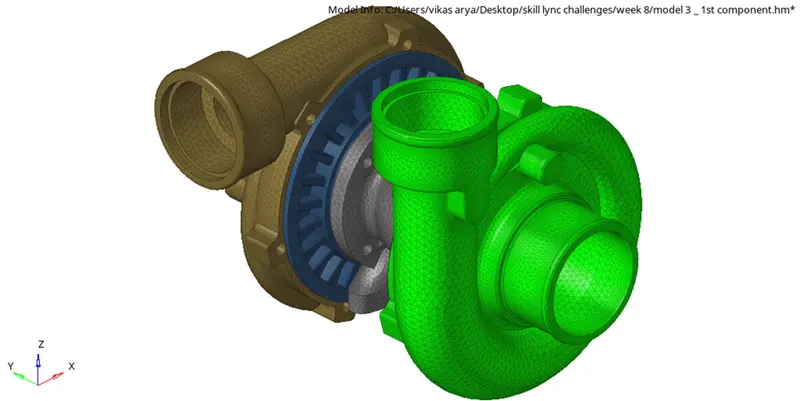
Image 30- 3d tetra mesh has been generated on model 3
The output of the challenge-
After doing the challenge I learned about 3d tetra meshing and different methods to perform the mesh and how we can do the 3d tetra meshing on a component.