Week 8 - Challenge 3 - Coin Holder Design
Coin Holder Design :
AIM :
Create the Coin Holder Plastic component through the given Class-A surface.the tooling axis for the given Class-A Surface should be created meeting the requirements of the draft angle and at the end perform the Draft analysis on the model. the Thickness of the component to be 2.5 mm.
CLASS A SURFACE :
In automotive design, a class A surface is any of a set of free form surfaces of high efficiency and quality. It gives the aesthetic of the component which is created by the styling team and gives to the part design engineer to create the part with all engineering aspects.
We have been given the Class-A surface and the first thing to do is to make sure that the given surface has no gap in between them. We can check it visually and also with help of Join or boundary commands.
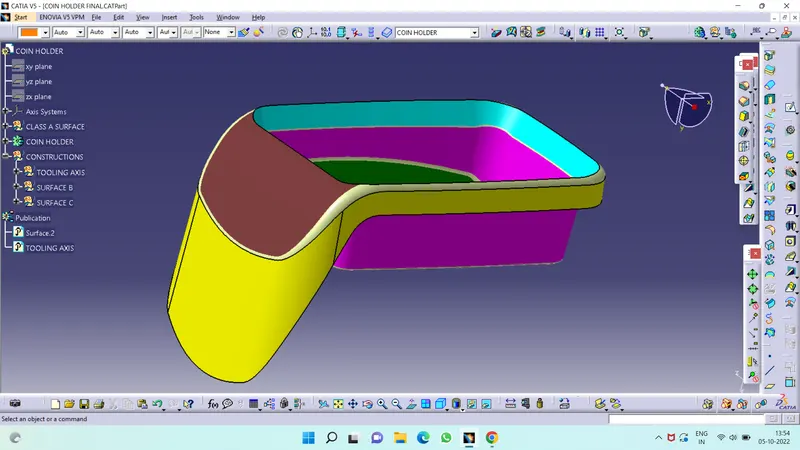
Tooling axis Creation :
In injection molding, the Class A surface is first analyzed to determine the axis or tooling direction that separates the molds. Tooling direction is critical for plastic product design because it determines mold direction.
TOOLING AXIS USING BISECTING METHOD :
Tooling axis for the part is created by using the dummy tooling axis using the bisectiong method .In order to check whether the part is toolable in the direction,the class A surface is analysed and the walls which are doubtful of clearing the 3 degree draft angle to the dummy tooling axis is identified.
Tree Structure of Tooling Axis :

Tooling Axis :
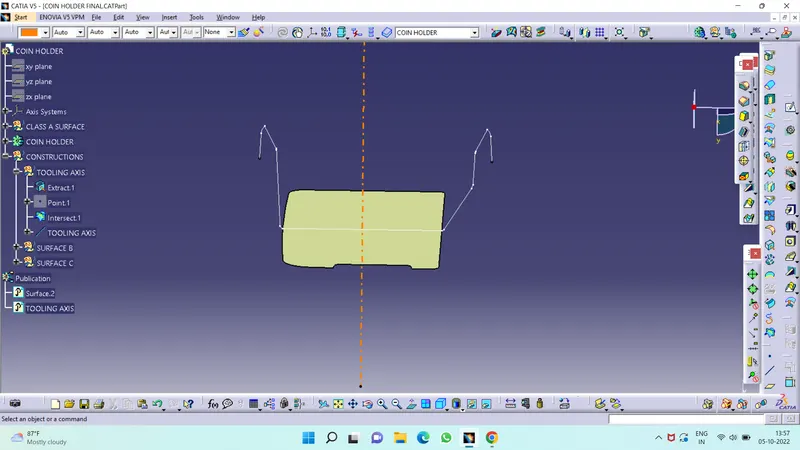
CLASS B SURFACE :
Class-B surface means the thickness of a part it is not visible and is inside part. In other words, the Class-B surface is a surface below a certain thickness from the class-A surface. This is the surface that contains engineering aspects of a model.The Class B finish is a quality finish with only minimal imperfections. A Class B finish is the most common finish for exterior surfaces. It is normally specified on surfaces such as external covers, panels, and parts that are fairly prominent.
It is the offset surface of the Class A Surface the offset value depends on the thickness of the material, here the offset value is 2.5mm.
Tree Structure of Class B surface :
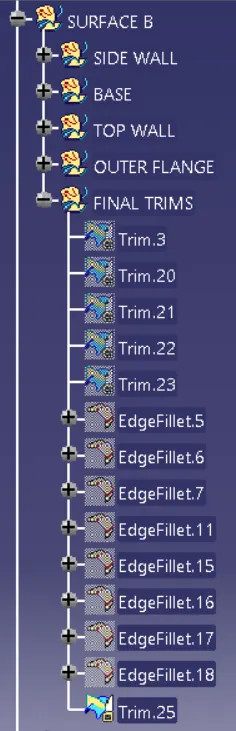
Class B Surface :
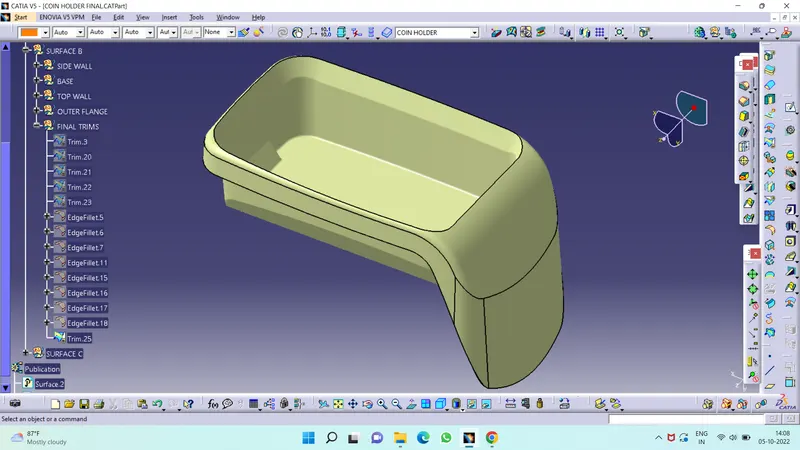
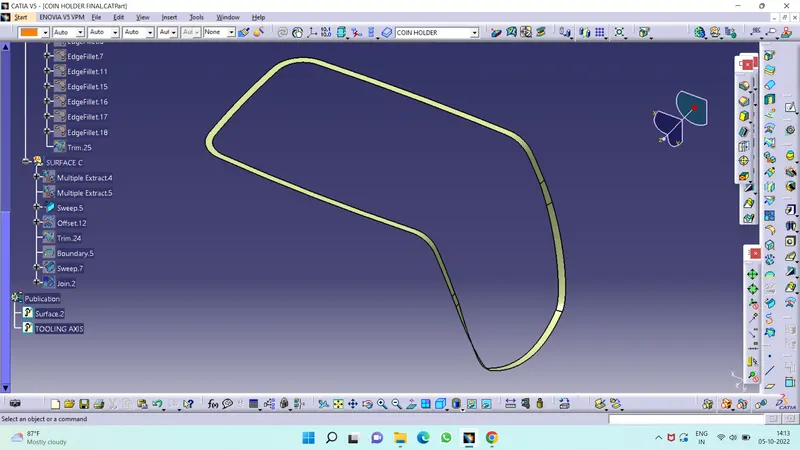
The surface that joins class-A and class-B surfaces are class-C surfaces. Class C is often specified for interior surfaces not readily visible, surfaces that will be covered by another part when assembledThe Class C finish allows more imperfections than Class A or B. Class C is often specified for interior surfaces not readily visible, surfaces that will be covered by another part when assembled, or surfaces which the Customer feels do not need to meet a high cosmetic finish.
The surface that Joins both Class A and Class B surfaces are considered to be Class C Surface
Tree Structure of Class C Surface :
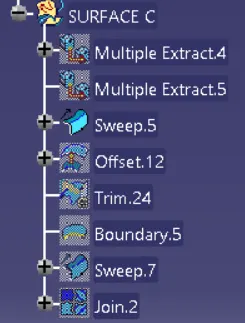
Class C Surface :
Class (A+B+C) Surface Body :
Here we combine all the surfaces into one closed surface using the Trim tool Command.
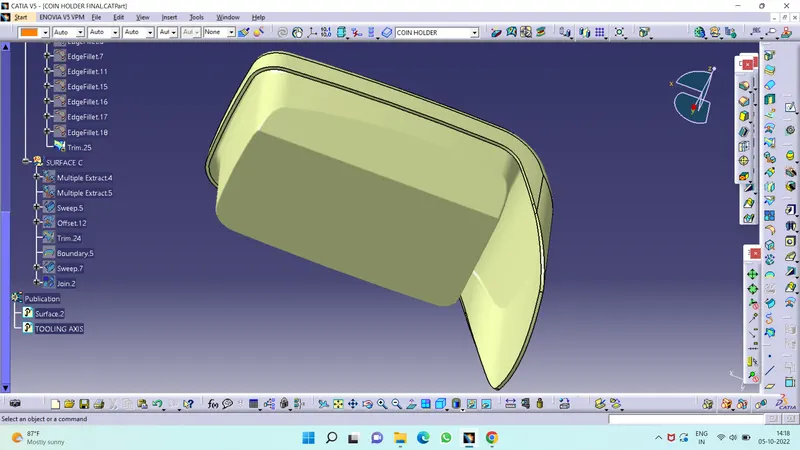
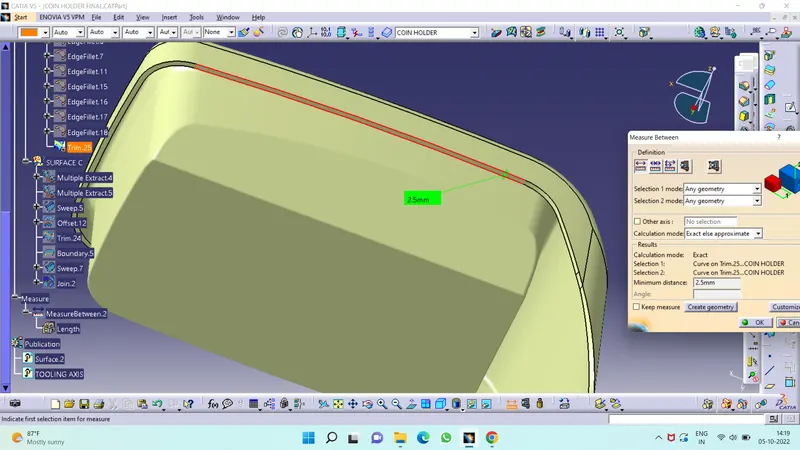
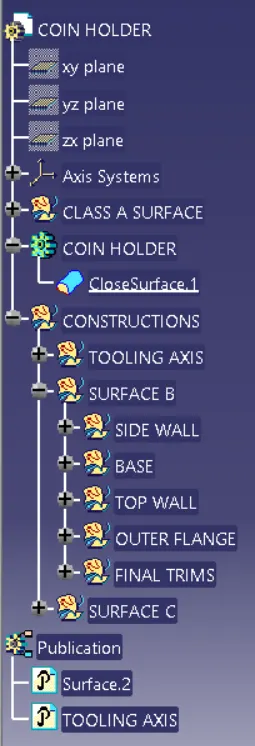
Full Tree Structure :
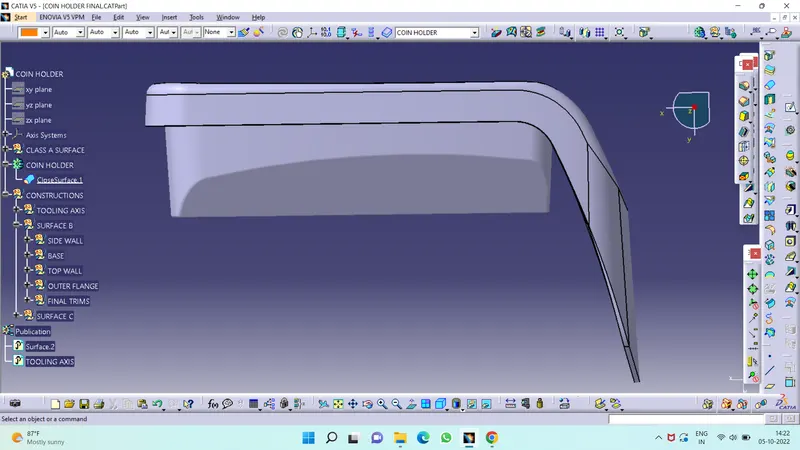
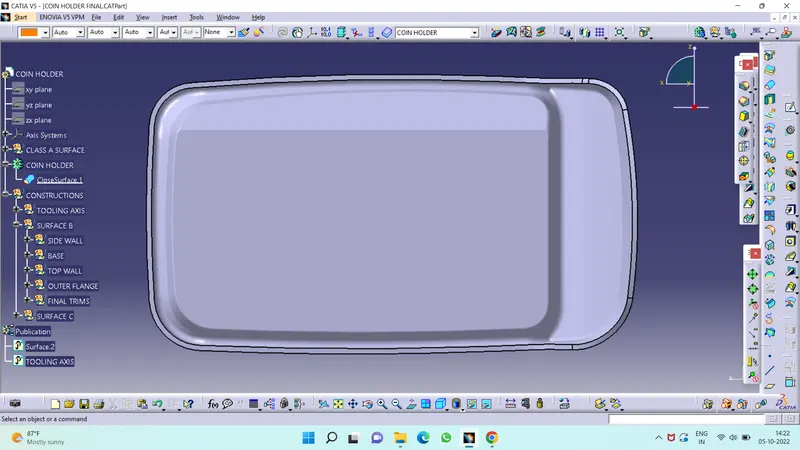
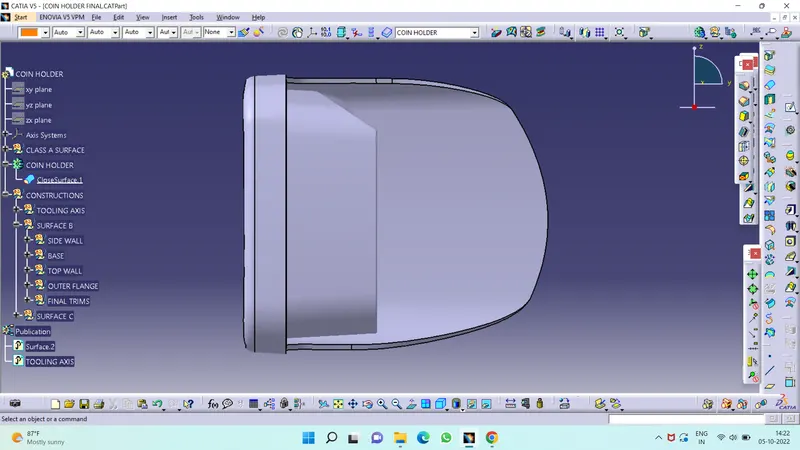
All Views of Coin Holder :
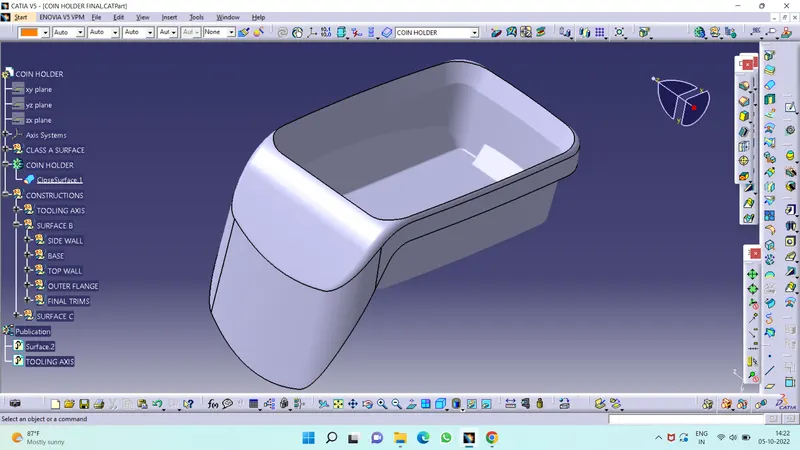
Draft Analysis
For molded or cast parts, the draft angle is the amount of taper perpendicular to the parting line. It is measurable in degrees. Because plastic shrinks and sticks on molding surfaces as it cools, we draft the walls of the plastic part so that it ejects or breaks free from the molding surfaces more easily and without dragging. To reduce the risk of damage to the parts and ensure ejection, a functional injection molding part must have drafts on both the cavity and core sides.
Nominal values for Draft angles
- 3 Degrees is a nominal draft angle
- 5 Degrees can also be manufactured. Increasing the manufacturing cost
- 7 Degrees is considered for Textured surface parts
Importance of Draft in injection molding
- Reduces the possibility of part damage due to friction during the release
- Reduces mold wear and tear
- Ensures a uniform, smooth, unscratched finish
- Ensures the integrity and uniformity of other surface finishes and textures
- Reduces overall cooling time by reducing or eliminating the need for unusual ejection setups
Steps followed for Draft Analysis
- The created part must be changed to the material mode in the display frame
- Compass is enabled and placed in the direction of the Tooling Axis
- The lock command is then used to fix the compass along the tooling axis
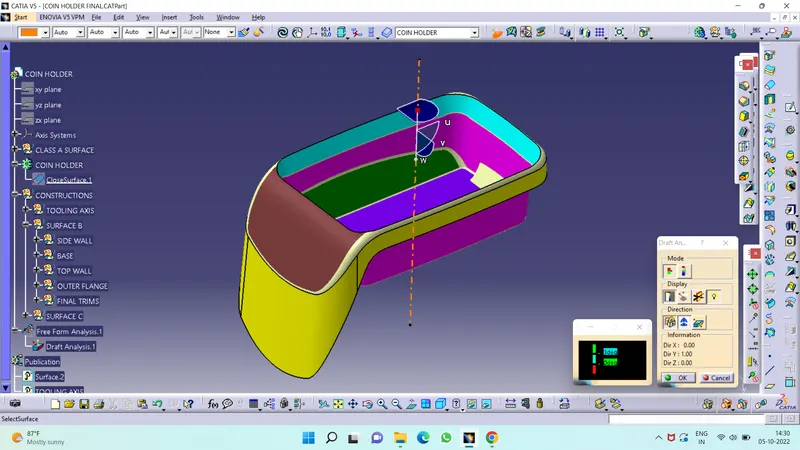
- Colour codes are classified and Draft angle is applied
- Running point analysis is used to display permissible draft angle
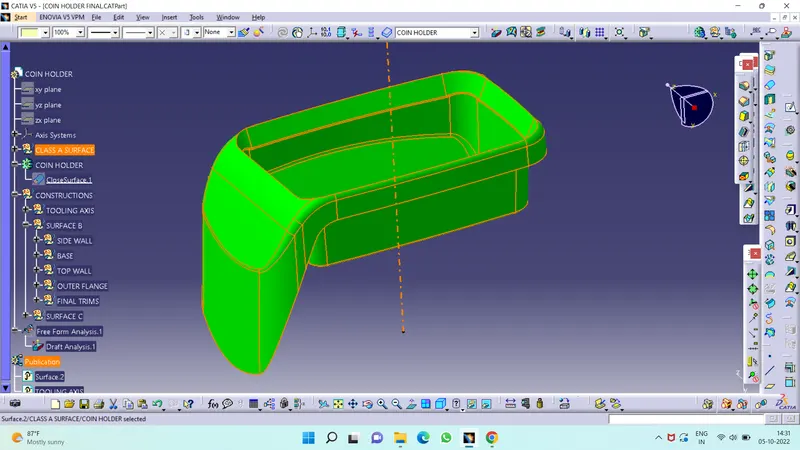
Draft Analysis of Class A Surface :
Draft Analysis of Close body Surface :
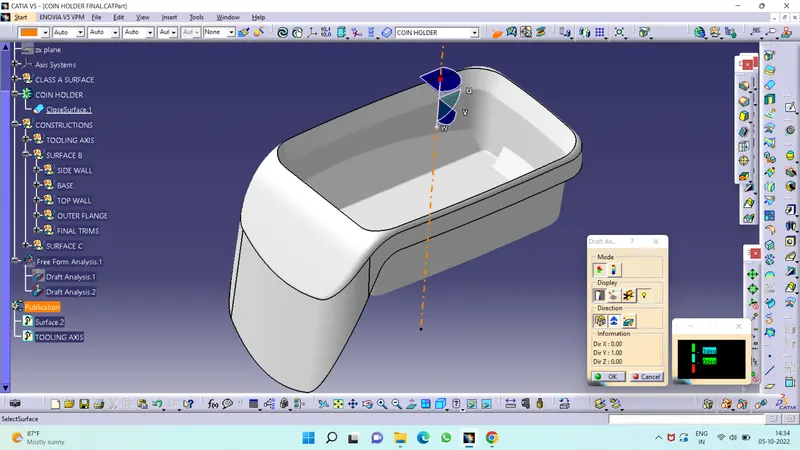
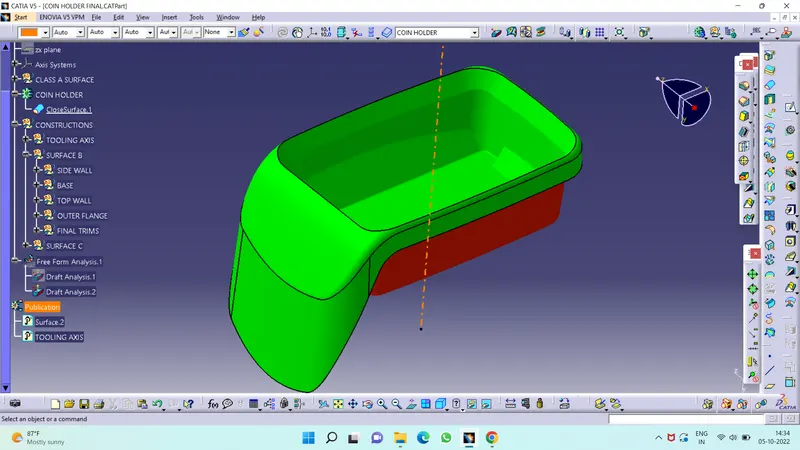
Analysis shows the drafted walls of the base bracket are above 3 degrees which is permissible for manufacturing in injection molding
Conclusion :
- Created the Coin Holder component using the given Class-A surface.
- The tooling axis for the given Class-A Surface is created which meeting the requirements of the draft angle
- Draft analysis is done on the CLASS A surface
- Draft analysis is done on the model.
- Using the Close Surface feature solid body is created from the surface
- Publications: Tooling Axis Class A, B, and C surface and closed surface