Week 8 - Challenge 1 - Draft Analysis on a Fan Cover
AIM - To create the tooling axis for the given Fan cover model meeting the requirements of the draft angle and perform the Draft analysis on the model.
First, let's see what is draft angle
Draft Angle - A draft angle is a slant that is applied to each side of most features of an injection molded part. The angle, which is positioned to run toward the direction of a mold’s pull and parting line, helps with releasing the part from the mold. By tapering the sides of the mold by an appropriate "draft angle", for instance, 2° (two degrees), the mold will be easier to remove.
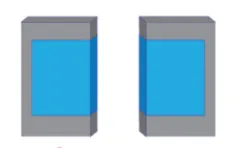
The above figure shows a part without draft
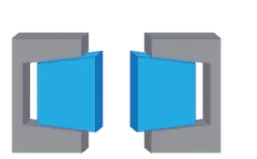
The above figure shows the part with some degrees of draft angle provided for easy ejection of the part.
Draft angle is necessary for plastic components because - When no draft is designed into the part, problems can come from friction and vacuums. These issues can damage both your part and even your mold in extreme cases. These problems are a direct result of having an insufficient draft. Because plastic shrinks as it cools, portions of the part may pull away from the mold while others grip the core. If there is no draft angle that allows a simple push from the ejector pins to pop the part out of the mold, the part’s surfaces will often drag along the mold as it is being ejected. This friction between the two surfaces can cause scratches or gouges on your part and affect the appearance. This is particularly troublesome if your part is being molded with a surface finish or texture. The friction will scrape away texture and leave you with many rejected parts.
In addition to friction, no draft presents the possibility of a vacuum forming during ejection. If the sides of a feature cannot release from the mold, the ejector pins may push on the section until the vacuum becomes so stressed that the part may bend, break, or warp by the time it is pushed out. By adding draft angles to our design, we can avoid these problems and lower the cost of production. The draft will allow parts to release from the mold with ease, which will result in better cosmetic finishes and fewer rejected parts. In addition, the draft can help us avoid costly elaborate ejection setups.
DRAFT ANALYSIS - Draft analysis is a technique that is used to analyze whether the part model created is manufacturable based on the draft condition applied. Here the part should be easily removed from the mold. Performing draft analysis we will be able to know whether the component is having a draft angle or not and how much is that draft angle from the tool direction.
The minimum draft value of the Automotive plastic component is 3 degrees and those for texture faces 7 degrees of the draft is suitable.
PROCEDURE - So here I have to first create the tooling axis of the fan cover and then have to perform the draft analysis.
Tooling axis - The tooling axis is basically a direction in which the mold opens or core and cavity opens and closes. The selection of the tooling axis is important so to ensure that the cost of the component is less.
The tree structure of the model is shown below:
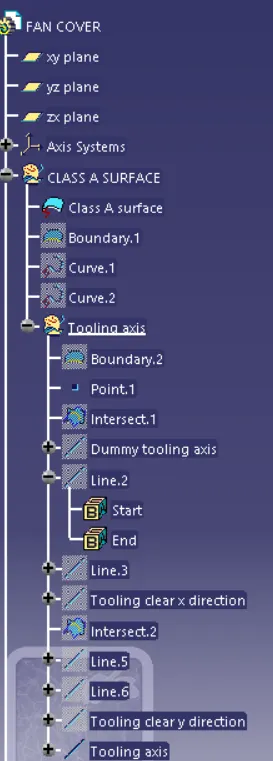
First, I have given a class A surface of the fan cover. So my first step will be to check the connectivity of the class A surface to ensure that there is no gap in between the surfaces.
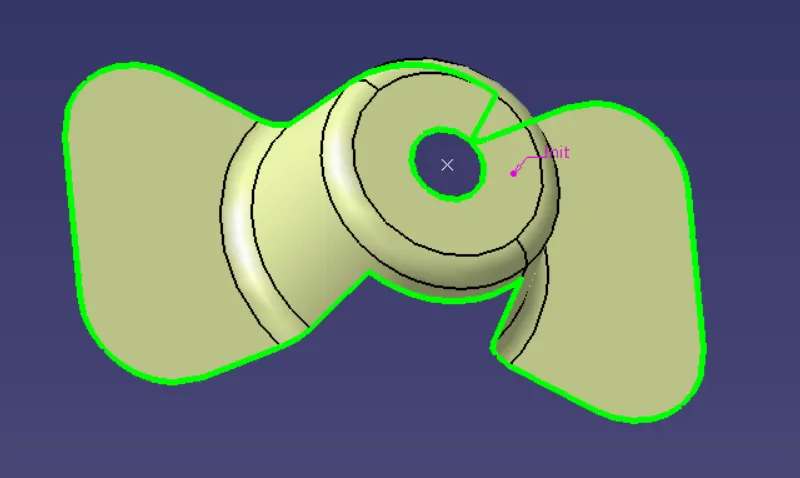
The above figure ensures that the model has no gaps and the surfaces are connected properly.
After ensuring this I will then find the tooling axis for the model.
I have to ensure that the tooling axis should clear all the surfaces. That is why choosing the correct direction for the tooling axis is important.
Here the tooling axis direction will be along Z-axis because by selecting the Z-axis direction I am able to clear the surfaces.
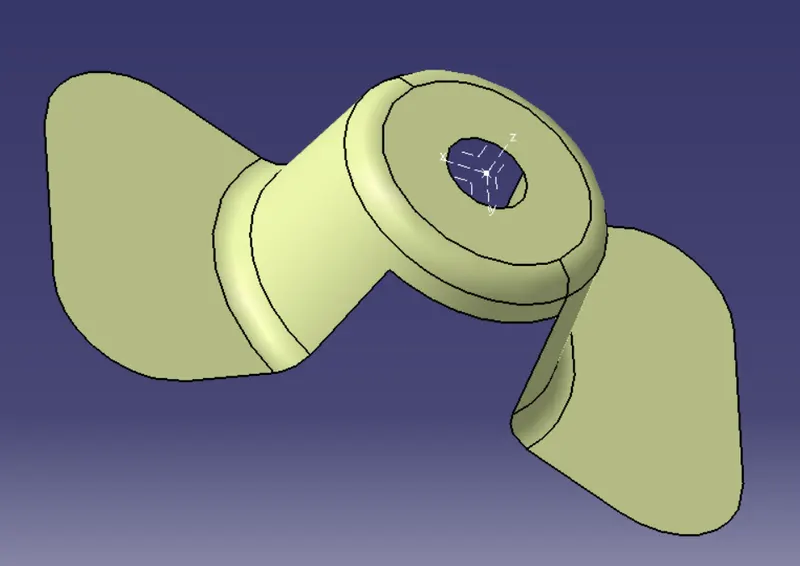
So first I have created the point at the center of the hole then I have created the axis system. The axis system is shown below:
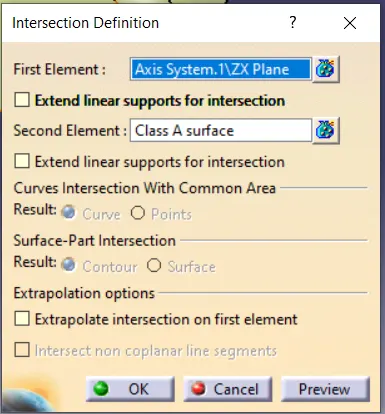
Then I have created the intersection of zx plane and fan cover because I have selected the z-axis as the direction of the tooling axis I have to make sure that it clears in both x and y-direction. So first creating the intersection for clearing in the x-direction. The intersection parameters are shown below:
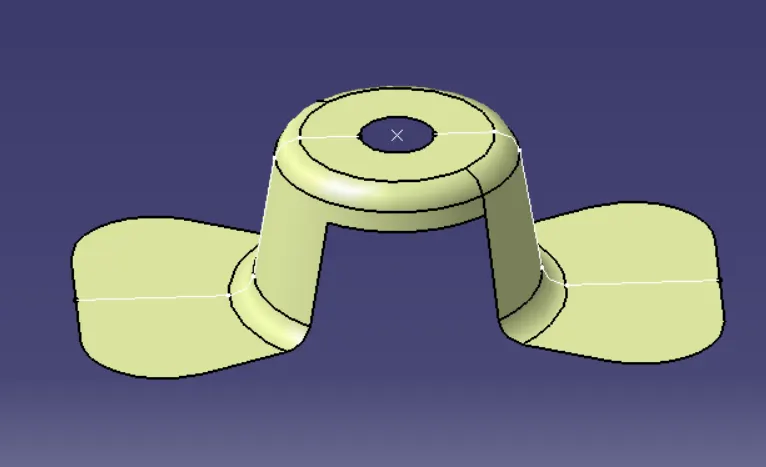
Then i have created a dummy tooling axis just to make myself clear. The Dummy tooling axis is shown below:
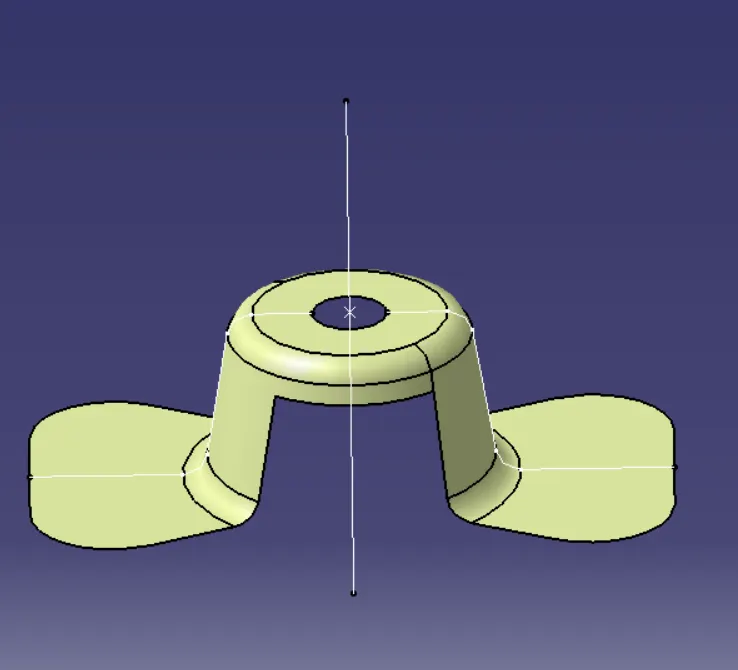
Then i have created the lines for the surfaces that would cause some problems during the ejection of the component. The lines are shown below:
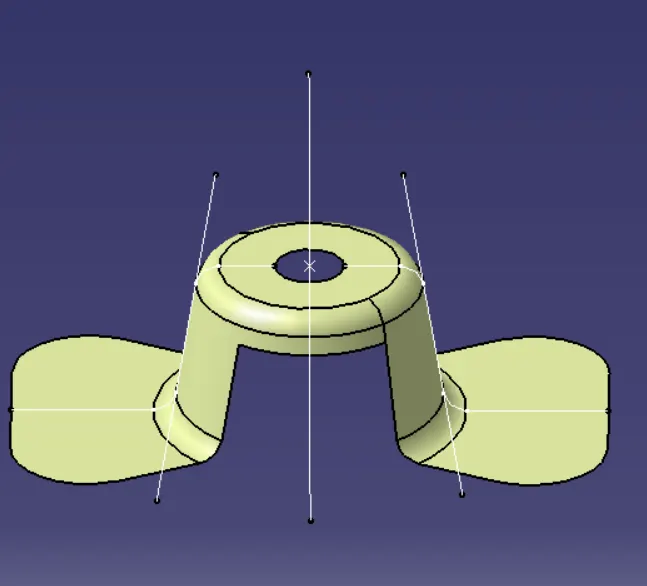
After this for clearing in the X direction, I will create a line bisecting the two lines that I created in the above figure. The line created by bisecting will give me the tooling clear in the x-direction. The parameters of the bisecting line are shown below:
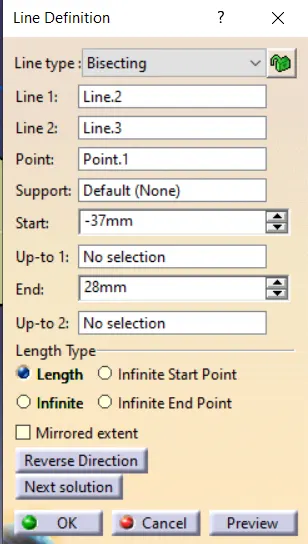
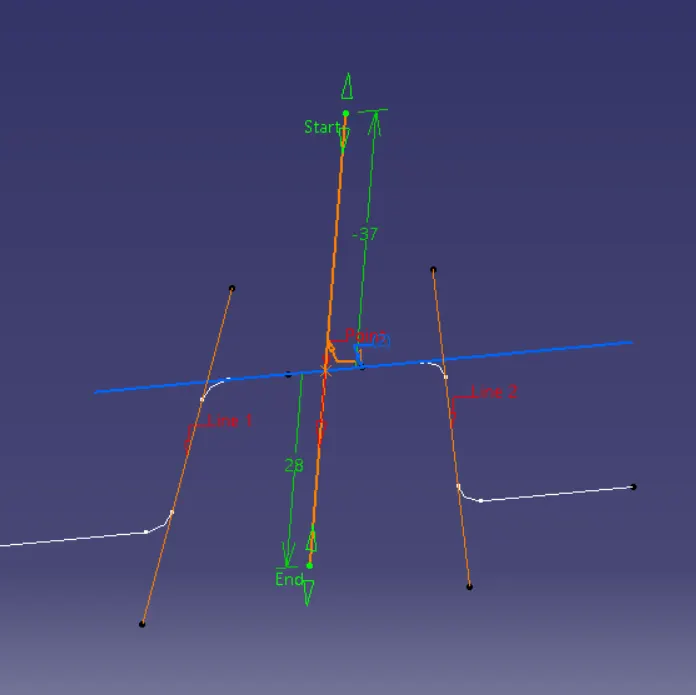
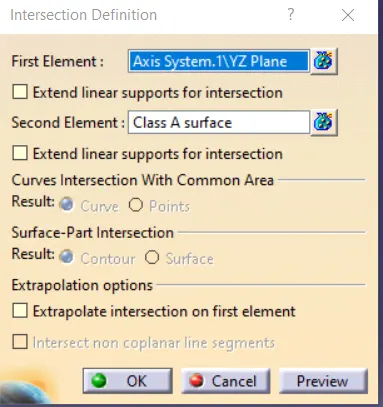
Now the same thing I will do it for Y dirction as well. So again I will create the intersect but this time the intersection will be of YZ pane of axis system and the class A surface. The intersection parameters are shown below:
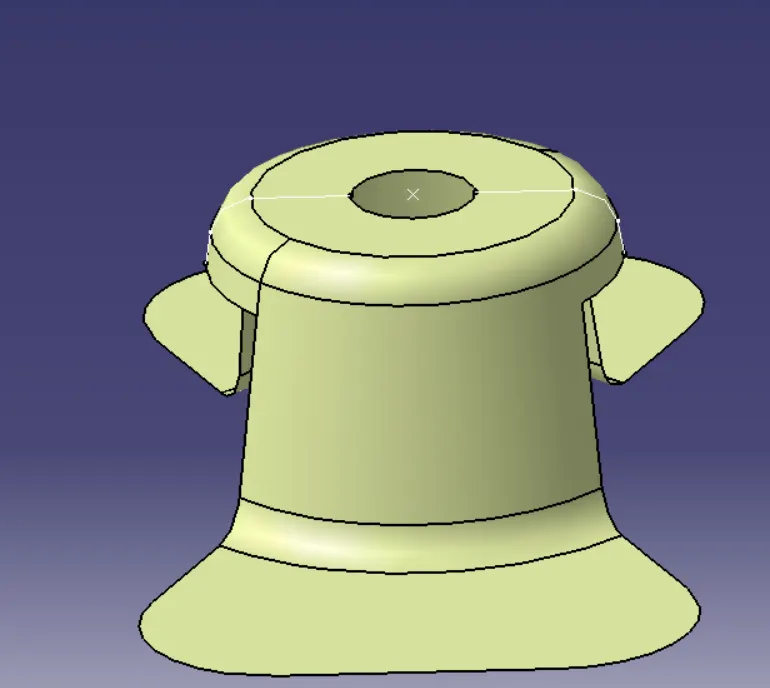
Then again I will create the lines for the surfaces that would create a problem during ejection. The lines are shown below:
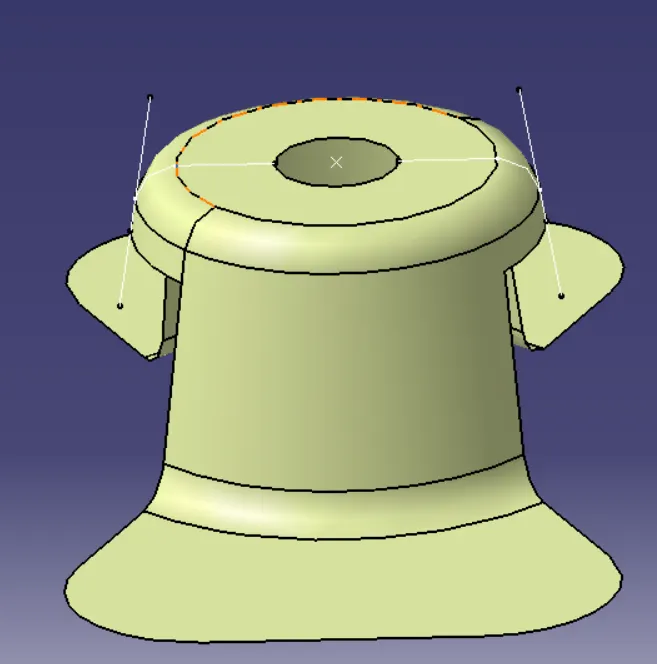
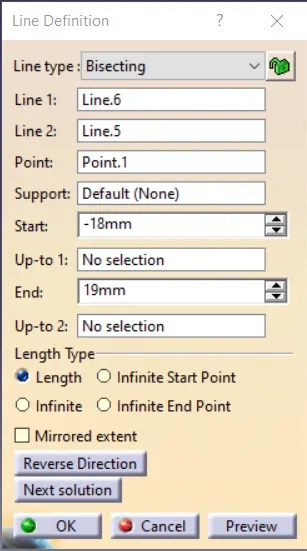
After creating the lines shown in the above figure. The will again create one line bisecting the two lines created which will be the tooling clear in the y-direction. The parameters of the bisecting line are shown below:
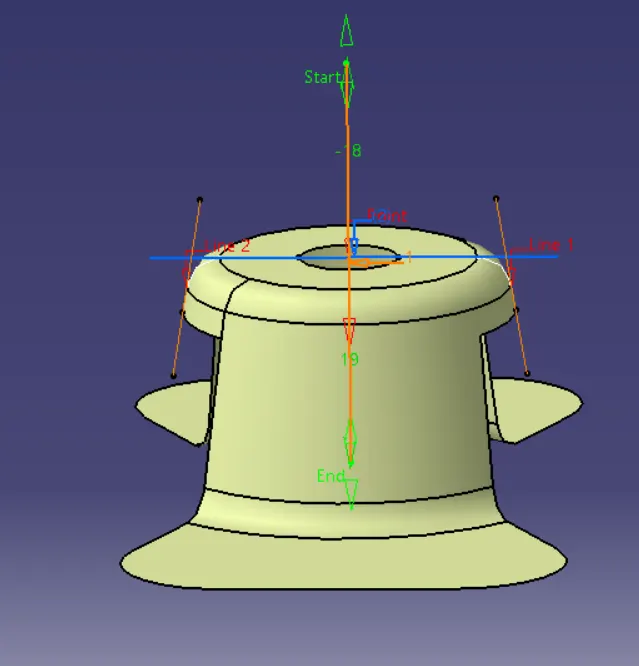
so now I have the tooling clear for both x and y-direction. Then I will another line bisecting the two lines that is the tooling clear for x and tooling clear for y-direction. And that line which will be created by bisecting the two lines will be my tooling axis. The tooling axis parameters are shown below:
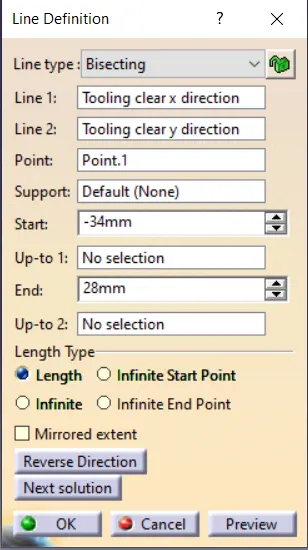
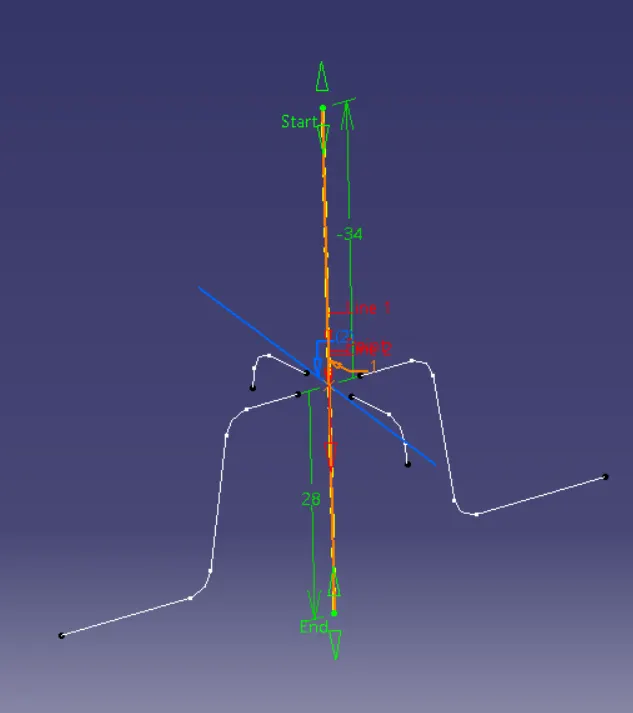
So now I have created the tooling axis for the fan cover. The tooling axis is shown below:
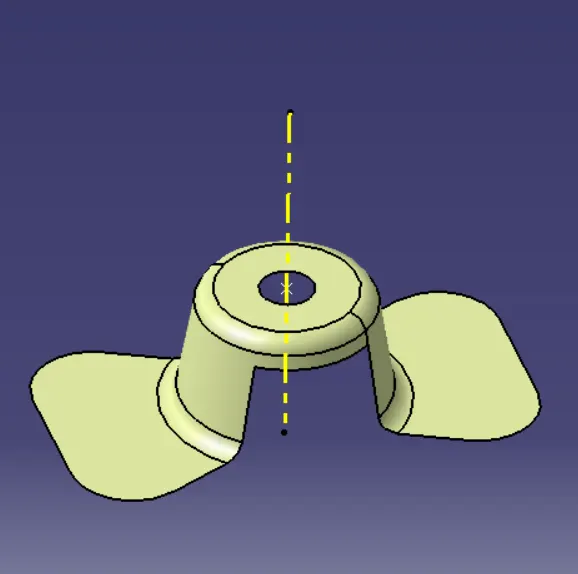
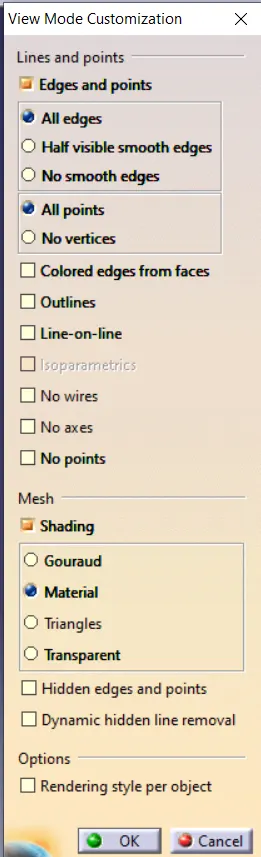
Now I have to perform the draft analysis on this model. So for performing it I have to first customize the view parameters and I have to select material and click ok.
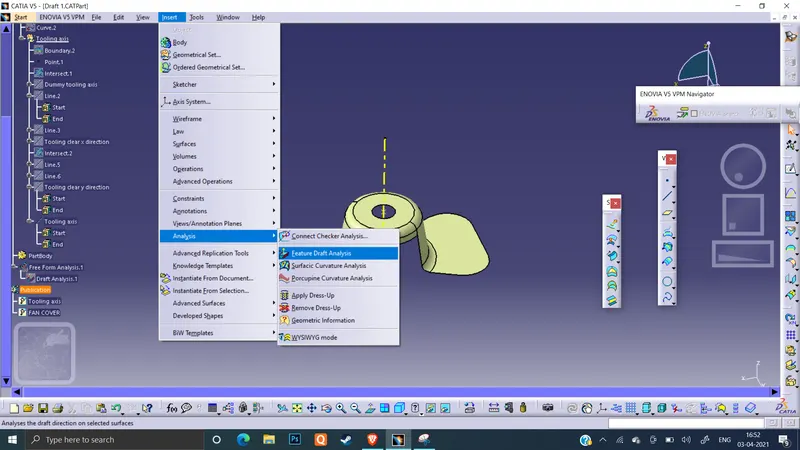
Then I will go insert the analysis and in the analysis, I will select the feature draft analysis.
The feature draft analysis will look like this:
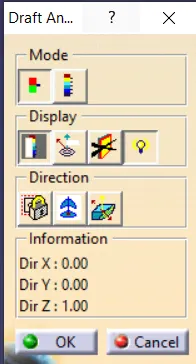
In the above-shown block under the mode section, I will select the quick analysis mode. and in the display mode, I will select show color scale and turn on the light effect for good visualization.
Then in the direction section, I will use the compass feature to define the draft direction. For that from vehicle zero, I will drag the compass and put it on the tooling axis. The process is shown below:
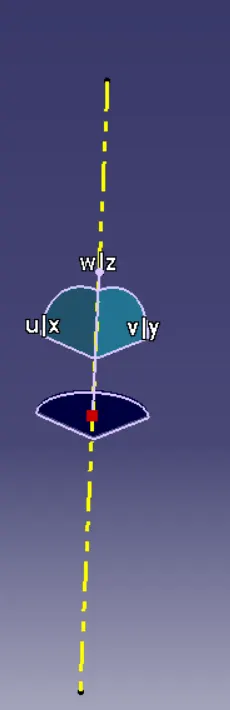
In the above-shown fig, I have to make sure that the w coincides with the tooling axis and it should point upwards.
Then I will click on the lock feature to lock the draft direction and then will click on the surface of the fan cover.
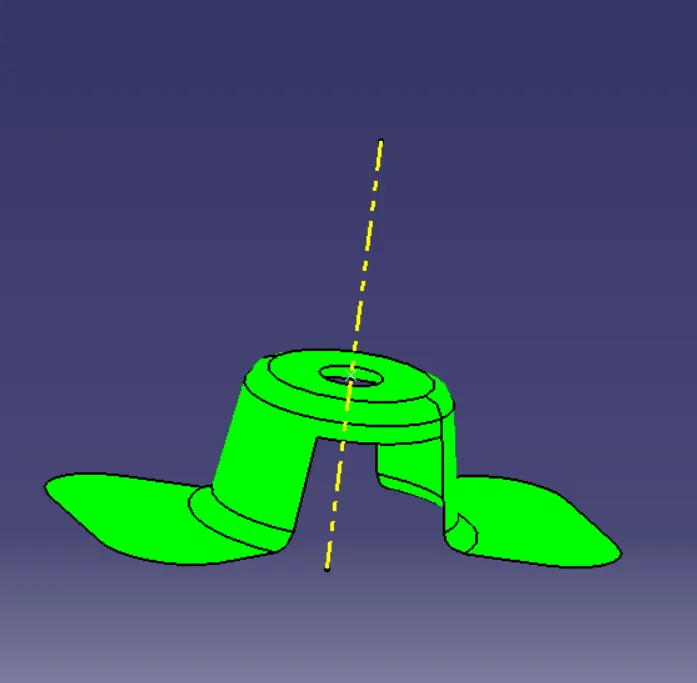
The result of that is shown below:
The color scale is shown below:
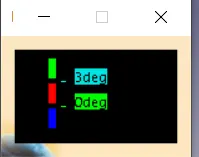
Here in the above fig, u can see that it shows three colors
The Green color shows that the draft provided is more than 3 degrees
The Red color shows that the draft provided is between 0 and 3 degrees
The Blue color shows that the draft negative.
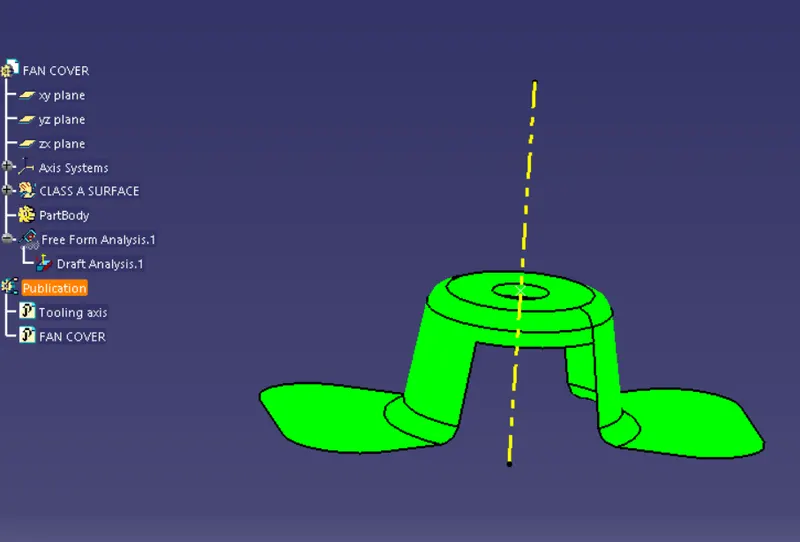
and as we know that the minimum draft to be provided for the plastic component is 3 degrees. And my model that is fan cover is fully green which shows that the draft is more than 3 degrees so I can say that mow my component that is the fan cover is now manufacturable.
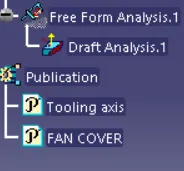
And finally, for the publication purpose, I will go to tools and select publication, and further the parameters I have to publish for this purpose I will choose the class A surface that is the fan cover and the tooling axis.
RESULT - The tooling axis is created and the draft analysis is also performed and now my component that is the fan cover is manufacturable.
CONCLUSION - This concludes the creation of the tooling axis for the given Fan cover model meeting the requirements of the draft angle and the Draft analysis on the model.