Week 8 - Challenge 1 - Base Bracket Design
BASE BRACKET DESIGN
OBJECTIVE:
To create the Base Bracket Plastic component through the given Class-A surface. To begin with, the tooling axis for the given Class-A Surface should be created meeting the requirements of the draft angle and at the end perform the Draft analysis on the model.
TOOL USED: CATIA V5
GIVEN:
Thus the following Class-A surface as the inuput and the thickness of the plastic component is 2.5 mm.
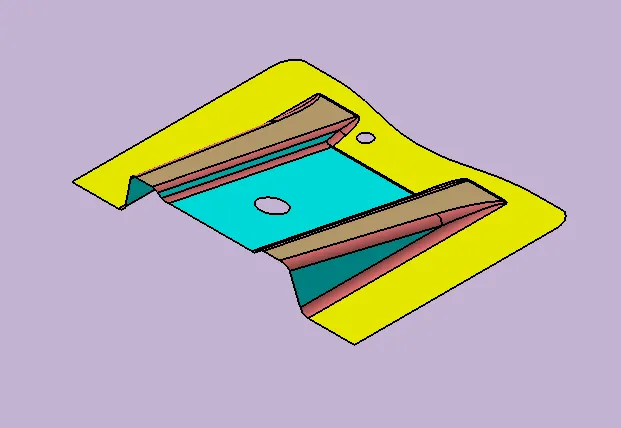
From the given Class-A,
Thus the Filleted radius of the surface meassured as 3 mm.
SURFACE MODELING:
STAGE_1: CREATING TOOLING AXIS
Tooling direction is main consideration for plastic part and the mold parts because it defines the movement of the mold part and possibility of plastic part come out from the mold part. And it also helps to define the two halves of the plastic componet like core and cavity parts. From this given Class-A of the Base Bracket its tooling axis as to be defined by the following are,
STEP_1
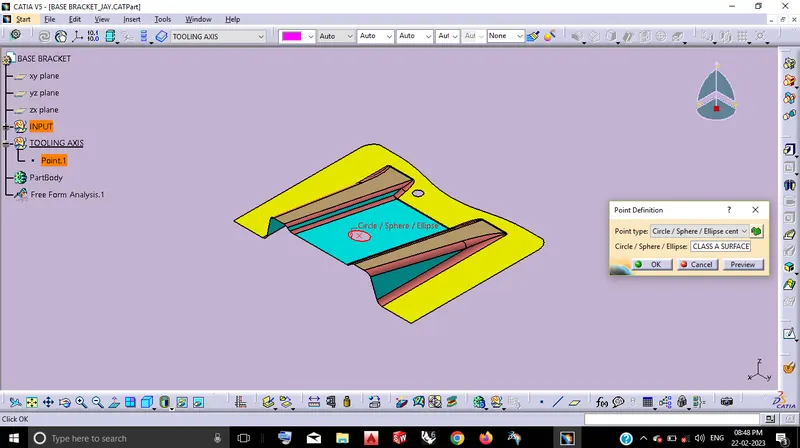
Initially,from the Class-A the flat surface region/holes has considered to create the tooling direction. In before that we define a dummy tooling axis by the following are,
By defining point definition thus the centre of the hole point has to located. Which will helps to create the point-direction line.
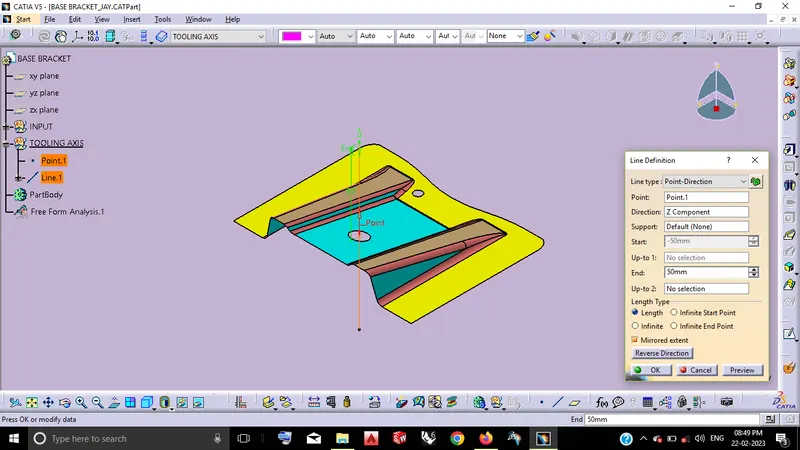
By using line definition by defining point to direction thus following dummy tooling axis to be created.
STEP_2
Then we go to consider the Class-A as remains that the Possiblities of denfing main tooling axis and following are,
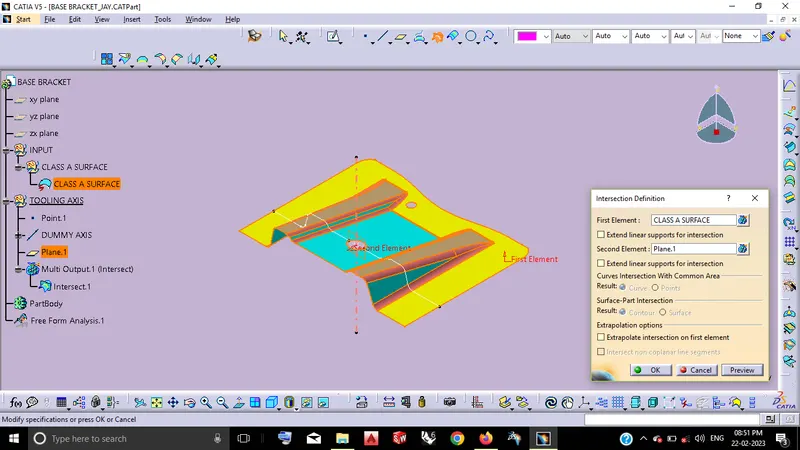
By using of Plane definition.
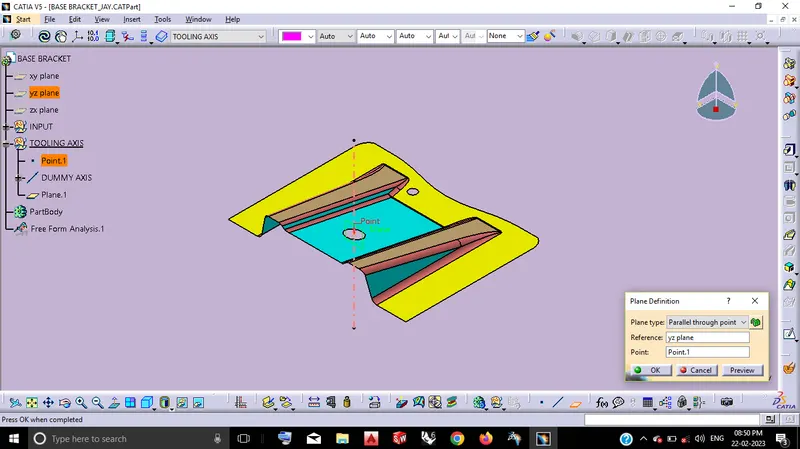
After that by using the above plane create interstions from the Class-A by using Intersection definition.
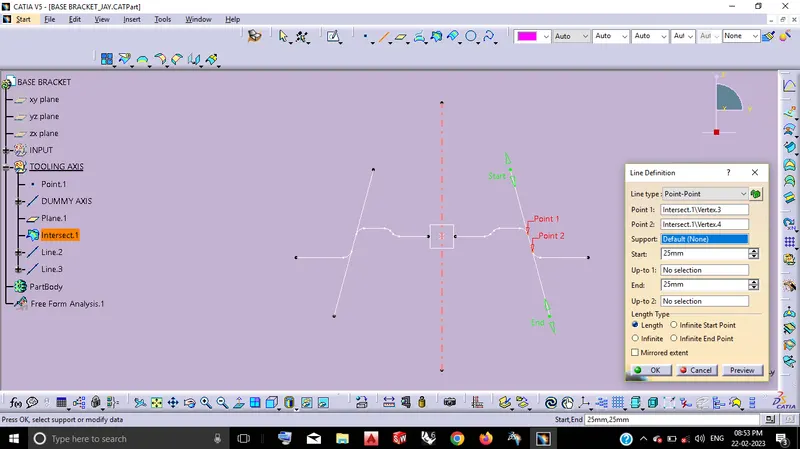
By using Line definition following point to point line can be defined.
STEP_4
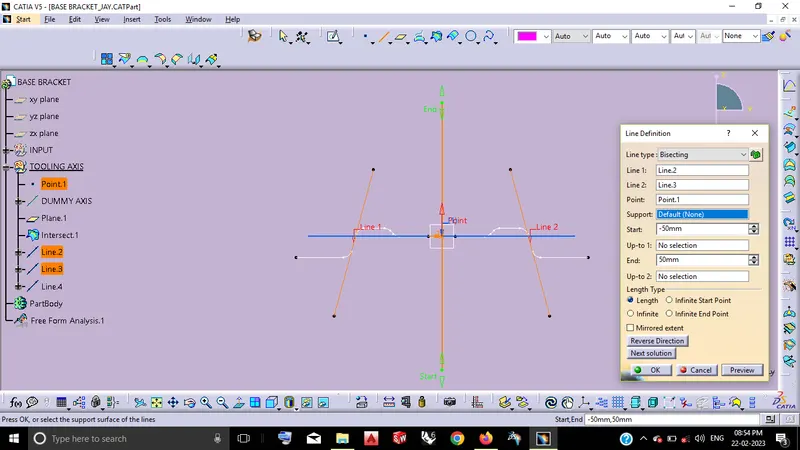
By using of above lines we can define the main tooling direction by using Line definition-Bisecting in a apropriate direction like the following as,
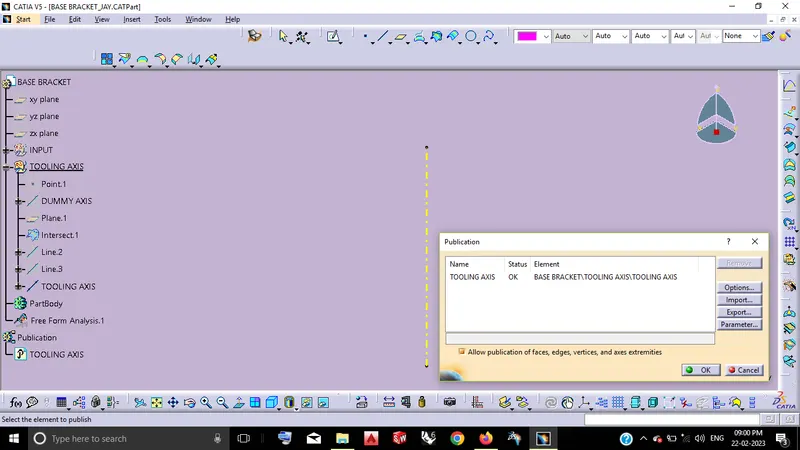
By using of Publication - Tooling Axis(Main tooling direction).
STAGE_2: DRAFT ANALYSIS FOR CALSS-A
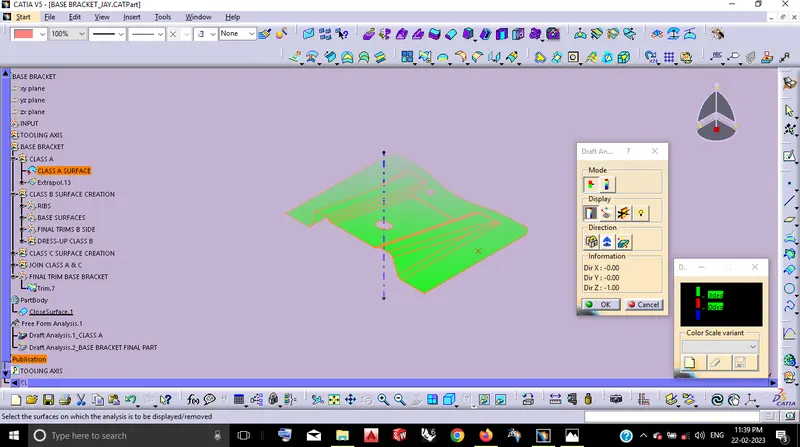
By using the Feature Draft Analysis by the defined Main tooling Axis thus the following results are,
Consider the minimum Draft angle of the Plastic component will becomes 3 deg on itself.
STAGE_3: CLASS-B CREATION
Class-B surface, In which can be easily defined as the thickness of the part and it is not visible which is inside surface of Class-A. For this Base Bracket we have the input thus the thickness of the plastic component will becomes 2.5 mm on itself and the Class-B surface definied by the followings are,
STEP_1_B-SIDE OF RIBS
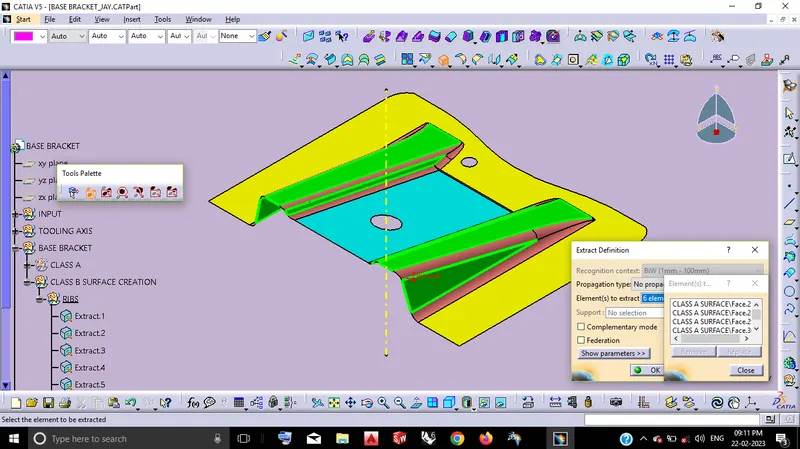
By creating the Class-B surface as defined has to be simplified as into smaller regions from Class-A then consider all those to obtain the B-side of the following are, Initially considering ribs from the Class-A and the following Sketch solvings are,
By using of Extract definition.
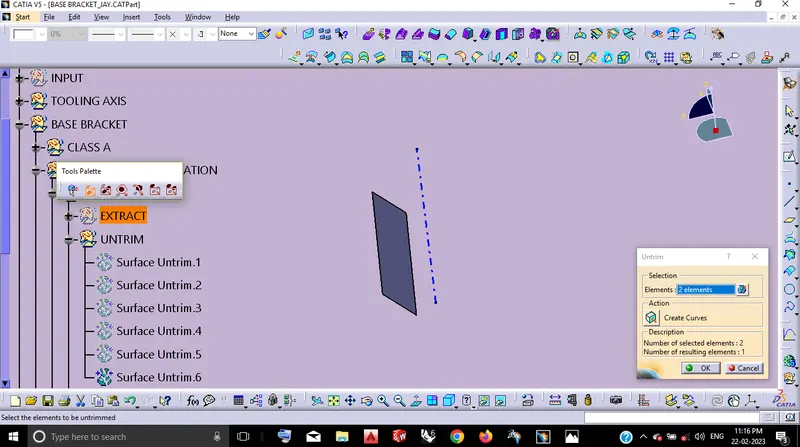
By using of Untrim definition.
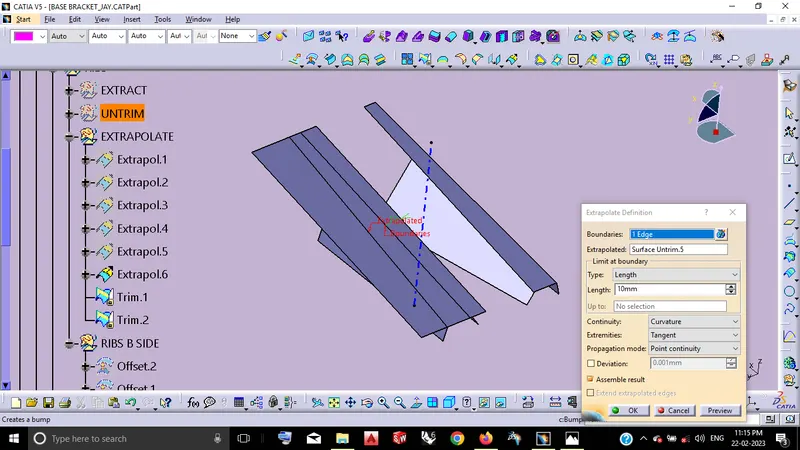
By using of Extrapolate definition.
By using of Offset definition.(Thickness of 2.5 mm)
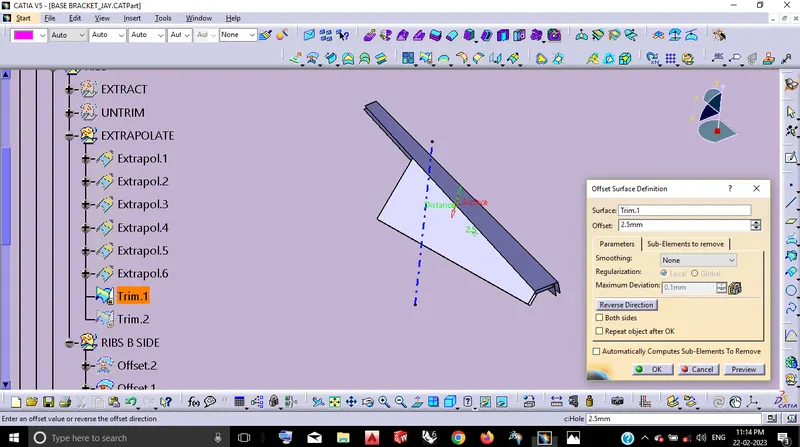
By using of Isoparametric curve. By using this curves to remove the excess/unwanted surface region, which will helps to define Dress-up feature can be easier.
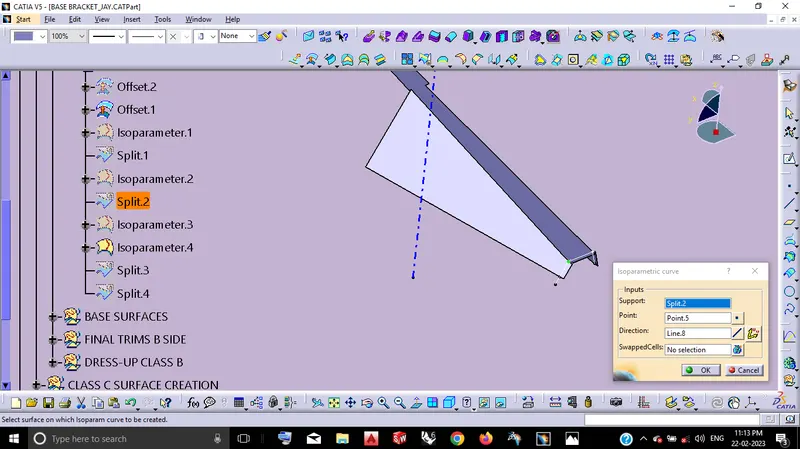
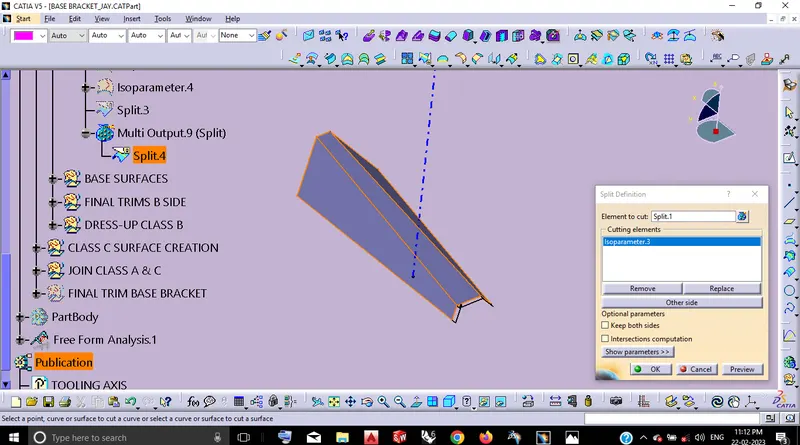
By using of Split definition.
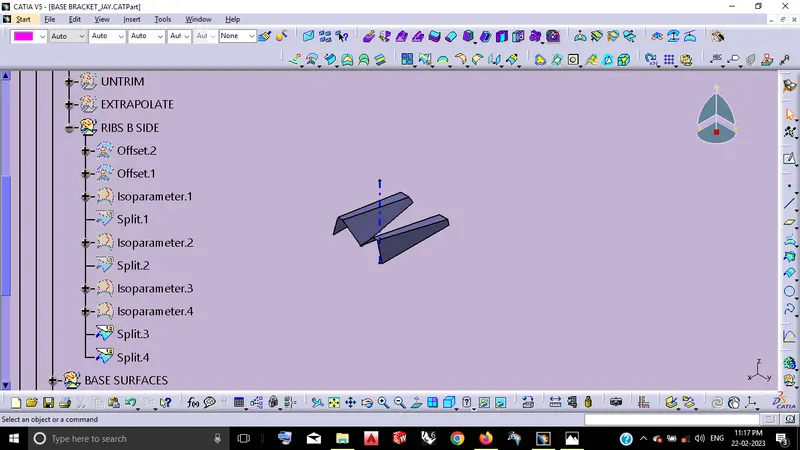
Finally we obtain B-side surface of the Ribs are followings,
STEP_2_ B-SIDE OF BASE SURFACES
By creating the B-side surface of the Base surface as followed the above same opration commands and which will become like following some of its sketch solvings are,
By using of Extract definition,
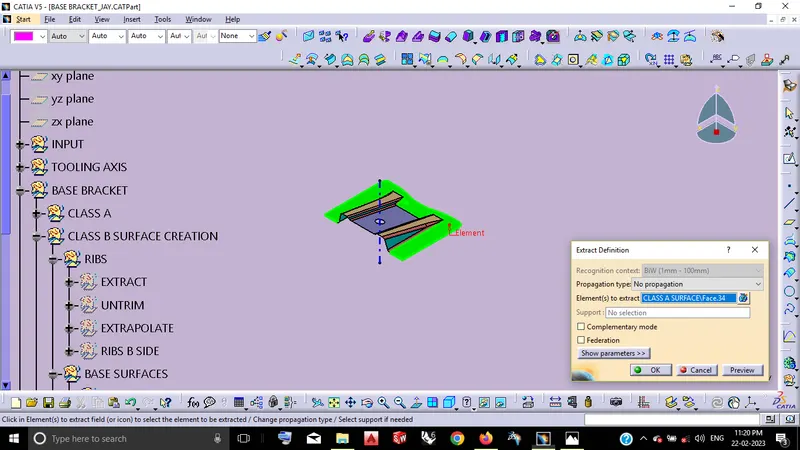
B-side of the Base surfaces,
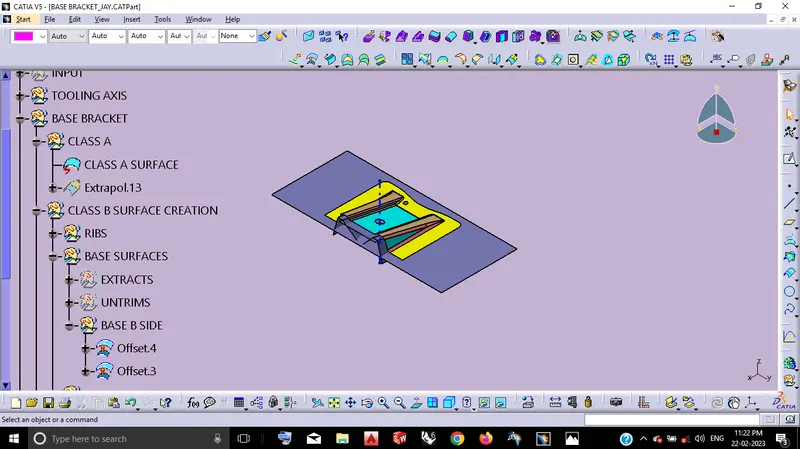
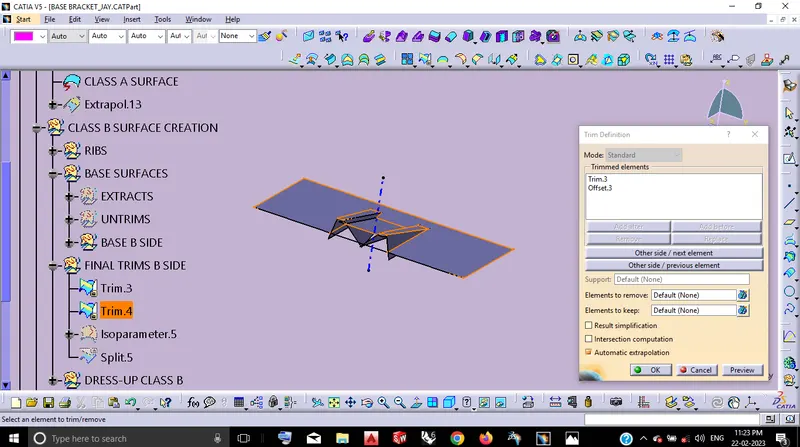
By using of Trim definition, We can trim thus the above Rib B-side surface with the B-side of Base surfaces which will results as the following thus the B-side of the Base Bracket obtained.
STEP_3_DRESS UP CLASS-B
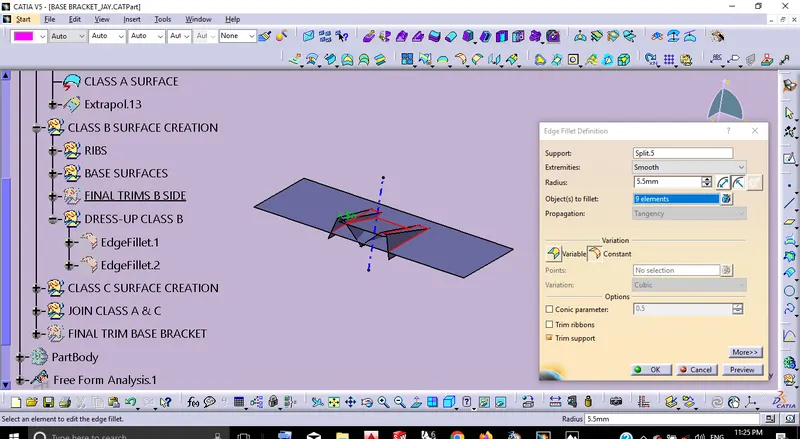
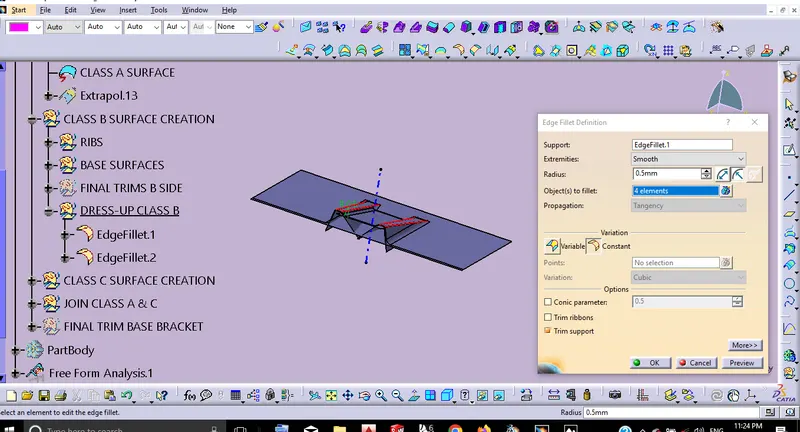
From the given Class-A surface thus the fillet radius has massures as 3 mm by the way to make fillets to the Class-B considering its thickness thus the following Edge Fillet definitions can be done.
By using of Edge Fillet definition.
STEP_4_CLASS-C SURFACE CREATION
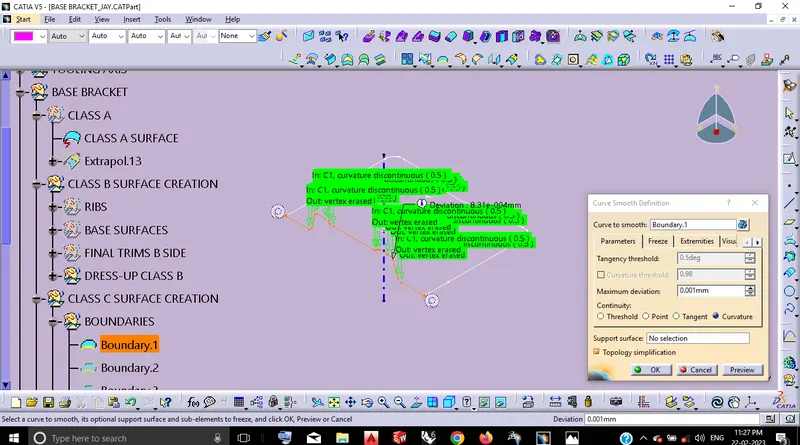
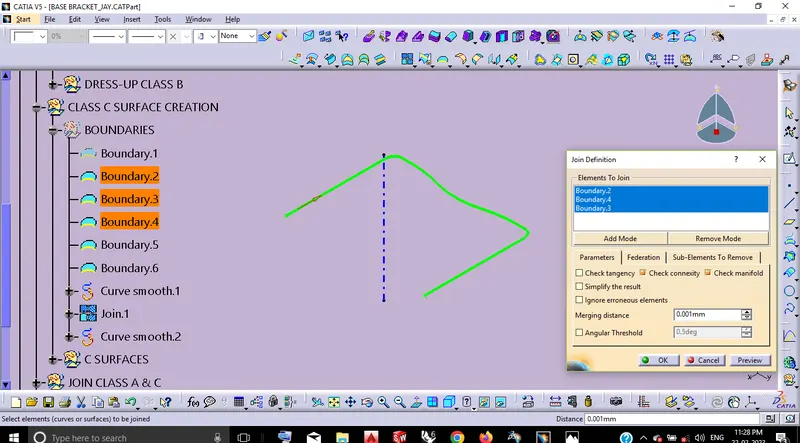
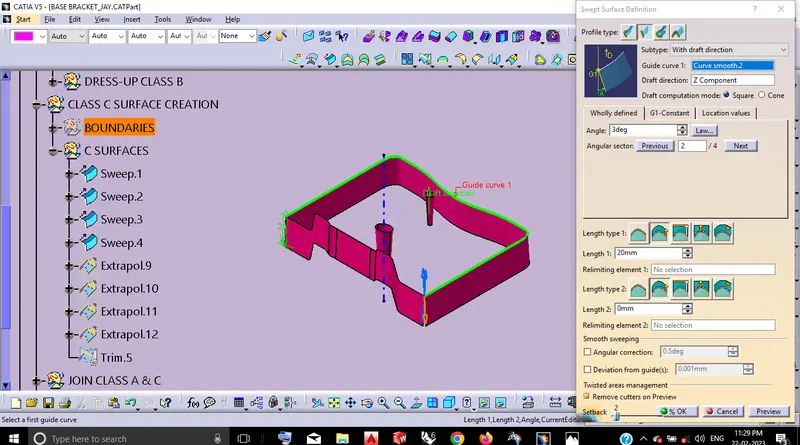
By using the Boundary definition thus the following curves are extracted from the Class-A surface. Then By using Curve smoothening it will becomes fine curvature to be formed. Then by using this following Curves thus the Class-C surface of the Base Bracket to be obtained by the following sketch solvings are,
By using of Curve Smoothening Definition to apply the Boundary Curves.
By using of Join Definition.
By using Swept Surface Definition with the drfat direction by following angle of 3 deg,
By susing of Trim Definition.
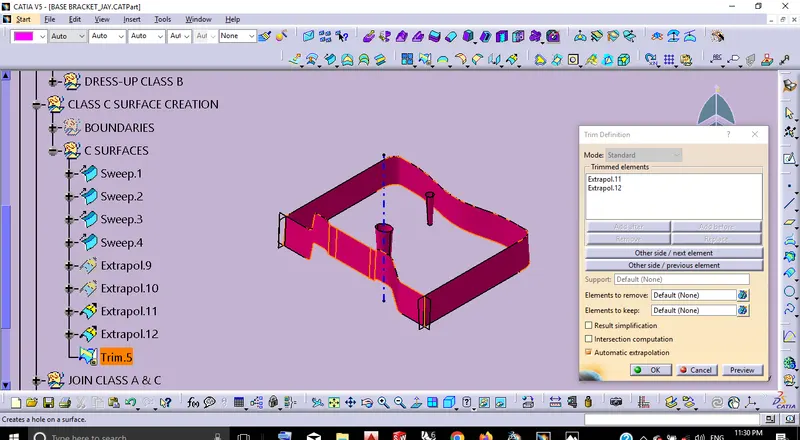
STEP_5_JOIN CLASS-A WITH C-SURFACE
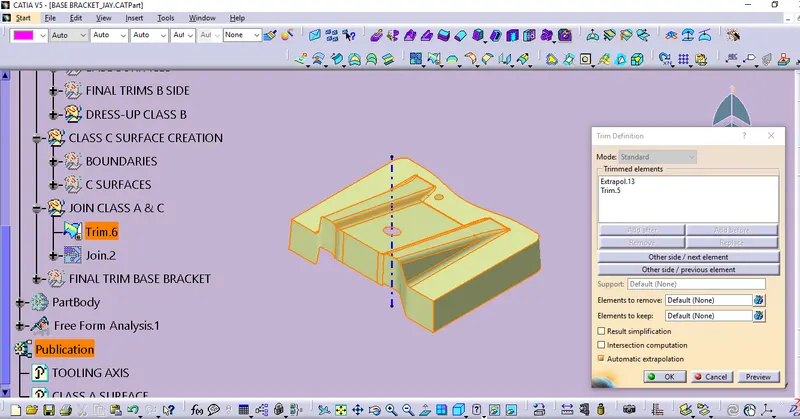
By using of Join definition. Thus the Class-A gets joined with the Class-C Surface.
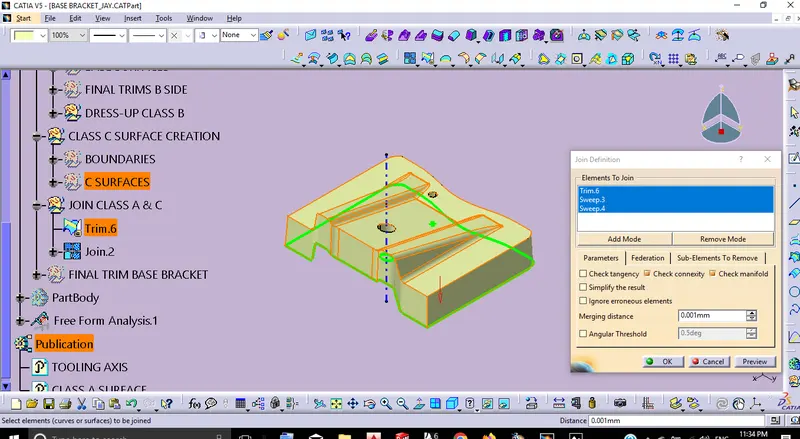
STEP_6_FINAL TRIM OF CLASS A&C WITH CLASS-B
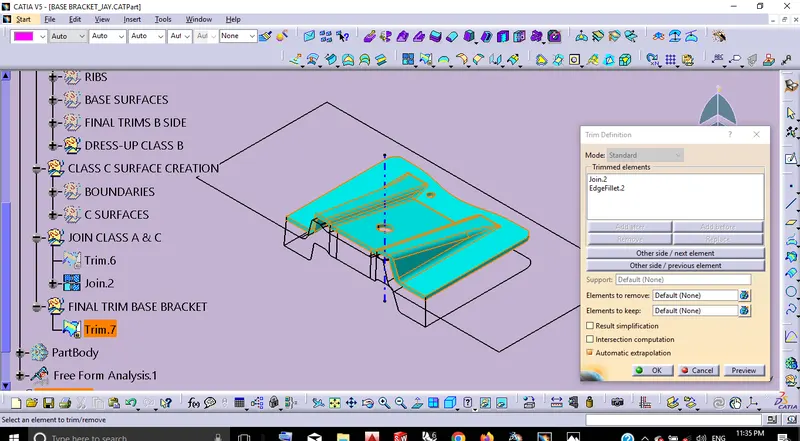
STEP_7_CLOSE SURFACE
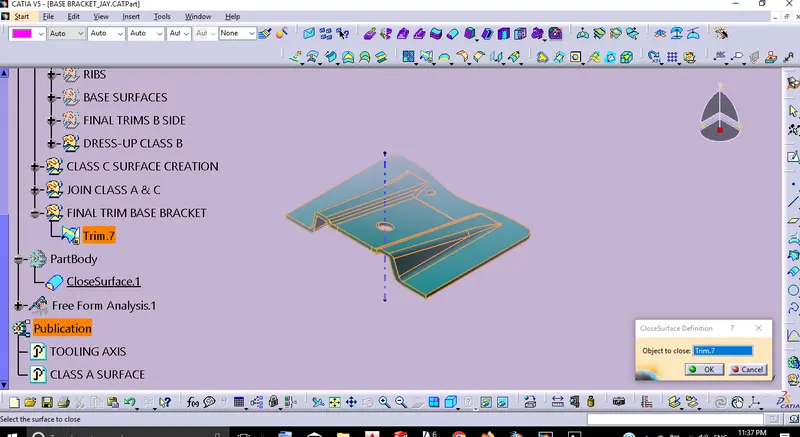
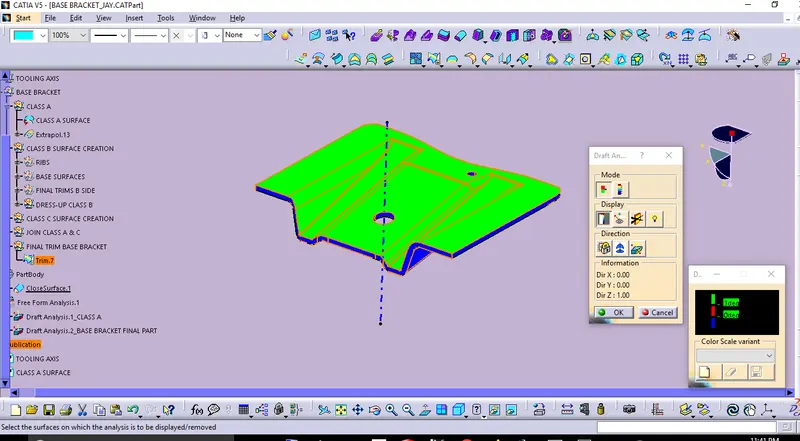
STEP_8 DRAFT ANALYSIS OF THE PLASTIC COMPONENT
From the following this Draft Analysis with the Draft angle of 3Deg,
Blue-which is Class-A surface becomes Cavity and
Green-which is B-side surface becomes Core.
Because thus the parting line on this one which will not affects(like Flashes) the Class-A surface.
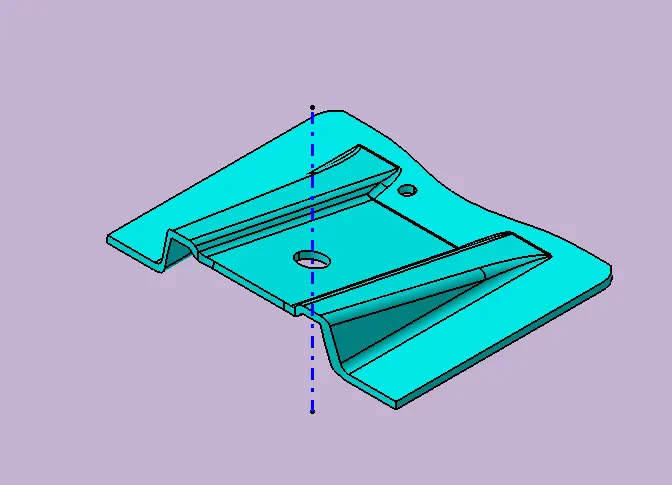
VIEW ORIENTATIONS:
ISO VIEW
TOP VIEW
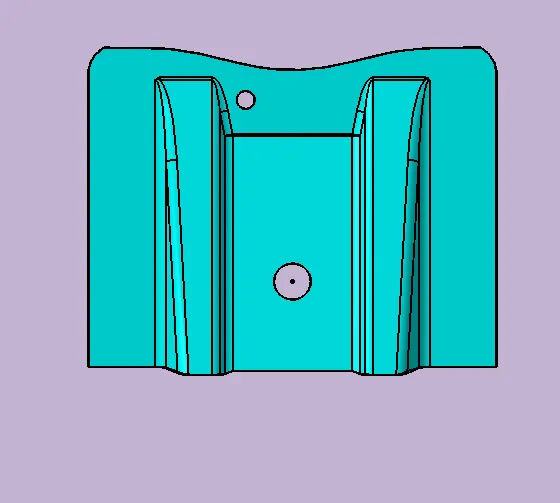
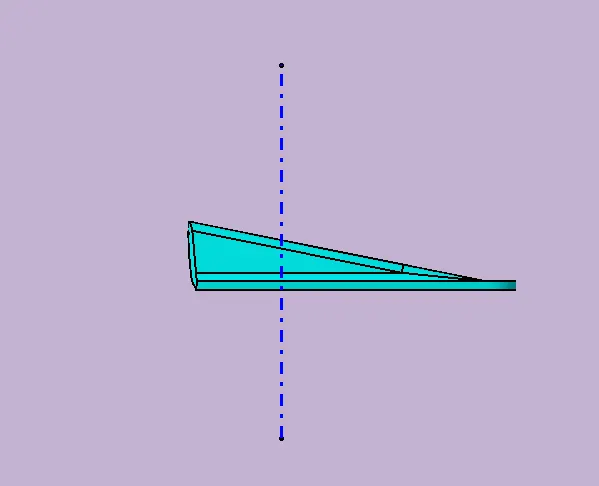
SIDE VIEW
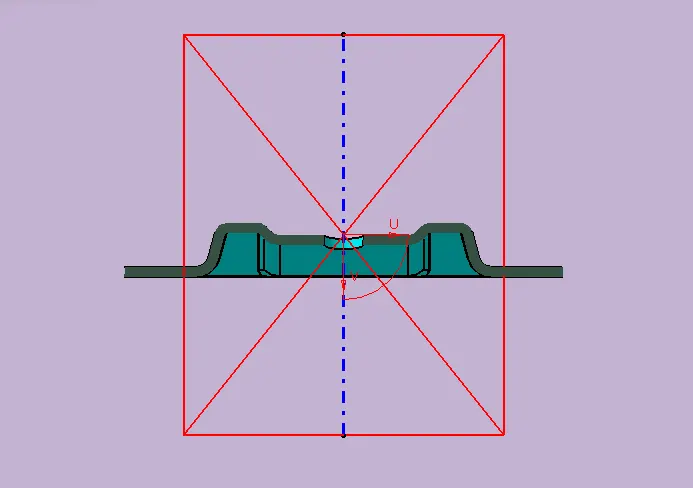
SECTION VIEW
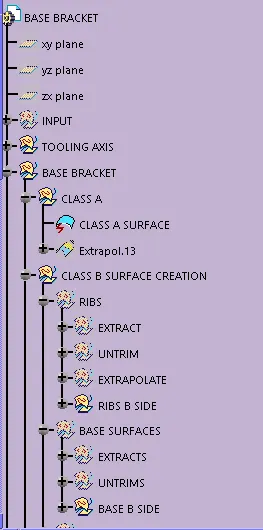
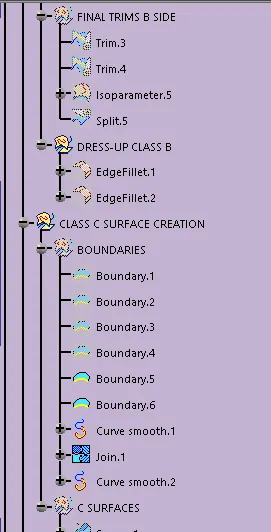
TREE STRUCTURE:
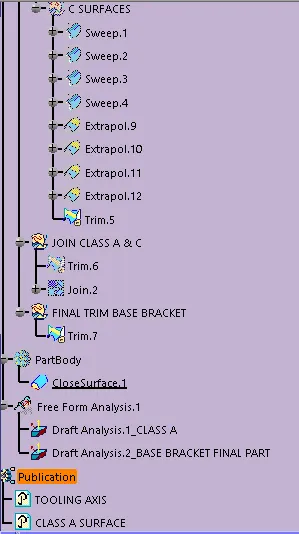
CONCLUSION:
Thus the Base Bracket Plastic component through the given Class-A surface to be done by using CATIA V5.
Tooling axis for the given Class-A Surface to be created.
Surface CATPart model to be done with the thickness of 2.5mm. And
The Draft analysis on the model to be completed.