Week 8 - Challenge 1 - Base Bracket Design
ASSIGNMENT 21
BASE BRACKET
STEP 1 :- GIVEN CLASS A SURFACE
Checked class A surface for continuity by clicking on boundry tool.Class A Surface is continous.
STEP 2:- Chicked for appropriate position for tooling axis throut which component that is core and cavity will opean and easily.
STEP 3 : - Drew Dummy tooling axis by method of bisecting extention line.Took plane thorough point (origine)and intesect it with plane and class A surface.
STEP 4:-TOOLING AXIS
Got intesectoin then checked if any other line which is parallel to dummy tooling axis or inclined and may get problem.
Line perpandicular to dummy tooling axis will not give any problem but line which is inclined to it may occure problem in drafting .
so choosed two lines thoes may give problem while dradting to component and drew two extension line througt points.
then chose bisecting method and bisect those lines we got TOOLING AXIS which is indicated by orange colour.
STEP 5:- DRAFT ANALYSIS
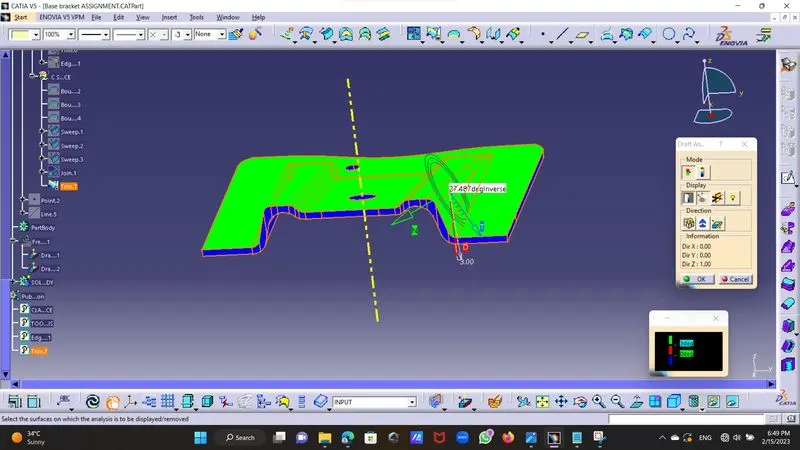
Checked draft analysis for class A Surface by Insert -Analysis-Feature base analysis
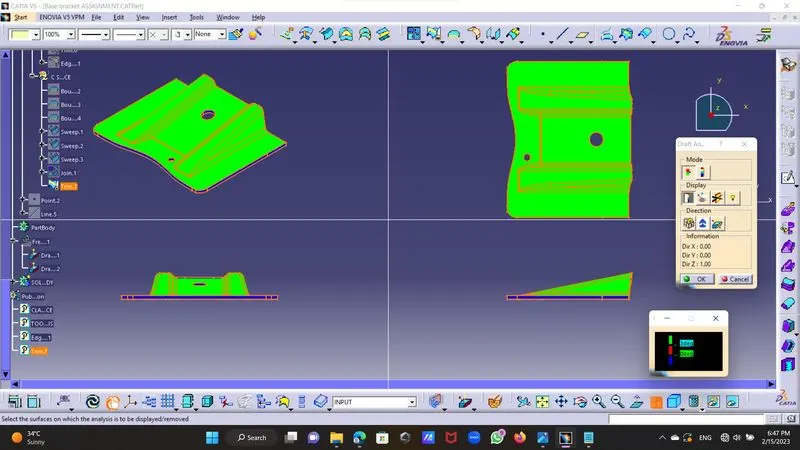
took compass tool meshed it with tooling axis properly by clicking on surface class A would change in green colour which we want by inverting it
convert into blue colure if copassed placed upside down.checked for draft valure it was 2 deg ,draft value which is permited is 3 as per standard.
changed draft value to 3 deg by editing it .There are several other tools like Analysis under the running point which shows draft angle.
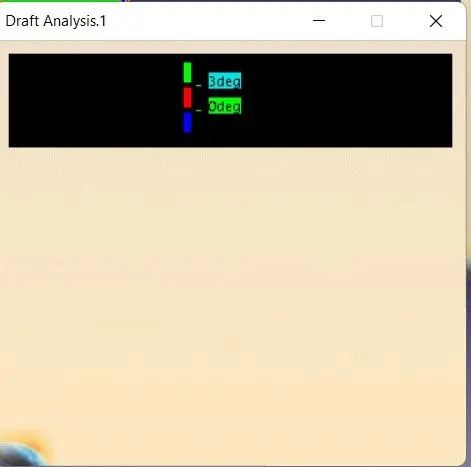
show or hide the colour scale .
In this have some colour indicators
green colour shows draft 3 or more than 3
red colour shows draft from 0 to 3 deg
blue colour shows negative value.
STEP 6 :- Base Bracket
Added a geomatrical set named it as base bracket
Added a geomatrical set named it as Rib 1 :- In this exratct rib 1 of Class A Surface then untreamed all extract and then extrapolet them trim them and offset.
Added a geomatricla set mamed it as Rib 2 :- In this exratct rib 1 of Class A Surface then untreamed all extract and then extrapolet them trim them and offset.
Added a geomatirical set named it as
STEP :-7 B surface :- exract plane surface containing hole and untreamed it and then offset then extrapolet it and trimed from rib 1 and 2.
Then exract the last cutting plane and untream it and offset towords downword and extrapolate it then trim it with main body.
STEP 8 :- CLASS C SURFACE
Took boundry tool and select outer boundry of the class A Surface and then swip it with draft direction by choosing swip tool.
then by boundry tool choose holes and swip them also in downdword direction and join the surfaces that is Class A Suface and Class C Surfaces .
then trim join of Class A Surface with Class C surface with thickness 2.5mm.
STEP 8:- Go to the part body chose close surface and inser a body convert it to solid.