Week 8-3D Tetra Meshing Challenge
3D TETRA MESHING OF THE HOUSING MODELS AND TURBOCHARGER ASSEMBLY MODEL
AIM:
- To do tetra meshing of the housing model by 2D to 3D conversion method.
- To do tetra meshing of the given model-2 by quick tetra mesh or volume tetra mesh method.
- To do tetra meshing of the turbo charger by quick tetra mesh or volume tetra mesh method.
GIVEN DATA:
(1)MODEL-1 : HOUSING COMPONENT
| S.NO | QUALITY CRITERIA | VALUES |
| 1. | Min length | 2 |
| 2. | Max length | 7 |
| 3. | Target element size | 5 |
| 4. | TET collapse | 0.15 |
(2)MODEL-2 :
| S.NO | QUALITY CRITERIA | VALUES |
| 1. | Target element size | 3 |
| 2. | TET collapse | 0.15 |
(3)MODEL-3 :TURBO CHARGER
| S.NO | QUALITY CRITERIA | VALUES |
| 1. | Target element size | 4 |
| 2. | TET collapse | 0.15 |
GIVEN MODEL :

SOFTEWARE USED:
Preprocessing software - Hyperworks Desktop-2022.
PROCEDURAL STEPS :
PART 1: TETRA MESHING ON THE HOUSING MODEL BY 2D TO 3D CONVERSION METHOD.
STEP 1 : IMPORTING THE HOUSING MODEL
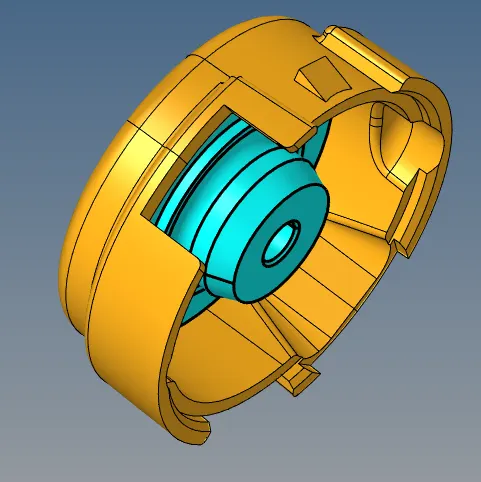
- Imported the stp file of housing model by import as a geometry option.
- File > import > geometry > selected the file type as STEP > browsed to selected the component > imported it.
CAD model of housing
STEP 2 : DELETING THE SOLID ENTITIES OF HOUSING
- Set the model as a by topo mode .
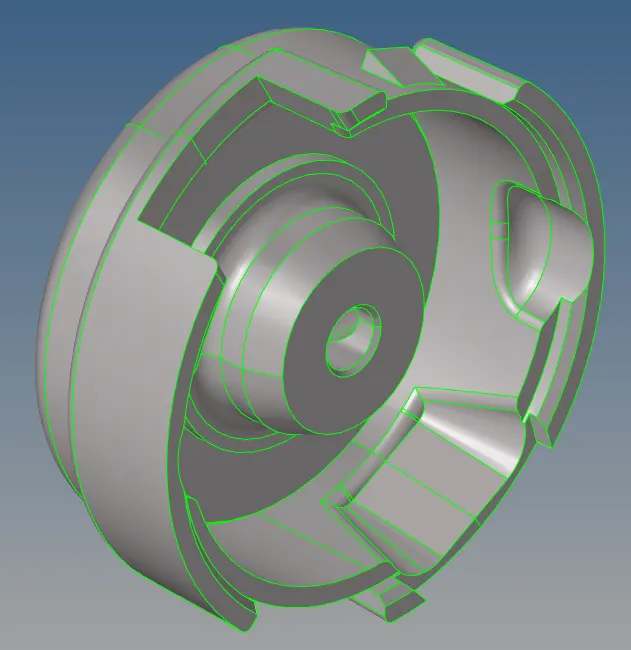
- In housing , inner component only have solid entities but outter component have surface only, so first of all deleted solids of the inner component.
- Deleted the solid entities of inner component housing model by, delete option > selected the solids > deleted it.
Surface entities of housing
PART 1A :TETRA MESHING ON THE OUTTER COMPONENT OF HOUSING MODEL.
STEP1A : GEOMETRIC CLEANUP ON THE OUTTER COMPONENT OF HOUSING MODEL
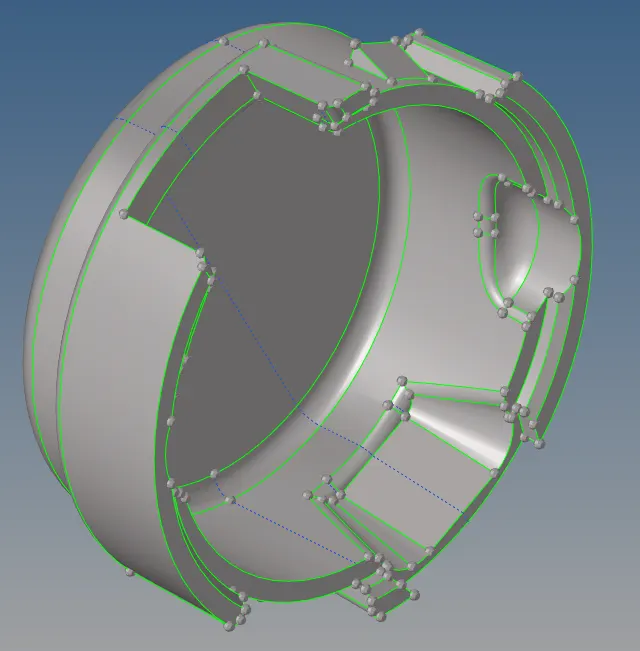
- Switch on the outter component only then,to check if there's any extra surface or free edges or missing surfaces
are present or not. - For this enable wireframe geometry mode and then try to observe and find irragularities and
discontinuities in the model. If found then fix it manually. - Removed the lines, where the below minimum length criteria.
Geometric cleanup on the outter component
STEP 1B : SET THE MESH PARAMETERS AND QUALITY CRITERA VALUES
- Before go to the meshing process, set the mesh parametes values and quality criteria values as per the
given data for model-1 housing part. - Title bar > Preferences > parameter file settings > basic > changed the parameter values as per given data.
Title bar > Preferences > quality criteria file settings >2D and 3D options > changed the parameter values as per given data.
STEP 1C: SURFACE MESHING ON OUTTER COMPONENT OF THE HOUSING
- Performed surface meshing on the outter component by automesh method.
- Mainmenu > 2D > automesh > set the target element size = 5mm > selected the surfaces > meshed it.
- Fixed the elements which are failing for quality of min length and max length errors
- Mainmenu > 2D > Quality index > smooth and element optimize options to fixed the quality errors.
- Mainmenu > 2D > element cleanup > selected the elements which are failing for quality > cleaned the failing elements.
2D meshing of outter component
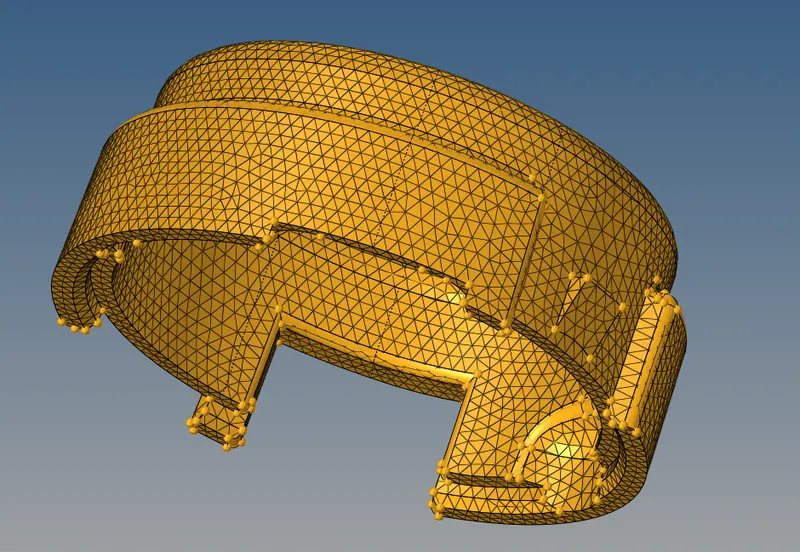
2D meshing of outter component without quality issues
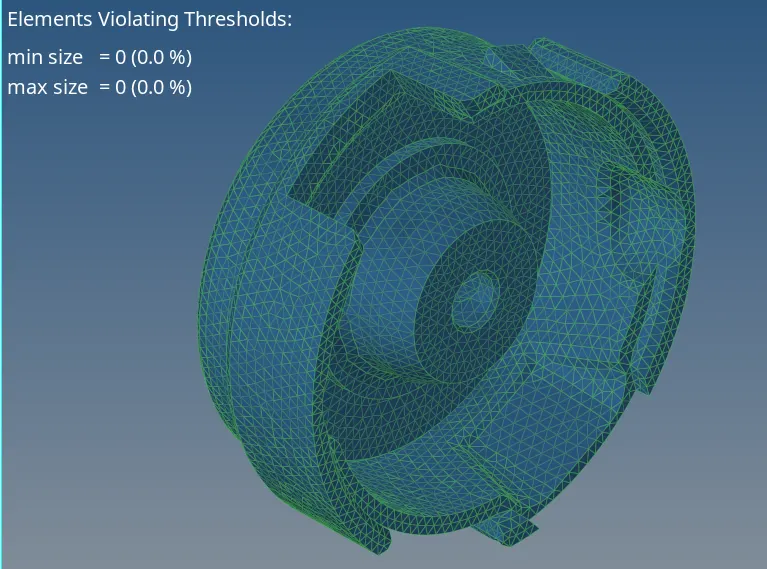
STEP 1D: CONVERSION OF SURFACE MESHING INTO SOLID MESHING OUTTER COMPONENT OF THE HOUSING
- Converted 2d meshing of housing into 3D meshing by the following steps.
- Main menu > 3D > Tetra mesh > selected the elements by display >check simple pyramid > meshed it.
- Then checked the quality of the mesh by Mainmenu > tool > check elements > 3D > tet collapsed elements failed are shown
- Failed the TET collapsed elements are cleared by using Tetra Remesh.
- Main menu > 3D > Tetra mesh > selected the elements by display >checked free boundary faces is fixed and mesh to current comp > remeshed it.
- Elements failed for tet collapse are 0(0.0%)
Tetra meshing of outter component without tet collapse
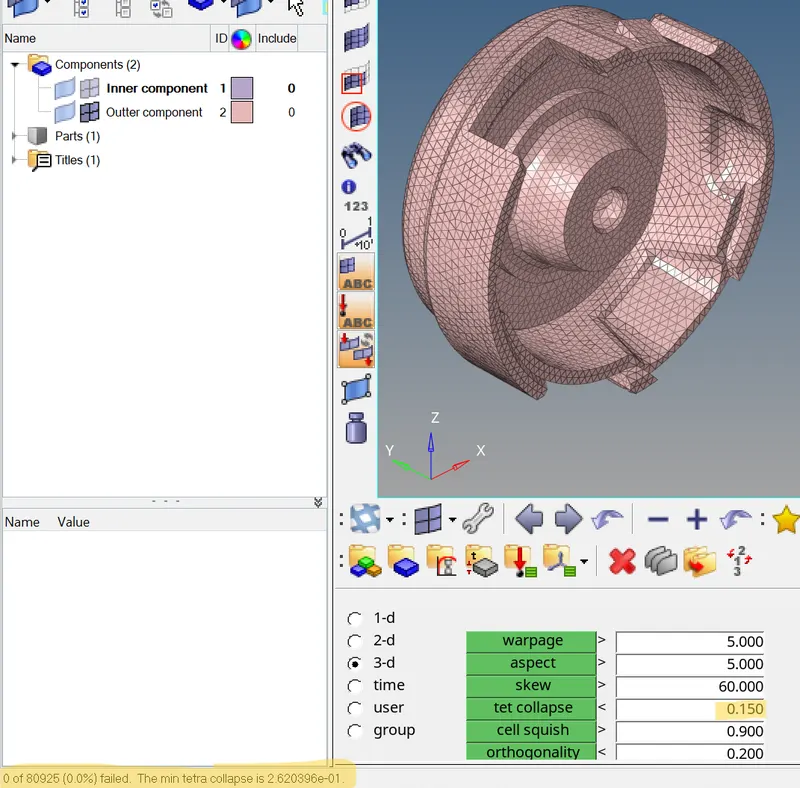
PART 1B :TETRA MESHING ON THE INNER COMPONENT OF HOUSING MODEL.
STEP1B1 : GEOMETRIC CLEANUP ON THE INNER COMPONENT OF HOUSING MODEL
- Switch on the inner component only then,to check if there's any extra surface or free edges or missing surfaces
are present or not. - For this enable wireframe geometry mode and then try to observe and find irragularities and
discontinuities in the model. If found then fix it manually. - Removed the lines, where the below minimum length criteria.
Geometric cleanup on the inner component
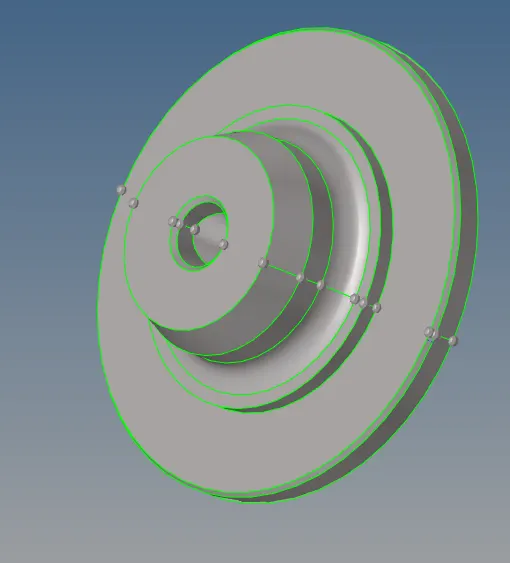
STEP 1B2 : SURFACE MESHING ON INNER COMPONENT OF THE HOUSING
- Performed surface meshing on the inner component by automesh method.
- Mainmenu > 2D > automesh > set the target element size = 5mm > selected the surfaces > meshed it.
- Fixed the elements which are failing for quality of min length and max length errors
- Mainmenu > 2D > Quality index > smooth and element optimize options to fixed the quality errors.
- Mainmenu > 2D > element cleanup > selected the elements which are failing for quality > cleaned the failing elements.
2D meshing of inner component without quality issues
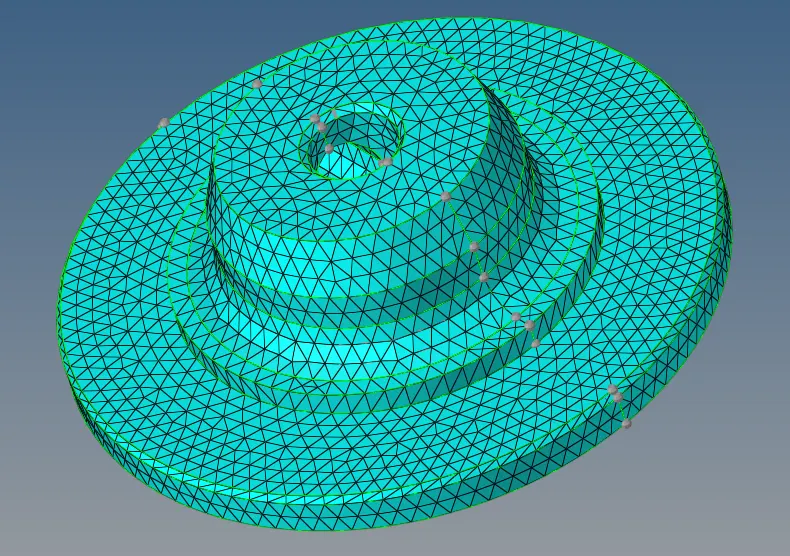
STEP 1B3 : CONVERSION OF SURFACE MESHING INTO SOLID MESHING OF INNER COMPONENT OF THE HOUSING
- Converted 2d meshing of housing into 3D meshing by the following steps.
- Main menu > 3D > Tetra mesh > selected the elements by display >check simple pyramid > meshed it.
- Then checked the quality of the mesh by Mainmenu > tool > check elements > 3D > tet collapsed elements failed are shown
- Failed the TET collapsed elements are cleared by using Tetra Remesh.
- Main menu > 3D > Tetra mesh > selected the elements by display >checked free boundary faces is fixed and mesh to current comp > remeshed it.
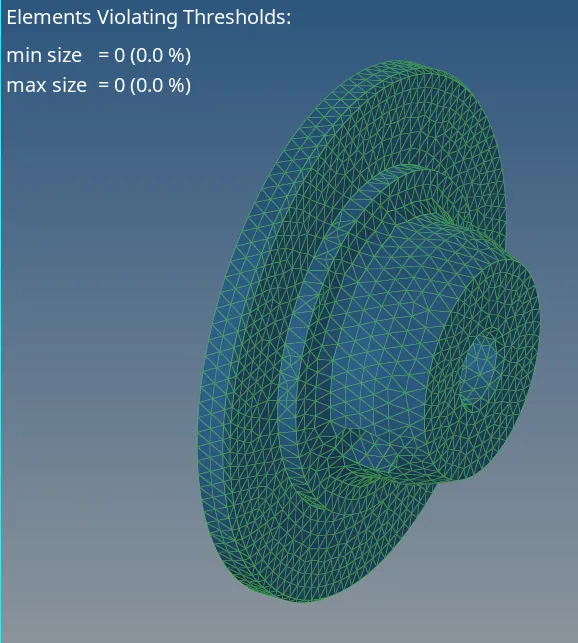
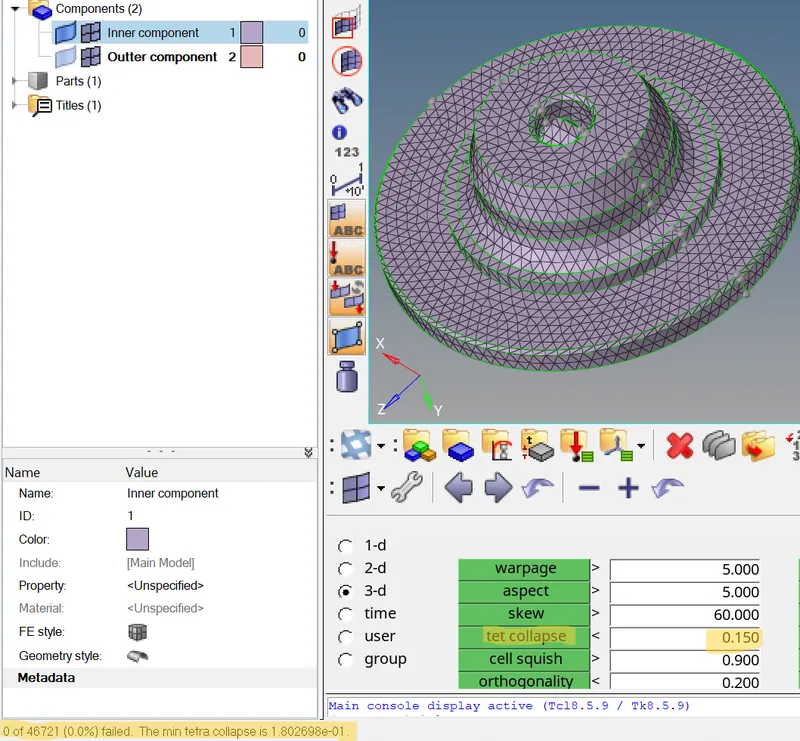
- Elements failed for tet collapse are 0(0.0%)
Tetra meshing of inner component without tet collapse
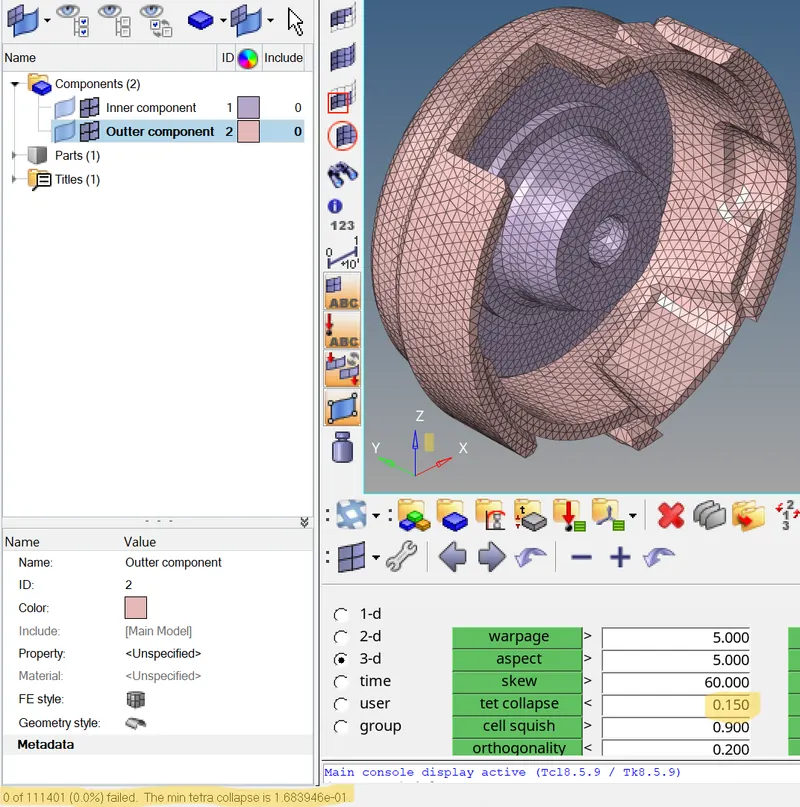
FINAL 3D MESHING OF BOTH INNER AND OUTTER COMPONENT WITHOUT TET COLLPASE
PART 2 : TETRA MESHING ON THE MODEL-2 BY QUICK TETRA MESH METHOD.
STEP 2A: IMPORTING THE MODEL-2
- Imported the IGES file of model-2 by import as a geometry option.
- File > import > geometry > selected the file type as IGES > browsed to selected the component > imported it.
CAD model of Model-2
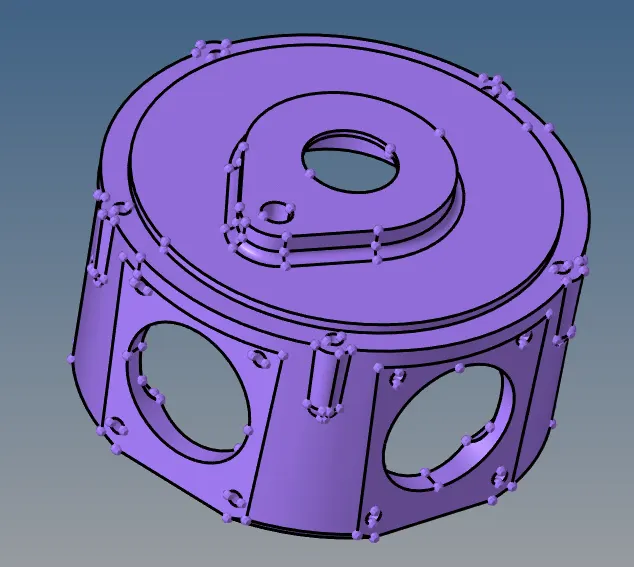
STEP 2B : DELETING THE SOLID ENTITIES OF MODEL-2
- Set the model as a by topo mode .
- In model-2 component have solid entities so first of all deleted solids of the component.
- Deleted the solid entities of component by, delete option > selected the solids > deleted it.
Surface entities of Model-2
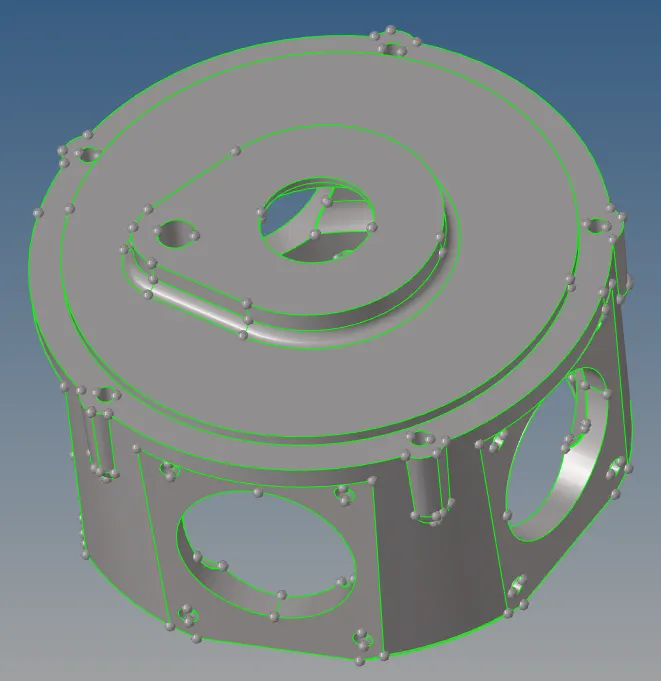
STEP2C : GEOMETRIC CLEANUP ON THE MODEL-2
- Checked if there's any extra surface or free edges or missing surfaces are present or not.
- For this enable wireframe geometry mode and then try to observe and find irragularities and
discontinuities in the model. If found then fix it manually.
STEP 2D : SET THE MESH PARAMETERS AND QUALITY CRITERA VALUES
- Before go to the meshing process, set the mesh parametes values and quality criteria values as per the
given data for model-2. - Title bar > Preferences > parameter file settings > basic > Target element size-3mm and mesh type- trias only
Title bar > Preferences > quality criteria file settings >3D options > Target element size-3mm and TET collapse-0.15 .
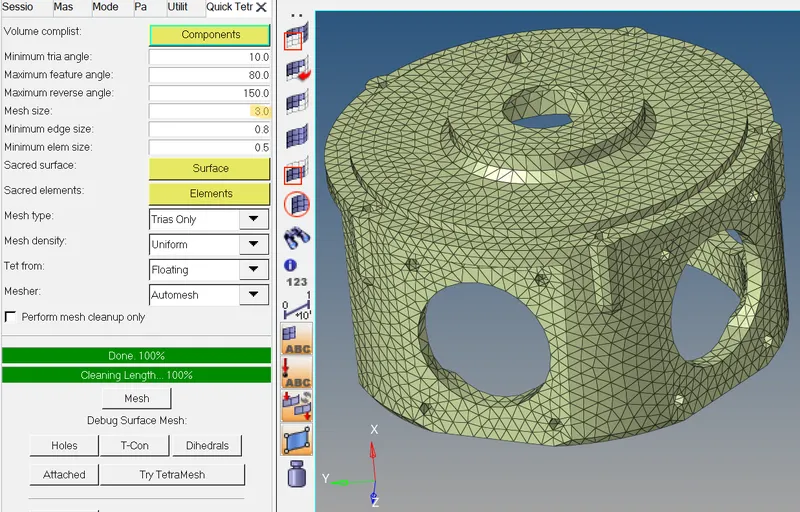
STEP 2E : TETRA MESHING ON MODEL-2
- Tetra meshing on the model-2 by quick tetra mesh method
- Title bar >view >browser > hypermesh > utility > Geom / mesh > mesh tools > quick tetra mesh > selected the component to proceed and select the mesh size-3mm > meshed it.
Tetra meshing of model-2
STEP 2F : CHECK THE QUALITY OF TETRA MESHING ON MODEL-2
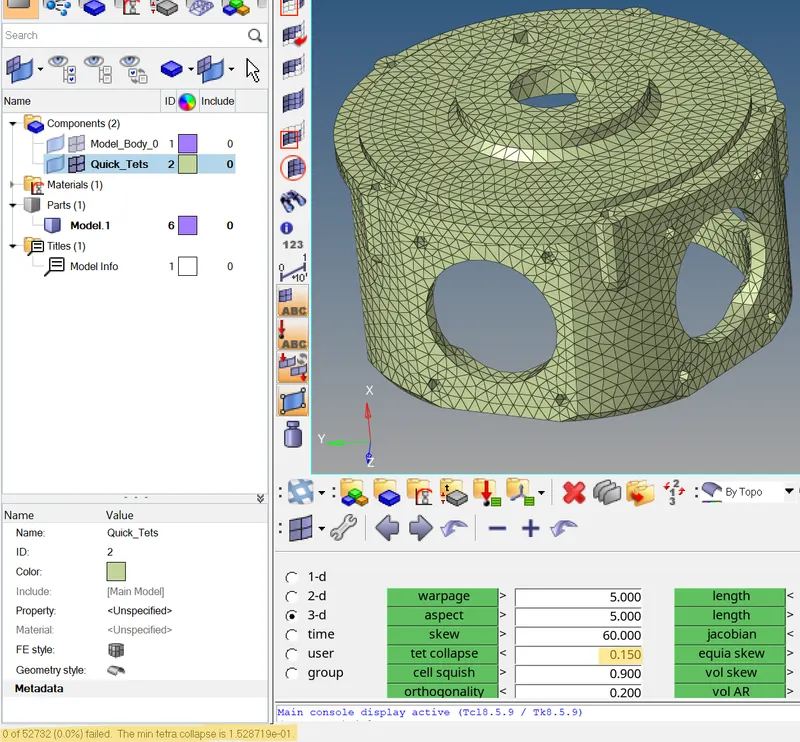
- Checked the quality of the mesh by Mainmenu > tool > check elements > 3D > tet collapsed elements failed are shown
- Failed the TET collapsed elements are cleared by using Tetra Remesh.
- Main menu > 3D > Tetra mesh > selected the elements by display >checked free boundary faces is fixed and mesh to current comp > remeshed it.
- Elements failed for tet collapse are 0(0.0%)
Tetra meshing of model-2 without tet collpase
PART 3 : TETRA MESHING ON THE TURBOCHARGER ASSEMBLY MODEL BY VOLUME TETRA MESH METHOD.
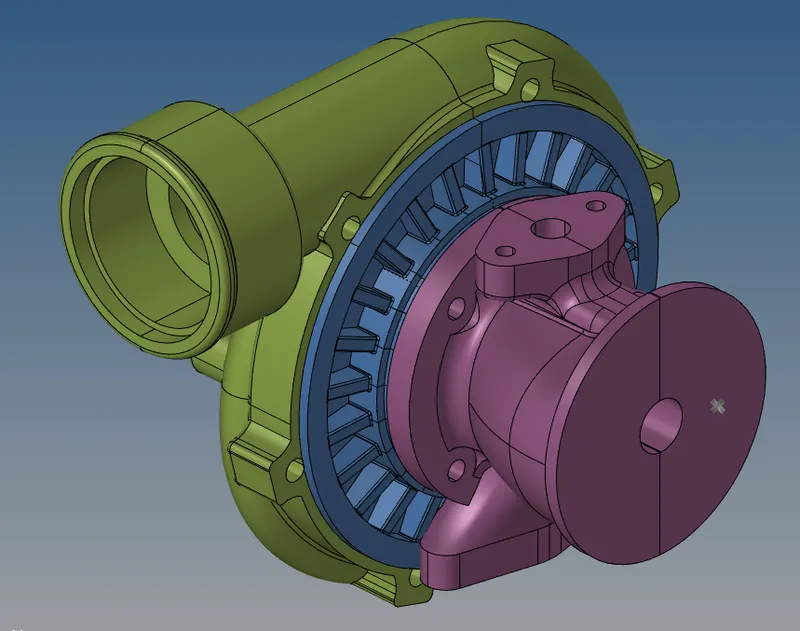
STEP 3: IMPORTING THE TURBOCHARGER MODEL
- Imported the hm file of turbo charger by import as a model option.
- File > import >model > browsed to selected the component > imported it.
CAD model of turbocharger
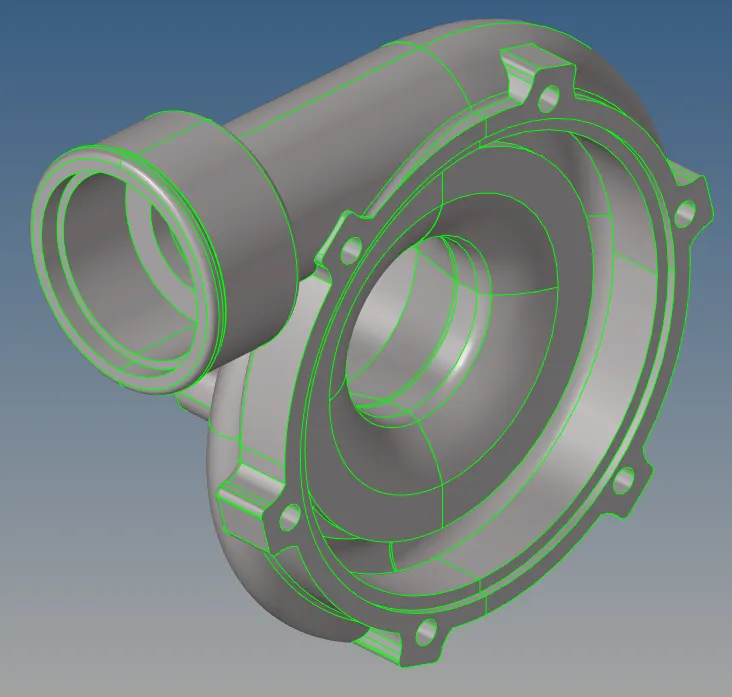
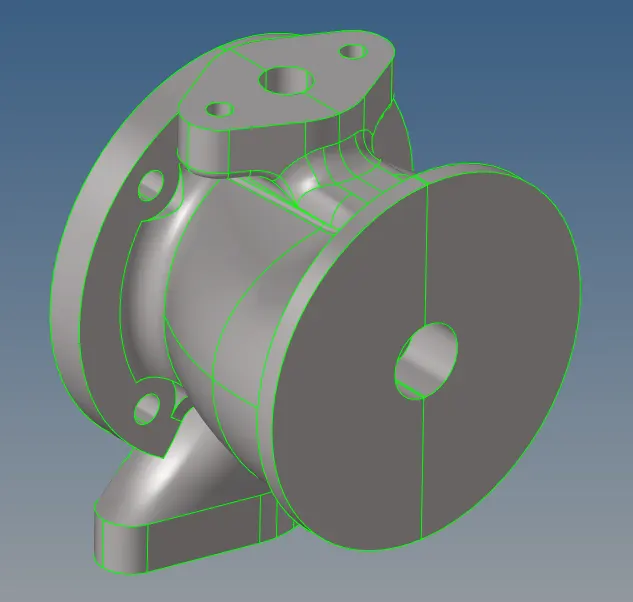
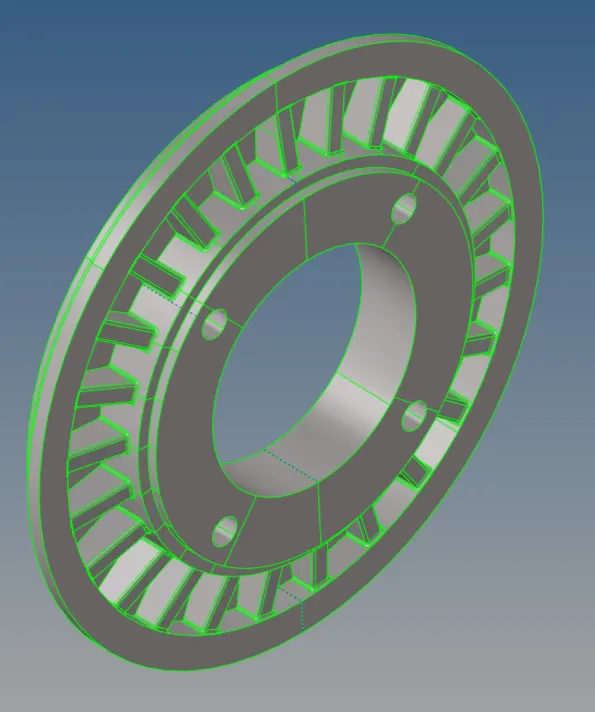
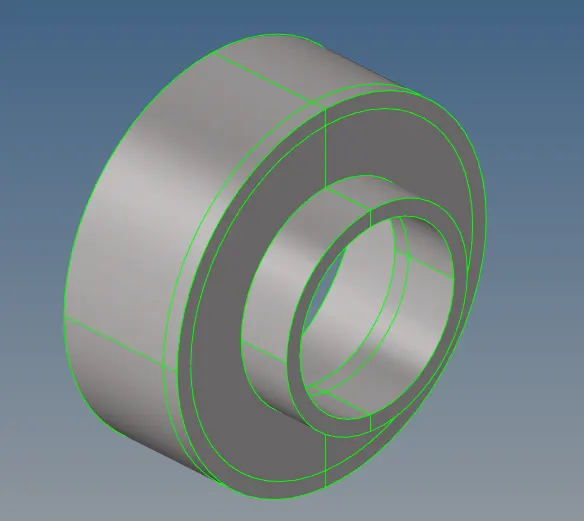
STEP3A1 : GEOMETRIC CLEANUP ON THE COMPONENTS OF THE TURBO CHARGER
- In this model there is no solid entities are present.
- Checked if there's any extra surface or free edges or missing surfaces are present or not.
- For this set by topo and enable wireframe geometry mode and then try to observe and find irragularities and
discontinuities in the model. If found then fix it manually.
Geometric cleanup of casing Geometric cleanup of Hub
Geometric cleanup of supporting plate Geometric cleanup of holder housing
STEP3A1 : SET THE MESH PARAMETERS AND QUALITY CRITERA VALUES
- Before go to the meshing process, set the mesh parametes values and quality criteria values as per the
given data for model-3. - Title bar > Preferences > parameter file settings > basic > Target element size-4 mm and mesh type- trias only
Title bar > Preferences > quality criteria file settings >3D options > Target element size-4 mm and TET collapse-0.15 .
STEP 2E : TETRA MESHING OF THE TURBO CHARGER BY VOLUME TETRA MESH METHOD.
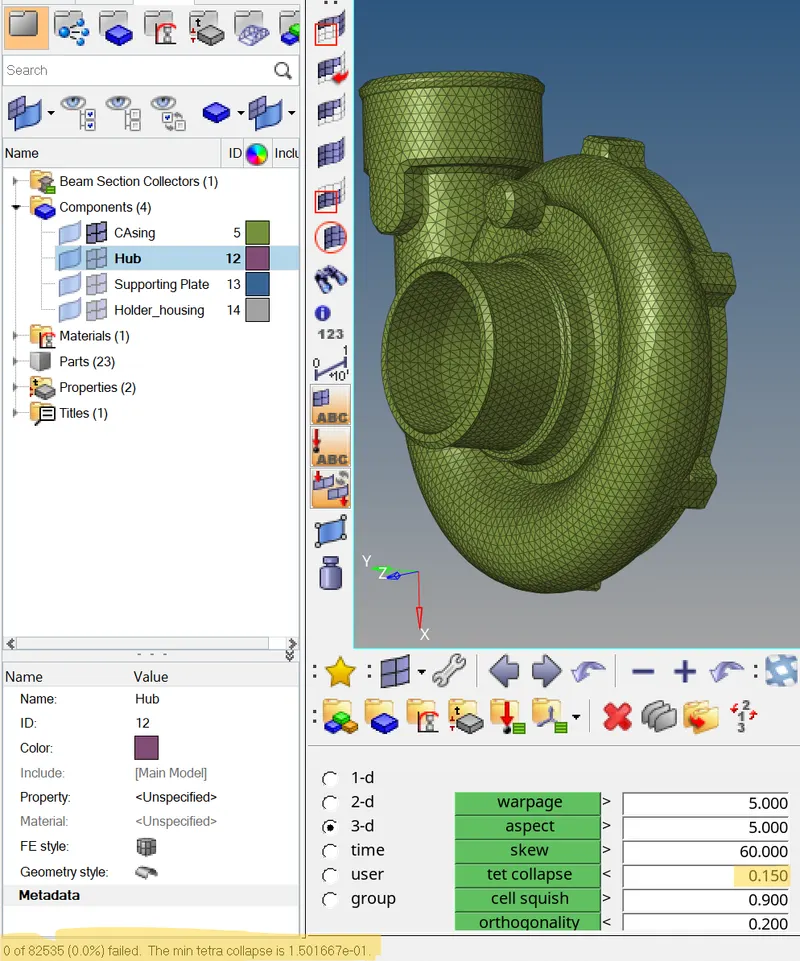
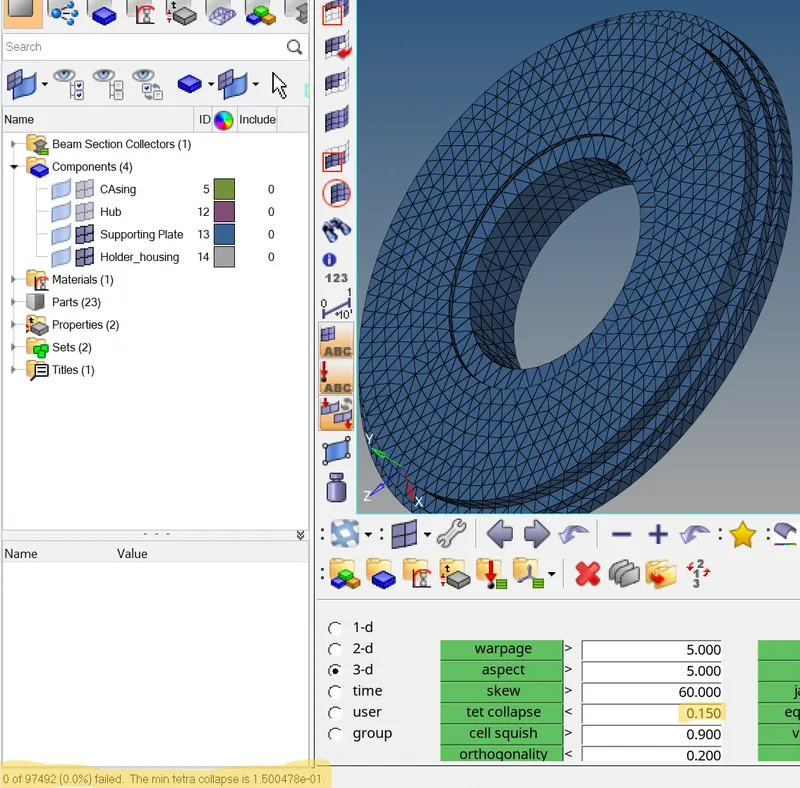
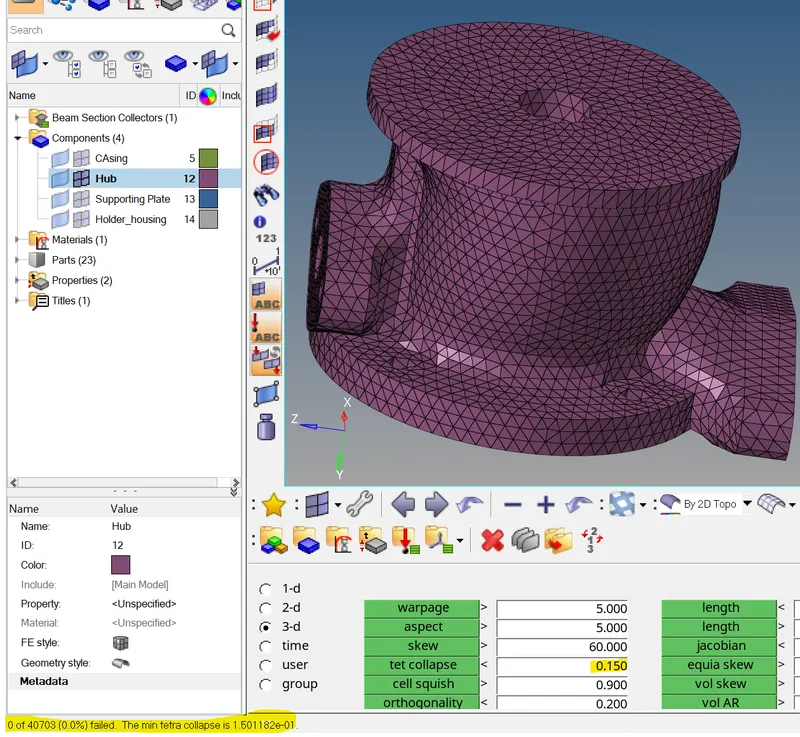
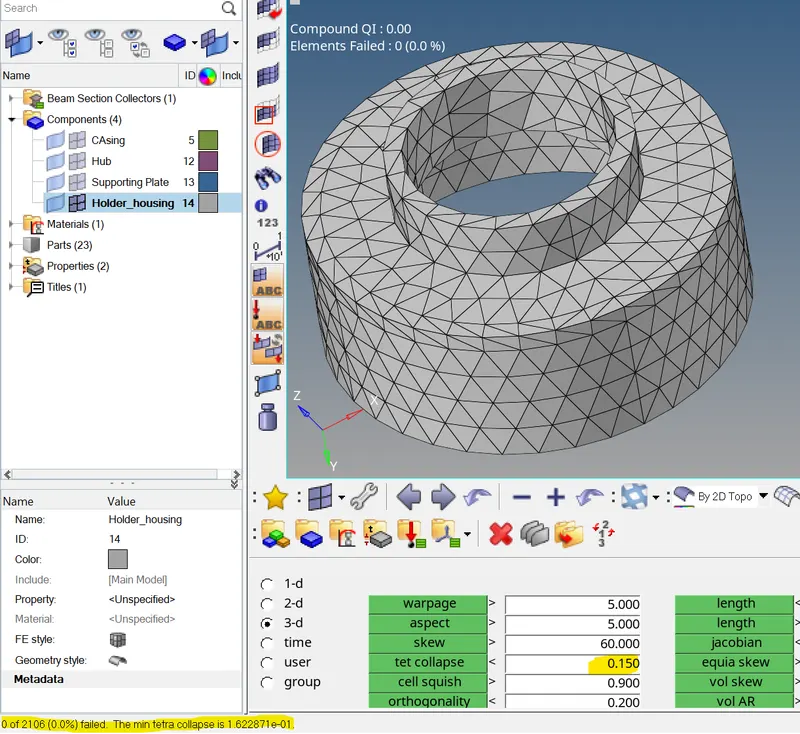
- Mainmenu > 3D > Tetramesh > volume tetramesh > selected the surfaces > set element size=4 units > meshed it.
- some of the tetra elements are failing for tet collapse.
- so,fixing the tet collapse by tetra remesh method ,
- Mainmenu > 3D > Tetramesh > tetra remesh > selected the elements >check remeshable option > remeshed it.
- Again some of the elements have tet collapse its go to fixed by manual method by moving nodes.
- Mainmenu > tool > translate > selected the nodes > N1,N2,N3 > magnitude values > moved it > fixed tet collapse.
- (or) Mainmenu > Geometry > distance > two nodes > moved nodes to fixed tet collapsed tetra elements.
Tetra meshing of casing without tet collpase
Tetra meshing of supporting plate without tet collpase
Tetra meshing of hub without tet collpase
Tetra meshing of holder housing without tet collpase
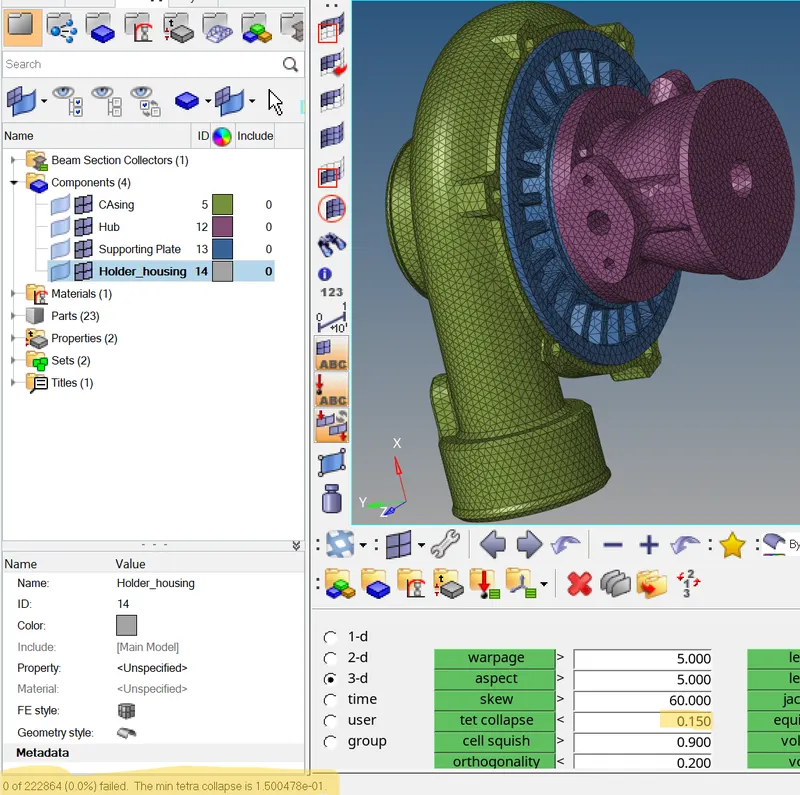
FINAL 3D TETRA MESHING OF TURBO CHARGER WITHOUT TET COLLPASE ISSUES
RESULT :
- Hence the geometric cleanup of the given 3 models without any free edges was successfully completed.
- Then fixed the damaged geometry in the model.
- A well connectivity established between the surfaces.
- The features have been captured properly.Performed 2D and 3D meshing of housing model with no quality issues.
- Performed quick tetra meshing of model-2 without TET collapse issues.
- Performed Volume tetra meshing of turbo charger assembly model without TET collapse issues.
LEARNING OUTCOMES :
In this week 8 challenge, i came to know
- How to do geometric cleanup of the part without any free edges.
- How to do fixing the damaged geometry in manual method.
- How to do conversion of 2D to 3D meshing method.
- How to do Quick tetra mesh method.
- How to do volume tetra mesh method.
- How to do fix the tetra elements which are failing for TET collapse .