Meshing of Hood using Hypermesh
AIM:
- To extract mid-surface, geometry cleanup, and deploy for the hood model components.
OBJECTIVES OF THE PROJECT:
- To extract separate mid-surface for the components.
- To perform geometry cleanup for the extracted mid-surface.
- To deploy mesh on the extracted mid-surface.
- To remove the elements failing for quality.
- To assign thickness to the components.
PROCEDURE:
- First step is to import the model into Hypermesh.
- Go to FILE > IMPORT > MODEL > BROWSE > OPEN > IMPORT.
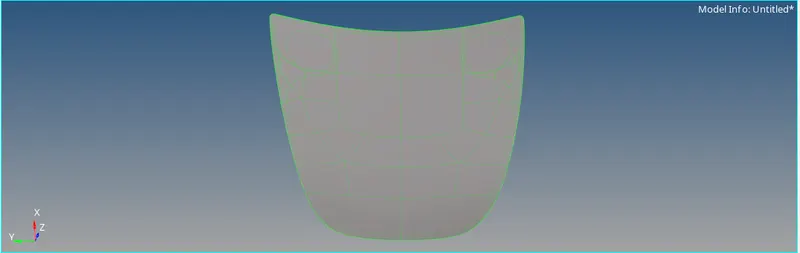
- Now, as we can see there are 4 components in the components tree, we have to extract separate mid-surface for each component.
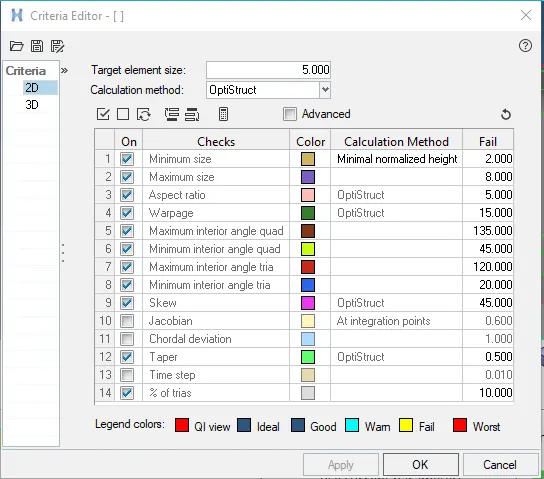
- Before that, we have to set the preferences for the quality criteria. Go to, PREFERENCE > CRITERIA FILE SETTINGS > 2D and enter the following criteria-
Target Element Length = 5
Aspect ratio = 5
Skewness = 45
Warping = 15
Taper = 0.5
Min length = 2
Max length = 8
Min angle Quad = 45
Max angle Quad = 135
Min angle tria = 20
Max angle tria = 120
- Latch reinforcement –
- CREATE > COMPONENT > RENAME > LATCH REINFORCEMENT MID.
- This will create a component wherein the mid-surface will be saved.
- Hide components other than Latch reinforcement.
- Go to GEOM > DISTANCE > TWO POINTS > MEASURE to measure the thickness of the component.
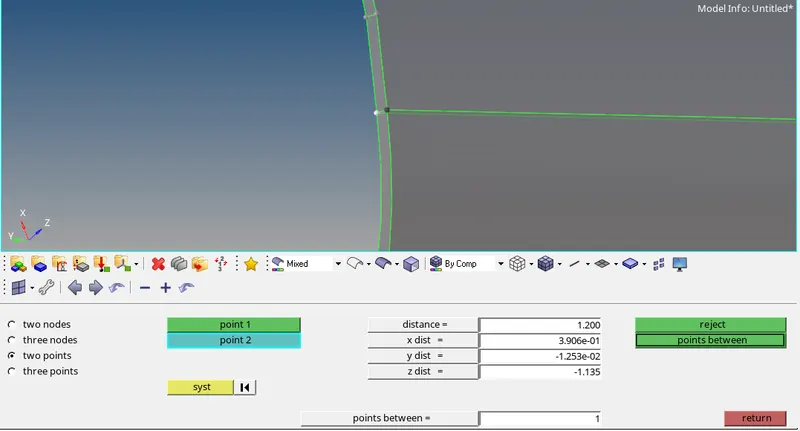
- For extracting mid-surface go to GEOMETRY > MIDSURFACE > EXTRACTION OPTIONS > SKIN OFFSET > RESULT IN CURRENT COMPONENT > AUTO EXTRACTION > SURFS > DISPLAYED > EXTRACT.

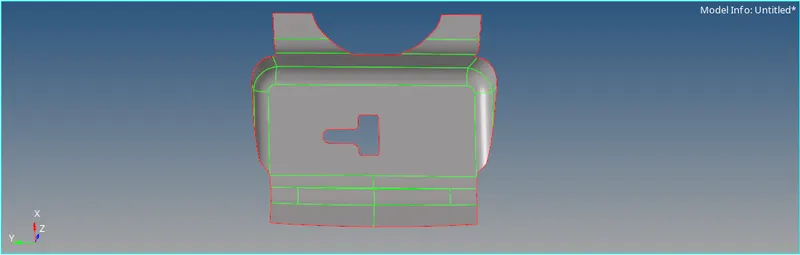
- This will extract the mid-surface for the Latch in the Latch reinforcement mid component.
- Now, after extraction of the mid-surface we can start meshing.
- Go to 2D > AUTOMESH > SURFS > ELEMENT LENGTH = 5 > SELECT THE SURFACE > MESH.
- This will deploy Mixed mesh on the surface. We can increase the no of nodes at the edges by simply left click to increase the no of nodes and right click to decrease the no of nodes.
- Go to 2D > AUTOMESH > ELEMENTS > BOX SELECTION > MESH to remesh the small portions for obtaining better mesh flow.
- Mesh element have to be checked for quality criteria. Go to MESH > CHECKS > ELEMENTS > CHECK ELEMENTS or simply press F10 from the keyboard to go to checks menu.
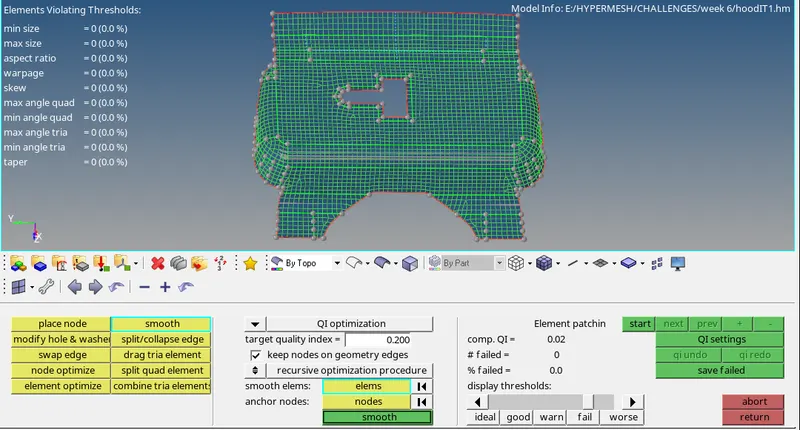
- Review the elements failing for quality and try to remesh or clean elements. Go to 2D > QUALITY INDEX > CLEANUP TOOLS to use different tools for cleaning up the failed elements and to obtain a proper mesh flow.
- Go to TOOLS > EDGES > ELEMENTS > DISPLAYED > FIND EDGES to check for discontinuity between the elements if any.
- DELETE EDGES after checking.
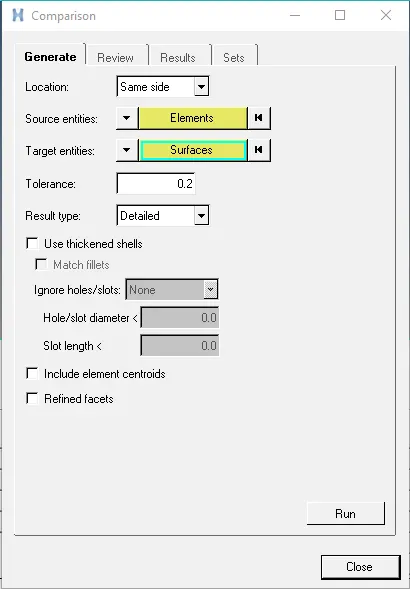
- Now, go to MESH > CHECKS > ELEMENTS > COMPARISION > ELEMENTS > DISPLAYED > SURFACES > DISPLAYED > TOLERANCE = 0.2 > RUN to check whether the elements have captured the surface or not.
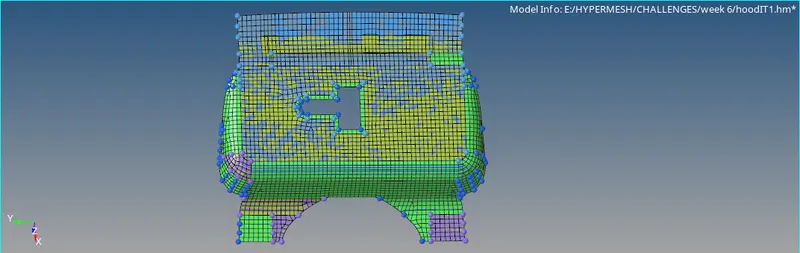
- For the elements to capture the surface go to TOOLS > PROJECT > ELEMENTS > TO SURFACE.
- CREATE > MATERIAL > RENAME > STEEL > MATEIAL CARD ID > MAT1 for creating steel material.
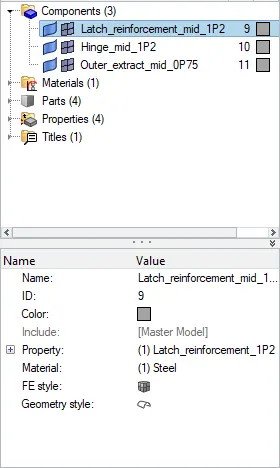
- CREATE > PROPERTY > RENAME > LATCH_MID_1P2. Assign steel material to this property.
- Assign the property to the Latch mid component and assign thickness as 1.2mm.
- Hinge reinforcement –
- CREATE > COMPONENT > RENAME > HINGE REINFORCEMENT MID.
- This will create a component wherein the mid-surface will be saved.
- Hide all the components except for the Hinge Reinforcement.
- Go to GEOM > DISTANCE > TWO POINTS > MEASURE to measure the thickness of the component.
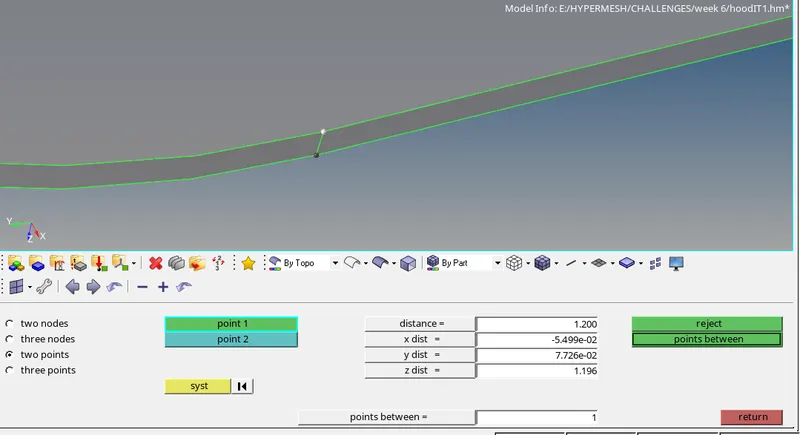
- For extracting mid-surface go to GEOMETRY > MIDSURFACE > EXTRACTION OPTIONS > SKIN OFFSET > RESULT IN CURRENT COMPONENT > AUTO EXTRACTION > SURFS > DISPLAYED > EXTRACT.
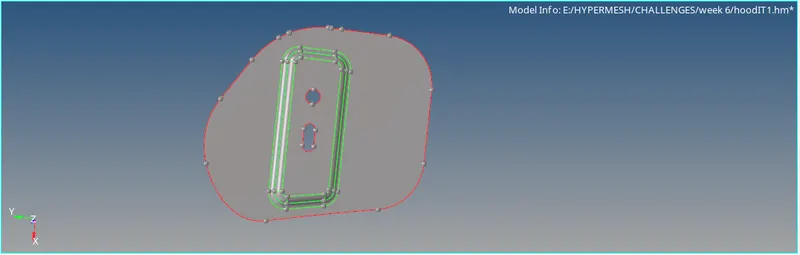
- This will extract the mid-surface for the Hinge in the Hinge reinforcement mid component.
- Now, after extraction of the mid-surface we can start meshing.
- Go to 2D > AUTOMESH > SURFS > ELEMENT LENGTH = 5 > SELECT THE SURFACE > MESH.
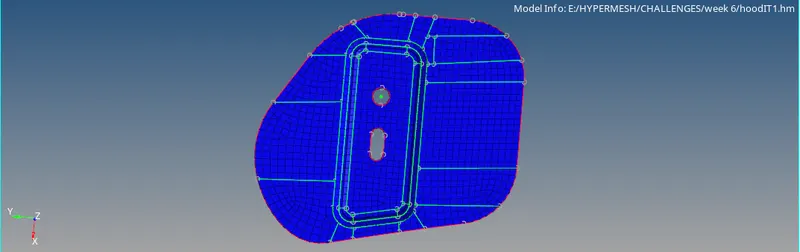
- This will deploy Mixed mesh on the surface. We can increase the no of nodes at the edges by simply left click to increase the no of nodes and right click to decrease the no of nodes.
- Go to 2D > AUTOMESH > ELEMENTS > BOX SELECTION > MESH to remesh the small portions for obtaining better mesh flow.
- Mesh element have to be checked for quality criteria. Go to MESH > CHECKS > ELEMENTS > CHECK ELEMENTS or simply press F10 from the keyboard to go to checks menu.
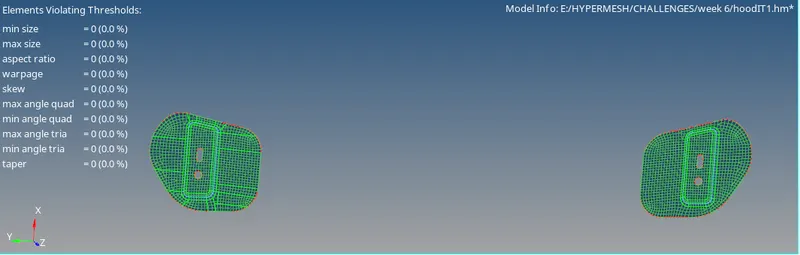
- Review the elements failing for quality and try to remesh or clean elements. Go to 2D > QUALITY INDEX > CLEANUP TOOLS to use different tools for cleaning up the failed elements and to obtain a proper mesh flow.
- Go to TOOLS > EDGES > ELEMENTS > DISPLAYED > FIND EDGES to check for discontinuity between the elements if any.
- DELETE EDGES after checking.
- Now, go to MESH > CHECKS > ELEMENTS > COMPARISION > ELEMENTS > DISPLAYED > SURFACES > DISPLAYED > TOLERANCE = 0.2 > RUN to check whether the elements have captured the surface or not.
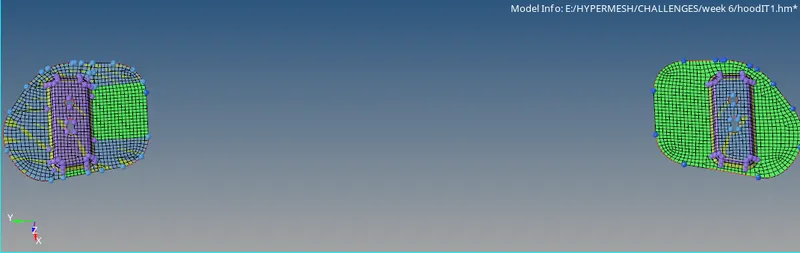
- For the elements to capture the surface go to TOOLS > PROJECT > ELEMENTS > TO SURFACE.
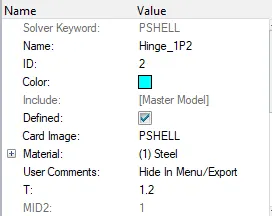
- CREATE > PROPERTY > RENAME > HINGE_MID_1P2. Assign steel material to this property.
- Assign the property to the Hinge mid component and assign thickness as 1.2mm.
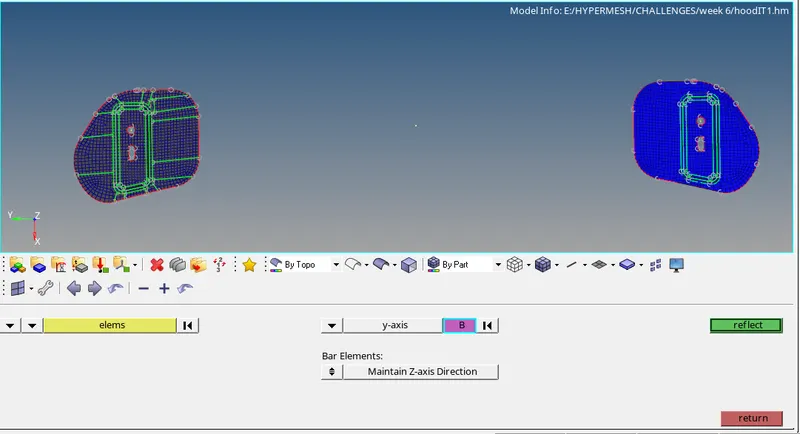
- Go to TOOLS > REFLECT > ELEMENTS > DISPLAYED > DUPLICATE > Y AXIS > BASE NODE > REFLECT, to reflect the mesh elements on to the other hinge mid-surface.
- Outer extract –
- CREATE > COMPONENT > RENAME > OUTER EXTRACT MID.
- This will create a component wherein the mid-surface will be saved.
- Hide all the components except for the Outer Extract.
- Go to GEOM > DISTANCE > TWO POINTS > MEASURE to measure the thickness of the component.
- For extracting mid-surface go to GEOMETRY > MIDSURFACE > EXTRACTION OPTIONS > SKIN OFFSET > RESULT IN CURRENT COMPONENT > AUTO EXTRACTION > SURFS > DISPLAYED > EXTRACT.
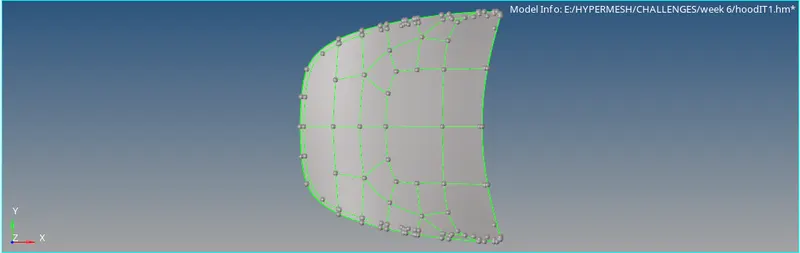
- This will extract the mid-surface for the Outer Extract in the Outer Extract mid component.
- Now, after extraction of the mid-surface we can start meshing. Mesh the half panel and use reflect after.
- Go to 2D > AUTOMESH > SURFS > ELEMENT LENGTH = 5 > SELECT THE SURFACE > MESH.
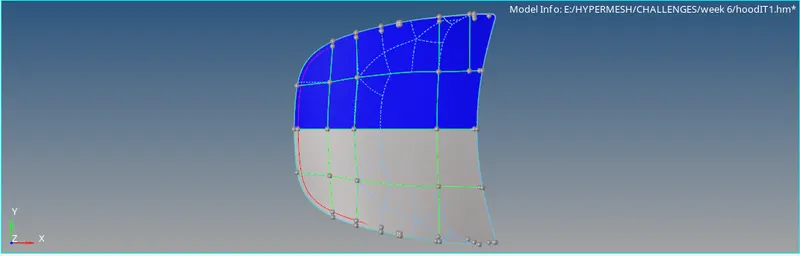
- Go to 2D > AUTOMESH > ELEMENTS > BOX SELECTION > MESH to remesh the small portions for obtaining better mesh flow.
- Mesh element have to be checked for quality criteria. Go to MESH > CHECKS > ELEMENTS > CHECK ELEMENTS or simply press F10 from the keyboard to go to checks menu.

- Review the elements failing for quality and try to remesh or clean elements. Go to 2D > QUALITY INDEX > CLEANUP TOOLS to use different tools for cleaning up the failed elements and to obtain a proper mesh flow.
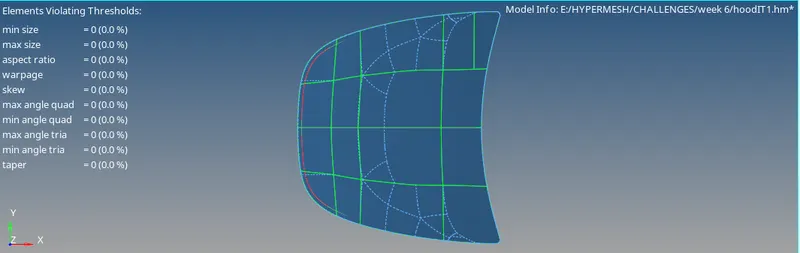
- Go to TOOLS > EDGES > ELEMENTS > DISPLAYED > FIND EDGES to check for discontinuity between the elements if any.
- DELETE EDGES after checking.
- Now, go to MESH > CHECKS > ELEMENTS > COMPARISION > ELEMENTS > DISPLAYED > SURFACES > DISPLAYED > TOLERANCE = 0.2 > RUN to check whether the elements have captured the surface or not.
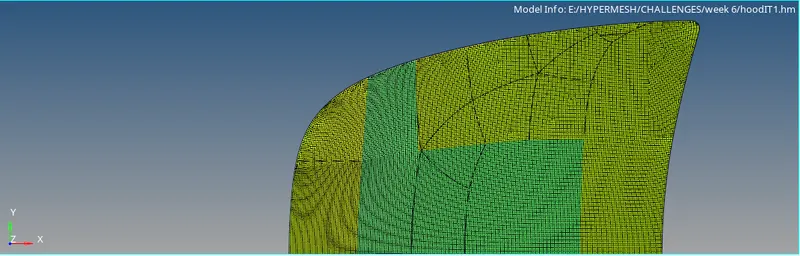
- For the elements to capture the surface go to TOOLS > PROJECT > ELEMENTS > TO SURFACE.
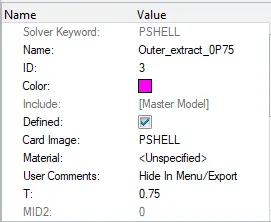
- CREATE > PROPERTY > RENAME > OUTEREXTRACT_MID_0P75. Assign steel material to this property.
- Assign the property to the Outer Extract mid component and assign thickness as 0.75mm.
- Go to TOOLS > REFLECT > ELEMENTS > DISPLAYED > DUPLICATE > Y AXIS > BASE NODE > REFLECT, to reflect the mesh elements on to the other hinge mid-surface.
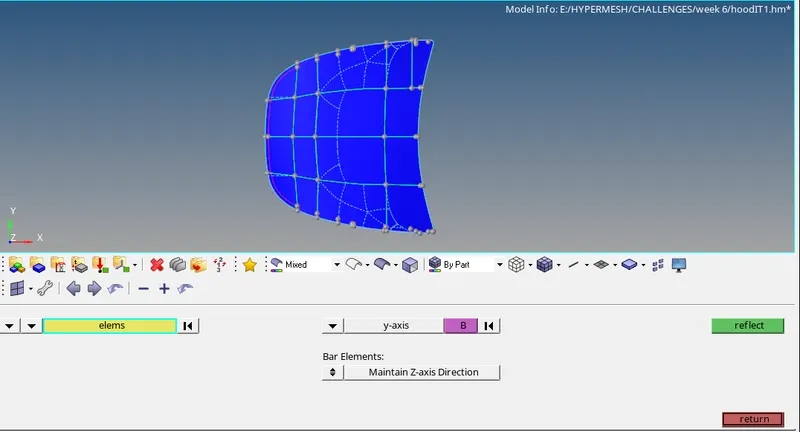
- Inner extract –
- CREATE > COMPONENT > RENAME > INNER EXTRACT MID.
- This will create a component wherein the mid-surface will be saved.
- Hide all the components except for the Inner extract.
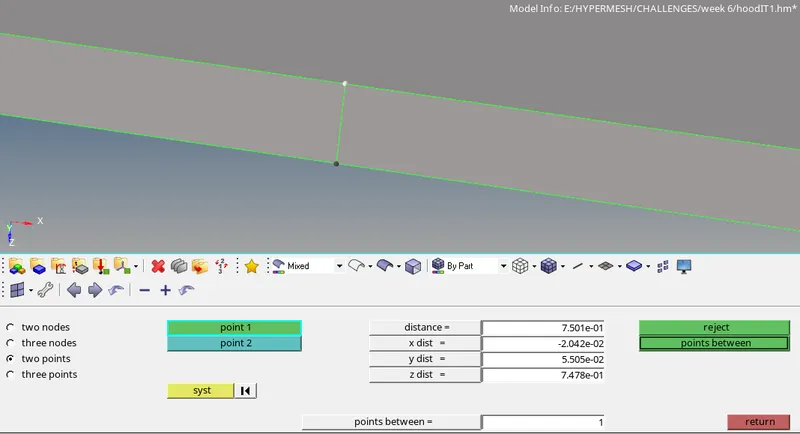
- Go to GEOM > DISTANCE > TWO POINTS > MEASURE to measure the thickness of the component.
- For extracting mid-surface go to GEOMETRY > MIDSURFACE > EXTRACTION OPTIONS > SKIN OFFSET > RESULT IN CURRENT COMPONENT > AUTO EXTRACTION > SURFS > DISPLAYED > EXTRACT.
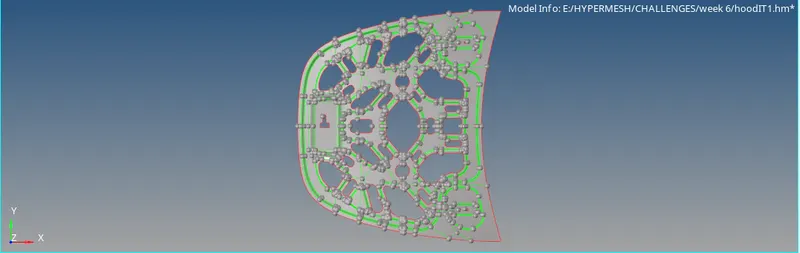
- This will extract the mid-surface for the Inner Extract in the Inner Extract mid component.
- Now, after extraction of the mid-surface we can start meshing. Mesh the half panel except the latch surface and use reflect after.
- Go to 2D > AUTOMESH > SURFS > ELEMENT LENGTH = 5 > SELECT THE SURFACE > MESH.
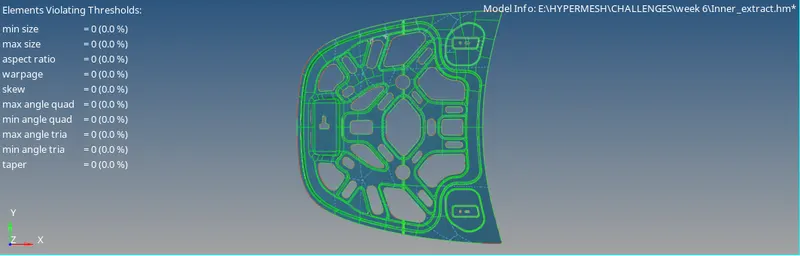
- Go to 2D > AUTOMESH > ELEMENTS > BOX SELECTION > MESH to remesh the small portions for obtaining better mesh flow.
- Mesh element have to be checked for quality criteria. Go to MESH > CHECKS > ELEMENTS > CHECK ELEMENTS or simply press F10 from the keyboard to go to checks menu.
- Review the elements failing for quality and try to remesh or clean elements. Go to 2D > QUALITY INDEX > CLEANUP TOOLS to use different tools for cleaning up the failed elements and to obtain a proper mesh flow.
- Go to TOOLS > EDGES > ELEMENTS > DISPLAYED > FIND EDGES to check for discontinuity between the elements if any.
- DELETE EDGES after checking.
- Now, go to MESH > CHECKS > ELEMENTS > COMPARISION > ELEMENTS > DISPLAYED > SURFACES > DISPLAYED > TOLERANCE = 0.2 > RUN to check whether the elements have captured the surface or not.
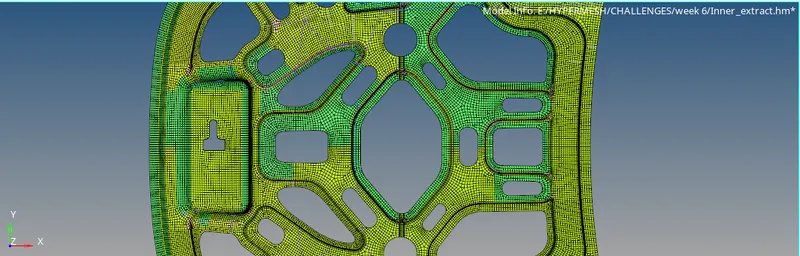
- For the elements to capture the surface go to TOOLS > PROJECT > ELEMENTS > TO SURFACE.
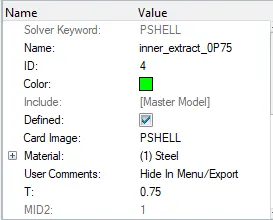
- CREATE > PROPERTY > RENAME > INNEREXTRACT_MID_0P75. Assign steel material to this property.
- Assign the property to the Inner Extract mid component and assign thickness as 0.75mm.
- Go to TOOLS > REFLECT > ELEMENTS > DISPLAYED > DUPLICATE > Y AXIS > BASE NODE > REFLECT, to reflect the mesh elements on to the other hinge mid-surface.
LEARNING OUTCOMES:
- To extract Midsurface for the components.
- To use geometry cleanup.
- To manually split surfaces and toggle lines.
- To mesh the mid-surface using the mixed mesh.
- To set quality criteria values in the preferences.
- To check the elements for Quality criteria.
- To manually remesh and clean the elements failing for quality.
- To reflect the elements for saving time in symmetric components.
- To compare the elements with the surface association.
- To assign thickness for the components.
- To assign material for the components.
CONCLUSION:
- Hence, by performing the project we conclude that the Hood model is meshed according to te given quality criteria values and is ready for analysis.