2D Meshing, Quality criteria, and assign thickness for the given Hood component using hypermesh
Challenge 6- Meshing, Quality criteria, and assign thickness for the given component:
Objective:
To mesh the given hood component as per the given quality criteria and assign thickness.the hood has an assembly of five components.so first we have extract midsurface from assembly components individually and mesh it properly.
Target Element Length = 5mm
| S.N | Quality Criteria | Value |
| 1 | Aspect Ratio | 5 |
| 2 | Skewness | 45 |
| 3 | Warping | 15 |
| 4 | Taper | 0.5 |
| 5 | Min. Length | 2mm |
| 6 | Max. Length | 8mm |
| 7 | Min angle Quad | 45 |
| 8 | Max angle Quad | 135 |
| 9 | Min angle Tria | 20 |
| 10 | Max angle Tria | 120 |
| 10 | Tria % | 10 |
Procedure:
now extract the midsurfaces of the five components individually and mesh it.
1.Latch:
- first delete the solids in geometry by selecting delete-solids command.
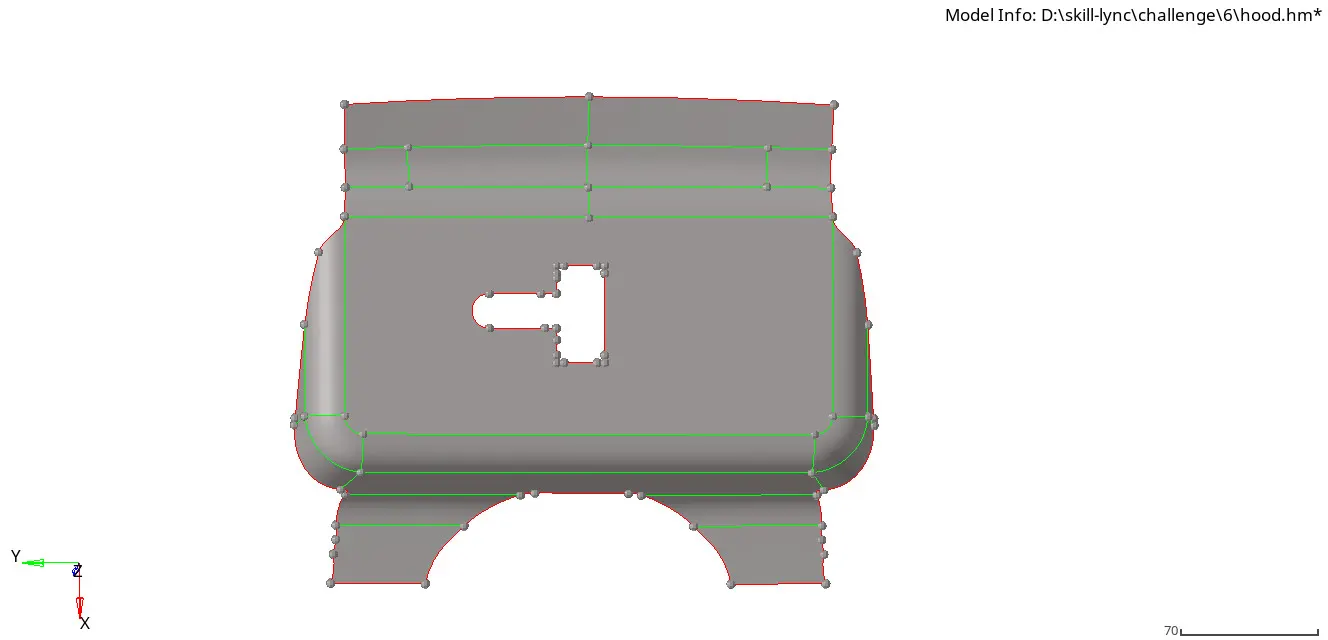
img.1 latch model in 2D surface
- after this go to midsurface command in geometry, slect the entrie surface and select auto extraction-offset+planes+sweeps and create it.
- first do the geometry cleanup and check the free edges, missing surfaces and toggle the lines where we want to toggle.
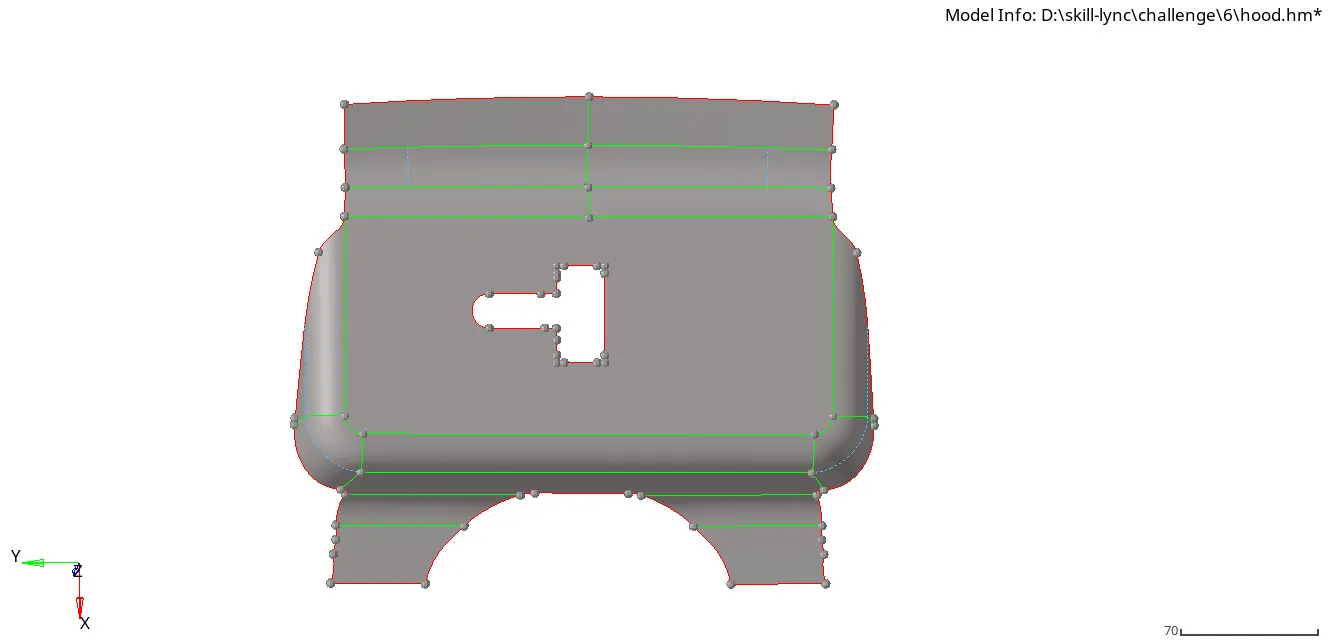
img.2 after geometry cleanup
- after that mesh the component with element size 5 by surface by surface properly.
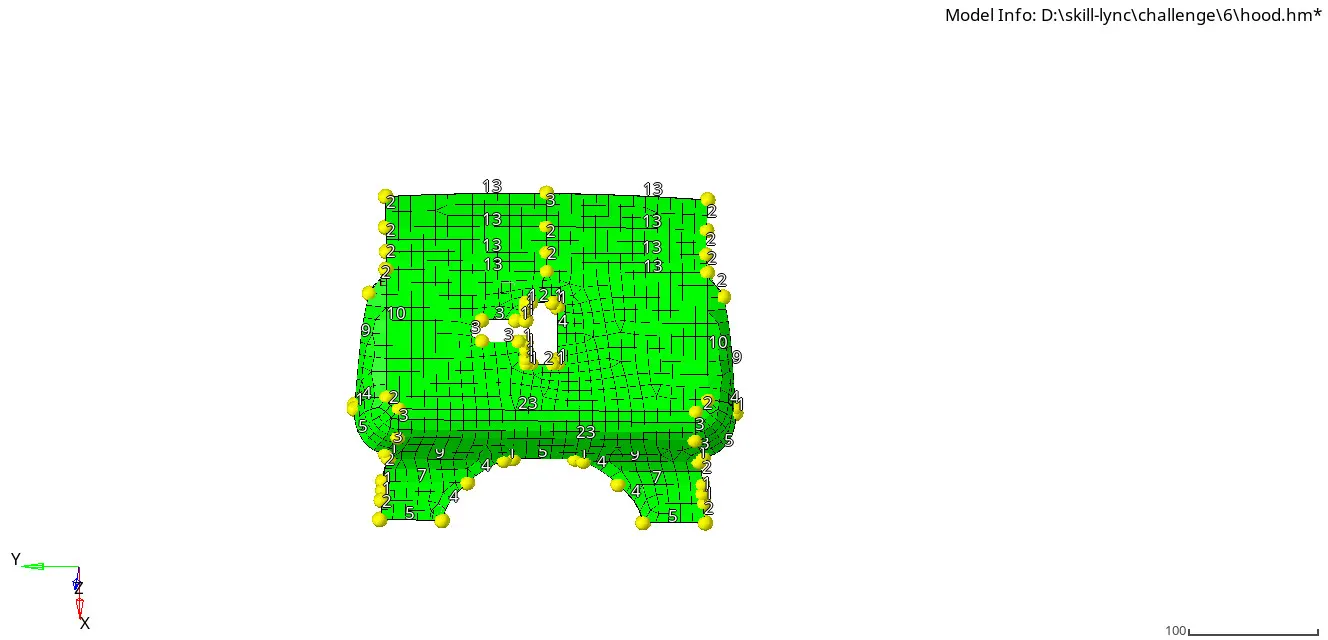
img.3 meshing of the component
- Use quads elements for rectangular faces and mixed for non linear faces
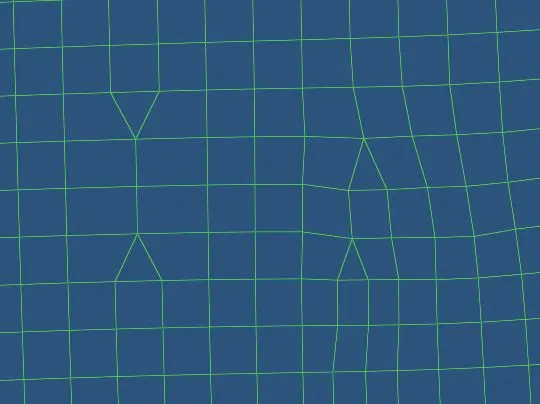
img.4 opposite trias and back to back trias
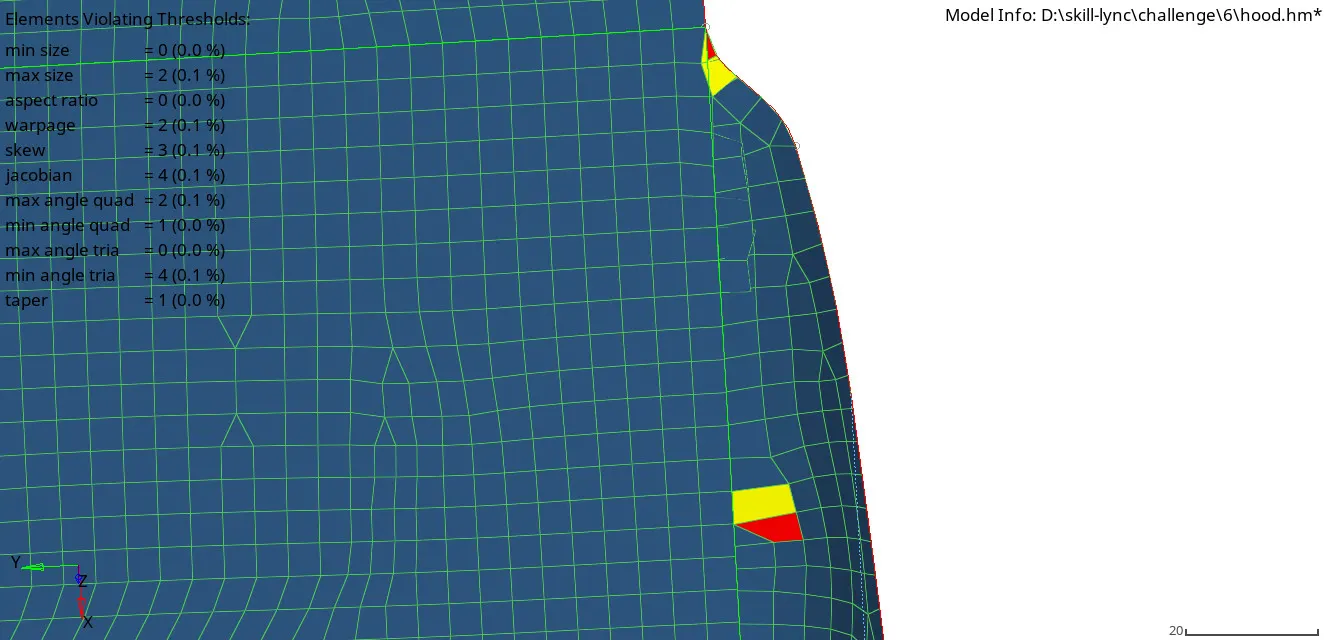
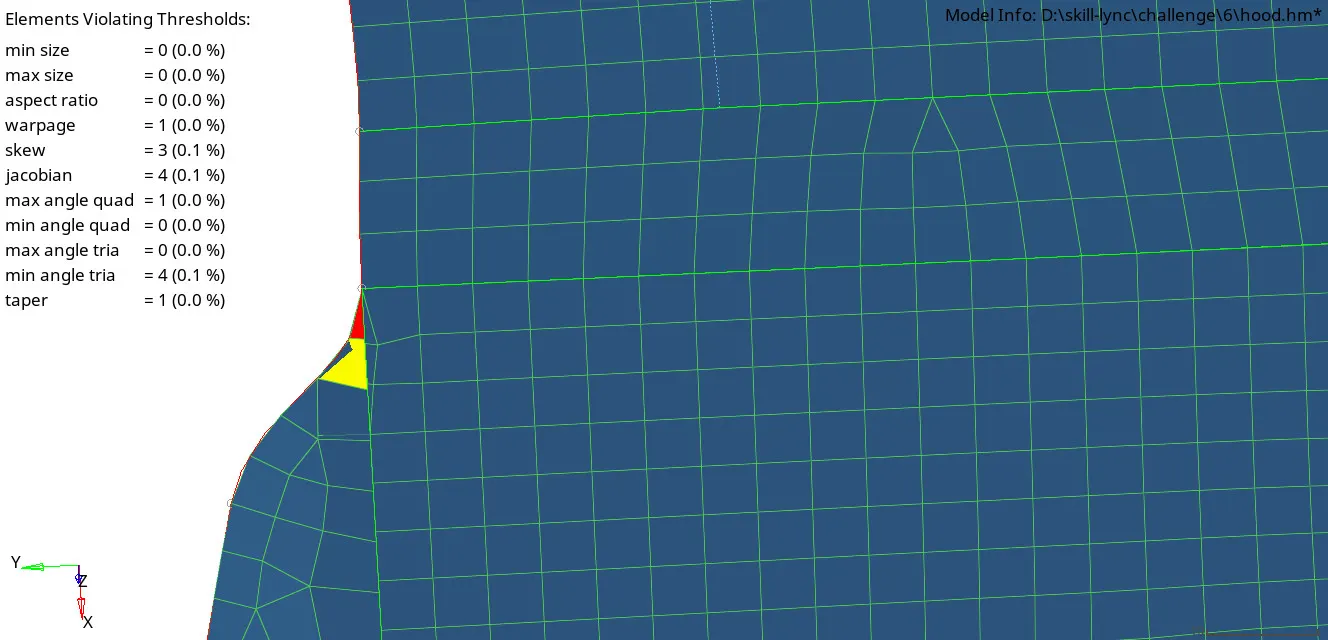
img.5 quality criteria check
- after meshing one surface, check the quality index,assign thickness, material, property.
- first remove the rotational quads and trias by increasing and decreasing the nodes while meshing.
- now we have a mesh slight properly,the rotational quads and trias also appears after this also.now we do other methods to remove this.
after this check for the trias management criteria as follows
- reduce the tria concentration(tria element)
- avoid back to back trias
- avoid opposite trias
- reduce no of trias on below quality criteria
- reduce no of trias on the corner of the edges
- avoid trias on fillets and hemming areas
- avoid trias share a boundary with feature line of the model
- avoid rotational quads
img.6 after remesh
- now we must remove the rotational quads in the model by remesh again and again using those elements only not a surface.
- first assign the quality criteria values in criteria settings.first select preferences-criteria settings and now assign the values are given above and select ok.now your mesh will create depend on this quality criteria.
- we can use quality index tool for know the mesh was created under the assigned quality criteria values.
- In quality index tool,many tools are there to optimize the elements like drag trias,element optimize, node optimize, place node,combine two trias,split quads etc.,
- now remove trias using quality index command in 2D tool.use drag tria option to reduce the opposite trias.
- we can remove back to back trias using these quality index tool.
- after cleanup the elements, check the quality index and it result shows zero.
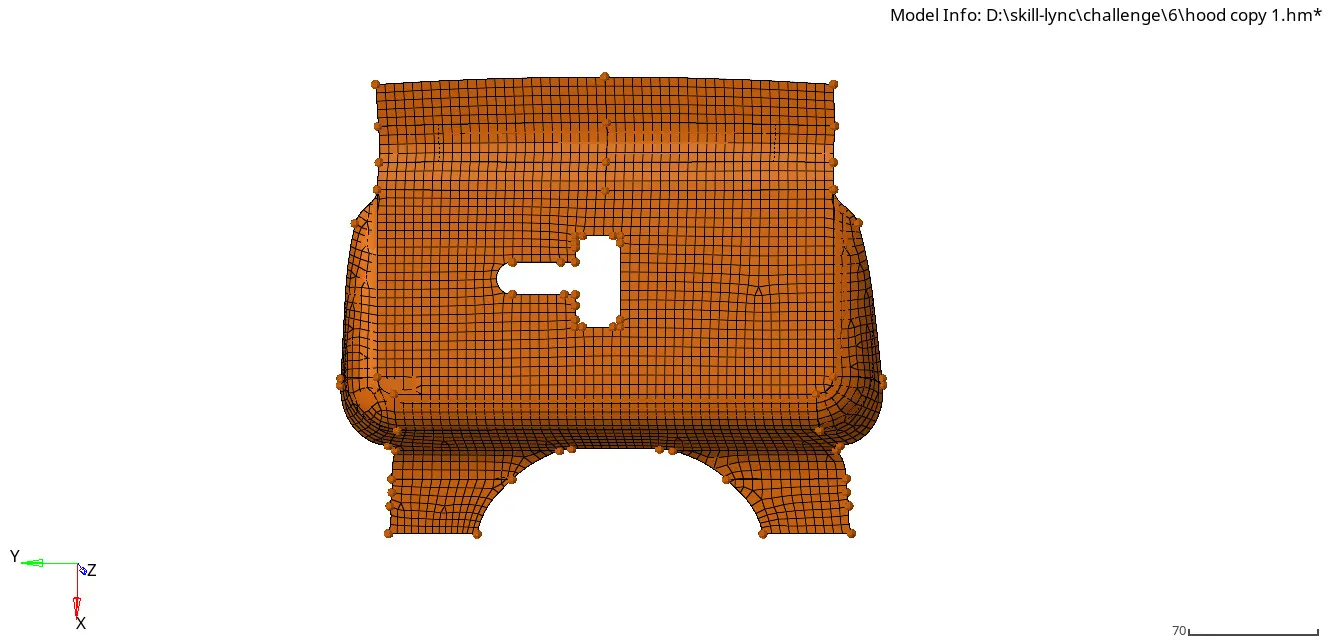
img.7 final model
- now check the free edges of the model using tool-edges-find edges. if the free edges are appears in between the surfaces, we have to equivalence the edges using equivalence option in edges tool.
- now clear any free edges appears and check the quality index appears zero and check the mesh.the value is zero in the quality index.
- now assign the property with thickness and material of the model.
Hinge reinforcement body 1:
- first delete the solids using delete-solids command and then check the sufaces for any free surfaces or not by topo view
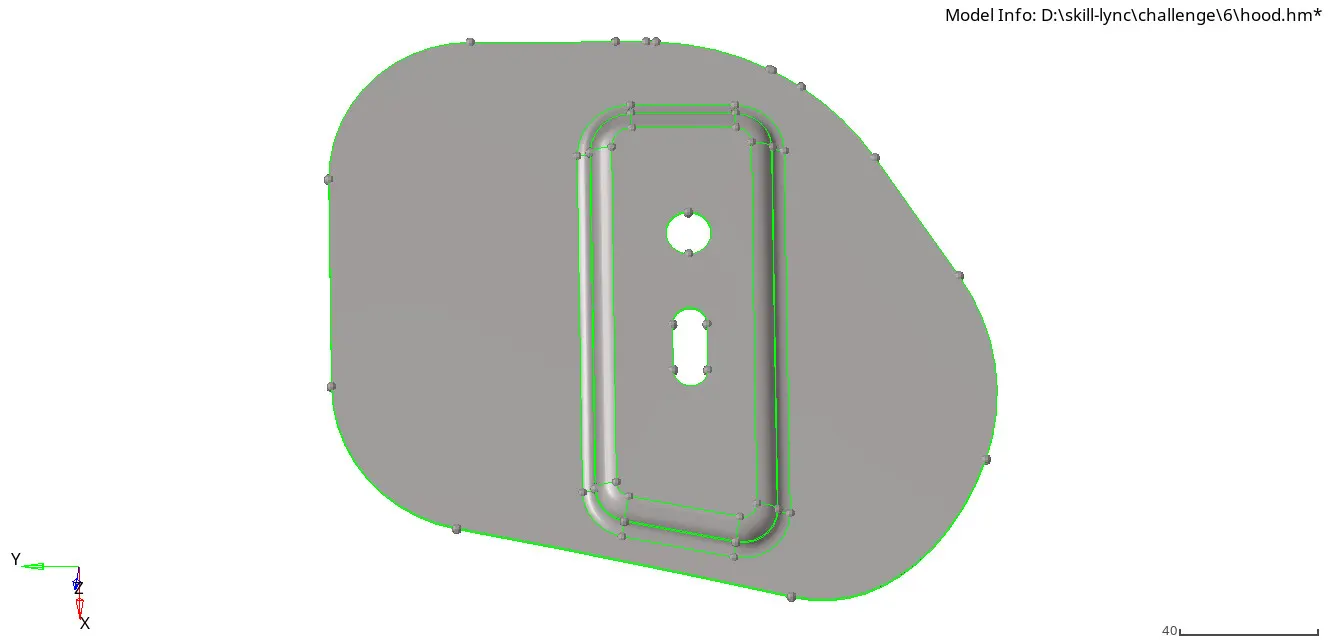
img.8 hinge-1 2D surfaces
- now extract the mid surface of the hinge body 1 by the command of midsurface extraction using offset+planes+sweep.
- checkt the surfaces and cleanup the geometry manually and toggle the lines with tolenrace 0.5mm to clean the surfaces for meshing.
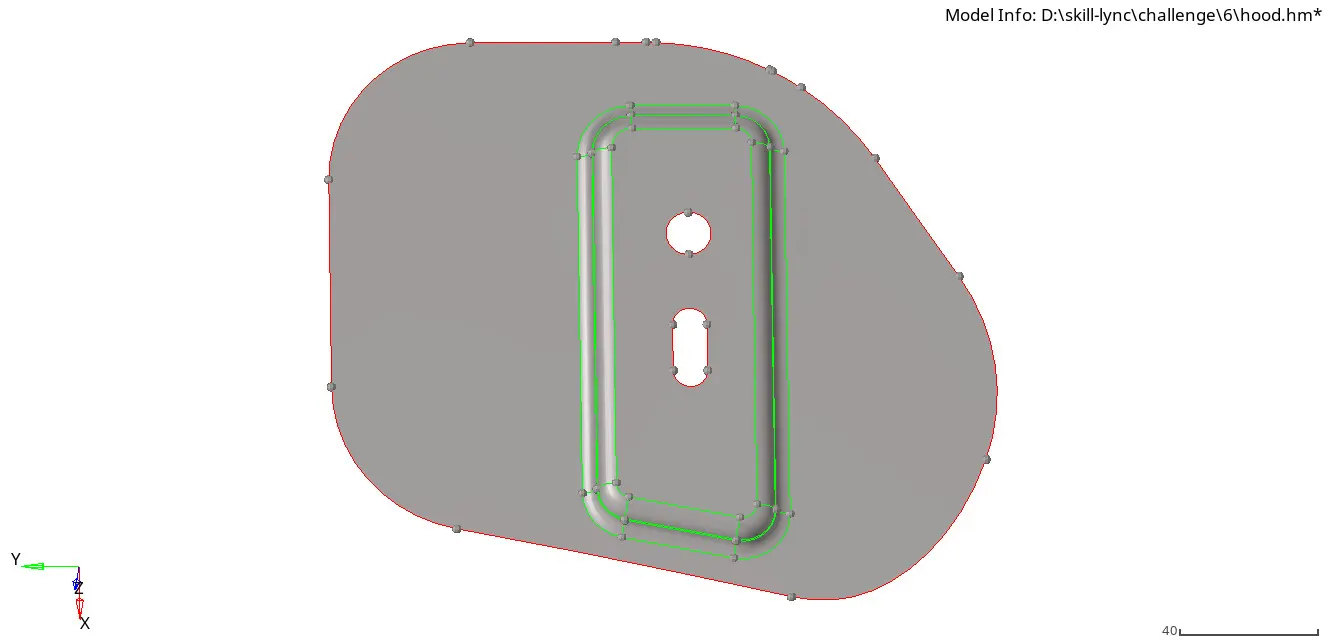
img.9 after mid surface extraction and geometry cleanup
- Now the model is ready for mesh.first select the surface, click automesh and element size is 5 and mixed type and select automesh.
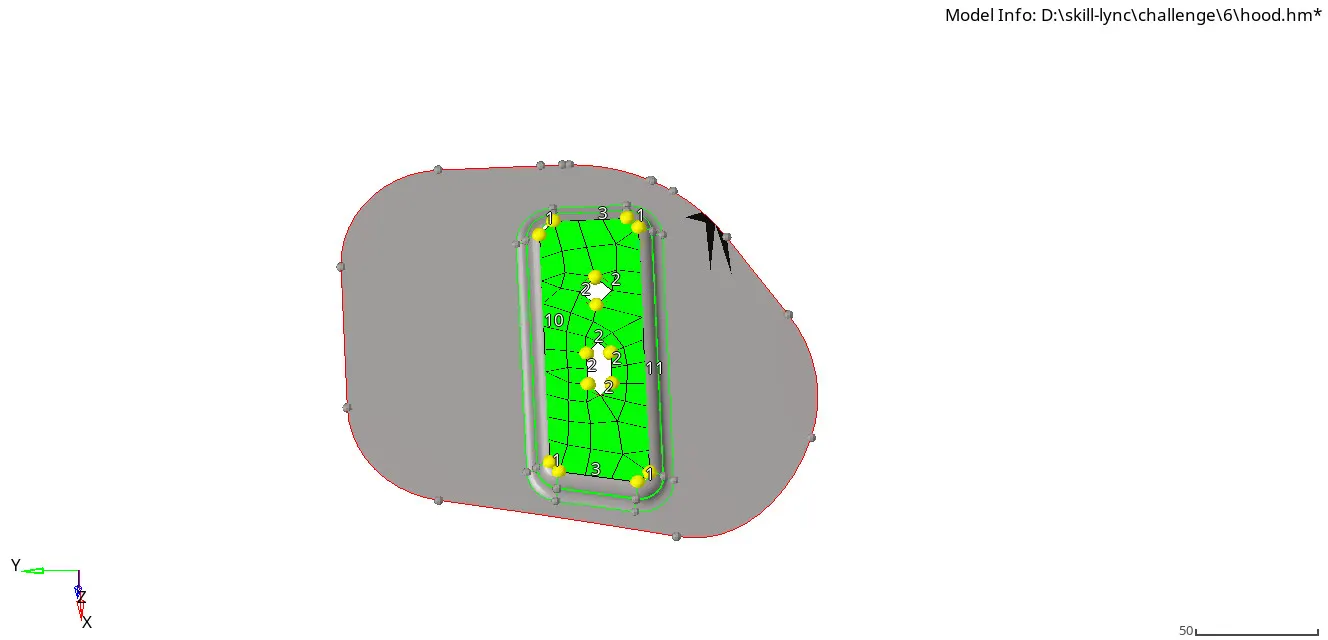
img.10 meshing surface by surface
- before this go to criteria settings panel and assign the given values in required box.
- following the rules the rotational quads and back to back trias are avoided by remeshing those elements.
- For perfect quads just increasing and decreasing the nodes in the initial meshing.
- Use quality index tool to reduce opposite trias using drag trias option.
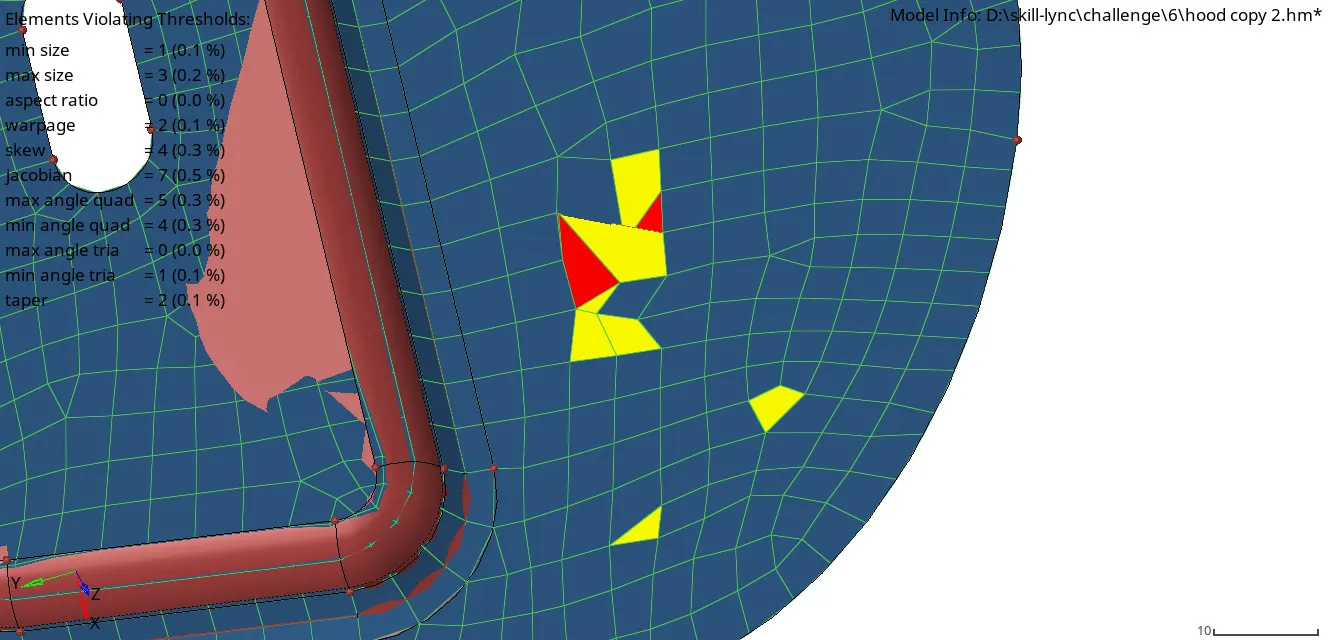
img.11 elements cleanup for as per quality criteria
- after those correction,we have to do smooth the elements using smooth command in 2D tool.
- after smoothing,use quality index tool for further corrections in elements and check the quality of the mesh also,once the the quality index result is zero.your model get a good mesh follow.
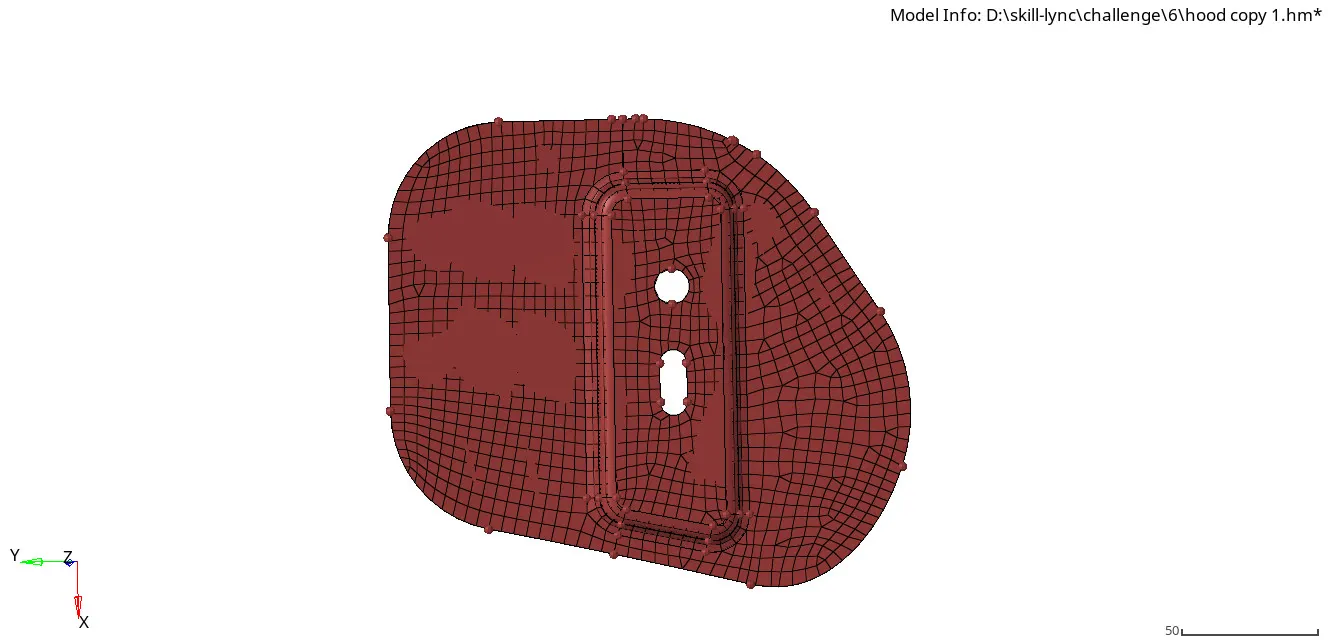
img.12 final meshing of the hinge
- After getting the result,assign the property with thickness and material-steel for the model.
- now finally find the free of the model ,if it is a gap between the elements you can equivalence the elements.
Hinge reinforcement body 2:
- hinge body 2 is the reflection of the hinge body 1, so we can reflect the mesh (elements) from hinge 1 to hinge 2 surfaces.
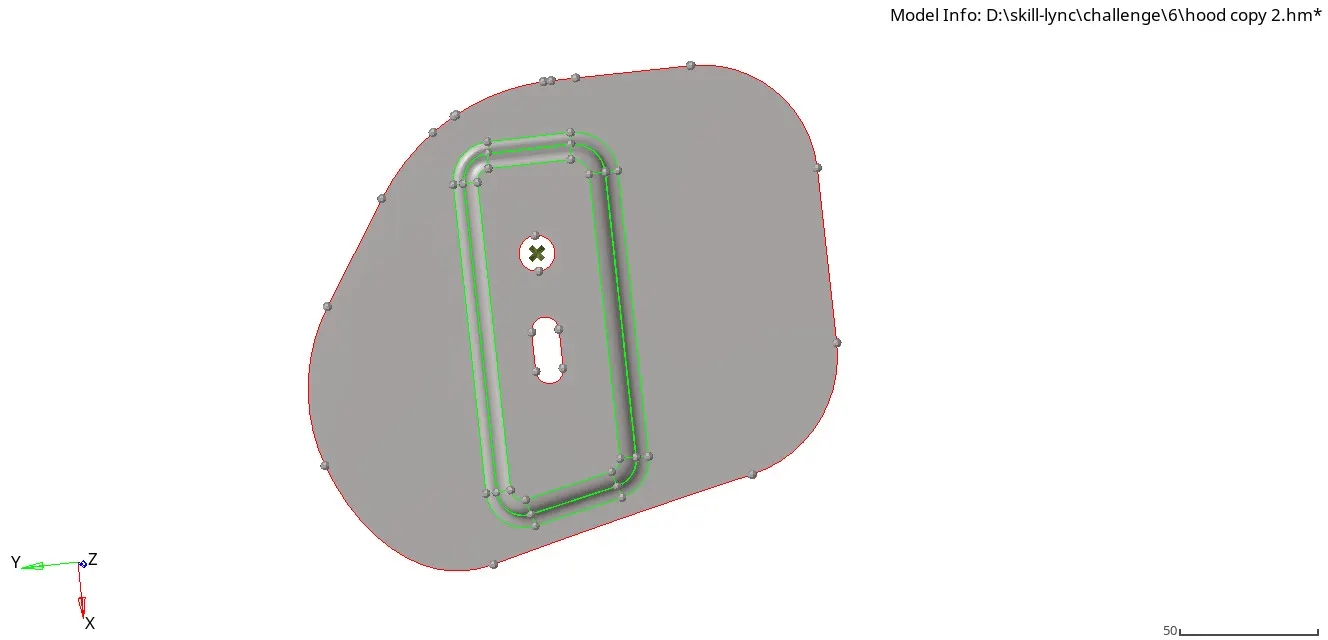
img.13 midsurface of hinge-2
- Before that first create the base point or center point for both the components symmetrically using points.
- for that go to tool option, select reflect command, now select elements displayed and choose y axis direction , click the base point and then select reflect before that duplicate the elements.
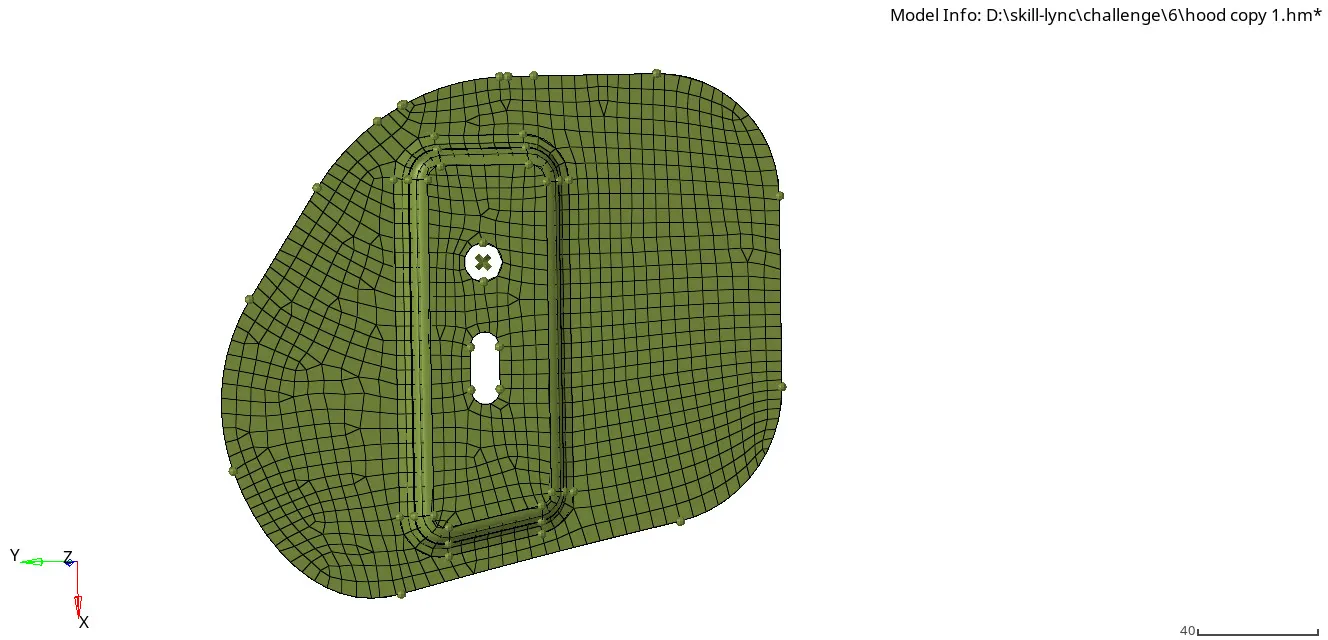
img.14 final model of hinge-2
Outer body:
- first delete the solids using delete-solids command.
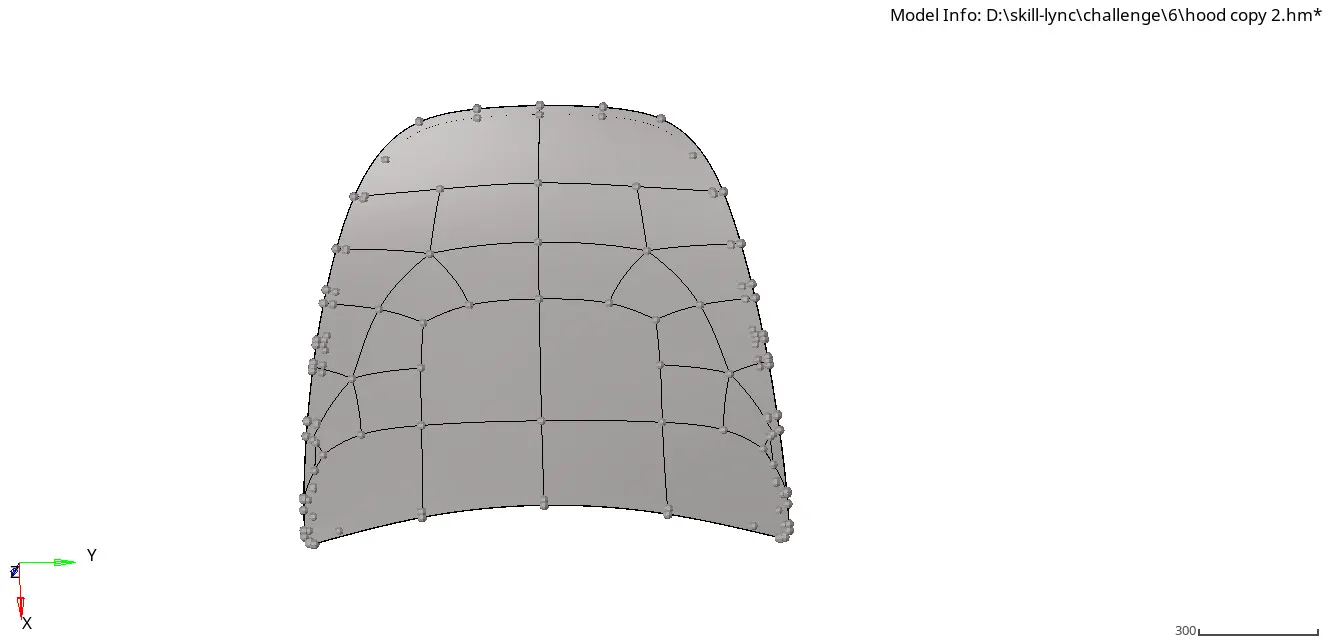
img.15 2D surface of outer body
- Now extract the midsurface of the model and toggle the lines with 0.5mm for get a single surface meshing.and next cleanup the geometry and unwanted points using points edit tool,suppress those points.
- toggles some lines in the hemming area to avoid bad mesh flow.
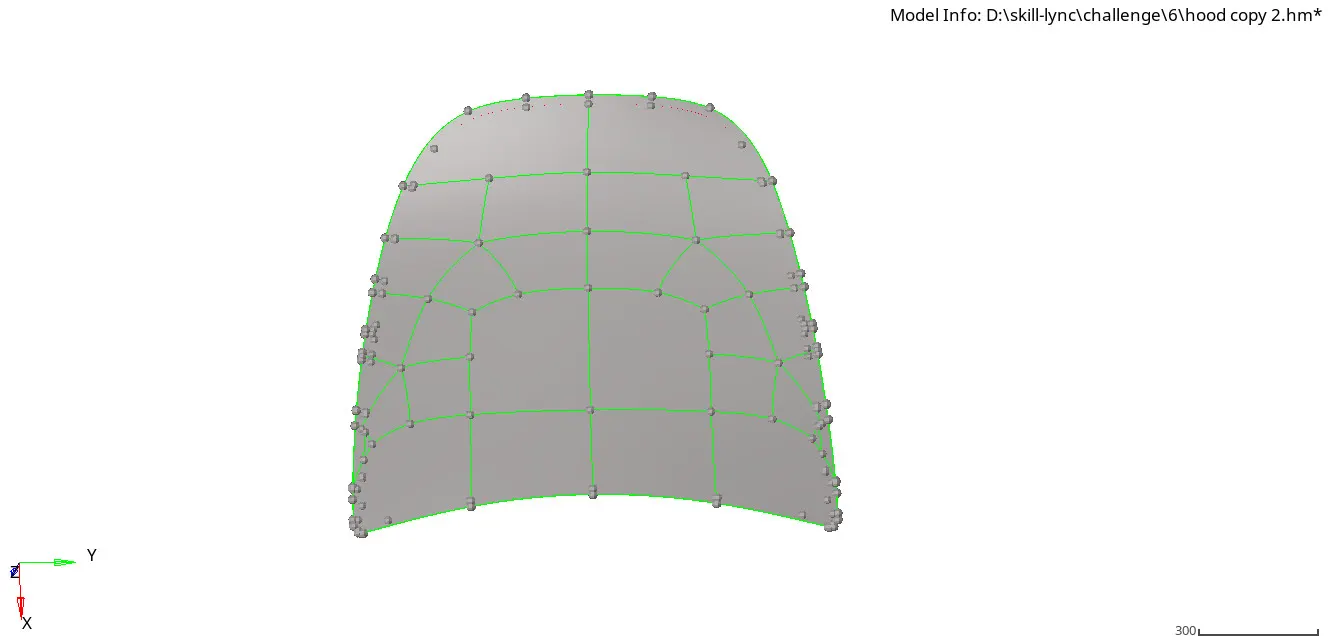
img.16 midsurface of the model
- the model is symmetrical, if one side is meshed we can reflect them into other side.
- first partition the one side of the model by rectangular shape. now we can easily get a good mesh flow over these surfaces.we can easily handle the trias and quads by following rules.
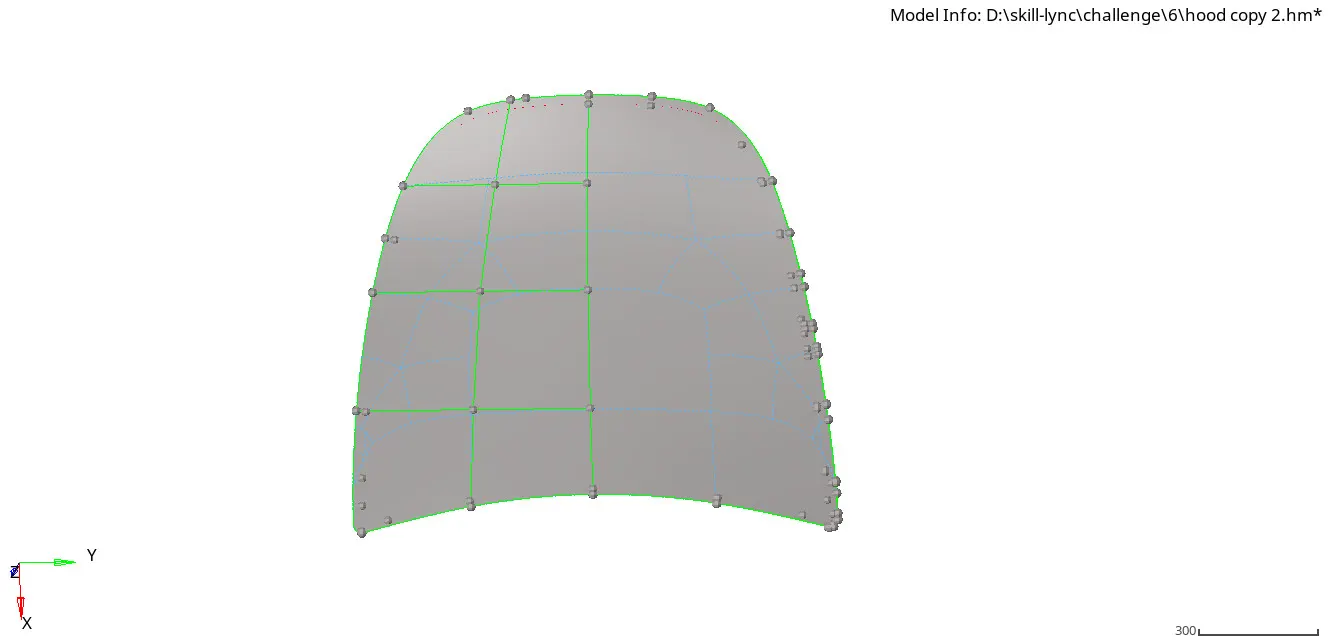
img.17 after geometry cleanup and partition for smooth meshing
- now mesh the rectangular partition surfaces one by one, the element size is 5 and select mixed for fillet corners and select quads for rectangular partition surfaces.
- now use quality index tool for correct the rotational quads, back to back trias, opposite trias and check the quality criteria also.
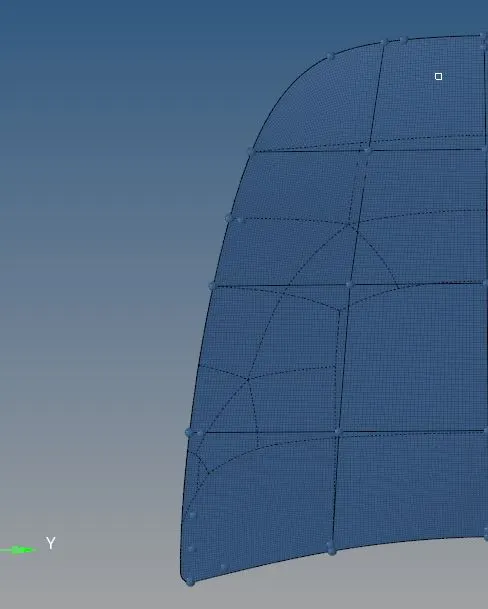
img.18 one side mesh of the model
- after get a proper mesh, now we can reflect the elements to the other side by using tools-reflect and select the elements and give duplicates for avoid the parent elements get failed.
- Now select the base node and select the axis, now click reflet.
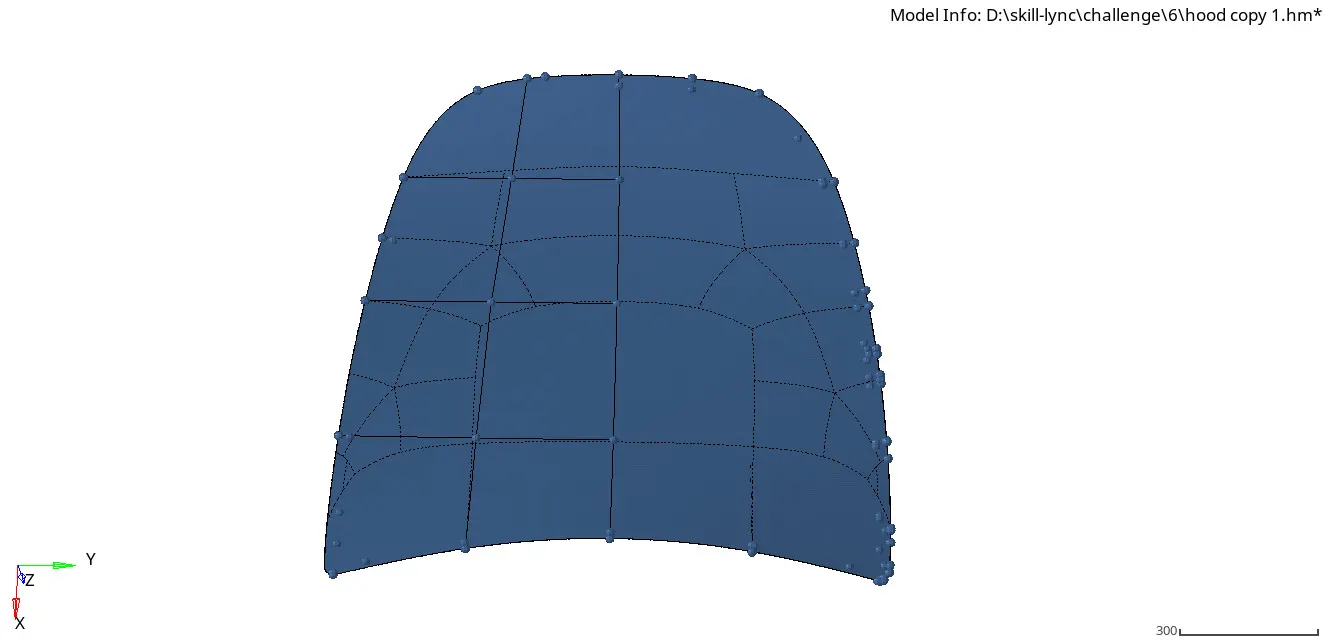
img.19 final mesh of the component
- After the reflection,both sides of the elements are not connected, so use edges command in tool and select all elements and select preview equivalence with tolerance value of 1mm.and click equivalence to get a connected and proper mesh for the model.
- now check the quality criteria for the whole mesh we have a errors like minimum size because of the hemming size is minimum than the given quality criteria values.the hemming part has a fillet radius below 2mm, so we can optimize the elements using element optimize in quality index panel.
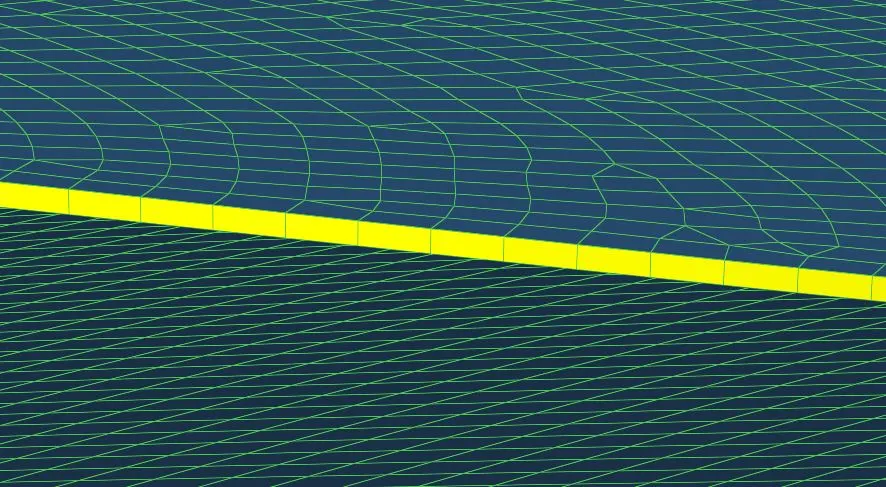
img.20 hemmimg surface error due to minimum thickness
- finally assign the material and property with thickness.
Inner body:
- first delete the solids using delete-solids command.
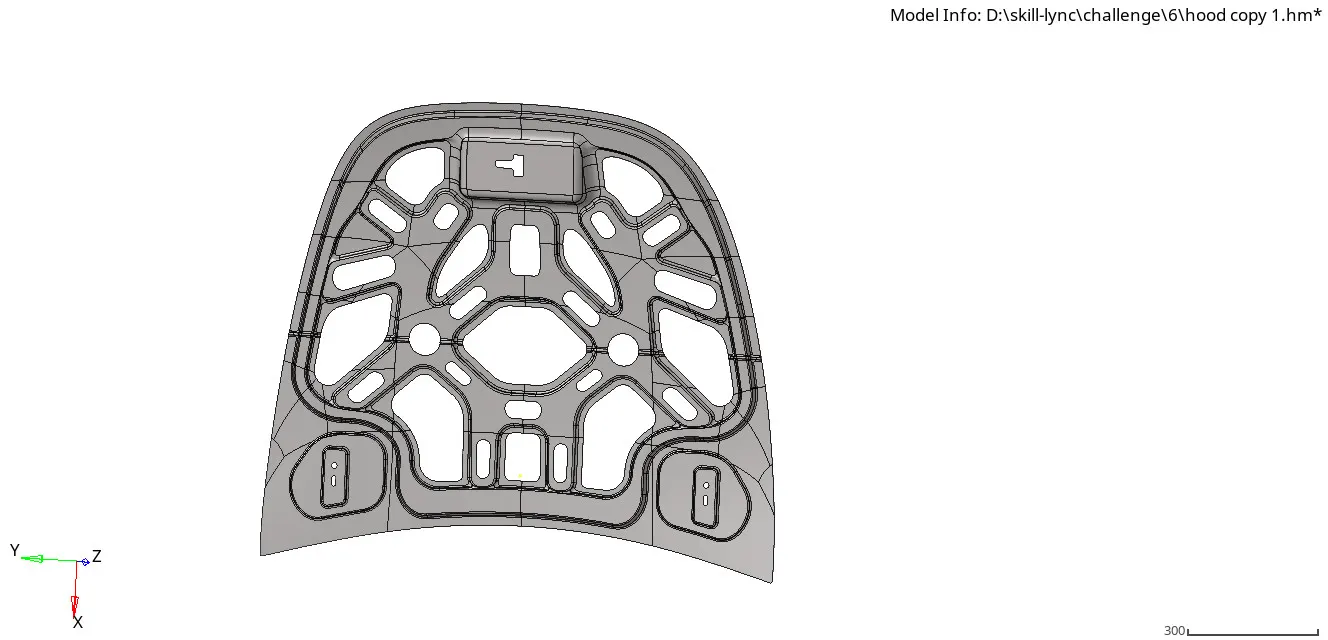
img.21 2D surface of inner body
- the inner body is the large component like the outer body and also has a complex surfaces, so we have mesh this model single surface by surface.this model is also symmetrical like the outer body.
- so first extract the middle surface of the component and do basic geometry cleanup.
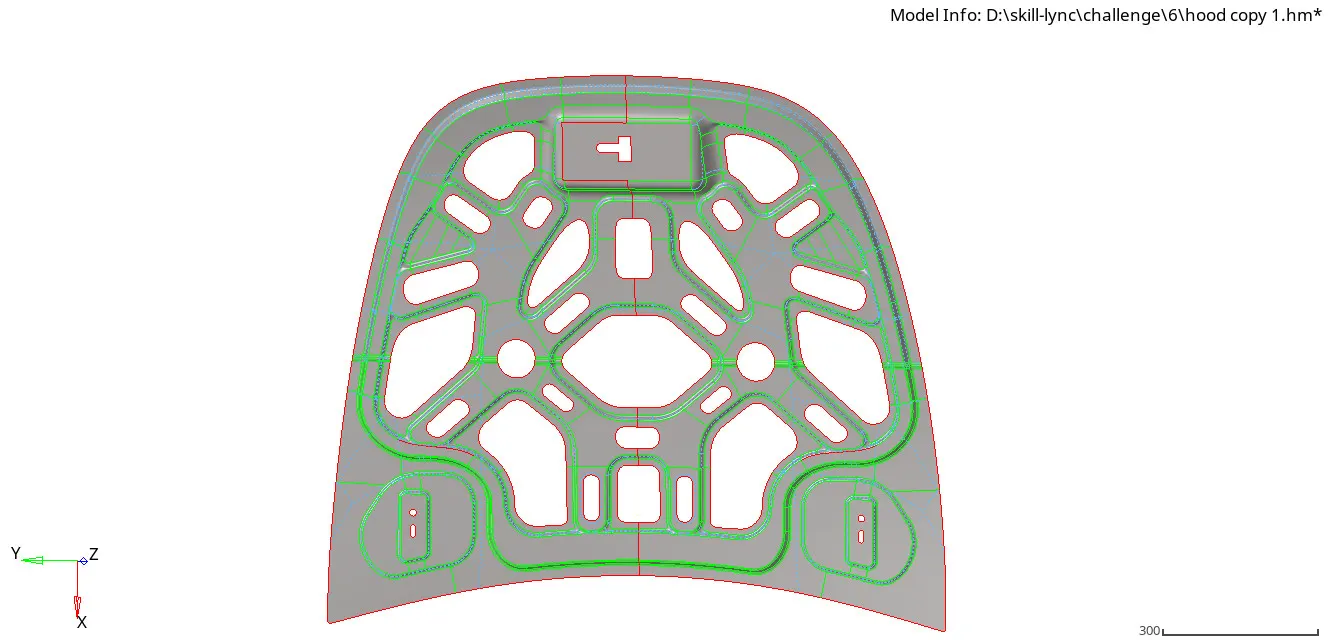
img.22 mid surface of the inner body
- delete one side surfaces for easy to mesh the component and after that reflect both surface and elements easily.
- after this, mesh the surfaces one by one and clear the quality index one by one.
- avoid back to back trias and rotational quads while meshing.
- toggle the lines for generating proper mesh and use segments for easy meshing.
- while meshing in fillet areas, do check the warpage and quality criteria prpoerly.
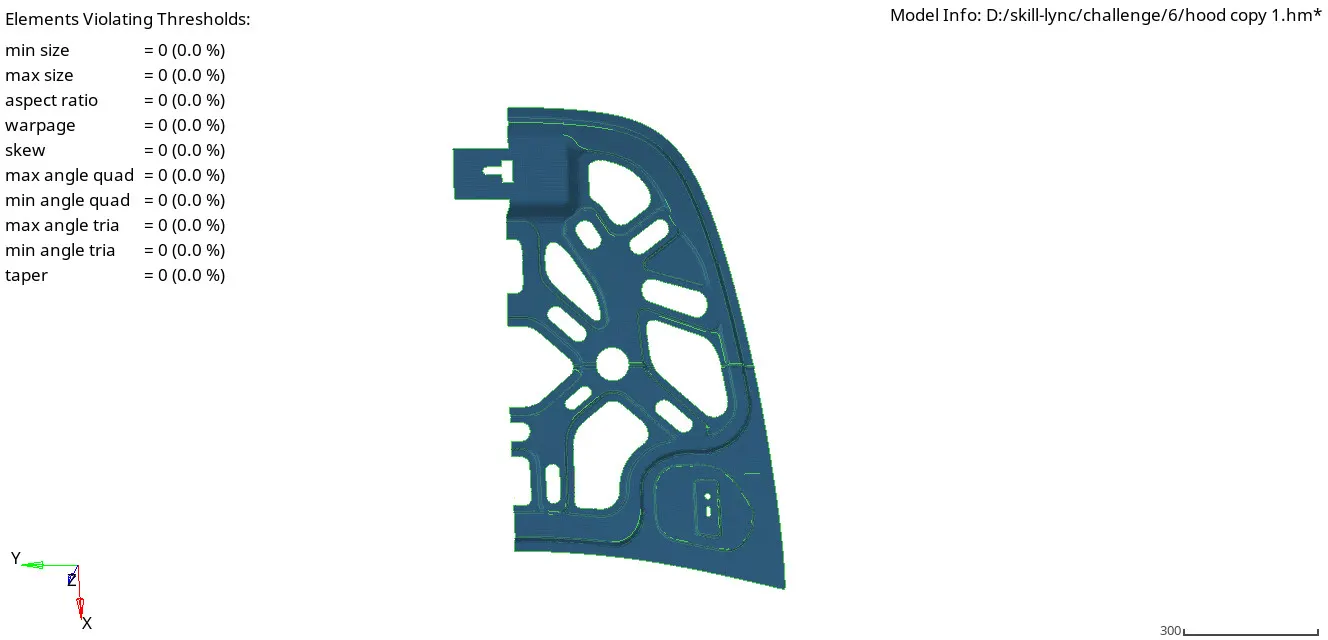
img.23 mesh of one side surface
- after meshing, now time for reflecting the surfaces, go to tool and select reflect command
- now select the surface first, duplicate it and select y axis and select the base point , select reflect. now the surfaces reflected symmetrically. '
- next do the same steps for reflect the elements
- now we have a free edge in the centre of the component and now join the component using edges command in tool panel.
- In edges panel, select the surfaces first and give tolerance for merging the surfaces. finally select equivalence. do the same procedure for connecting elements.
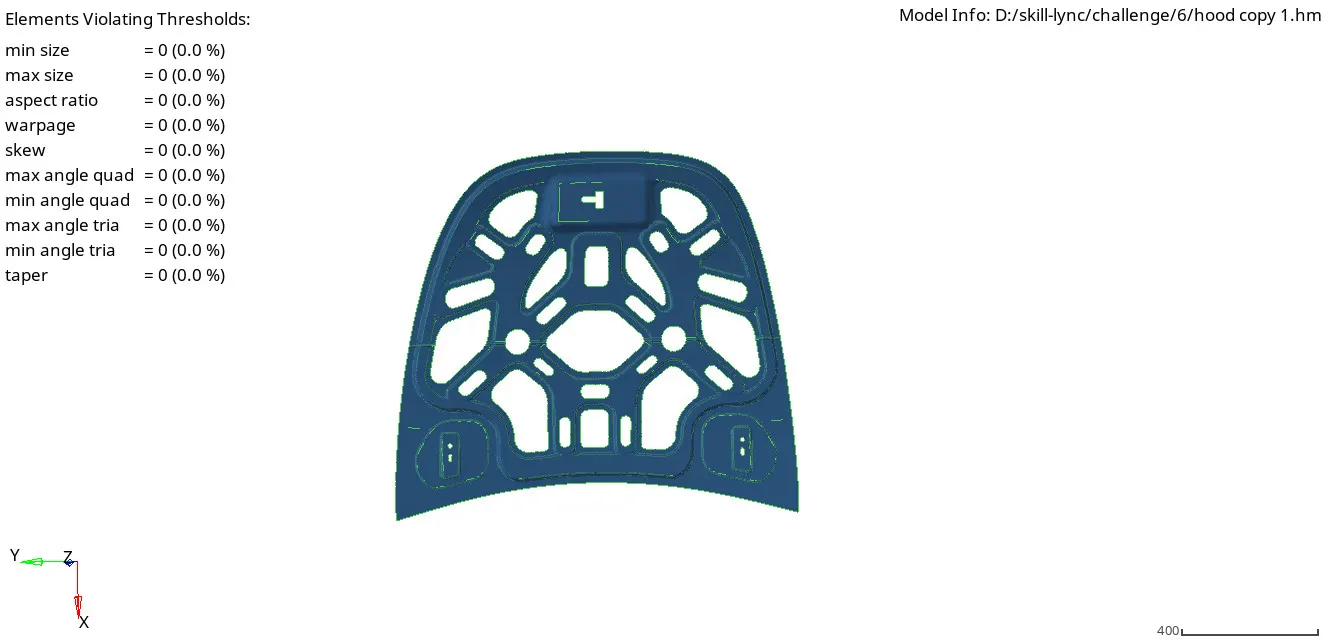
img.24 both side of the component
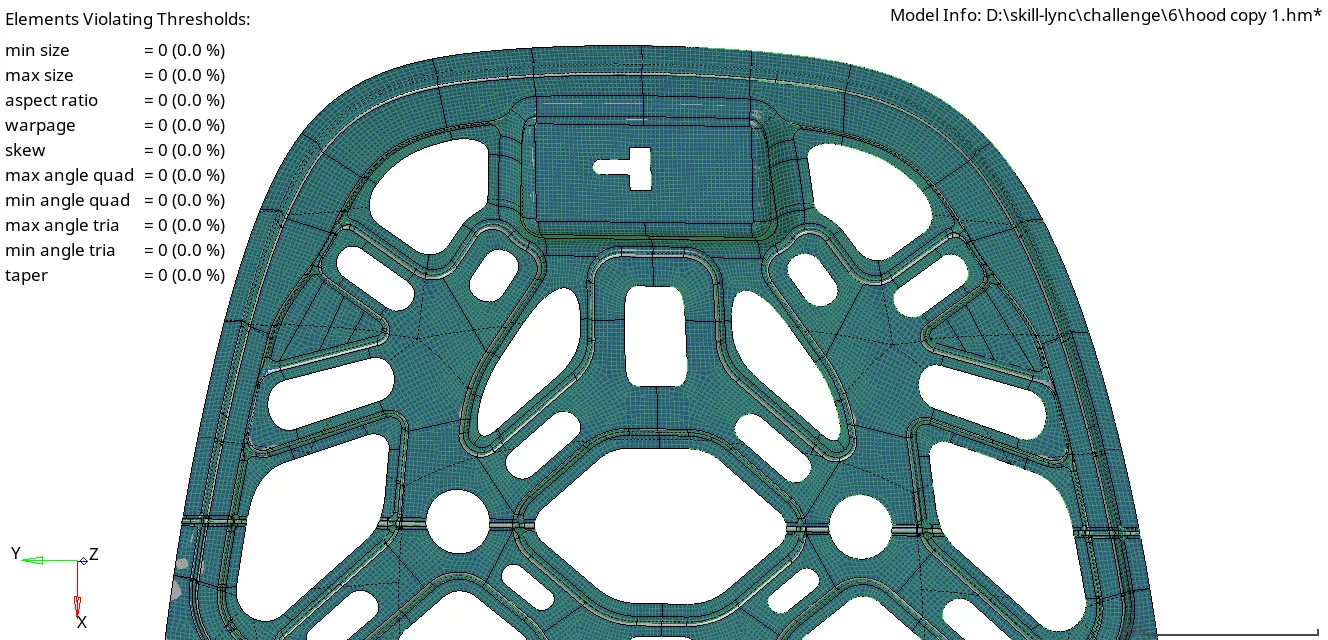
img.25 final mesh
- finally assign the material and property with thickness.
conclusion:The hood assembly is meshed with element size of 5 and both mixed and quad type elements used with all checked ok with the given quality criteria.
- while meshing we were avoid the rotational quads, follow the trias management rule, get the fine mesh over all surface expect the hemming surface in the outer body.
- we couldn't clean the quality criteria in hemming surfaces due to minimum thickness of that surfaces and geometry errors in the surfaces.
- Expect the hemming surface, other component surfaces are finely meshed.
- while doing this challenge, we can learn how to do the geometry cleanup and 2D mesh over the complex components.
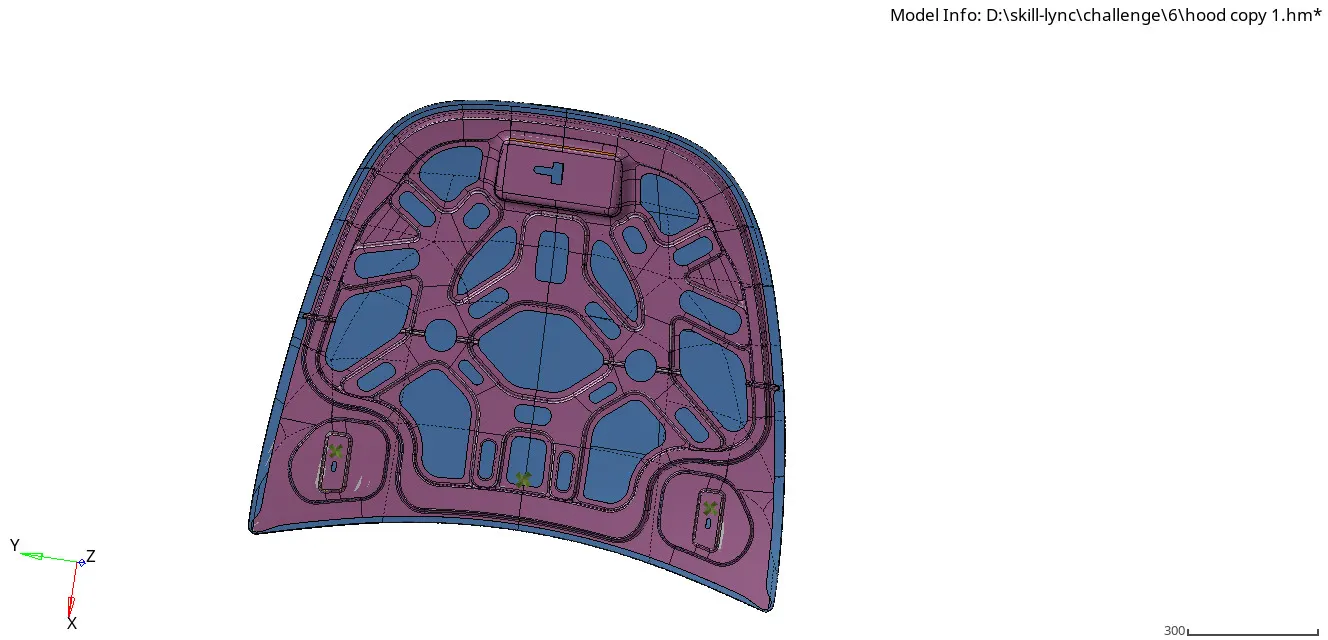
img.26 final model of the hood assembly
NOTE: the hinge-2 surfaces and mesh are deleted due to some errors (number of nodes exceeds maximum) spotted while saving the model.i was tried alot but couldn't make it. so i was deleted the reflect component of hinge-1.
---------------------------------------------------------------------------------------