Week 5 Challenge : Surface wrap on Automotive Assembly
Week 5 Challenge : Surface wrap on Automotive Assembly
Aim/Objective:
To perform geometry cleanup on the given geometry of engine, transmission and gearbox CAD model and merge all 3 models into one. Perform surface wrap of target length 3 mm on the merged model.
Procedure:
We shall follow 3 major steps here,
- Geometry cleanup (deleting unwanted faces, resolving triple and single CONS)
- Merging and preparation for surface wrap
- Performing surface wrap
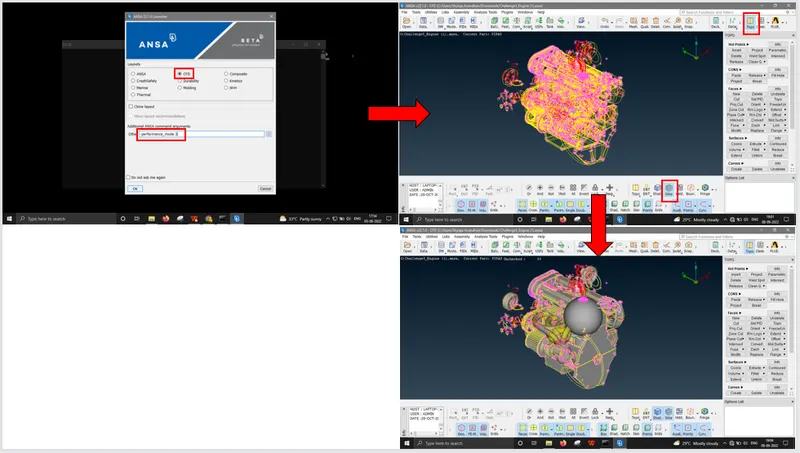
The first step is to open the ANSA in performance 3 mode with CFD enabled. Open the given CAD model of the Engine from FILE > OPEN. Default view of the geometry is wireframe, we shall turn on SHADOW mode for better visibility.
STEP 1: Geometry cleanup (deleting unwanted faces, resolving triple and single CONS)
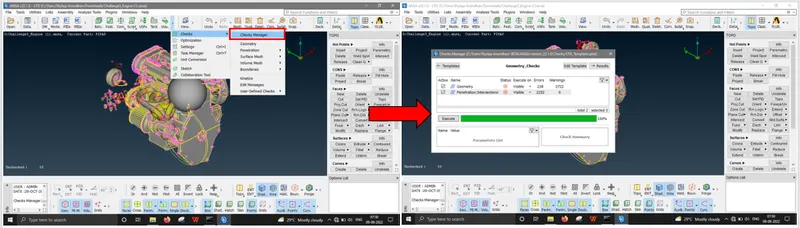
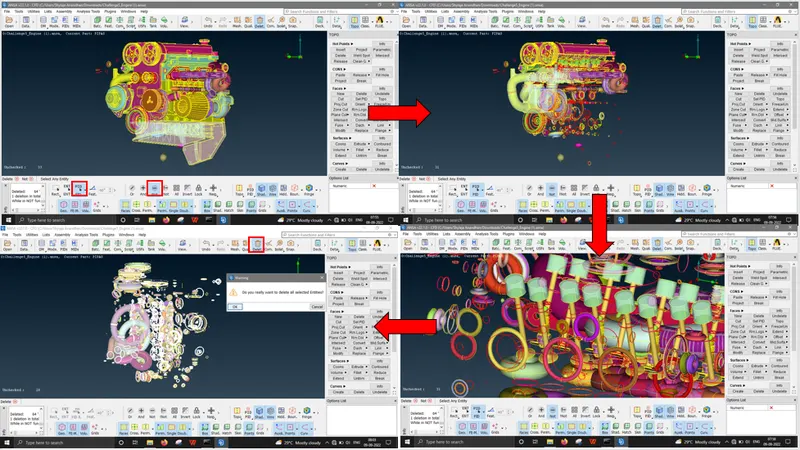
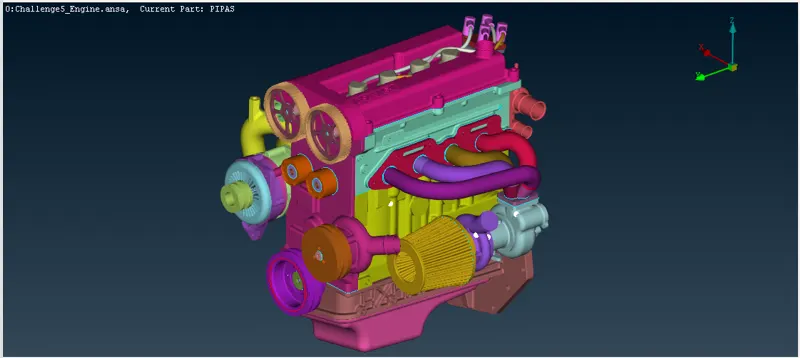
In the engine model, it is very obvious that we have so much of unwanted surfaces that are irrelevant to the engine model itself. We shall start identifying the unwanted surfaces and delete them. To start with, there are many doughnut shaped structures that are as a part of the round edges and fillets, we don’t want them, we can identify and eliminate them. we can even run a quick geometry check, but in this case going with the geometry check is not a good option since we are focusing on solving only the surface level errors.
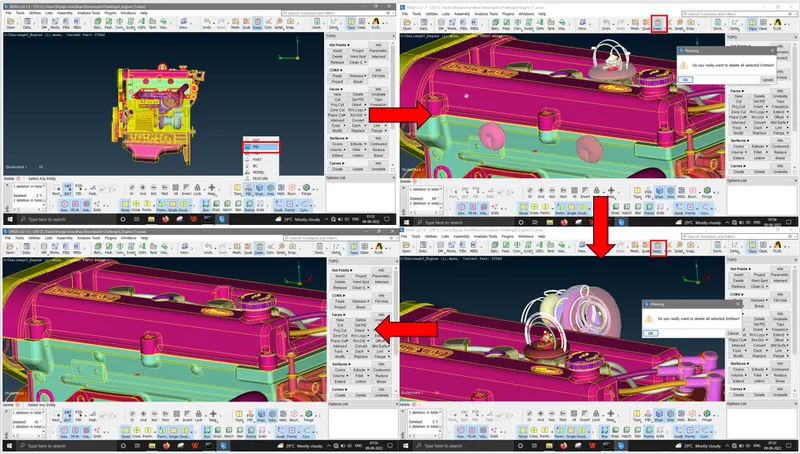
We can use view controls, F1 to F6 views and use box select to delete them also. Using PID and PID region wherever required to isolate the required parts of the engine in order to separate the unwanted surfaces is a good idea to delete them in one go. we can delete the timing belts here they are not required for the wrap.
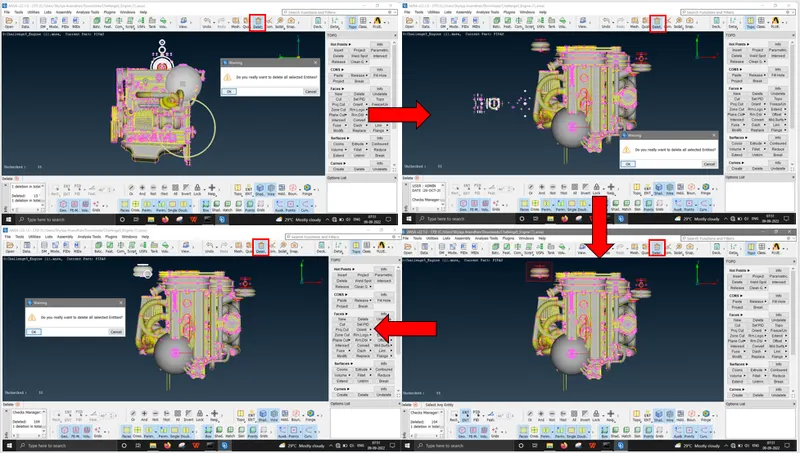
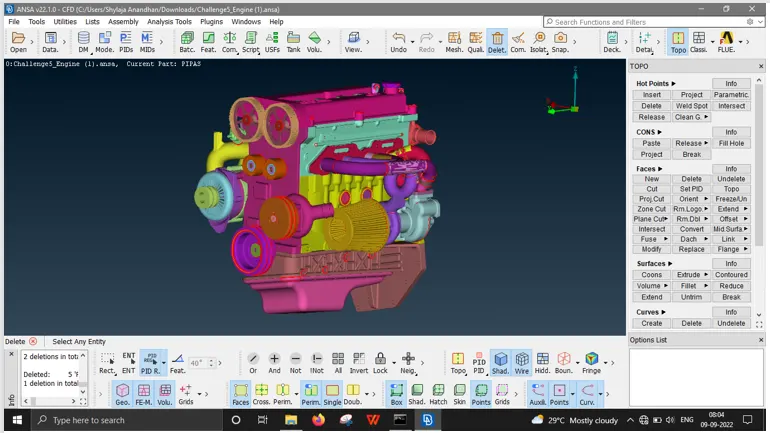
For the triple CONS we can use NOT option to hide the nearby surfaces to reveal the triple CON surface or the overlap surface, DELETE it to make into double CON. In this case, surface wrapping can be done by resolving only the surface triple CONS and single CONS alone. Internal error resolving is not required.
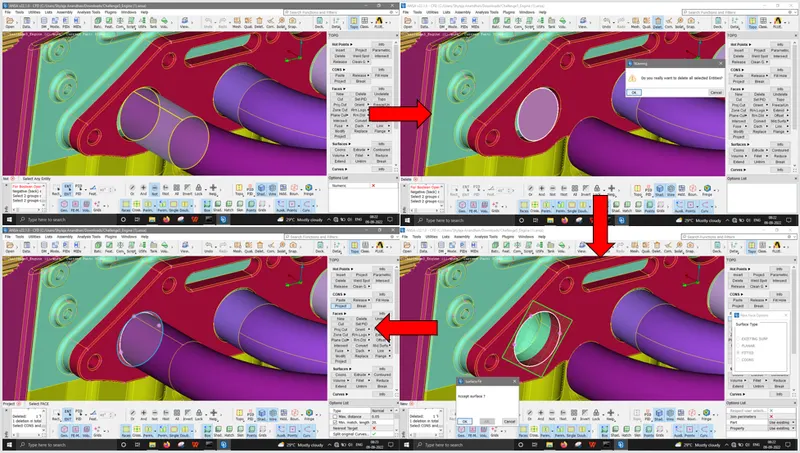
for the single CONS, we can use FACES > NEW > COONS to close the single CON surfaces or the surfaces we might have deleted mistakenly during deletion of unwanted surfaces. Here, it is not recommended to use UNDELETE because there are numerous surfaces it can difficult to select and undelete.
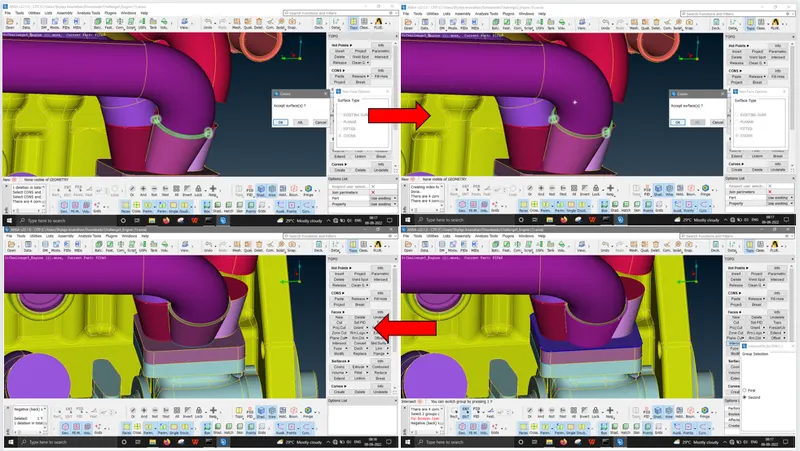
In the inlet manifold region, we can use DELETE option to delete unwanted doughnut shapes and use INTERSECT option to intersect the conical surfaces to the planes.
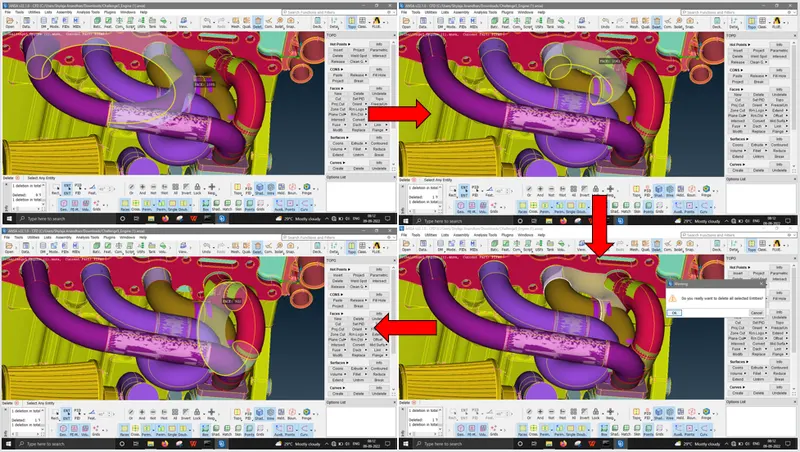
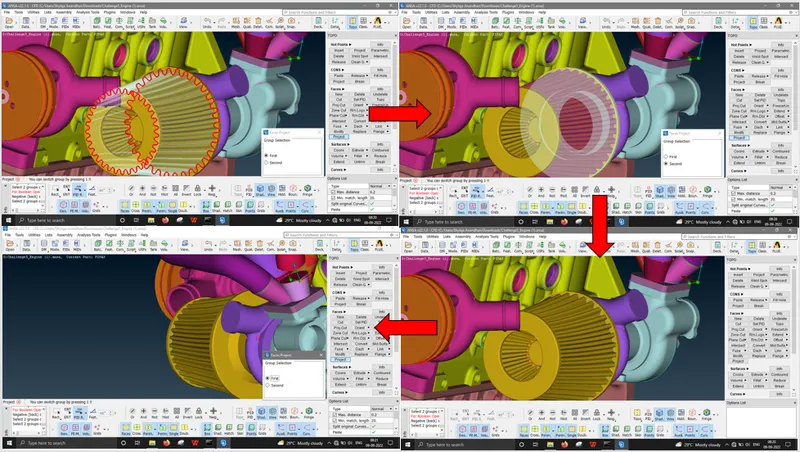
In the air filter region, there are single CONS that need to be projected to its neighbour surfaces. We can use FACES > PROJECT select the corrugated surface as first and the round surface as second, middle click should complete the projection and result in triple CON. In a similar fashion, we shall connect the inlet manifold and engine interface surface too.
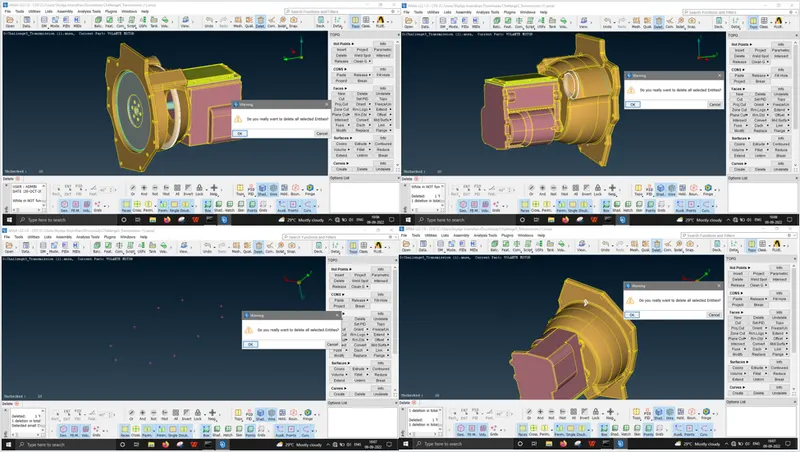
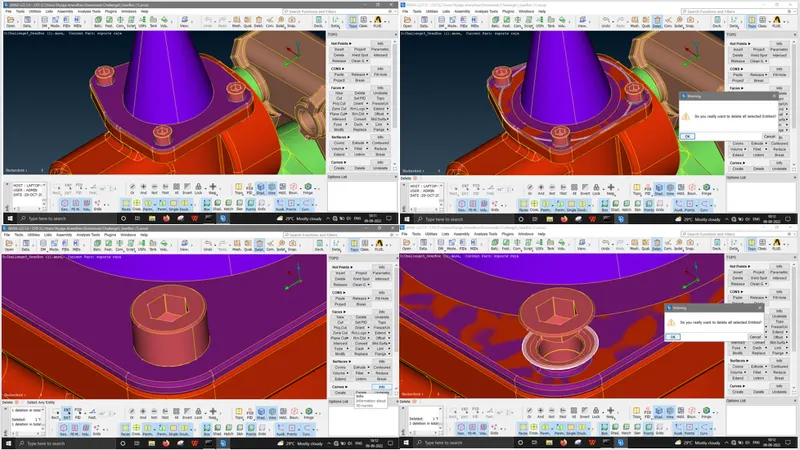
In the Transmission model, there are minor errors like some doughnut structure hidden inside. We can use NOT option to hide outer surfaces and DELETE the doughnut structure. An unwanted surface is seen on the outer surface that can be deleted. Also, there are some unchecked surfaces that can be deleted too.
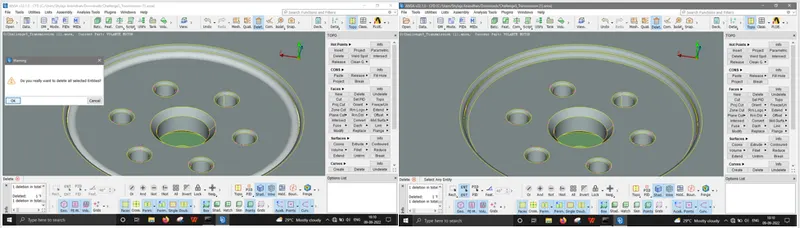
In the gear box model, there is only one triple CON error that can be resolved by deleting the inside doughnut structure. Similar situation is seen in the bolt heads as well, we can repeat the same.
STEP 2: Merging and preparation for surface wrap
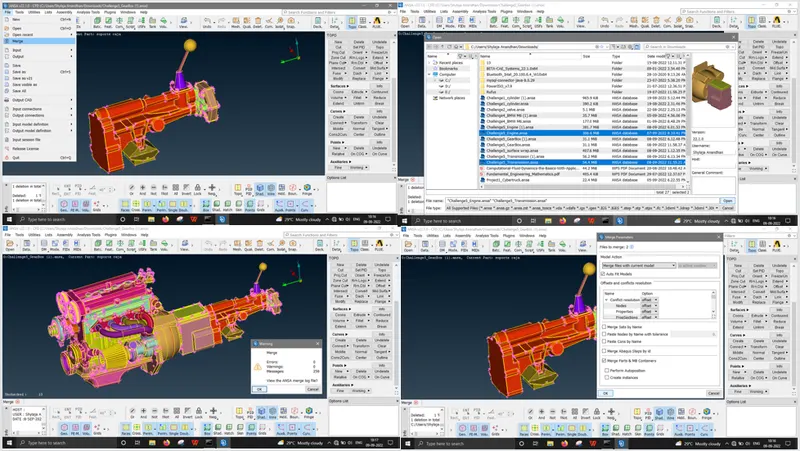
As we have completed the surface level geometry cleanup, we can proceed with the merging of engine, transmission and gearbox files. Click on FILE > MERGE and select the other files such as engine, and transmission (as we have gearbox already opened in our case). click on OK. There we have our merged file available in the viewport.
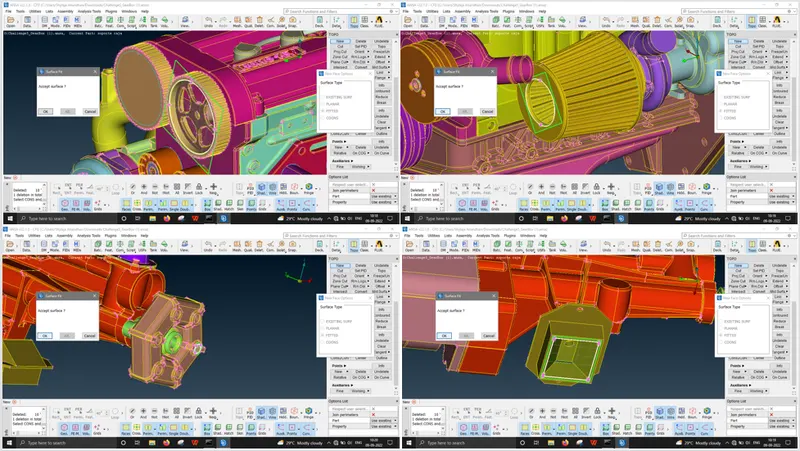
For surface wrapping to be visually appealing, we need to close all the small openings such as fastener holes, gear pulley areas so as to achieve a good looking wrap. We shall do the same for all 3 parts, in engine, in transmission, and in the gearbox as well. We can use FACES > NEW > FITTED option here to get a clean closing surface.
STEP 3: Performing surface wrap
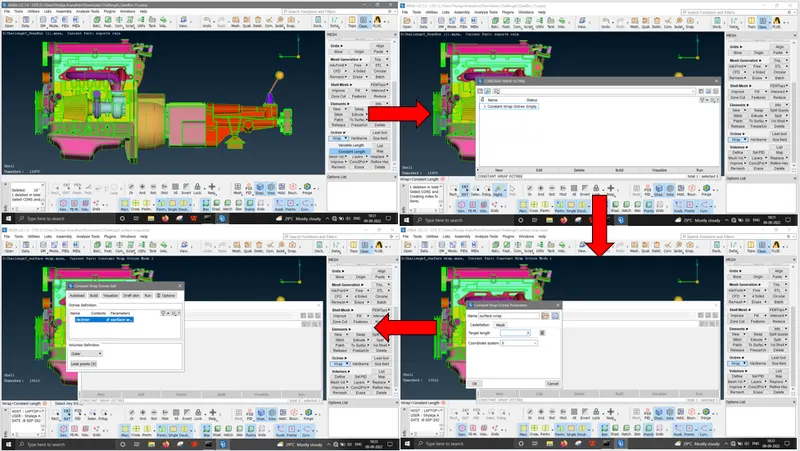
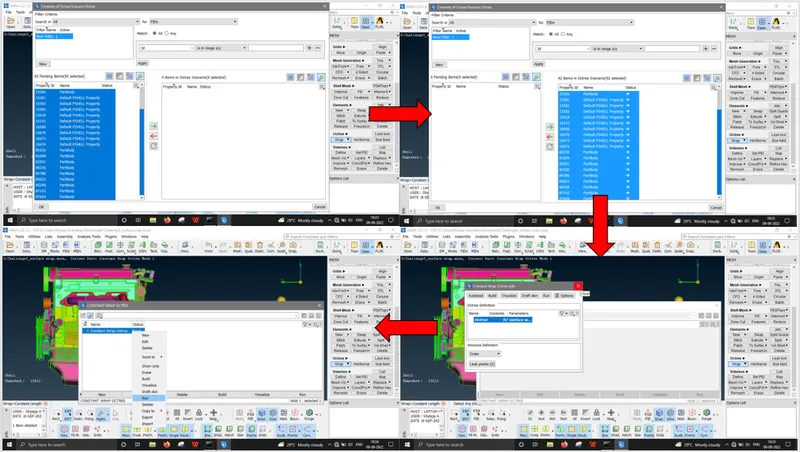
To perform surface wrap, we need to go to MESH module. There are two options which are basically same, there is a WRAP option under OCTREE. The same option is available in the ELEMENTS as well. Long pressing the WRAP option drops down a dialog box, in which we go for CONSTANT LENGTH. Now double clicking on the wrap parameters available, we can rename as desired (we shall use Surface Wrap). Double clicking on the contents, shows the available PIDs from which we can select. Here, there are dummy PIDs as well, we can use COMPRESS option to permanently delete the dummy PIDs. Clicking on CTRL + A on the PIDs and clicking on the GREEN ARROW moves the PIDs to selection, then click OK. Now right clicking on the wrap and selecting RUN should finish the surface wrap.
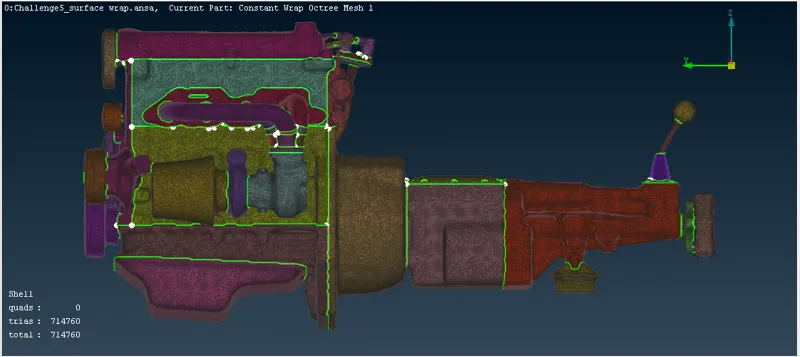
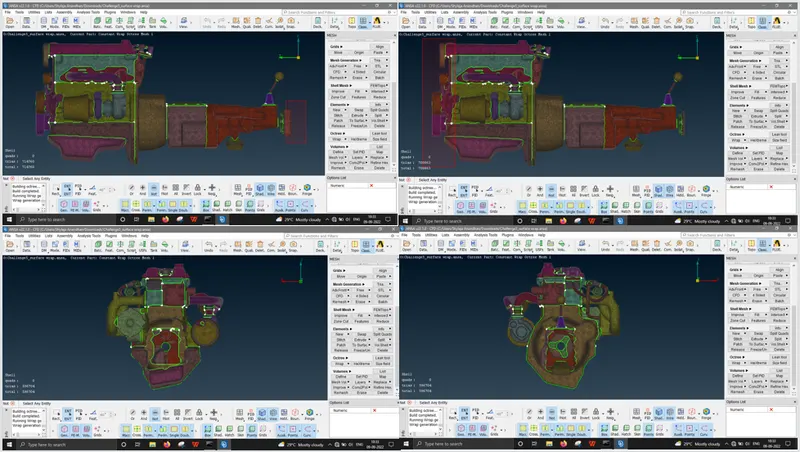
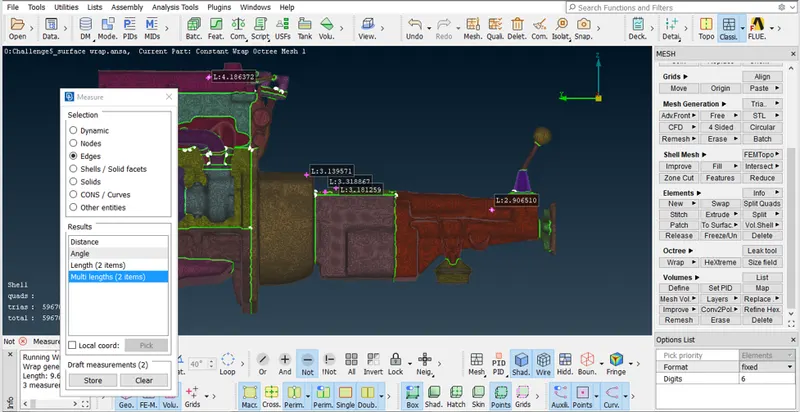
We shall use NOT option to hide front and end portion so as to view the inside single volume generated in surface wrap. We can always use MEASURE tool to check the mesh length here.
Learning outcome:
- the difference between surface meshing and surface wrapping and when & where to use it, is learnt.
- The reason for closing small openings and surfaces in order to get a clean wrap is thoughtful.
- Similar to surface mesh, surface wrap also improves quality of wrap with decreasing mesh length with compromise in computational time and strain.
- Already used merge option, but in this challenge had some insights of merge option as well.
Result:
The surface wrapping of the merged engine, transmission and gearbox model given is successfully completed with target mesh length as 3 mm with constant length octree wrap algorithm.
Conclusion:
The overall challenge had some insights on what possible geometric errors could occur in a given CAD model, and solving them has given a boost of confidence in geometry cleanup part. In merging, this merge is a bit different from the earlier challenge merge. That lead to some questions and clarifications, ultimately leading to better understanding of merge option as well. Thus the surface wrap is done, and the ANSA file of merged and wrapped model is shared via gdrive link.
https://drive.google.com/file/d/1Q1BvpflWF06OCRNT93GVf3VCK0xJste7/view?usp=sharing