Week 5 Challenge : Surface wrap on Automotive Assembly
Surface wrap on a Automotive Assembly
Aim:
The aim of the project is to apply surface wrapping techniques to automotive assembly components. This involves generating smooth and accurate surface models and check the geomentrical errors and delete surfaces which are unwanted for surface wrap. After clearing geomentry, merge all 3models and perform surface wrap. Write a detailed report on steps followed to finish this challenge.
Objective:
Target length = 3mm.
Tools used are classic mesh --> Elements --> Wrap --> Constant length.
Introduction:
Surface wrapping plays a crucial in modern automotive engineering, enabling the transformation of raw point cloud data into smooth and accurate surface models. This process is essential for various applications, including visualization, analysis, and manufacturing in the automotive industry. By employing advanced surface wrapping techniques, automotive industry engineers can efficiently design, simulate, and optimize complex components and assemblies of safer, more efficient, and aesthetically pleasing vechiles.
In this report, we explore the application of surface wrapping on automotive assembly components. We delve into the procedure involved in generating surface models from point cloud data, highlighting the importance of this process in automotive design and manufacturing. Furthermore, we discuss the learning outcomes, results, and conclusions drawn from our exploration of surface wrapping techniques in the context of automotive assembly.
Procedure:
Following steps are followed from geomentry clean up for Engine, Transmission and Gear box components, assembled all the three components to execute surface wrap.
1. Geomentry Cleanup:
1. Engine:
- Begin by importing the geomentric model into a suitable software environment, such as a CAD program or a dedicated geomentry processing tool.
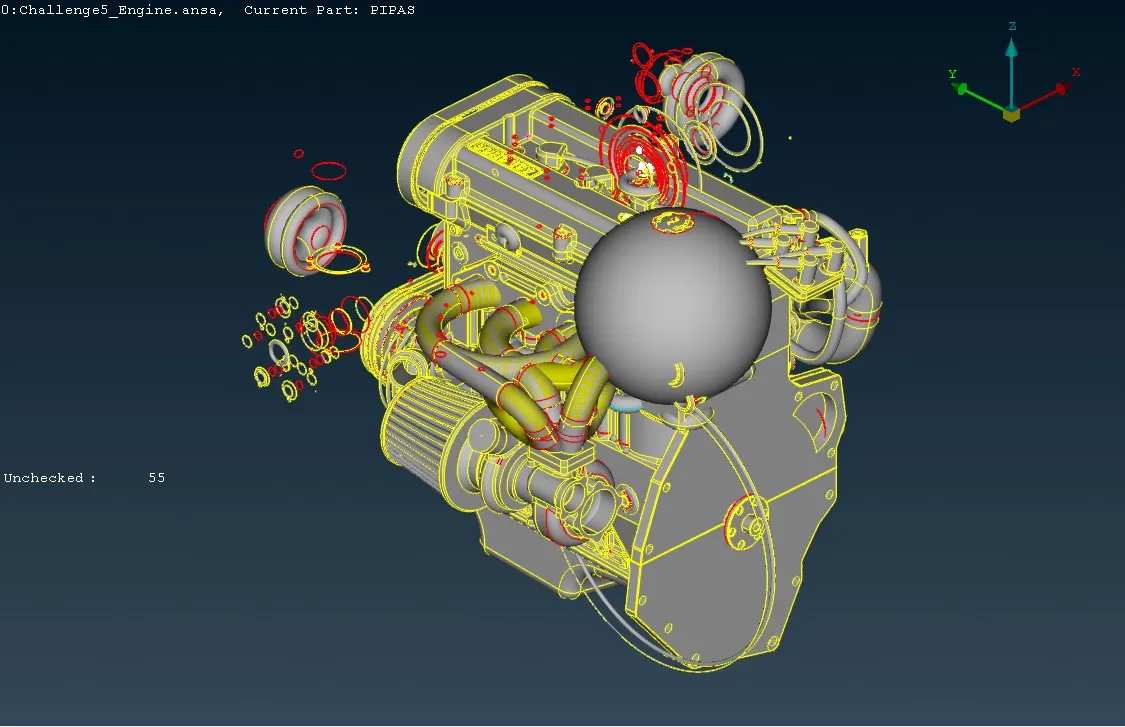
- Import the geomentry.
- Delete the unnecessary surfaces by using universal delete tool by hidden the main engine parts.
- Now we need to delete the unwanted parts before performing the surface wrap we delete the unwanted reference model which were used such as the rings, spheres, balls as these are not essential.
- Carefully examine te geomentry to identify any imperfections, errors, or undesirable features. This may include gaps, holes, self-intersections, overlapping faces, non-manifold edges, or other geomentric anomalies.
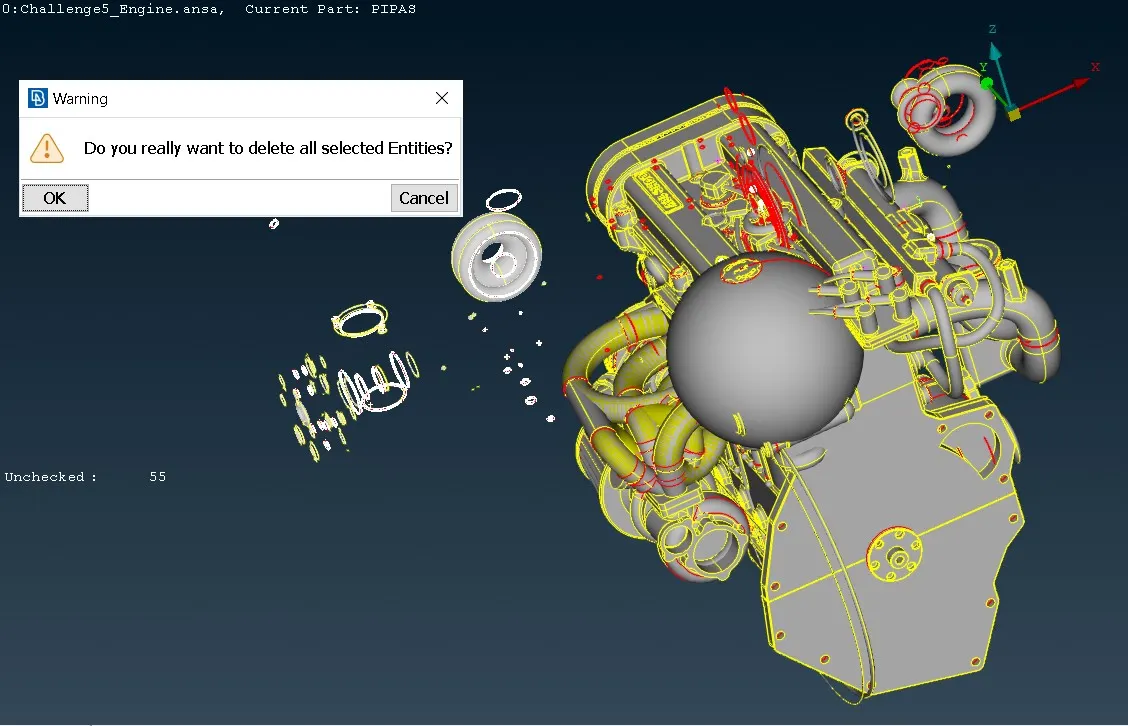
- Here we can see that in the image, unwanted parts are dragged and deleting by using the selection tool.
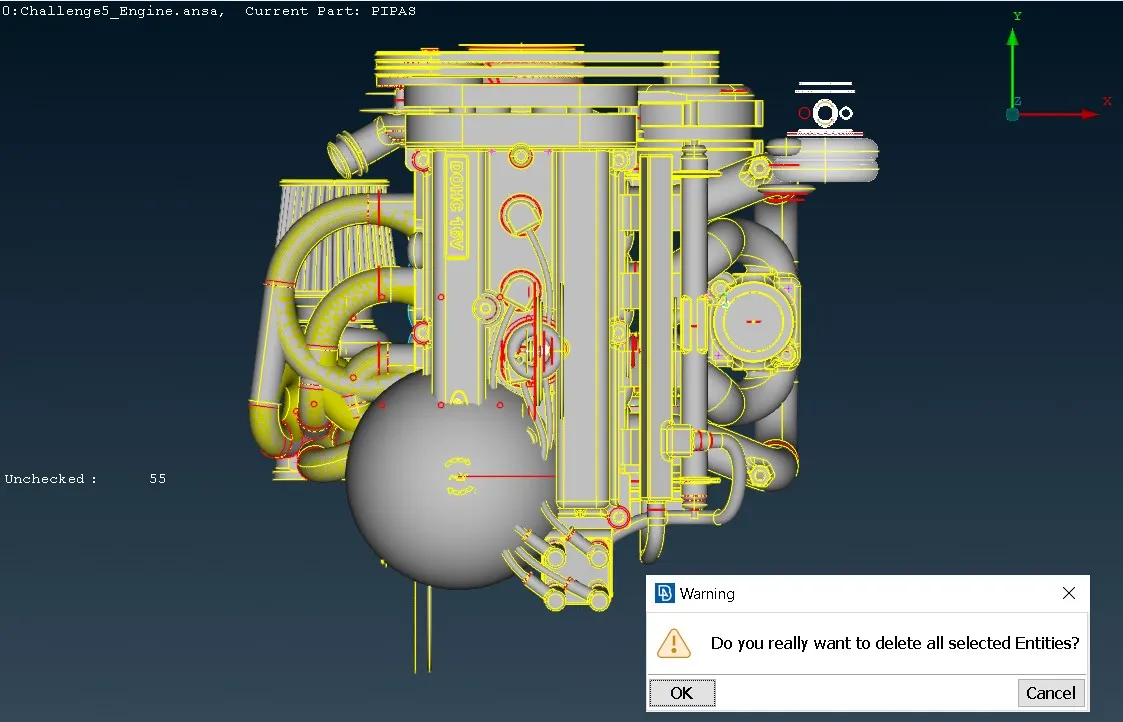
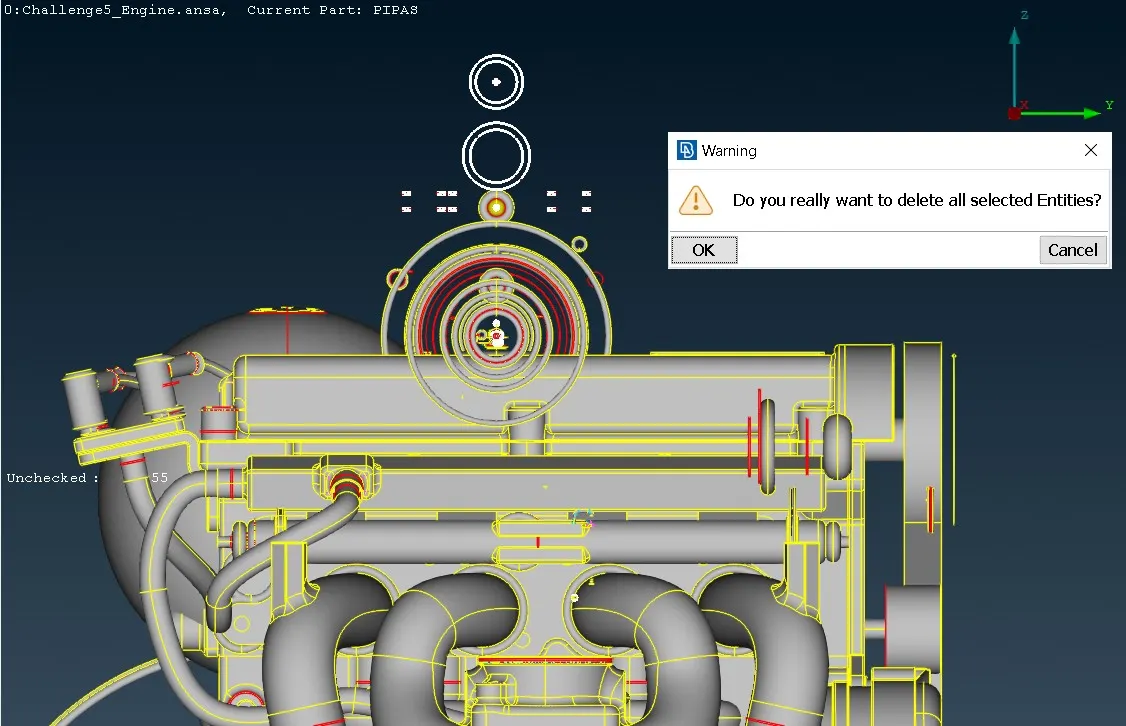
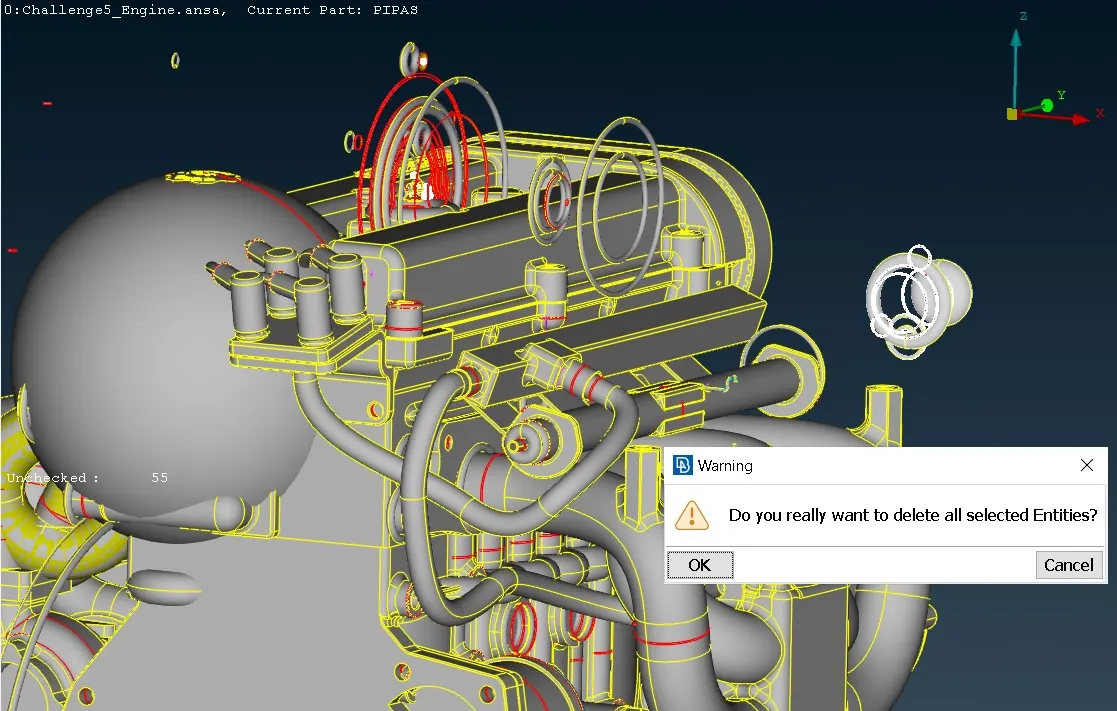
- The cylindrical and donut shaped objects are selected and deleted here.
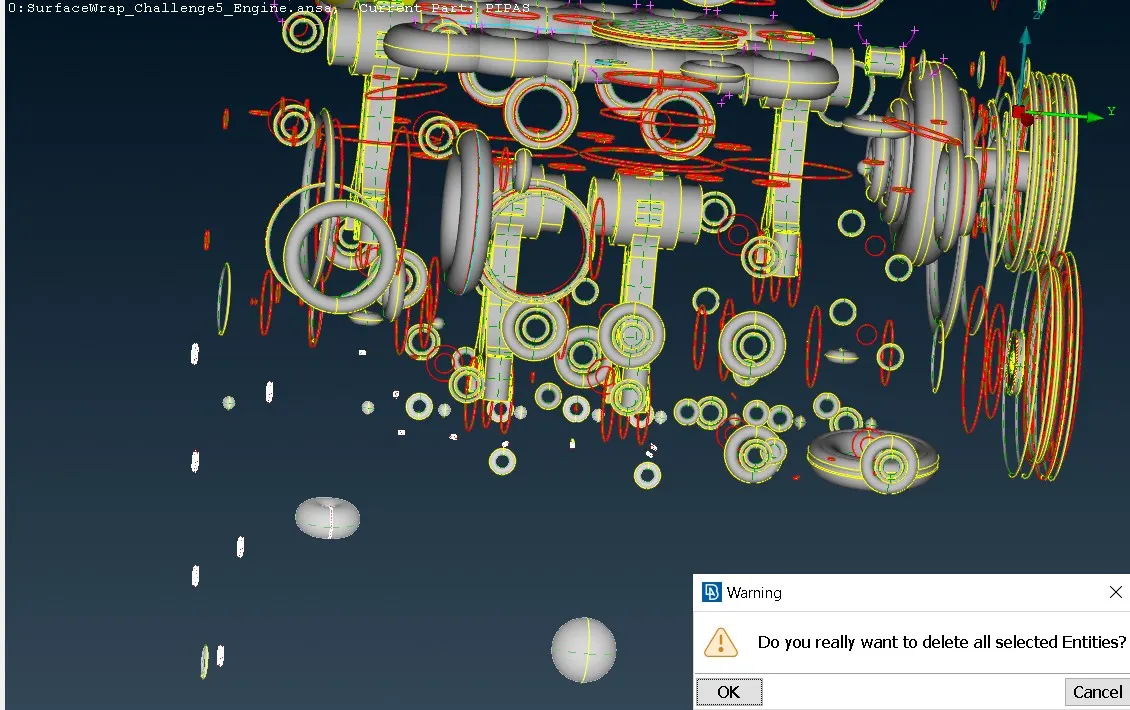
- You can highlight any of the problematic areas by left-clicking on it, or isolate it on the screen by right-clicking on it and selecting “Show only”. Depending on the type of problem ANSA also offers the option to automatically fix it.
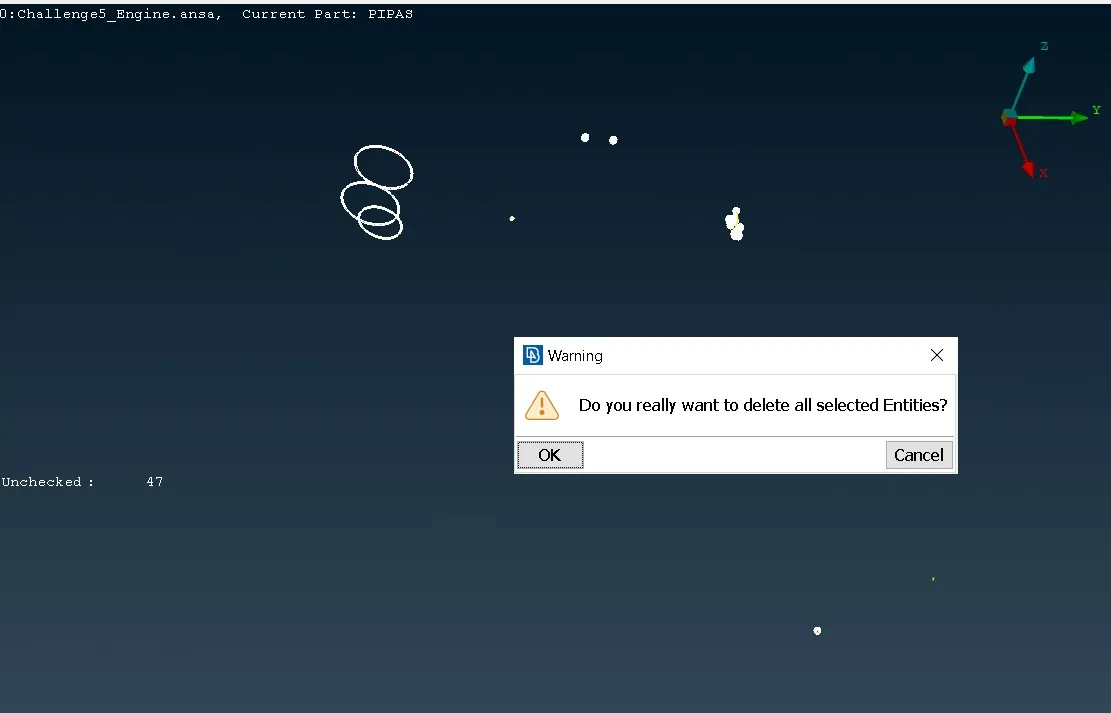
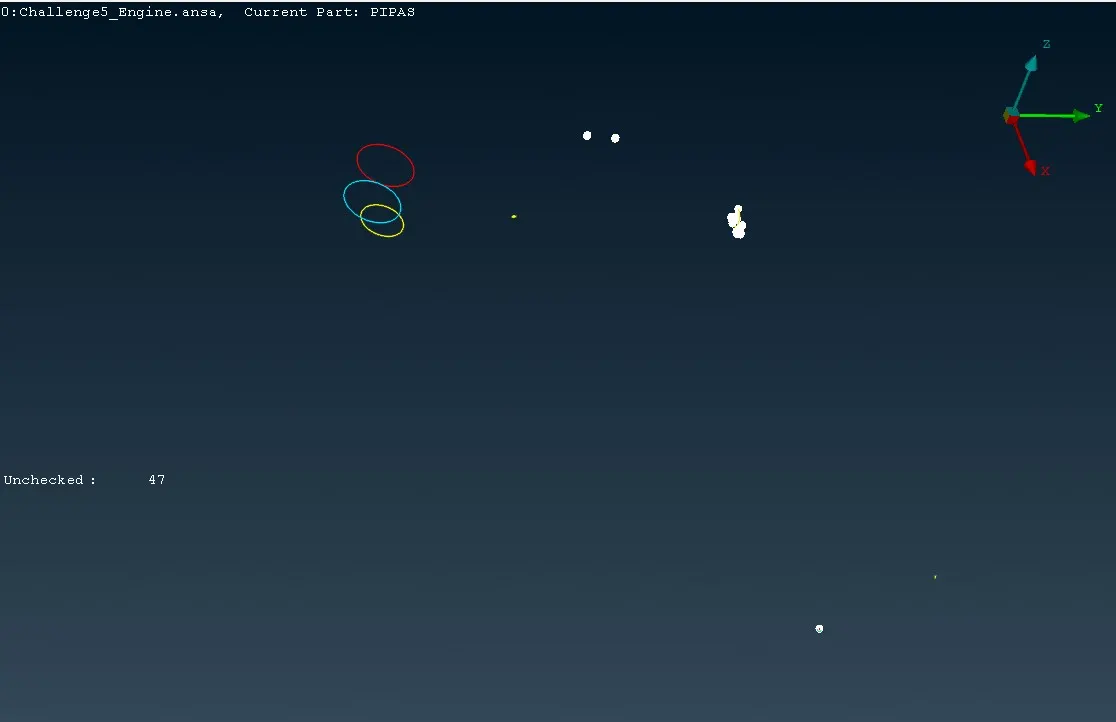
- This image shows that the unwanted parts are isolated using OR command and isolated. After isolating drag and select those by using selection tool and delete it.
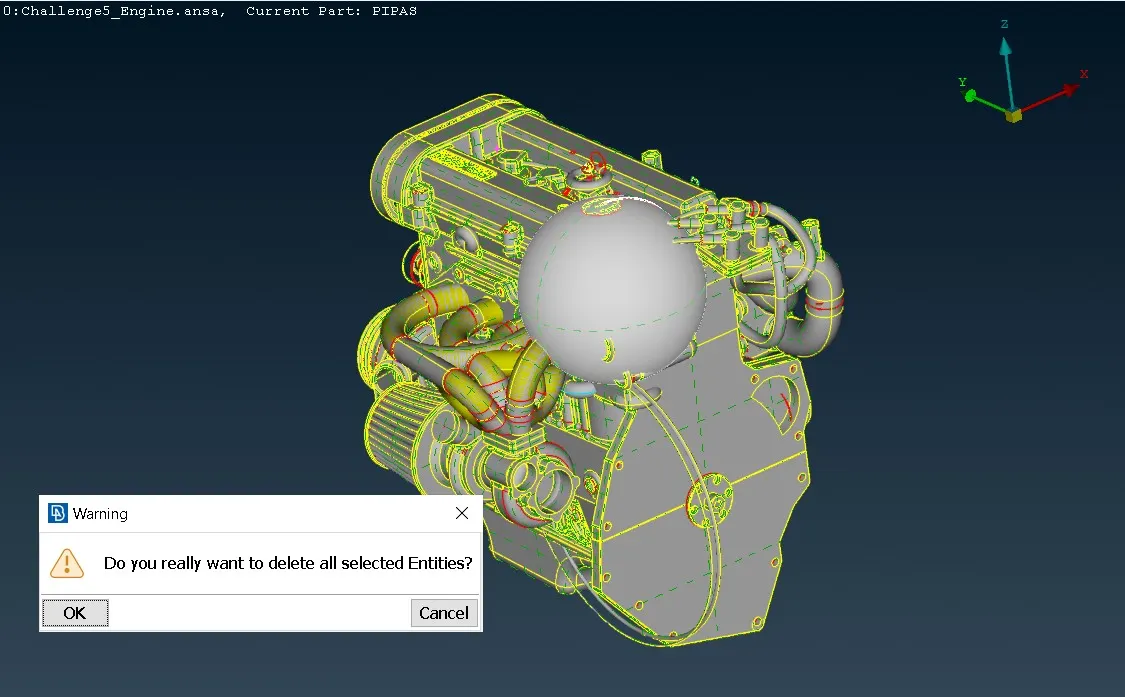
- After deleting the unwanted surfaces we need to wrap the surfaces but before performing the surface wrap we close all the open surfaces in the model because when we apply the wrap on the model before closing the open surfaces it will create skewness on the model so we do first close all the open surfaces.
- In order to create to close the gap by using Faces à New à Fitted.
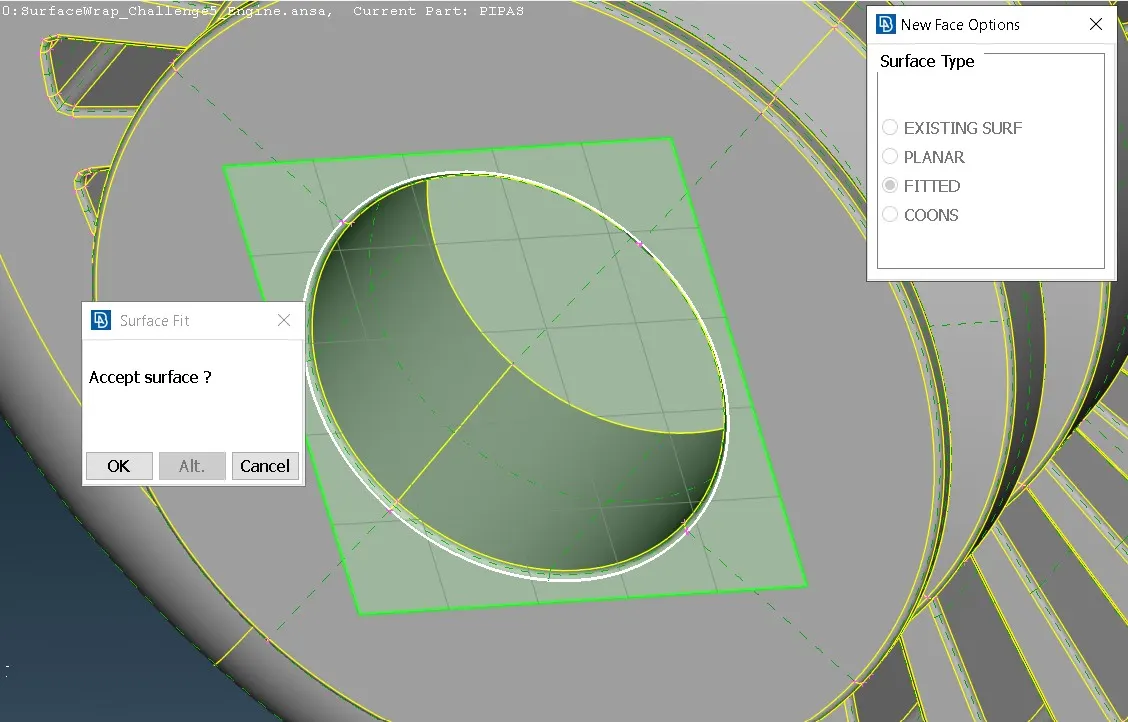
- Select the surface to close and click on OK.
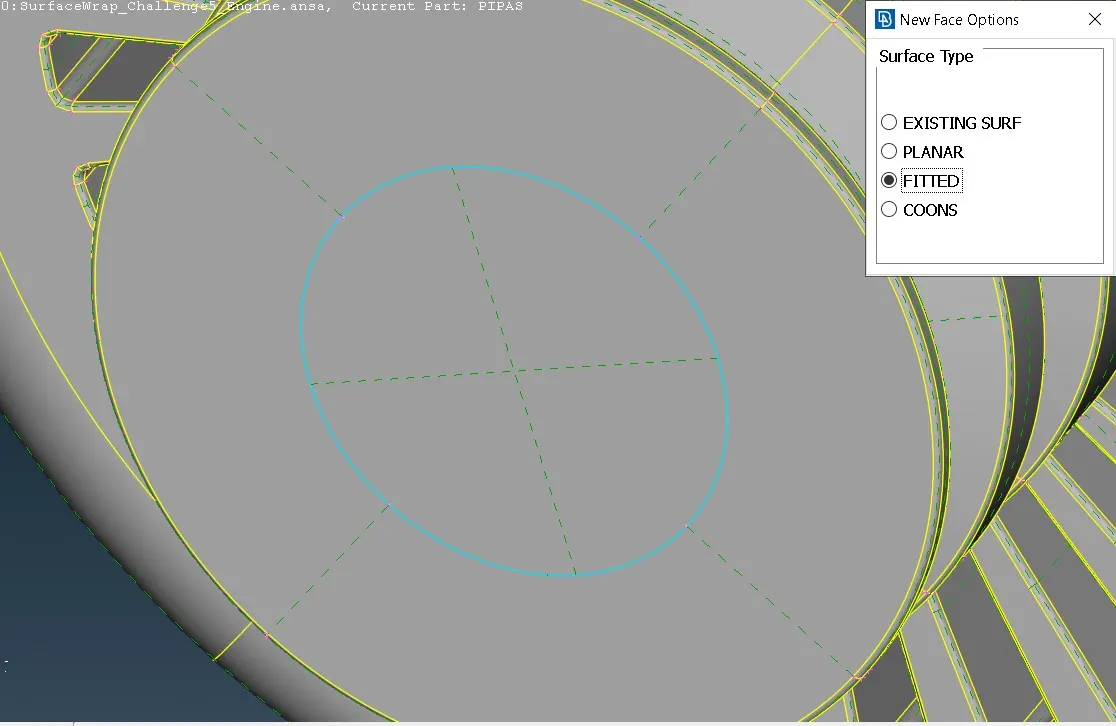
- This image shows the gap in surface has been closed.
- Now we need to do the same for the other parts of the body to close the gap.
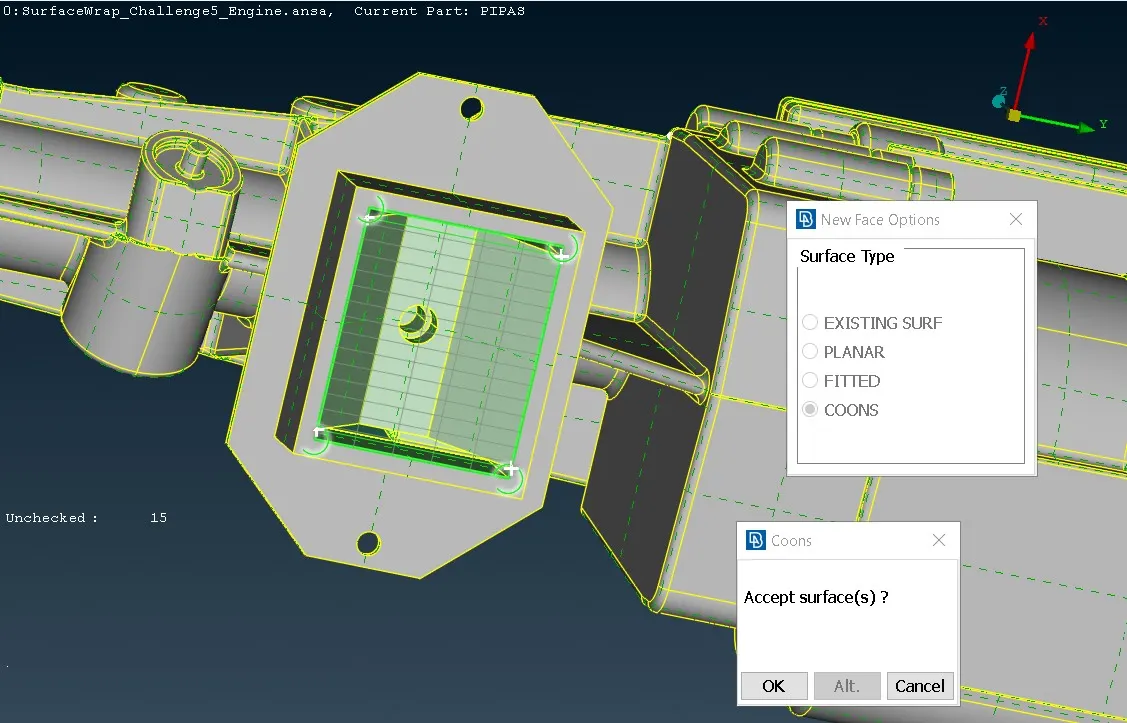
- In here we need to do the same as it is before, just select the surfaces and click on using Faces à New à Coons to create a surface there.
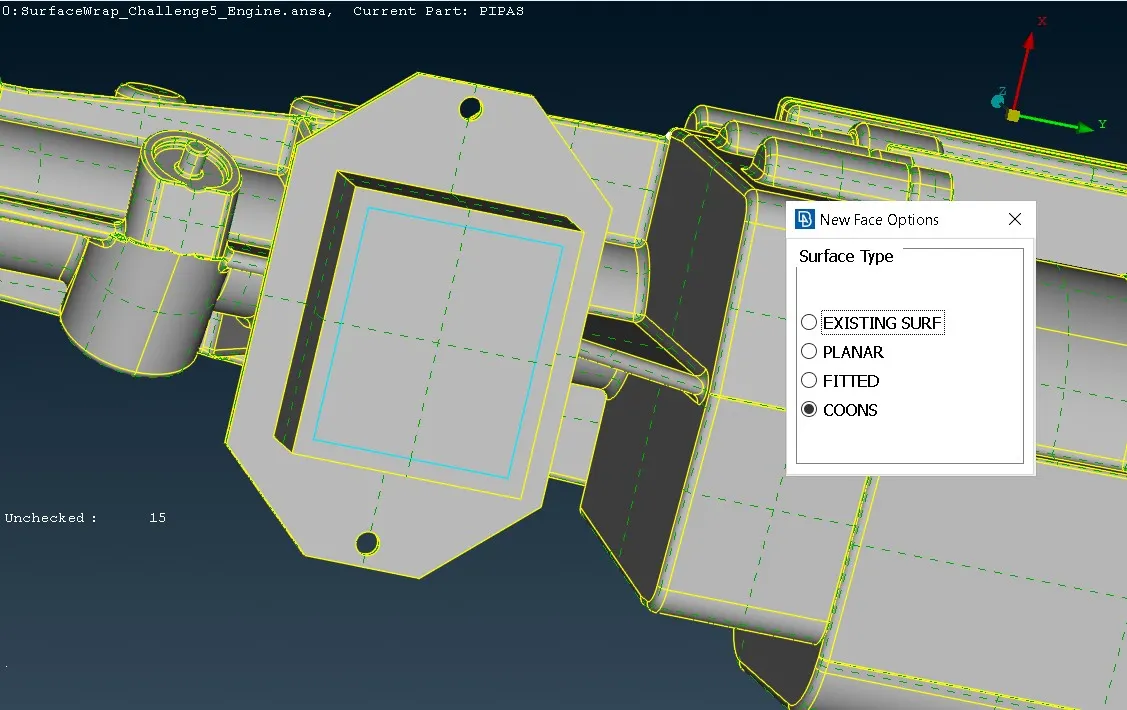
- This image shows that the surface gap has been closed.
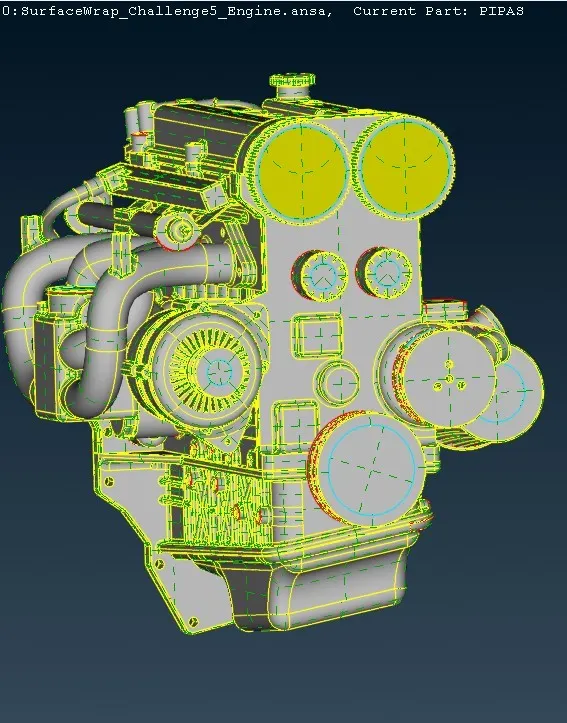
- In here we can see that the surface gaps in engine has been closed, now we can move on transmission to clear all the unwanted entities.
2. Transmission:
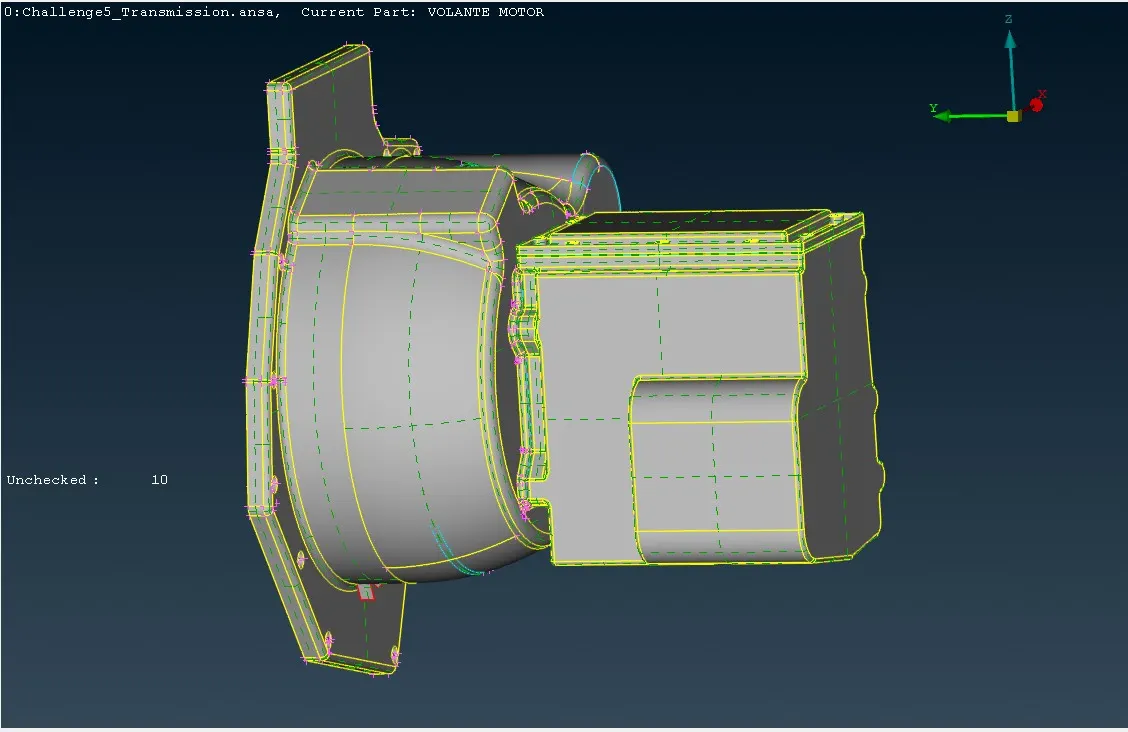
- Here we can see the transmission, Now we need to delete the other unwanted entities in the transmission system just like the previous steps as follows.,
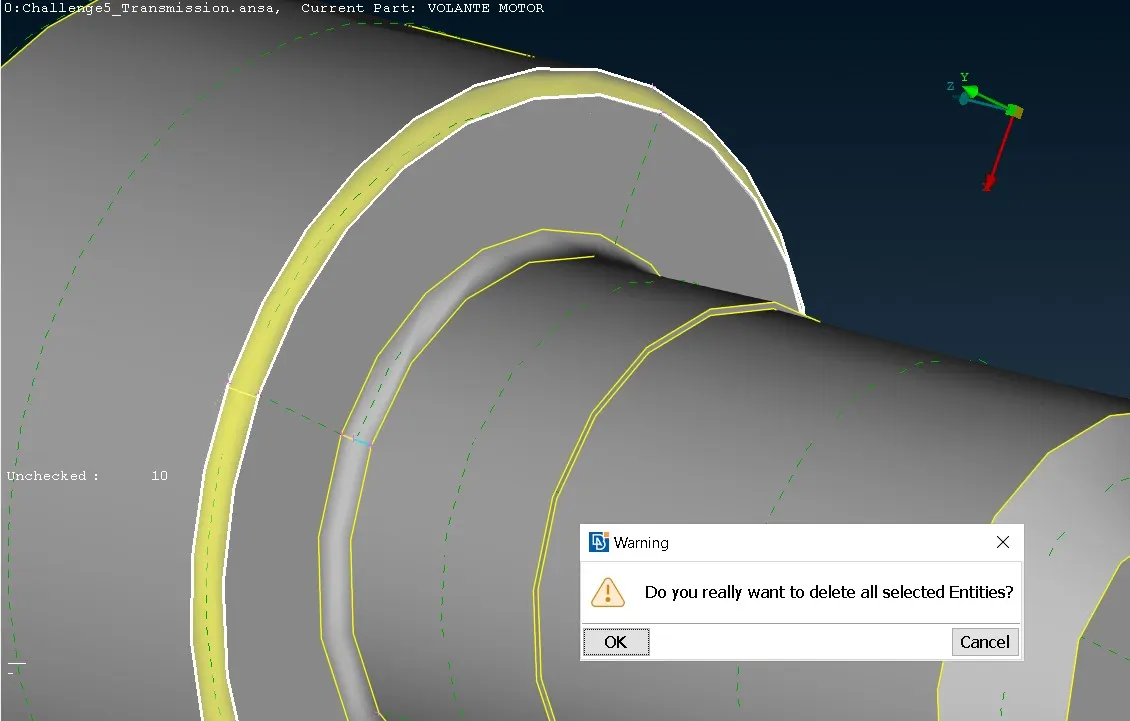
- In this image shows that the unwanted surface in the transmission is selected by using the selection and deleted.
- And after deleting the unwanted surfaces we need to isolate the in the bolts are selected and isolated using OR command.
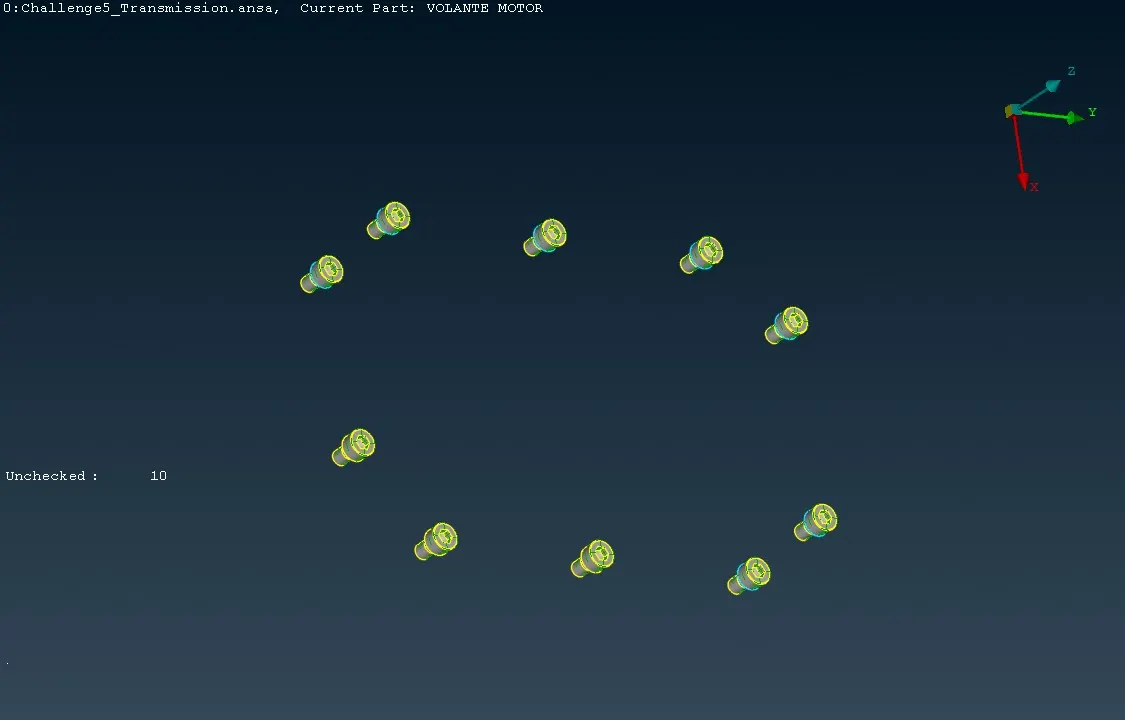
- In this image the bolts have been isolated, now we need to delete the unwanted entities.
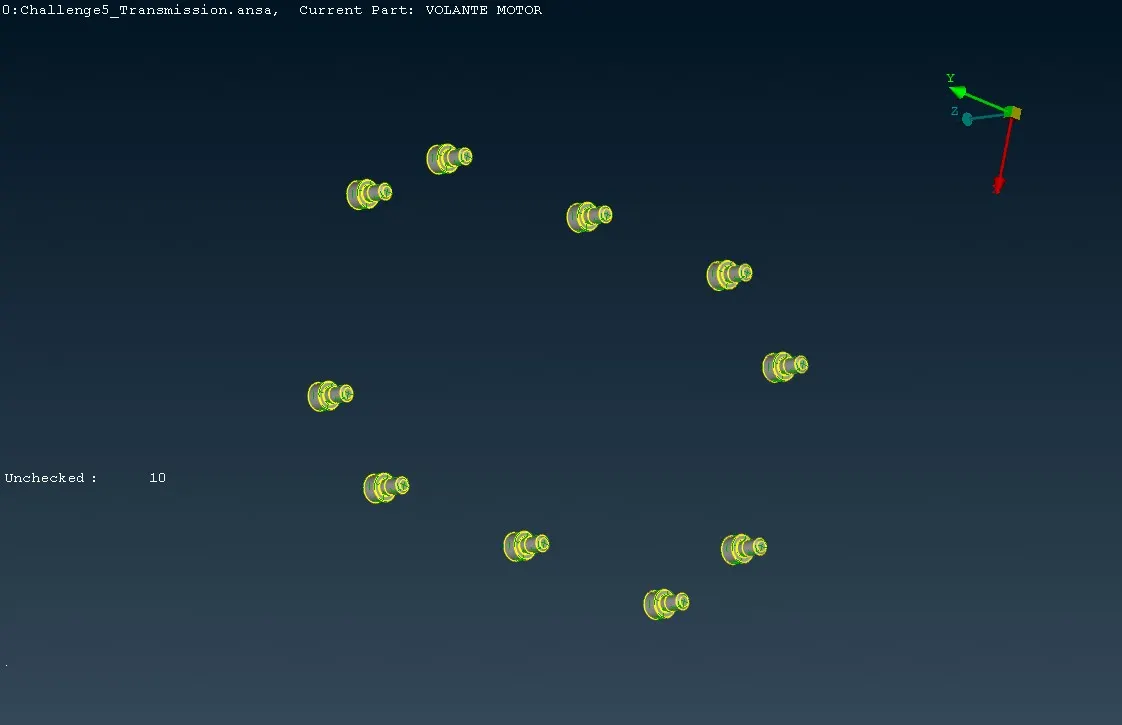
- Select the unwanted entities in the bolts are deleted in the above image.
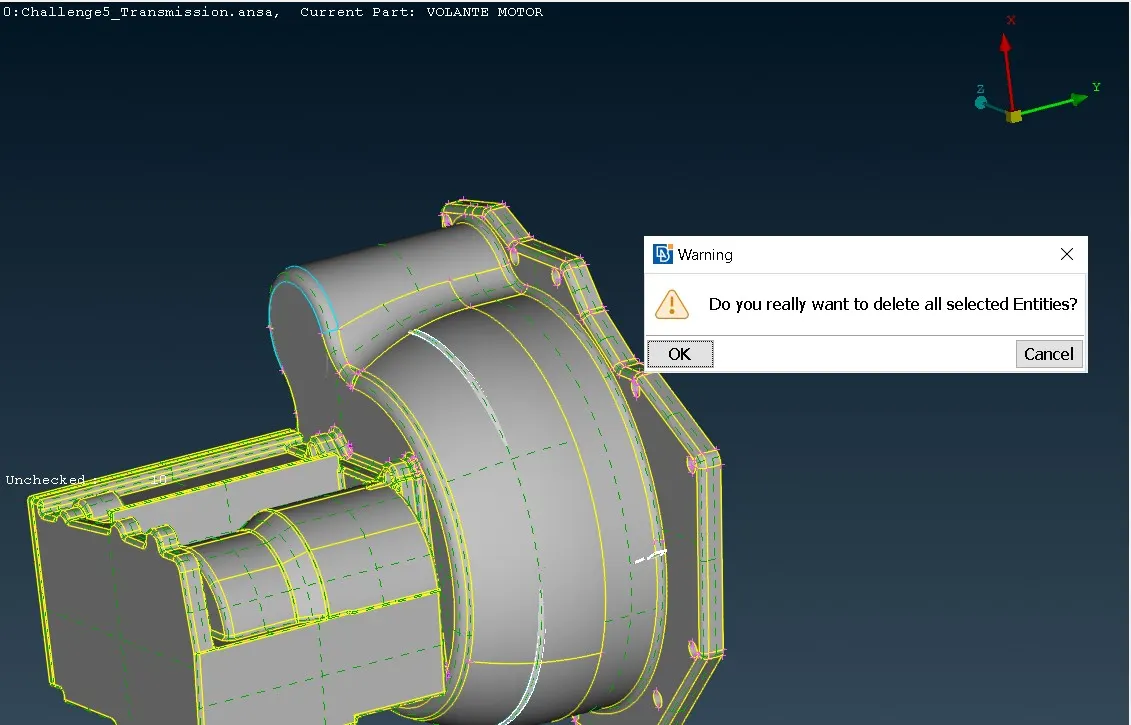
- There was a unwanted surface in the middle of the transmission is selected and deleted.
- In the transmission we have deleted the unwanted entities and now we can move on to the Gear box.
3. Gear box:
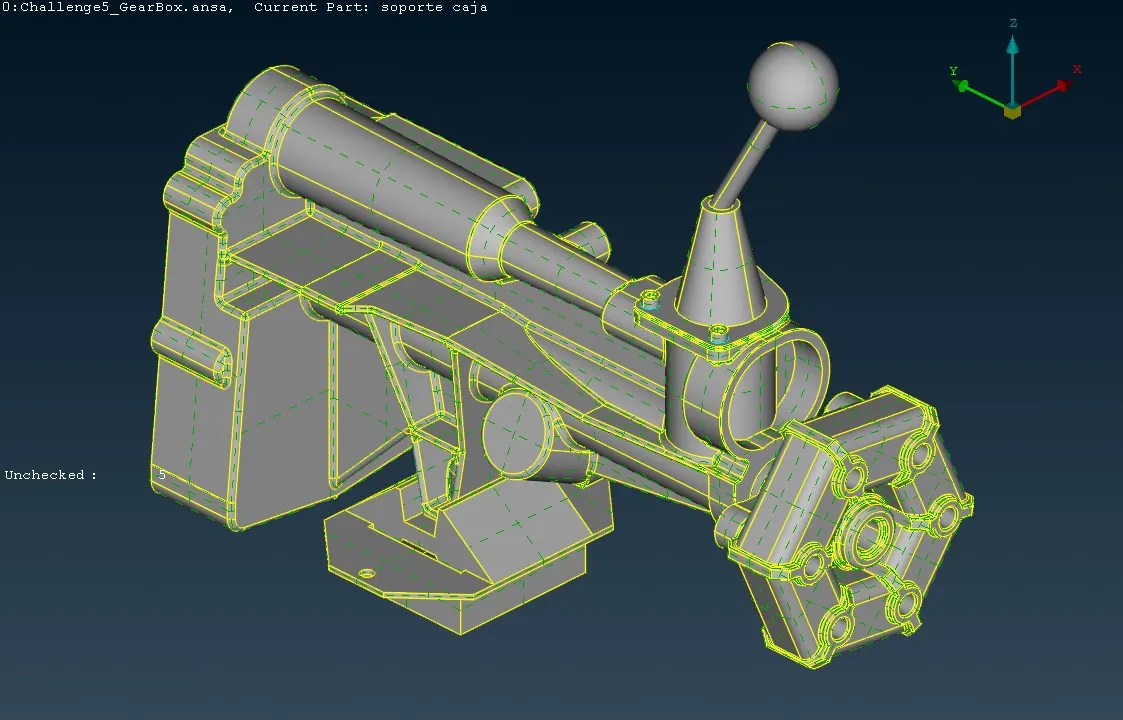
- Here the gear box has been uploaded, and now we need to analyse and delete the unwanted entities in the body.
- Before that we need to do the topo mode.
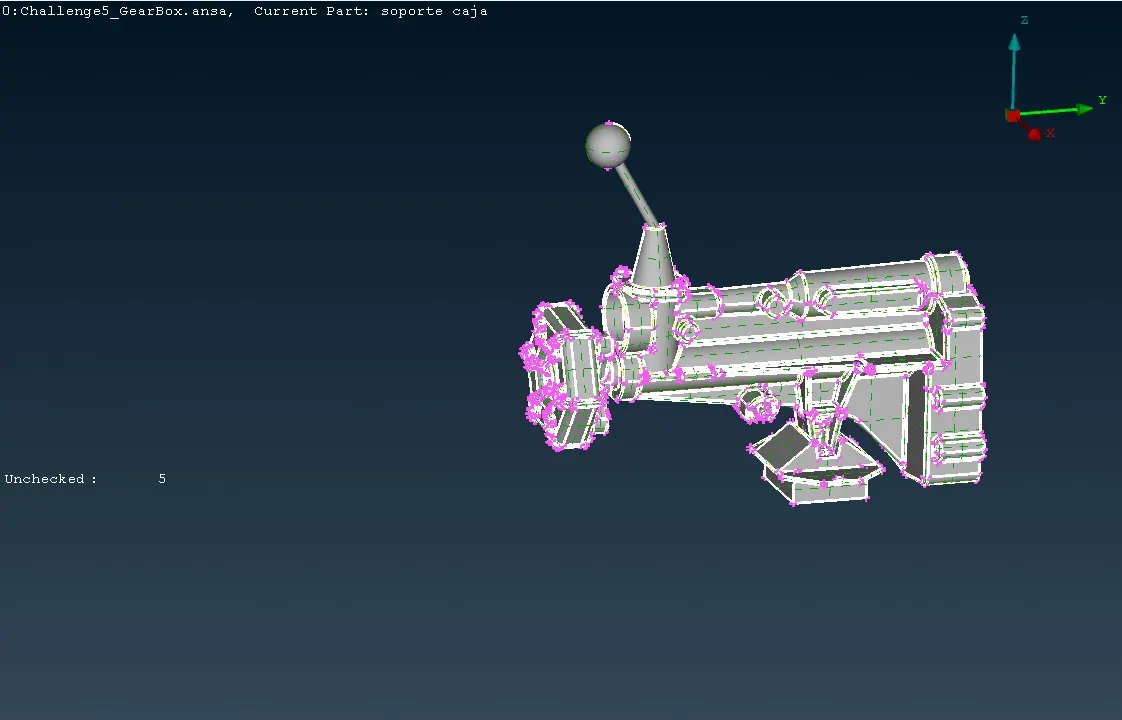
- After the topo mode we need delete the unwanted entities.
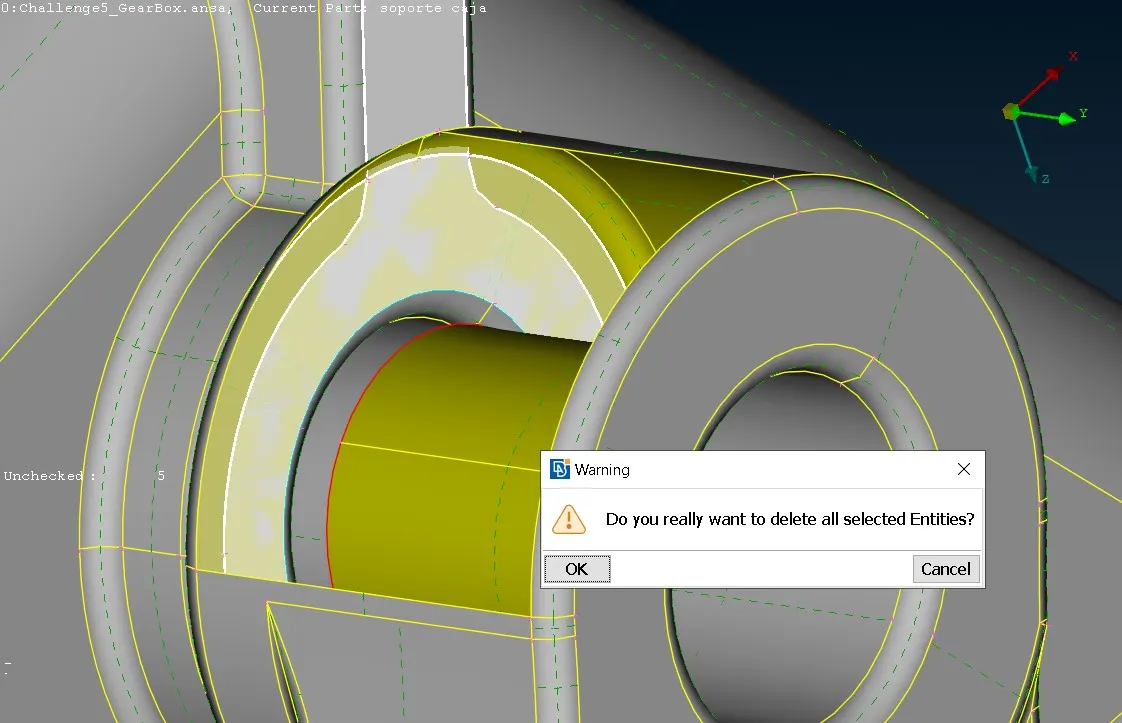
- In the below image there was an unwanted surface was hidden inside the gear box, so that we can isolate by using OR command and delete the inner surface inside the body.
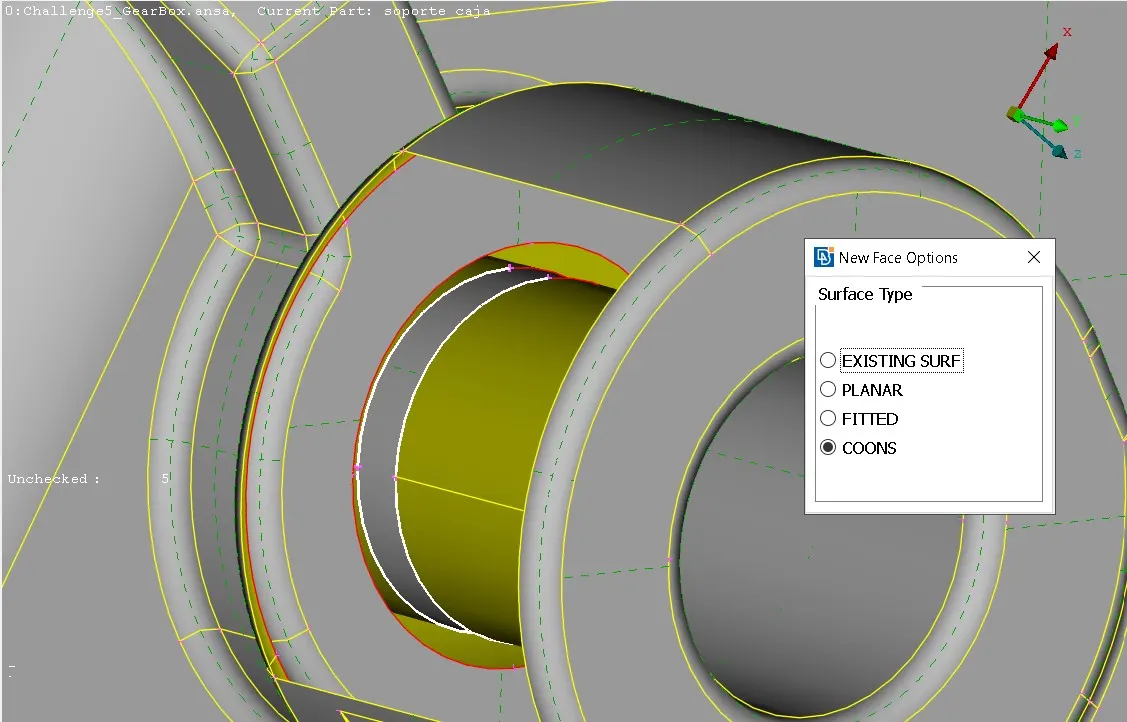
- After deleting the surface we use to create a new surface over there, so we use the Faces àNew à Coons.
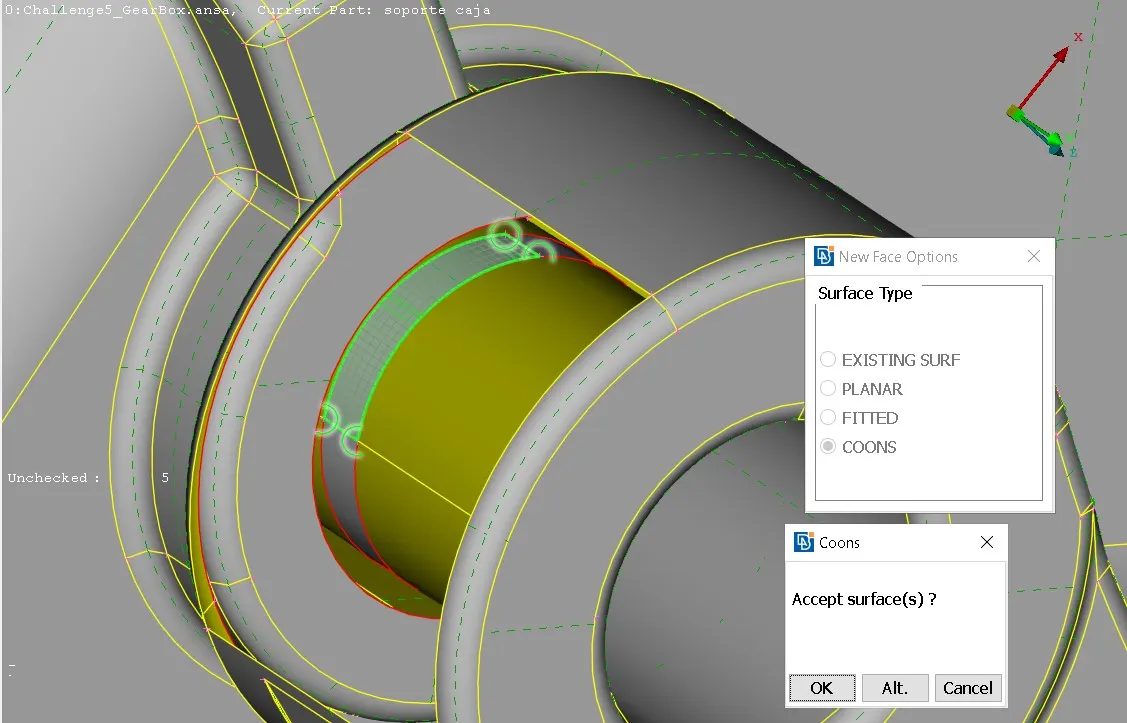
- And click on OK.
Merge all the three componments Engine, Transmission, & Gear box.
We explore the application of surface wrapping on automotive assembly components. We delve into the procedure involved in generating surface models from point cloud data, highlighting the importance of this process in automotive design and manufacturing. Furthermore, we discuss the learning outcomes, results, and conclusion drawn from our exploration of surface wrapping techniques in the context of automotive assembly.
Transmission
- By creating a surface wrap first we need go to the mesh mode and selecting the wrap option under the elements tab.
- A new dialog box will appears,
- Click on openfile option and select the Transmission file.
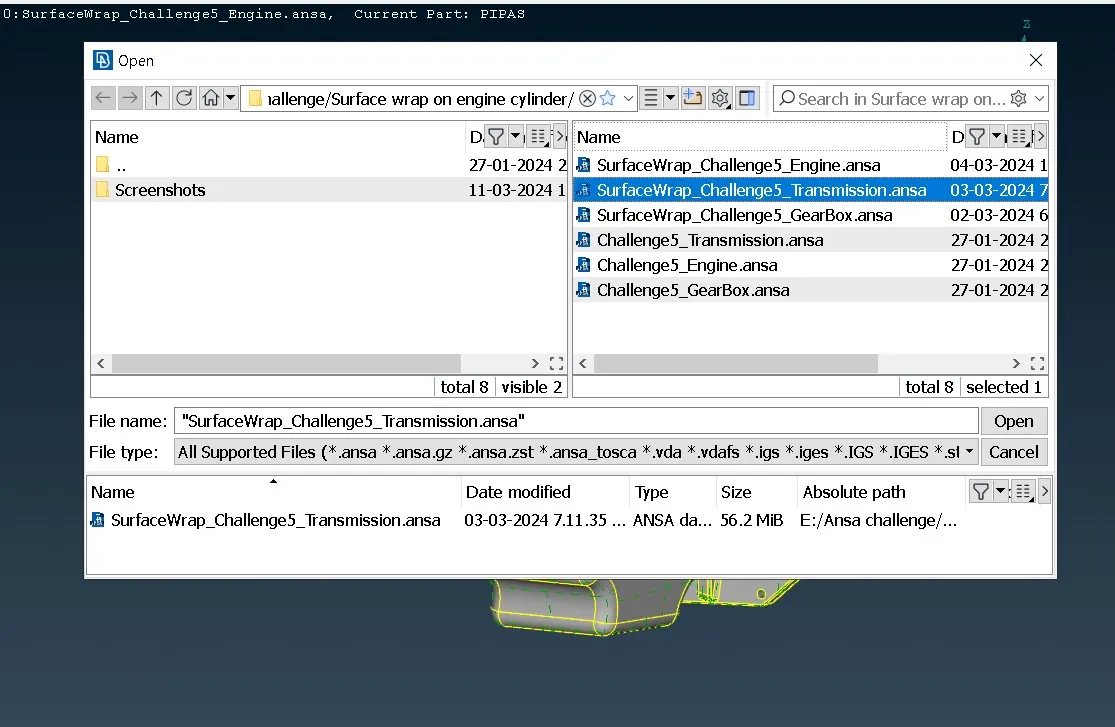
- Click on Open.
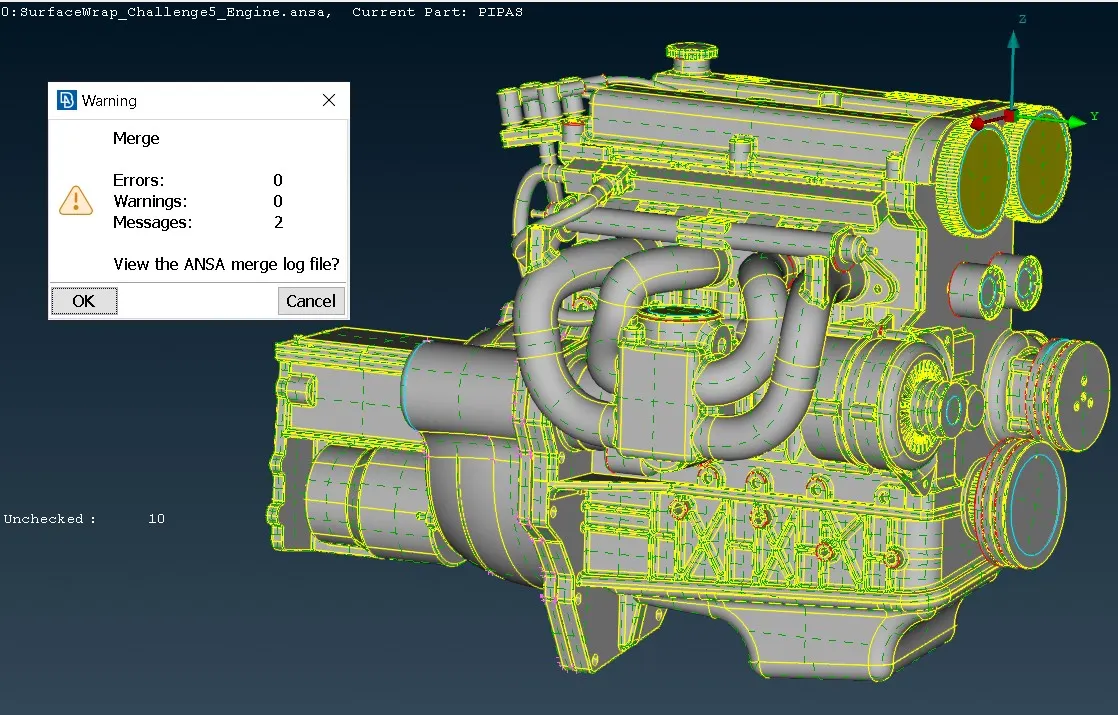
- Now we can see that in the above image the transmission is merged to the engine, we use the same procedure to merge the gearbox as it is.
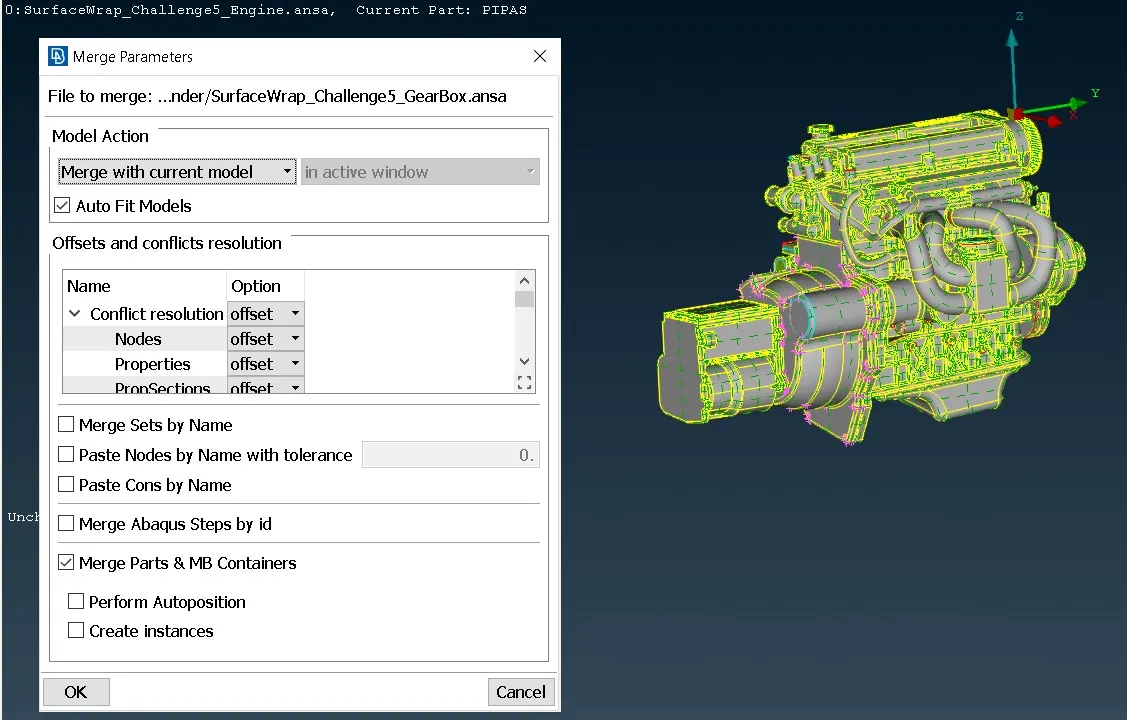
- In here we use the same procedure to merge a gear box, after selecting the gear box file in the Mesh parameters dialog box we need to select the Auto Fit Models and the click on Ok.
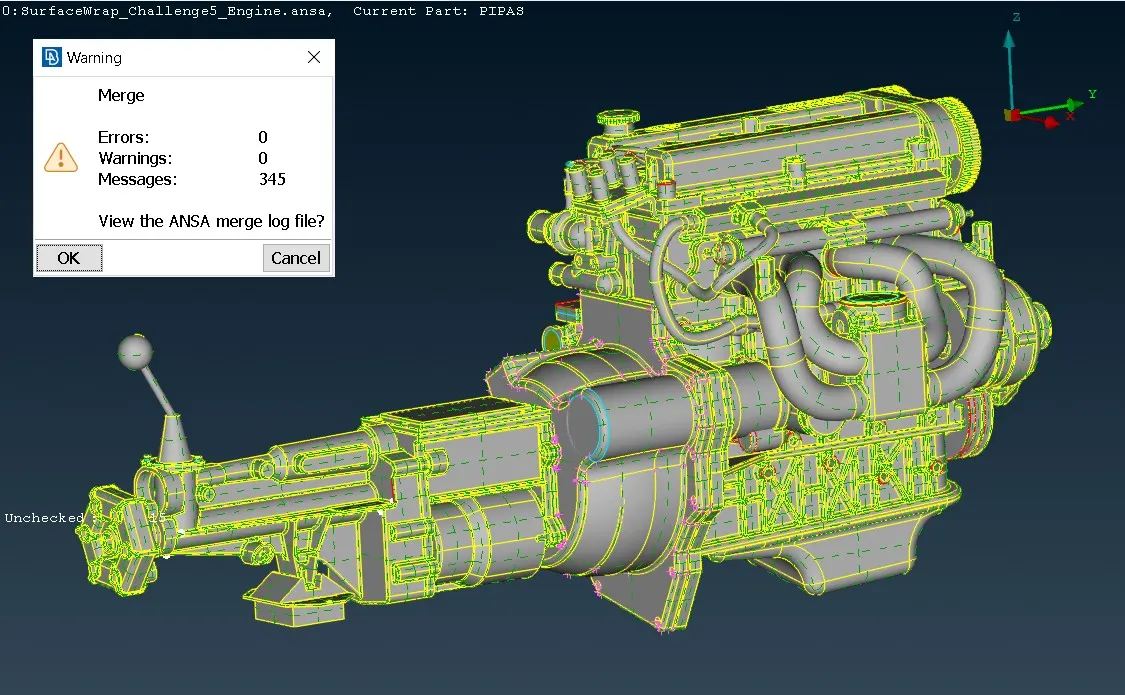
- In here we have successfully merged the gear box to the transmission system, now we are ready to do the surface wrap the body.
Steps to creating a surface wrap:
- The first step is to go to the mesh mode and selecting the wrap option under the elements tab.
- A new dialog box appears,
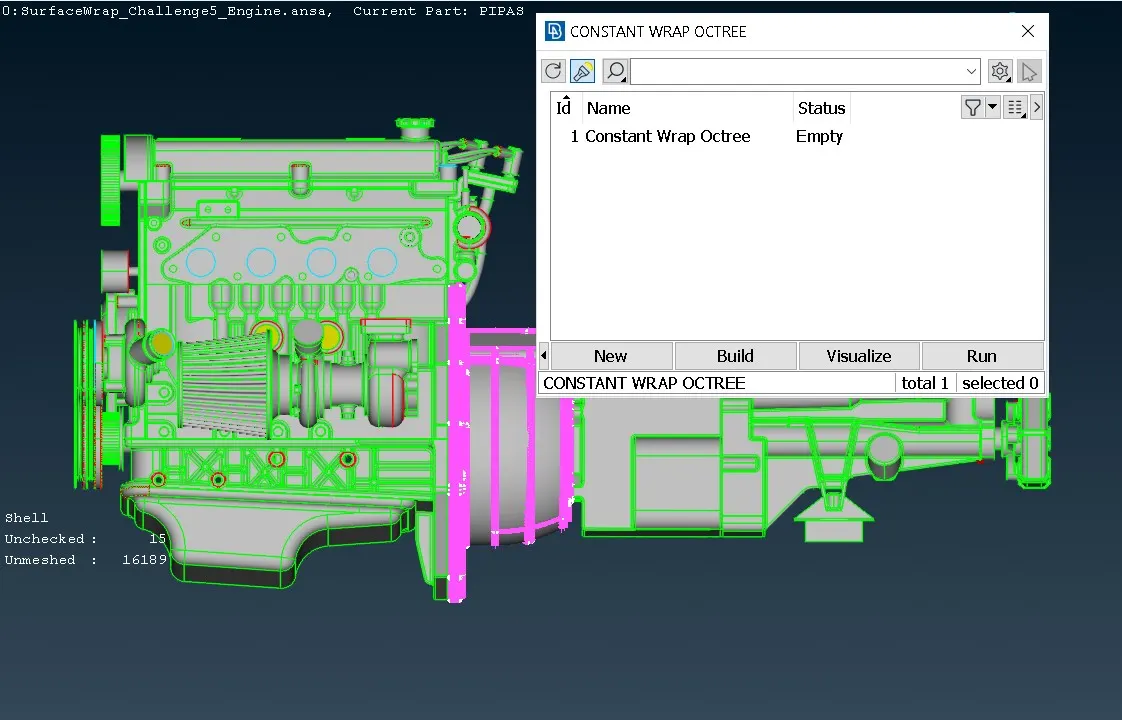
- Click on to the Constant Wrap Octree the new dialog box will open,in that click on to the Octree.
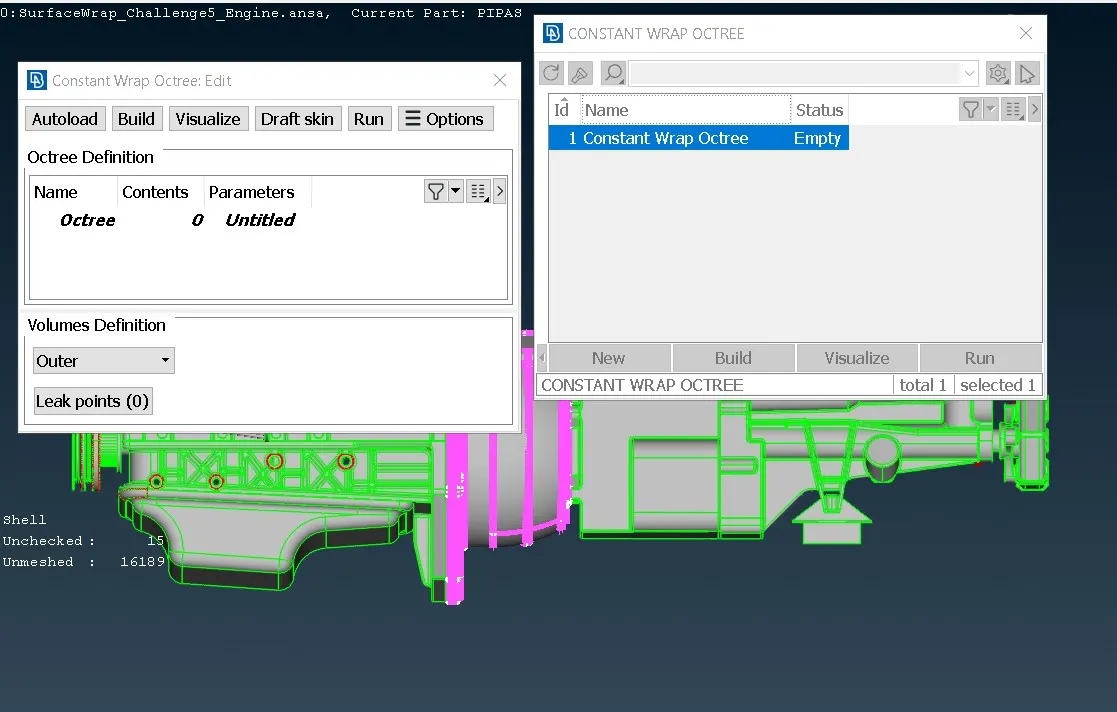
- After clicking ok there will be new dialog box appears, in that we should have to give the target lengths.
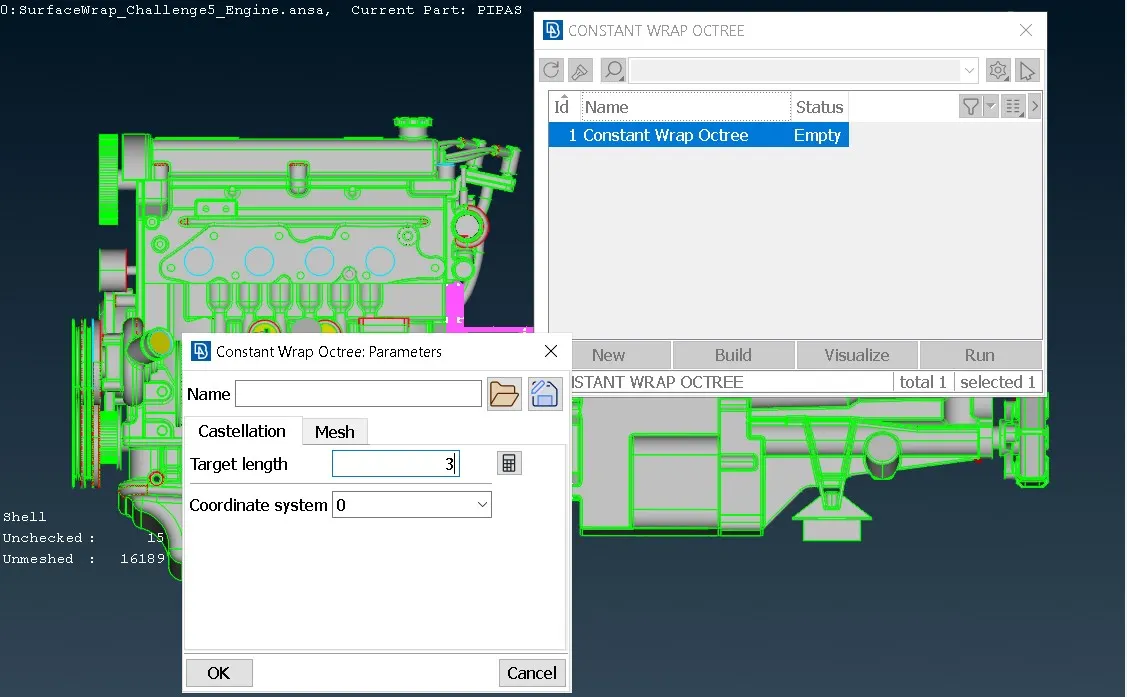
- In here we enter the Target length value = 3mm, and click on OK.
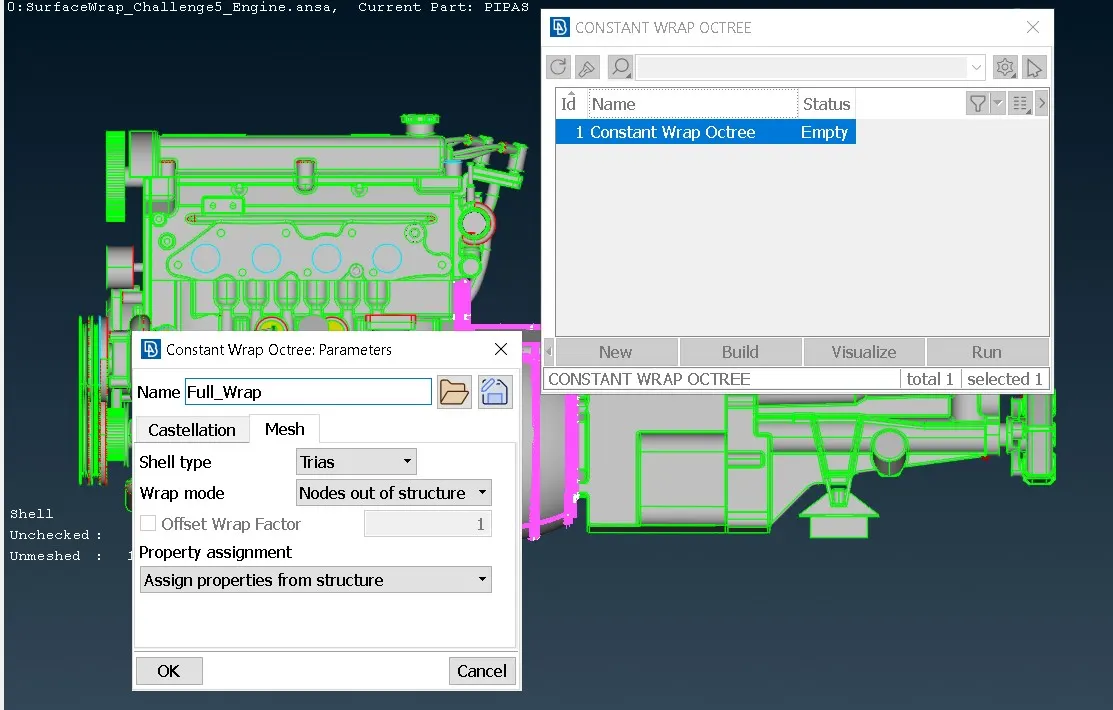
- Click on contents and move on all the items to be surface wrap.
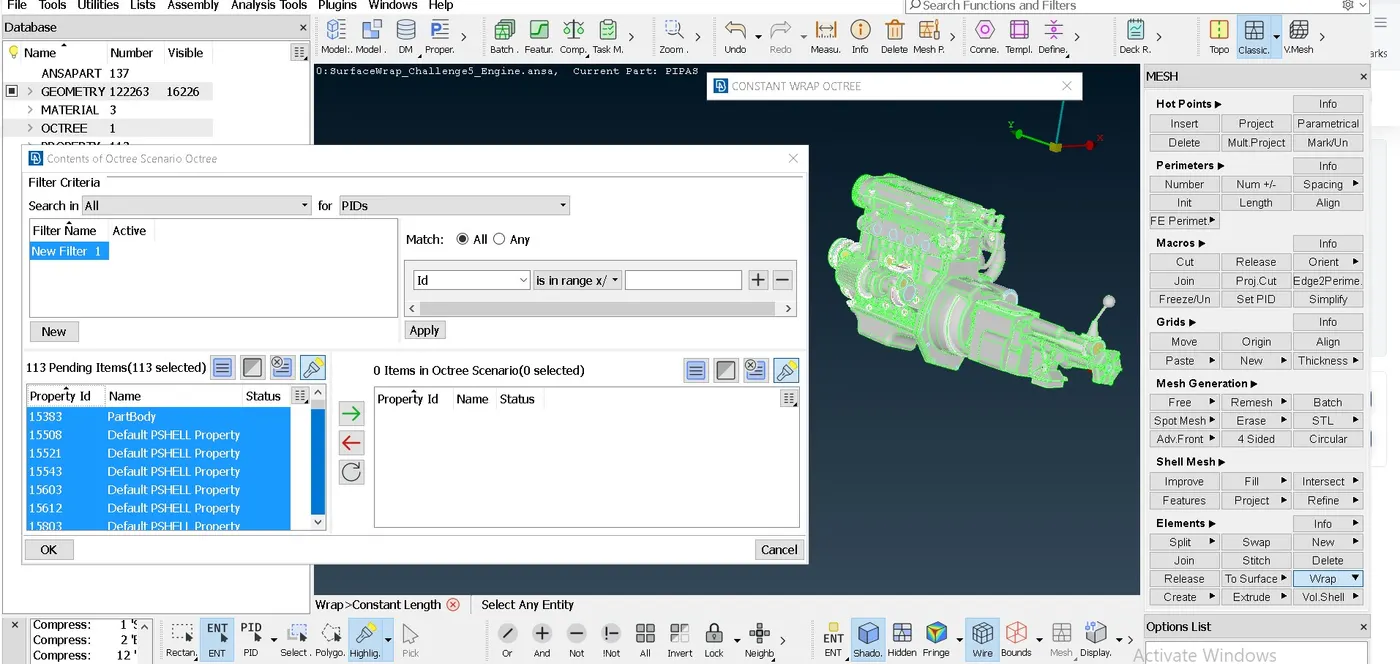
- In here we can see that the 113 pending items are dragged and selected.
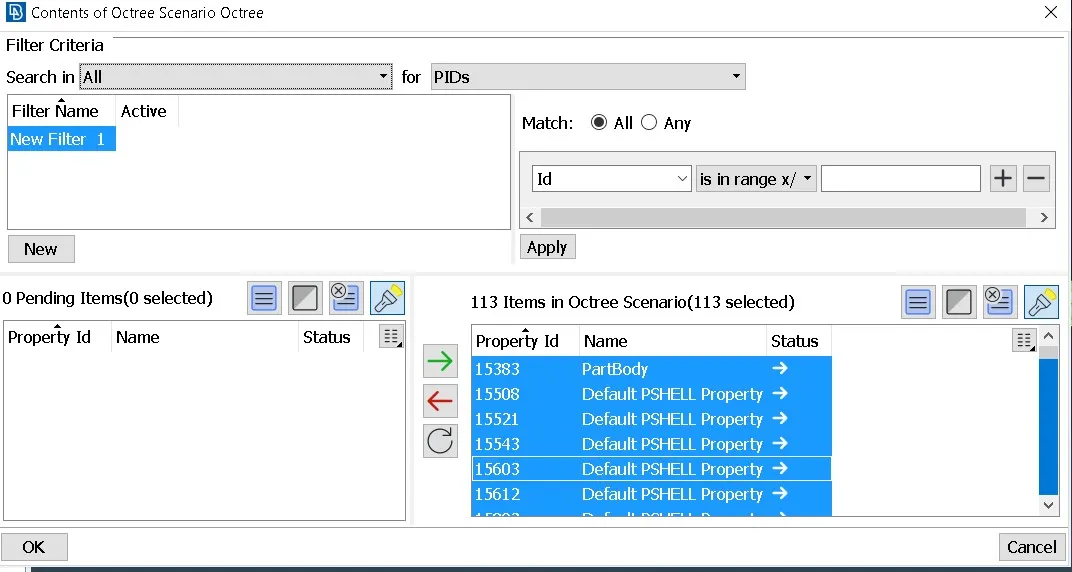
- After the property selection, click on to the green arrow to change into the Octree Scenario and click on OK.
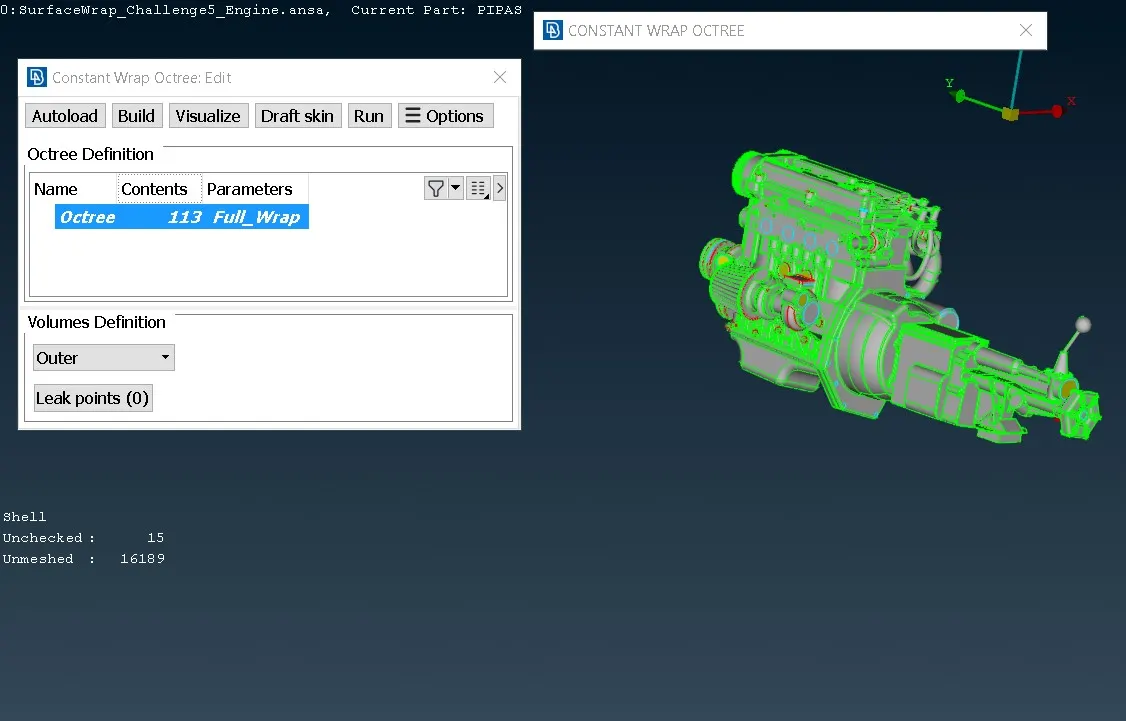
- Click on run to obtain the surface wrap of the assembled components.
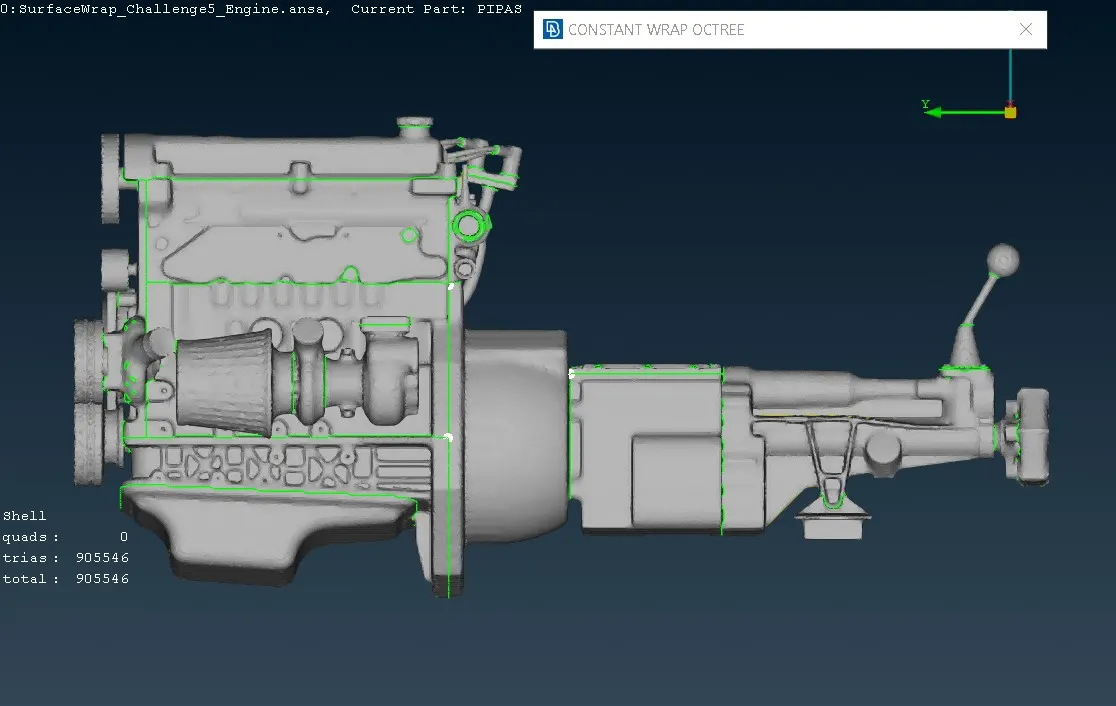
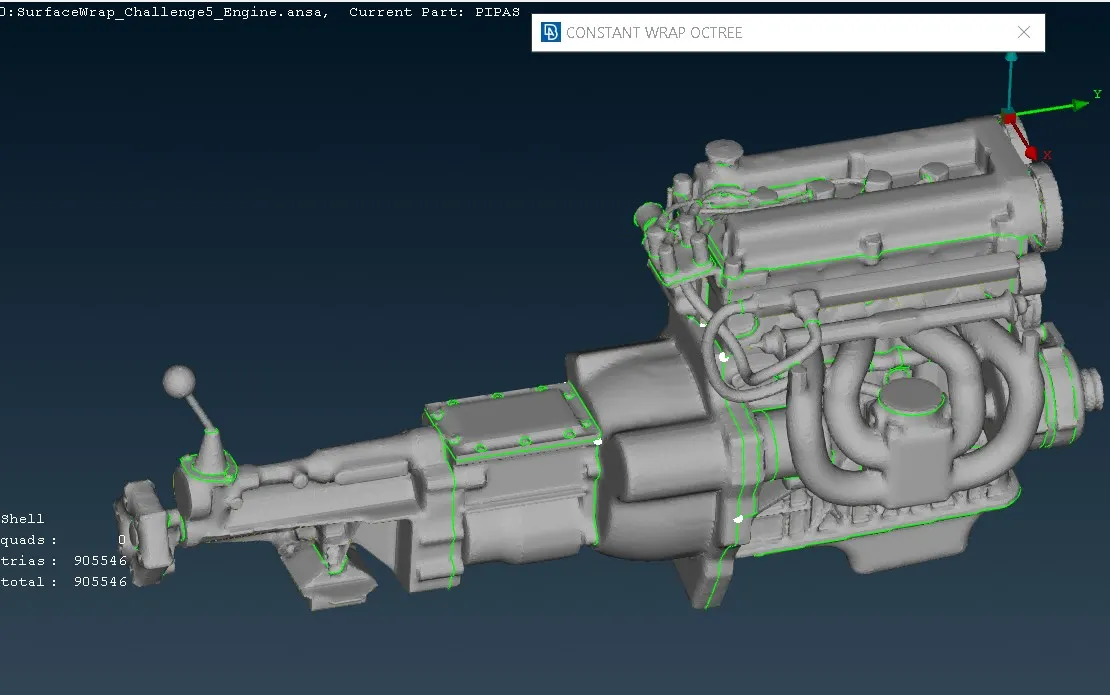
- This both images shows that the surface wrapping on the Engine, Transmission, and Gear box.
Shell Quads:
- Trias = 905546.
- Total = 905546
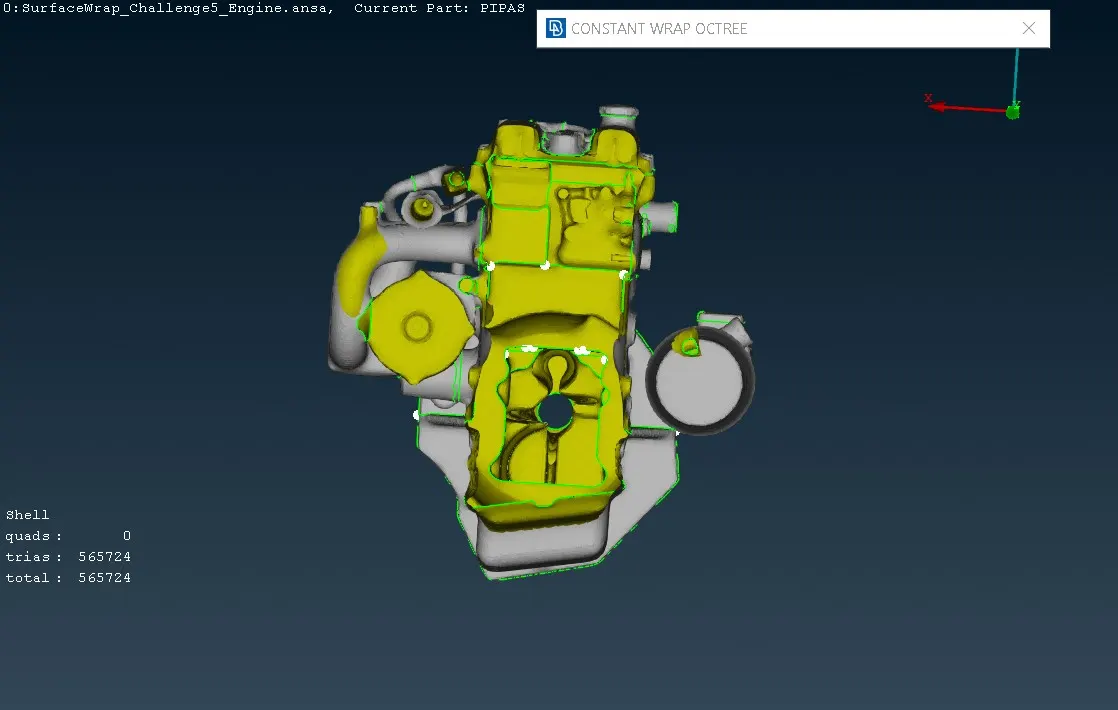
- In this image we can see the cut section view inside the body.
Learning Outcomes:
I have learn new tool of surface wrap meshing from geomentry clean up to constant length wrap meshing.
Conclusion:
In conclusion, the surface wrap on automotive assembly process is a critical step in creating accurate digital representations of automotive components for various applications such as design, analysis, and manufacturing. Throughout this project, we aimed to refine the geomentry obtained from scanned point cloud data to create high-quality surface models that faithfully represent the original components.
The procedure involved several key steps, including noise reduction, outlier removal, mesh pair, boundary correction, feature preservation, topology optimization, surface normalization, quality assessement, and iterative refinement. Each step played a crucial role in preparing the geomentry for surface wrapping, ensuring accuracy, completeness, and reliability.
Through this process, we successfully cleaned up the geomentry, removing noise, outliers, and defects while preserving important geomentric features and optimizing the mesh topology. The iterative refinement allowed us to fine-tune the geomentry cleanup parameters and address any remaining imperfections, resulting in a geomentry that is suitable for surface wrapping.
Overall, the geomentry cleanup process has enabled us to create high-quality surface models that meets the requirements of the surface wrapping applications. These models can now be used for further analysis, visulaization, and intergration into automotive design and manufacturing workflows, contributing to the overall efficiency and quality of the automotive assembly process.
https://drive.google.com/file/d/1bvux5Z0NHPH5eGkpDoK37bQ3mKOC6-vj/view?usp=sharing