Week - 4 - 2D meshing for Plastic components
Q.1) ANSWER-
AIM- TO EXTRACT THE MIDSURFACE OF THE COMPONENT ALONG WITH ASSIGNING PROPERTY AND THICKNESS AND MESH IT ACCORDING TO THE GIVEN QUALITY CRITERIONS.
OBJECTIVE-
- Import the cad geometry of the given model.
- Cleanup the geometry until no topological errors are found.
- Extracting midsurface of the geometry.
- Assigning property and thickness to the component.
- Meshing the component with the given quality criterions.
QUALITY CRITERIONS-
|
SR.NO |
QUALITY CRITERIA |
VALUE |
|
1 |
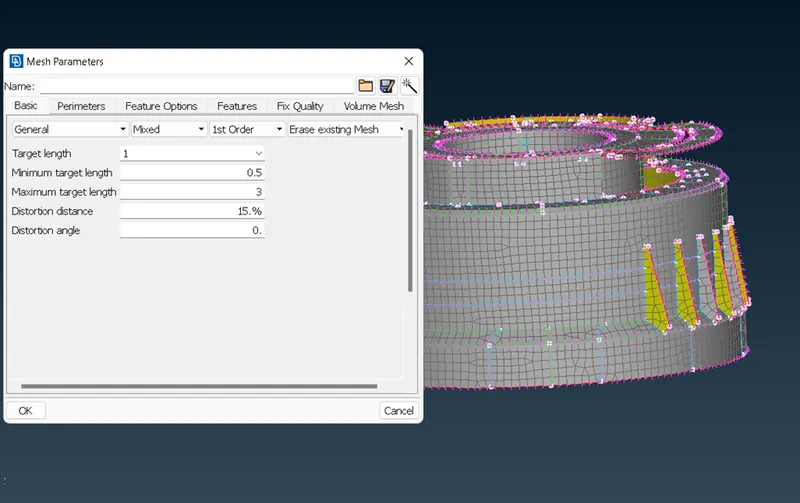
Target/average length |
1 |
|
2 |
Minimum length |
0.5 |
|
3 |
Maximum length |
3 |
|
4 |
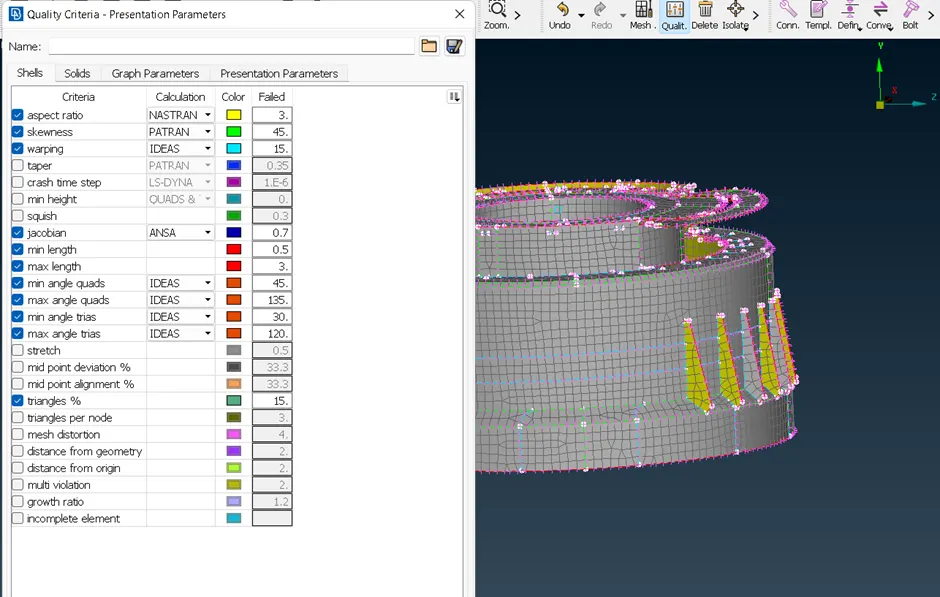
Aspect |
3 |
|
5 |
Warpage |
15 |
|
6 |
Jacobian |
0.7 |
|
7 |
Minimum Quad Angle |
45 |
|
8 |
Maximum Quad Angle |
135 |
|
9 |
Minimum Tria Angle |
30 |
|
10 |
Maximum Tria Angle |
120 |
|
11 |
Tria Percentage |
15 |
PROCEDURE-
1.1) Importing model:
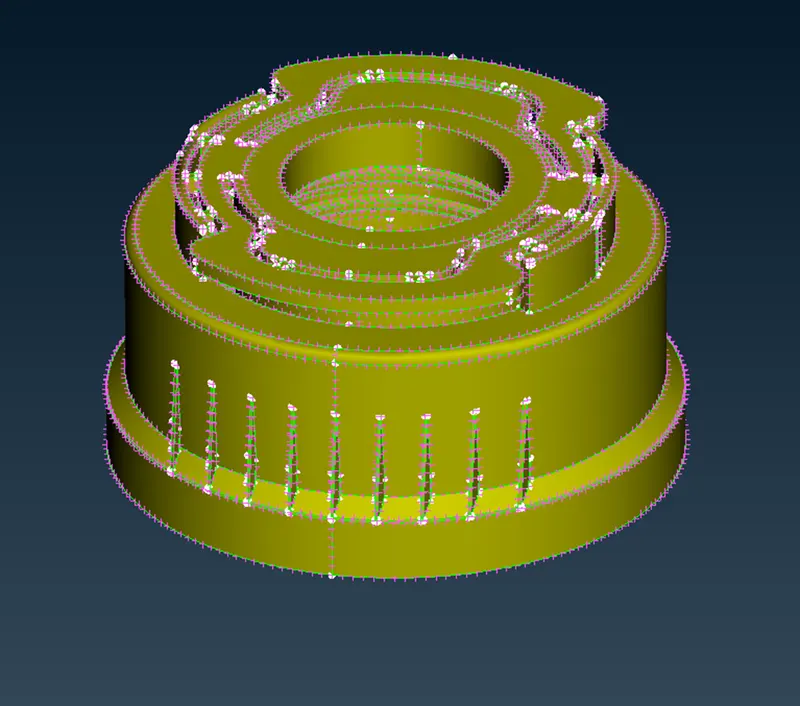
- First, we import the given model into ANSA. The given file is a IGS file.
- Model Image
1.2) Geometry Cleanup:
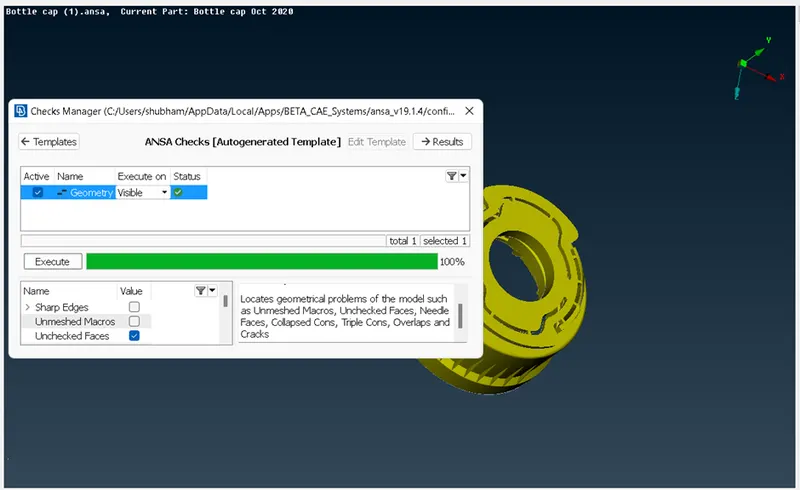
- After the model is imported, we check for any geometrical or topological errors present in the model.
- In order to check this, we open the check’s manager to do a geometry cleanup.
- After all the errors are rectified, we rerun the execution if it will be 100%, then you can move forward.
1.3) Assigning Property:
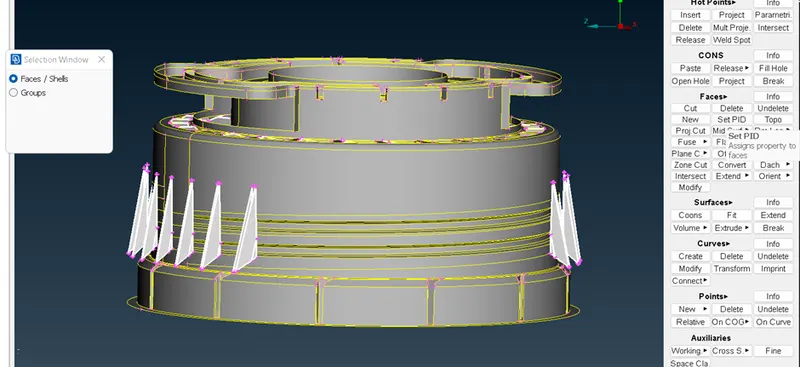
- Every part in the component has its own property. For assigning PID we select the part and click apply, then we have to select the whole part using window selection to apply PID.
1.4) Extracting Midsurface:
- There are multiple ways to generate midsurfaces. We will use the ‘middle’ and ‘offset’ tools.
- The middle tool is useful for generating midsurfaces as our model contains various ribs. [Command<Faces>Middle]. After that we select the ribs and generate the midsurface.
- After extracting all the midsurfacs we have to extend them to each other to join them with the other adjacent counter parts. [Command<Faces>Extend]
1.5) Generating midsurface:
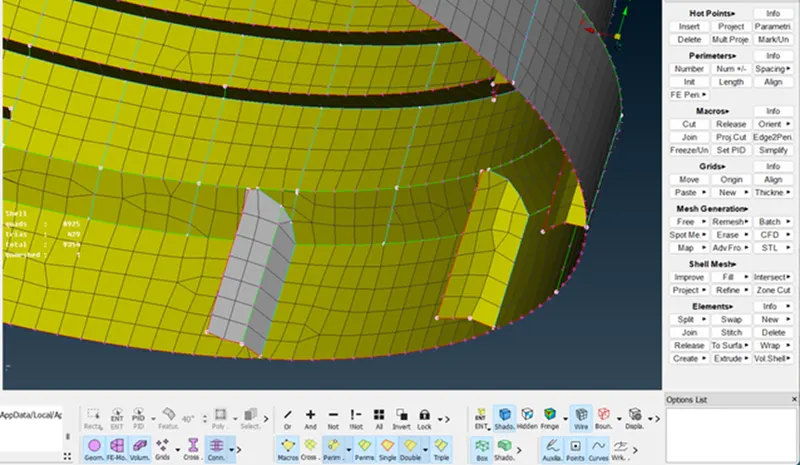
- We can start meshing the entire component using the command Mesh generation. [Command< Mesh Generation>Best].
- It is ideal to start from a region with more single cons surrounding it. One of the outer ribs, for example. Since most surfaces have straight cuts, the mesh is less likely to have a large number of trias.
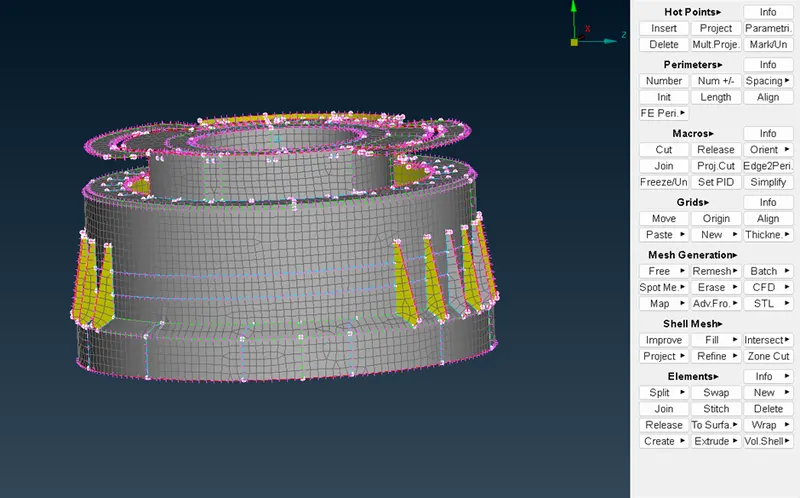
- Once the mesh is completed we set the quality criterions.
1.6) Quality criterions:
- Now we set the quality criterions for our model.
1.7) Learning Outcomes:
- Learnt to make use of one more alternative for creating midsurface- the ‘middle tool’ option.
- Learnt the transform> rotate option, to copy the same surfaces around an axis
- Got hands on with the intersect, extend and project tools.
- Learnt to make use of curves to generate surfaces.
1.8) Conclusion:
- The given model of the bottle cap was meshed according to the given quality criterions, after carrying out the topology, orientation, midsurface generation, setting properties and thickness to the surfaces and meshing the component as per the quality criterions.