Week - 4 - 2D meshing for Plastic components
1. AIM: Do a 2D Meshing for the Plastic Component (Bottle Cap model).
2. OBJECTIVES OF THE PROJECT:
For the given Plastic Bottle Cap model, check for the geometrical errors and take the mid surface by suitable mid surfacing techniques. Set PID as per variety of thickness available in the model. Mesh the same with given element Quality criteria. See the table Below for the Quality criteria.
|
S.No |
Quality Criteria |
Value |
|
1 |
Target/Average length |
1 |
|
2 |
Minimum Length |
0.5 |
|
3 |
Maximum Length |
3 |
|
4 |
Aspect |
3 |
|
5 |
Warpage |
15 |
|
6 |
Skewness |
45 |
|
7 |
Jacobian |
0.7 |
|
8 |
Minimum Quad Angle |
45 |
|
9 |
Maximum Quad Angle |
135 |
|
10 |
Minimum Tria Angle |
30 |
|
11 |
Maximum Tria Angle |
120 |
|
10 |
Tria Percentage |
15 |
3. BODY OF THE CONTENT:
Let's Explore whole process step by step.
- IMPORTING THE FILE: Importing the given .ansa file using a path file > open
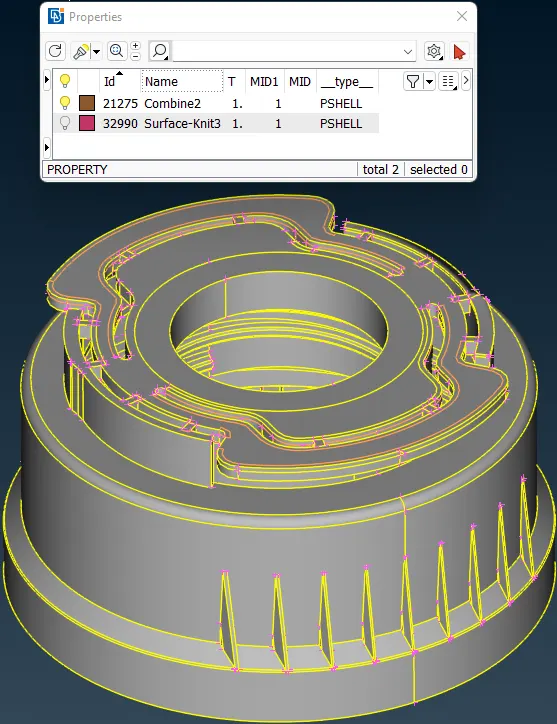
Fig: 01 Bottel_cap.ansa
- GEOMETRY ERROR: After importing the file. First task should be to check the geometry errors of the part.
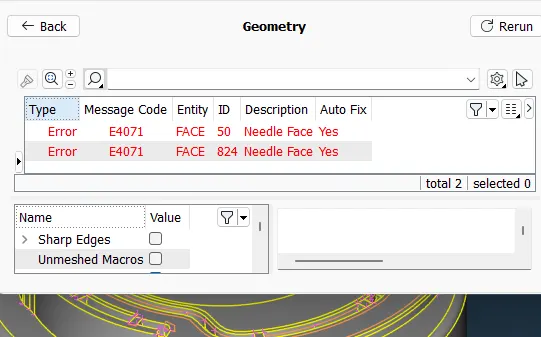
We can see the model has some errors in geometry. There are 'Needle faces', Which can be fixed either auto or manually. Here doing the auto fix for all.
Fig: 02 Geometry errors in Bottel_cap
- THICKNESS MEASUREMENT: After clearing geometry error. Let's measure parts thickness at various points. This is a plastic component so at many locations it gets different thickness. Like 0.50, 0.81, 0.86, 1.02, 1.14, 1.22, 1.50, 1.53, 1.78, 1.94,2.25 etc..
- MID-SURFACE GENERATING: Now the second step is to generate mid-surface. There are two types of functions to generate mid-surface. In Mid.Surface 'skin' & 'casting' for auto operation and 'Offset' & 'Middel' for manual operation. Here the model has many complex features, where the auto function will not give a good result. So I will go with 'Offset' and 'Middel'. Before creating mid surface let's simplify the part. For ease I will divide it in 2. Take a look in the image below. We can assume which top and bottom part will be.
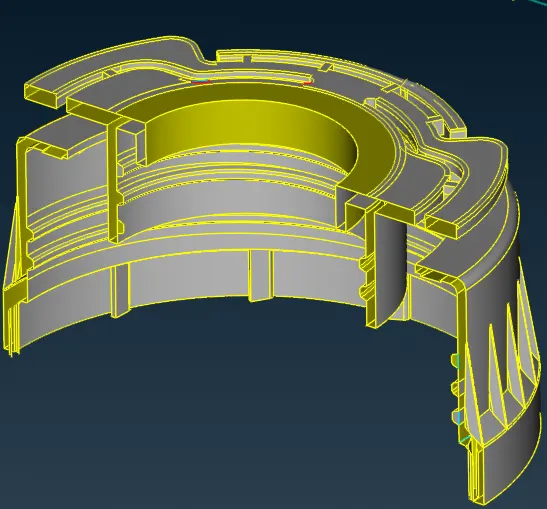
Fig: 03 Half-section of Bottel_cap
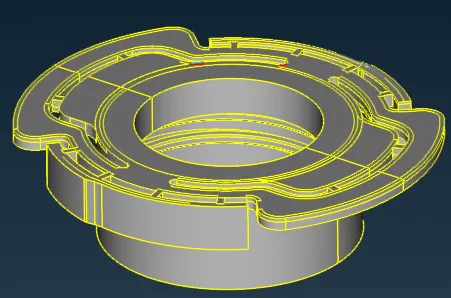
Fig: 04 Top part of Bottel_cap
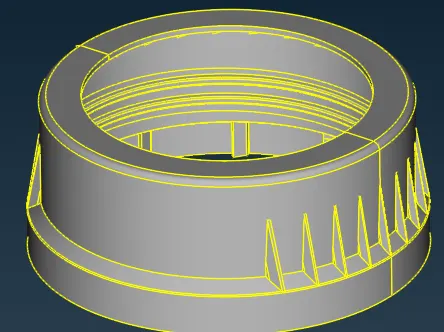
Fig: 05 Bottom part of Bottel_cap
- TOPO CLEANUP (defeaturing the midsurface): There are not many differences between 'Part' and 'Created mid-surface'. Let’s talk about Topo cleanup. In Topo operation we are suppressing unwanted cons in geometry without much affecting part’s feature and also some cut created to maintain feature and also for easiness of generating mesh.
- In this part there are many variations in thickness, So at first stage I will create a mid surface in one PID only. Then after meshing i will give a separate PID for each thickness.
- Top and Bottom part Mid - surface generated as per below with topo cleanup. Can Identify it with suppressed cons. Where red, yellow and orange cons represent Single cons, Double cons, Toggled cons respectively.
-
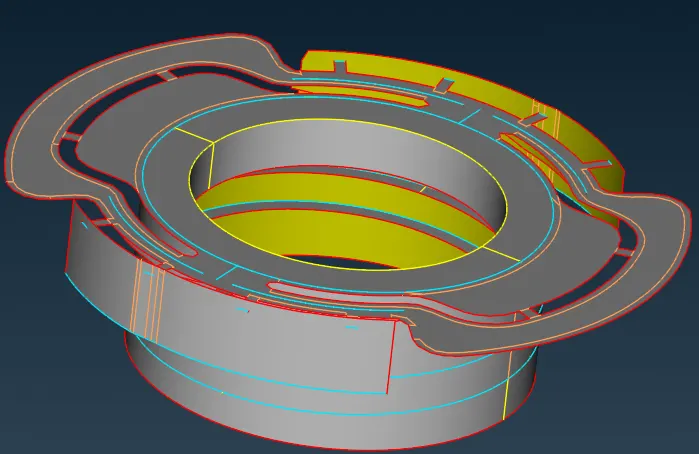
Fig: 06 Top mid-surface of Bottel_cap
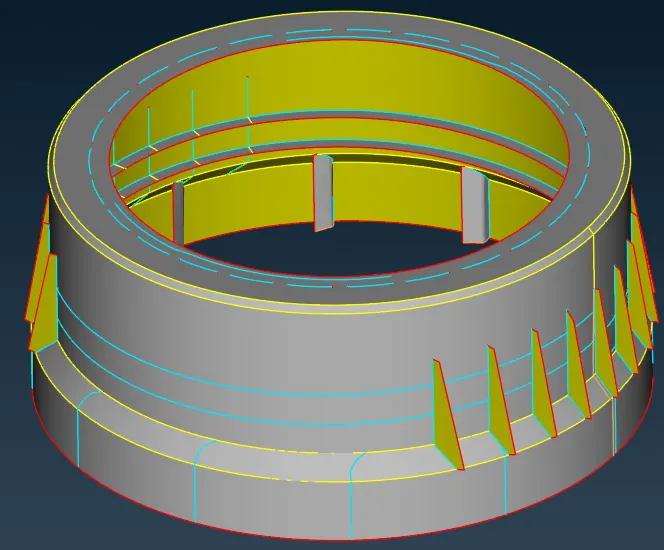
Fig: 07 Bottom mid-surface of Bottel_cap
As we know this whole part is a single component. So after generating the mid surface of both parts. And Hit a Topo button. Lets see how it looks in one as per below fig.
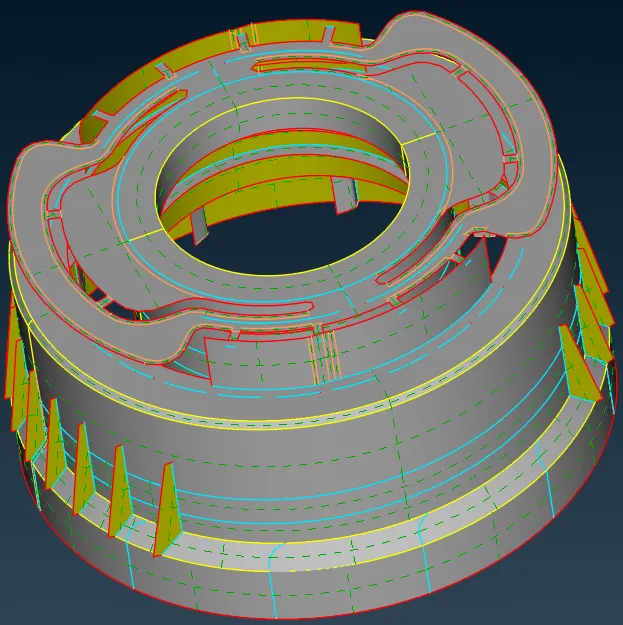
Fig: 08 Combining mid-surface of Bottel_cap
Now, its time to set Mesh Parameters & Quality Criteria as per given in the challenge.
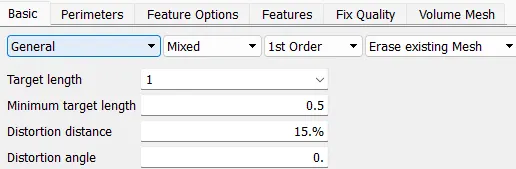
Fig: 09 Mesh Parameters Window
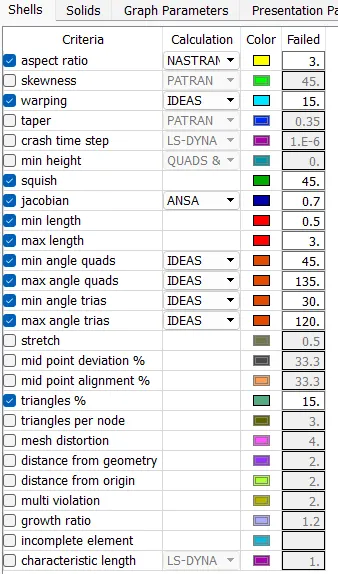
Fig: 10 Quality Criteria Window
Before generating a mesh, one more step needs to be followed. Set Element length to 1(Target length) for both ‘Perimeter’ and ‘Macros’ using 'Length' function.
And check whether the number of nodes at hole or slot perimeter is in even number, Otherwise maintain it using ‘Num +/-’ function and also remove unwanted hot points from perimeter using ‘Hot points > Delete’ option.
Now, we are ready to generate mesh in face. But first we have to enable visualization of ‘Quality Criteria’ by activating ‘Hidden’ drawing styles inside a menubar.( This flag activates the hidden mode. At this state, the mesh appears in hidden mode and the visible elements that exceed the selected quality criteria thresholds are colored accordingly).
Here we are using the ‘Best’ function (This function automatically meshes 'Macro Areas' using all alternative meshing algorithms and keeps only the mesh of highest quality according to QCHECK). Now mesh is generated but sometimes mesh flow is not good, rotating quads, opposite trias should be present. So, using the MESH function rearranging the mesh flow. Function like “Cut, Join, MV Surf, Smooth, Reshape, Reconstruct, Split, Swap etc.
Generated mesh as shown below,
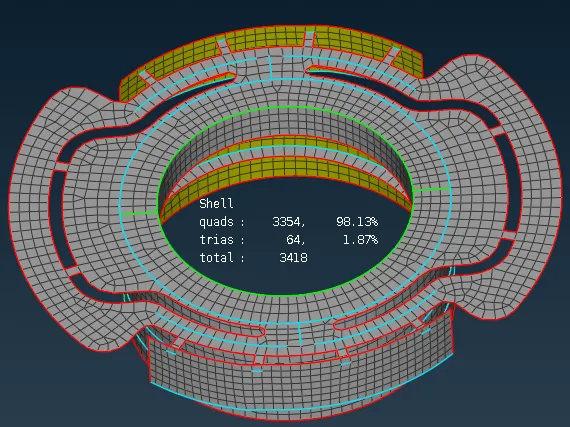
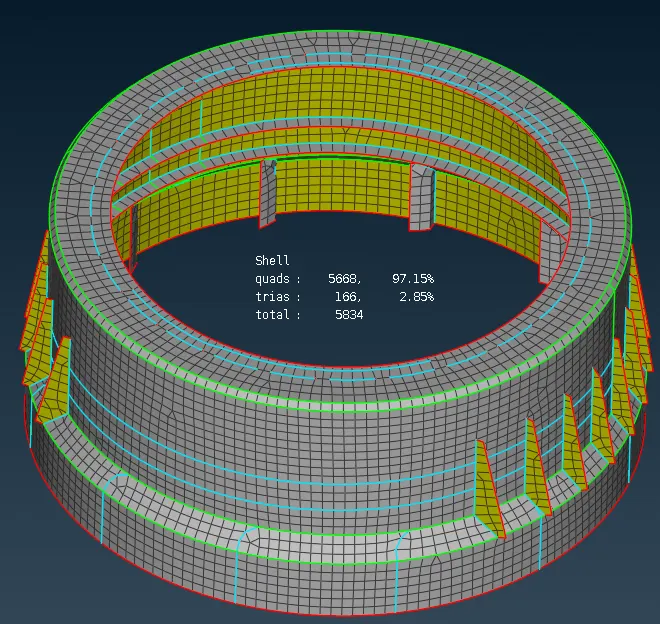
4. LEARNING OUTCOMES:
This ANSA challenge has a Plastic model. Difficulty I faced in this challenge was to generate mid-surface from a variable area. Like Ribs, thread, Stiffeners etc. Also I learn at some level how to keep control on complex parts while generating mid surfaces. And for multi thickness multi PIDs need to be generated and compare it with parent geometry.
5. CONCLUSION:
Finally the challenge is completed. This challenge is a practice model for me as a Plastic component. There are a total of 1 part with complex features. After this challenge, I’m able to do meshing for any shell object with as per given criteria. Some problems occur via generating mesh at triple cons area in the part, for that ignoring some area and correcting the remaining area with as per quality criteria.