Week - 4 - 2D meshing for Plastic components
BOTTLE CAP CHALLENGE
AIM:
- In this challenge the given model is Plastic Bottle Cap, we are going to create the 'FE model' for this component using the 'ANSA preprocessing tool'.
CHALLENGE EXPECTATION:
- Check for the geometrical errors and take the mid surface CAD model, and Mid surface has to be extracted.
- The extracted Mid surface has to be meshed with the proper Quality mesh flow under given quality criteria.
- PID and Thickness assignment has to be done for all the mid surfaces.
PROPERTIES OF THE COMPONENTS:
- Materials which is having less than or equal to 6mm can be meshed with 2D Meshing.
- In 2D Meshing, we can classify the materials into two types.
- Sheet Metal Component
- Plastic Component
- The material which is having Linear Thickness throughout the Body is known as 'Sheet metal'
- The material which is having Non Linear Thickness is 'Plastic Material'.
PROCEDURE:
- CAD SET UP
- CAD Geometry
- Model Clean Up
- CAD MODELING
- Meshing
- FINAL CHECK
- Maintaining proper Mesh
- Assigning Thickness to Mid.surface
PREPERATION OF MODEL FOR MESHING: (Part -1)
- I used to check the existing PID’s in the ‘Property Card', in this Bottle cap model there is only one PID was there.
Steps to be followed in Begining:
- Import the downloaded geometry using File manager and then we have to set 'Cons Resolution' for the parent geometry, It is present in (Mesh module/Perimeters Group/Length)
- Next step is Orient (Topo module/Faces group/Orient)
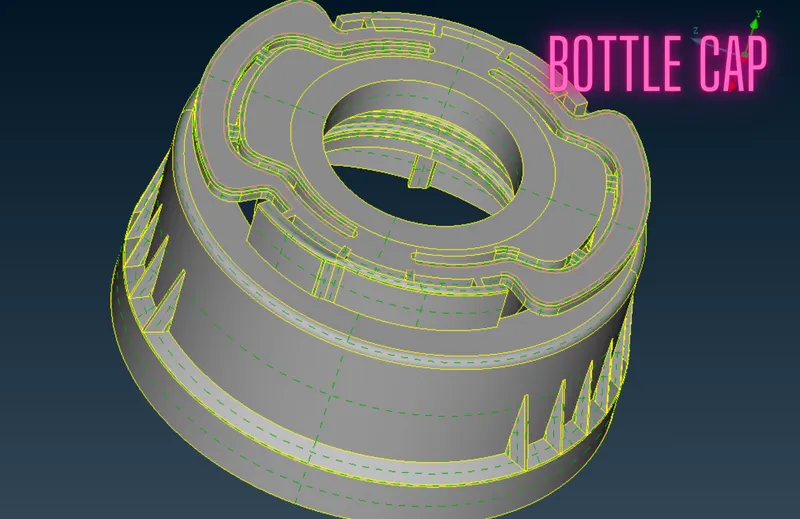
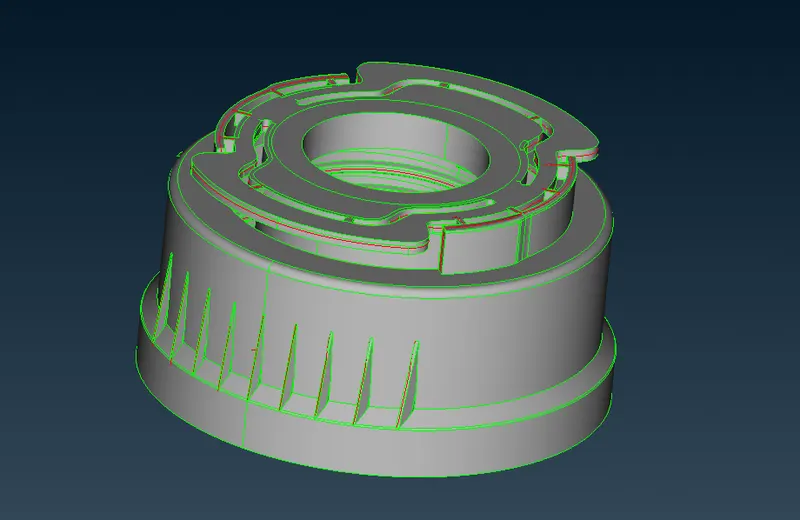
- This is our Bottle Cap model.
TOPOLOGY CLEAN UP: (Part - 2)
- Now it is time to Geometry Cleanup.
- Before start meshing Geometry Check is necessary, because in Original CAD geometry there might be some errors in cons.
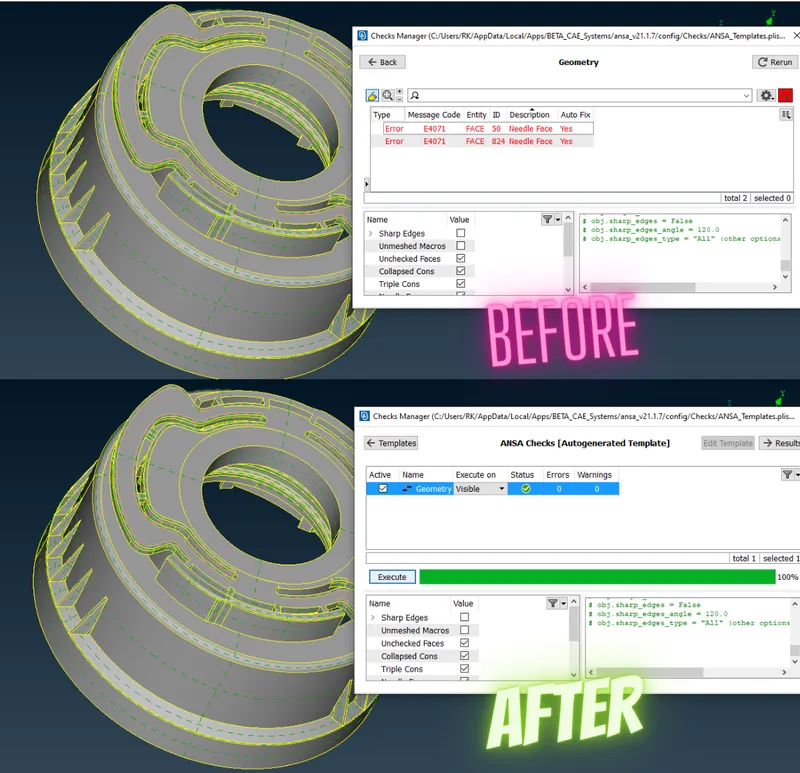
- In our 'Bottle Cap Model' only two errors were present when perform the geomentry check.
- We can find the option (Tools/Checks/Geometry) here.
- In ANSA there is an option called 'AUTO FIX', i used this function to fix my errors, because it saves more time.
THICKNESS CHECK
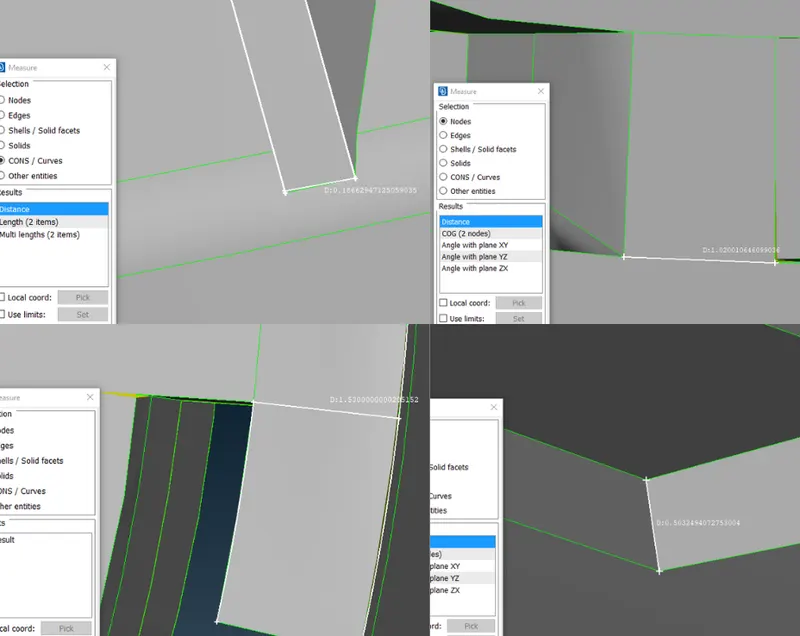
- We can see it clearly this BOTTLE CAP model has Non uniform thickness so we can consider this is Plastic Component.
MID SURFACE CREATION: (Part - 3)
- We have prepared geometry. Next step is creating the mid-planes
There are Two methods to create Mid plane
- Manual Method
- Automatic Method
- In this model i used the Manual mid.surface to create the Mid Surface, using the Option (Topo Module/Faces Group/Mid.surface/Casting)
- The Reason I go with the Auto method because this model has different thickness in various areas, so the mid surface extraction save my time a Bit in auto method
- On the 'Single middle mouse button' confirmation the mid surface creation is done easily.
BEFORE CREATING MIDSURFACE
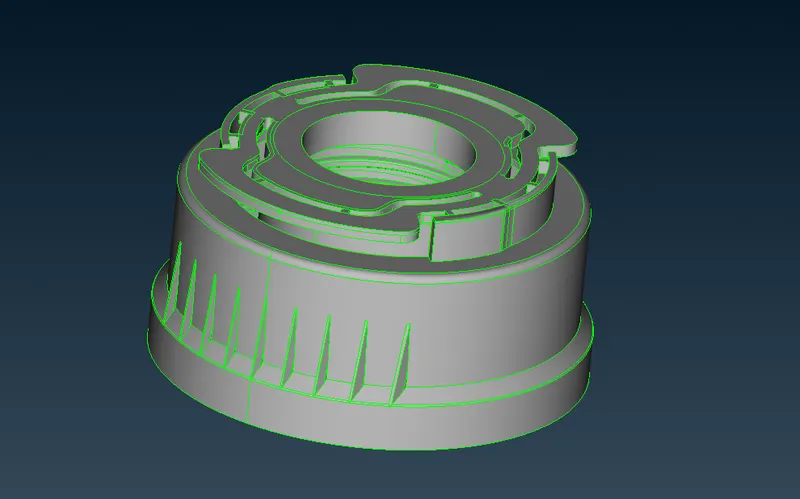
STEPS TO FOLLOW BEFORE MESHING:
- We have set the Quality criteria and mesh Parameters properly as per the given requirement, because when we use the 'CASTING' option, the mesh also be Generated automatically.
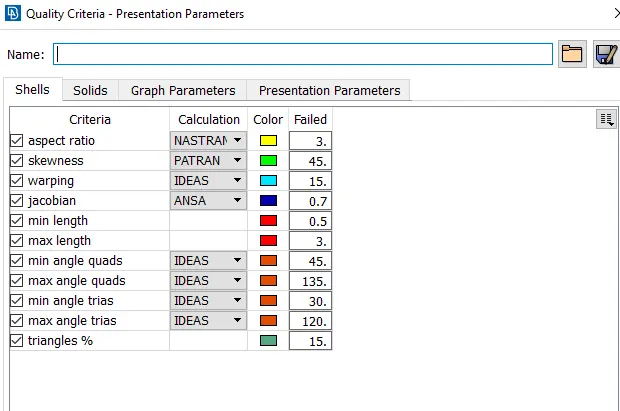
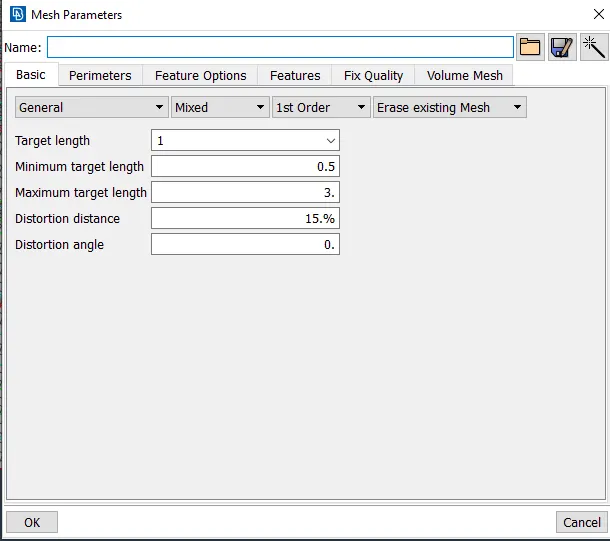
AFTER CREATING MIDSURFACE
- The Mid Surface is Created by 'CASTING' option so the PID has assigned to it automatically.
- Here also it saves our efforts to creating it by manual.
EXTRACTED MID SURFACE PID
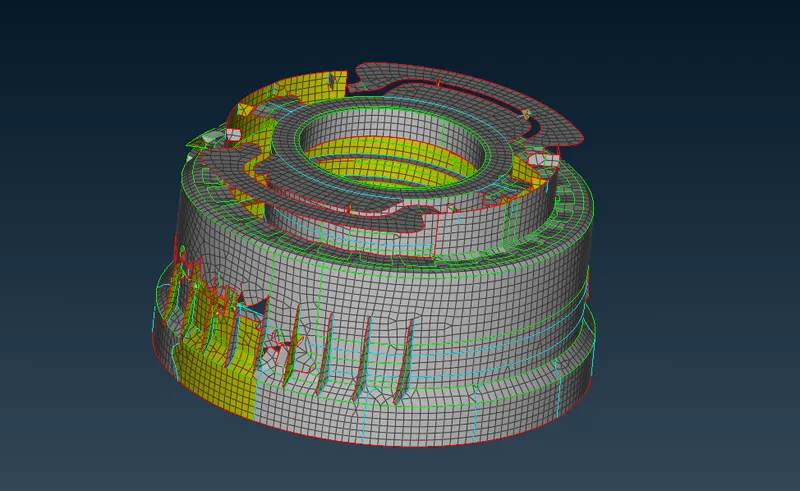
- As we can clearly see this mid.surface that created by the 'CASTING' is not that much good.
- Some areas are not properly aligned compare to the 'PARENT GEOMETRY'
- So it is our responsibility to clean it up and make it proper.
HERE ARE THE SOME EXAMPLES OF DISTORTED AREAS OF OUR CASTING RESULT:
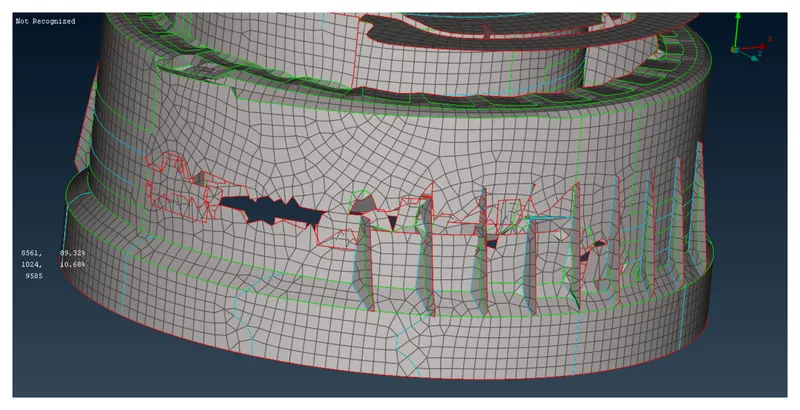
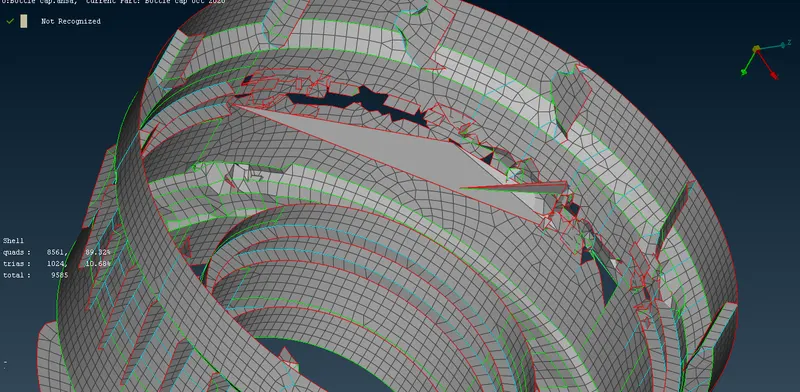
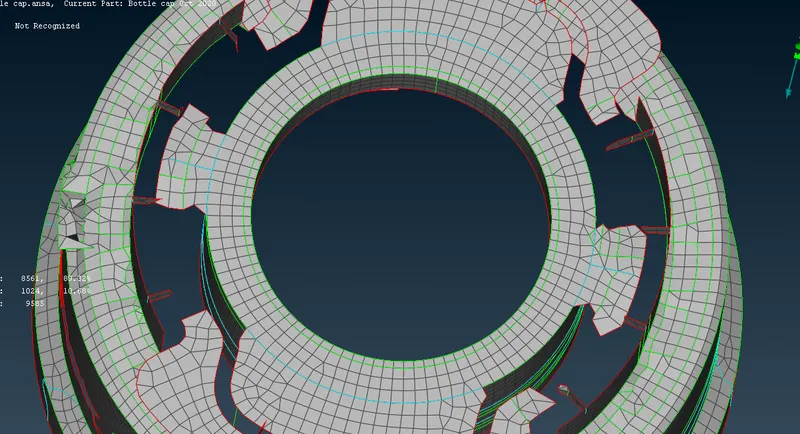
- These areas can not capture during CASTING operation, here some features and some fillet areas not properly created.
- Now it is time for cleaning with the help of the ALIGN MANAGER.
ALIGN MANAGER FUNCTIONS:
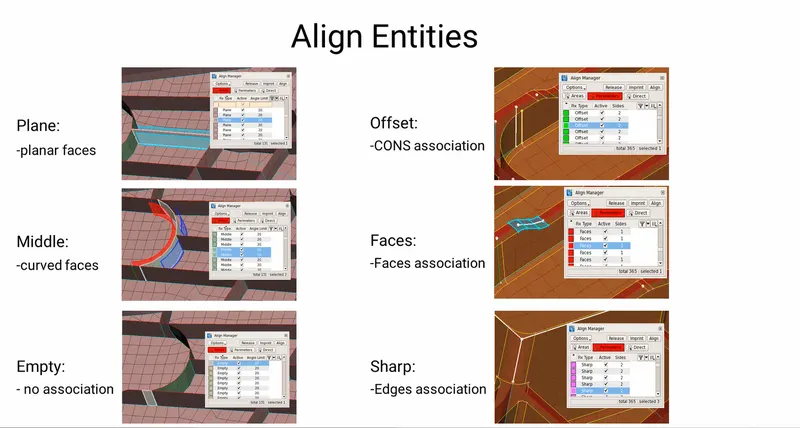
- These are the main aeas of Align manager.
MISSED TEETH CAPTURING
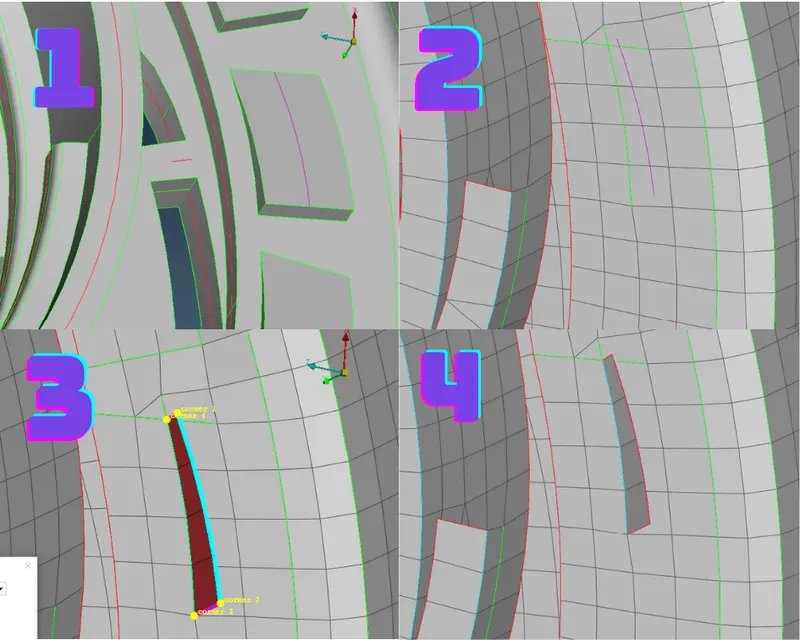
- To Capture this feature I use the 'Middle curve' option to create it as a Reference of Parent Geometry. (Topo module/Curves Group/Middle)
Steps showed in the above Image
- Step 1- Middle Curve Creation using middle curve option
- Step 2- Project the curve in the middle surface using (Mesh module/Shell mesh group/Project)
- Step 3- Fill option can be used to create a new surface with help of the projected line and the middle curve
- Step 4- The Newly created shells can see, with the help of Align Manager the definition has given.
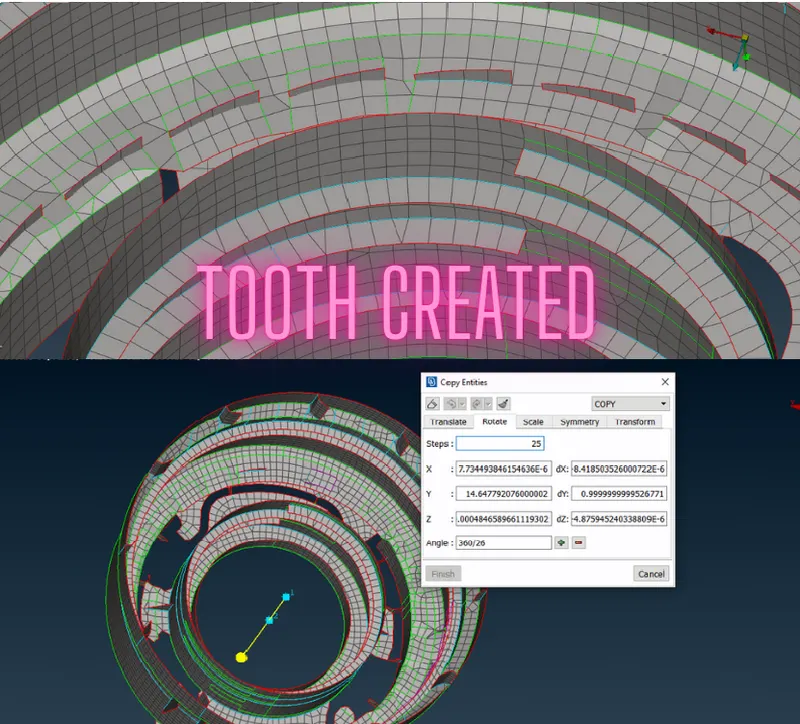
- After creating the one teeth the Transfrom/Rotate option used to capture the other features as well.
- In total 26 tooth has been created.
FINAL CHECKING OF MESH: (Part - 4)
- Once we done with the clean up and corrections of the 'CASTING RESULT', need to work on the OFF ELEMENTS and the MESH FLOW.
- Some areas are not meet the 'Quality Criteria', where the areas Triple Cons closely present in the model, Elements has failed .
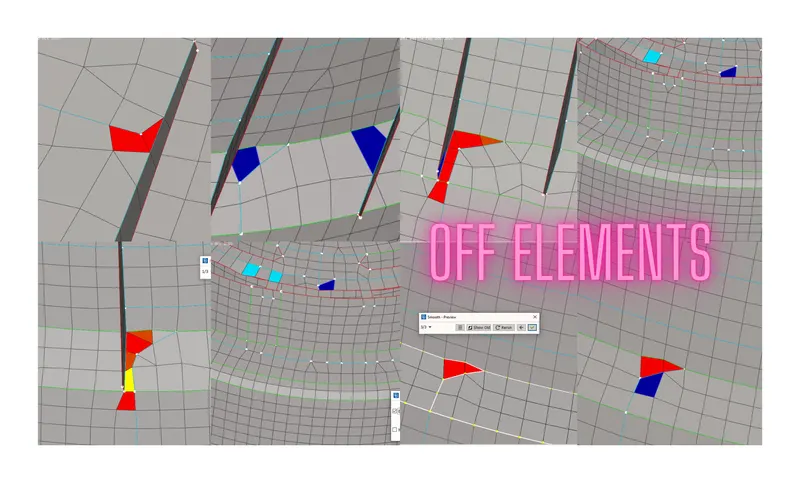
- In the Above picture, the critical areas are mostly off elements were present.
- This was the challenging task for me, I managed to get the better result as much as I can.
HERE IS THE BEFORE & AFTER RESULT OF OFF ELEMENTS:
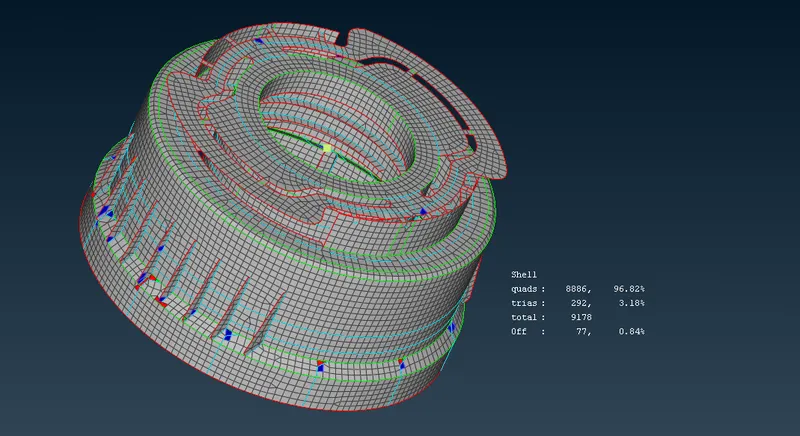
- This is the data in the above picture that i receive after I corrected the Distorted casting Result.
- In this window the Off elements percentage was high.
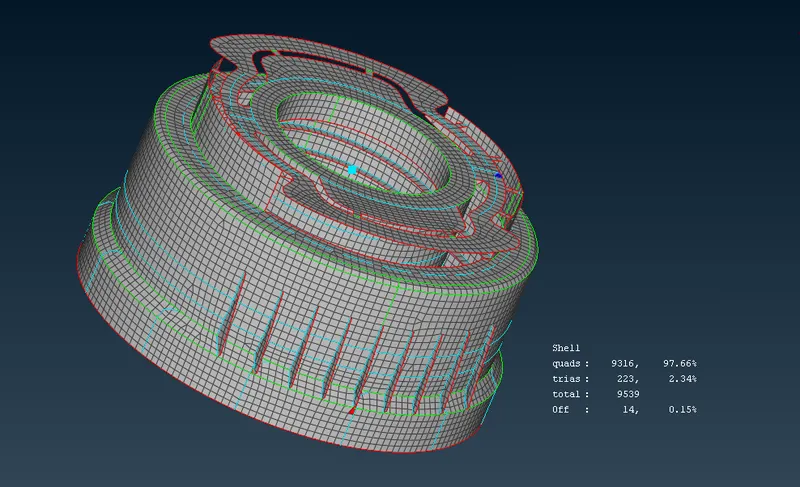
- After dealing with Off elements and mesh flow, this is the Final outcome of the Bottle Cap.
ASSIGNING THICKNESS TO THE MID SURFACE:
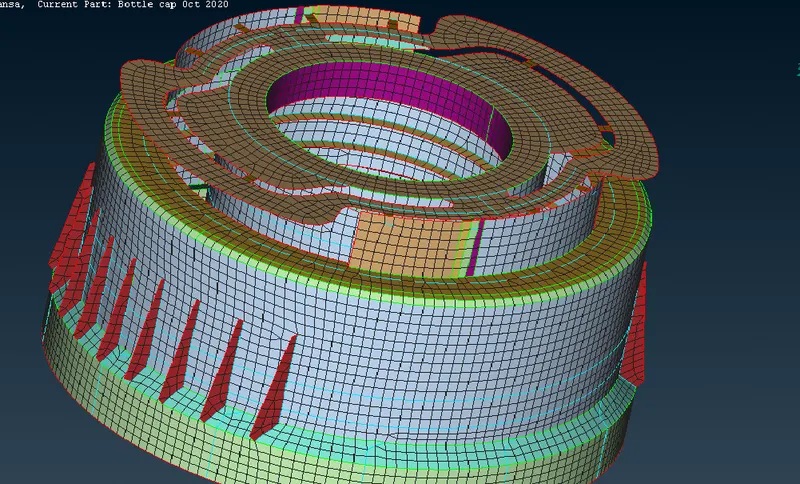
- Thickness has been assigned to the different thickness areas individually, using (Mesh module/Grids/Thickness/Convert)
RESULT OUTCOMES:
- Finally achived Trias with 2.34% and OFF Elements with 0.14%
- Good Mesh flow, no trias touching on the Circle and no trias touching the Free end.
- No Rottating Quads keep maintained, No Opposite Trias are present in the FE model.
- No any other Feature Lines missed while meshing.
- Missed Ribs, Thread and Teeth has been captured properly as per the Parent Geometry Reference.
CONCLUSTION AND LEARNING OUTPUTS:
- On the conclustion of this Bottle cap model, it was a Quiet a challenging one, when completing this model, I learned new commands and how they are helpful to achieve good meshing.
- The new method of Mid surface/Casting option learned in this challenge.
- It gives the confidence to meet any complicated Models can be easily face it.
- Especially the Align manager and 'Mesh module/Grids/Align options' are the interesting things to learn from this challenge.