Week 4-1D Element Creation Challenge
Aim:- Aim of this challenge is to create mid surface of given component and then assign the required 1D element on the given location in Hypermesh.
Procedure:- To start working with the challenge, first we import the igs file of the 3D geometry in hypermesh using import geometry command.
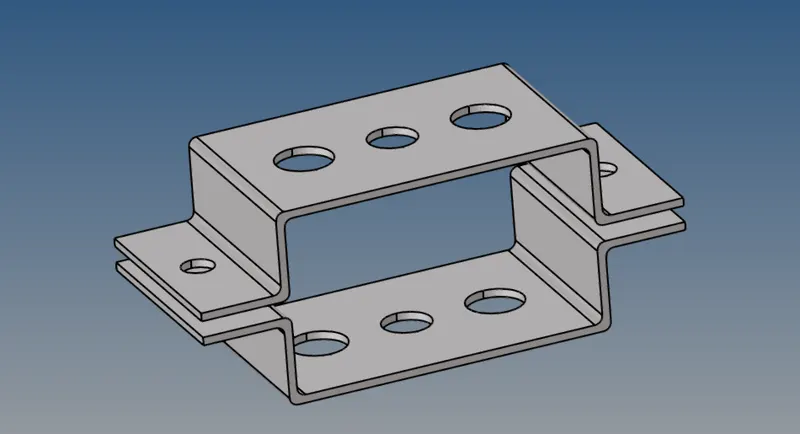
Fig 1: Showing the imported geometry in the hypermesh
After importing the geometry in the hypermesh, we will extract the mid surface of the model, using command available in surfaces -> midsurface. To properly extract the mid surface of the model, we have used skin offset command.
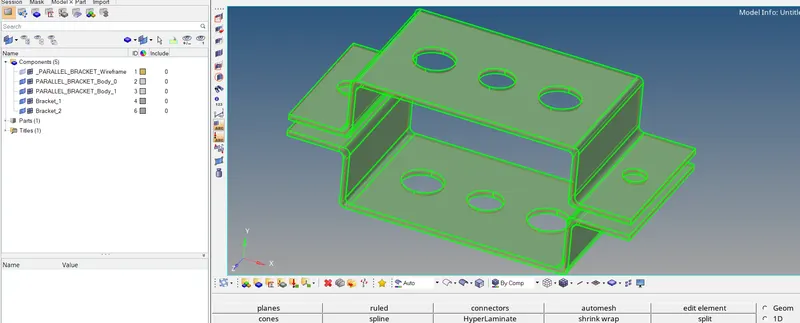
Fig: 2 showing the extracted mid surface from the CAD geometry
Now, we create a new material for this part. In this example we have named is MS.
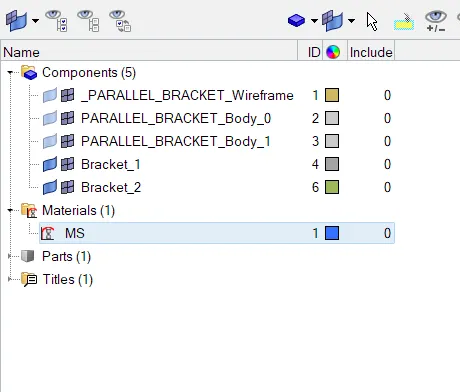
Fig 3: Showing newly created material property named MS
Now, to assign the thickness to the generated mid surfaces, we create a new property and name it as 'bracket_surf_thickness'. We assign card image as PSHELL, since it is a 2D representation of the 3D body. And in the thickness value we give it as 5mm as the orignal thickness of the 3D part. In material, we assign the previously created material property.
Now after creating this propery, we assign this to the midsurface created of both the brackets.
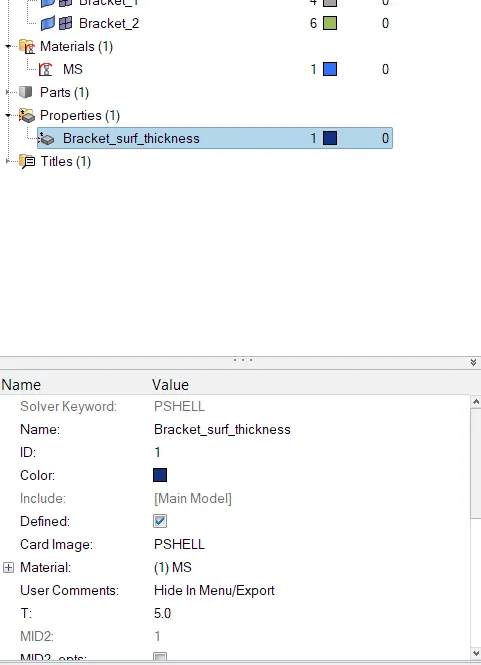
Fig 4: Showing new PSHELL property and its assigned thickness value.
Now, we procedd towards, meshing. To do proper meshing of the surfaces, firstly we perform the auto-cleanup. This will create the washer split areas automatically near the holes. This will ensure good mesh flow across the holes area.
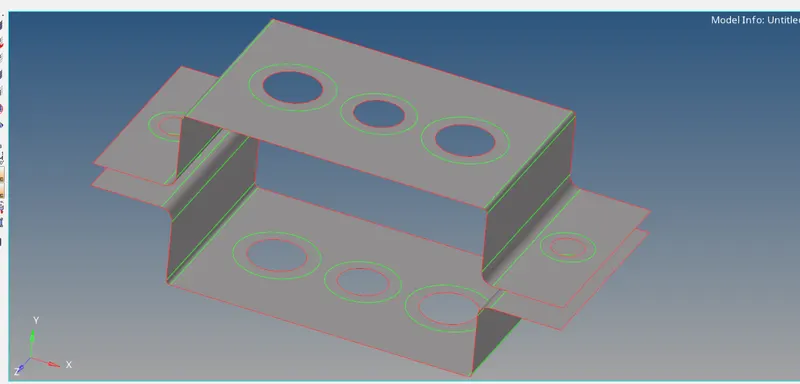
Fig 5: Showing the created washer split areas, after performing auto cleanup operation.
Now, automesh command is used to mesh the surfaces with 5mm element length, having mostly quad elements.
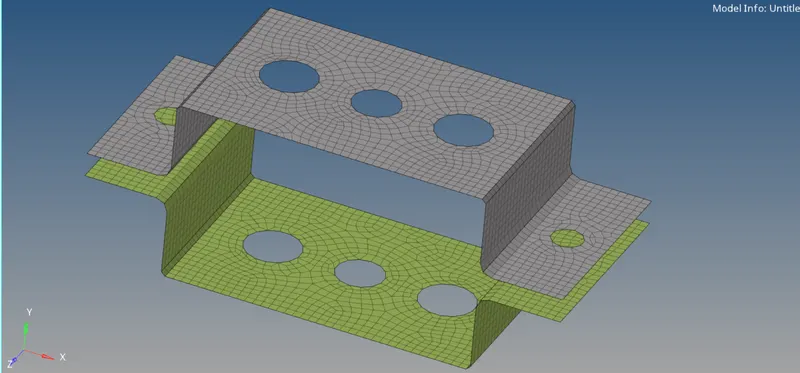
Fig 6: Showing created mesh on the surfaces using auto mesh command.
Now, to assign the required Rod, beam and bar element, we create the neccessary rbe2 and rbe3 elements at the required holes a, b and c.
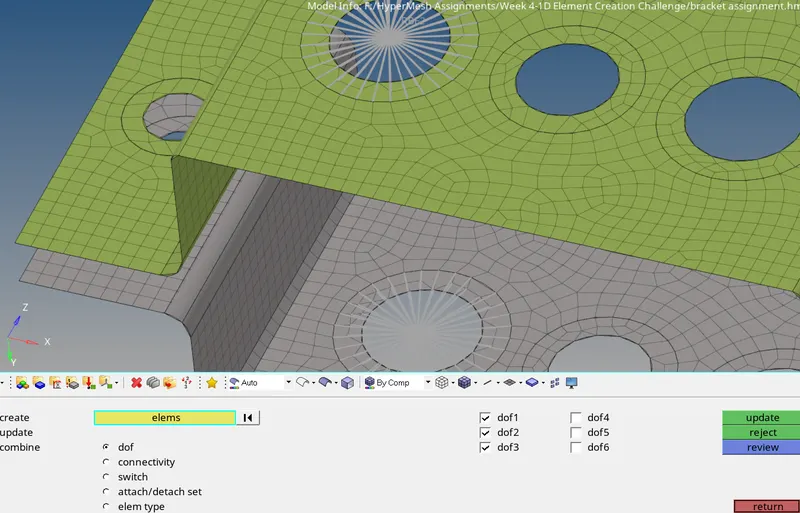
Fig 7: Showing created rbe2 element having only translation dof constrained.
Now to create the rod element between the master node of rbe2 clusters element above created, rods element creation option is selected. After giving all the required inputs crod element is created between the selected nodes.
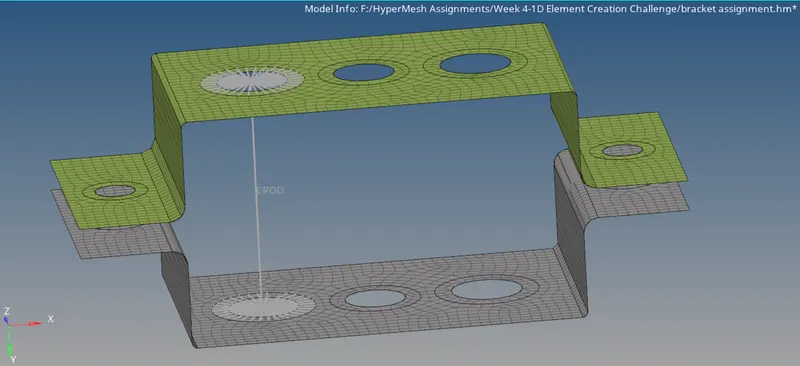
Fig 8: Showing created CROD element at position A
Similarly, beam and bar elements are created at required positions.
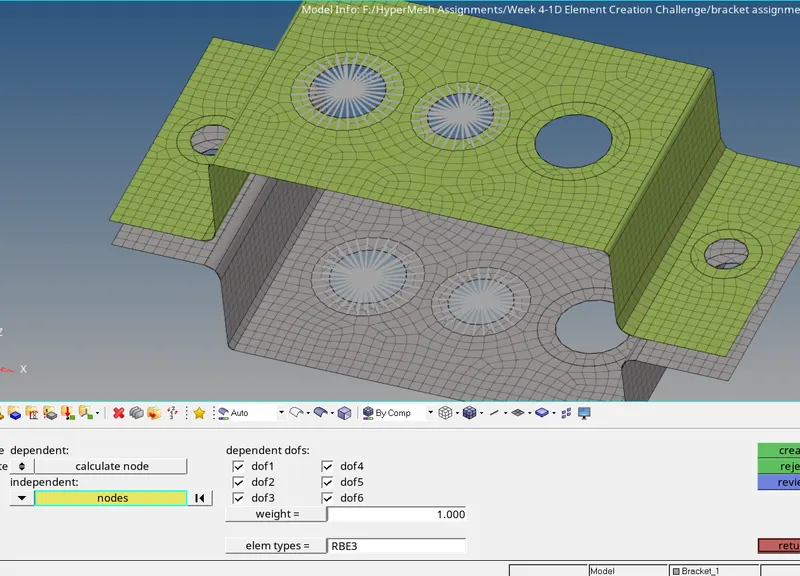
Fig 9: Showing rbe3 link with all dof constrained at position B
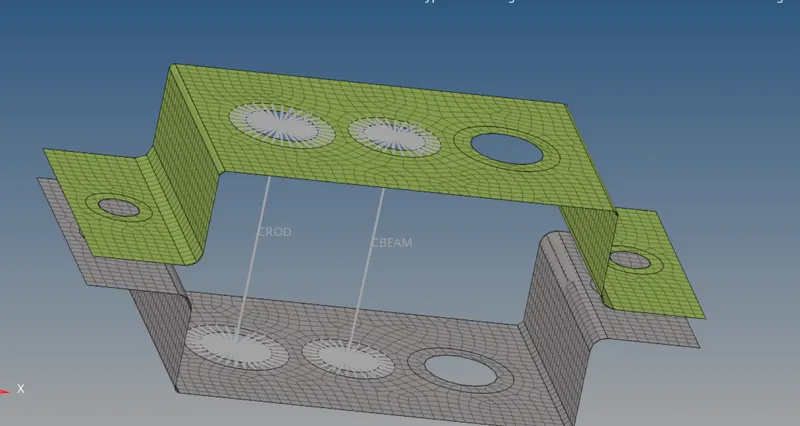
Fig 10: Showing CBEAM element at postion B
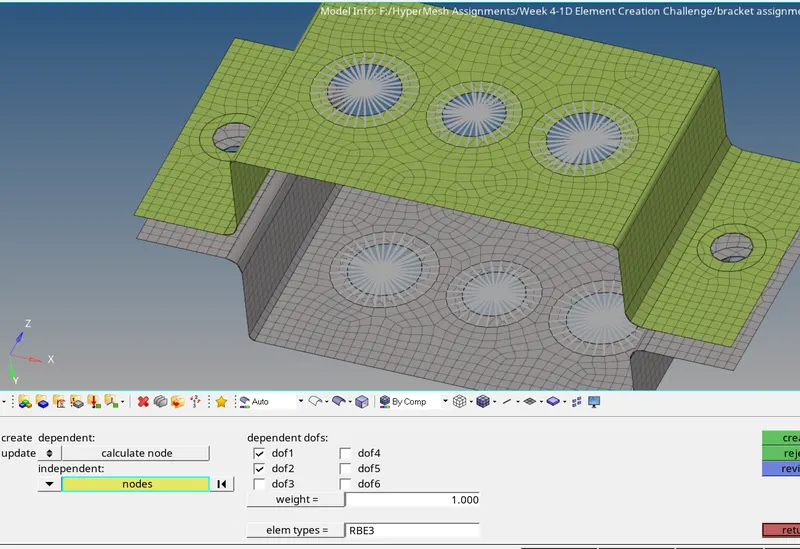
Fig 11: Showing rbe3 element with x and y dof only constrained at point C
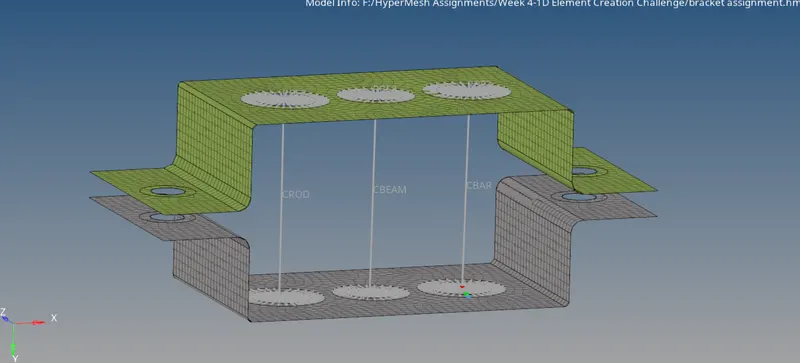
Fig 12: Showing CBAR element at position C
Now, to assign the cross-section properties, firstly we need to create the required cross-section using Hyperbeam command.
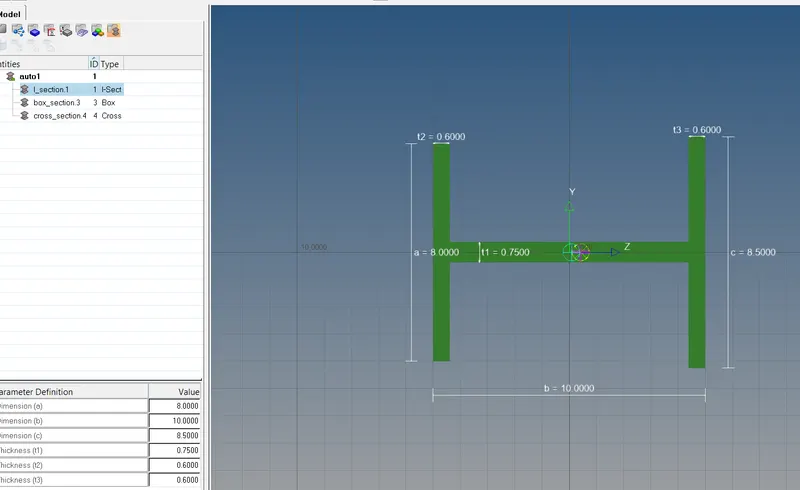
Fig 13: Showing created I section
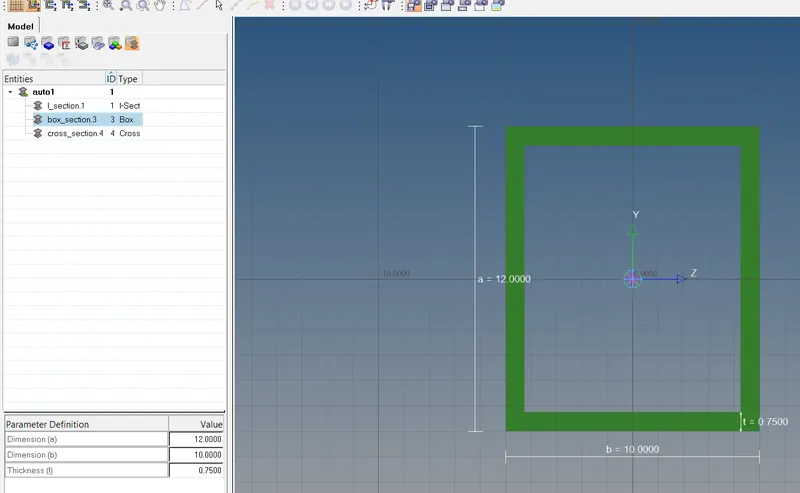
Fig 14: Showing created box section
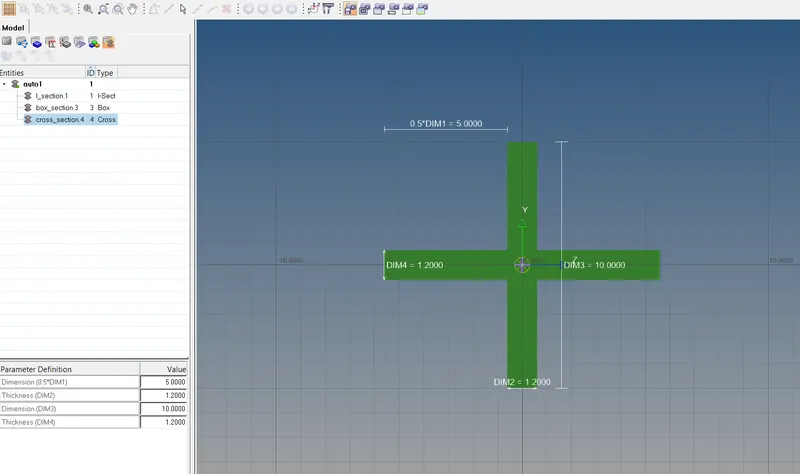
Fig 15: Showing X section
Now we create the three new properties for all the above created cross section, named rod, beam and bar: and assign the required crossection to them.
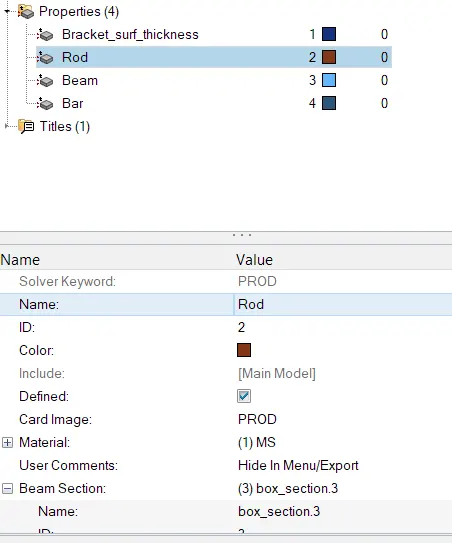
Fig 16: Showing new properties for above created cross-section
Now, required cross-section is assigned to the CROD, CBEAM and CBAR element through update element command.
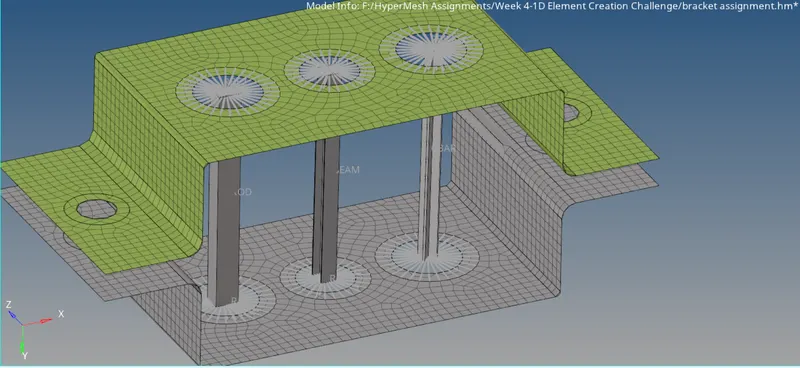
Fig 17: Showing applied crossection to the elements.
Now to assign the mass element at position d and e, rbe2 element cluster is created, and CMASS property with 10 unit magnitude is asigned to them.
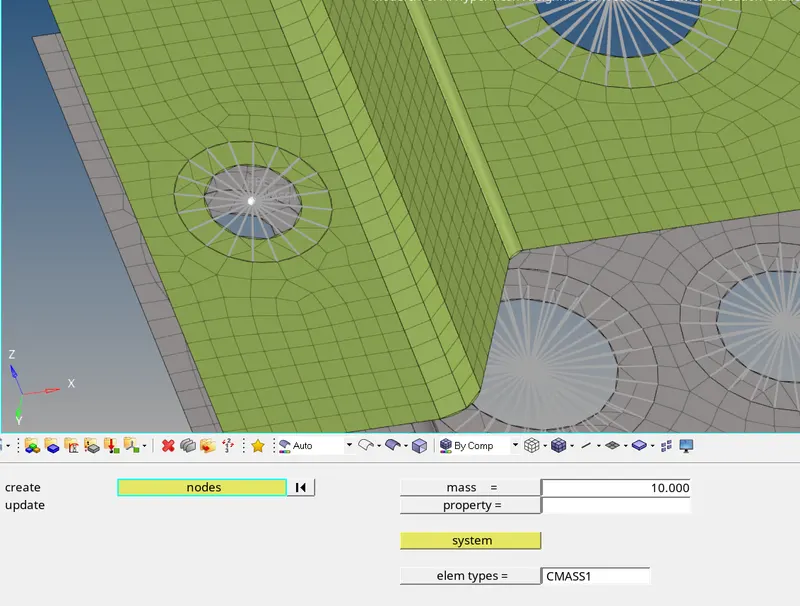
Fig 18: Showing assigned mass element CMASS1 at postion D
Now to attach the spring element, rbe2 cluster is created at bottom plate holes also and CELAS1 is created between the master nodes of holes at d, e and f.
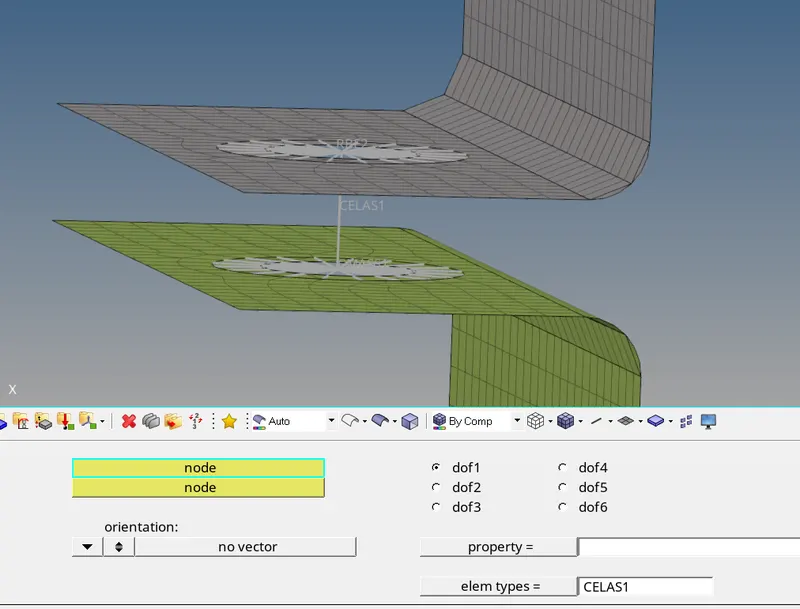
Fig 19: Showing created CELAS1 element
Results and Conclusion: In this challenge a 2d mesh of sheet metal bracket is created and then at the different holes of bracket different types of 1D elements are created. Required crossection is assigne dto the elements and mass is also added at some points in the model.
The final model image after completing all the objectives of this challenge is shown below.
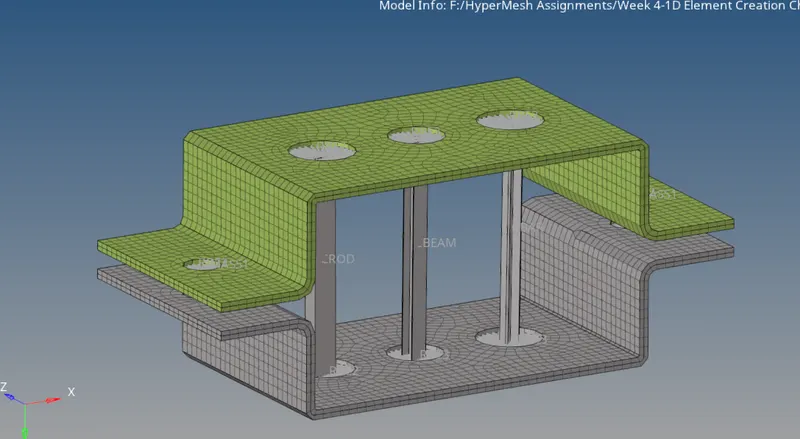
Fig 20: Showing complete model image with mesh and all created elements.