1D Element Creation Challenge
Aim:
To create the 1D Element on the given model of Parallel Bracket following given parameters and mesh the component.
Objective:
- Mesh the Given component with the Size of 5 Units.
- Create 1D elements on the following component with given cross-section and DOF
a. Rod element:- Translational DOF should be Constrained with RBE2 link
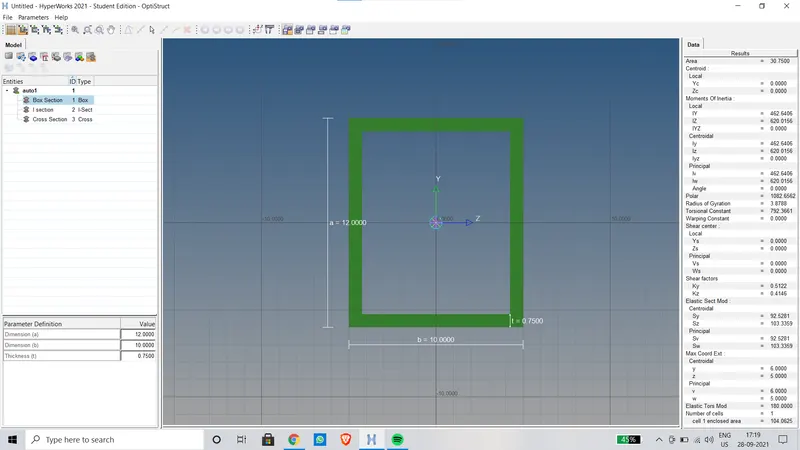
Cross-Section: BOX-
- Dimension a= 12 mm
- Dimension b=10 mm
- Thickness t= 0.75 mm
b. Beam element:- All DOF should be constrained with RBE3 link
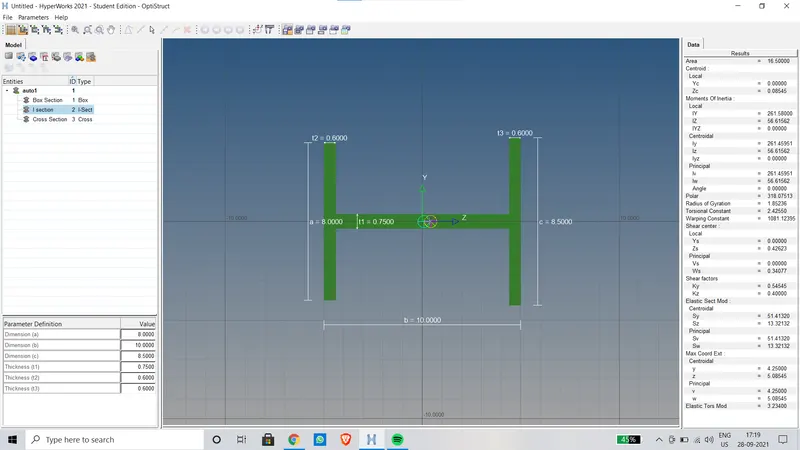
Cross-Section: I Section-
- Dimension (a)= 8 mm
- Dimension (b)= 10 mm
- Dimension (c)= 8.5 mm
- Thickness (t1)= 0.75 mm
- Thickness (t2)= .6 mm
- Thickness (t3) = .6 mm
c. Bar element:- Constrain only x and y DOFs With RBE3 link
Cross-section: X section-
- Dimension DIM1= 5 mm
- Thickness DIM2= 1.2 mm
- Dimension DIM3= 10 mm
- Thickness DIM4= 1.2mm
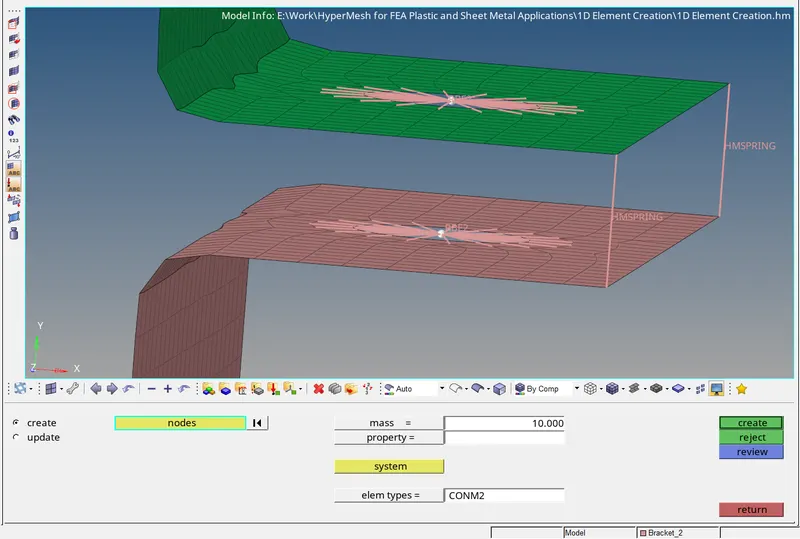
d & e:- Apply the mass of magnitude 10 with the RBE2 link
- Join the two components with Spring elements
Procedure:
- First, we need to import the given model for that go to the import geometry option and select the file and click import.
- Next, the model has Two surfaces and one wireframe as we can see below image;
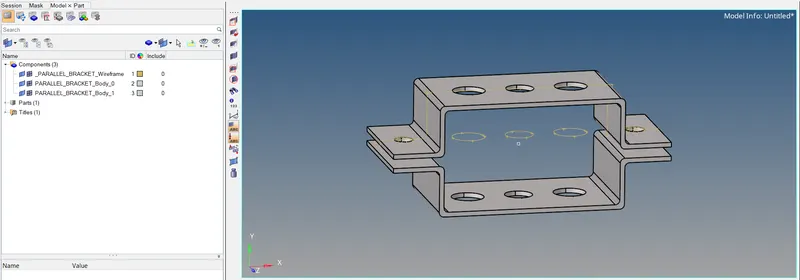
- After that, we need to find mid surfaces of the model, Go to Geometry>midsurface and choose the individual model to get a separate midsurface.
- The mid-surface modeling process relies on an accurate solid model as the starting point. Midsurface modeling is best suited to thin solids or thin-walled solids where wall thickness is constant or where reasonable approximations of the wall thickness at each point can be made easily. You can apply midsurface modeling to any solid cell within a model; you need not apply it to the entire model. If you apply midsurface modeling to only a portion of a solid model, CAE automatically creates shell-to-solid coupling constraints to couple the motion of the midsurface shell edges to that of the remaining solid model faces. Shell-to-solid coupling constraints will not be created if the angle between the shell surface and the solid face deviates significantly from 90°.
- Before going to mesh the part we need to give a washer split on the holes to get smooth mesh on holes. Here, We give 5 units offset value on the 'washersplit' command.
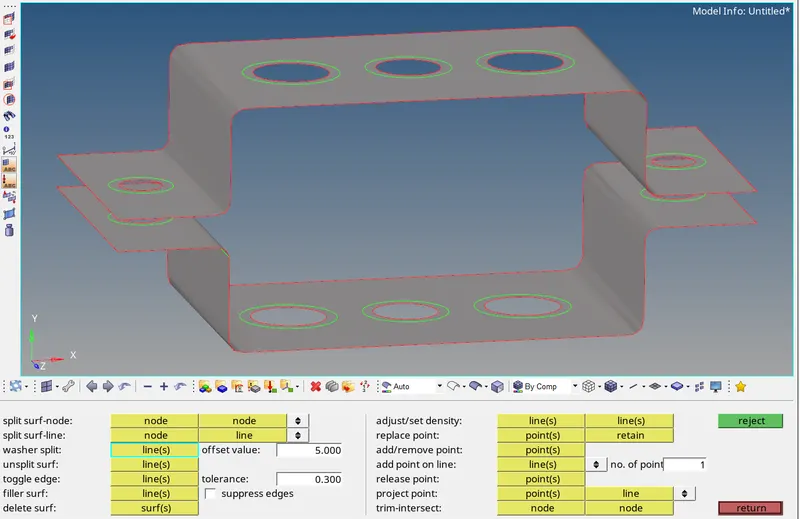
- Now, We can use the 'automesh' command which is in a 2D element with an element size of 5 units. After meshing adjust the size of the nodes on the holes and make it similar to get a perfect smooth mesh.
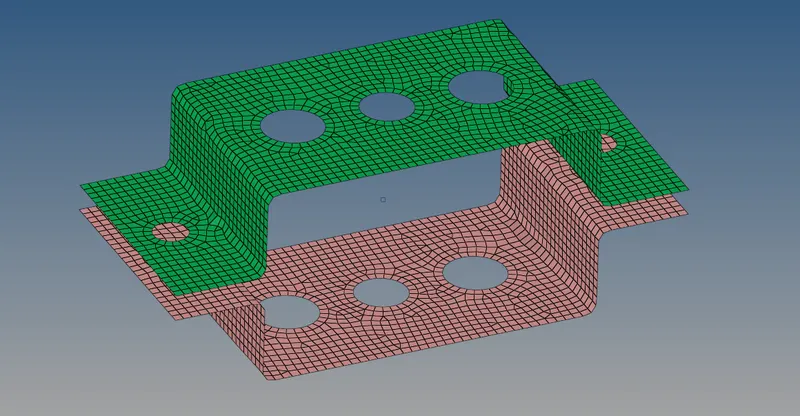
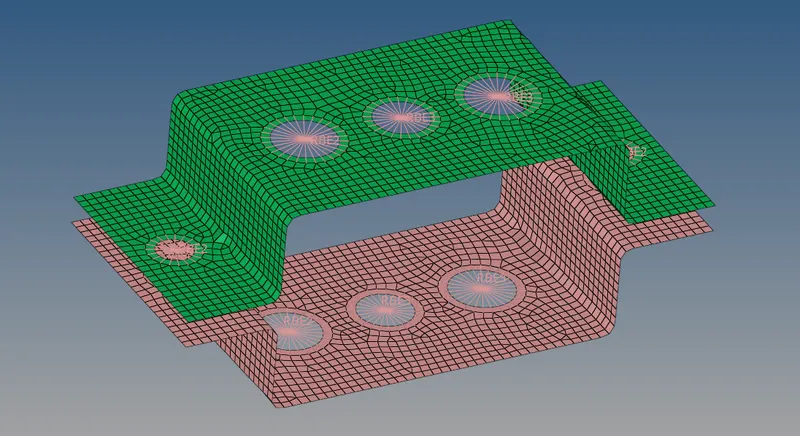
- After meshing the component I need to create the 1D elements. So I created the Rbe2 and Rbe3 elements around the holes of the plates.
- First creating the Rbe2 elements on Hole(a) which have all translational degrees of freedom constrained. So for that, I will select the rigids under the 1D section.
- Next, I will create the Rbe3 elements with all the degrees of freedom constrained on Hole(b).
- Then for Hole(c) also I will create the Rbe3 elements with constraints in only the X and Y-direction.
- Similarly created on another Bottom part.
- Now I have created Rbe2 elements for the side holes also following the same procedure as I did for the other holes. The elements are shown below and I have also applied the masses to the nodes as well by selecting the masses option under the 1D section.
- I have created the beam element by selecting the bars under the 1D section and then selecting the element type as CBEAM.
- After that I have to create the 1D CROD element so again under the 1D section, I will go to rods and select the nodes and will create the element.
- Then for this, I have to create the CBAR element so I will select the bar under the 1D section and create it.
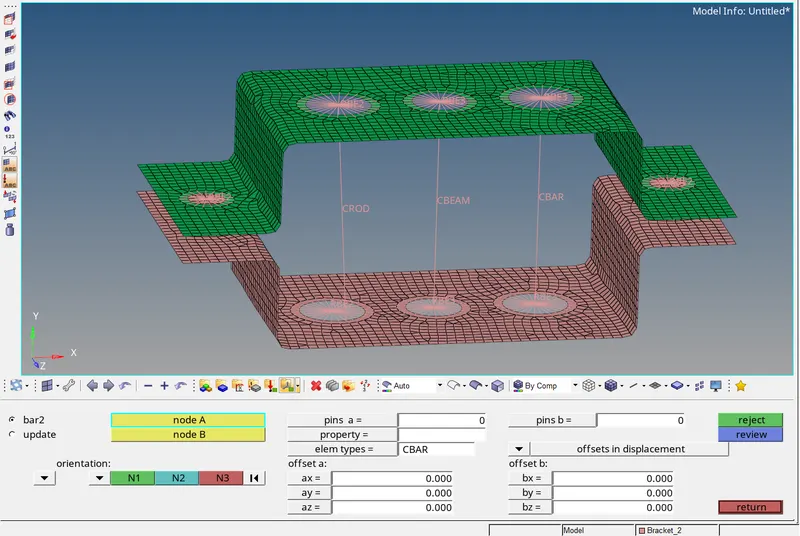
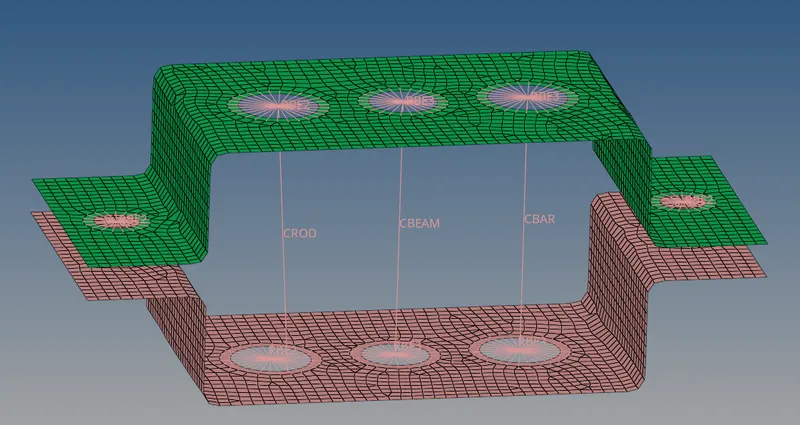
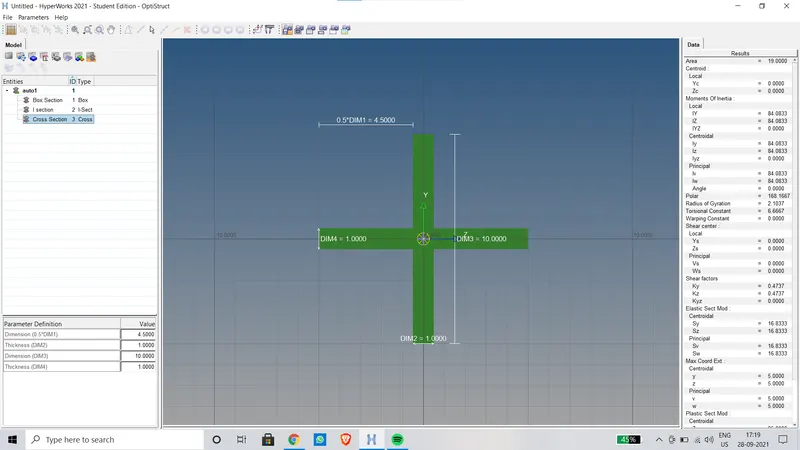
- Then I will define a cross-section for all these elements that I created. For defining the cross-section I will go to the hyperbeam and then the standard section and finally define the section.
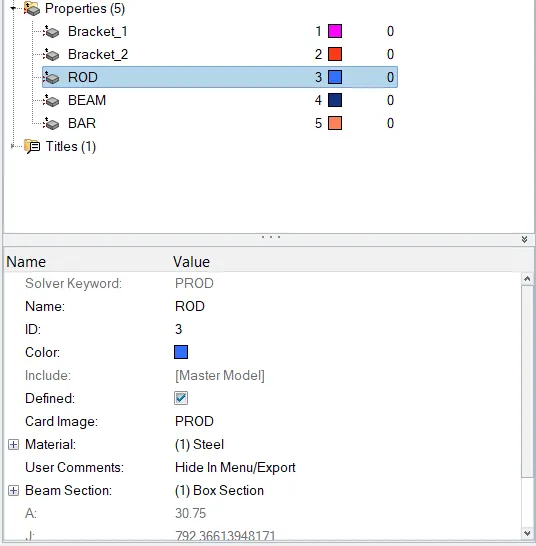
- For the rod element the cross-section will be a Box section as shown below:
- For the beam element the cross-section will be standard I section shown below:
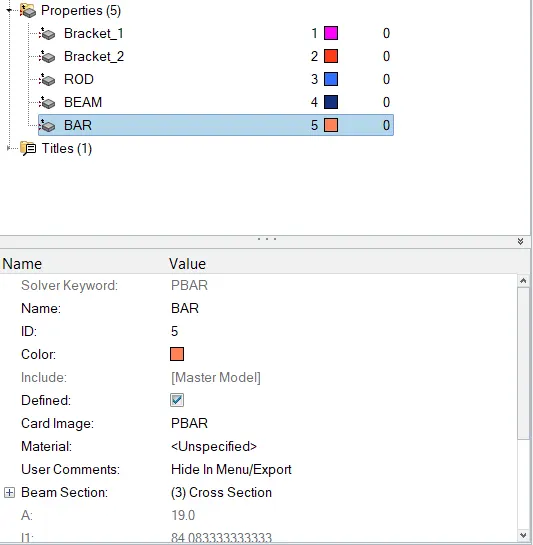
- For the bar element the cross-section will be cross(X) section shown below:
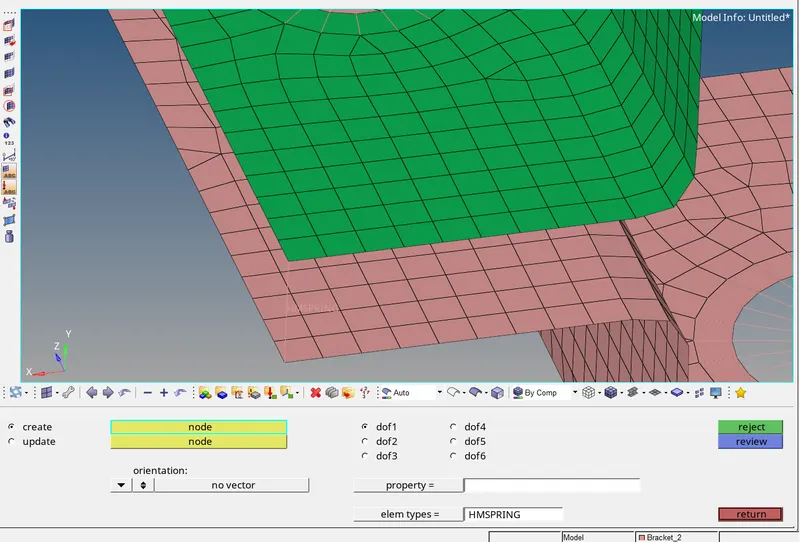
- Then at last I will join two components with spring elements. So for joining the plates under the 1D section I will select the springs and then change the element type to HMspring then select the nodes and join them. So here both the plates will be joined at the four corners.
At last, Apply the mass of magnitude 10 with the RBE2 link on side Holes(d&e).
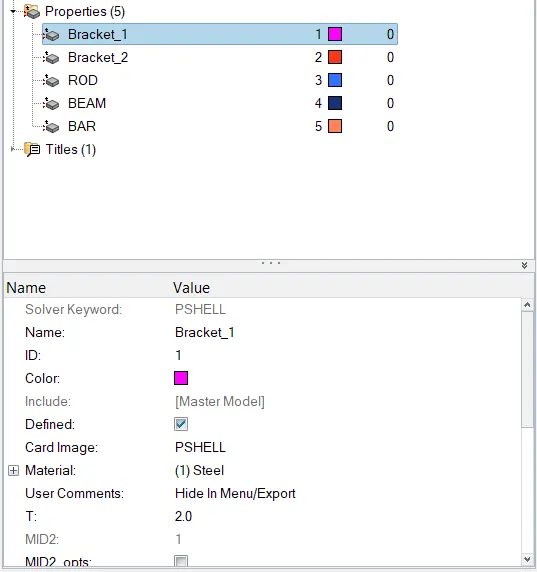
- Here I have also created the properties for both the brackets and for BEAM, BAR, and ROD, and after updating their properties are shown below:
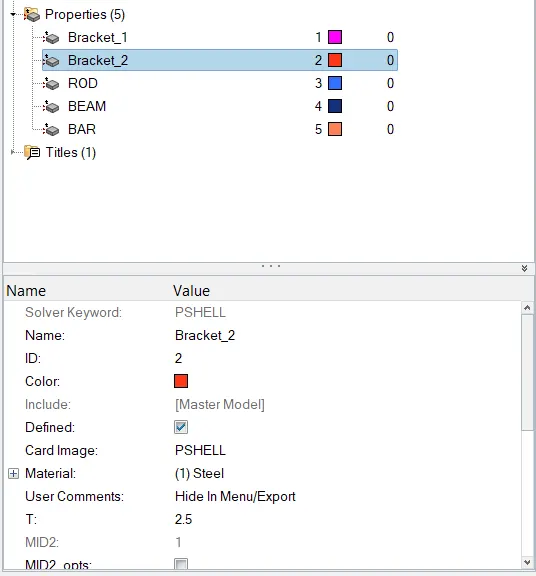
ROD:
BEAM: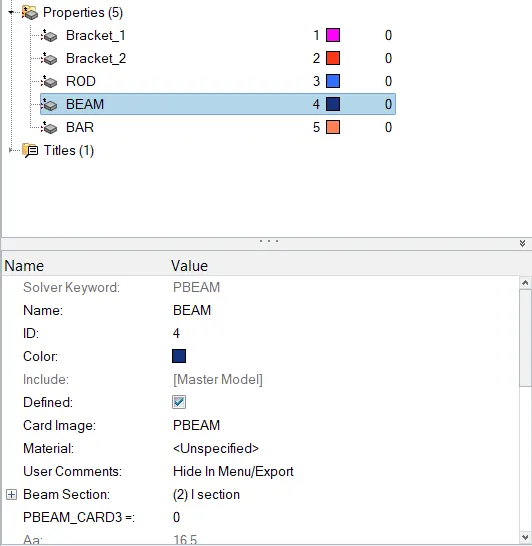
BAR:
Final Model:
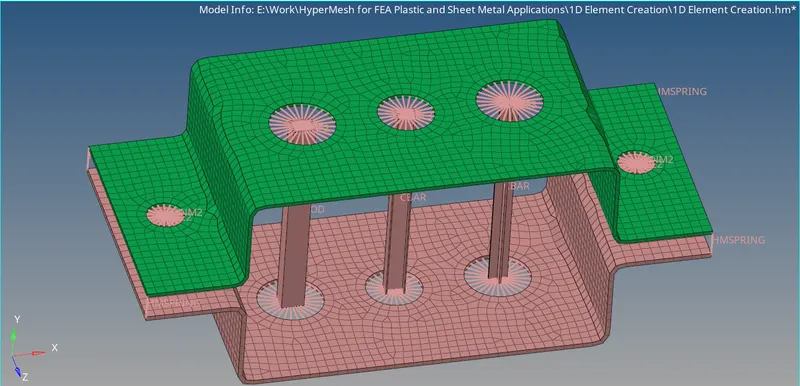
Results: The final model of the parallel bracket is shown below:
The 1-D detailed element representation:
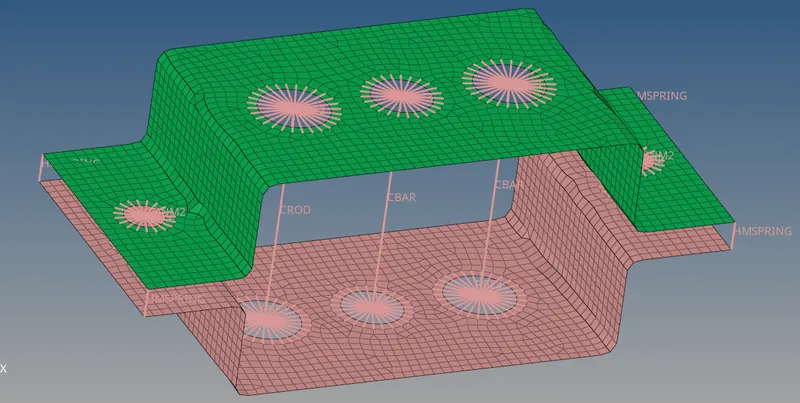
The 2-D detailed element representation:
The thickness given for the Upper Bracket is 2mm and the Lower Bracket is 2.5mm.
Conclusion:
The 1D element of the Bracket model is created successfully with a given cross-section and DOF.