Week - 3 Drop test Challenge
- Aim: To sucessfully create a complete input file for performing a drop test using the given mesh file and interpret the results.
- Procedure: Open the given .k file in LS-Prepost. The file contains simplified model of phone and a plate which represents the ground.
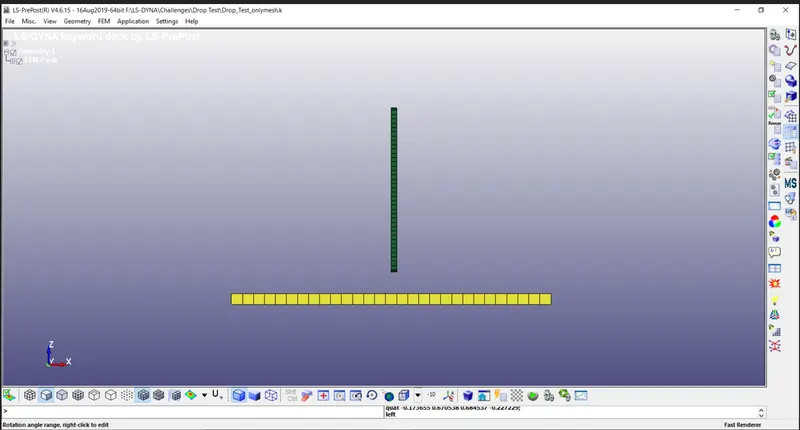
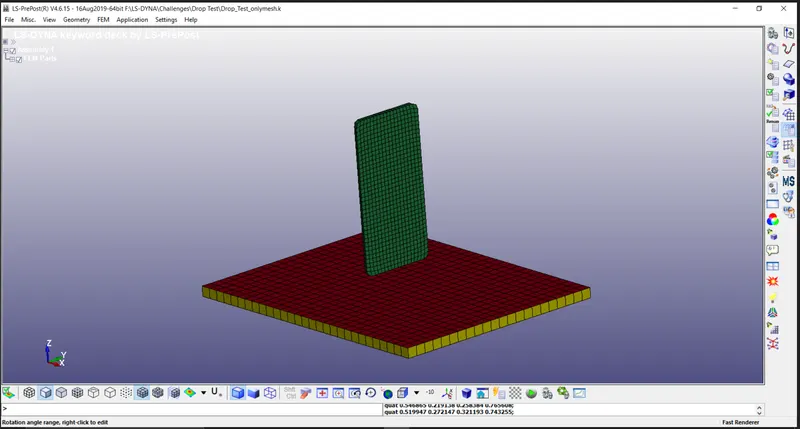
As seen above, the model contains an extra part of shell elements. To see all the entites contained in the model, go to Model & Part > Part Data.
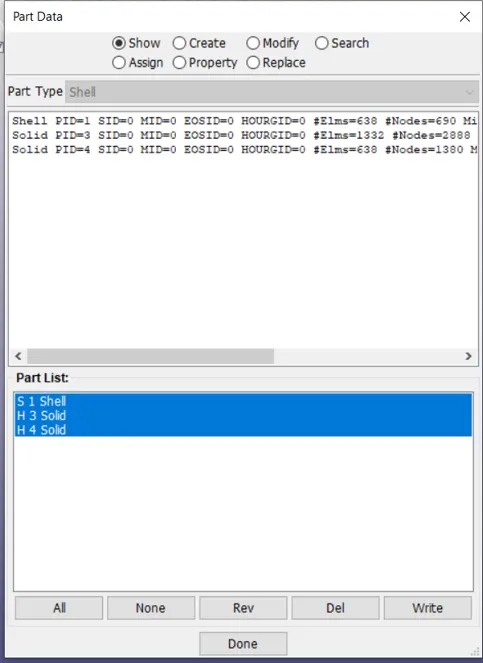
Here, we can see that the FE model contains total of 3 parts - Solid elements for phone and plate and an extra layer of shell elements on the top of plate. Since the shell elements will not be necessry to capture the interaction between the phone and the plate after impact, it can be removed from the FE model.
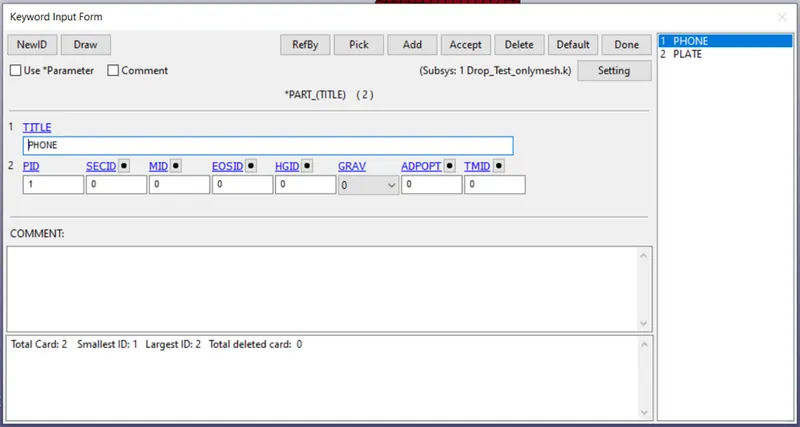
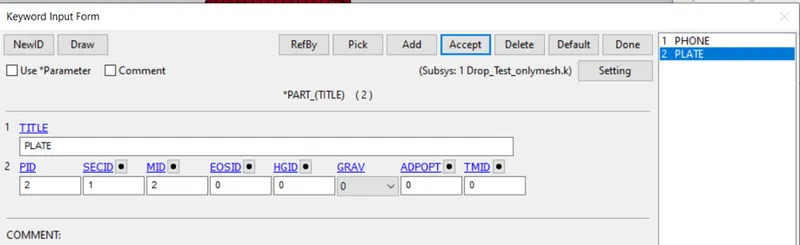
In the Keyword Manager, it can be seen that the PART card contains no Section ID and Material ID. These need to be created, so that the element type, the type of element formulation and the material properties can be defined. Define the appropriate material model for phone and the plate using MAT card. Rigid material (MAT 20) is defined for the plate & Piecewise Linear Plastic (Mat 24) is defined for the phone. Fully integrated solid elements is defined for both plate and the phone using the SECTION card. Since LS-DYNA follow system of consistent units, kg-mm-ms system is used for inputs for this drop test.
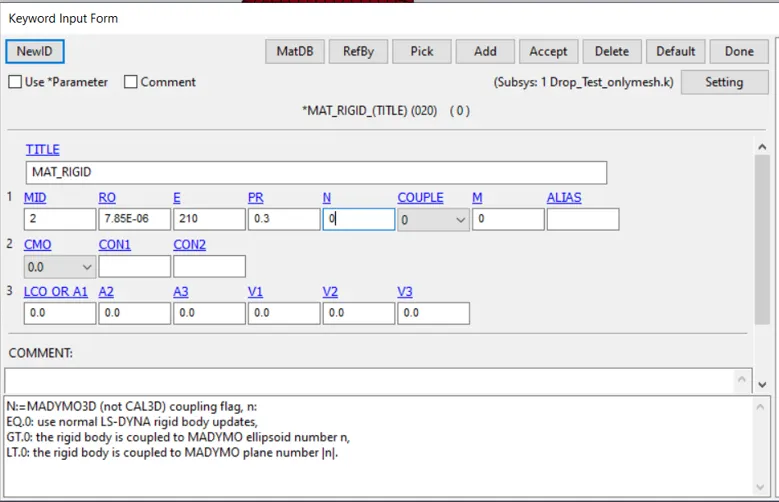
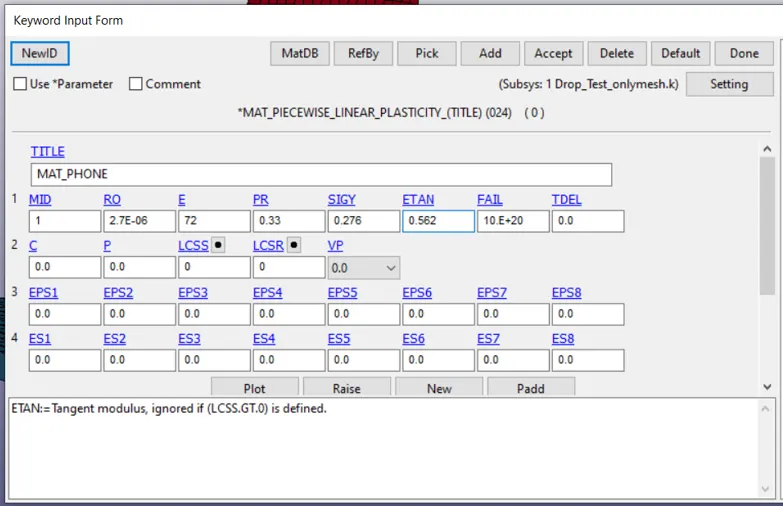
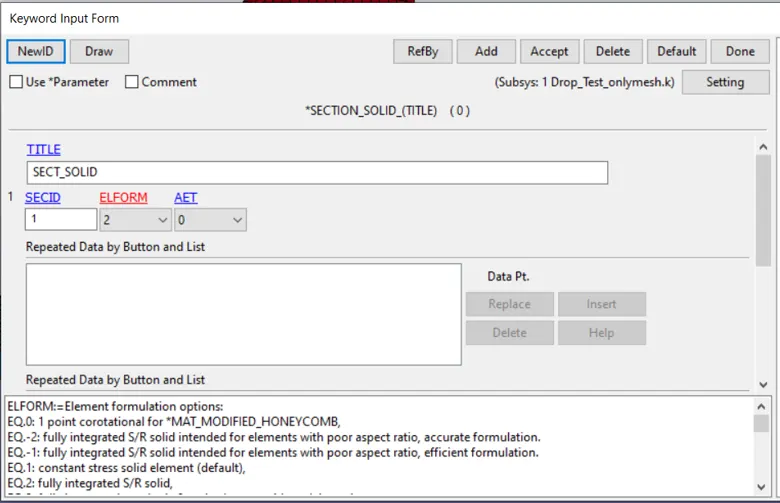
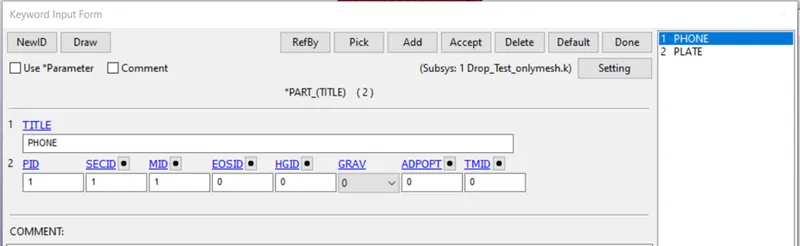
Now, update the Part card for the Phone and the plate with the appropriate MAT ID and SECT ID.
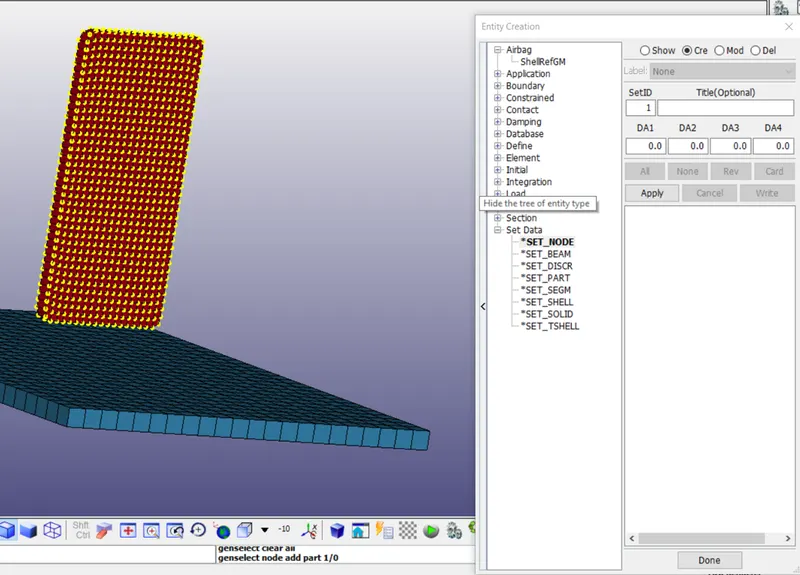
Now, create a node set for applying initial velocity. Go to Model & Part > Create Entity > Set Data > Set_Node > Create. Select all the nodes of the phone model as shown and create a set with appropriate id.
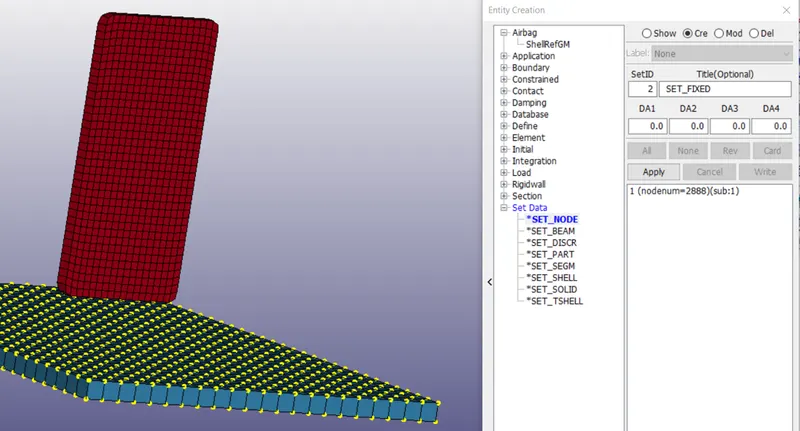
Similarly, create a set for the plate for applying constrain, so that the plate can be fixed.
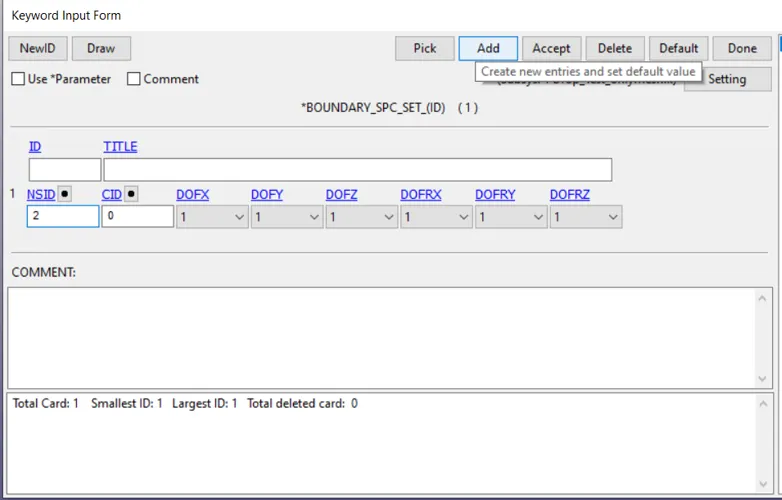
Now, apply the constrain to the node set created for the plate. Go to Keyword Manager > Boundary > SPC Set. Enter the NSID created for constraining plate and lock all degrees of freedom.
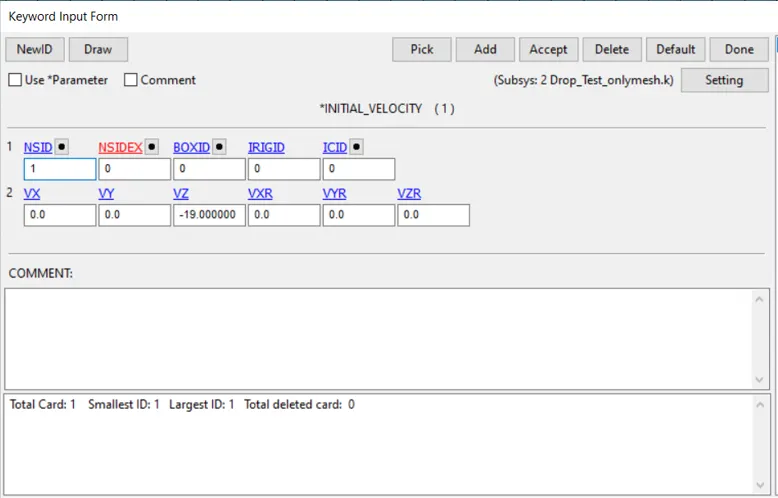
Similarly, using Initial_Velocity card, apply initial velocity to the node set created from the Phone part.
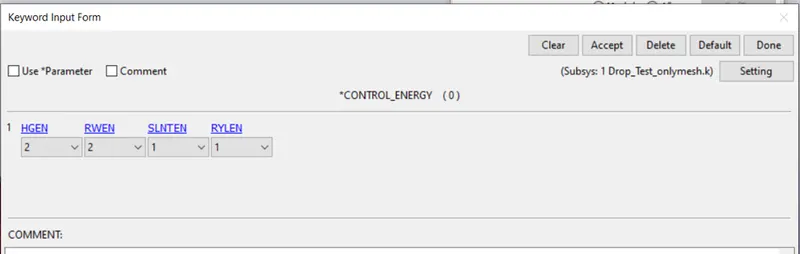
Using Control_Energy Keyword, call for Hourglass energy calculation using HGEN = 2 if required. For now, it can be ignored, since we are only concerned with successfully creating a input file and successfully executing it.
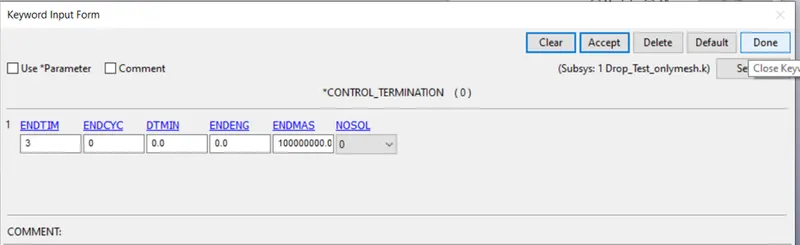
The most important keyword that needs to be inputted is Control_Termination, using which the software will understand the endtime for the simulation. End time of 3 ms is defined.
Also, define the Contact_Automatic_Surface_To_Surface contact between the plate and the phone so that the interaction between them can be captured after impact. For Master Set id, the rigid plate with higher stiffness is selected as the master and the phone which is having low stiffness is selected for the Slave set id.
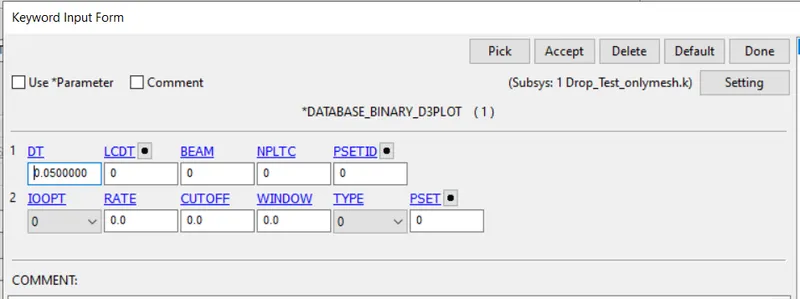
Finally, request for the output animation file using Keyword Manager > Database > BinaryD3Plot. Set time interval for writting results = 0.05 ms.
Similarly, using ASCII options available under Database option, request for addditional results such as GLSTAT, MATSUM, RCFORC etc. GLSTAT will give track of different types of energy involved in the system and the RCFORC will give track of reaction force occuring during the contact during the impact of the phone with the plate.
Save the .k file and run the simulation.
- Results:
1. Animation file for stress contour:
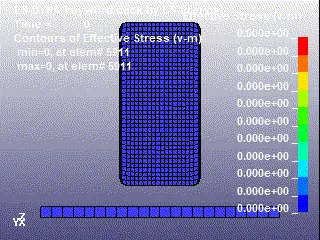
Maximum stress occurs after impact during rebound.
2. Plot of energies:
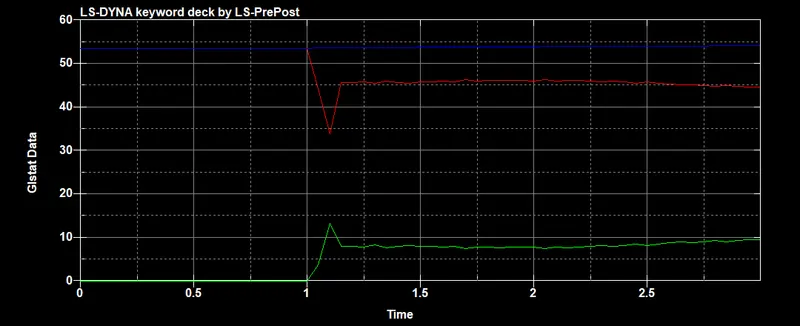
As seen from the graph, kinetic energy is maximum (indicated by red line) before impact. As soon as the impact happens, the kinetic energy drops, and an increase in internal energy can be seen (indicated by green line). A part of kinetic energy lost after impact is converted into internal energy. Some amount of energy is lost during impact. The total amount of energy in the system (indicated by blue line) almost remains constant.
3. Reaction force:
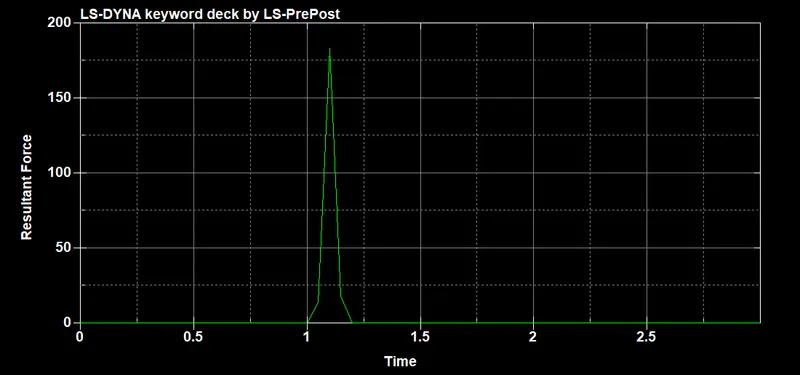
Contact force is maximum at Time =1, i.e at the time of impact. Before impact and after rebound, contact force drops again to zero.
- Conclusion: Thus, the case setup for drop test is successfully created from scratch and executed with normal termination. The results are plotted and interpretted.