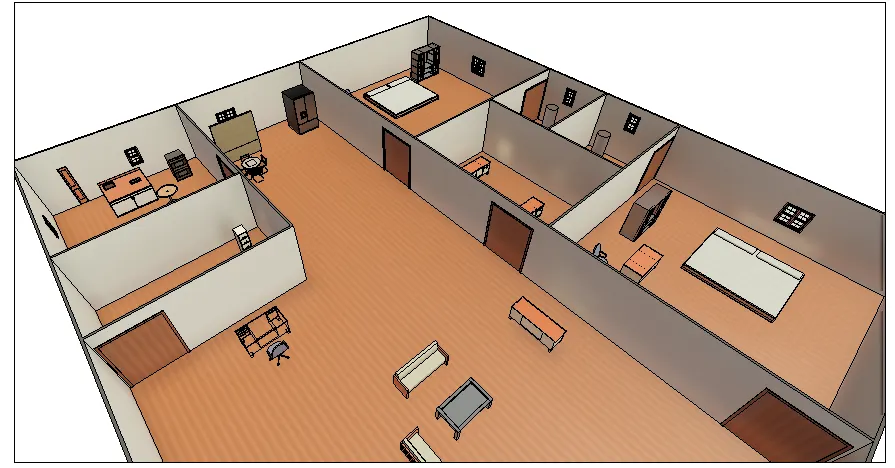
Week 3 Challenge
1)AIM: To create a layout in the ground floor level and allign the floor plan with grids
TOOLS USED:
- OPEN
- ARCHITECTURAL TAB
- PROJECT BROWSER
- FLOOR
- GRIDS
PROCEDURE:
STEP-1:
- open the file already created
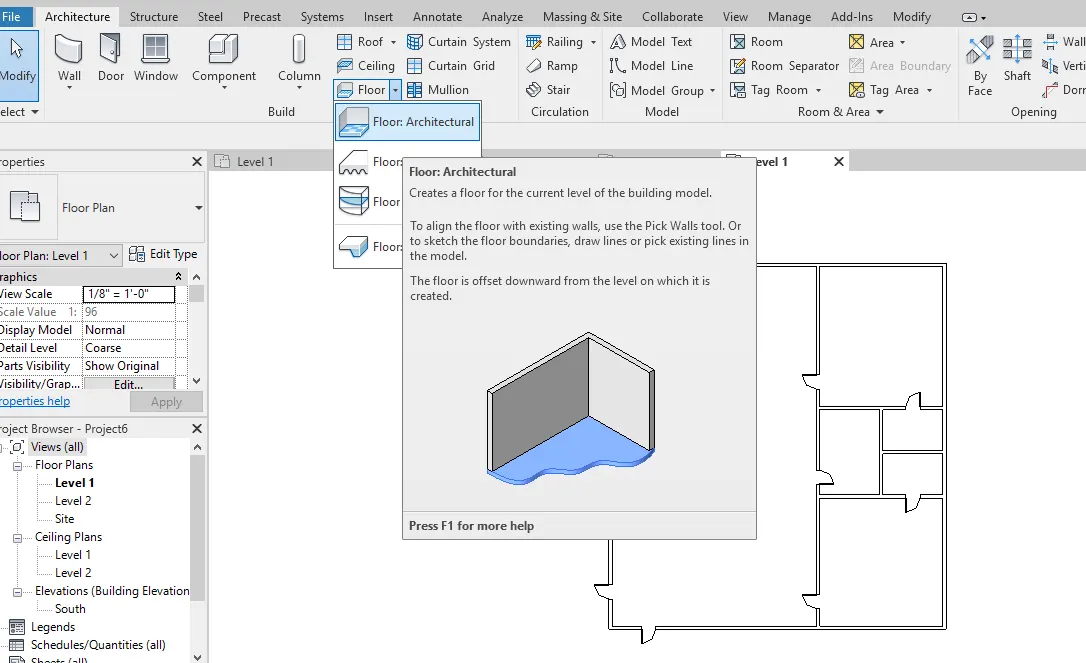
- click on architectural tab
- select floor
- r
STEP 2:
- now,click on boundary line and select pick a line and select boundaries
- click on tick mode to get the floor area
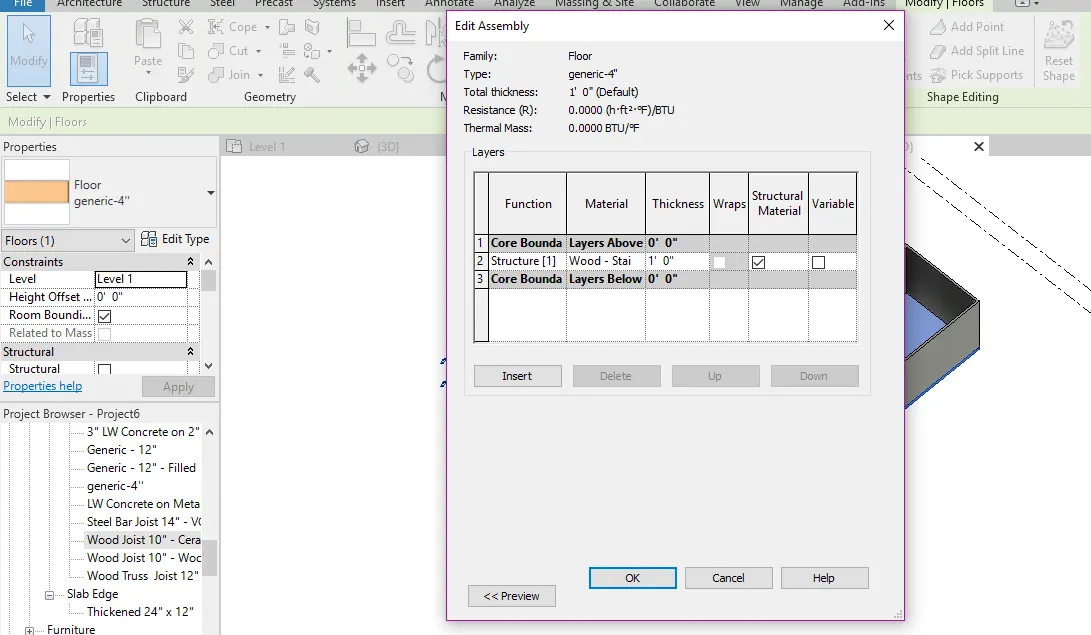
- in propeties select the floor finifh and click edit to chanage the thickness of the floor and materials.
step-3:
- Click on architectural tab
- select grids
- arrange the grids longitudinall and transversly as required.
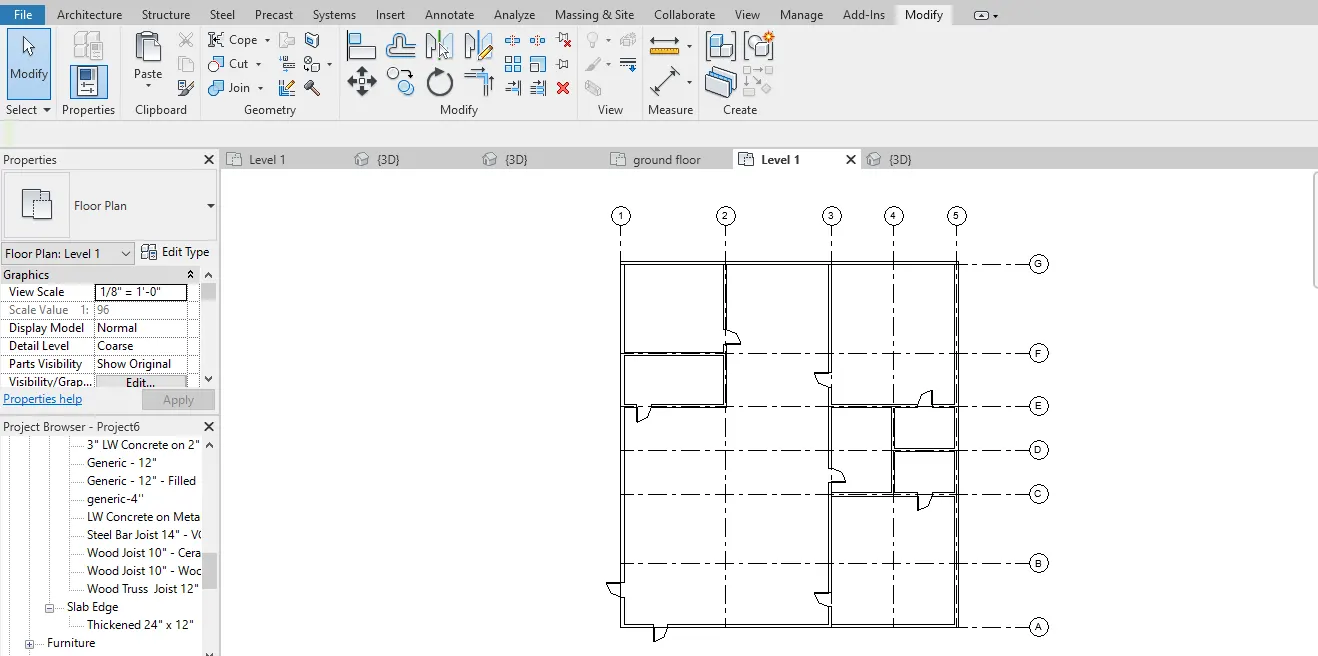
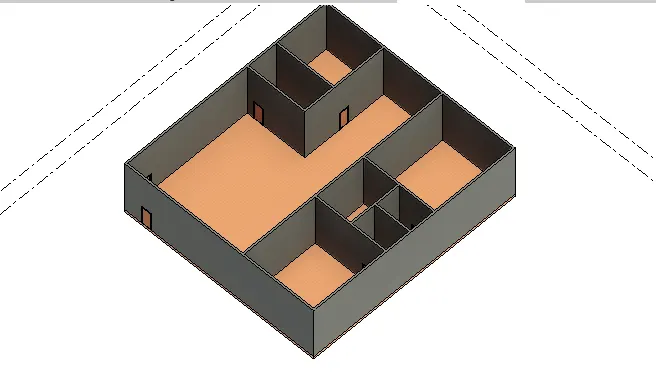
RESULT: A layout has been created with floor plan and grids were inserted accordingly.
2)
AIM: To use the draw tool to modify the boundarywalls and to verify if top and bottom walls are constrained.
TOOLS USED:
- OPEN
- ARCHITECTURAL
- WALLS
- PROPERTIES BROWSER
- OFFSET
- 3D VIEW
PROCEDURE:
STEP-1:
- Open the file consisting layout
- click on architectural tab and select walls
- select properties and click on edit , change the thickness as required.
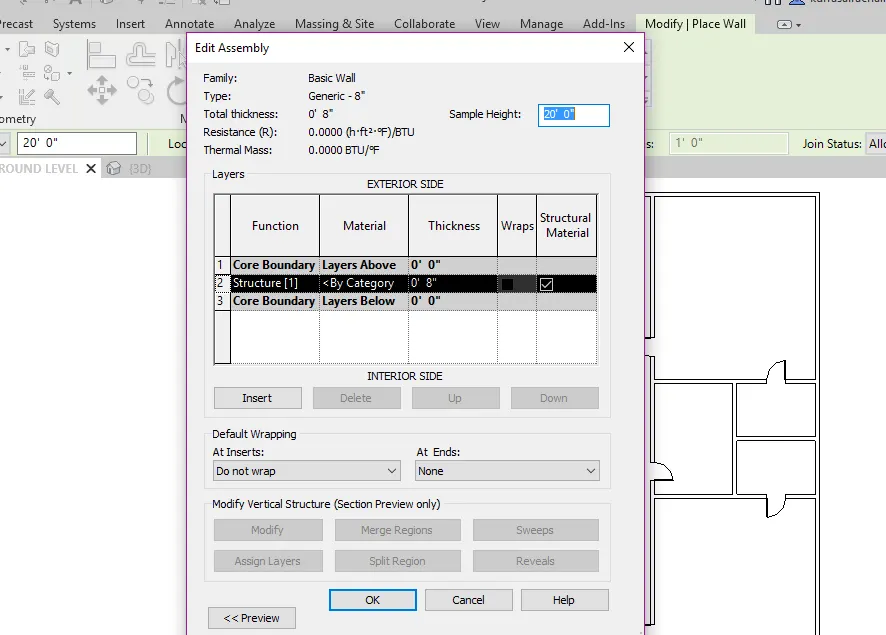
STEP-2:
- click on the properties
- select the contraints
- select level 2 ,so that we can see the wall constrained upto second floor
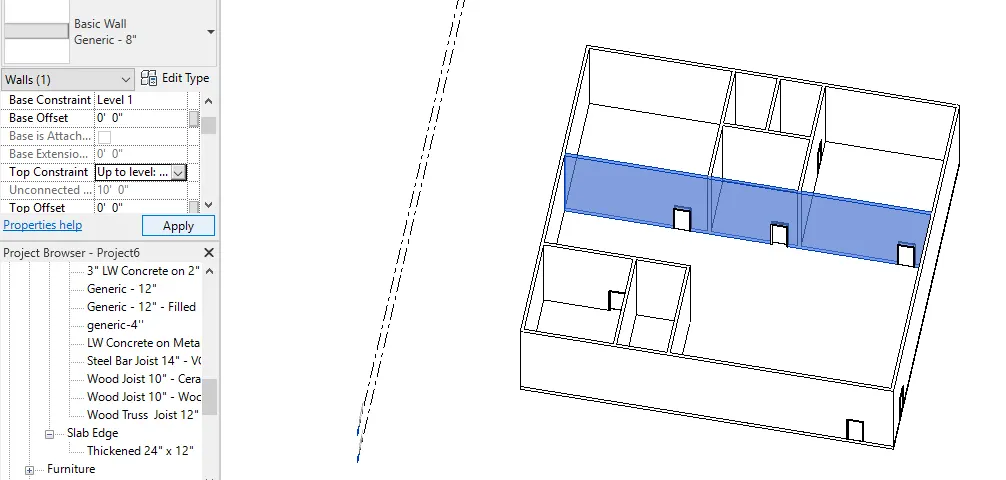
RESULT: the boundary walls are modified and top and bottom constraints are verified.
2a) Benifits of connecting walls is that when walls are connected with constraints any changes in height of the building,the walls automatically adjusts its height with the levels,whereas in unconnected we have to edit the height of walls manually which takes lots of time and even errors may occur.
2b) acoording to me by height is convient rather than depth because it can help the project to complete in a proper way.
3)
AIM: TO COPY MODEL ELEMENTS FROM GROUND FLOOR AND PASTE IT IN FIRST FLOOR LEVEL
TOOLS USED:
- OPEN
- COPY
- PASTE
- ALLIGNED TO LEVEL
- MODIFY
- 3D VIEW
PROCEDURE:
STEP-1:
- open the file already existed with a layout
- drag to selcet the walls and floor
- click on ctrl+c
- select modify
- click on paste
- select paste alligned to sectional view
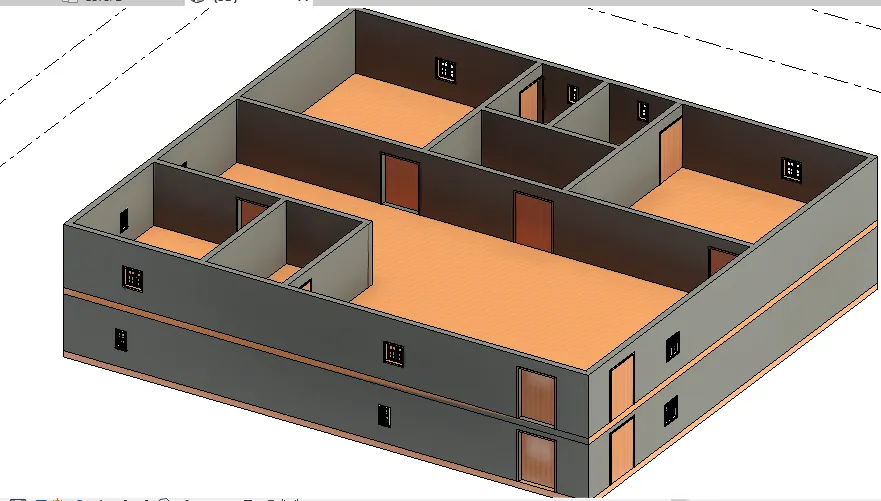
RESULT: first floor has been created from the reference of ground floor using copy and paste
4)
AIM: To create interior partion walls to create seperate rooms of residential building
TOOLS USED:
- OPEN
- ACRCHITECTURAL
- WALLS
- PROPERTIES TAB
- INTERIOR PRTITION WALLS
PROCEDURE:
STEP-1:
- open the revit file
- click on walls under architectural tab and draw a layout
- click on properties browser and click on edit type and select interior wall partition
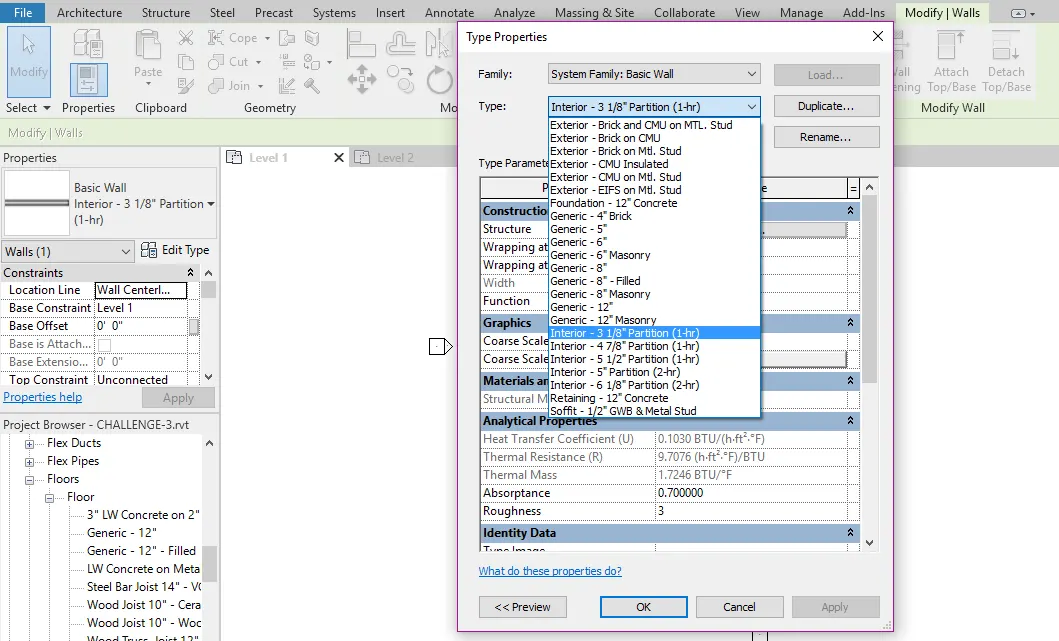
STEP-2:
- Select manage tool bar and select project units
- change the uits to feet and inches
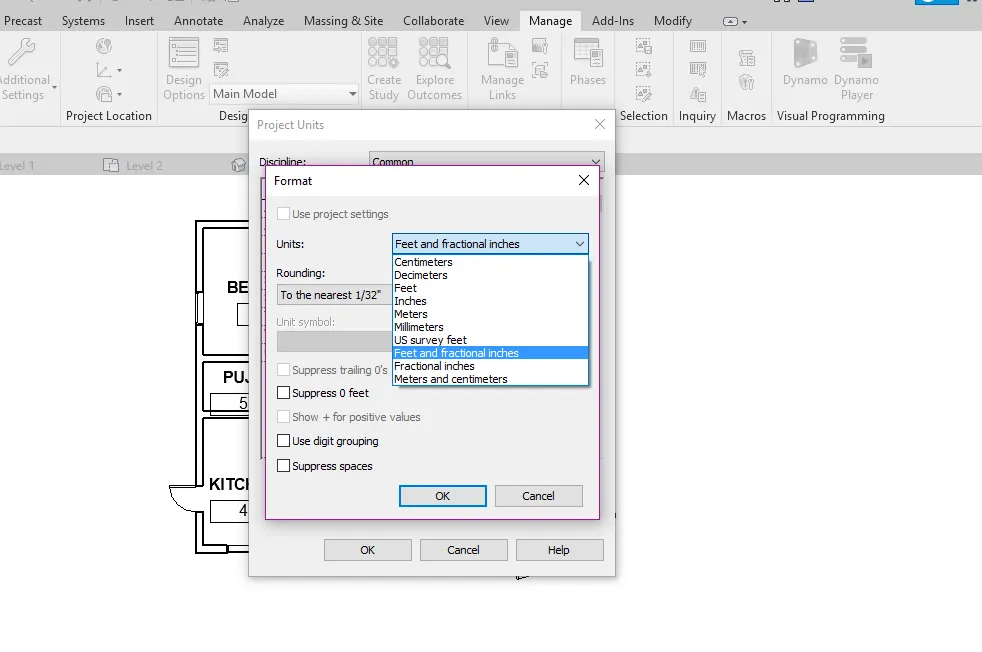
STEP-3:
- create rooms as specified or create seperate rooms of residential building by using walls
- click on rooms and name them as kitchen,bedroom..etc., as required
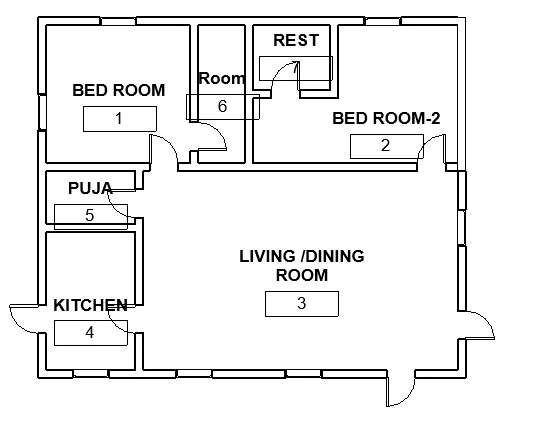
RESULT: By using interior partiton wall, separate rooms has been created with proper units.
5)
AIM: To place the components in appropriate locations to add details for week 2 assignment.
TOOLS USED:
- open
- architectural
- components
- insert
- load family
PROCEDURE:
- open the week 2 assignment layout
- click on architectural tab
- select components that to be inserted in the layout
- click on insert
- click load family
- choose the elemnts to be inserted ith the building
- doors,windows,table,chair,sofa,kitchen tools,refrigeratoer,beds,storage,cupboars etc., were inserted in the layout.
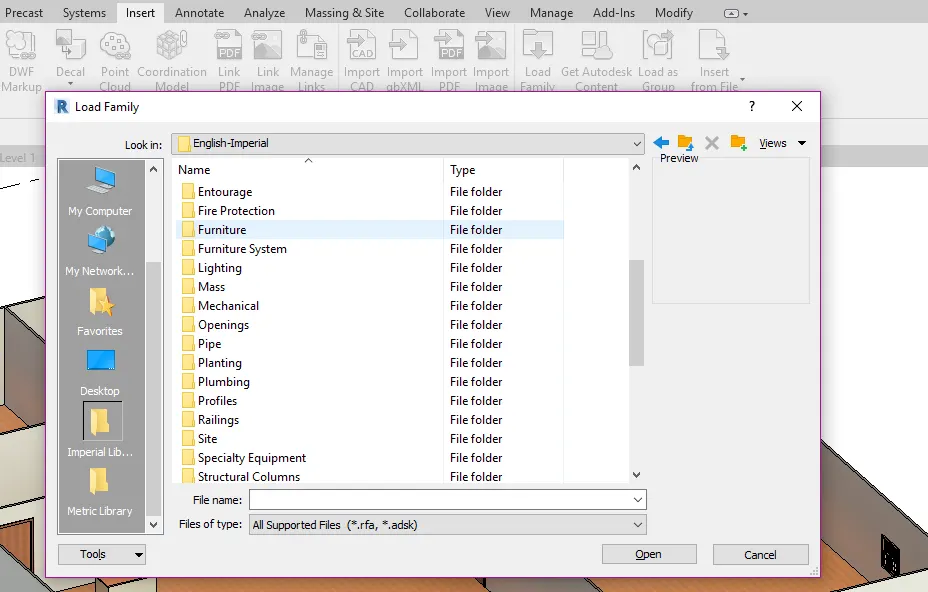
- use cameras to view the interoir
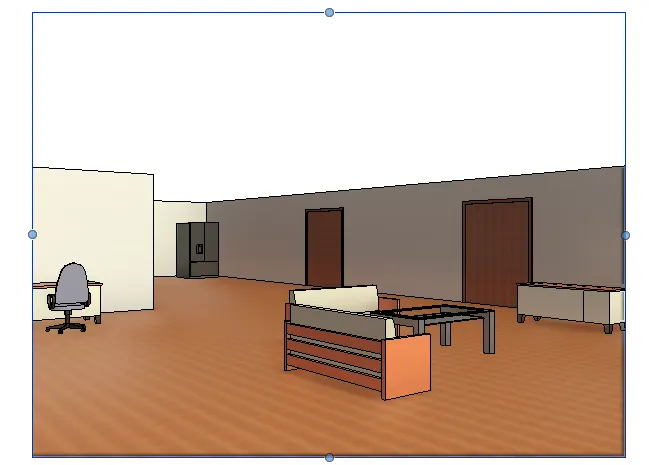
- RESULT: componenets were inserted as per instructions given from load family and comp0nents.