Week 2 Challenge
1) What is BIM? Summarize the features of BIM and benefits of using BIM over 2D CAD tools.
ANS: Buliding information modelling is a concept created by autodesk heping us in achieving as a process. It is a 3D model based process and provides coomen platform for architectural engineering construction proffesionals and also can acess tools to more effectiently plan ,design,construct,manage buildings and infrastruture. BIM provides cost estimation,material specifications, analysis and also hepls in reduction of time of construction.so it helps us in saving overall time and cost compared to 2D CAD.
2)
AIM: To pic familiy and element from category and insert it to revit model:
TOOLS USED:
- OPEN
- INSERT
- LOAD FAMILY
- ELEMENT
PROCEDURE:
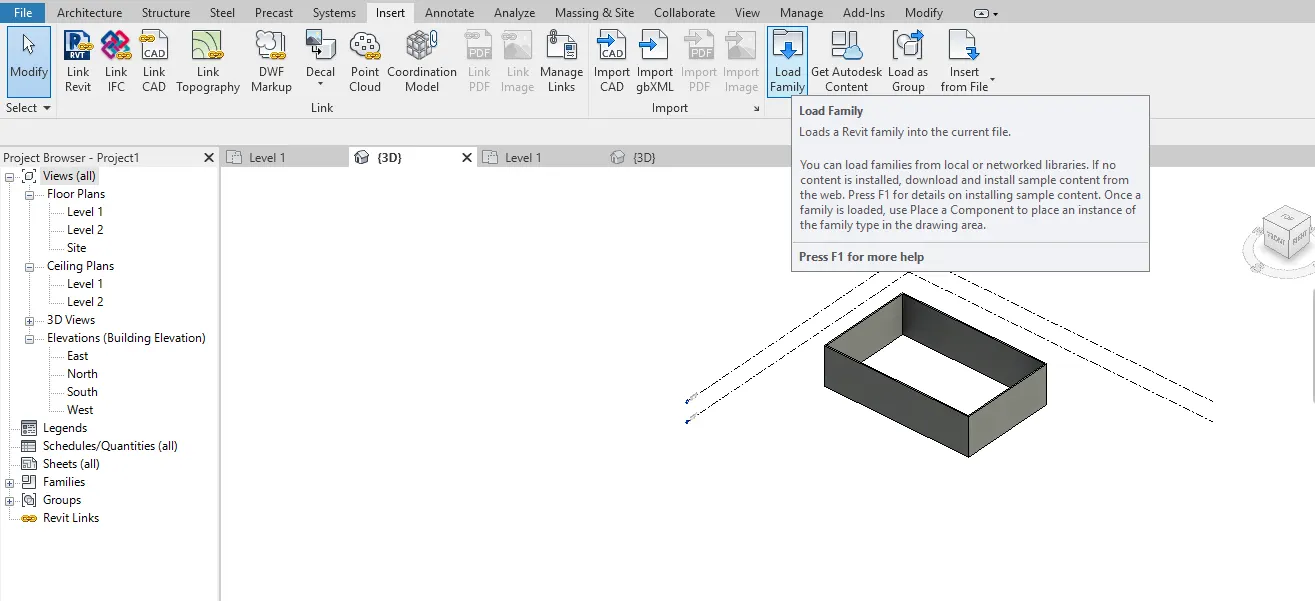
step-1:
- open the file created already.
- select insert pane
- click on load family
step-2:
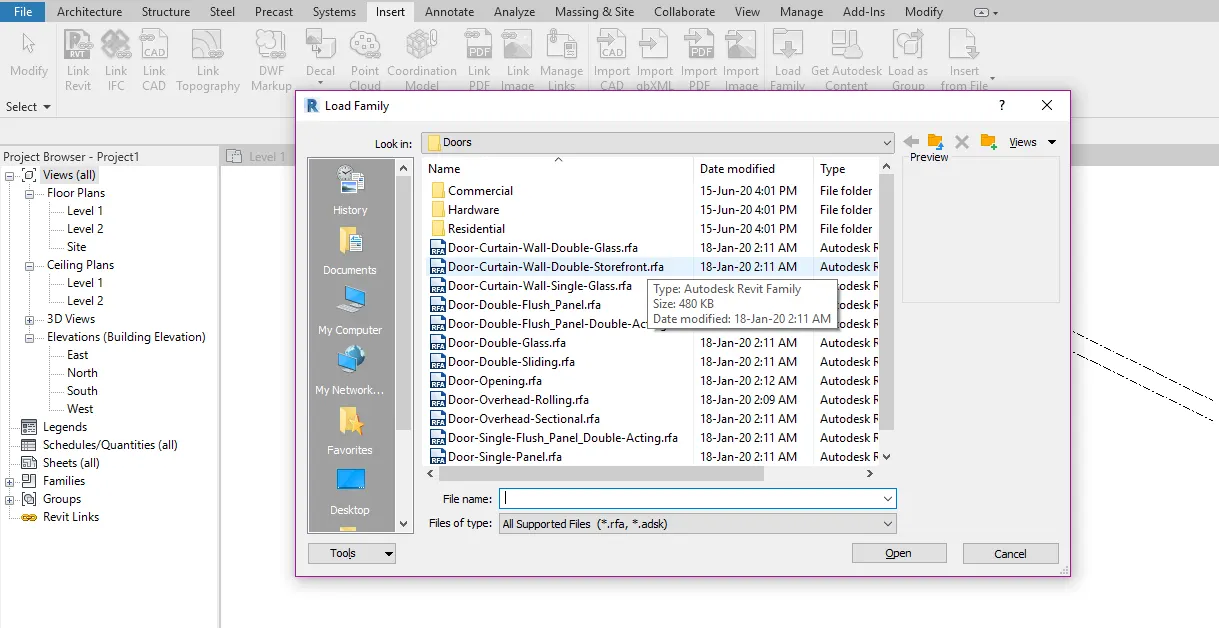
- select the category and selectg the element like doors windows etc.,
- click on the door and select type of door
- insert it in the frame work designed.
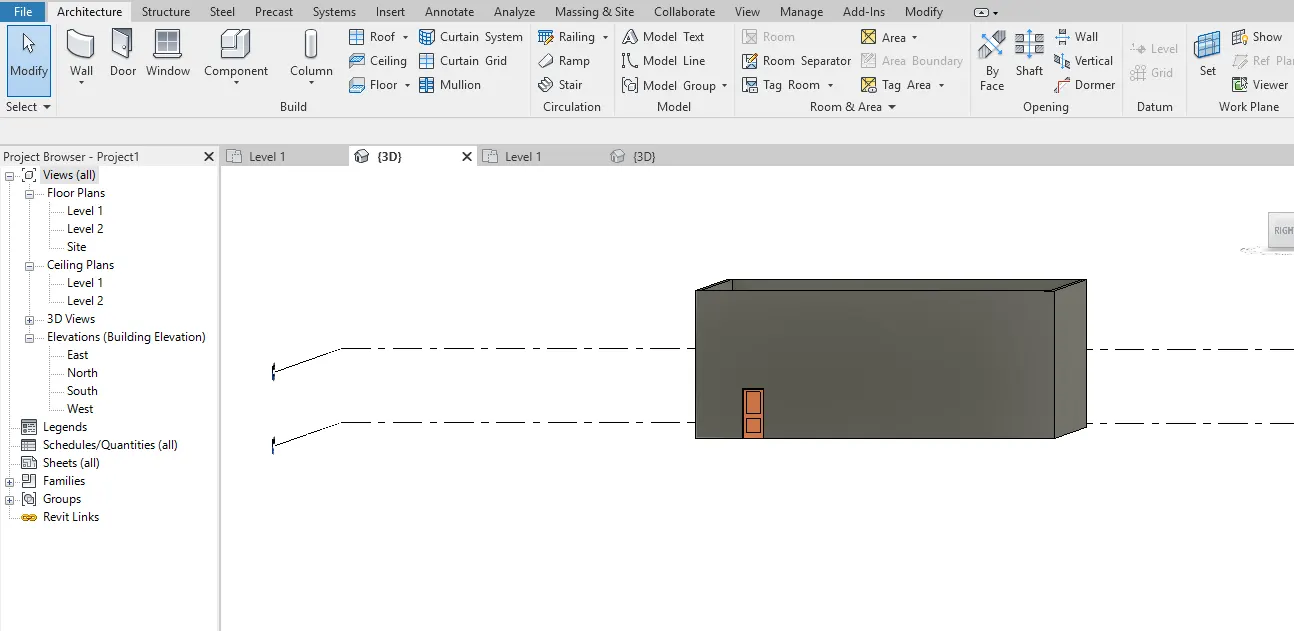
RESULT: the concept of families,elements has been acknowledged. Families and elements has been picked and inserted in revit model.
3)
AIM: To open a project file with archtectural template,save the file with appropriate name,set units and set up to maximum of 3 backups.
TOOLS USED:
- OPEN
- FILE
- TEMPLATE
- SAVE
- MANAGE
- PROJECT UNITS
- PROJECT INFORMATION
- MAXIMUM BACKUPS
PROCEDURE:
STEP 1:
- open the new file
- select architectural template and enter
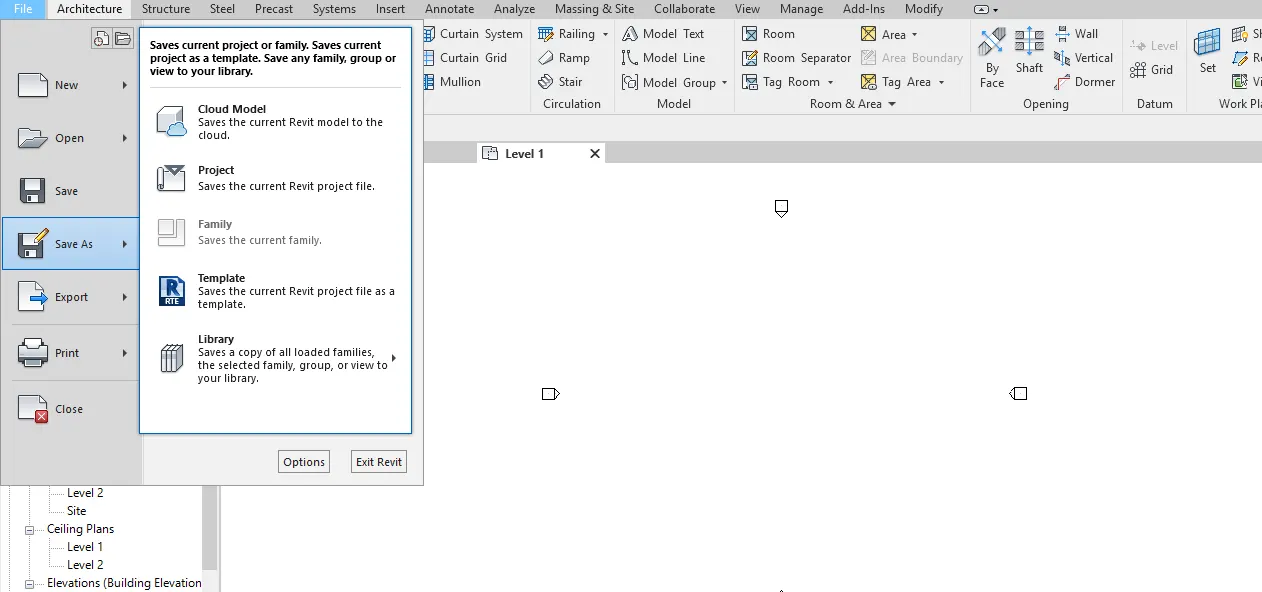
- click on file menu and select save as and save it appropriate name
step-2:
- select the manage tool bar
- click on project units and specify the units.
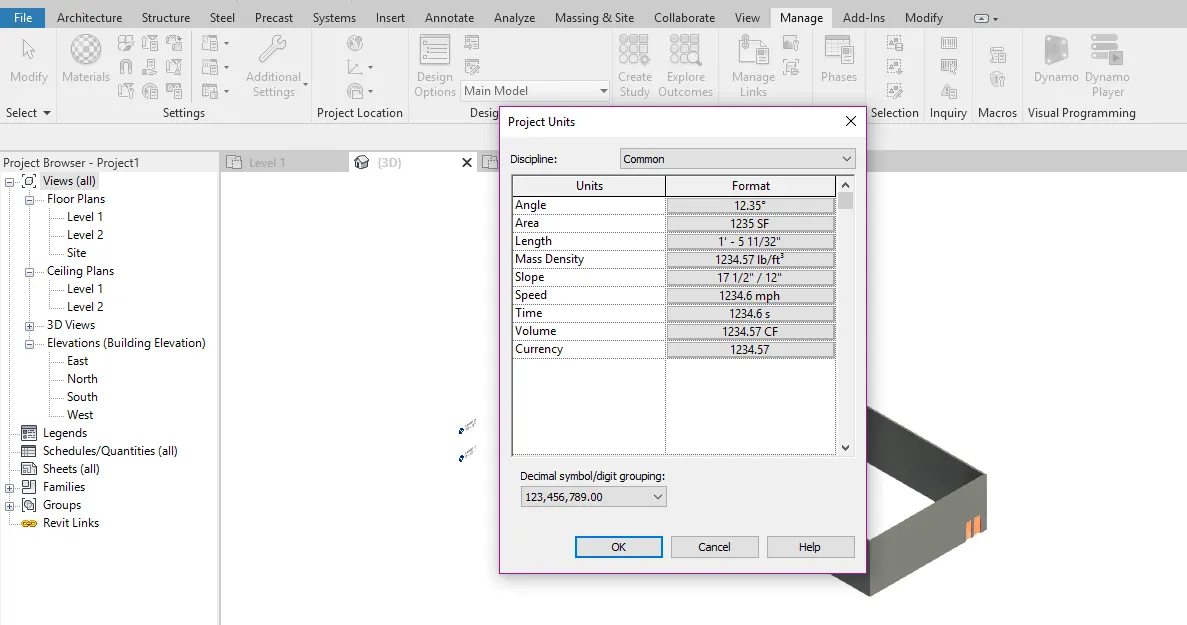
step-3:
- now, select the file and click on save as
- click on the options in the right corner
- select the no. of backups
- we consider here 3 backups
- click ok and save the file
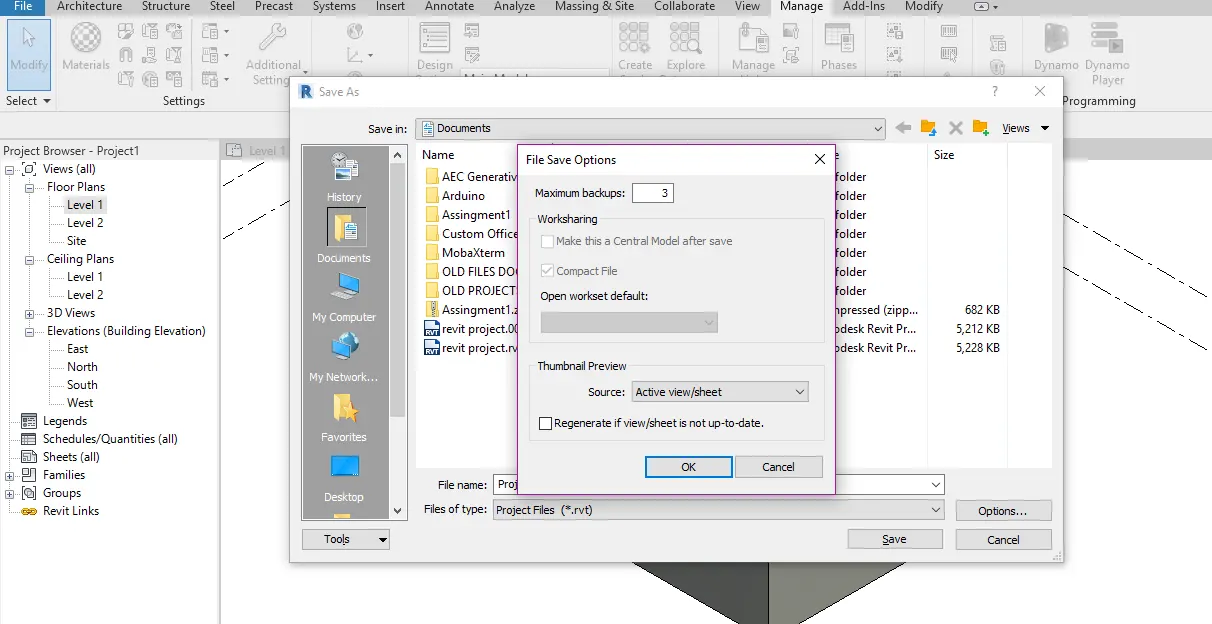
RESULT: A project of architetural template has been created with 3 maximum backups with appropriate name.
4)
AIM: To create /draw
ground floor @0'
first floor @10'
second floor @20'
roof @30'
Grids :transverse grids A,B,C,D,E @10' spacing
horizontal grids from 1 to 10 @20' spacing
TOOLS USED:
- OPEN
- ARCHITECTURAL
- PROJECT BROWSER
- ELEVATION
- LEVEL
- GRID
PROCEDURE:
STEP 1:
- open the revit file
- select architetural template
- select project browser
- select anyone of the elevation
- from the architectural tab select level in the top right corner
- adjust the levels accordingly
- name them as grounf floor,first floor,second floor and roof.
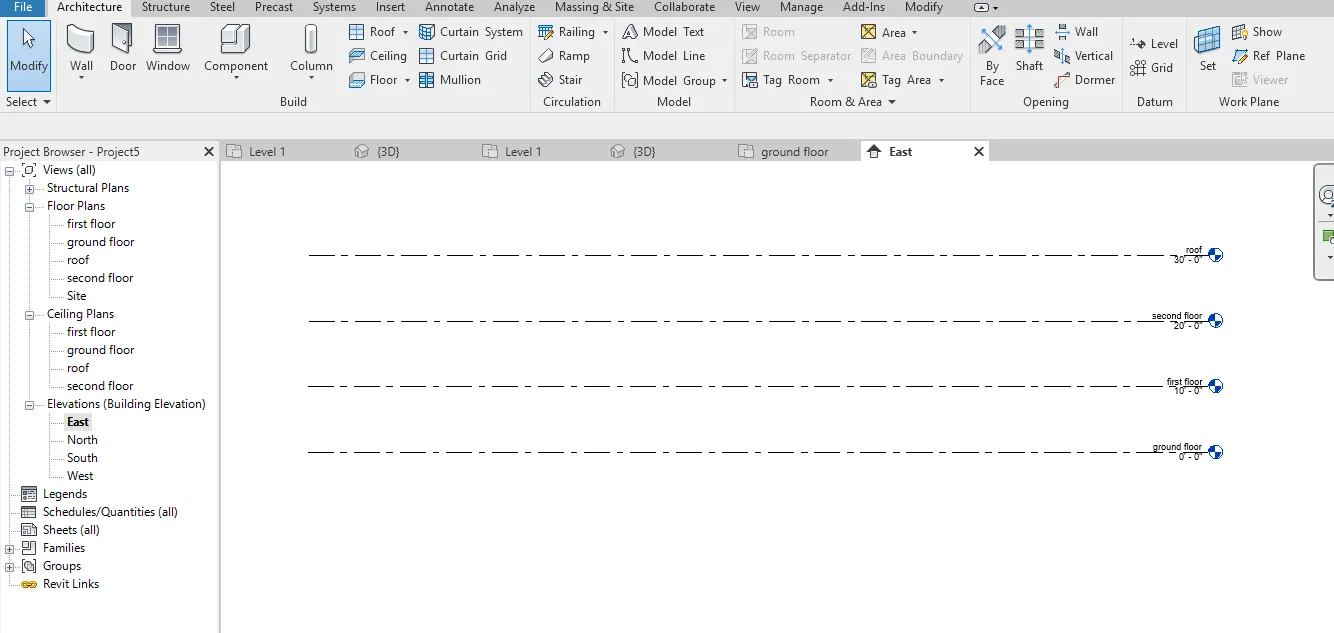
step-2:
- go to ground floor and select grids
- draw transverse grids spacing @10' and name them as A,B,C,D,E
- Simillarly,click on horixontal and drew logitudinal grids spacing @20' and name them 1-10.
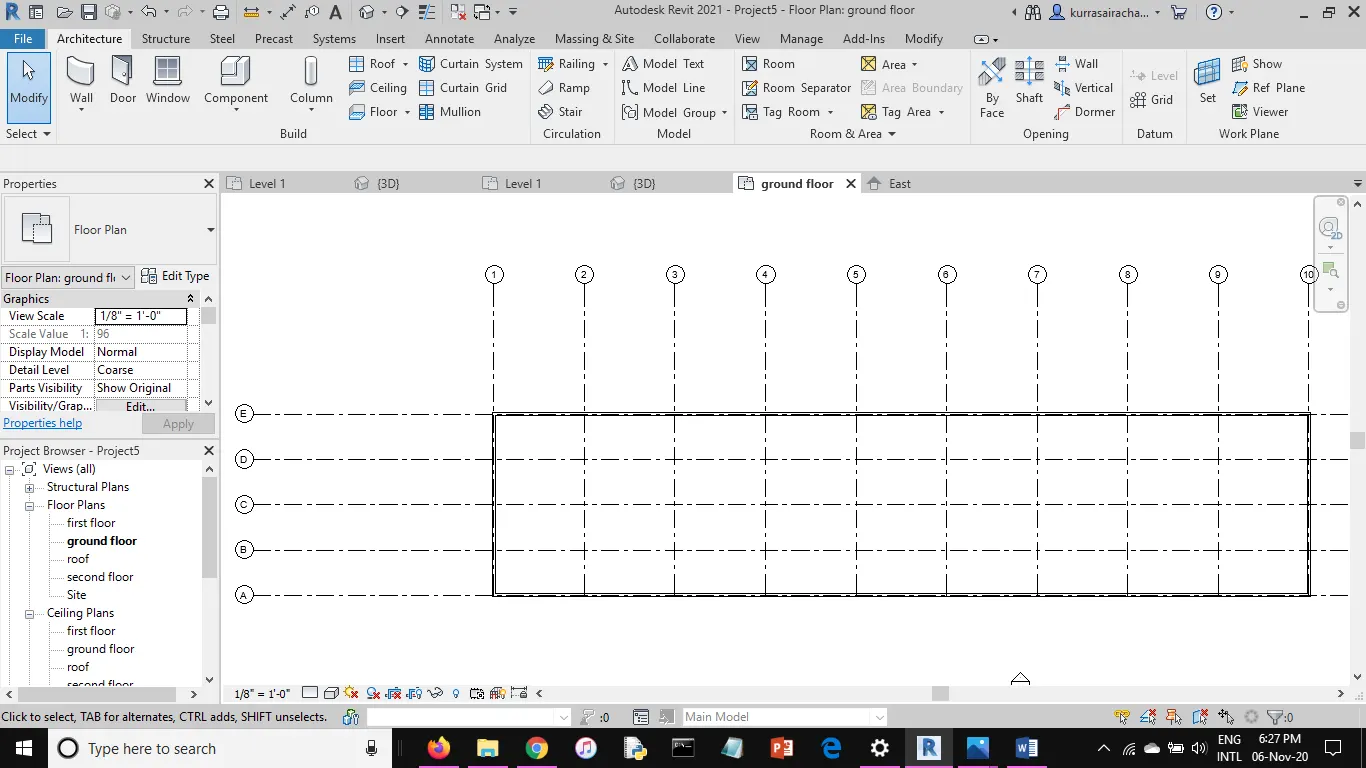
RESULT: levels and grids has been created with given units.
5)
AIM: To create a conceptual layout of the residential unit
TOOLS USED:
- open
- architeural
- wall
- propeties
- edit type
PROCEDURE:
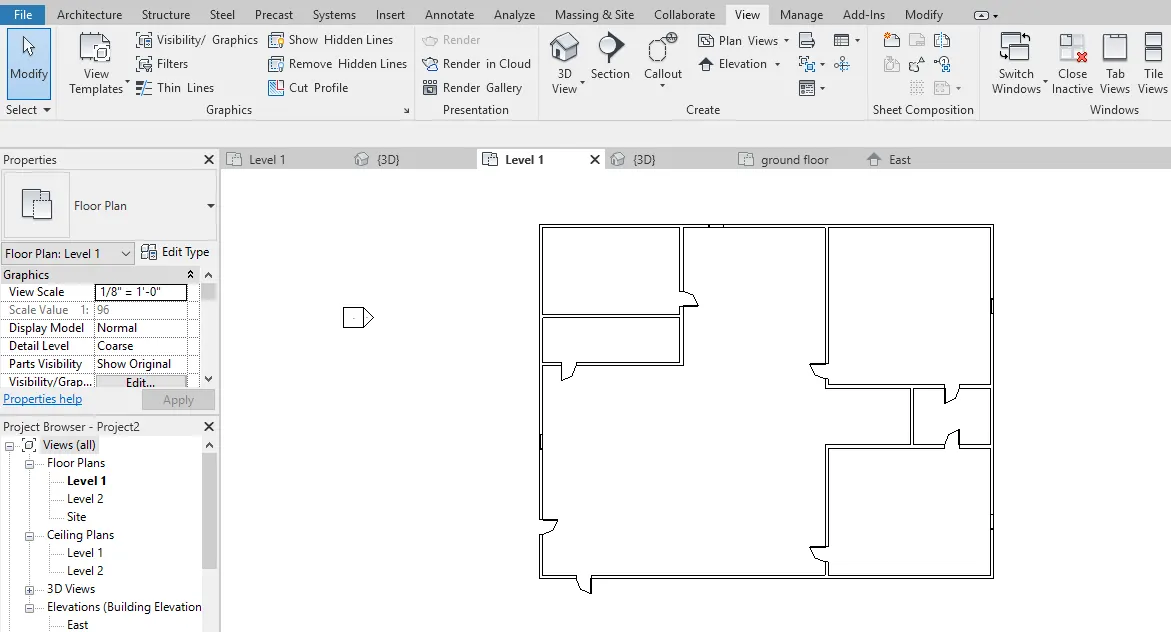
STEP-1:
- Open the revit file
- select the architectural template
- click on the architectural tab and select walls
- draw walls as required.
STEP-2:
- selecct the view toolbar and view in 3D
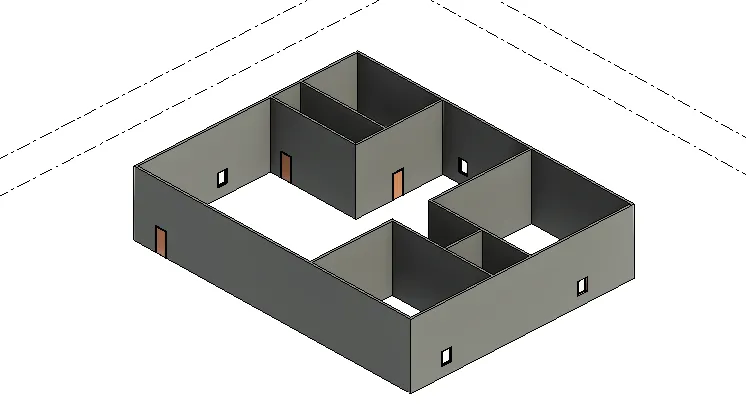
RESULT: 3D layout residential unit has been created.
6)
AIM: To include the dimensions of layout
TOOLS USED:
- WALL
- DIMENSIONS
- doors
- ROOMS
- TAG ROOMS
PROCEDURE:
STEP1:
- Open the revit
- open the layout created early
- allign the dimesions to the layout
- Put the doors as required
- click on room command uder arcutetural toolbar
- select rooms and tag rooms to do tagging.
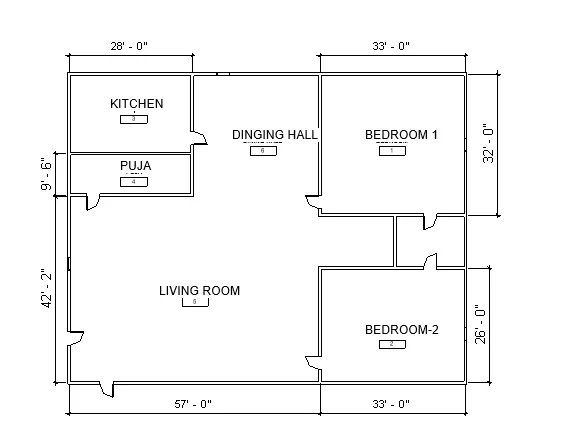
RESULT: dimensions are alligned to the layout.
7)
AIM: To insert different elements like doors,windows,chairs,bed etc., in the plan
TOOLS USED:
- OPEN
- INSERT
- LOAD FAMILIES
- ELEMENTS
PROCEDURE:
- open a file that has been created early
- click on insert
- click on load families
- select the elemnts like chairs,doors,windows,bed etc.,
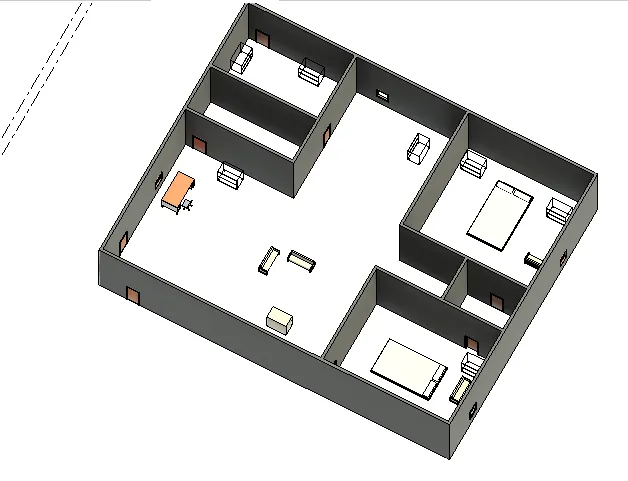
RESULT: Different types of elements like door,windows,sofa,storage,beds,table,chair has been inserted in the model layout.