Week 3 - 2D meshing for Sheet metal
PREPROCESSING OF HOOD USING ANSA
Aim:
To extract mid-surface and generate mesh on Hood using ANSA
Introduction:
The hood of a car is called a bonnet. It's the part that covers and opens up to give access to the engine compartment on rear-engine for maintenance and repair. In recent times, car manufacturers have been working on redesigning the bumper and hood of the car's front end to decrease the chances of pedestrians getting injured in case of a collision. The front part of the vehicle, including the bonnet, gets damaged during an accident, so there is a need to change the existing design or material of the bonnet. The goal of these efforts is to decrease the number of fatalities and reduce the severity of injuries sustained by pedestrians involved in a collision with a car in urban areas. It is basically a reinforced skin panel with many safety and quality requirements.
Objective:
- To check for the geometrical errors in the parent geometry.
- To perform Topology cleanup accordingly.
- To extract the Mid-surface using most suitable method.
- To generate the mesh and obtain smooth mesh flow reducing the trias to the lest possible.
- To improve the mesh quality as per the provided quality criteria.
Meshing:
Here for this challange we have inner extract, Hinge and Latch reinforcement extract of car hood.
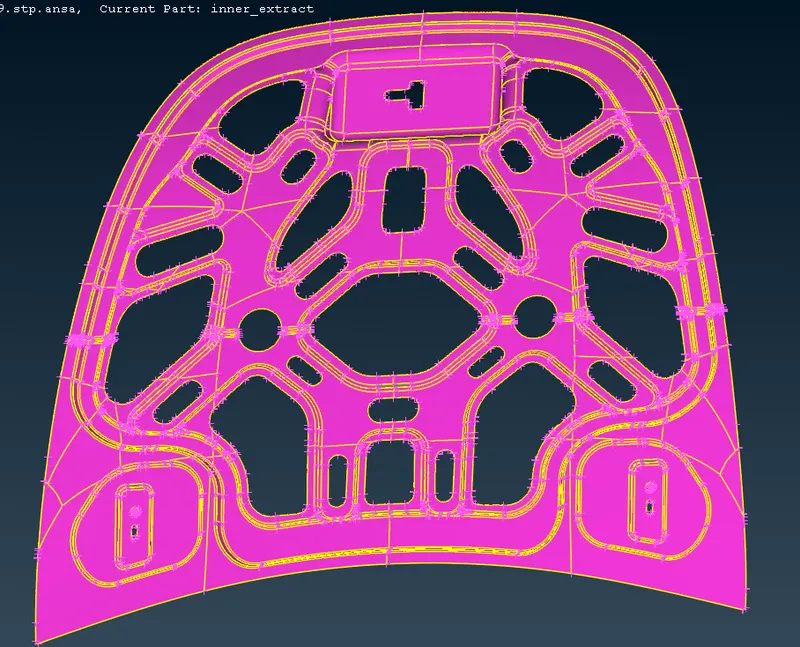
Inner Extract
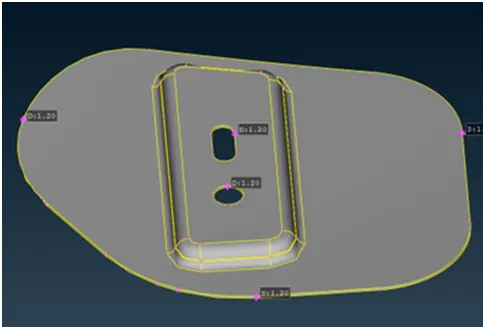
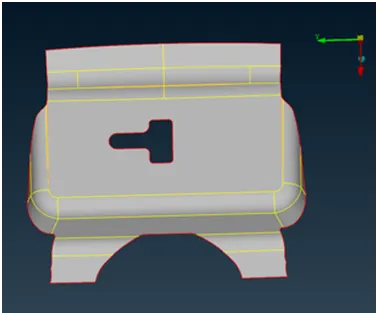
Hinge Reinforcement Extract Latch Reinforcement Extract
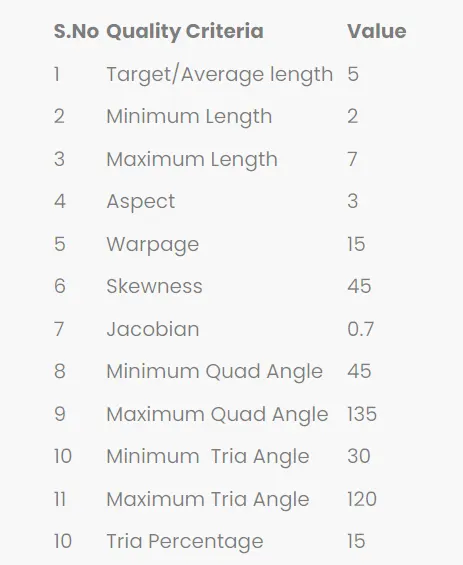
Quality Criteria :
The three steps involved in the process are as follows:
- Import the geometry and perform cleanup.
- Extract the mid-surface and assign properties.
- Mesh the surface while meeting the specified quality criteria.
Procedure:
Step 1: Importing geometry and cleanup:
- To bring in the geometry, navigate to File, then Open, select the file, and click Ok.
- Once the geometry has been imported, Check it is for any geometrical errors, missing surfaces and triple cons.
- Fix all the errors using different options. Majority of errors can be fixed by using "Geometry Checks window" but some errors can't be fixed so, we have to use manual methods to fix them.
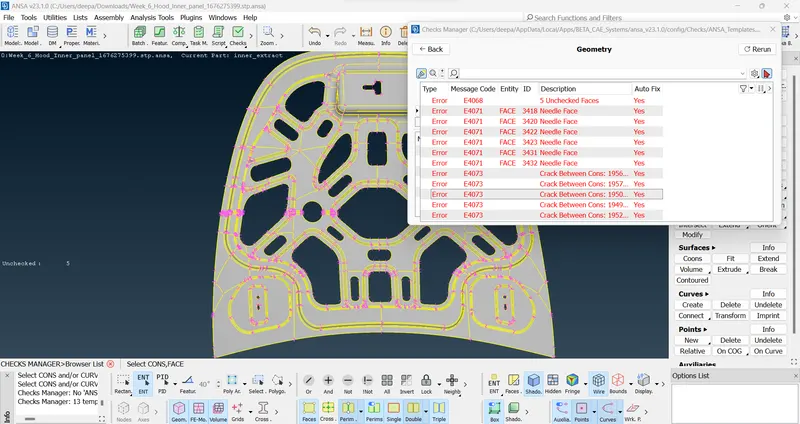
When all the errors are fixed the parent geometry is now ready for mid-surface extraction.
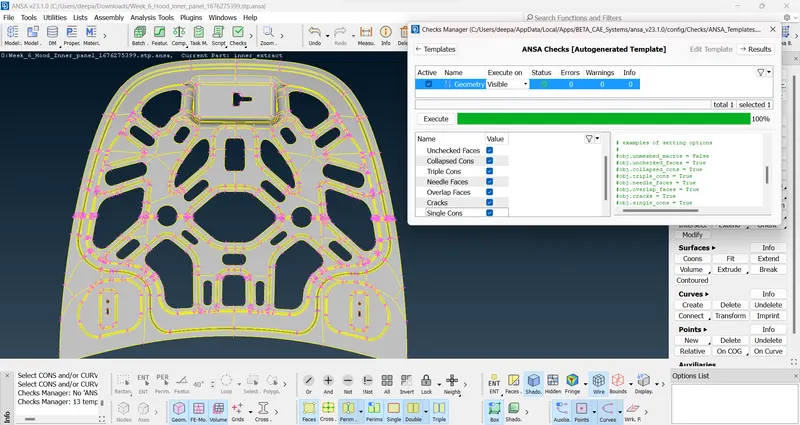
Step 2: Extracting Mid-surface and Assigning property
Mid-Surface can be extracted by 2 ways:
- Select "Mid-surface" then "Skin" under section "Faces" to obtain the mid-surface of the whole geometry by using a single command.
- Select "Offset" under section "Faces" and choose the surface for which mid-surface is to extracted and enter the offset value which is half of the thickness of the model and then choose whether to keep the existing surface.
Note:
In this module we have used the "Offset" command to generate mid-surface because we can generate the mid-surface for components of variable thickness by using this option whereas "Mid-surface" command does not work for the element having variable thickness.
- To extract the mid-surface, go to Faces, then offset, select complete surface using window selection by mouse, then click on the "feature selection tool" on the bottom left of the screen and extract it.
- After extracting the mid-surface, check for any geometric errors such as needle faces, missing surfaces, or triple cons. If any errors are present, fix them properly.
- Set Property ID to the extracted mid-surface using the properties window form the Lists present on the top left corner of the screen.
- Enter all the properties in the property tab and assign them to the mid-surface.
Step 3: Generating mesh within the given quality criteria:
To generate the mesh, follow these steps:
- Before meshing, cut the geometry into smaller section to obtain better mesh flow.
- Go to "Mesh Generation" then select "Best" and mesh it. "Best" option is used to select the best meshing method according to ANSA among different meshing options.
- Check the obtained mesh for smooth mesh flow. If the mesh obtained is not proper and have high trias percentage use option "Reconstruction" under section "Shell Mesh" to reconstruct the mesh and obtain a better result.
- ANSA do not adjust the mesh for few elements keeping in mind the target length of shell so, we have to use options like "Paste" under section "Grids", "Reconstruct" and "Smooth" under section "Shell Mesh" and "Split" and "Swap" under section "Elements" to improve the mesh flow and obtain a smoother mesh flow.
- If any elements fail for quality, use the tools listed above to resolve the problem and obtain a smooth mesh flow which follows the provided "Quality Criteria".
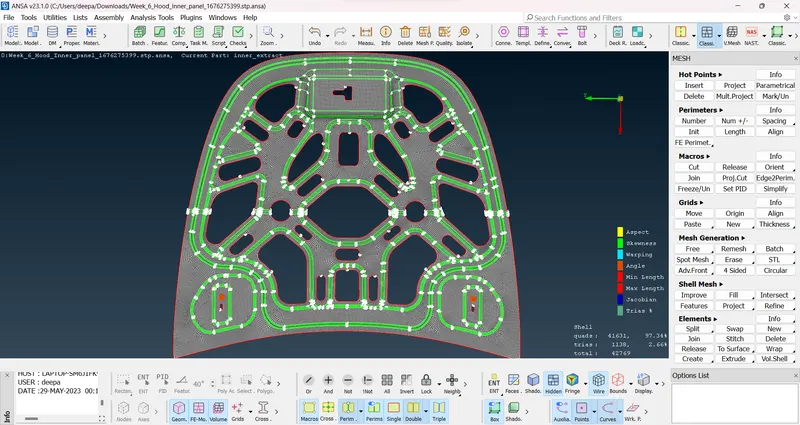
Conclusion:
The mid-surface of the given hood panel has been successfully extracted and the mesh has been generated within the specified quality criteria.
Note:
I have deleted the parent geometry and kept only the mid-surface and also compressed the file in order to upload it.