Project 1 - Meshing of Floor Panel
PREPROCESSING OF FLOOR PANEL USING ANSA
Aim:
To extract the Midsurface and generate a Mesh on the given Floor Panel by following the specified Quality Criteria using ANSA.
Objective:
- Generate mid-surface manually and perform geometry clean-up on the component.
- Generate mesh with proper mesh flow, with target element size of 5 unit.
- Check the quality of the element according to the given quality criteria.
Introduction:
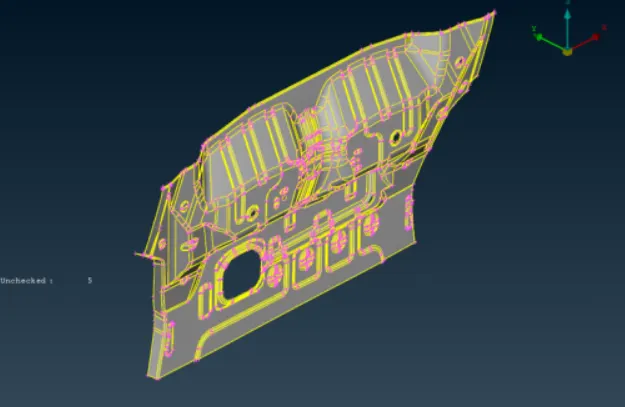
The floor panel is a large sheet metal stamping that often incorporates several smaller welded stampings to form the floor of a large vehicle and the position of its external and structural panels. In the case of unibody designs, the floor panel is the most important metal part establishing the chassis, body, and thus the car's size. It serves as the foundation of most of the structural and mechanical components of any unibody automobile to which the powertrain, suspension system, and other parts are attached.
Procedures:
- Importing the CAD model:-
The cad model is imported into the ANSA software by clicking File ---> New command.
2. Geometry Checks:-
- First step after importing the model is to check geometry of the CAD model. This will helps us to clear all the surface errors, unwanted cons and also for any dissruptions placed in the CAD model.
- This can be done by giving the command Tools ---> Checks ---> Geometry
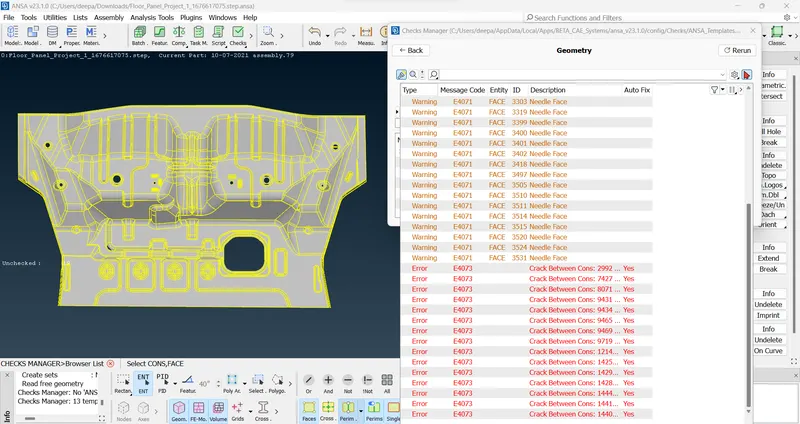
- Majority of the errors can be fixed by using automatic fix option in the geometry checks window while, the errors that cannot be fixed automatically had to be fixed manually by using Faces--->New and Faces--->Delete options.
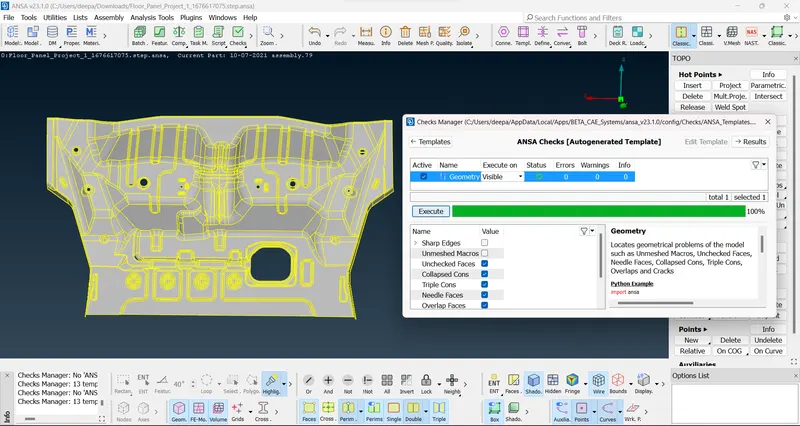
- When all of these errors are fixed, the component is again cheched for geometry and is fine to be cleared for all the geometry checks.
3. Mid-surface generation:-
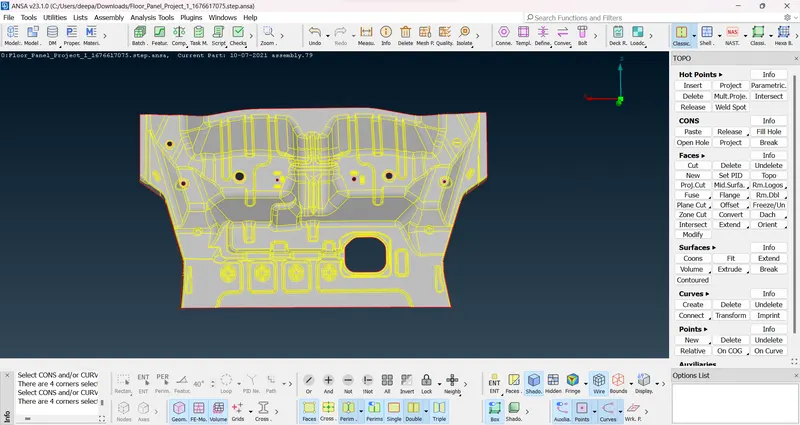
- Use option Mid Surface--->Skin option to generate the midsurface. Select the entire geometry by window selection and confirm it by middle mouse click and then check and enter the offset value.
- Set the PID by navigating to Faces--->Set PID and assign the thickness to the midsurface.
- The extracted mid surface is checked for any geometrical errors present and fixed to proceed for mesh generation. Also the features are modified to ensure the areas that might violate the quality criteria and disturb the proper mesh flow.
4. Mesh Generation:-
- Go for the Length option from the mesh module to find out the actual geometry of a model by navigating to Perimeter--->Length and entering the length as 5 units.
- The quality criteria is entered for the mesh generation by pressing F11 or by navigating to Utilities--->Quality Criteria.
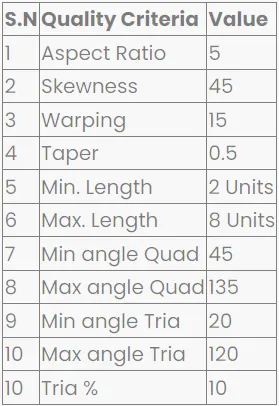
- Mesh the mid-surface to qualify the quality criteria and confirm the same by viewing the model in hidden mode.
- Meshing is done using the Mesh generation--->Best tool. This tool generates the mesh using the best algorithm applicable.
- Then, the created mesh is refined using the Shell Mesh--->Reconstruct. It is ensured that there are no rotating quads.
- To deal with trias, the following tools are used:
- Grid--->Paste, to paste the nodes and move tria backward.
- Elements--->Split, to split an element and move tria forward.
- Elements--->Swap, to move the tria left or right.
- Elements--->Join, to join two trias to make a quad.
- Shell Mesh---> Smooth option is used to smoothen the mesh flow in the selected area. Any elements failing for quality criteria are also fixed by either re-meshing or smoothing the elements again.
-
Also, trias are kept as low as possible
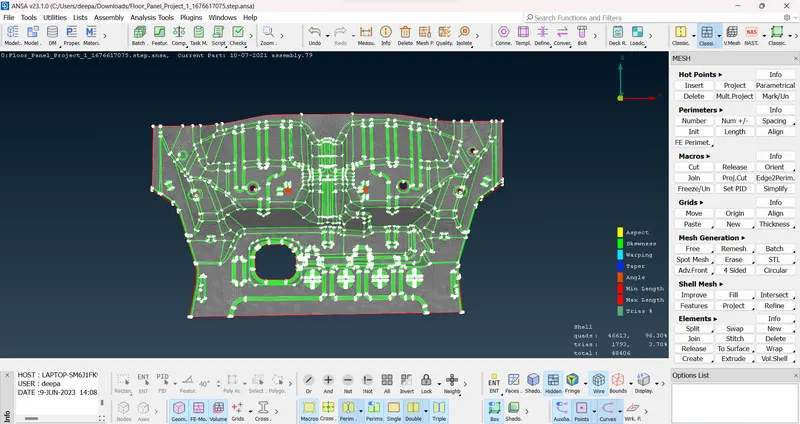
Result:
Quads - 46613 (96.30%)
Trias - 1793 (3.70%)
Total - 48406
Trias are mentained to a low level of 3.7%.
Conclusion:
- The geometry was cleaned, and the mid-surface was generated.
- The mid-surfaces meshed, and thickness was applied.
Note:
I have deleted the parent geometry and kept only the mid-surface and also compressed the file in order to upload it.