Week 3 - 2D meshing for sheet metal
Q.1) ANSWER-
AIM- To extract the mid surface and then mesh the component with given quality parameters and assign the thickness on the hood component.
OBJECTIVE- The given hood component has 4 components, but in the live session we have been told to work only on the Inner Panel.
To assign the property on each part with their parent component thickness and then mesh the component with target size of 5mm and as per given quality parameters.
|
Sr. No |
Quality Criteria |
Value |
|
1 |
Target/Average Length |
5 |
|
2 |
Minimum Length |
2 |
|
3 |
Maximum Length |
7 |
|
4 |
Aspect |
3 |
|
5 |
Warpage |
15 |
|
6 |
Skewness |
45 |
|
7 |
Jacobian |
0.7 |
|
8 |
Minimum quad angle |
45 |
|
9 |
Maximum quad angle |
135 |
|
10 |
Minimum angle tria |
30 |
|
11 |
Maximum angle tria |
120 |
|
12 |
Tria percentage |
15 |
PROCEDURE-
1.1) Import Model:
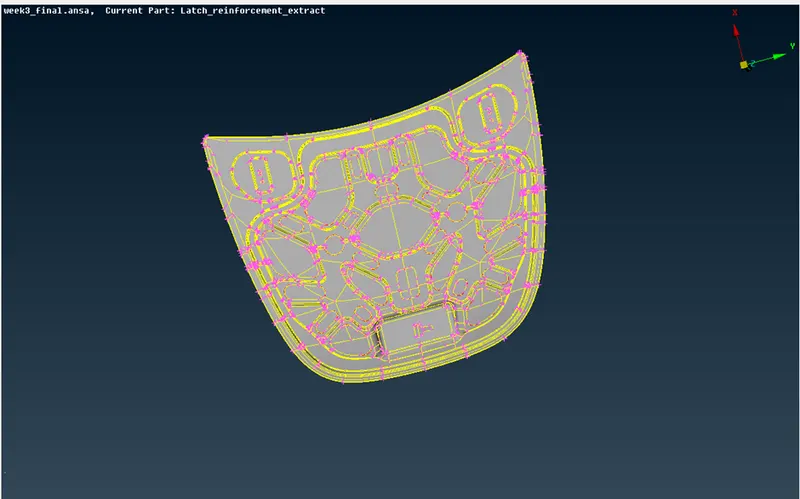
- First we import the given step file. The model has 4 components, but we work only on the inner panel. The thickness of the inner panel is 0.75.
-
1.2) Geometry cleanup:
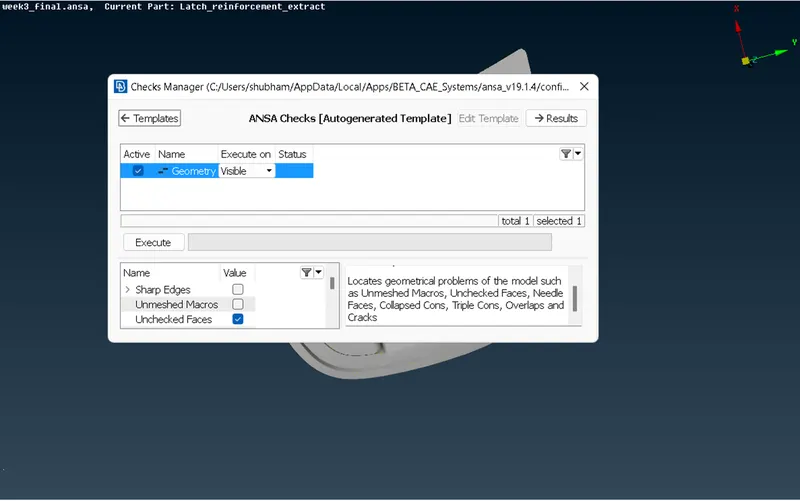
- The next step is to cleanup the geometry using the command [Checks>Geometry] and clean up the errors using the auto fix and the topo tools like new face, delete and topo, etc. to achieve 100% accuracy .
1.3) Midsurface Extraction:
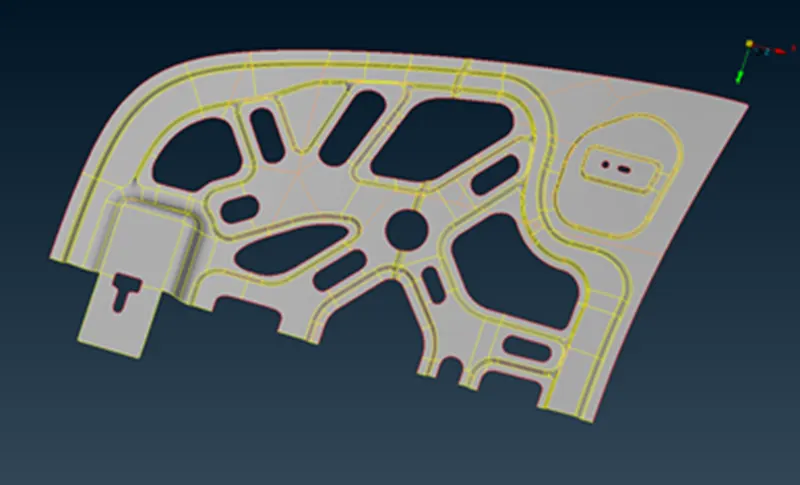
- After the geometrical cleanup is done, we move on to extract the midsurface of the component. We use the offset option by giving the distance half of the thickness.
- As this is a symmetrical component, we delete half of the component and only one part of the component is extracted and then reflect it later.
- The midsurface is again checked for errors.
1.4) Assigning Property and Thickness.
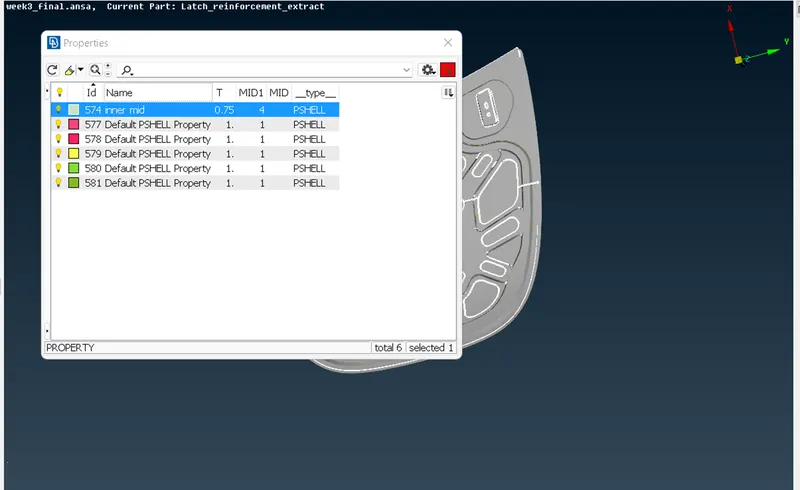
- The midsurface of the component is assigned with new PID and respective thickness.
1.5) Meshing:
- First, we enter the given target element size and quality criterions.
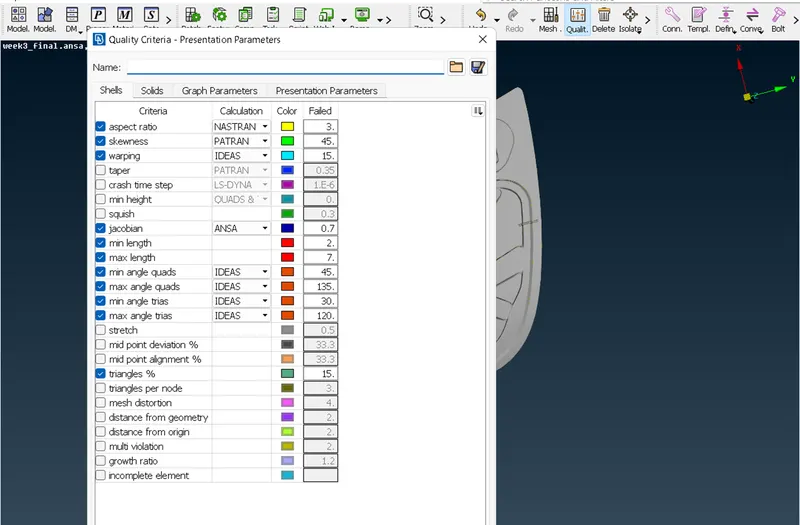
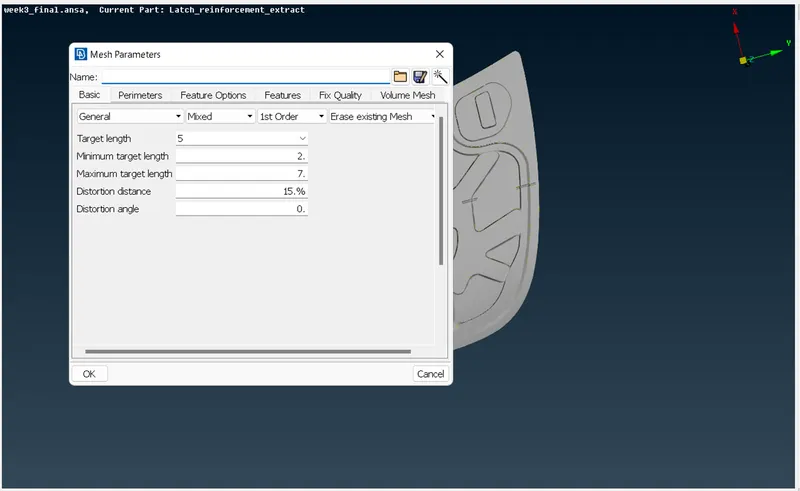
- Cons and Hot points are altered according to fit the criteria.
- The perimeter and macros are set for 5mm using the length in the perimeter option of the mesh tab.
- The mesh quality is improved using the reconstruct command in Shell mesh.
- Further failing elements are rectified using the following commands- Split, Swap, Join (Elements tab), Smooth (Shell mesh tab), Paste (Grids) and Num +/- (Perimeter tab)
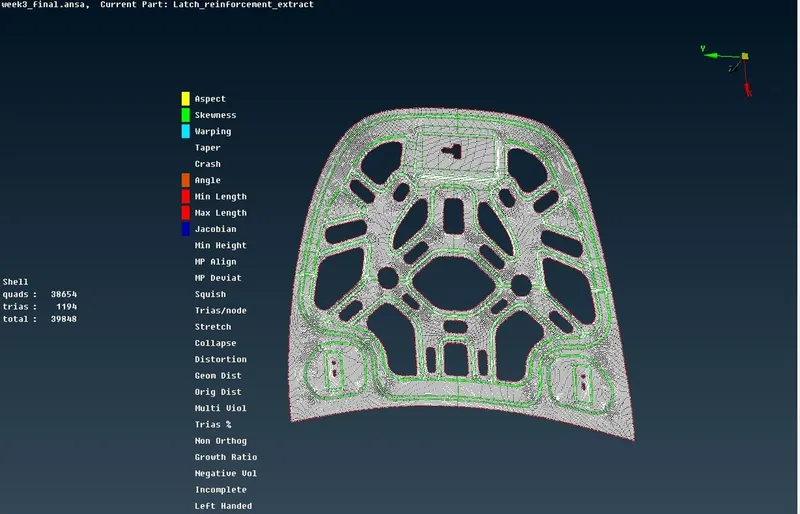
- The symmetric surface is then reflected using the command (Transform>Copy) option (Symmetry>Working plane).
1.6) Learning Outcomes:
- Basics of ANSA software tools
- To cleanup geometry errors of components.
- To extract the midsurface of the components and assign property and thickness to them.
- To mesh the components according to the given quality criterions with better mesh flow and less concentration of trias.
1.7) Conclusion:
- The given hood component is meshed successfully satisfying the given quality criterions.