Week 3.2 - 2R Robotic Arm Challenge
Aim:
To write a program in Matlab to simulate the forward kinematics of a 2R Robotic Arm.
Objective:
To write a program in Matlab to simulate the forward kinematics of a 2R Robotic Arm. Generating an animation from the program's graphs. Observe how a 2R robot moves in a 2D workspace.
Governing equation:
- cos(theta)=x1/L1; x1=L1*cos(theta1)
- sin(theta)=y1/L1; y1=L1*sin(theta1)
- x2=x1+L2*cos(theta2)
- y2=y1+L2*sin(theta2)
Theory:
The robotic arm is frequently used in manufacturing roles. A typical robotic arm is made up of seven metal segments, joined by six joints. The computer controls the robot by rotating individual stepper motors connected to each joint (some larger arms use hydraulics or pneumatics). Unlike ordinary motors, step motors move in exact increments. This allows the computer to move the arm very precisely, performing the same movement over and over. The robot uses motion sensors to make sure it moves just the right amount.
An industrial robot with six joints closely resembles a human arm — it has the equivalent of a shoulder, an elbow, and a wrist. Typically, the shoulder is mounted to a stationary base structure rather than to a movable body. This type of robot has six degrees of freedom, meaning it can pivot in six different ways. A human arm, by comparison, has seven degrees of freedom.
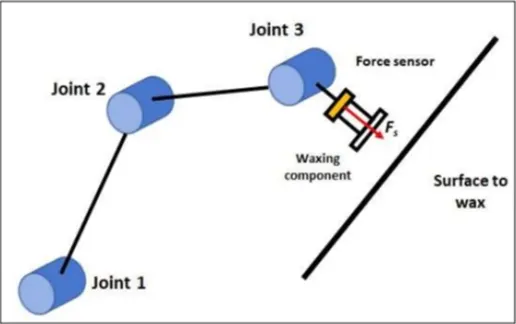
Your arm's job is to move your hand from place to place. Similarly, the robotic arm's job is to move an end effector from place to place. You can outfit robotic arms with all sorts of end effectors, which are suited to a particular application. One common end effector is a simplified version of the hand, which can grasp and carry different objects. Robotic hands often have built-in pressure sensors that tell the computer how hard the robot is gripping a particular object. This keeps the robot from dropping or breaking whatever it's carrying. Other end effectors include blowtorches, drills and spray painters.
Program code:
% To write program in Matlab to simulate the forward kinematics of a 2R Robotic Arm
% Testing some commands to clear and close all windows

clear all
close all
clc
% Taking inputs
% Length of (L1) and (L2) in meter
L1=1;
L2=0.5;

% Angle by L1 and L2 in degrees (theta_1,theta_2)
theta_1=linspace(0,100,20);
theta_2=linspace(0,100,20);

% Initialising base coordinates of L1
x_0=0;
y_0=0;

ct=1;

for i=1:length(theta_1)
    THETA_1 = theta_1(i);  % taking particular values of angle by L1
    for j = 1:length(theta_2) % iterating all values of theta_2 for particular value of theta_1
        THETA_2=theta_2(j);  % taking particular values of angle by L2

        % Calculating the coordinates of end point of L1
        x_1=x_0+L1*cosd(THETA_1);
        y_1=y_0+L1*sind(THETA_1);

        % Calculating the coordinates of end of L2
        x_2=x_1+L2*cosd(THETA_2);
        y_2=y_1+L2*sind(THETA_2);

        % Plotting the robotic arm for simulation
        plot([x_0 x_1],[y_0 y_1],[x_1 x_2],[y_1 y_2], "linewidth",3);
        axis([-0.1 1.5 0 1.5]);
        % Pausing the current plot for a while before movoing to the next and plot
        pause(0.1);
        % Capturing the current plot to combine later
        M(ct) = getframe(gcf);
        % Incrementing ct for each frame is captured in M
        ct=ct+1;

    end
end

% Making a movie from collected frames
movie(M)
% Creating a video file of '.avi' format to save the animation
videofile=VideoWriter('2R_robotic_arm.avi','Uncompressed AVI')
open(videofile)
% movie in the videofile created
writeVideo(videofile, M)
close(videofile)
Expalnation:
1. To write a program in Matlab to simulate the forward kinematics of a 2R Robotic Arm.
2. Testing some commands to clear and close all windows.
3. Taking inputs of Length of (L1) and (L2) in meter.
4. Angle by L1 and L2 in degrees (theta_1,theta_2).
5. Initialising base coordinates of L1.
6. Taking particular values of angle by L1 and iterating all values of theta_2 for a particular value of theta_1. Again, taking particular values of angle by L2.
7. Calculating the coordinates of end point of L1 and end of L2.
8. Plotting the robotic arm for simulation and pausing the current plot for a while before moving to the next and plot.
9. Capturing the current plot to combine later and incrementing ct for each frame is captured in M.
10. Making a movie from collected frames and creating a video file of '.avi' format to save the animation.
11. Then, a movie in the video file is created.
Output:
The output is in an animated video clip. The youtube link is attached below.
Conclusion:
Using the MATLAB application, a simulation of the forward kinematics of a 2R Robotic Arm in a 2D workspace was generated.