Week 2 Challenge : Surface meshing on a Pressure valve
Title : - SURFACE MESHING ON A PRESSURE VALVE
Aim/Objective : - To perform surface meshing on a pressure valve with different target lengths and element type as tria.
Procedure : -
- Open the ANSA Software> File> Open. Open the file Challenge 2.ansa file.
Pressure valve will be imported and will be displayed on screen (Figure 1). If toolbar and icons does not displays labels then at below click Right Click of mouse> Show labels> Apply to all.
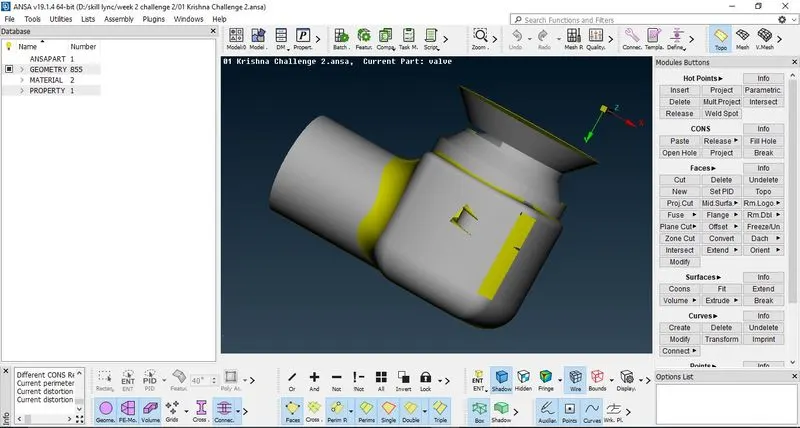
Figure 1:- Model imported in ANSA Software
2. Now go to Topo mode in order to check the topology of model. To check the geometry error of model and repair it, initially perform geometry check. Go to Toolbox> Tools> Checks> Geometry. This will open the checks manager (Figure 2).
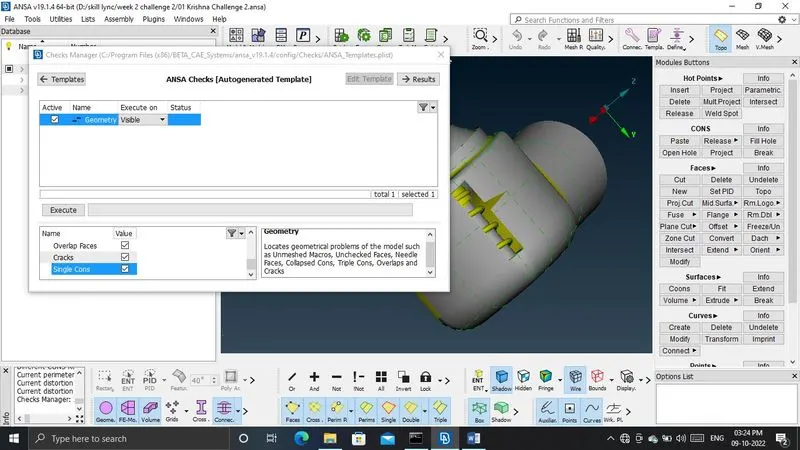
Figure 2: - Geometry Checks
3. In the list turn ON the single cons, and click on execute. This will execute the geometry check for the list turned on. It will show errors as shown in (Figure 3).In order to do the volumetric mesh, there should not be any single cons. The model must have closed surface. So all the single cons must be repaired.
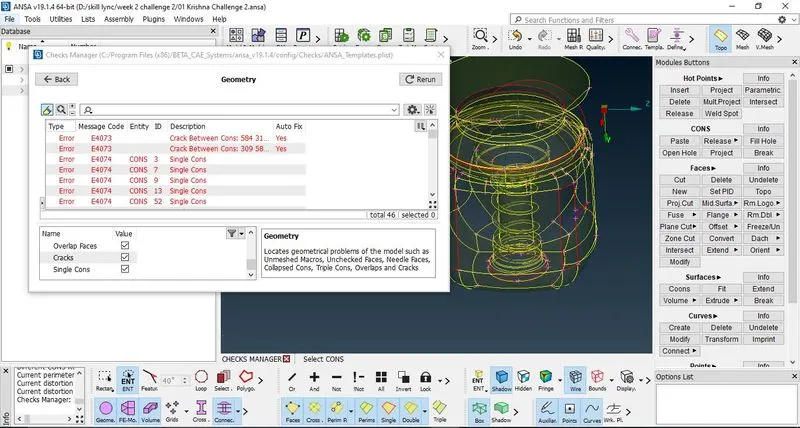
Figure 3: - Error log after executing geometry check
4. To make the closed surface, add new faces and fill holes by clicking on Faces>New. This will open new face option. There are 4 options that can be used to create a new face. i) Existing Surf: Can be used to create a face in the existing surface. ii) Planer: For plane surface iii) Fitted : To fit the surface in between the surfaces iv) COONS: To use COONS click on the loop option to select the cons in one click. Then press scroll button to confirm, and then to accept the surface press OK.
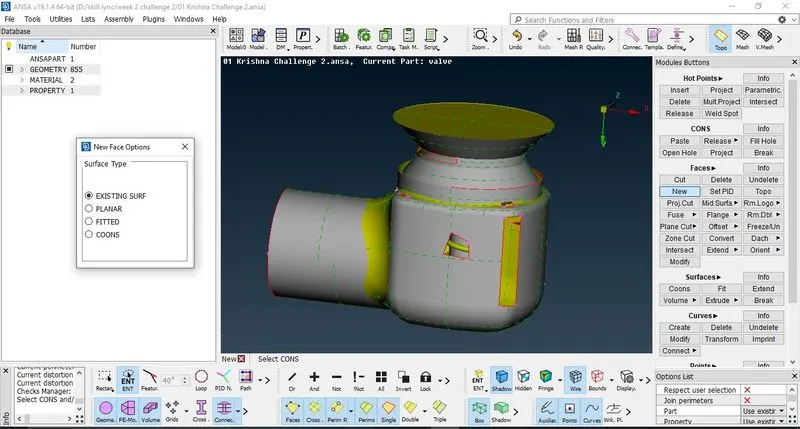
Figure 4: - New face options menu
5. Also in the CONS menu in TOPO Modules we can use fill hole to fill the surface as shown in figure.Now fill all the remaining patches as shown in figure 5. When the COONS and Fitted option is used, it will ask whether to select the previewed face or an alternate option. Also if it is not required to select all cons together in loop option we can use ENT. More option to select is PID region which can be selected. Close the faces which are open.
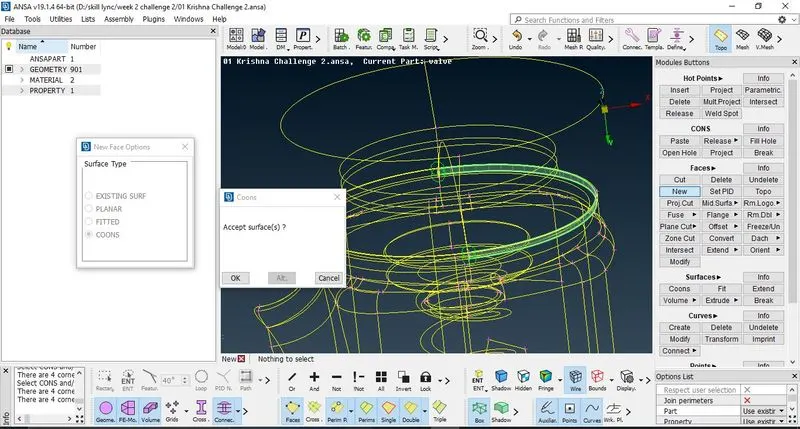
Figure 5: - Surface selection in COONS menu
6. Holes can be filled using CONS>Fill Hole. Select the holes and gaps to be filled.
7. Thus TOPO Cleanup is done. Fill the hole and then again check the geometry by doing geometry checks. We get that there are triple CONS present and that’s not a problem. Remove the unnecessary lines by using cut option in faces. Go to Faces> Cut, then right click to remove the unnecessary hot points and cons. This is done in order to have good quality and proper meshing.
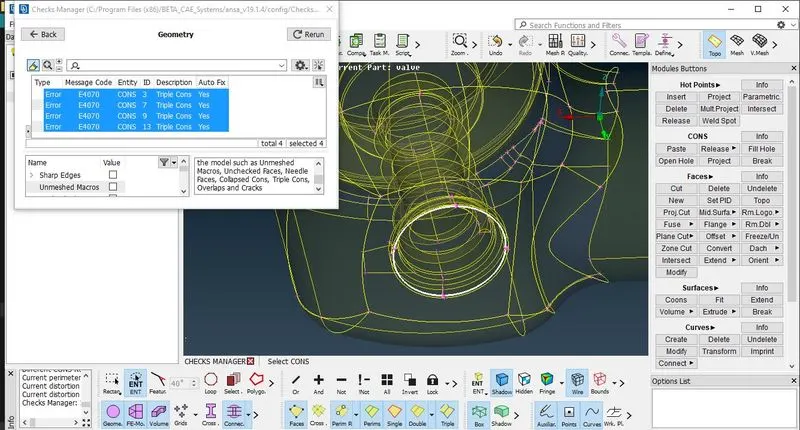
Figure 6:- Triple Cons are shown during geometry check
8. Now select the PID mode beside the shadow icon where ENT is selected. Then go to toolbar> select on properties>right mouse click> New> PSHELL>PSHELL.
Define the property and name it as inlet. Repeat the same to define the other properties.
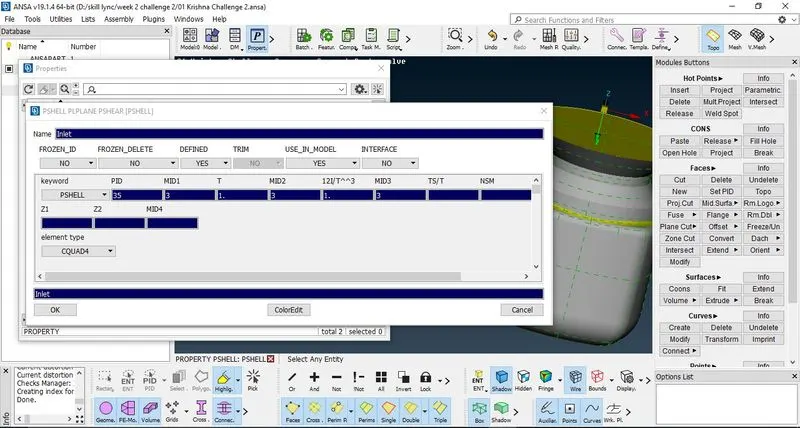
Figure 7: - Defining the property
Now define the property on the given model as properties> Rigt click on the defined property> apply> select the part> Middle click of mouse to confirm.
THUS WE DEFINE THE PROPERTY AS INLET AND OUTLET INITIALLY
Now to define the body, we need to use Boolean operation 'OR' and also select PID region to select the outer region instead of selecting whole assembly.
This will only keep the outer region and will hide the inner valve spring assembly.
Thus define the body using same procedure.
9. Now to give different colors in defined properties double click on colored box beside the property name and give the required color and press OK.
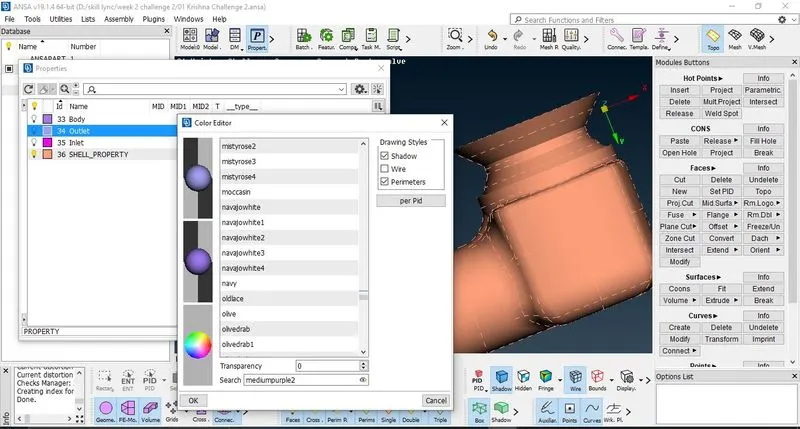
Figure 8: - Color defining
10. Now similarly use the boolean operations to seperate the valve head, spring and container and define the properties.
Now to remove the shell property which is undefined, use Face>Undelete> Select front outlet face> Confirm by pressing scroll button. Then go to properties> SHELL_PROPERTY> Right click> Delete>Confirm the option.
This completes the Topological cleanup and repair.
11. Now select on Mesh> Mesh Parameters>Change the mesh length to 3mm from average.
Change element type from mixed to tria. Define the mesh length max and min value from 0.25 to 6.
Go to Mesh Quality > Max value > change the value from 0 to 0.25
Mesh Quality> Min Value> change the value from 0 to 6.
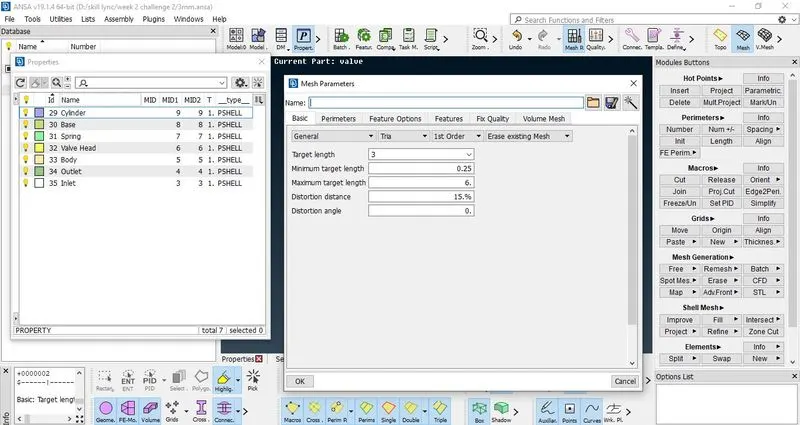
Figure 9: - Mesh parameters defining
12. Now click on Perimeters in module button> Length > Perimeters> Select the model > define target length as 3mm
Macros> Select the model> define as 3.
Now to mesh the complete model, mesh the model surfacewise by hiding the faces from properties>left click on yellow icon beside Property name
13. Now to generate the mesh click on Mesh generation> Spot meshing > select the surface> scroll button to confirm.
Complete the mesh for other surfaces. This completes the surface meshing of pressure valve with 3mm as target length and element type as tria.
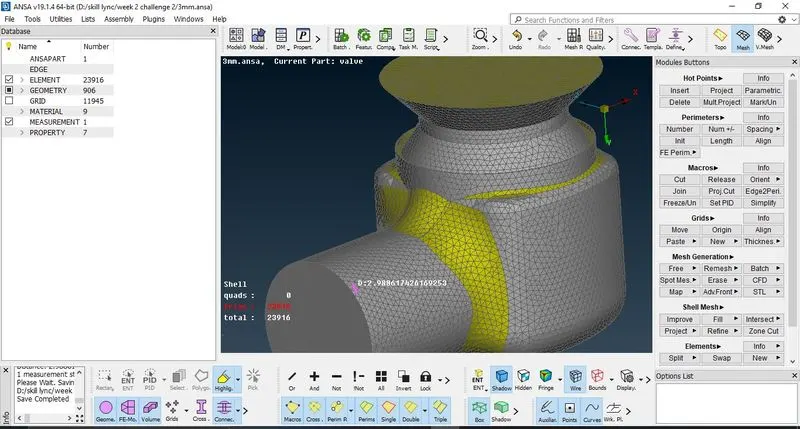
Figure 10: - Meshed model
Repeat the complete procedures for target length as 1mm and 5mm with element type as tria.
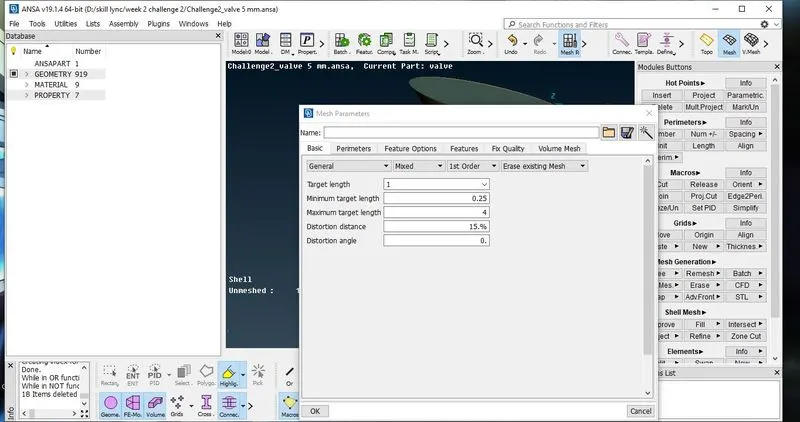
Figure 11: - Giving the target length as 1mm(further change the option from mixed to tria)
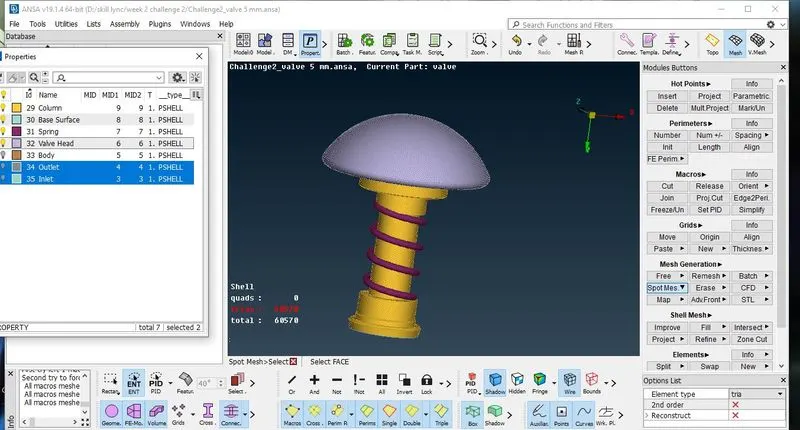
Figure 12: - Meshing the surfaces seperately and then making it visible
Result/Conclusion: - It was observed that for lower mesh length ( target length) good quality mesh is observed and proper meshing means better simulation results. For 5mm target length the meshed model seems to be distorted on the spring part. Thus it can only be given at surface having large areas. Lower the target length finer the mesh quality.
Learning Outcomes: - The property defining and performing geometry check and repairing it were learned. Also defining the quality mesh was also learned, moreover the proper meshing to be done and the effect of target length on the meshing was also learned.
Link to download the model
https://drive.google.com/file/d/1kzjKTut7VkQrq8gGf6DDihtFyxCyoZq0/view?usp=sharing