Week 2 Challenge : Surface meshing on a Pressure valve
AIM
To remove the geometrical errors, perform a Topology cleanup, and Surface Mesh the given Pressure Valve model.
THEORY
A pressure valve is a mechanical device that releases/transfers pressure from one system to another. This functions on the premise of how much pressure a spring system can sustain after which it realizes the pressure which is categorically defined by the spring constant.
We have
`F= -kx` , where k is the spring constant
`=> P.A = -kx`
`=> P = -(kx)/A`
In the below procedure of meshing, the procedure will consist of three main procedures.
1. Face Addition (Geometry Error Cleanup)
It is the most basic and primary step to have a complete geometry, thus helping in defining the Property ID (PID). The surface addition can be carried out by numerous methods. ANSA primarily provides the addition of face surfaces through COONS, FITTED, PLANAR, and EXISTING SURFACE. Apart from these, ANSA also provides a feature called FILL HOLE under the CONS bar in the TOPO Menu. These tools help surface addition in numerous missing spaces thus completing the geometry surface.
2. PID definition and Intersection Error removal (Topo Cleanup)
PID definition is an important aspect as it helps define the surfaces and further their mesh properties in complex geometries. It is also crucial as and when the models are exported for CFD analysis. Following the definitions, the intersections caused by the surfaces are ought to be removed without which CFD analysis is not possible. The surface intersections are removed using the INTERSECT tool in the FACES bar of the TOPO Menu. The INTERSECT tool lets us select the two surfaces causing intersections and eliminate the unnecessary surfaces.
3. Setting of Mesh parameters
Setting mesh parameters include setting up mesh element length and also mesh quality criteria in complex geometries. Here, the design will consist of 3 different mesh structures. 5mm, 3mm, and 1mm.
PROCEDURE
On opening the ANSA launcher, the CFD layout is used along the performance mode 3 for efficient performance.
Geometry Error Cleanup
As the model is launched, the geometric cleanup is performed on the model. This primarily includes -
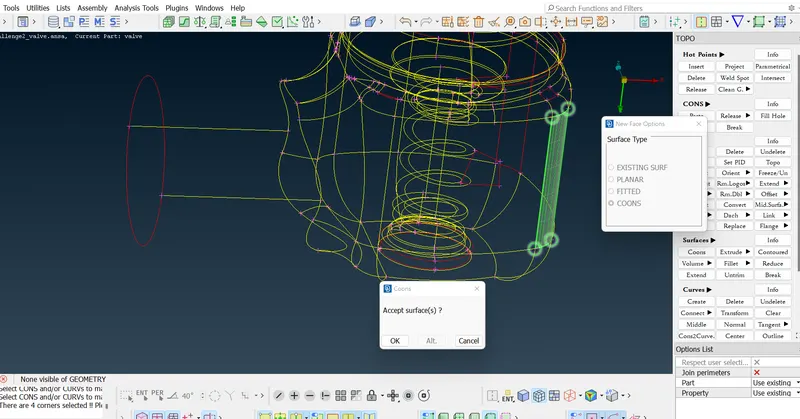
- Addition of faces in the incomplete geometry. The faces can be added by selecting Faces > New > Coons/Fitted/Planar/Existing Surface. After selection of any one based on the type of surface addition, the open ends of the surface are selected, thus helping the tool detect the empty surface.
- After selecting the surface the wire mesh helps us understand if the face option selected is the right fit. Ctrl+Shift can be used to check the viability of the new surface. Moreover, the FILL HOLE tool can be used to fill in small surfaces.
Note that planar/fitted surfaces are used in surfaces existing in a single plane.
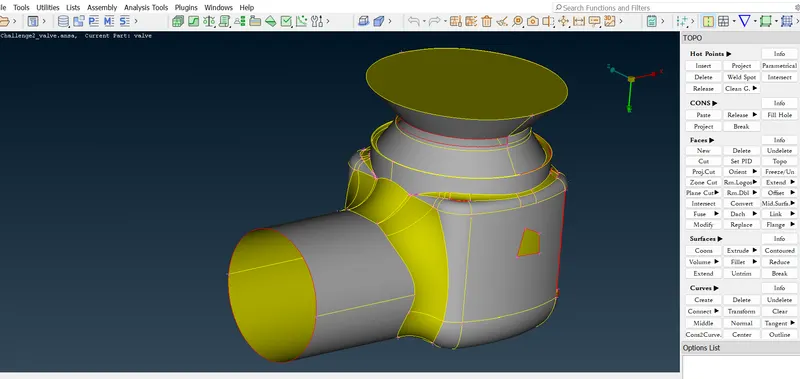
Below is the image showing the initial geometric errors in the model.
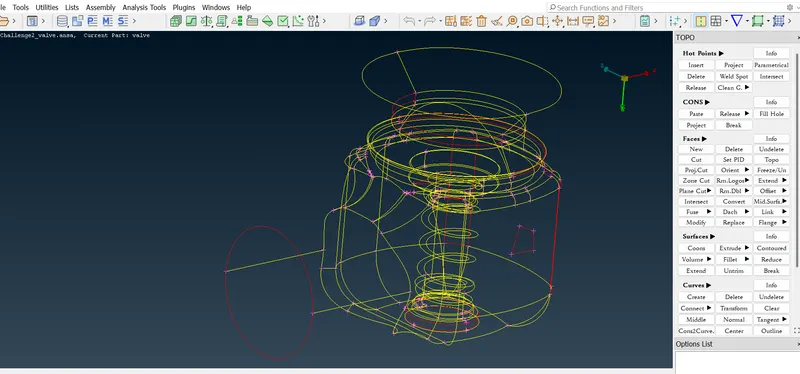
Below is the image showing the initial geometric errors in the model in the wireframe form. The red and blue cons denote the errors in the wire frame.
Below is the image showing the surface addition using COONS.
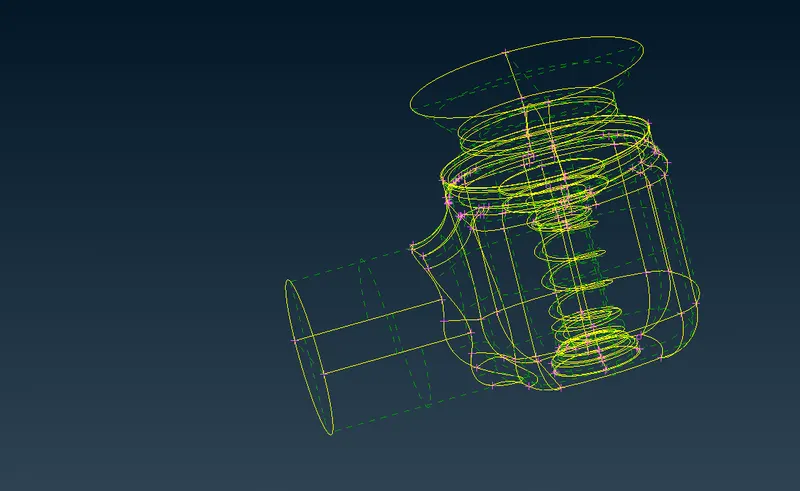
Below is the image showing the model after the addition of faces and removal of geometry errors. Note that all single cons are addressed.
Assigning of PID and Topo Cleanup
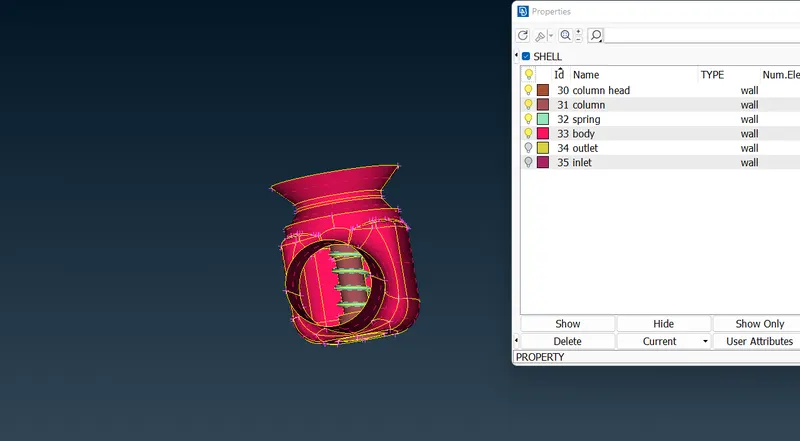
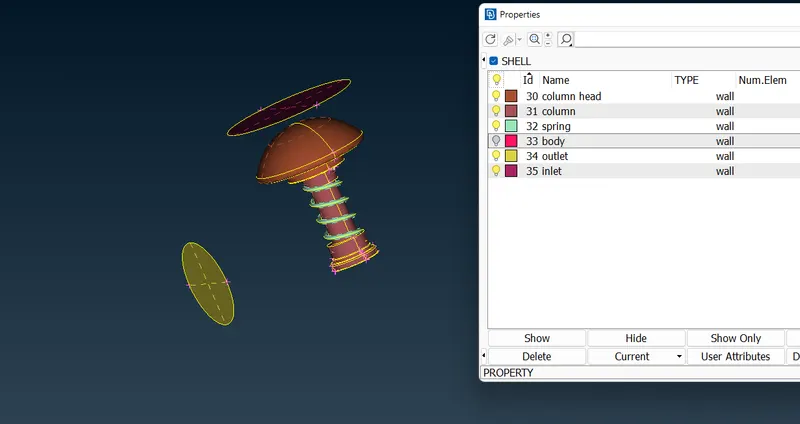
- Prior to Topo Cleanup, the PID is assigned for the surface parts. These include the Inlet, Outlet, Outer Body, Column, Column Head, and Spring. This is carried out under the Properties icon in the Main Menu Bar. There the properties are added with the help of the PID region selection tool located in the bottom left beside the ENT selector tool.
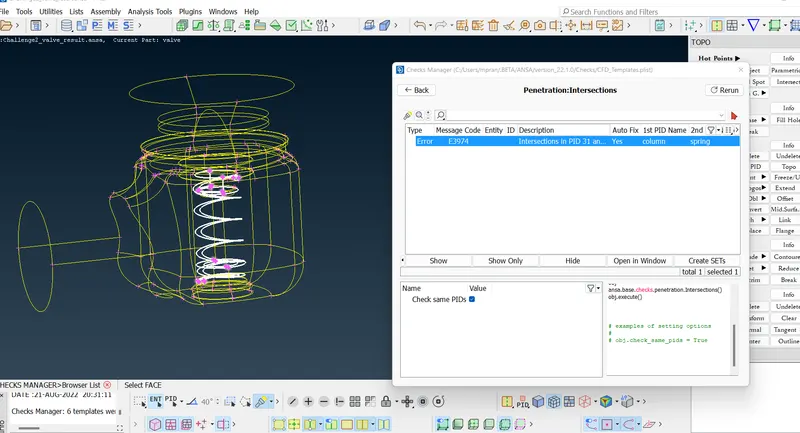
- After assigning of PIDs, the Check Manager in the Main Menu bar is used to check the geometry and intersection errors. After execution, one intersection error is detected between the spring and the column.
- This is addressed with the Intersect tool in the Faces bar in TOPO Menu. On selection, the two intersecting surfaces need to be selected. In this case, it is the column and spring. After selection, ANSA highlights the surfaces intersecting one by one. The extraneous surfaces are deleted.
Below are the images showing the PIDs of different parts.
Below is the image showing the intersection error in the wireframe, showing column and spring as errors.
Below is the image showing the geometry errors after the removal of intersection errors.
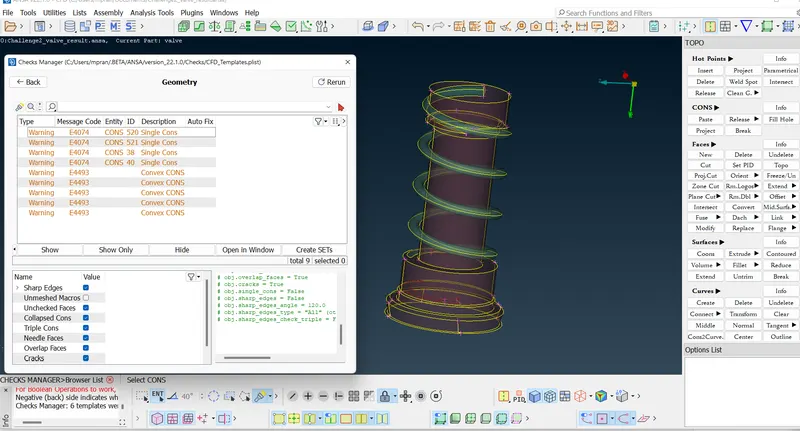
The single CONS are in the bottom of the column which can be removed using the Delete tool. The Convex CONS are ignored in this case as it does not interfere with geometry.
Mesh Generation
After the Geometry Error cleanup and Topo cleanup, finally, mesh parameters can be defined.
- The maximum and minimum mesh lengths are set in the Mesh Parameters icon in the Main Menu Bar.
- The same is done in the Quality Criteria icon in the Main Menu bar.
- Further, the mesh lengths are set in the Mesh menu. This is performed by selecting Mesh module > Perimeters > Length > Perimeters > Select the whole surface > Set the length to 5mm/3mm/1mm. Similarly got to Macros (in the same window of Length) > Set the length. This defines the element length of the mesh.
- The next step includes the meshing. This is a simple surface. Therefore both CFD and Spot Meshing can be used. However, for complex surfaces, CFD Meshing is preferred. Under Mesh Generation in Mesh Module, Long press Spot Mesh > Visible. The mesh with tria elements is formed.
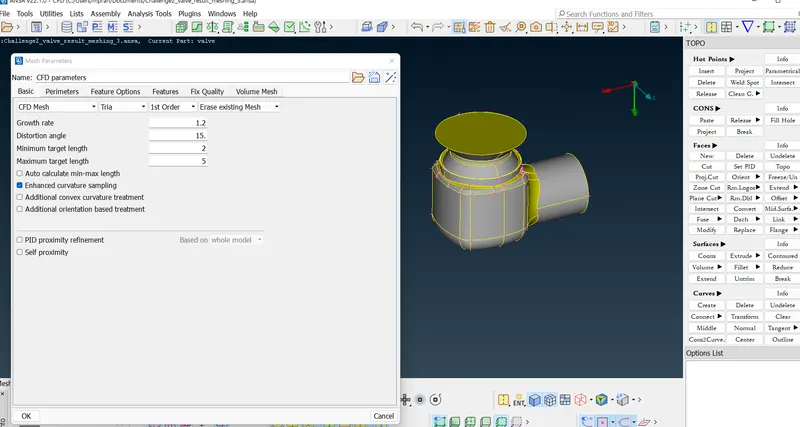
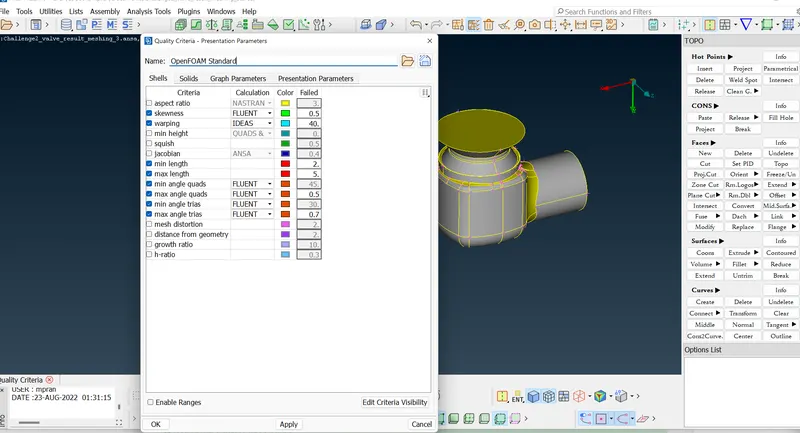
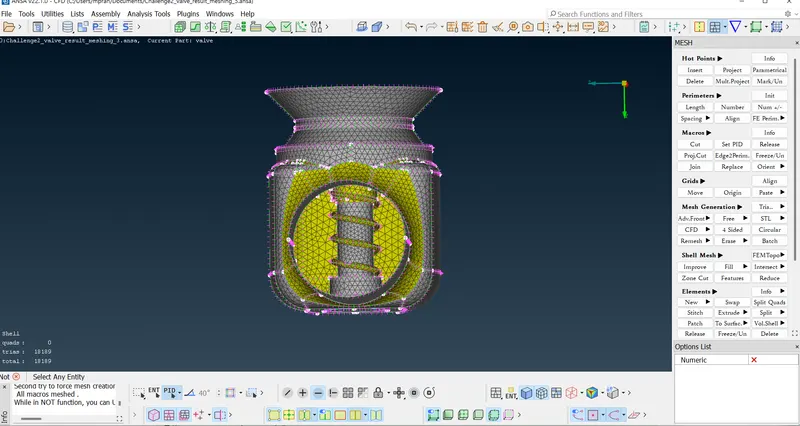
Below is the image of the final surface meshed model with 3mm element length.
Result and Conclusion
We can conclude from the final meshing of all the given element sizes that in element size = 5mm, the spring is not well captured in the meshing. As we decrease the element size to 3mm, the spring gets partially captured. And as we implement the 1 mm element size, it can be evidently noted that the 1mm size gives the finest meshing and captures the spring and column intricately.
Please find attached the models with the 1mm, 3mm, and 5mm element lengths.