Week 12:Project-1-Meshing of Door Inner Panel Challenge
WEEK 12 CHALLENGE
PROJECT 1 . MESHING OF DOOR INNER PANEL
OBJECTIVE:
The main objective in week 12 challenge is to perform Meshing of door inner panel according to given quality criteria values and to assign thickness for elements .
Aspect Ratio-5
Skewness - 45
Warping -15
Tape r- 0.5
Target elem. Length - 4 units
Min. Length - 2 Units
Max. Length - 6 Units
Min angle Quad - 45
Max angle Quad - 135
Min angle Tria - 20
Max angle Tria - 120
Tria % - 10
PROCEDURE:
- First Import the file by going to File - Import - Model - Type - IGES - Select the file - Import
- Press 'F' to fit the model in the screen
- Primarily check the thickness of the surfaces by going to Distance command(F4)
- For checking thickness on flat side or varied surface create nodes by going to Temp. nodes -Click and hold on one side and the portion will be highlighted than you can click wherever node is needed and for another side to check thickness
- Go to Project select the node to be projected - Duplicate the node twice - Select the opposite surface where node is to be duplicated -
- Now Go to Geom - Distance(F4) - Two nodes - measure the thickness wherever the thickness cannot be found easily
- Than start extracting midsurface manually as the component is with varying thickness by going to Geom - Surface edit - Offset -mention the offset value and extract the midsurface
- But this offset method cannot be followed for extracting midsurfaces for varying thickness Ribs
- For midsurface of Ribs - Go to - Geom - Line command - midline - Select one line for one linelist and another also for second linelist than - Click create - the midline will be created for that thickness
- Than Go to - Geom - Surface edit - Trim with lines - select surfs which is to be trimmed and Free lines as mid line - another shared edge will be formed on the surface
- Now Go to - Geom - Surfaces - By using ruled option - Create a surface for both lines - this will be the midsurface for a Rib
- Second method for Extracting Midsurface for varying thickness Ribs
- Go to - Geom - Midsurface - Final edit tools - Select - side 1 surface - side 2 - Another side of surface to be selected - Click on Extract - The midsurface will be extracted directly
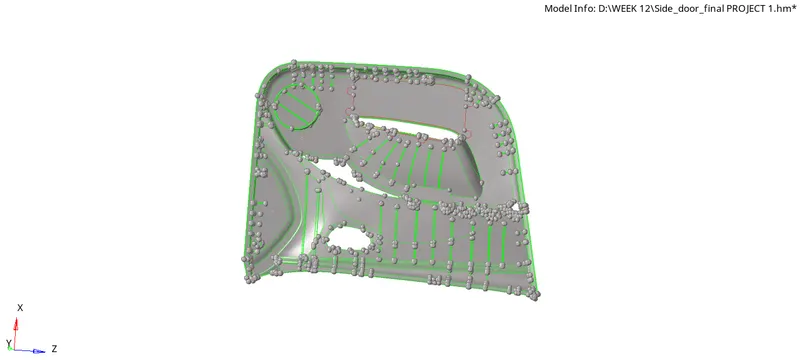
AFTER MANUAL MID SURFACING
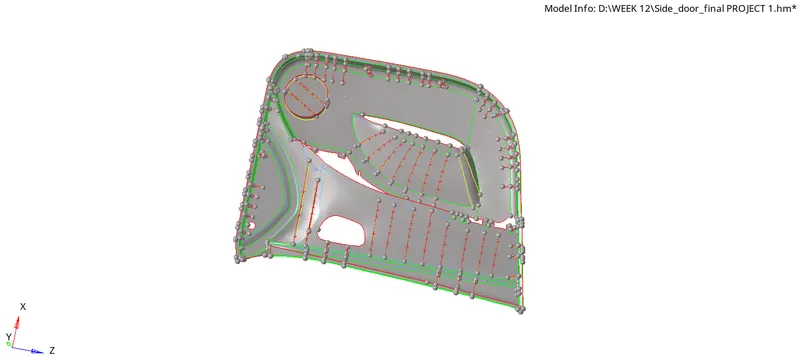
- After extracting all the mid surfaces start meshing by going to - Automesh - Target element size - 4 units - Mesh each and every midsurface individually to get proper mesh
- Than check for Quality criteria failure of elements by going to Tools - Check elements - Min. elem length, max. elem length, Skew , Aspect ratio , Warping etc... check those values and if any failures correct that by
- 2D - Quality index - By using Element optimize, Drag trias , smooth options bring all the failed elements to zero and than the mesh will look organised
- Now this created mesh should be assigned with thickness by creating seperate components for each size and should assign with the property with same thickness as
- Create - Component - Rename according to our thickness value - Mention thickness value in dropdown values of component - Can choose a colour also
- Than Create a Property - Rename with same value as in component - Enter the thickness as same as entered for component ss - Click enter - Data will be saved
- Now according to the thickness by verifying in parent model organise elements to the components created according to their necessary thickness values and now - Right click on the component and Click on - Assign - Mention property with same thickness -Apply - Ok - Tahn the thickness will be applied for those elements
- Cross verify those elements by going to 2D Detailed Element Representation the elements will be with the mentioned thickness values
AFTER MESHING AND ASSIGNING THICKNESS
RESULT:
Finally to perform Meshing of door inner panel Challenge according to given quality criteria values and assigning thickness for elements is successfully completed.