2D meshing Interior plastic component of the rear door of the car - HYPERMESH
OBJECTIVE : To create the mesh on the given component under given quality criteria and assign thickness. The component provided under project-1 is side door which is plastic component. Side door consists of large number of surfaces with different thickness so that the midsurfaces for it are large in number.
PROCEDURE :
- Geometry checkup for free edges
- Mid surface creation for all the surfaces
- Meshing the component
- Quality checkup
- Thickness and material assign
- 2D detailed element representation
Geometry checkup for free edges
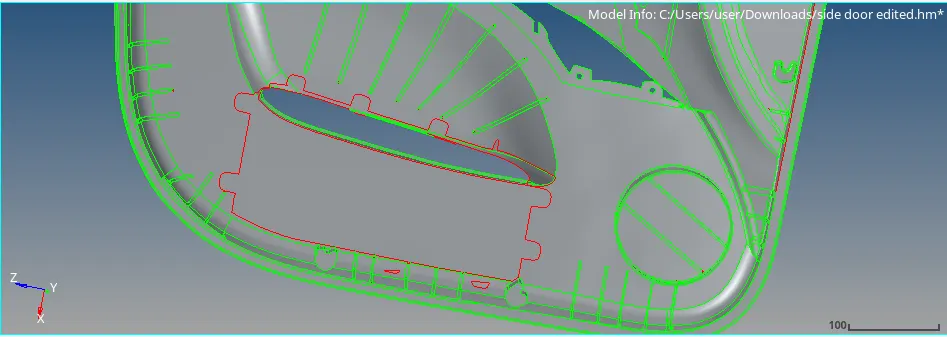
The given side door is imported into hypermesh and the geometry is well checked up for free edges. This checkup is essential one beacuse it will affect the mid surface if it has free edges. After the free edges absence in parent geometry procedures for mid surface are done. Here the mid surface is offsetted only from the front view of the door since there is a large part is removed already at the back portion of the door.
Mid surface creation for all the surfaces
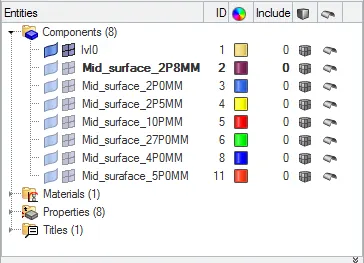
Side door consists of large number of surfaces with different thickness so that mid surface has been extracted manually using offset under surface edit tool. The thickness of every sufaces have been measured and those mid sufaces are alinged properly to different components in component collectors. The below image depicts the component collector shows the component collector.
After offsetting the surfaces to their half of the value and towards inwards (since the upper surface is choosen), colour has been applied seperately. Since the mid surface extracted here is manually, all the edges are not connected to each other. Using the quick edit tool followed by toggle edge, all the edges are made to share with each other. Before proceeding to mesh, all the surfaces are splitted. This is done by the same quick edit tool followed by surface split by node/line. This provided the surfaces with complex curves to easiest meshing.
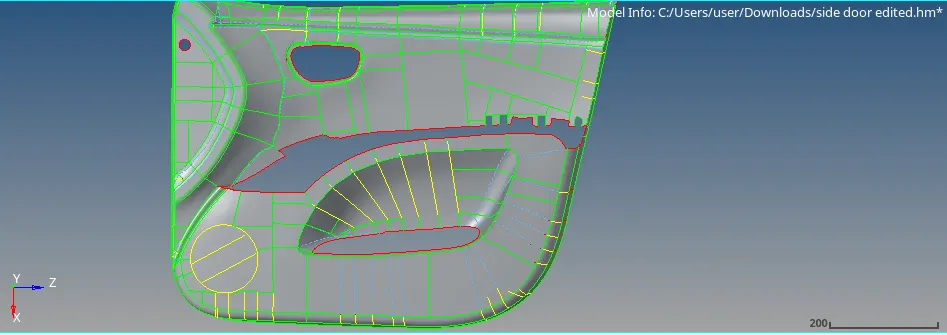 The above image provides the clear concept of surface spliiting to get fine mesh. This method also reduces the trias concentration. How long we go for the surface split, the fine and easiest mesh with quads elements can be attained. Another procedures for surface mating of child surfaces of side door are done. The yellow edges in the above image are the examples of this mating. The child surfaces are nothing but the surfaces of small parts small overlapped on the main side door. Those midsufaces are also extracted manually and made into contact with main side door mid surface using surface edit tool followed by extend the child surfaces to the main surface.
Meshing the component
To start the mesh after successful mid suface creation, mesh flow should be checked properly. The mesh flow should be from converging surfaces to diverging surfaces. It results in reduction of trias concentration. In other words, the mesh flow should be from moderate surfaces to simple surfaces. Here the mesh is done from upper surfaces to lower surfaces since there are some complex curve surfaces are there in upper portion. While meshing quality has been checked simulteanously after meshing of that particular surface. Surfaces are meshed using auto midsurface. The element density at the edges are changed to get proper mesh. The target element size used for meshing is 4mm.
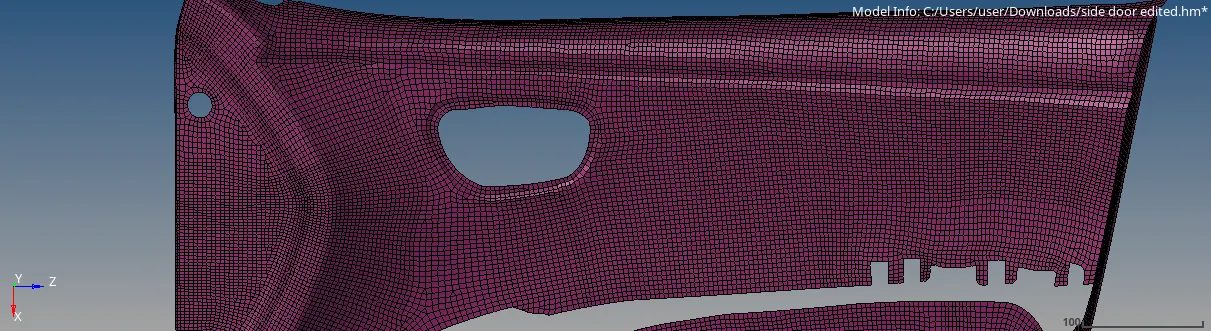
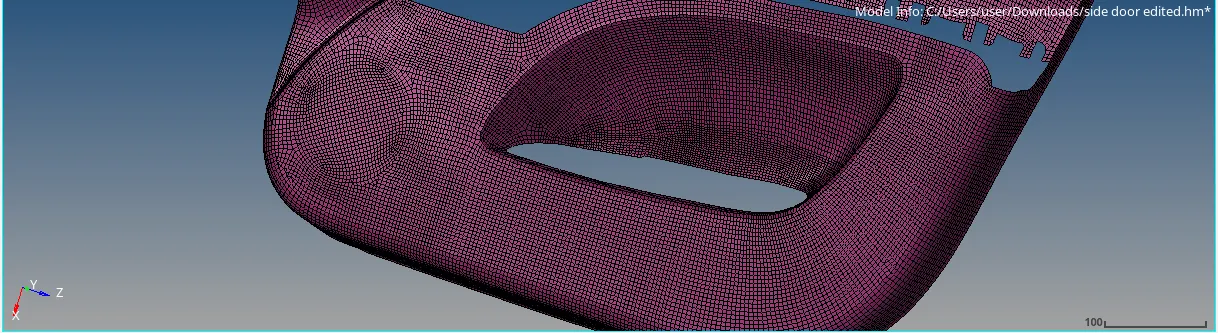
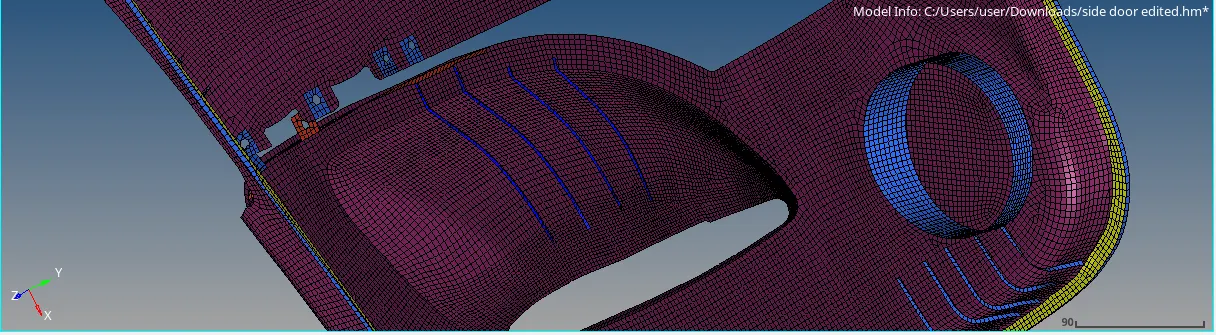 The upper, lower and back portion of the meshed side door are snapped and placed seperately to provide the better view.
Quality check up
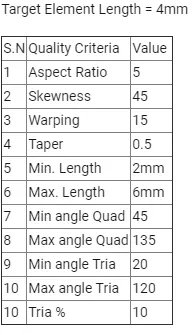
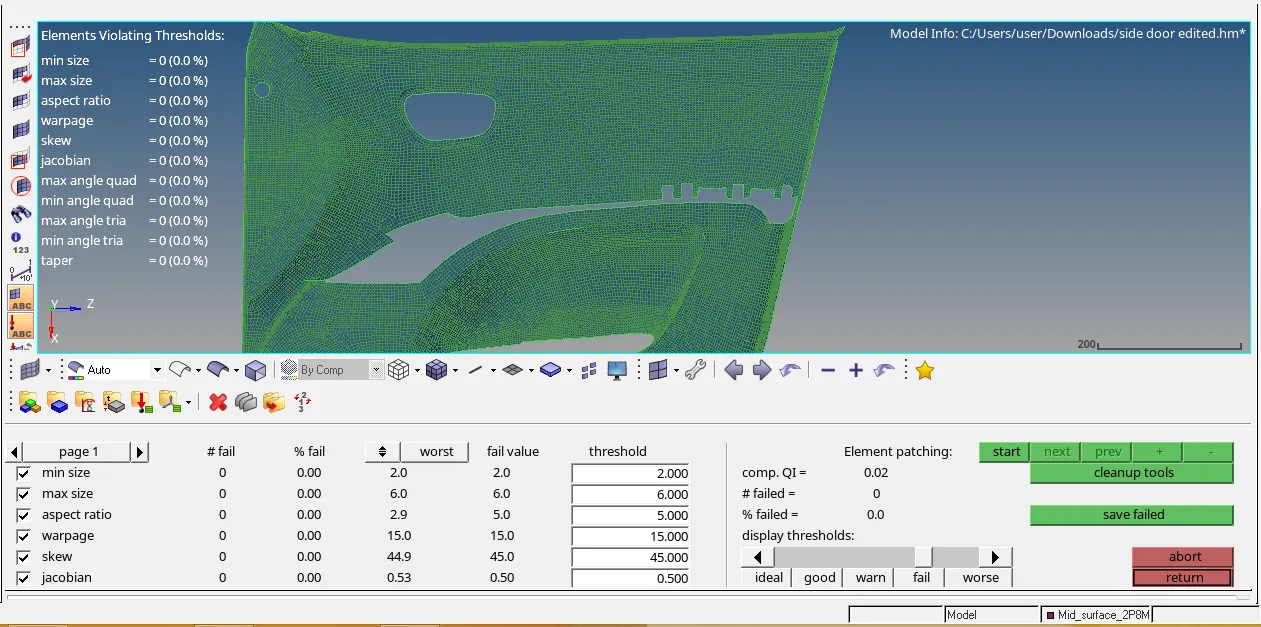
After meshing all the sufaces, quality criteria is checked for all the elements. The quality criteria for side door is in below image.
Thickness and material assign
Material and thickness are assigned to the side door. The thickness for each and every surfaces are assigned using property in component collector.
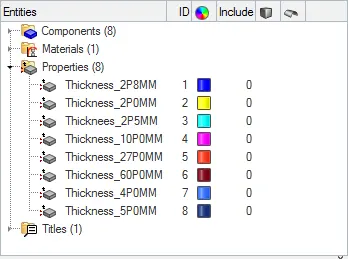
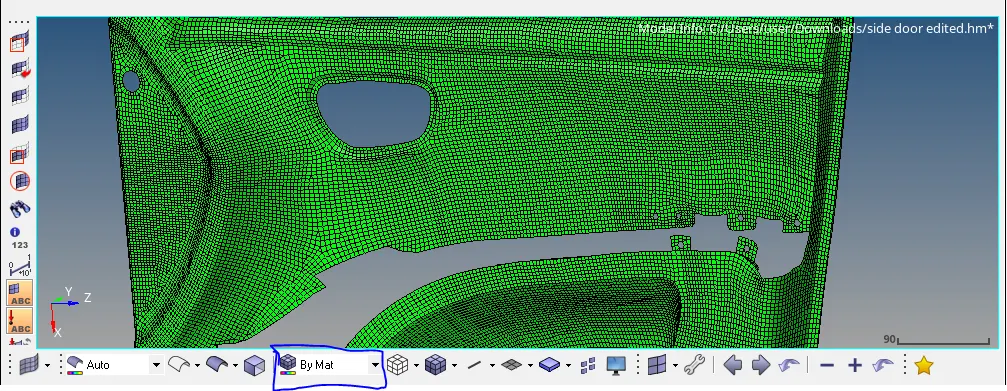
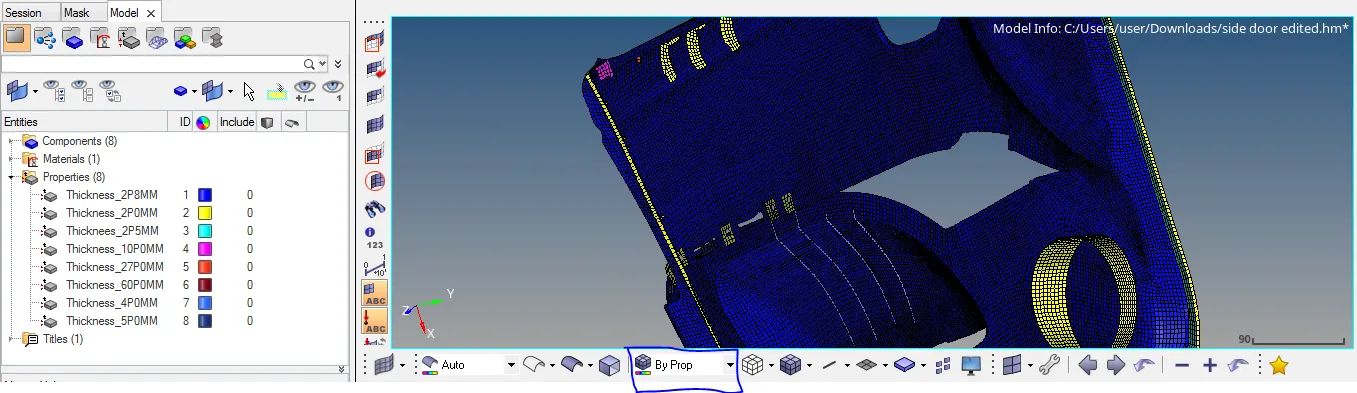
The below images show the mesh after material and thickness applied. "By mat" means 'By material'. "By prop" means 'By property'.
2D detailed element representation
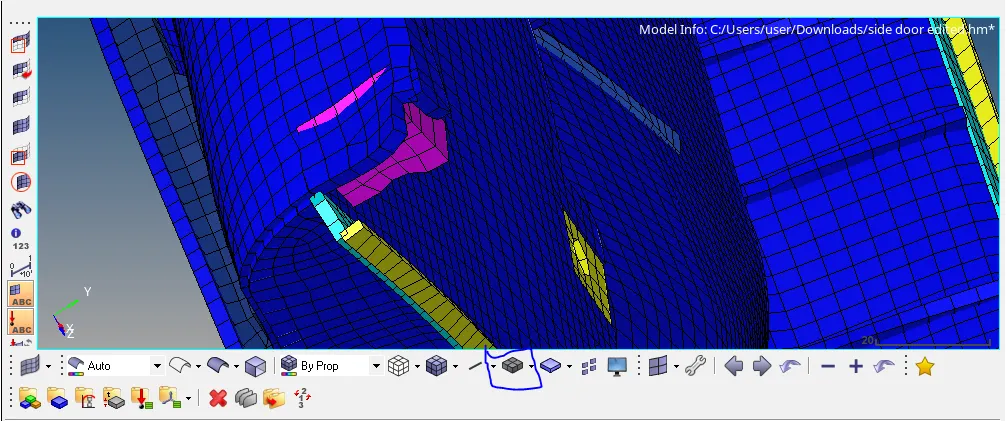
2D detailed element representation is nothing but changing the view of the 2D elements with their thickness.
CONCLUSION :
The given side door is meshed with given quality criteria and the material and thickness are assigned to the respective components. Learning outcomes from this project are
- Mesh flow should be find before meshing the component.
- Surface splitting results in decreasing the trias concentration.
- How to mate the child surfaces with the main surface and to eliminate the successive errors while mating.
https://drive.google.com/open?id=1CODhpsmnILOJou0durZE_gkX1yGoGpin