Week 12- Final project
Door trim lower panel-Final project
Aim:
In this project, we create the door trim panel Components that is (Lower subtract, Armrest, Bottle holder, map pocket) with the necessary input surfaces provided and generate the necessary B side features ( heat stakes, 4-way locators, Dog houses, push clips, Ribs, screw bosses etc) thereby assemble the individual components of the door trim by providing proper constraints thereby performing the proper draft analysis using catia V5 software
Objective :
The main objective is to create the individual components of the door trim with input class A surface provided and generate the class B and class C surface and produce the solid surface body out of it and perform the proper draft analysis with a required draft angle of 3 degrees for the body and continue the procedure for the remaining components. Then start creating the B-side features of the components by following the reference of the master sections provided and perform the draft analysis with an input draft angle of .5 degrees and assemble the components for the final door trim panel on the assembly workbench by providing the necessary constraints using Catia V 5 software
The procedure followed for the creation of the components:
- Analyse the input surface provided
- Class A surface as an input surface
- Tooling axis creation
- Draft analysis of class A surface
- Class B surface creation
- Class C surface creation
- Solid surface body generation
- Draft analysis of the solid body
- creating the B-side features
- Draft analysis of the solid body along with the B side features
Class A surface:
Class A surface is an aesthetic surface which is visible to the customer in the component
Class B surface:
Class B surface is an engineering surface where the B side features of the components like heat stakes, screw bosses, Ribs, and doghouses are situated
Class C surface:
Class c surface lies as an intermediate surface between the class A and the class B surface which means it generally accommodates the thickness of the whole plastic component
The input provided for the design is
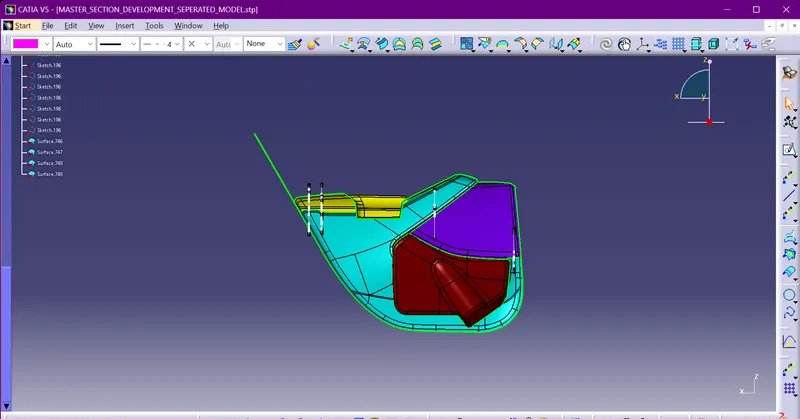
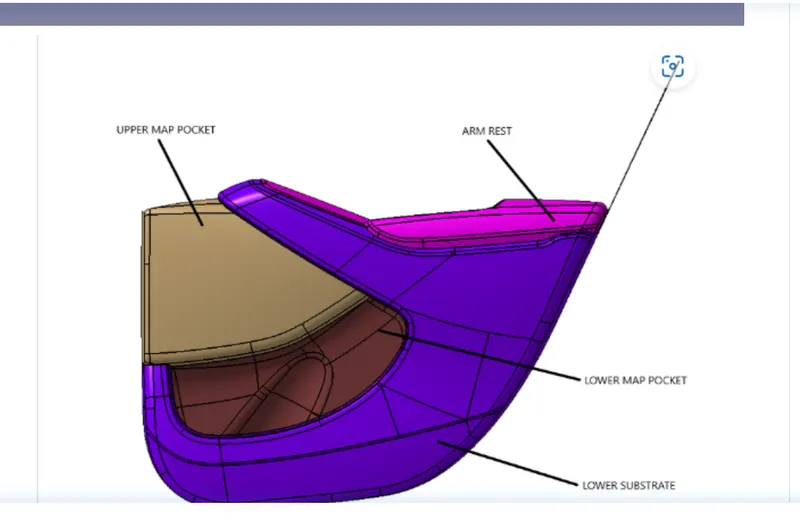
Armrest design:
In the front of the car, a central armrest, which commonly folds away based on user preference, will also often include a storage compartment and sometimes even cup holders. Some also provide the location for controls for non-essential functions of the vehicle, such as climate control or window motors
For the Armrest design, the input class a surface provided is
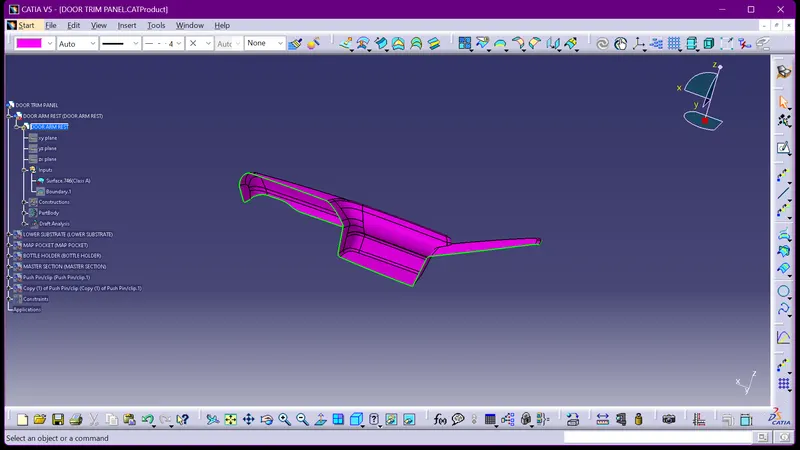
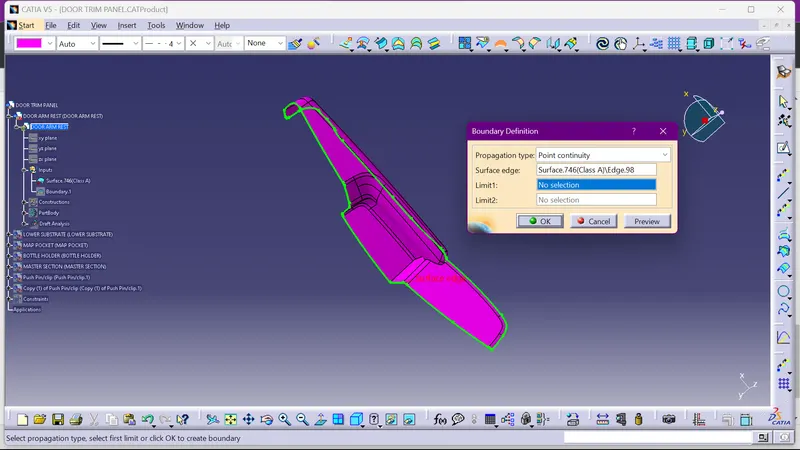
To check whether the surface has any open boundaries use the boundary feature then we can identify that there is an open patch or the surface which we need to work on
Tooling axis creation:
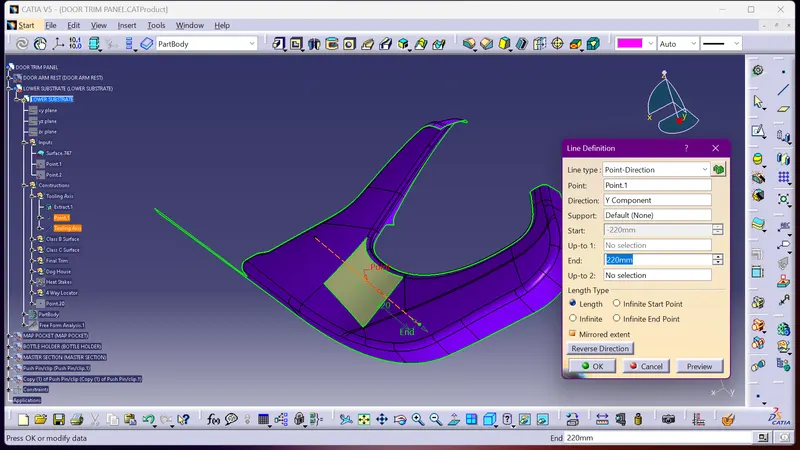
Extract the surface of the body and make a point on the surface. Using the line command create a line in the Z-axis through the point.
This is the main tooling axis
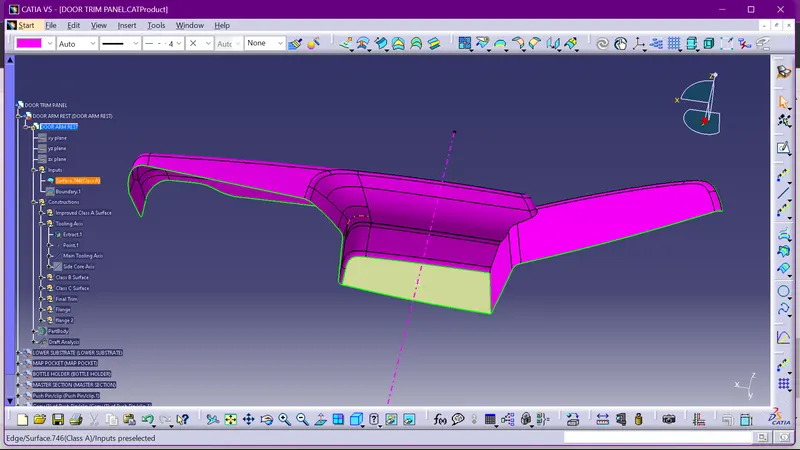
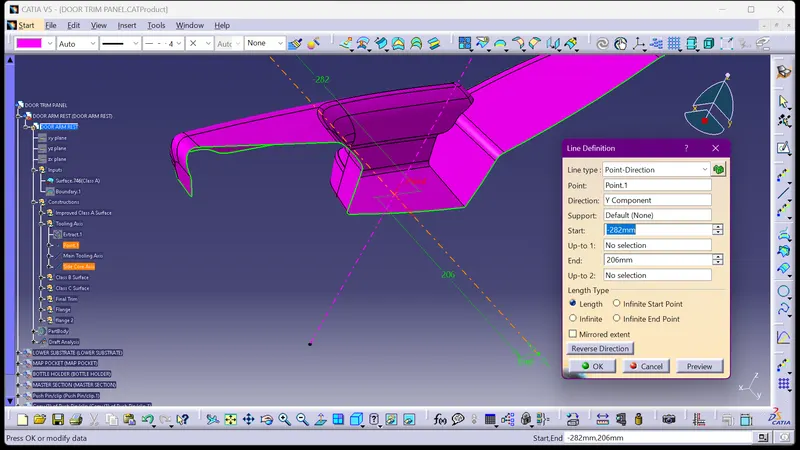
Presently step forward to make the side tooling axis utilize the point-direction method for making the side core axis
Draft analysis of the class A surface:
When the creation of the tooling axis is done perform the draft analysis of the class A surface whether all the surfaces of class A are clearing the draft examination or not
The general draft angle provided on the plastic engineering component is 3 degrees
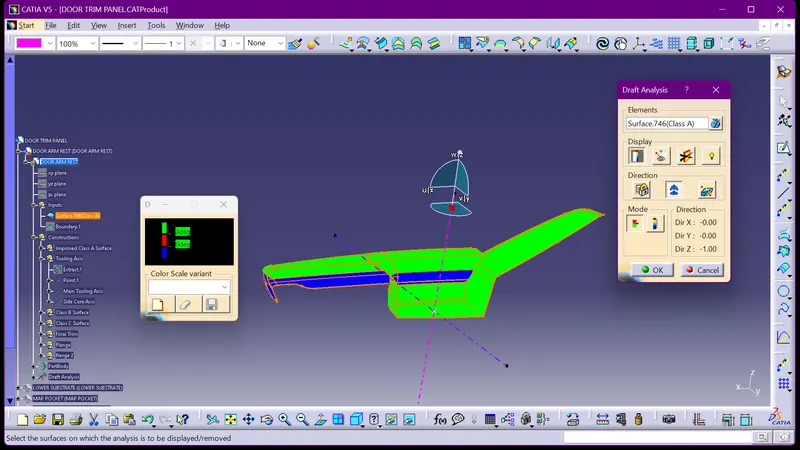
Here a portion of the surfaces of the class A surface can't have the option to clear the draft examination as for the main tooling axis so, it is possible that you ought to answer to the concerned group to update the draft on the uncleared surfaces or proceed with it.
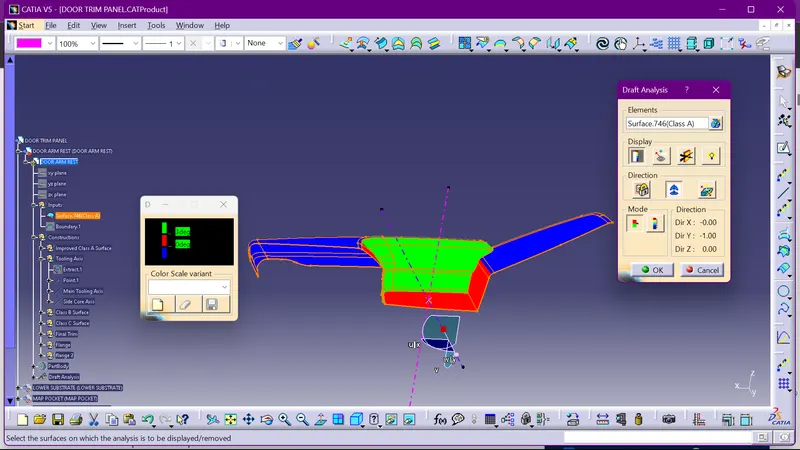
We can clear the surface of the A class using draft analysis through the side core axis
Class B surface generation:
Refer to the provided master section for the generation of the class B surface, measure the thickness of the plastic component, and then offset the class A surface 2.5 mm below the class A surface.
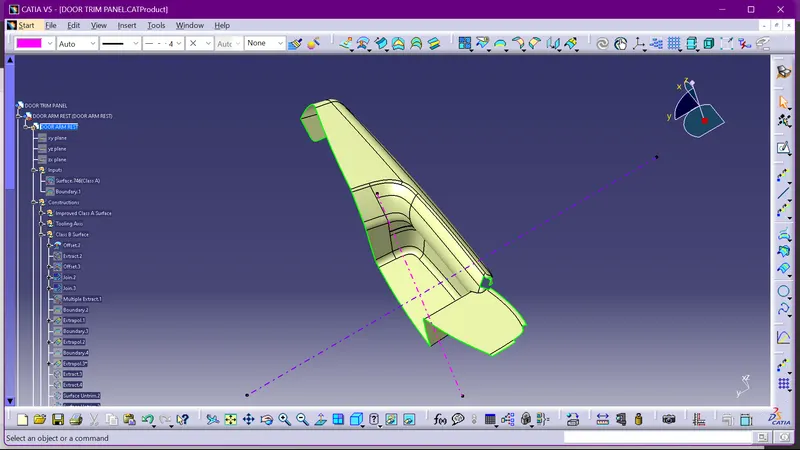
Some surfaces are missed after the offset. Perform surface work and create a surface over the missing areas.
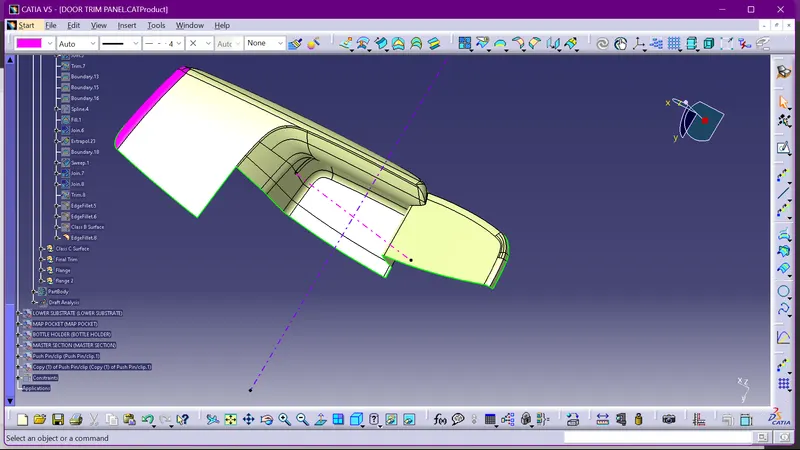
Making the surface of class C:
We use the class A surface as a reference for the generation of the class C surface and adhere to the draft about the reference surface and the main tooling axis.
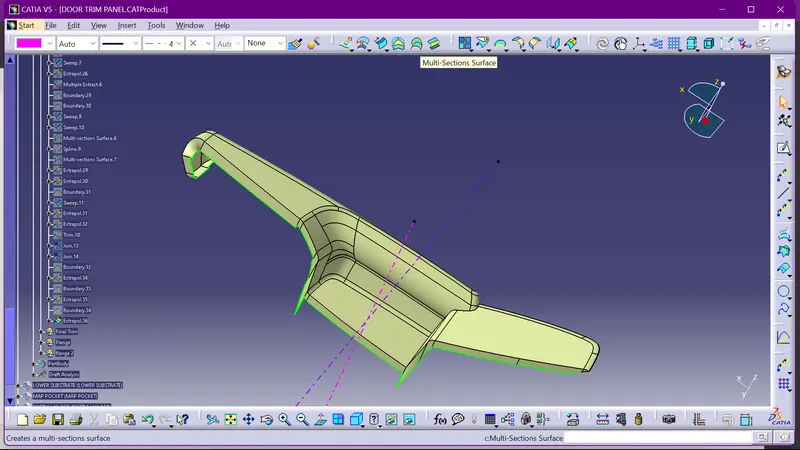
The final close surface generation:
After joining the class A and class C surfaces and trimming the resultant surface to match the class B surface, the resultant surface forms the final closed surfaces.
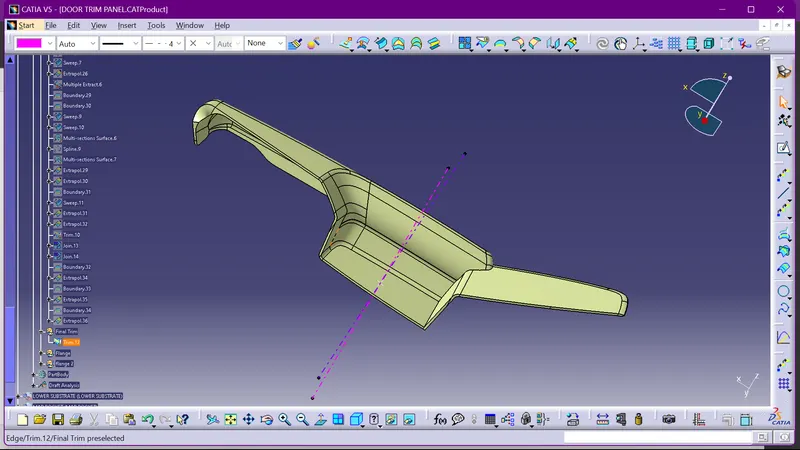
Create a new body using the solid body feature to create a solid surface body from it, which is the close surface of the plastic component with a thickness of 2.5 mm.
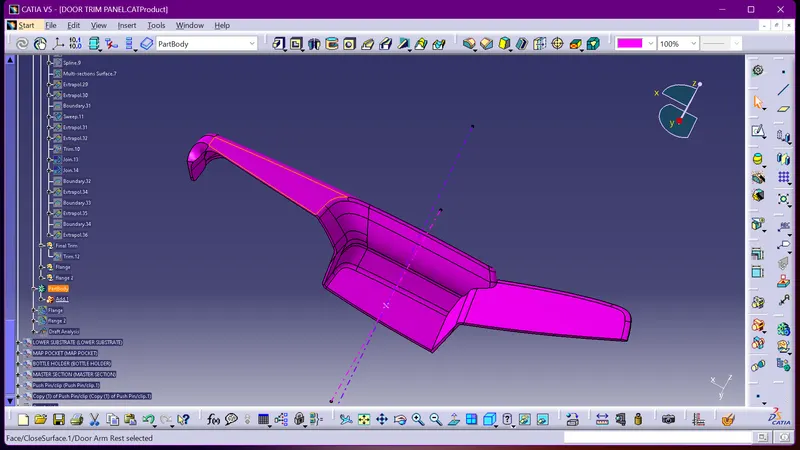
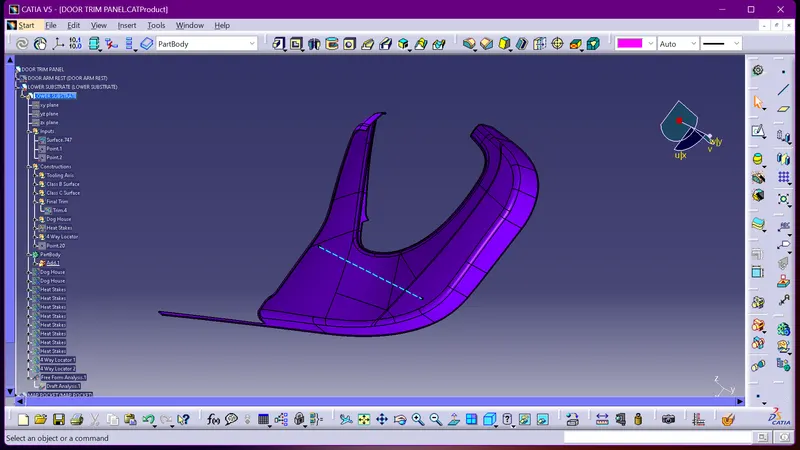
Lower subtract:
No boundary lines emerge after looking at the lower subtraction of the door.
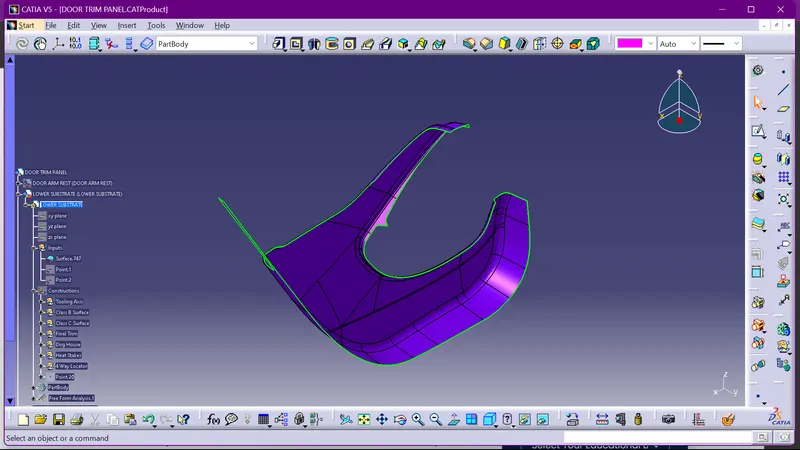
Tooling axis creation:
By viewing the surface in various orientations, extract the surface from class A, where it is easily visible and easy to manufacture. Next, using the point and direction method, draw a line from the middle of the surface at 0 coordinates. This line will serve as our primary tooling axis.
Draft analysis of the class A surface:
Perform the draft analysis on the class A surface to determine whether all surfaces are clearing the draft by 3 degrees relative to the tooling axis we create. If so, proceed with the model, or if you discover any flaws, share them with the class A team so that they can be fixed, or proceed with the creation of the class B surface.
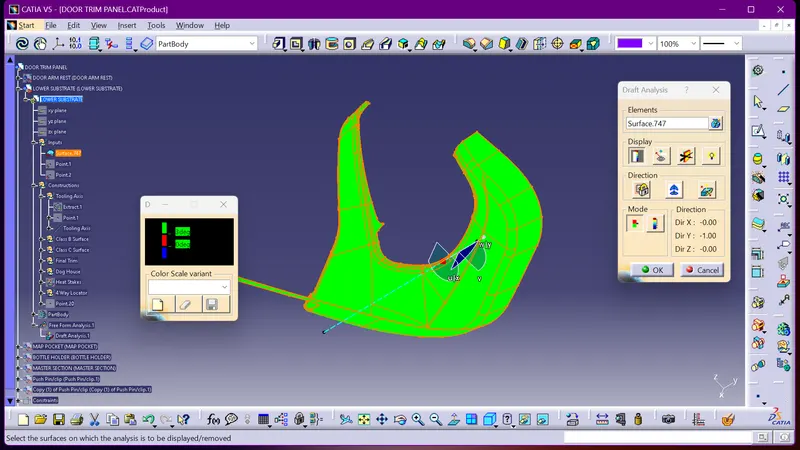
The class A surface completely clears the draft analysis of the three degrees concerning the created tooling axis.
Creation of class B surface:
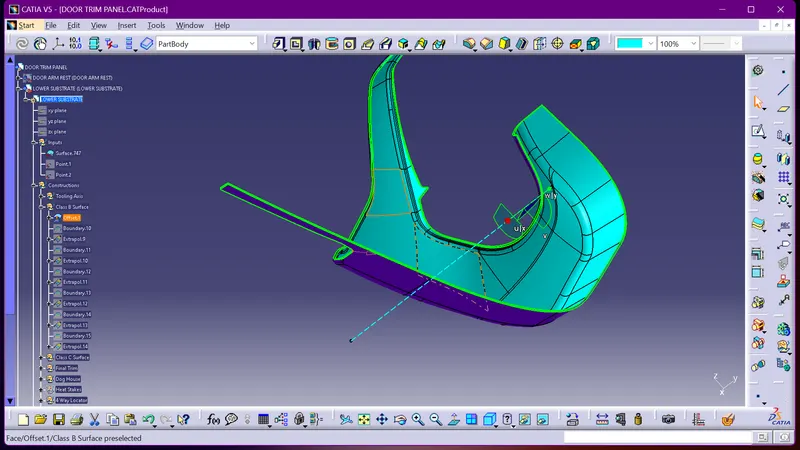
In the case of the lower substrate offset the class A surface to a value of 2.5 mm beneath the class A surface then extrapolate the class B surface which would help to make the final trim with the class A and C combined surface
Creation of class C surface :
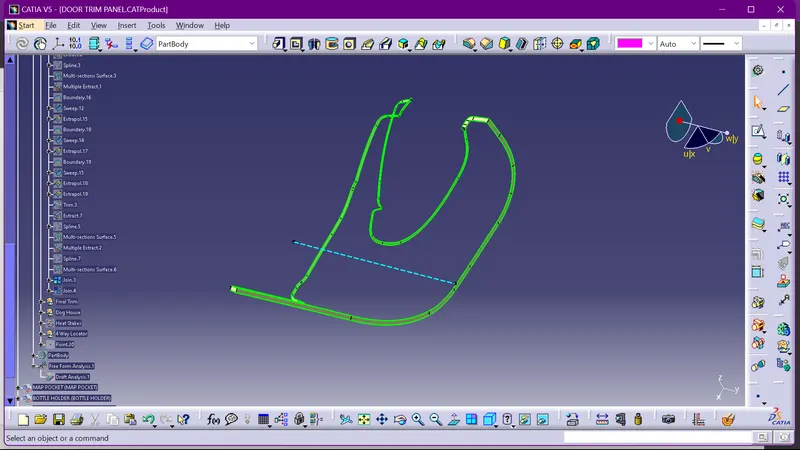
When the class C surface is parallel to the tooling axis, use the sweep to make an angle of 3 degrees concerning the draft direction. The surface should be outside the class A surface when viewed from the normal direction of the main tooling axis. Additionally, if the class C surface to be created is perpendicular to the tooling axis, sweep the reference surface at 90 degrees
Final surface formation:
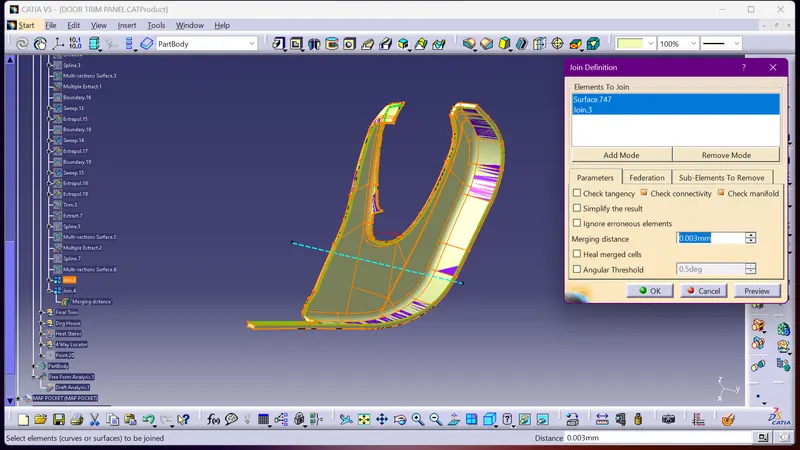
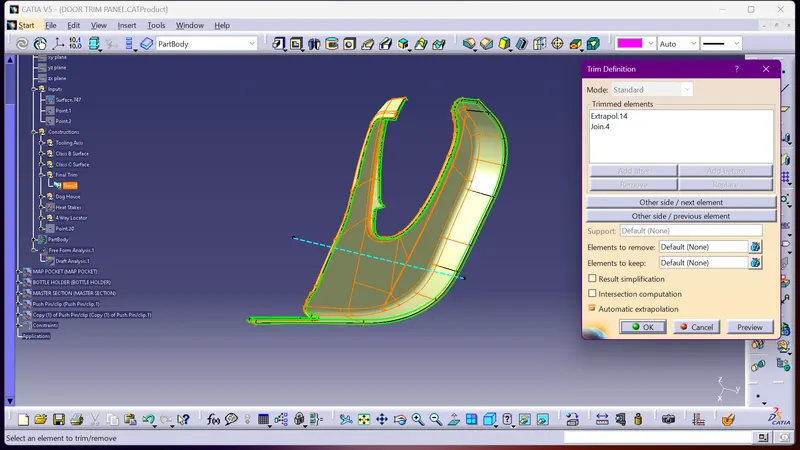
Now trim the class B surface using the join A and C surfaces and join the class A and C surfaces.
Solid surface body formation:
Now use the solid surface feature to create the solid surface body by going to the part workbench.
Map pocket design:
The subelement known as map pocket can be found directly at the centre of the lower subtract of the door trim panel. The process shown is the same as the previous components. First, we need to check the boundary of the input surface to see if there are any open patches or if it protrudes as the required class A surface.
The input surface provided is
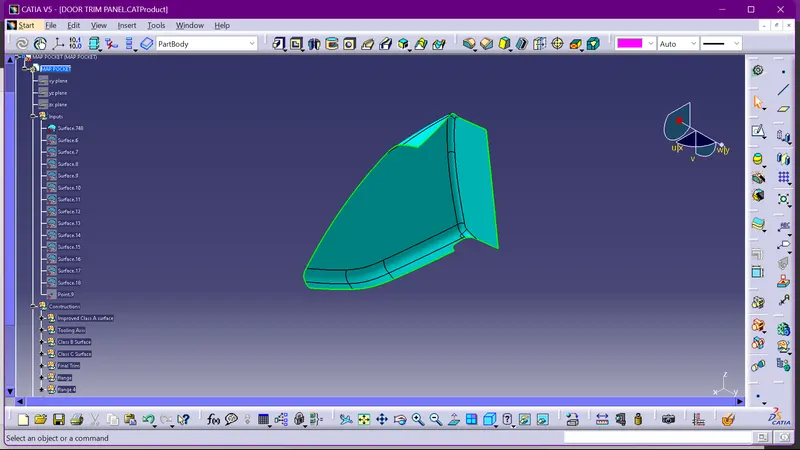
find out for any open patches by checking the boundary feature.
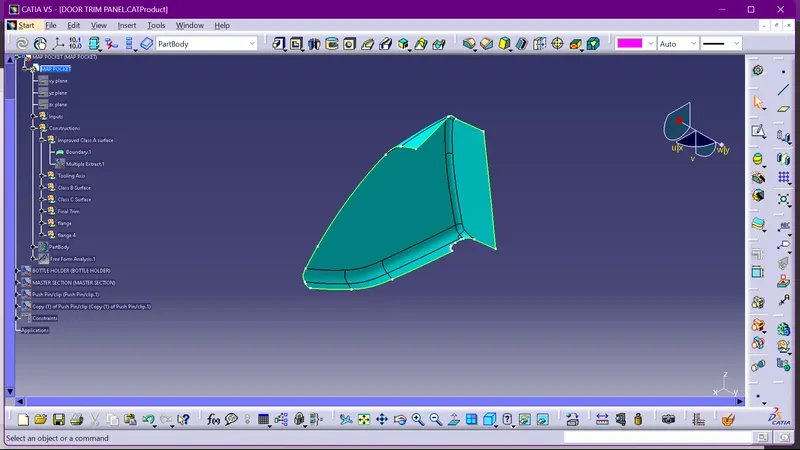
Tooling axis creation:
In the case of the map pocket, we extract the surface in the Y-direction orientation and generate the tooling axis of the map pocket using the point direction.
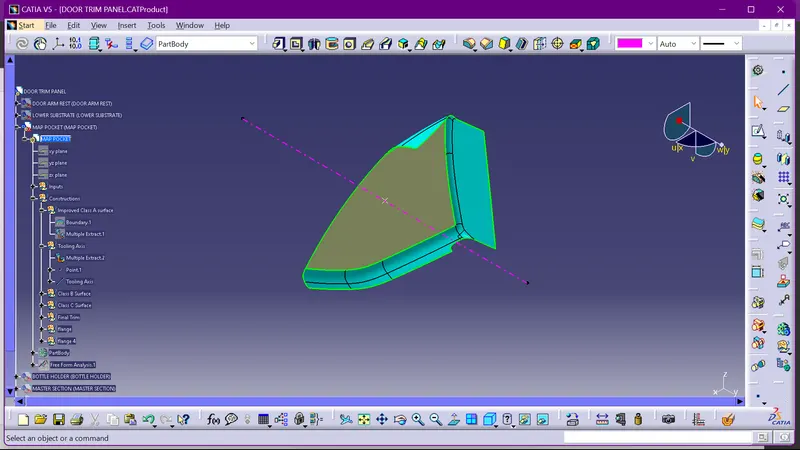
Draft analysis of the class A surface:
When the tooling axis is made to examine the draft for the class A surface with a draft point of 3 degrees
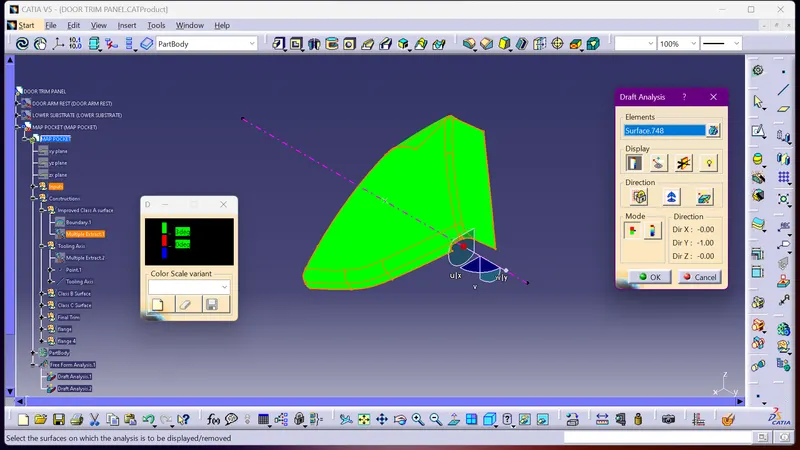
Thus, its generated tooling axis perfectly clears the draft of three degrees.
Creating a surface of Class B:
Now proceed to the next step, which is to create the class B surface by using the 2.5 mm offset from the class A surface to create the class B surface beneath the class A surface.
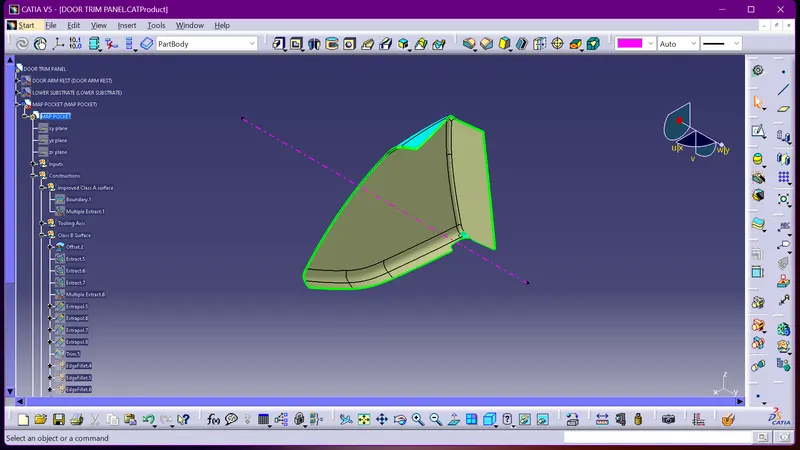
Utilizing the class A and C join, extrapolate the class B surface edges to create the ideal trim.
Creation of Class C surfaces:
Now use the sweep feature to create the class C surface, which is an intermediate surface between the class A and class B surfaces. It should have a draft of 3 degrees along the tooling axis direction and a draft of 90 degrees along the reference surface sweep.
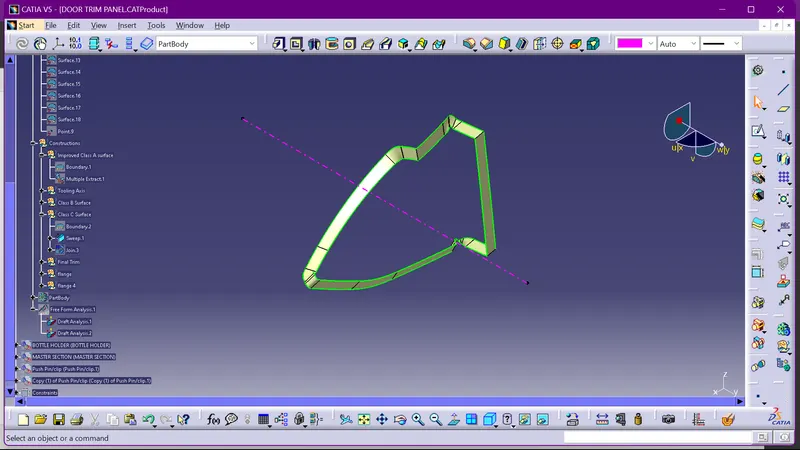
The final creation of the surface:
After creating all surfaces, including the class B and class C surfaces, combine the class A and class C surfaces and trim the surface that joins it to the class B surface to create the final closed surface.
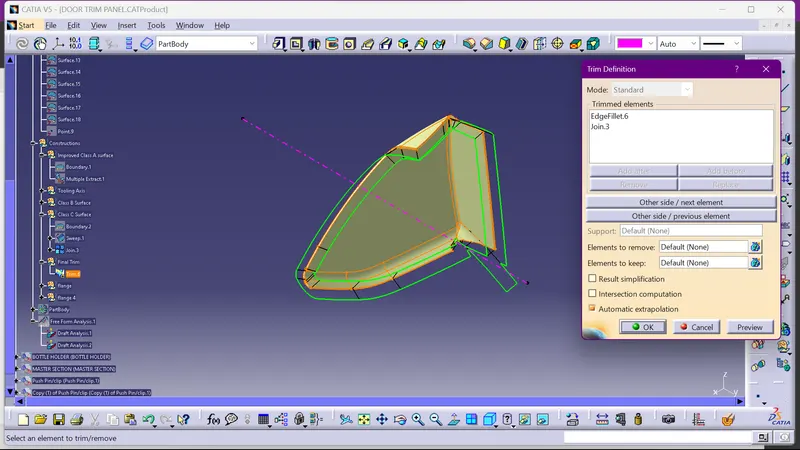
creation of a solid body:
Utilize the close surface feature to separate the solid body from the close surface body and carry out the draft analysis at the part workbench.
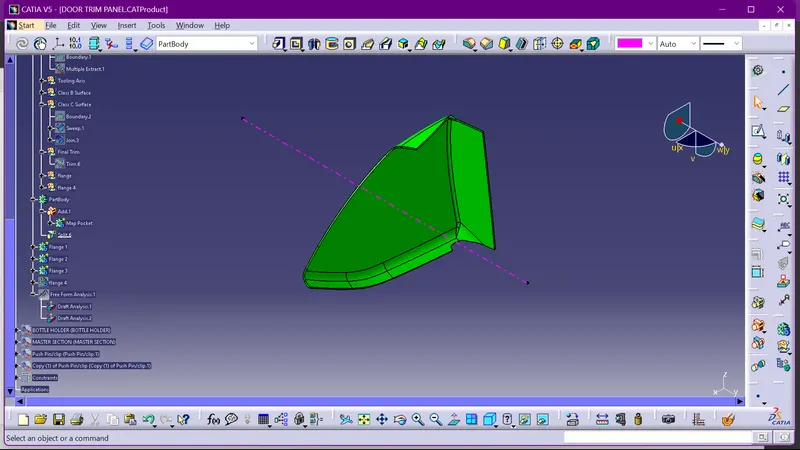
Draft analysis of the solid body:
Now perform the draft analysis with a draft angle of 3 degrees on the solid body
The results obtained are,
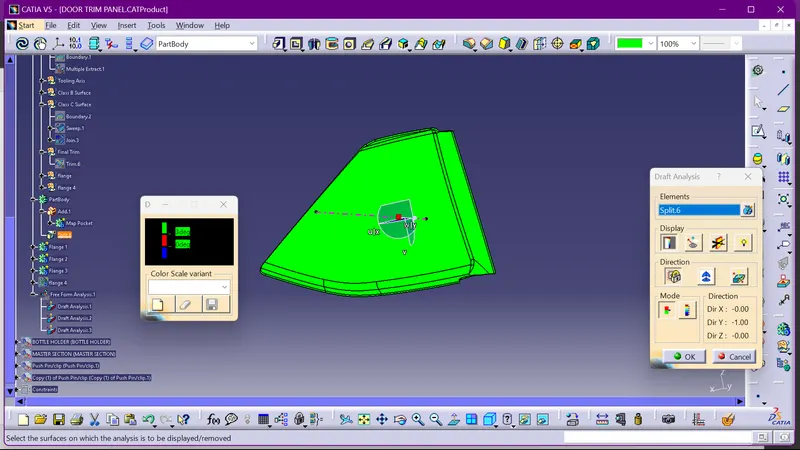
Almost all the surfaces are clearing the draft of 3 degrees along the B side
Bottle holder design:
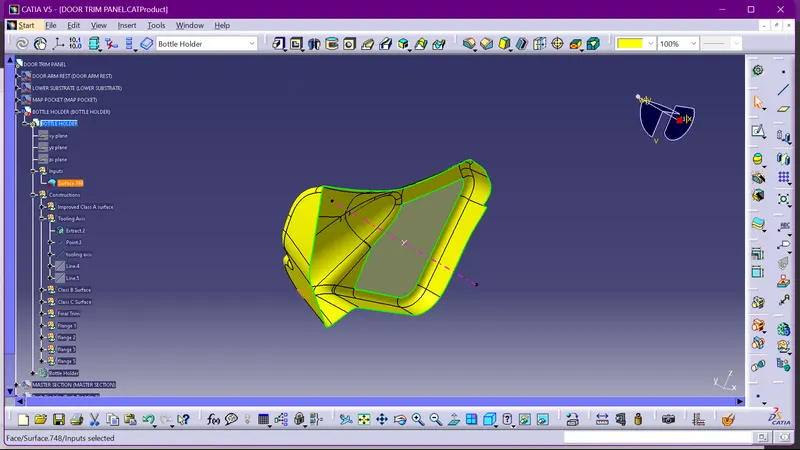
The bottle holder has an input surface that is
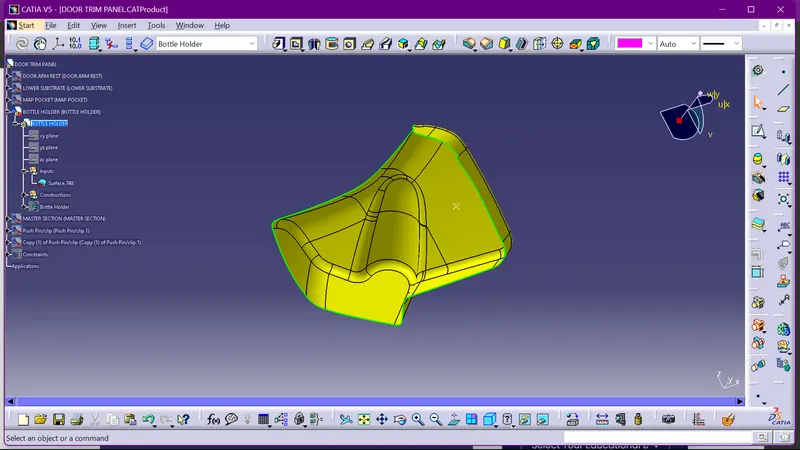
find out for any open patches by checking the boundary feature.
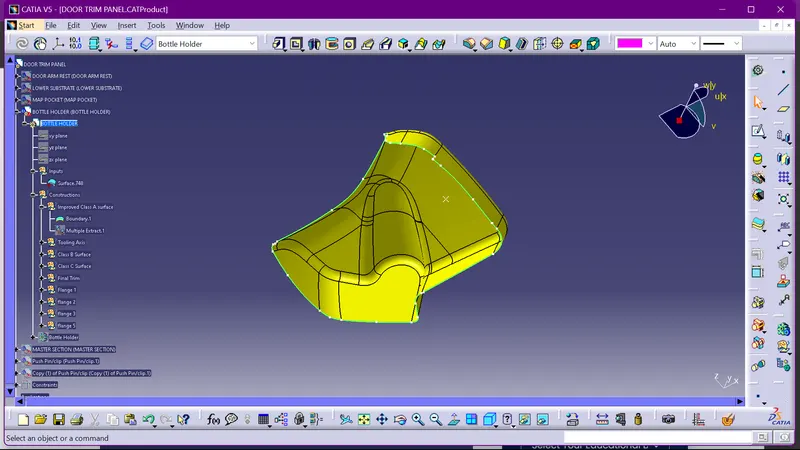
Tooling axis creation:
In the case of the bottle holder use the flat surface and extract the surface and create a point at the 0 coordinates and use the point - direction to create the tooling axis
Draft analysis of the class A surface:
Perform the draft analysis of the class A surface with a draft angle of 3 degrees the result obtained is
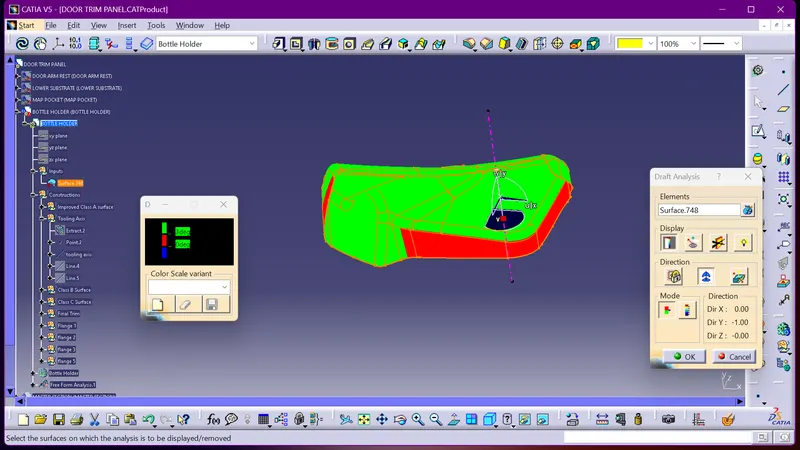
Some of the patches in the draft analysis are red, indicating that the draft is zero or below zero, while others are in the blur region, indicating that the draft is greater than or equal to 3.
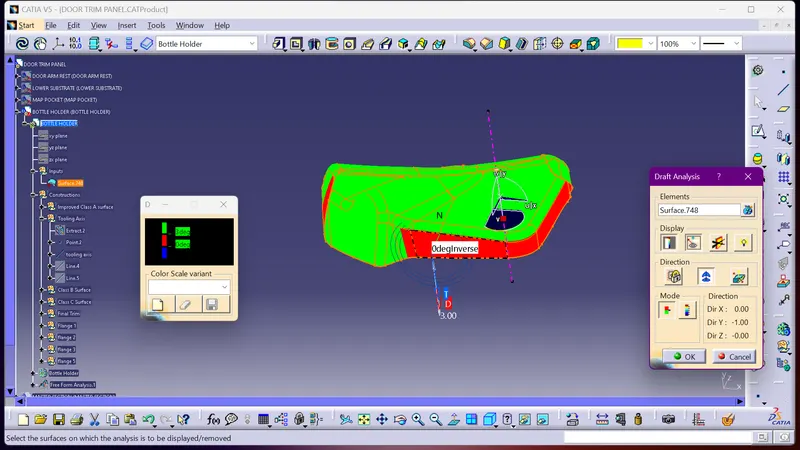
As a result, we must report to the class A team that the draft on the provided input surface is inappropriate, and we must obtain an updated class A surface. As a result, we must proceed with the draft analysis results for further creation.
Surface creation of Class B:
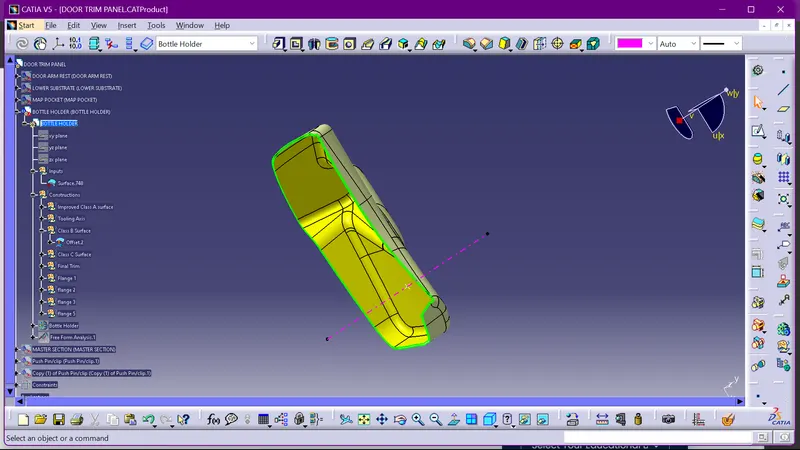
Now, offset the class B surface by 2.5 millimetres by following the master section beneath the class A surface and extrapolating the class b edges to a certain extent to form the appropriate trim with the class A and C join. Select the appropriate direction for offsetting the surface.
Surface creation of Class C:
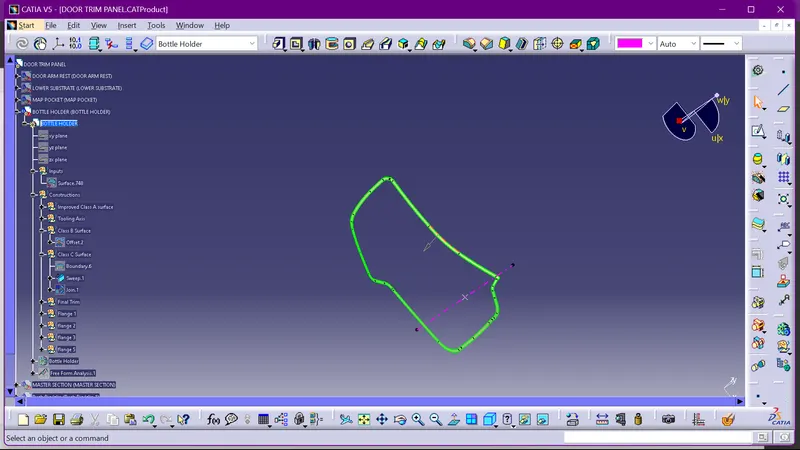
Utilizing the class A surface, the sweep feature, the reference surface parameters, and the draft direction create the class C surface now. Therefore, provide a draft of three degrees in the draft's direction, making the draft's direction the primary tooling axis and a draft of ninety degrees concerning the reference surface.
Creation of the final surface:
After all the surfaces, including the class B and class C ones, have been created, join the class C surface to the class A surface, and trim the surface that was joined to the class B surface.
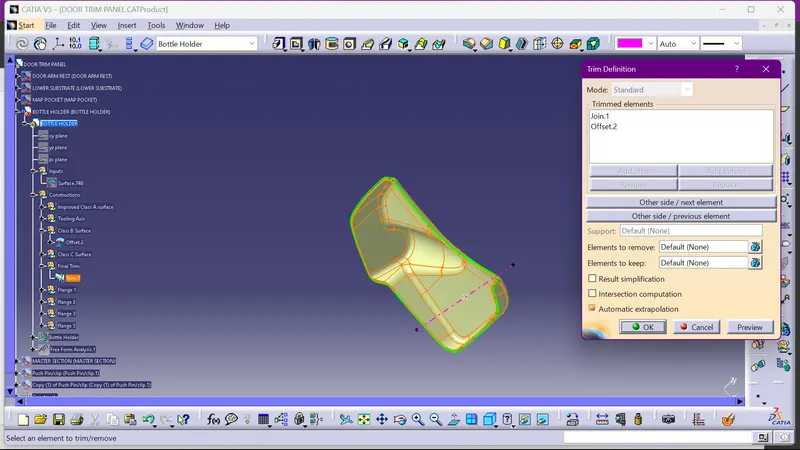
This is the final closed surface with the class B & C surfaces
Solid surface creation:
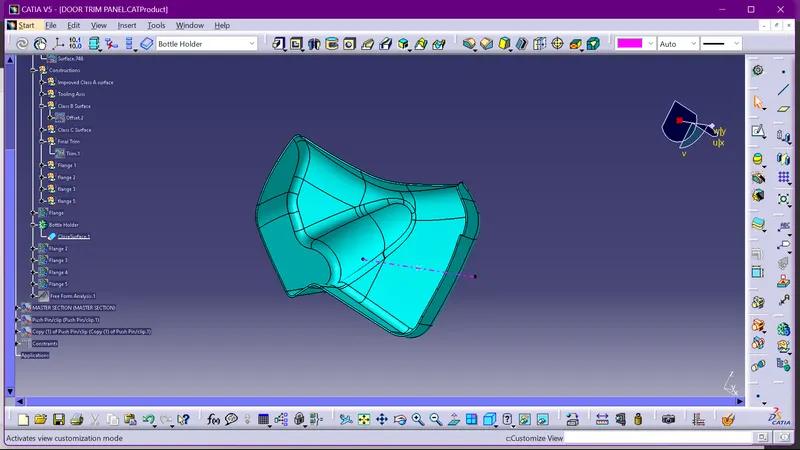
Go to the part workbench and use the solid surface feature to create the solid body from the closed surface.
Draft analysis of the solid surface body:
Using a draft angle of three degrees, conduct a draft analysis of the solid body. The resulting findings are as follows:
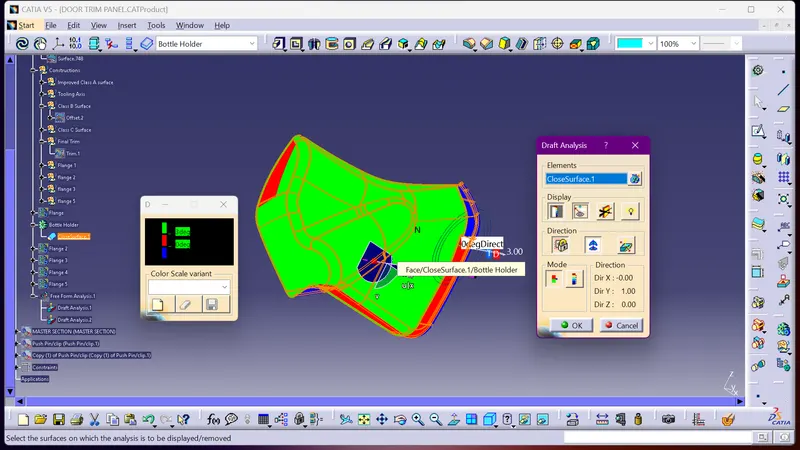
Due to the errors found in the class A surface draft analysis, the solid body's entire surfaces cannot pass the draft analysis. Because of this, we must create a report that includes the errors found in the solid body and send it to the appropriate team to make changes to the input surface to get the right result. The inclined curvature edges and improper continuation of the edges along the surfaces are the primary causes of this negative draft; the class A surface input team must update and correct these issues.
We need to move on to the B-side attachment features once all of the components' solid bodies have been generated.
The B-side attachment may have the following features:
- Dog house
- Ribs
- Screw bosses
- Flanges
- Snap fits
- Heat stakes
B-side attachment features:
The assembly would look like this when all the solid bodies have been completed.
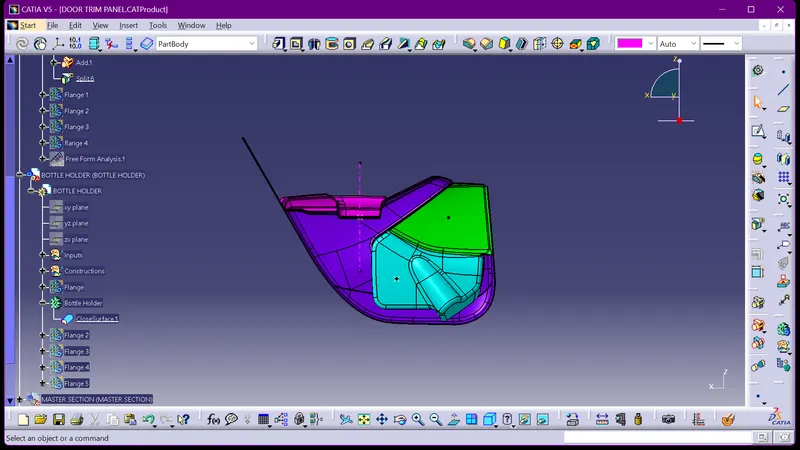
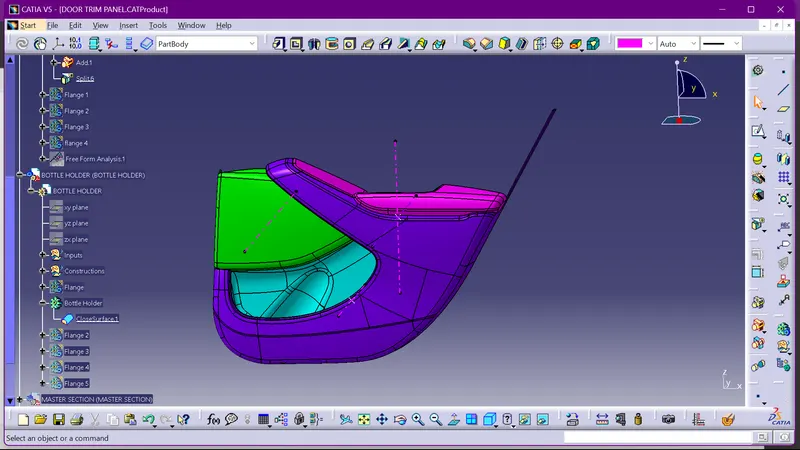
As a result, we need to adopt industry design standards and design parameter considerations to provide the proper attachment features for the final solid surface components. As a design engineers, we also need to have an idea of how a component needs to connect to the adjacent component, either by the flanges and the heat stakes assembly or with the flange and the locator assembly or with the dog house and the push pin, etc. We need to move step by step for creating the proper attachment features on every individual component
It indicates that the heat stakes are positioned on the surface based on the master sections provided for the lower substrate's input surface.
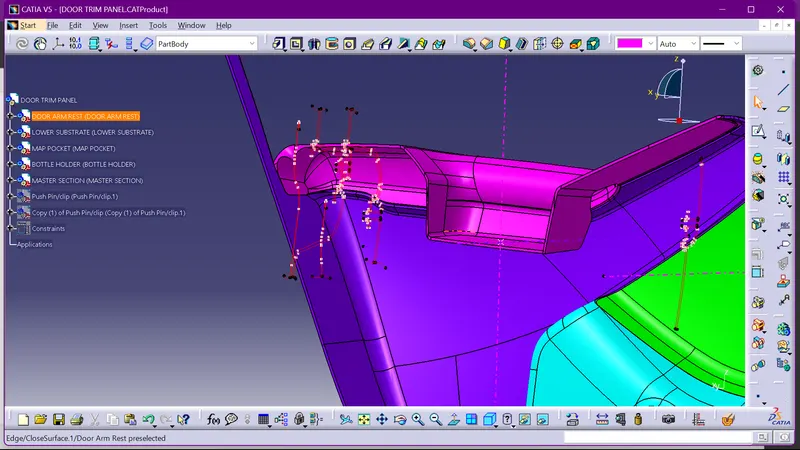
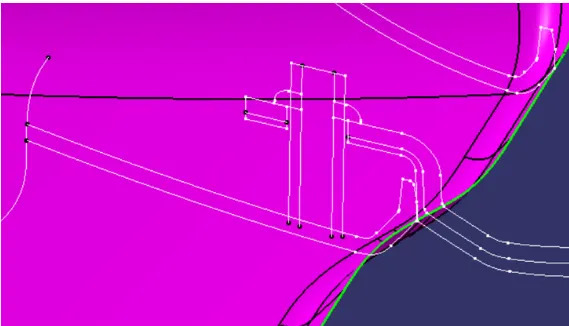
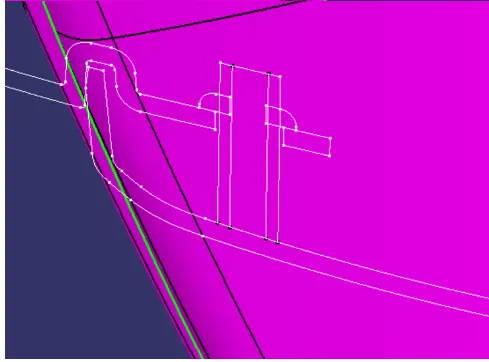
The heat stakes must be made on the lower subtraction B side after the master section.
Heat stakes :
How to put together heat stakes:
The controlled flow of molten plastic is used in thermal staking, also known as "heading or riveting," to capture or retain another component, typically of a different material. When the two parts are made of different materials and can't be welded together, thermal staking can be used instead of welding, or when just mechanically holding one part in place is enough.
The attachment of metal to plastic is the most common application. A boss made of plastic is inserted through a hole in the metal part. Localized heat is generated by the thermal tip's contact with the boss. The shape of the head is determined by the configuration of the horn's tip as the boss melts under the light pressure of the horn. The plastic material solidifies when the heat is turned off, joining the different materials.
Therefore, when using references from the master section, we must keep in mind that the referenced material should be distinct from the master section whenever possible.
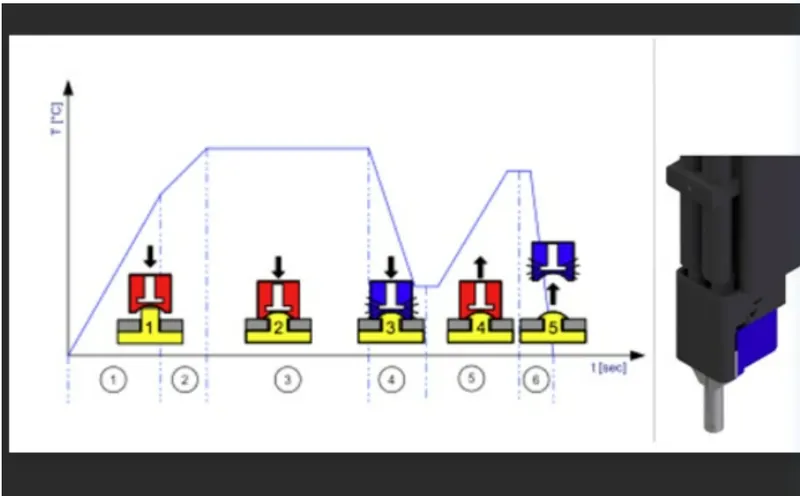
Therefore, begin creating the heat stake and provide it with ribs on all four sides as support to increase its strength.
Details of the design:
- Height we need to follow the master section
- Draft provided on the outer and the inner face with an angle of 0.5 degrees
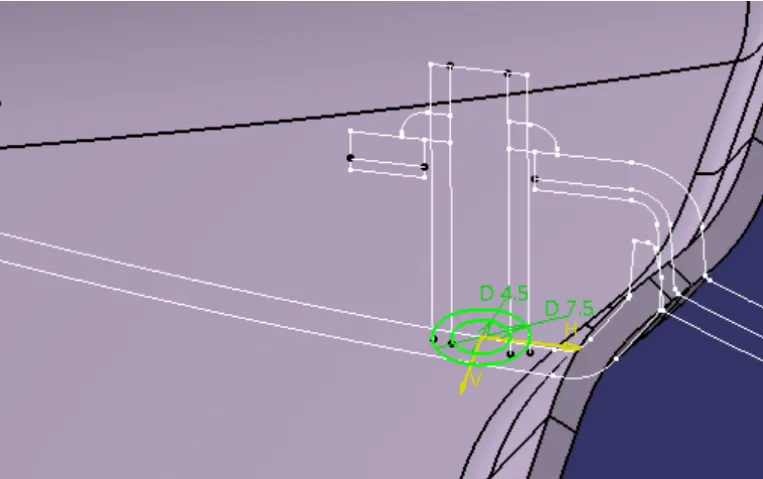
In the master section, pad the sketch with a height representation using the reference as the tooling axis direction.
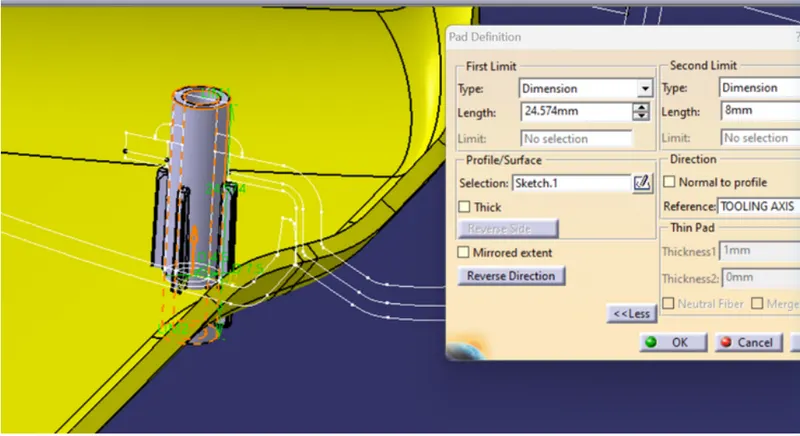
Apply the 0.5-degree draft to the inner and outer edges now.
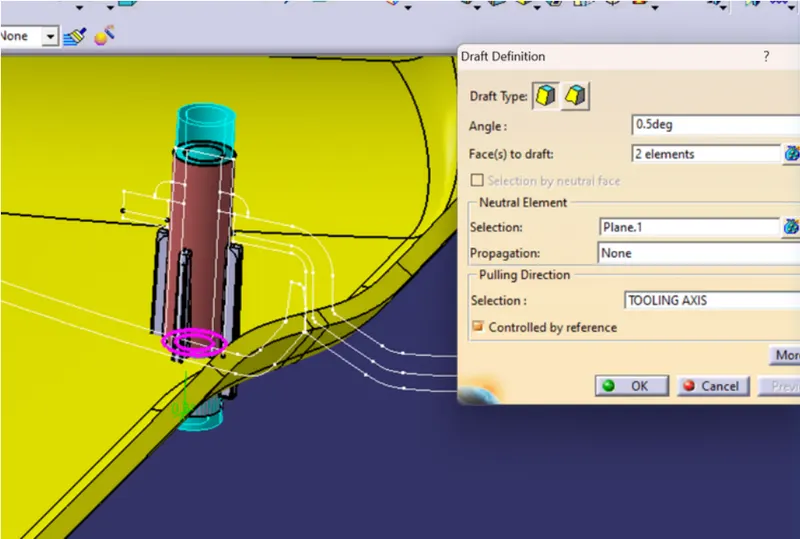
Now, for additional support, make the ribs.
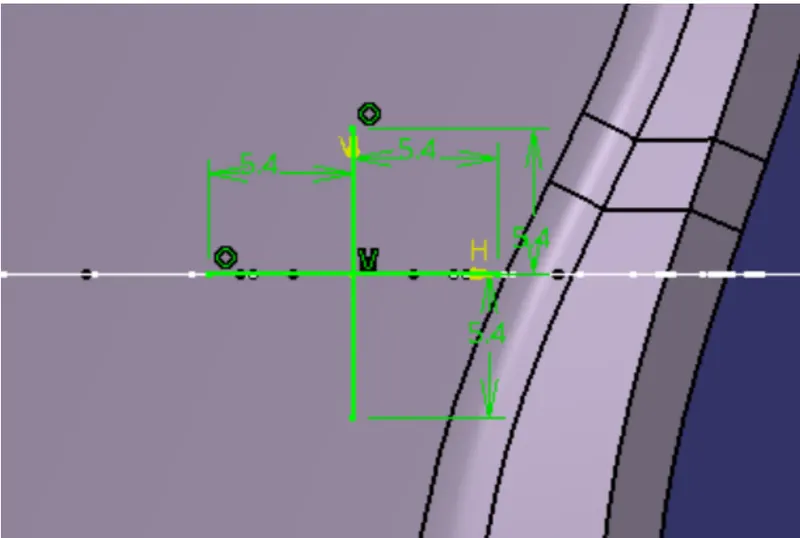
Ribs give the moulded part some strength and stiffness without making the wall thickness bigger.
Ribs facilitate:
- Locating and arresting the components of an assembly
- Providing alignment in mating parts
- Acts as a guide or stops mechanisms
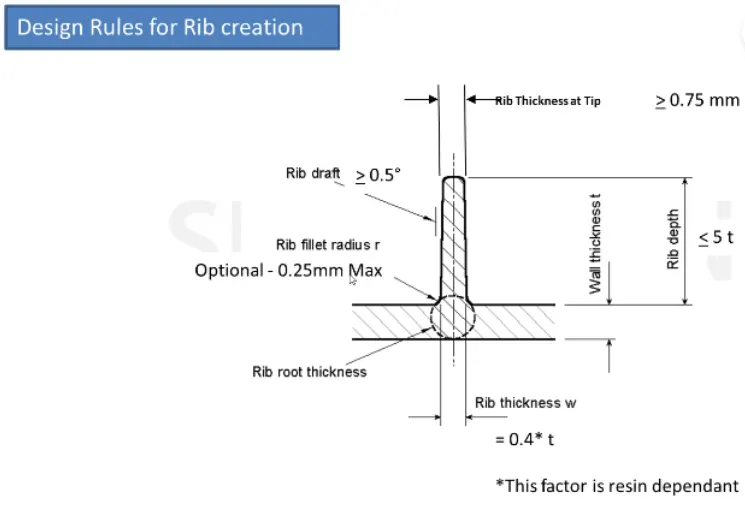
Design parameters:
- Draft: 0.5 Degrees per side (minimum) and maximum upto 1.5 degrees
- Thickness of ribs: 40 to 50% of wall thickness
- Height: ≤ 5 times the wall thickness
- Spacing (for more than 1 rib): 3:1- steel height/width ratio (maximum). h/w =3 or2(preferred) where h is the height of the rib and w is the space between two ribs.
- Minimum thickness at the tip: 0.75mm
- Rib fillet Radius: 0.25mm max or 0.125*thickness of the component
- Rib root thickness should not be more than 30% of the wall thickness.
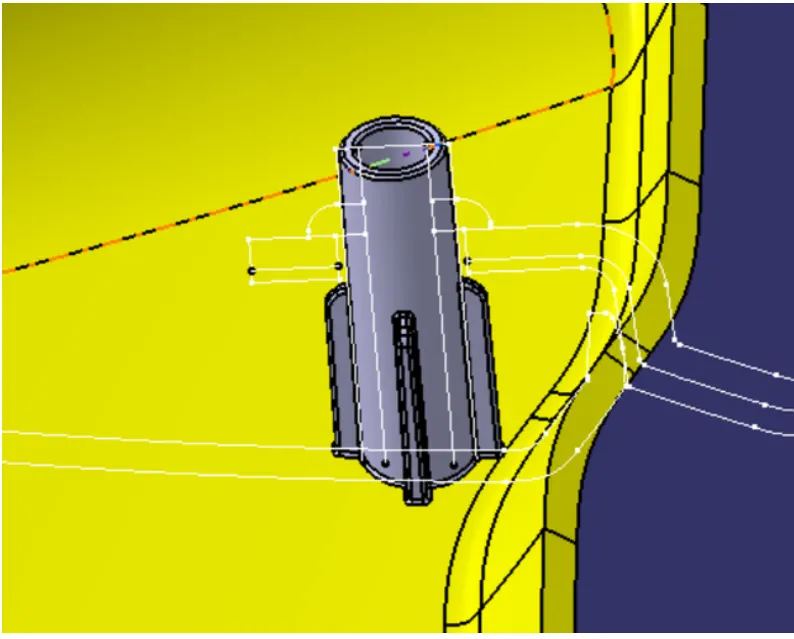
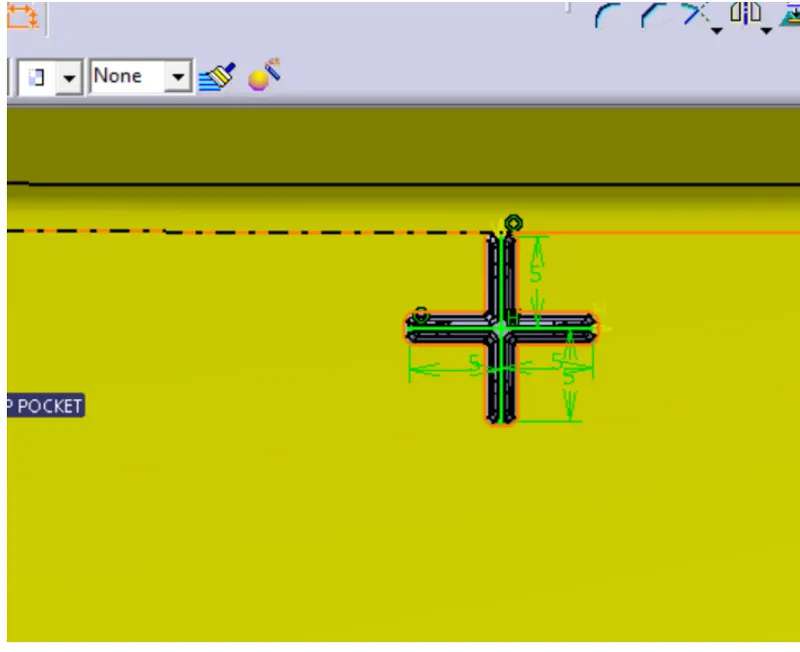
Because of the design rule, if the distance between the two heat stakes is not sufficient to create another heat stake, then we create the locators, and the height of the locator must be higher than the heat stakes, we must therefore position the heat stakes all over the component by the 50-100 mm distance between the two heat stakes. Another attachment feature that we develop is a four-way locator.
Locators:
- Locators are used to locate the position of the mating part while assembling.
- The design rule for the locator is mostly the same as the rib but the height of the locator should be more than the heat stakes at a min of 5mm.
- The locator also constrains the movement of the mating part.
- The gap between Flange and the locator should range between 0.5mm and 1 mm.
- There are two types of locators.
1. 2-Way Locator.
2. 4-Way Locator.
The design rules follow the same as in the case of ribs followed by some changes the sketch is
Dog house creation:
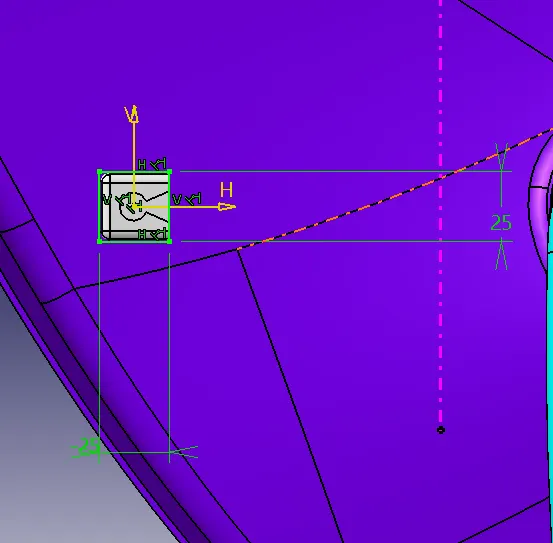
DOGHOUSE: A doghouse is a design element in plastic trim that aids in the removal of sink marks on Class-A surfaces and the creation of attachment features on Class-B surfaces. The doghouse serves as a supporting component; other components like pushpins, heat stakes, and locators are mounted on top of the doghouse for assembly and fixing purposes. Doghouses are exposed to draft investigation to forestall breakage of the part during discharge from the shape.
Here, I used a 25 x 25 dog house that was padded up to a height of 40 mm.
Make a thickness in the doghouse with the 2.5mm shell. Apply a draft of 0.5 degrees to the dog house's inner walls, using the pulling direction as the side core tooling axis, and then provide an outside draft of 1.5 degrees on the outer walls. As a result, the component typically has a thickness of 2.5 millimetres at the intersection of the doghouse and the lower substrate; however, due to the possibility of plastic defects such as sink marks at the bottom, the thickness at the contact is decreased to 1 millimetre to 1.2 millimetres depending on the thickness of the plastic product.
To accomplish this, we typically install coring at the bottom of the doghouse, maintaining a thickness of one millimetre from the dog house's exterior walls. The coring's height can range from three millimetres to six millimetres. Remove the component from the dog house using the boolean operation, and apply a draft of 0.5 degrees to the coring's walls.
Rib cage:
We construct a rib cage with two 1 mm-thick ribs and a 0.5-degree draft about the side core tooling axis as additional support for the dog house.
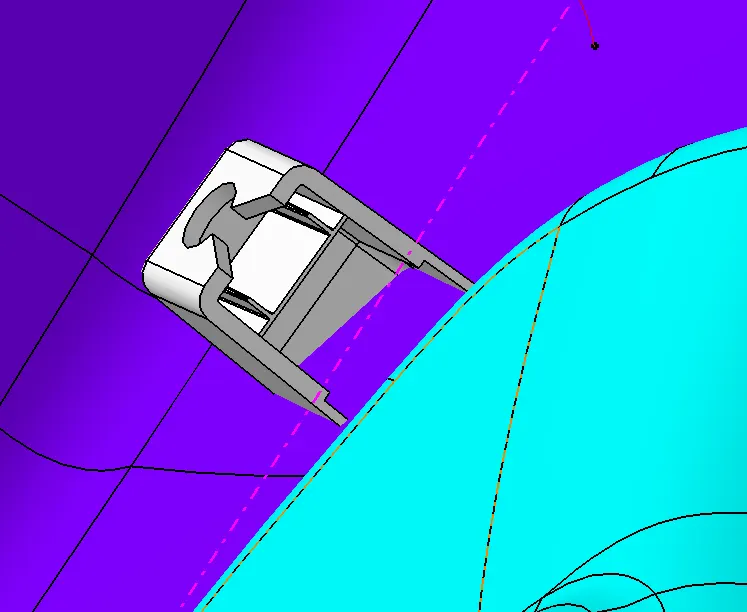
There is a cutout at the top of the surface so that the push clip can fit in the top of the dog house.
PUSH PINS: Push pins are used to connect two parts. The doghouse is attached to these. The following was used as a reference for the dimensions when making the push pins:
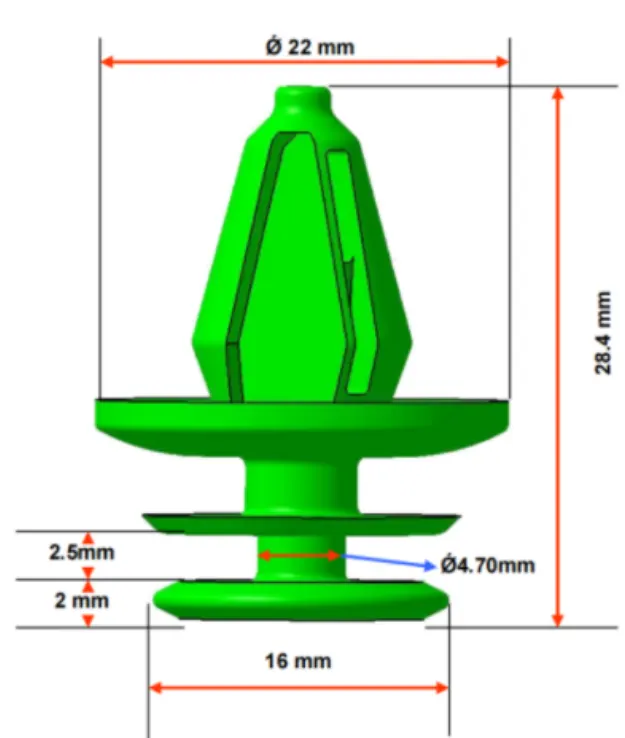
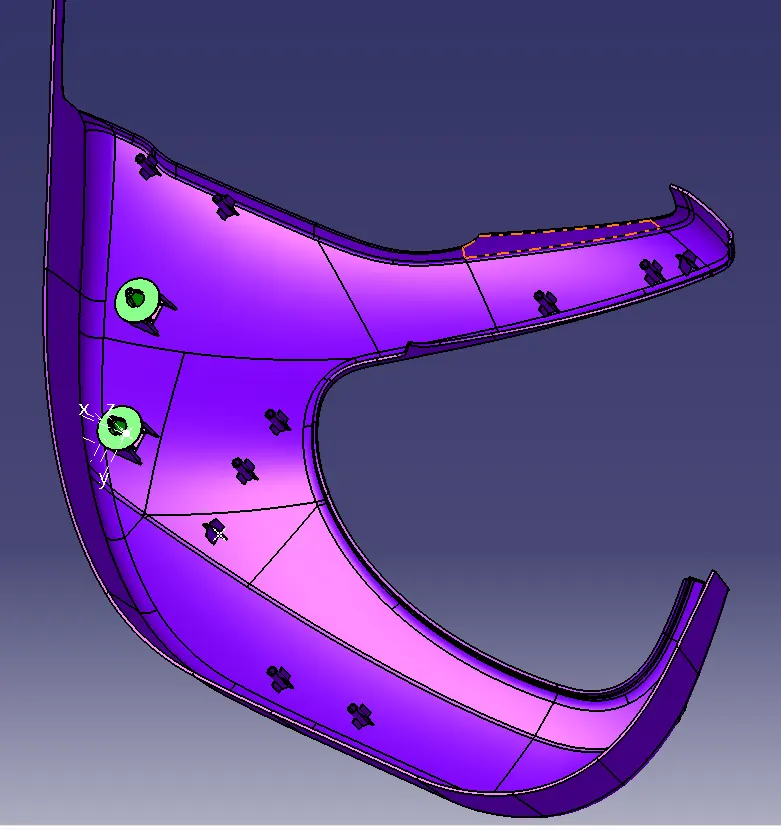
To remove the cutout from the dog house, pad the sketch and perform the boolean operation, applying a draft of 0.5 degrees to the cutout's edges. Draft analysis is typically performed in two directions along the tooling axis: along the slider axis or the side tooling axis and the main tooling axis. The draft analysis results are along the slider with a draft angle of 0.5 degrees. The dog house typically performs the draft analysis in two directions, one along the main tooling axis and the other along the slider axis or the side tooling axis. The draft analysis results are along the slider with a draft angle of 0.5 degrees. Pad the sketch and perform the boolean operation to remove the cutout from the dog house. with a draft of 1.5 degrees along the main axis of the tooling. Therefore, we must provide up to three dog houses on the lower subtract, keeping in mind that there may not be any engineering features within 90 mm (minimum distance) of the slider's opening. We use the translate option to copy and paste the dog houses at various locations and the rotate option to change the direction of the slider's opening. These are the two dog houses and their slider axes. The draft analysis of the other two dog houses concerning their side core tooling axes is
B-side attachments on the Door armrest:
Flanges are the joining elements that aid in component assembly. Flanges were made using the master section. The flanges are translated using point-to-point translation after one flange has been made. The flanges must have a draft of 0.5 degrees from us. Flanges should be spaced 50-100 mm apart. Attachment features were added to the closed body using boolean operations.
Design:
For the door armrest, we need to follow the master section for the flange. The flange's thickness is 2.5 mm, which is the same as the thickness of the plastic component. The draft is 0.5 degrees. Apply the necessary fillets to all of the sharp edges. The sketches are based on the master section.
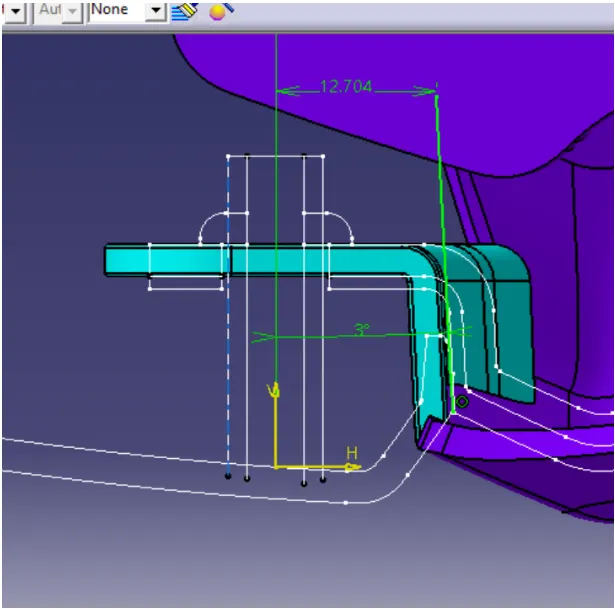
The flange's surface developed. Thiocken the surface in the part workbench with a thickness of 2.5mm. The surface offset can be used to split uneven surfaces on thick surfaces. Apply a draft of 0.5 degrees to the flange's edges. Apply the appropriate fillets to the corners now. Now, drill a hole in the hole so that the heat stake or the locator can be positioned concerning the flange for proper assembly. The hole's diameter should be 0.5 to 1 millimetre between the flange and the heat stake or between the flange and the locator. Apply a draft of 0.5 degrees concerning the side tooling axis and pad the sketch. Use the boolean operation to create the perfect hole on the flange and obtain the corresponding value. Therefore, to complete the assembly, we must adjust the flanges at each position about the heat stakes or the locator, which are located on the lower substrate.
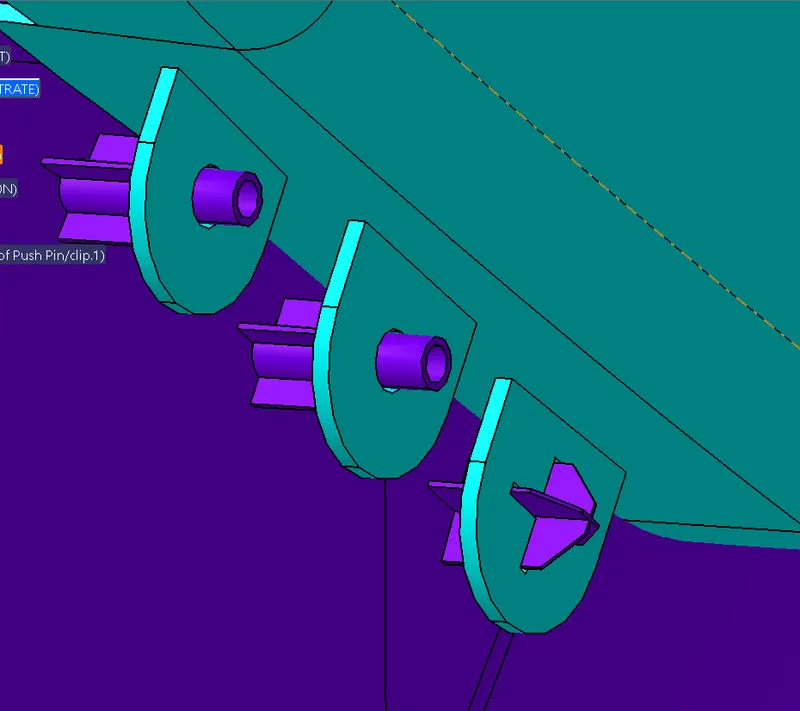
The final parts that have the B-side features are
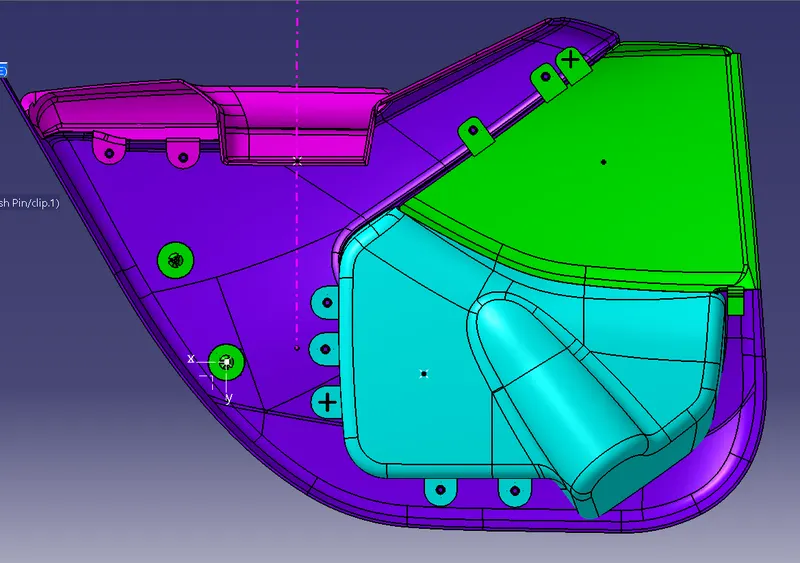
conclusion:
The Plan of The Auto Entryway Trim Board from a Class A surface to a Shut Part Body with all the fundamental connection highlights by observing all the plan guidelines utilizing CATIA V5 is done Effectively and all the expected CATPart and CATProduct documents are joined.