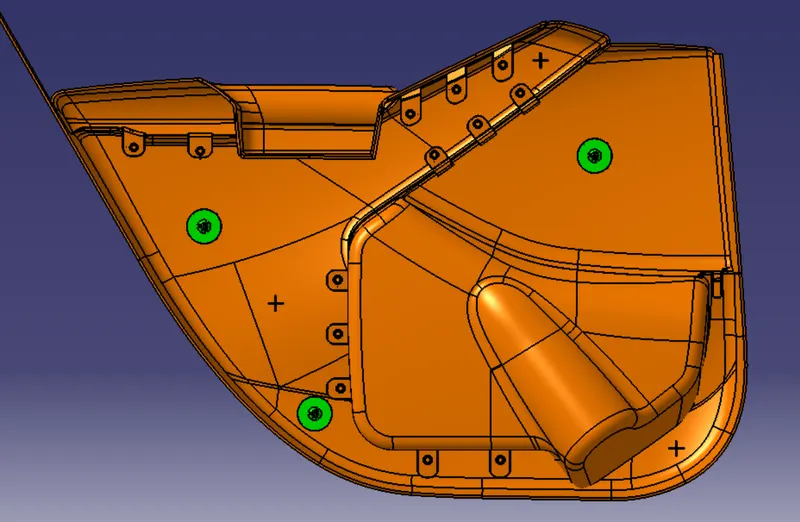
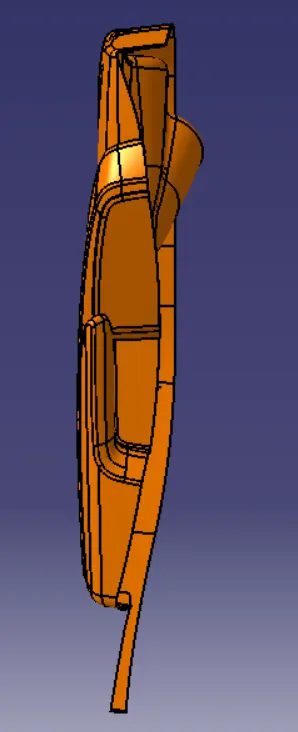
Week 11 - Final project
DEVELOPMENT OF DOOR TRIM PANEL:-
1) OBJECTIVE :- THE OBJECTIVE OF THIS FINAL PROJECT IS TO CREATE DOOR TRIM PANEL FROM GIVEN CLASS A SURFACE OF LOWER SUBSTRATE , ARM REST , MAP POCKET , BOTTLE HOLDER .
2) ABSTRACT: This report contains a brief theory on design rules and the approach followed to achieve the final plastic product. Draft analysis report on all the class-A surface apart from the procedure to make the class-B and class-C surface is also mentioned.
3) DESIGN METHODOLOGY :-
Class-A surface means visible surface. It gives the aesthetic of the component which is created by the styling team and gives to the part design engineer to create the part with all engineering aspects.
DESIGN METHODOLOGY TO CREATE A PLASTIC COMPONENT FROM GIVEN CLASS A SURFACE ARE :-
- TOOLING AXIS CREATION
- CHECK DRAFT ANALYSIS
- CREATION OF CLASS B SURFACE CONSIDERING THE THICKNES OF THE COMPONENT
- CREATION OF CLASS C SURFACE
- CREATE FINAL TRIMS TO FORM THE CLOSED BODY.
4) DESCRIPTION :-
CLASS-A SURFACE :-
A-Class surface is a term used in plastic product design. That means the surface of a component that is smooth( aesthetic) or visible side to the human eye after the part is assembled. it refers to those surfaces which are visible and abide by the physical meaning of a product.
A common method of working is to start with a prototype model and produce smooth mathematical Class A surfaces to describe the product's outer body. From this the production of tools and inspection of finished parts can be carried out. Class A surfacing complements the prototype modelling stage by reducing time and increasing control over design iterations.
In automotive industry various teams works on various components, a car for example is not entirely designed by a single designer. There are many teams among which the task of making various components is distributed. And this is followed for every department of the industry. In this project we are given class-A surface which is designed in other software like Autodesk Alias, by a class-A designer. This is aesthetic surface and a lot of time, effort and good experience are demanded for making this continuous and a good flowing surface model. This is the major reason why, when we get this as input we are not allowed as a plastic designer to make any improvements in the class-A surface. Rather, it should be brought to the attention of the seniors which later is conveyed to the concerned team and take care of.
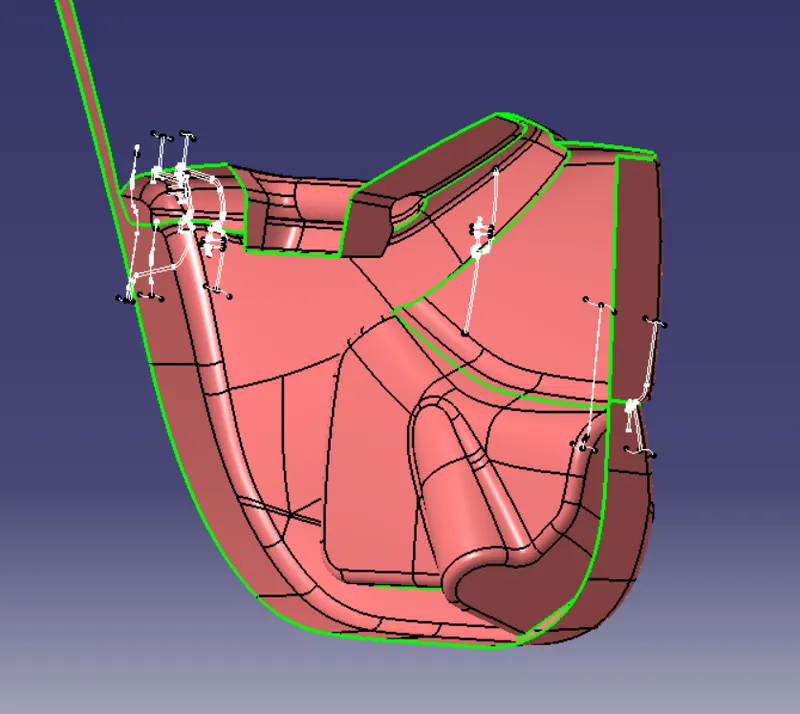
MASTER-SECTIONS :-
Master sections are the guides for design requirements which decide the component packaging after technical (Styling, Concept or Class-A) surfaces.
A. Concept development in BIW. Concept & Feasibility.
B. Concept design / Design support and feasibility study.
C. Concept surface description.
VISIBLE IN THE COMPONENT WITH WHITE LINES .
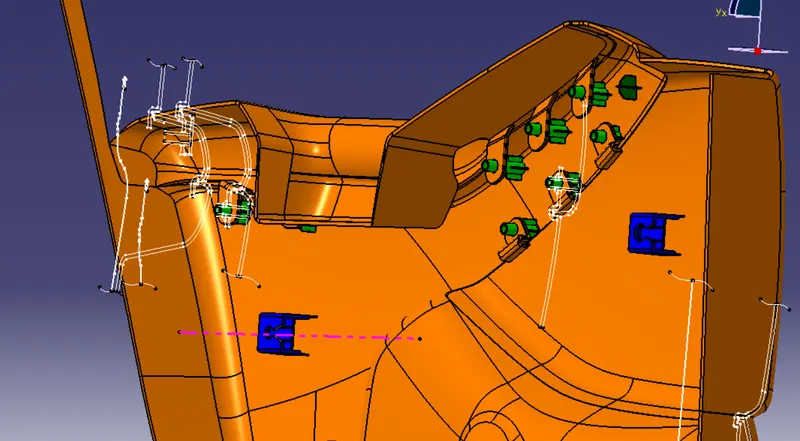
CLASS B SURFACE :-
B-Class surfaces are the secondary surfaces that you can see sometimes, but are less important, such as the inside of your glove box, ashtray, etc... These must be smooth and "error-free" as well but are not held to the standards that class A surfaces are. it also means the thickness of a part.
TOOLING AXIS :-
Tooling axis is the axis along which the core and cavity opens and closes. It is very important to define the tooling axis in the first step while designing a component as it is the main component which helps us to run draft analysis on class-A at initial stage to see if we can move ahead. Also for later stage, tooling axis is the direction along which class-C surface and the draft to the components is given.
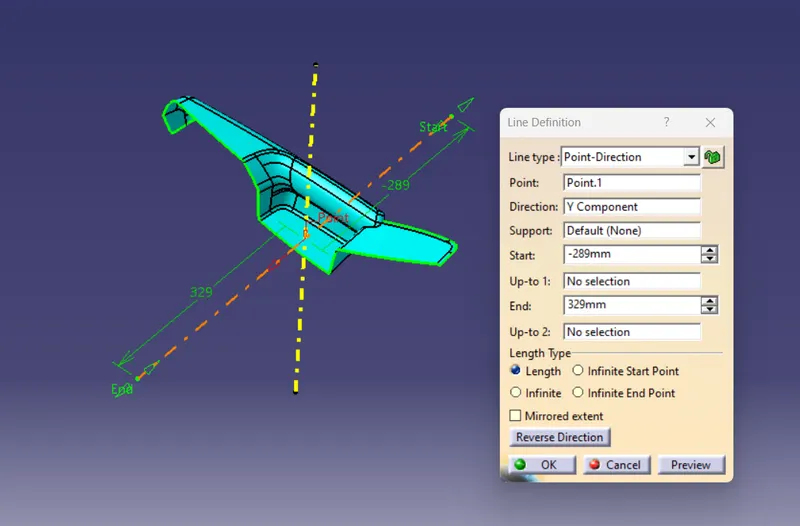
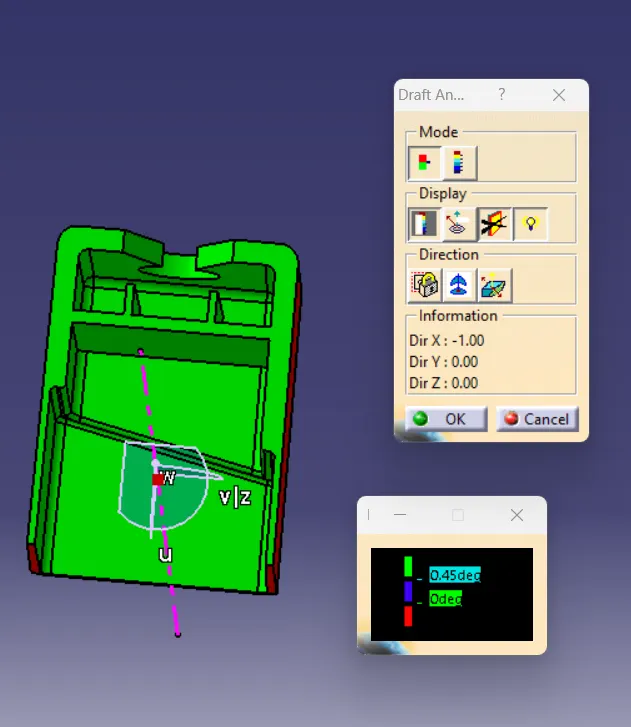
In this model we have a tooling axis in the perpendicular direction to the entire door trim that is y-direction in the model. It is very evident that switch bezel will require a side core, so another tooling direction is made specifically for switch bezel. Apart from these two tooling axes we also have a side core tooling axis for dog house.
DRAFT ANALYSIS :-
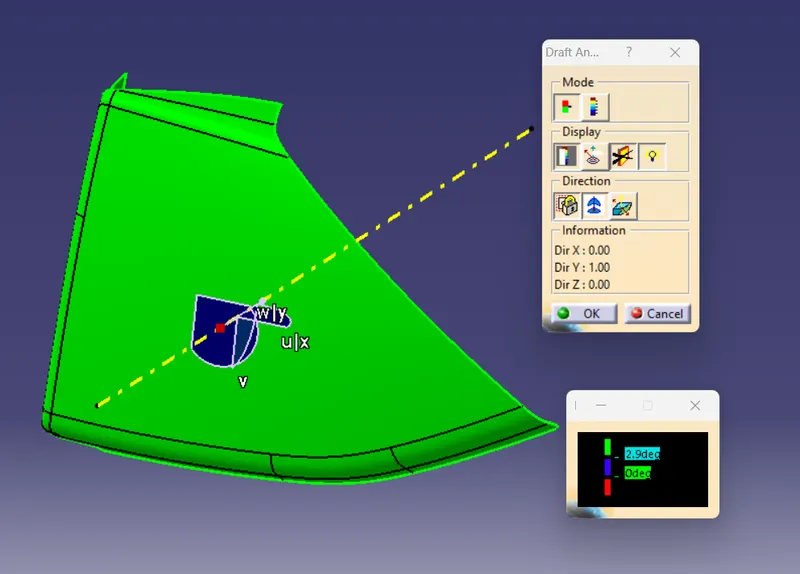
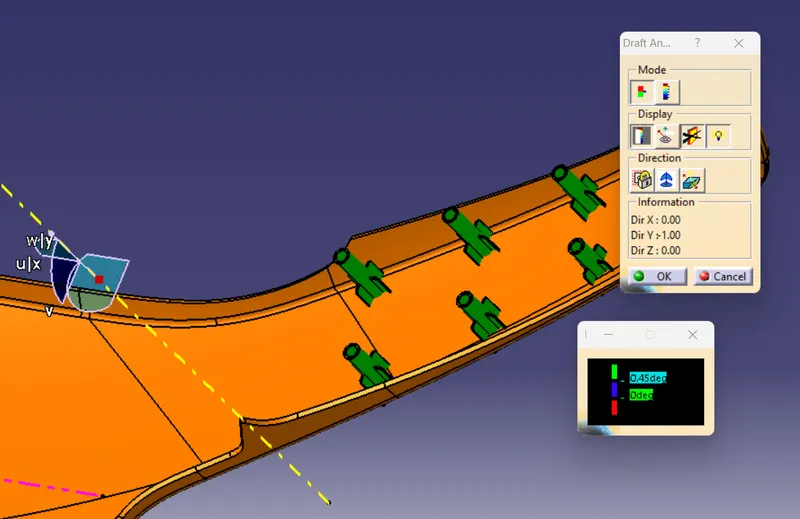
Designers of plastic parts and mould tooling manufacturers can use the Draft Analysis tool to check the correct application of draft to the faces of their part. With draft analysis, you can verify draft angles, examine angle changes within a face, as well as locate parting lines, injection, and ejection surfaces in parts.
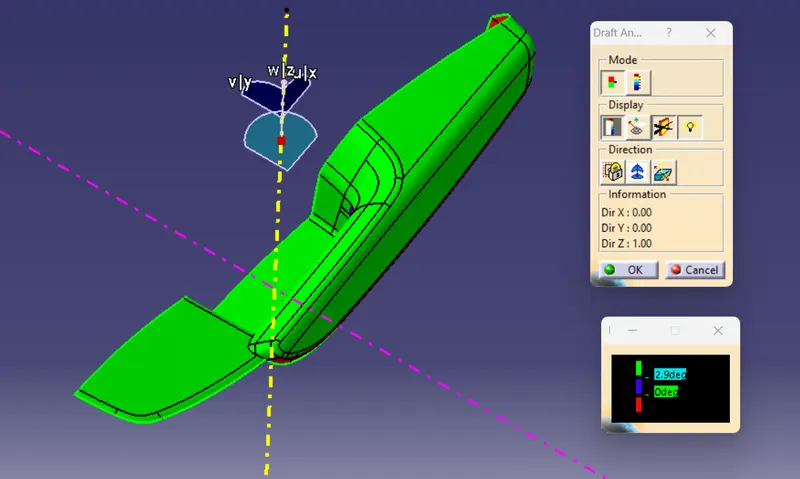
The Draft Analysis command enables you to detect if the part you drafted will be easily removed. This type of analysis is performed based on color ranges identifying zones on the analyzed element where the deviation from the draft direction at any point corresponds to specified values.
In the molding process the molded parts have to eject from the die so there are some issues while removing the molded parts it may get sticky with the die, or while removing chances to get damaged, so we need to set up is the draft angle this draft angle helps the molded parts to eject from the die easily. the standard of OEM for the plastic components draft angle should be in 3 degrees and if it is sheet metal component 7 degree should be the draft angle, This draft is get analyzed and ensuring the part is with proper draft angles.
OEM Rules for Features Draft Analysis
The truth is no single draft angle can be applied to all part designs. Factors like wall thickness, material selection, ejection, shrink rates, finish/texture, wall depth, and manufacturing capabilities all come into play. But fear not, some simple rules can be followed that can help.
When designing a part, apply as much draft angle as possible a general rule of thumb is 1 degree of draft per 1 inch of cavity depth, but that can change with the aforementioned factors. Try following these general guidelines:
- 0.5 degrees on all vertical faces is strongly advised.
- 1 to 2 degrees works very well in most situations.
- 3 degrees is minimum for a shutoff (metal sliding on metal).
- 3 degrees is required for light texture.
- 5 or more degrees is required for heavy texture.
Our first step before starting the model should always be to check is the surface has enough draft that it will not create any problems while ejecting from the mold. This seems like a big task as we have to foresee something that will come at very later stage. But this is done by a small process called draft analysis. This analysis tells us whether our component will be safely ejected in the tooling axis we have provided. Some components require side core where there are under undercuts, holes or projections on the side walls, so for this we need a different tooling axis and a different analysis is required to check those areas. Draft analysis shows color codes which are defined by the user for different values which also are defined by the user. These colors help us to analysis if the component is clearing the analysis and we are good to go ahead or not. In case the component fails the analysis for class-A then we have to submit the draft analysis report to the higher authority so that the surface of the component can be improved. Failing analysis simply means that the component does not have the required draft value it must have. In case our solid model which we develop, fails the analysis at some parts then we have to correct it ourselves.
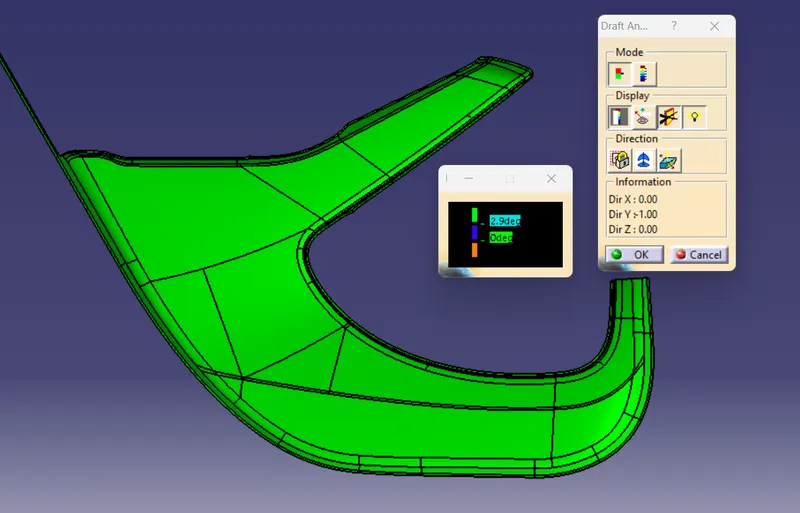
We have to make sure that our entire model is green which means it is clearing the analysis. So we have to run analysis for class-A, solid model and other B-side features as every single component, regardless of its size should be ejected safely from the core.
5) DESIGNING PLASTIC COMPONENT :-
As the entire door panel is divided into various components, we will make this plastic component in the same way. Following steps have been carried out to make the plastic component for every component:
The first step for every component was same. The given input was not a single unit but has numerous patches. These patches were joined together using join command. Thus after performing this operation we got our single class-A surface.
Once we get class-A, we have to proceed to make class-B surface. Creating class-B by extracting every flat surface will be a complex process in such component. So we directly offset it by 2.5mm.
For making class-C surface we have used sweep command ‘with draft direction’ by giving 3deg draft angle and tooling axis as direction. But at many places this did not work so we have to sweep ‘with reference surface’ at 90deg. Once that was done, the C surface was joined together using join command.
To make a final surface model, we have to trim all the three surfaces together. And later go to part design to close the surface.
HERE ARE THE IMAGES OF EVERY COMPONENT IN THE ORDER OF THE ABOVE STEPS :-
A) LOWER SUBSTRATE :-
DRAFT ANALYSIS ON GIVEN CLASS A SURFACE AND TOOLING AXIS:-
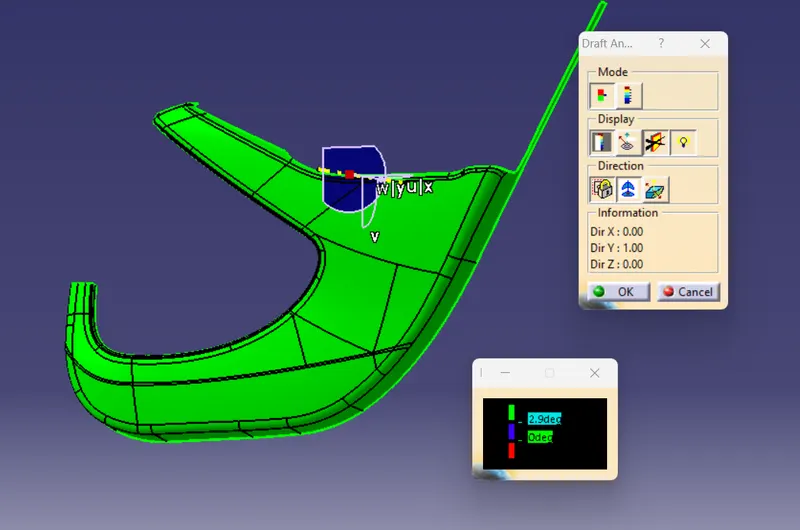
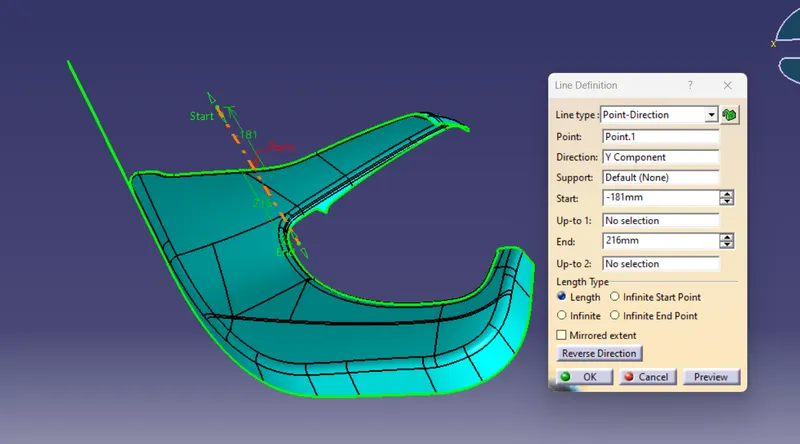
POINT AND DIRECTION METHOD IS USED FOR CRETION OF TOOLING AXIS AND COLOUR IT YELLOW AND PUBLISH IT.
CREATION OF CLASS B SURFACE WITH OFFSET OF 2.5 MM THICKNESS OF THE COMPONENT.
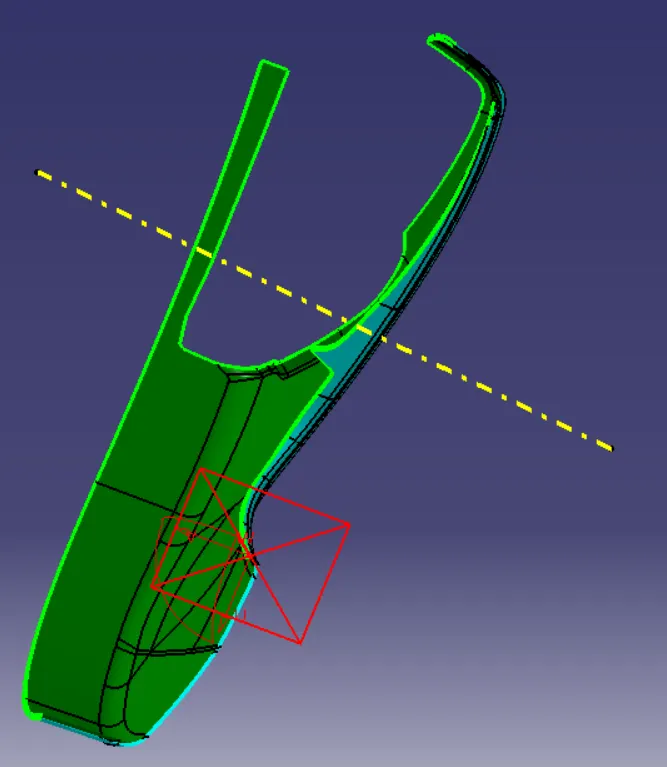
CREATION OF CLASS C SURFACE BY SWEEPING BOUNDARIES WITH RESPECT TO REFERENCE SURFACES AND TOOLING DIRECTION.
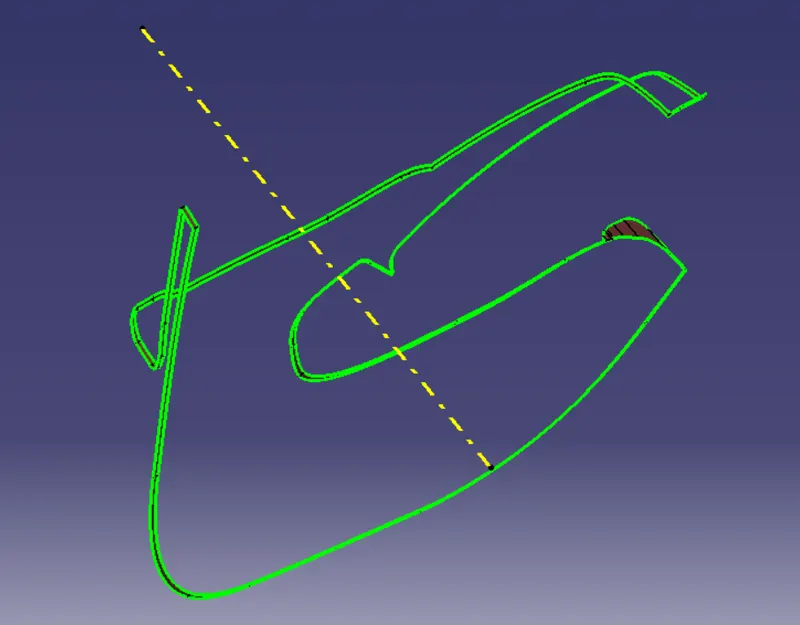
CREATION OF FINAL SURFACE BY JOINING CLASS A SURFACE AND CLASS C SURFACE TOGEATHER AND TRIMING IT WITH B SURFACE.
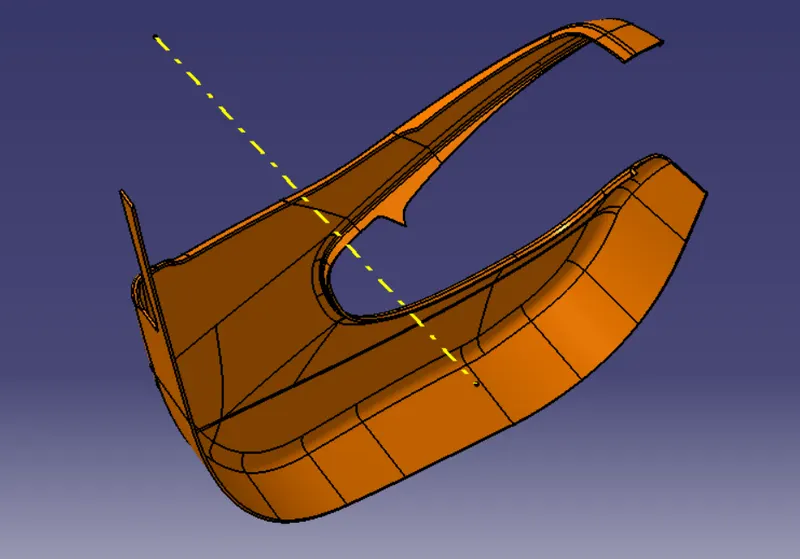
Once we get the surface model, we make it into solid model by going to part design and closing the surface. Once that is done, we run a draft analysis on the component and once it is clear, we move ahead with making B-side features and again run a draft analysis on the entire component. Below image shows the analysis on lower substrate component after making all the features.
DRAFT ANALYSIS ON CLOSED BODY :-
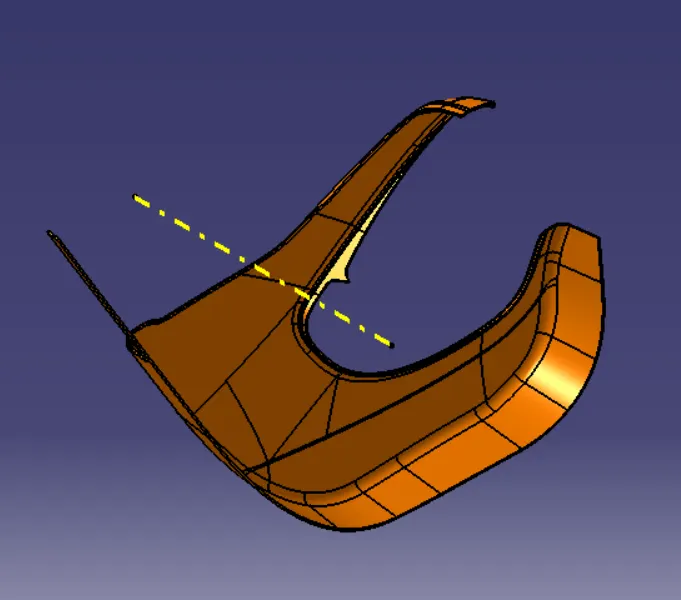
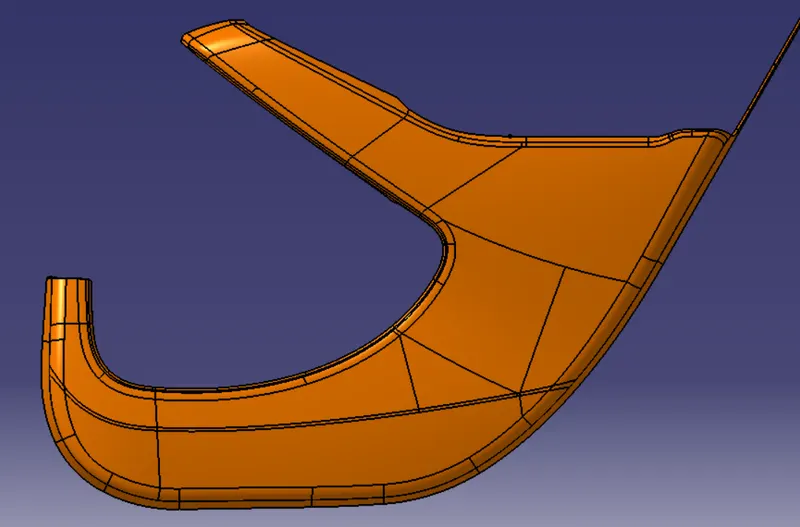
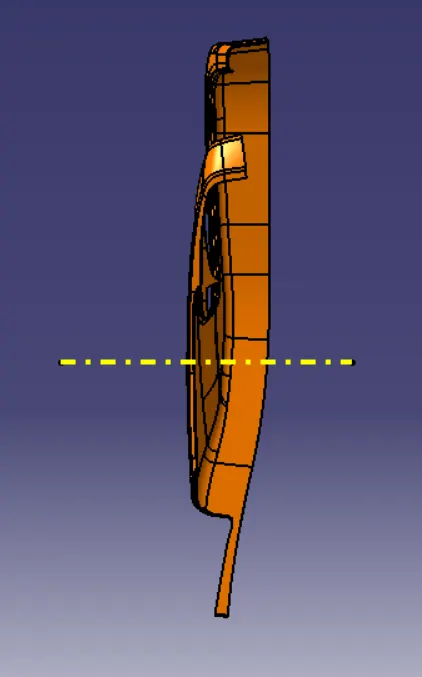
LOWER SUBSTRATE PART MODEL IN VARIOUS ORIENTATIONS :-
1) ISOMETRIC VIEW :- 2) FRONT VIEW :-
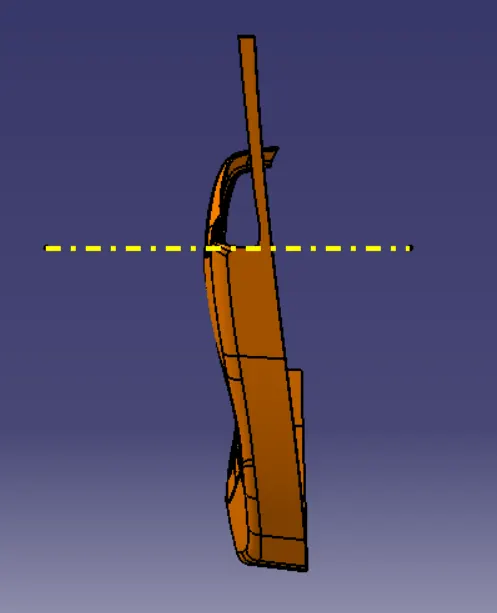
3) SIDE VIEW :- 4) TOP VIEW :-
B) MAP POCKET :-
DRAFT ANALYSIS ON GIVEN CLASS A SURFACE AND TOOLING AXIS:-
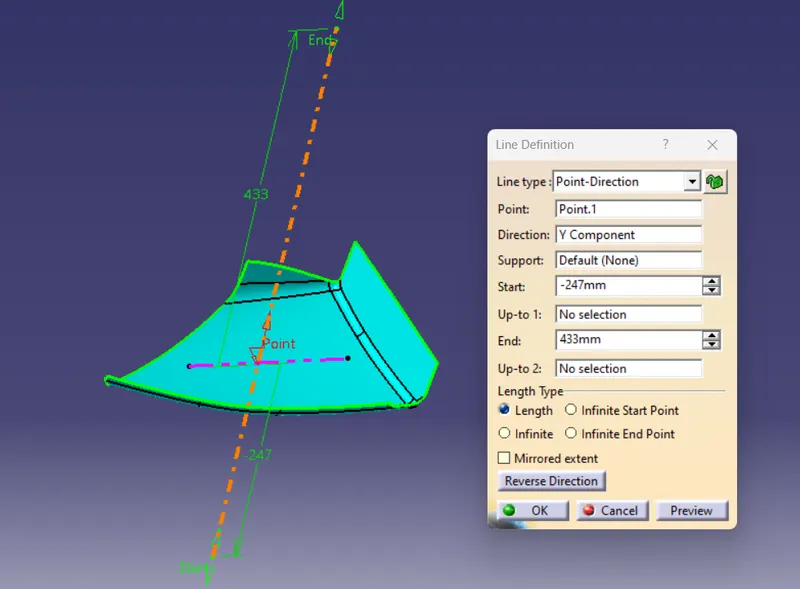
POINT AND DIRECTION METHOD IS USED FOR CREATION OF TOOLING AXIS AND COLOUR IT YELLOW AND PUBLISH IT.
CREATION OF CLASS B SURFACE WITH OFFSET OF 2.5 MM THICKNESS OF THE COMPONENT.
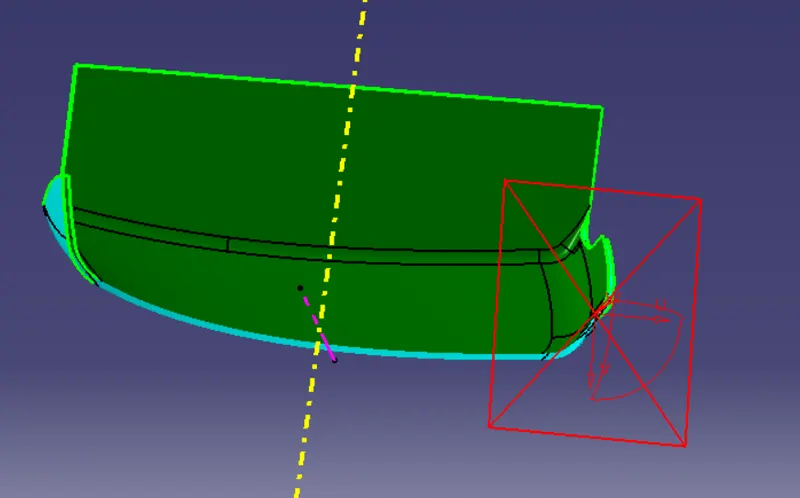
CREATION OF CLASS C SURFACE BY SWEEPING BOUNDARIES WITH RESPECT TO REFERENCE SURFACES AND TOOLING DIRECTION.
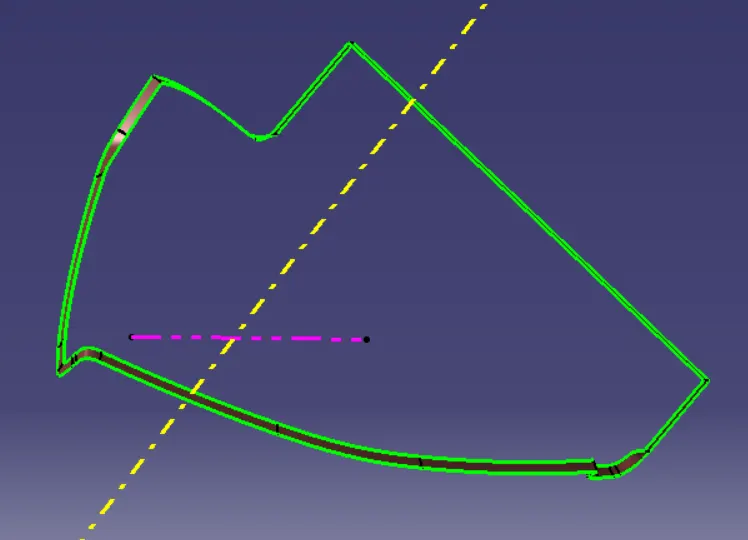
CREATION OF FINAL SURFACE BY JOINING CLASS A SURFACE AND CLASS C SURFACE TOGEATHER AND TRIMING IT WITH B SURFACE.
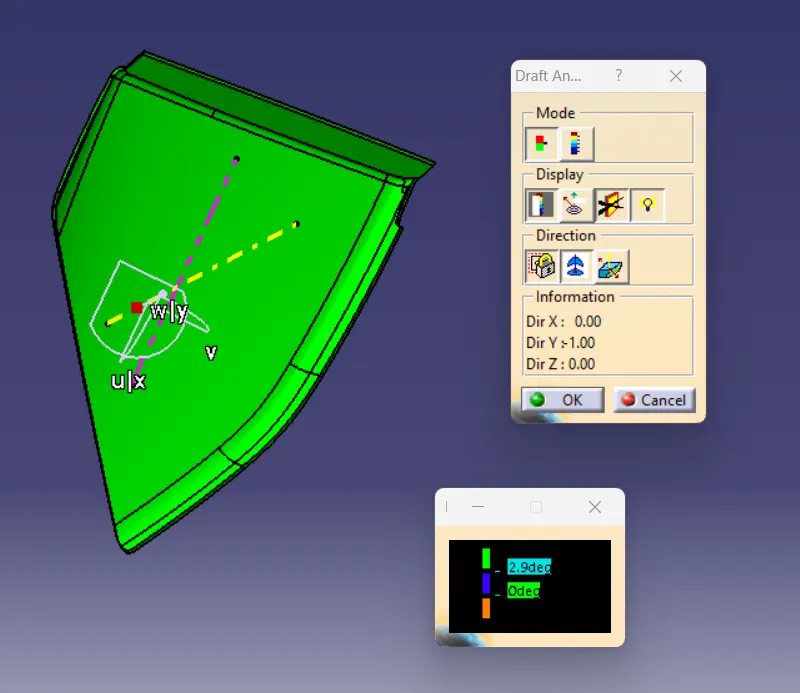
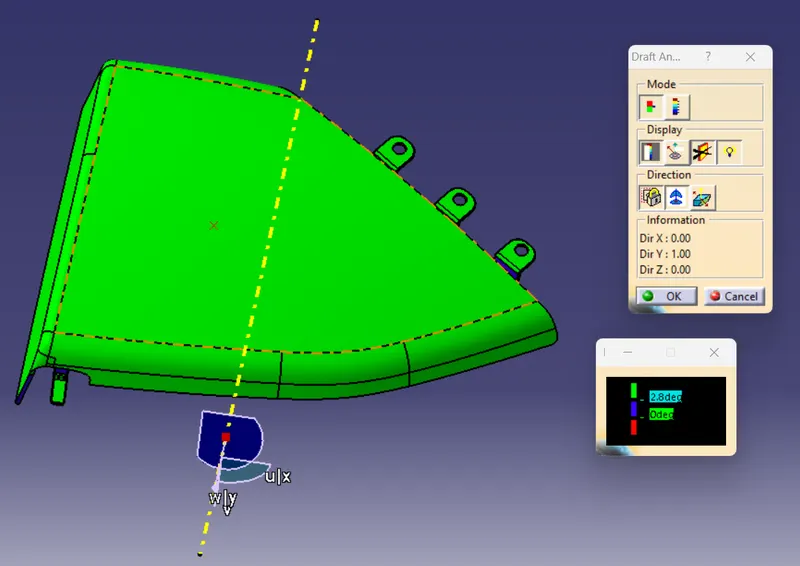
Once we get the surface model, we make it into solid model by going to part design and closing the surface. Once that is done, we run a draft analysis on the component and once it is clear, we move ahead with making B-side features and again run a draft analysis on the entire component. Below image shows the analysis on MAP POCKET component after making all the features.
DRAFT ANALYSIS ON CLOSED BODY :-
MAP POCKET PART MODEL IN VARIOUS ORIENTATIONS :-
1) ISOMETRIC VIEW :- 2) FRONT VIEW :-
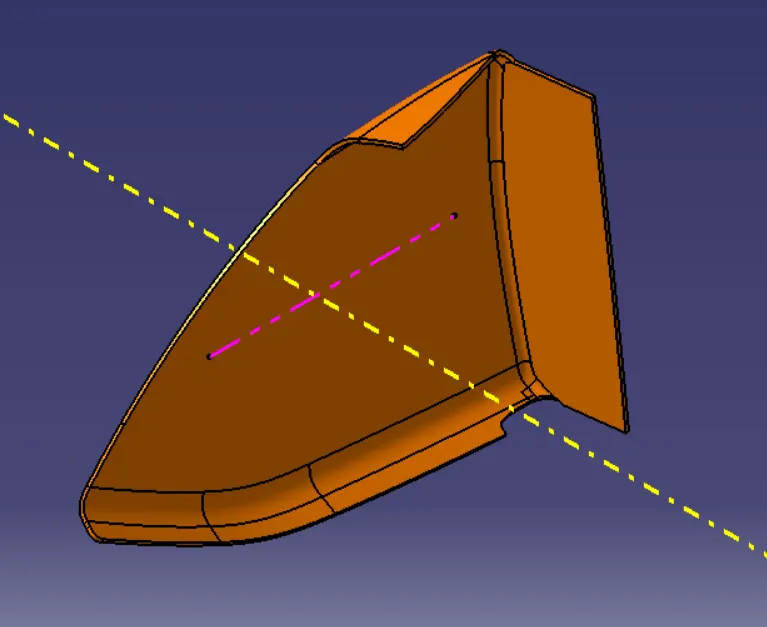
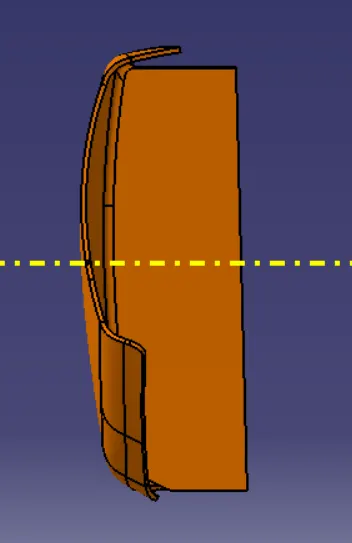
3) SIDE VIEW :- 4) TOP VIEW :-
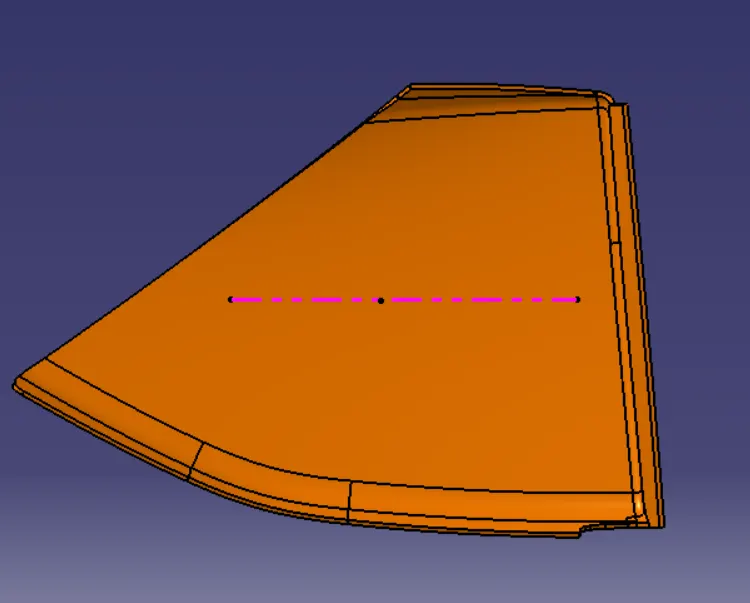
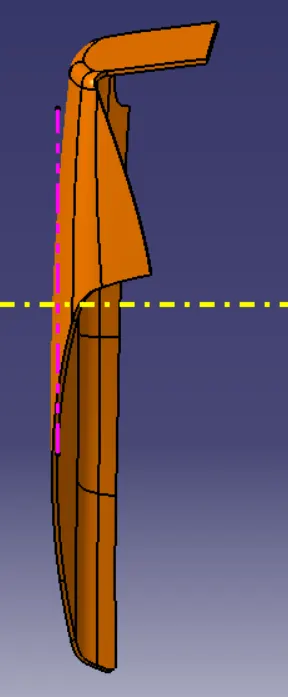
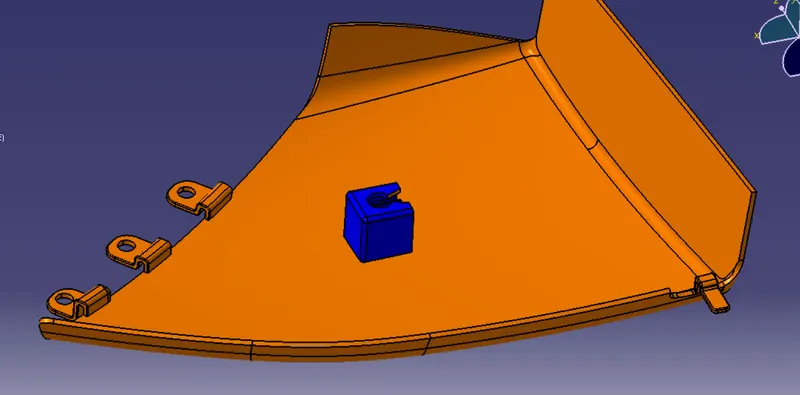
IMAGES OF MAP POCKET WITH FLANGES :-
C) ARM REST :-
GIVEN CLASS A SURFACE WITH DISCONTINUTY AND IMPROVED CLASS A:-
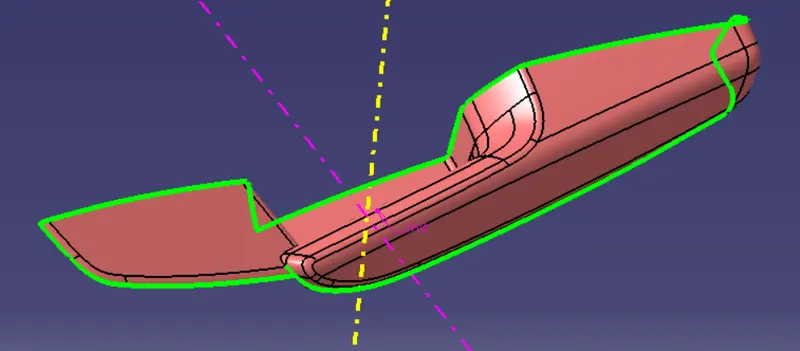
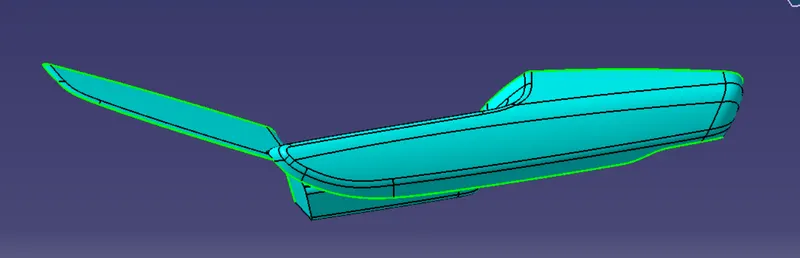
CREATION OF MAIN TOOLING AXIS AND SIDE CORE AXIS USING POINT AND DIRECTION COLOUR IT YELLOW AND PINK AND PUBLISH THEM:-
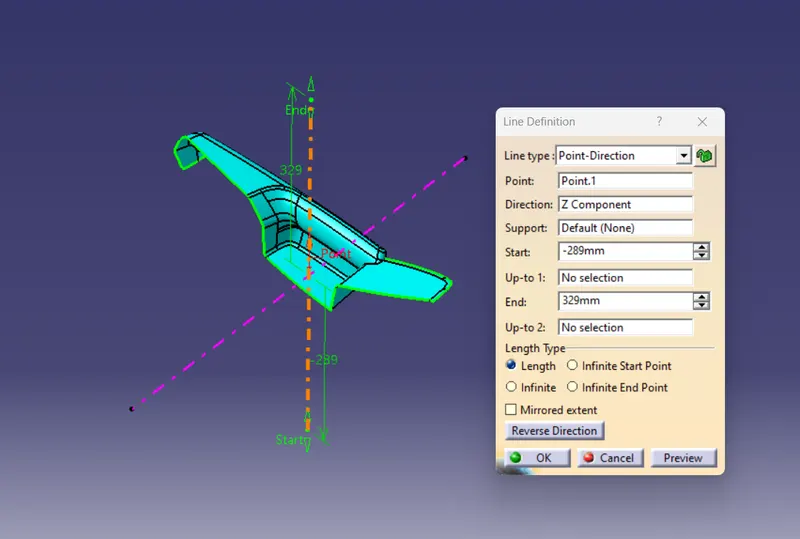
DRAFT ANALYSIS ON IMPROVED CLASS A SURFACE USING TOOLING AXIS , SIDE CORE AXIS :-
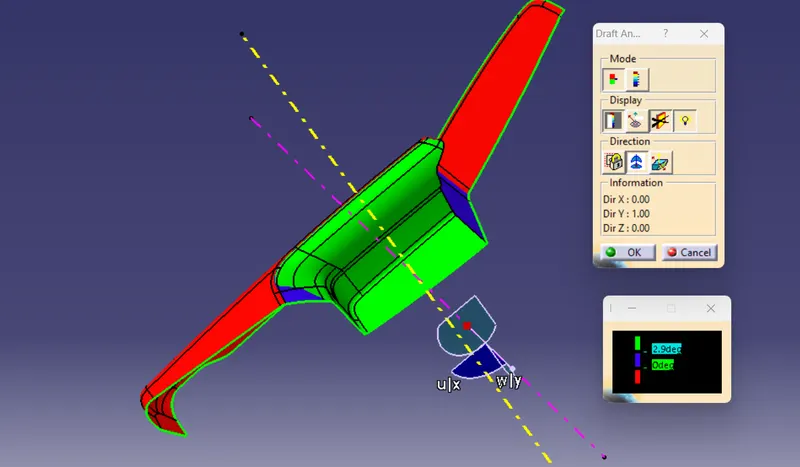
CREATION OF CLASS B SURFACE WITH OFFSET OF 2.5 MM THICKNESS OF THE COMPONENT.
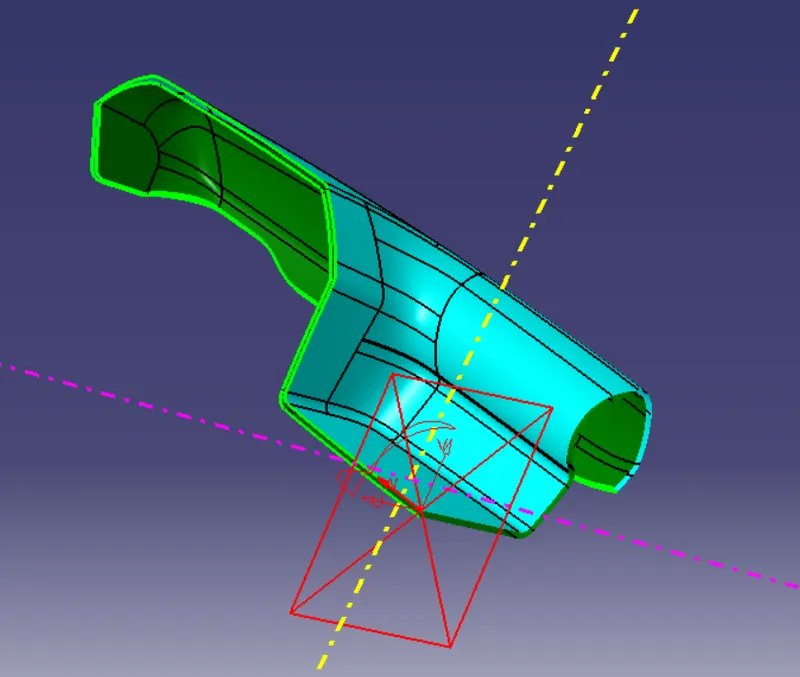
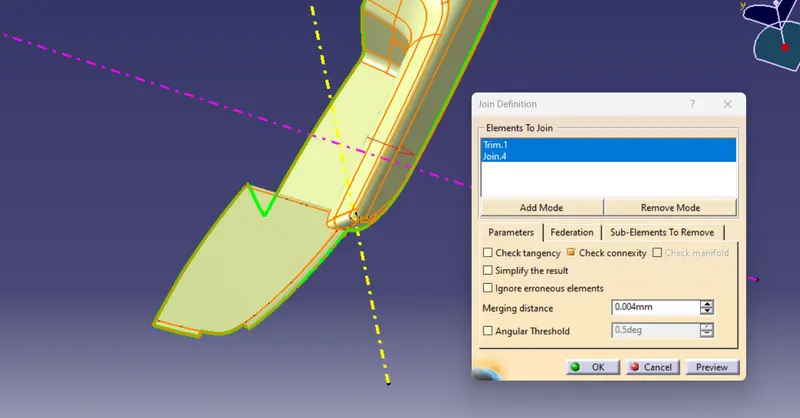
( I HAD USED 0.004 AS A MERGING BECAUSE I AM USING CATIA V5 (2009 VERSION) AND THE SOFTWARE DOSENT ALLOW TO MERG AT 0.003 BUT THE SAME THING IS POSSIBLE IN THE LATEST VERSION OF CATIA V5 AND THIS ISSUES WERE DISSCUSED BY ME WITH THE TECHNICAL SUPPORT TEAM.)
CREATION OF CLASS C SURFACE BY SWEEPING BOUNDARIES WITH RESPECT TO REFERENCE SURFACES AND TOOLING DIRECTION.
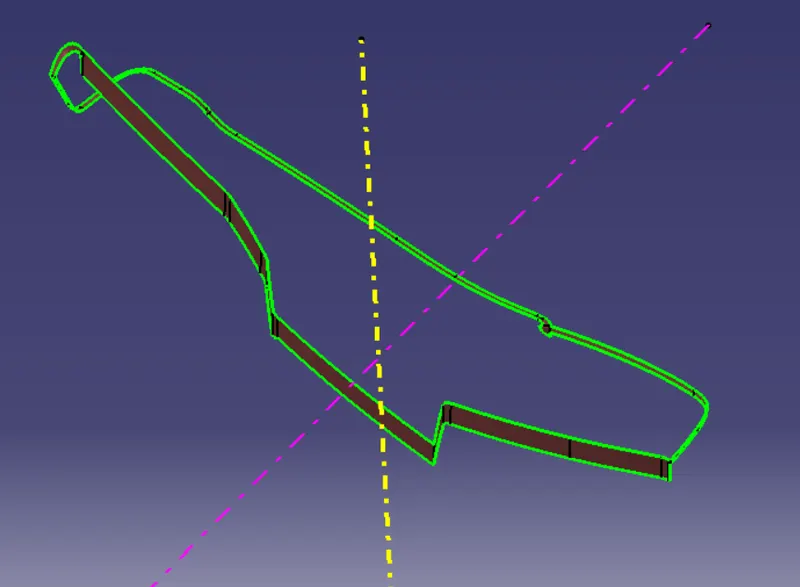
CREATION OF FINAL SURFACE BY JOINING CLASS A SURFACE AND CLASS C SURFACE TOGEATHER AND TRIMING IT WITH B SURFACE.
Once we get the surface model, we make it into solid model by going to part design and closing the surface. Once that is done, we run a draft analysis on the component and once it is clear, we move ahead with making B-side features and again run a draft analysis on the entire component. Below image shows the analysis on ARM REST component after making all the features.
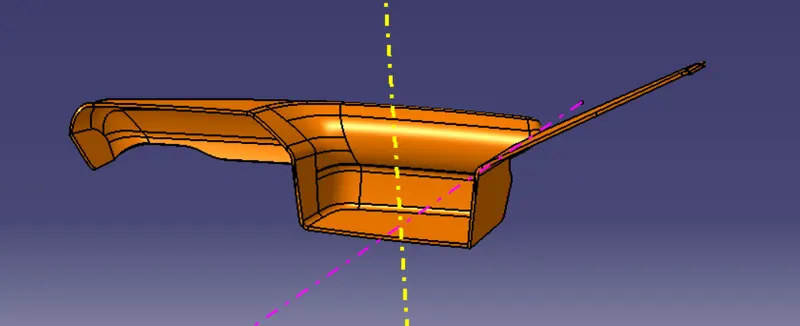
DRAFT ANALYSIS ON CLOSED BODY :-
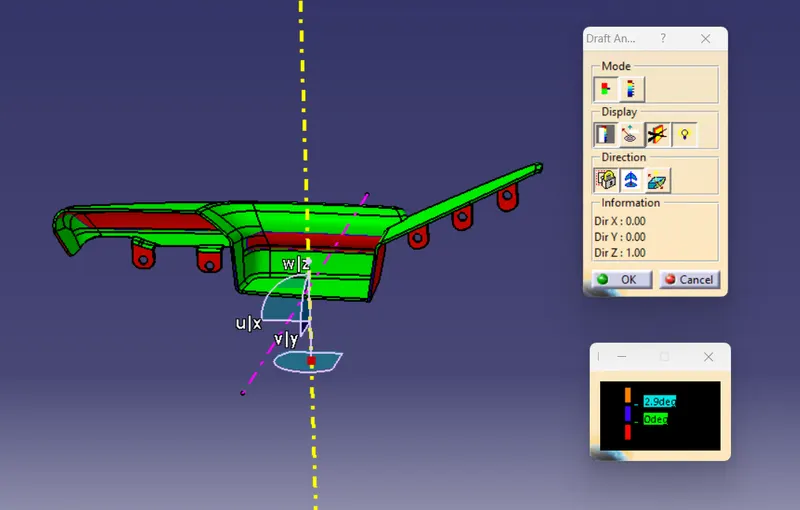
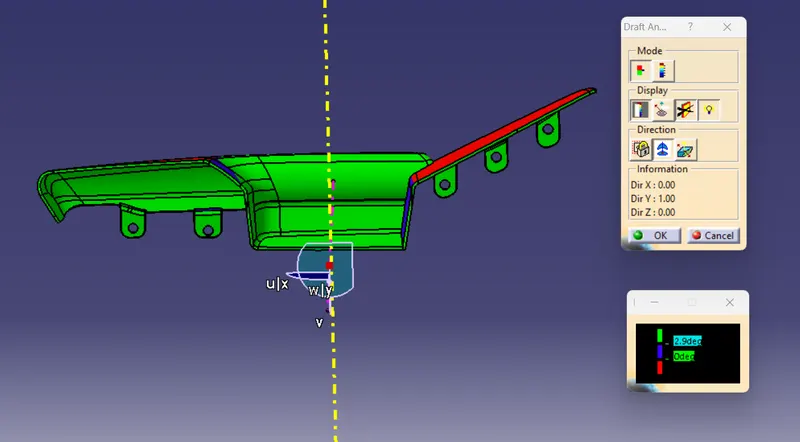
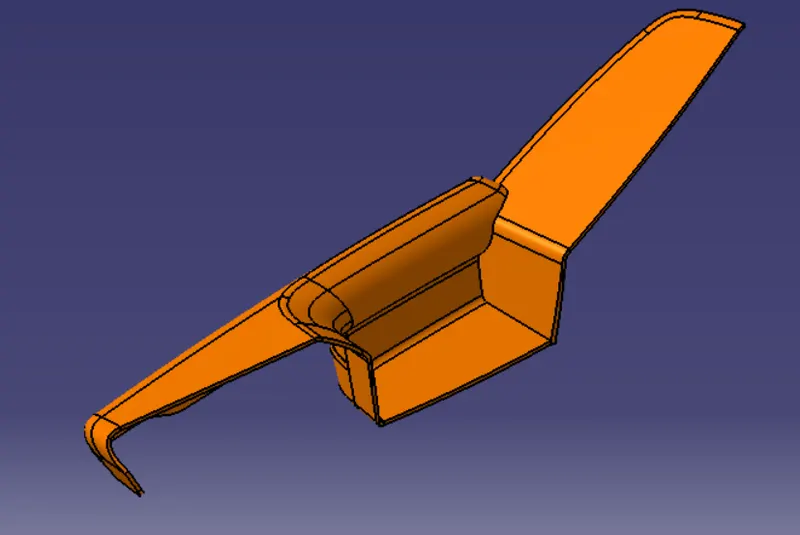
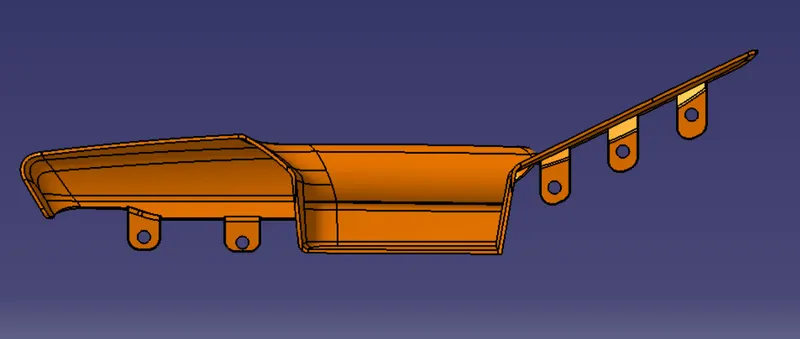
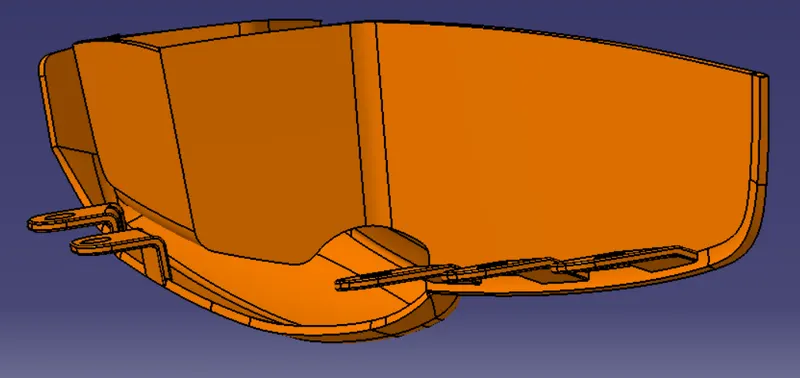
ARM REST PART MODEL IN VARIOUS ORIENTATIONS :-
1) ISOMETRIC VIEW :- 2) FRONT VIEW :-
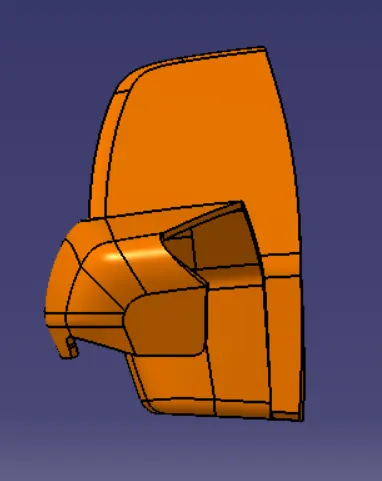
3) SIDE VIEW :- 4) TOP VIEW :-
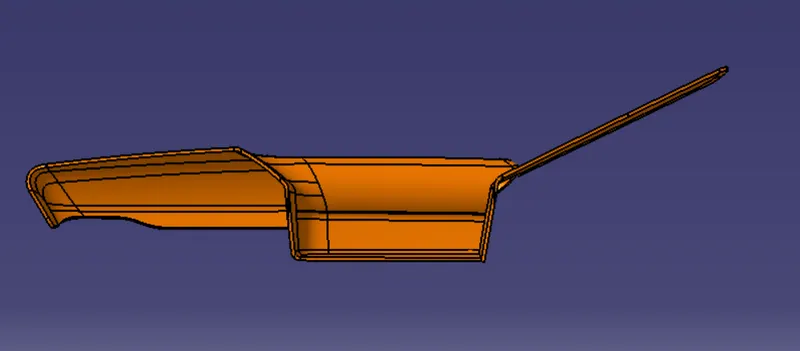
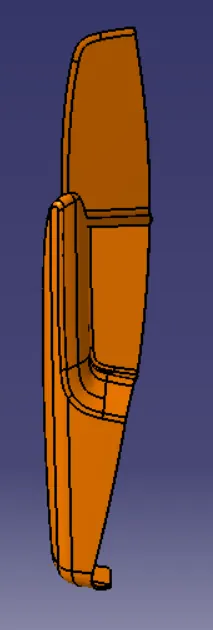
IMAGES OF ARM REST WITH FLANGES :-
D) BOTTLE HOLDER :-
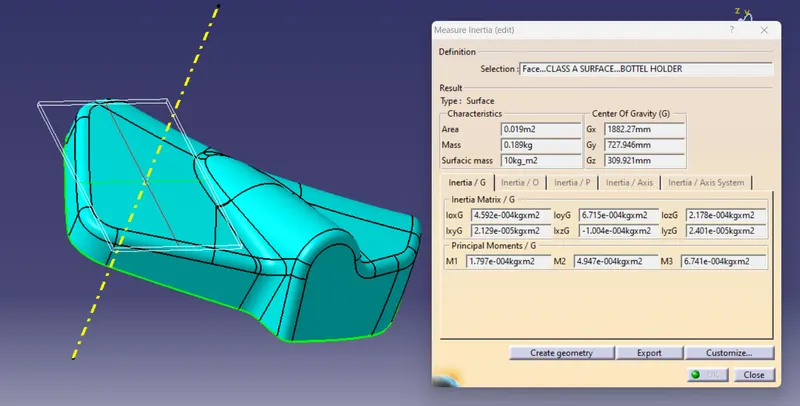
DRAFT ANALYSIS ON GIVEN CLASS A SURFACE AND TOOLING AXIS:-
TOOLING AXIS OF BOTTLE HOLDER COMPONENT IS CREATED USING MEASURE INERTIA METHOD BY TAKING POINT IN THE CENTRE OF GRAVITY OF COMPONENT WITH APPROPRIATE DIRECTION AND THEN COLOUR IT YELLOW AND PUBLISH IT.
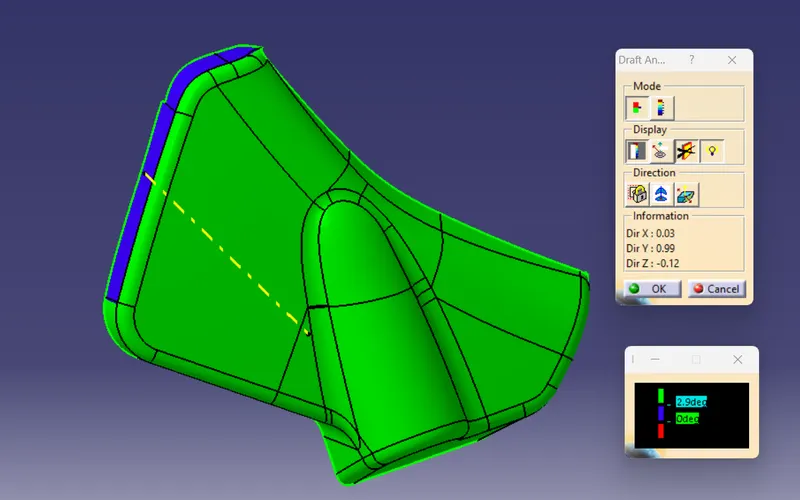
CREATION OF CLASS B SURFACE WITH OFFSET OF 2.5 MM THICKNESS OF THE COMPONENT.
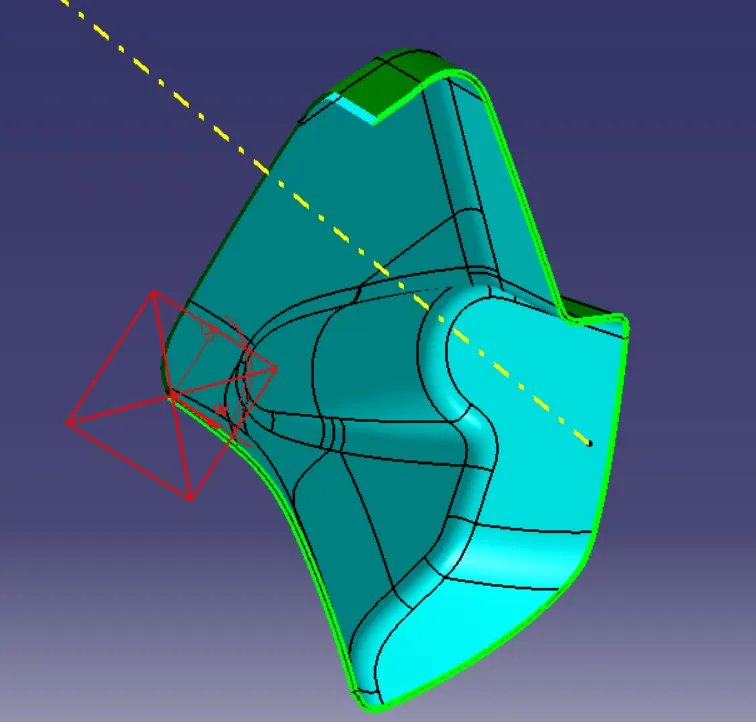
CREATION OF CLASS C SURFACE BY SWEEPING BOUNDARIES WITH RESPECT TO REFERENCE SURFACES AND TOOLING DIRECTION.
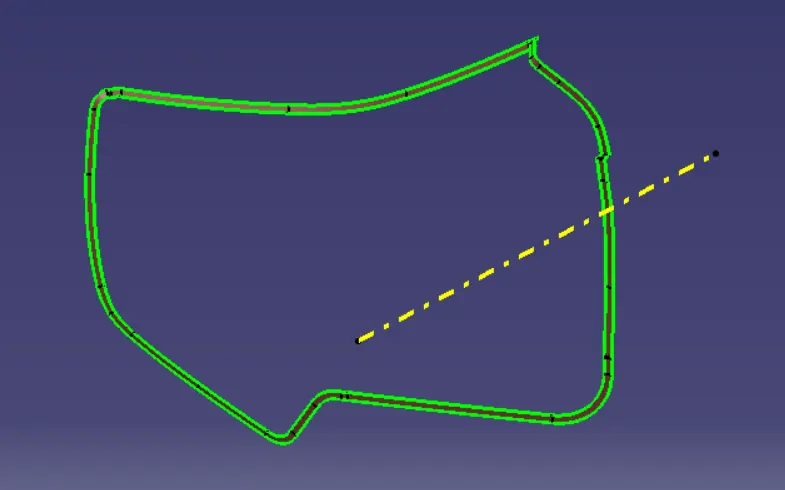
CREATION OF FINAL SURFACE BY JOINING CLASS A SURFACE AND CLASS C SURFACE TOGEATHER AND TRIMING IT WITH B SURFACE.
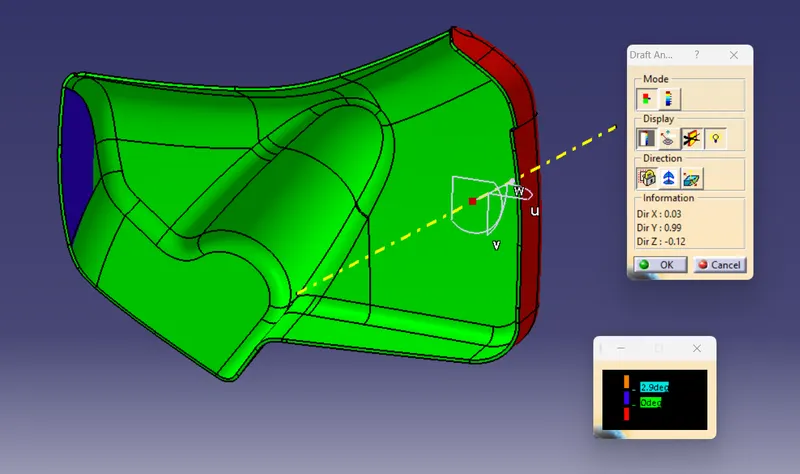
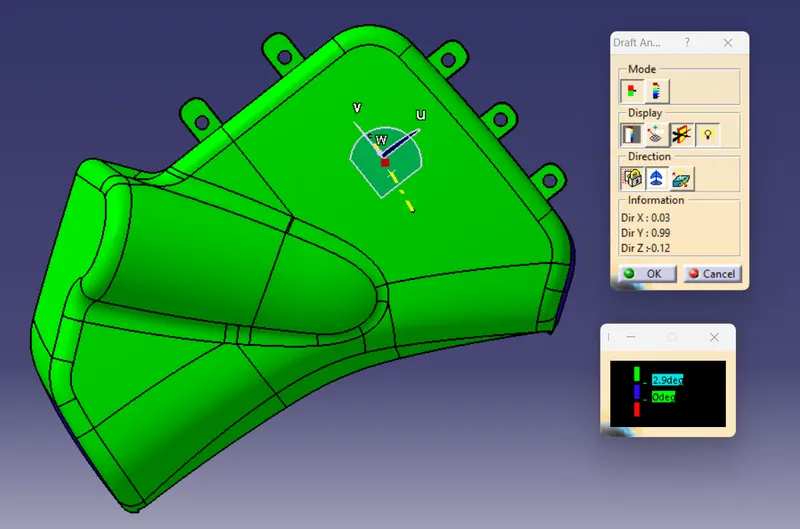
Once we get the surface model, we make it into solid model by going to part design and closing the surface. Once that is done, we run a draft analysis on the component and once it is clear, we move ahead with making B-side features and again run a draft analysis on the entire component. Below image shows the analysis on BOTTLE HOLDER component after making all the features.
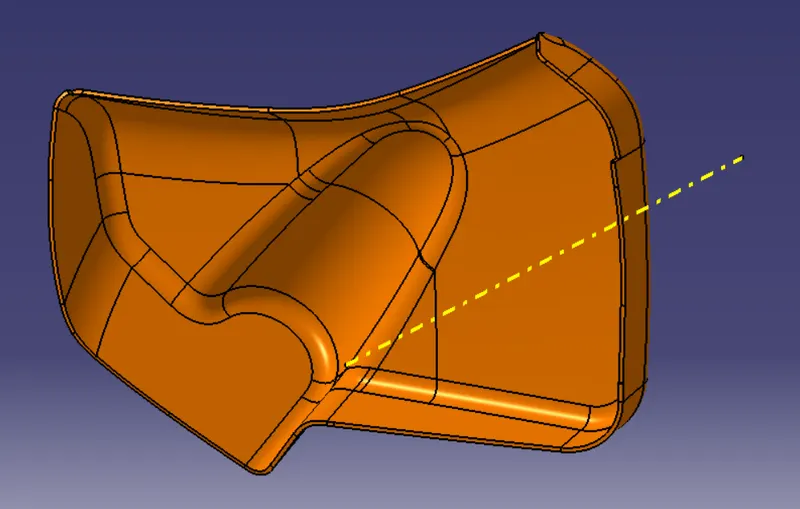
DRAFT ANALYSIS ON A CLOSED BODY :-
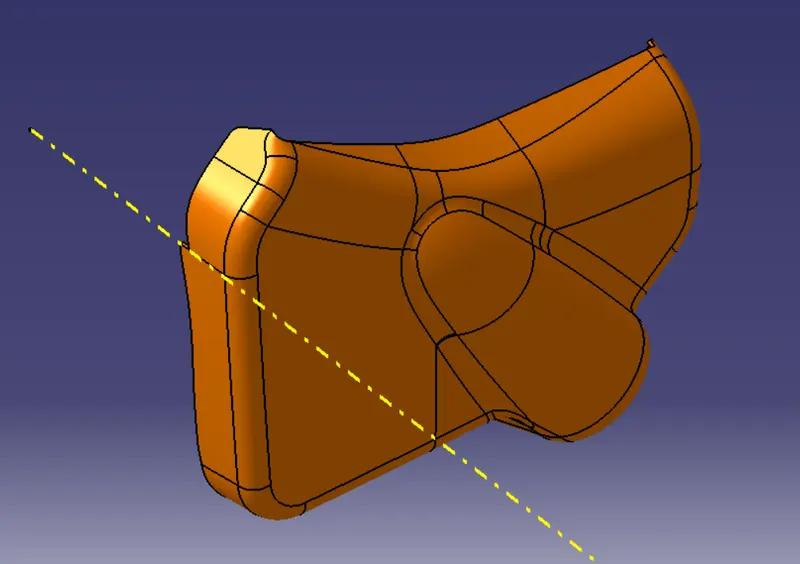
BOTTLE HOLDER PART MODEL IN VARIOUS ORIENTATIONS :-
1) ISOMETRIC VIEW :- 2) FRONT VIEW :-
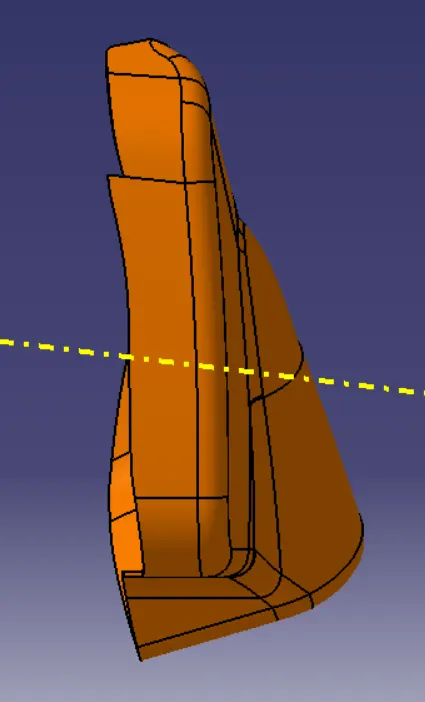
3) SIDE VIEW :- 4) TOP VIEW :-
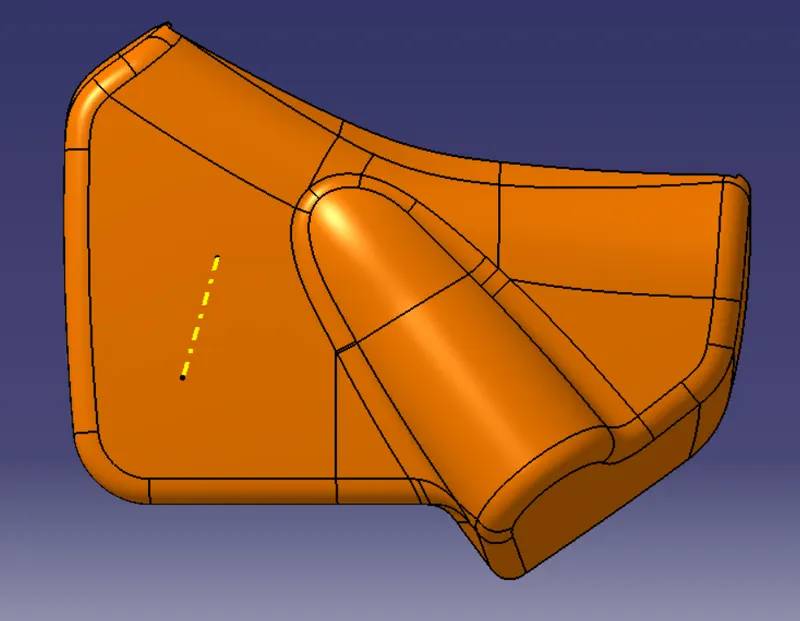
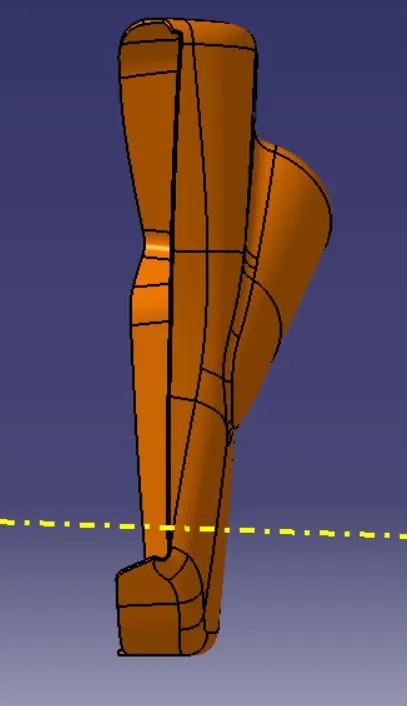
IMAGES OF BOTTLE HOLDER WITH FLANGES :-
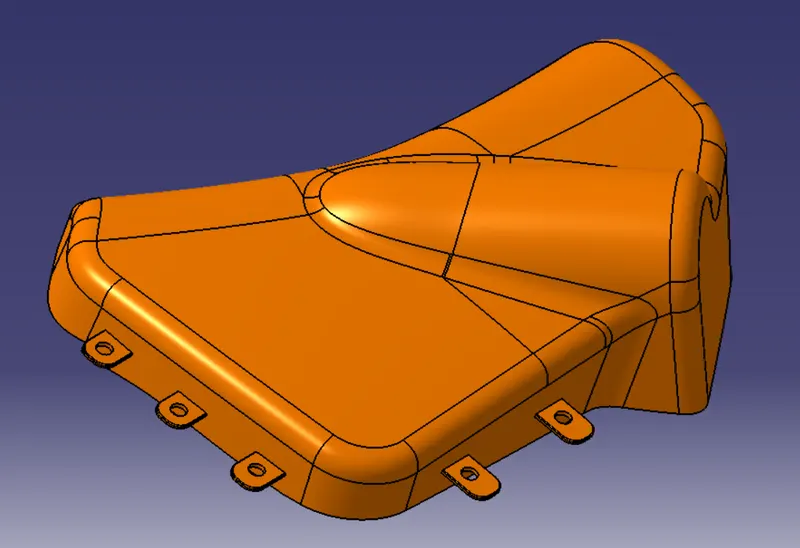
DESIGNING B-SIDE FEATURES
DOG HOUSE :- Dog house is an engineering feature used in plastic design. Dog houses are used as support feature. Sometimes other engineering features like snaps, locators, screw bosses are mounted on them to increase their strength.
Dog houses are subjected to draft analysis to prevent breakage of the component during ejection from the mould cavity. Dog house and oher engineering components are built on the B-surface
GENERAL DESIGN GUIDELINES FOR DOG HOUSE DESIGN:
- Minimum height: Less than 6mm causes steel condition.
- 3:1 ratio of steel width to height. But 2:1 is preferred.
- Minimum width: 3:1 ratio of steel width to height. But 2:1 is preferred.
- Draft: minimum 1.5deg.
- Sink saver: height= 40% of nominal thickness. Width= 3.0mm-6.0mm.
- Optimal radius:25mm
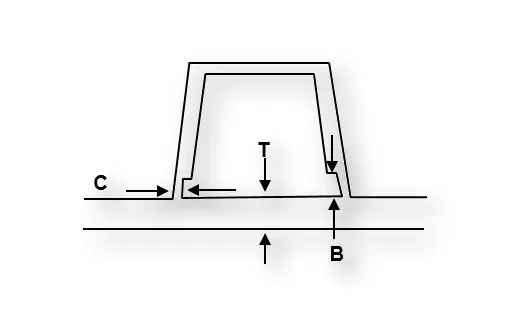
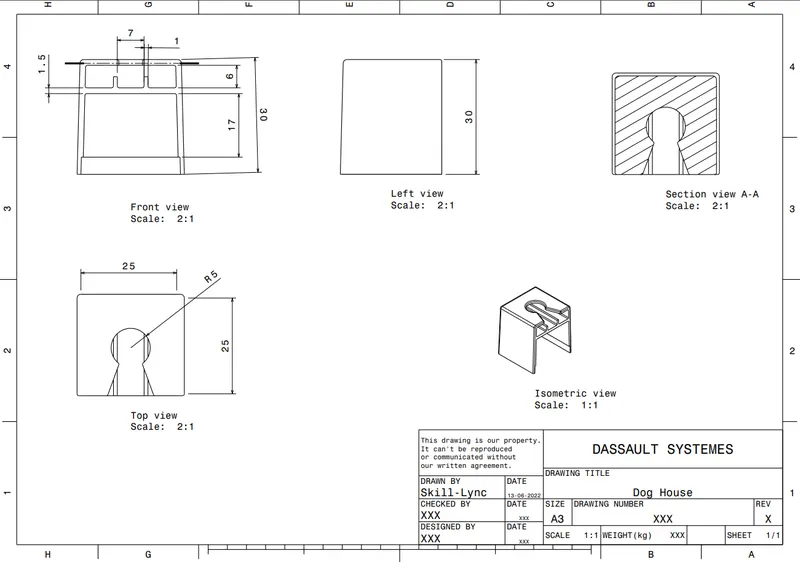
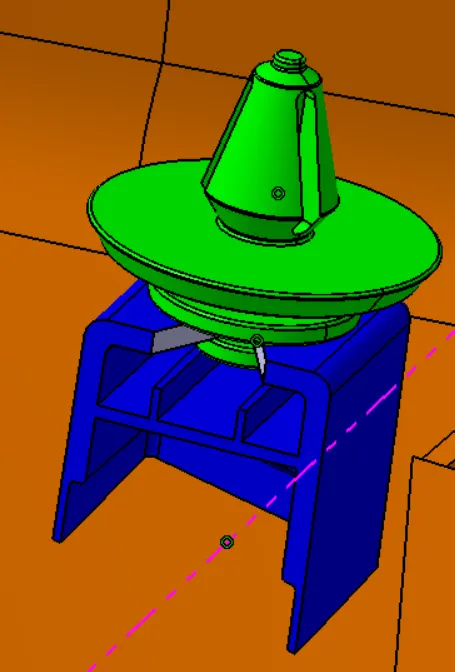
However, for this model we made a dog house which mounts push pins on it. Every above design rules were followed while making the dog house.
PUSH PIN MOUNTING ON DOG HOUSE :-
DRAFT ANALYSIS ON DOG HOUSE USING SIDE CORE AXIS :-
SCREW BOSS: They are used for the purpose of mating two parts. They have hole in them which accepts the threaded part of the fasteners such as screws.
GENERAL DESIGN GUIDELINES FOR SCREW BOSS DESIGN:-
- Draft: 5 deg on each walls.
- Wall thickness: 40% of the nominal wall thickness i.e. 0.4*t where t is the wall thickness which is 2.5mm in this case.
- Height/diameter: 3:1 steel but 2:1 is preferred.
- Radius of the fillet: minimum 0.25mm.
- Boss gussets (rib like structure giving strength to the screw boss) must meet ribs guidelines.
- Avoid merging the screw-boss into wide wall.
RIBS/GUSSETS: They increase the stiffness and strength without increasing overall wall thickness of the model which is not desired. They also facilitate:
- Locating and arresting components of an assembly
- Providing alignment in mating parts
- Acting as stopper or guides for mechanisms.
DESIGN RULES FOR RIBS:
- Draft: 0.5 deg per side (minimum), but this value should not be high enough that it will cause failure for other consideration. For example, more draft will result in less thickness at the top surface.
- Thickness of ribs: 40% of wall thickness or 0.4*t where t is the wall thickness.
- Height: ≤ 5 times the wall thickness i.e. 5*t
- Spacing (for more than 1 rib): 3:1- steel height/width ratio (maximum). h/w =3or2(preferred) where h is the height of the rib and w is the space between two ribs.
- Minimum thickness at the tip: 0.75
- Radius: 0.25mm max
- Ribs on opposite side of the wall should be offset
- Ribs should be connected to other structural features where possible.
- Rib root thickness should not be more than 30% of the wall thickness.
HEAT STAKES :-
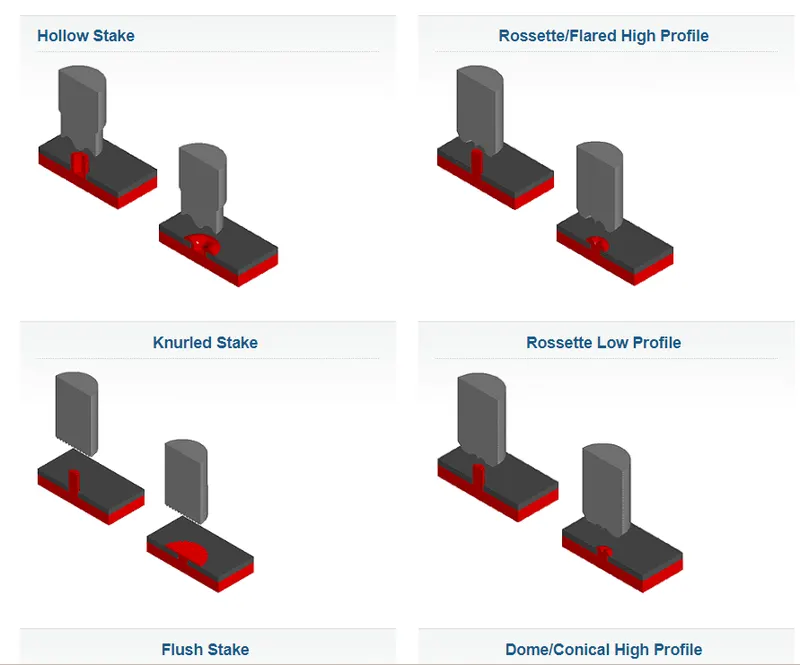
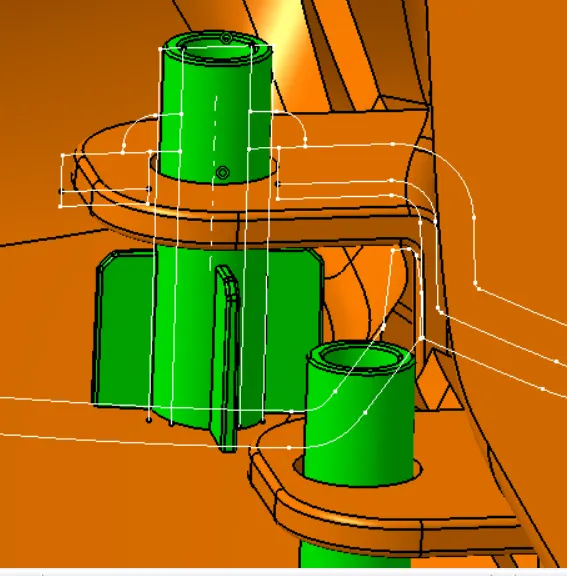
Heat staking also known as thermoplastic staking is the process of joining two dissimilar materials together. In heat staking we use local heating and cooling to raise the temperature of plastic components and allow plastic reforming to be carried out. This reforming can be used in a wide variety of applications.
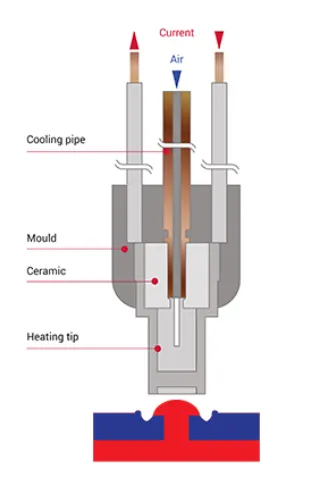
DRAFT ANALYSIS ON HEAT STAKES :-
4 WAY LOCATORS :-
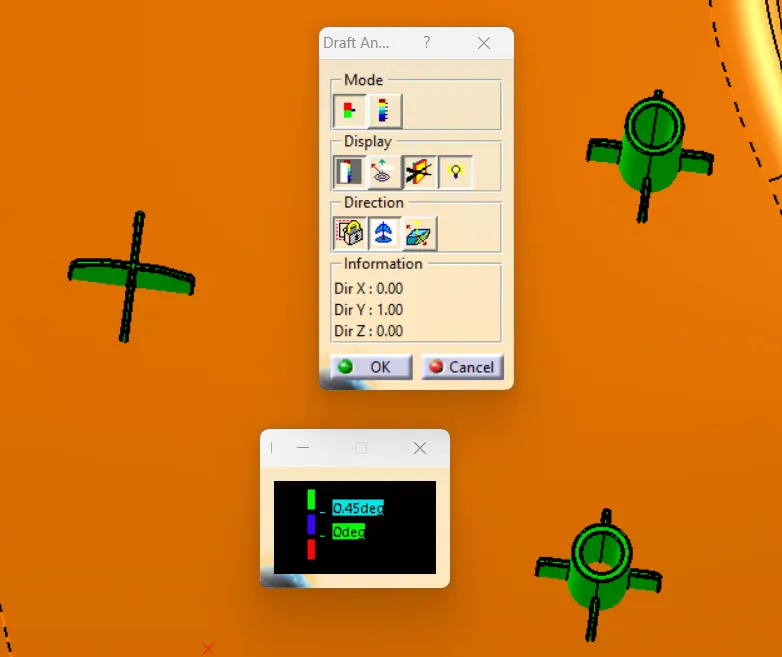
A round locating pin located concentrically in a hole is a common application of a 4-way pin, and helps to further secure the piece. 4-WAY LOCATORS: 4-way mean you prevent movement at 2 axes (+X, -X, +Y and -Y) on the plane. Generally, you have cylindrical pin on the fixture and circular hole at workpiece part.
DRAFT ANALYSIS ON 4 WAY LOCATORS :-
IMAGES OF COMPLETE DOOR TRIM PANEL IN VARIOUS ORIENTATIONS :-
1) ISOMETRIC VIEW :- 2) FRONT VIEW :-
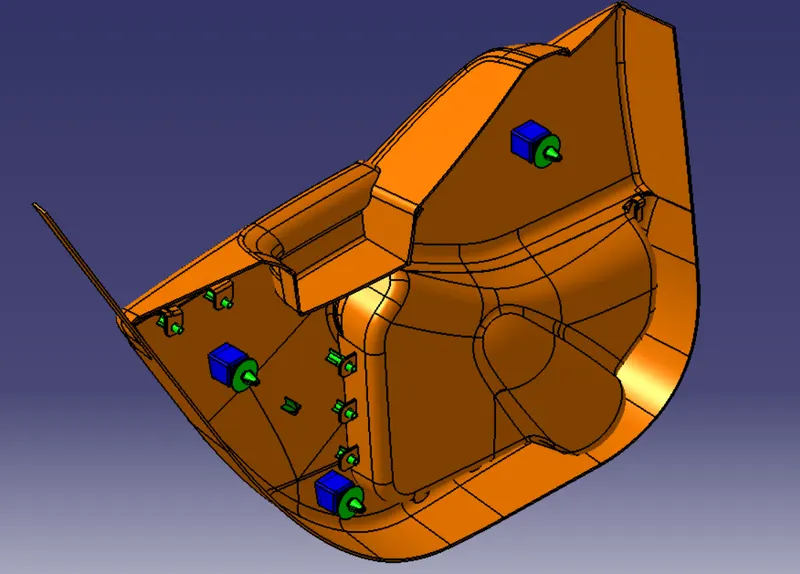
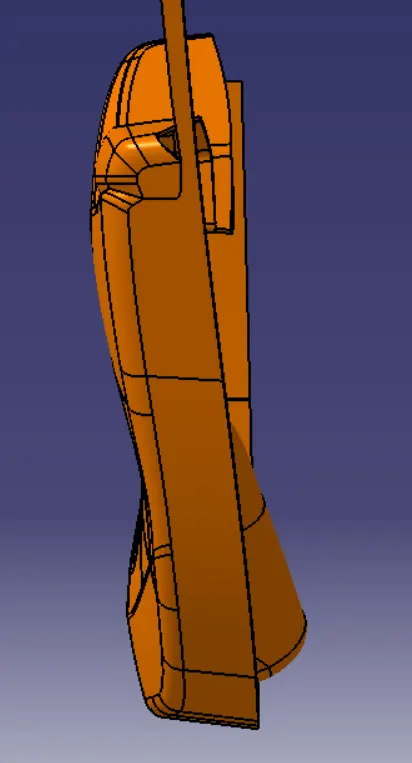
3) SIDE VIEW :- 4) TOP VIEW :-