Usage of Collaborate tool in REVIT
1)
Open an architectural template. Using the Manage tab set project base point and project shared coordinates for the project
AIM: -
To open an architectural template and to set the project base point and project shared coordinates using the manage tab for the project.
PROCEDURE: -
- Create an architectural template.
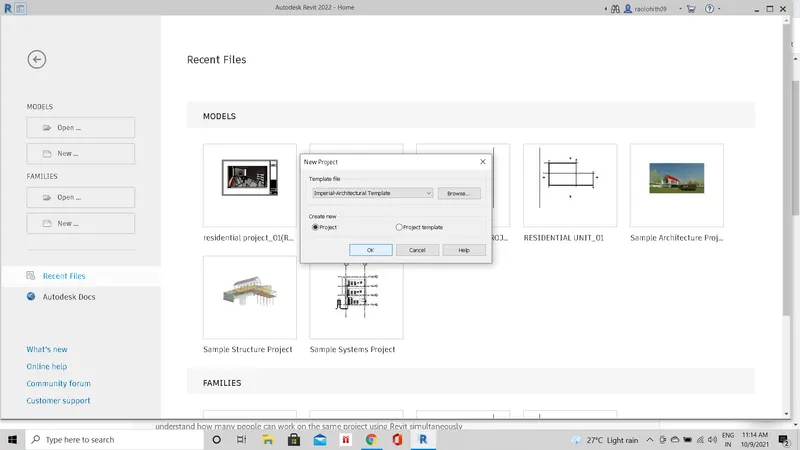
- Open the architectural template.
- Save the architectural template as concrete building architectural template on to the specified folder.
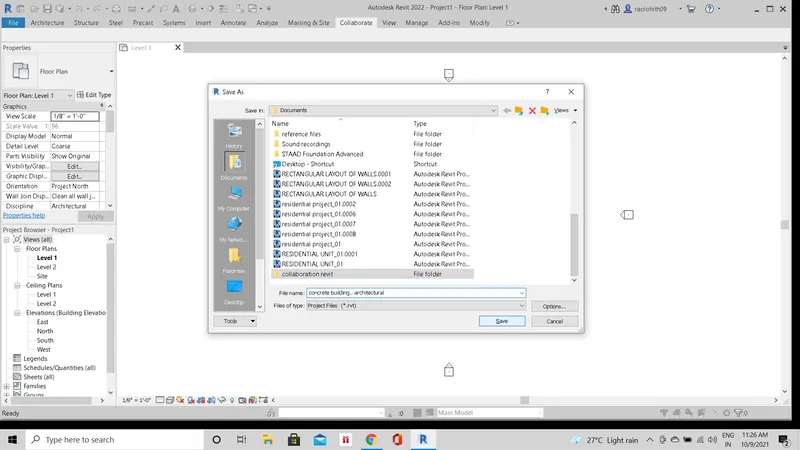
- After saving the template, click on the architectural toolbar.
- Under the architectural toolbar, click on the grid icon.
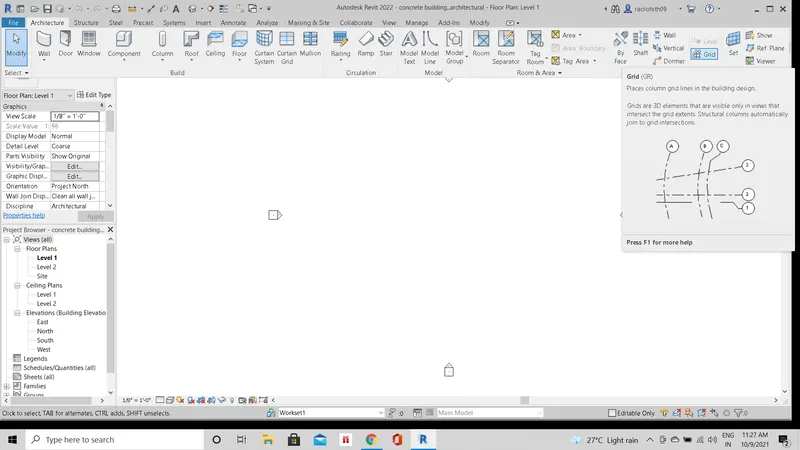
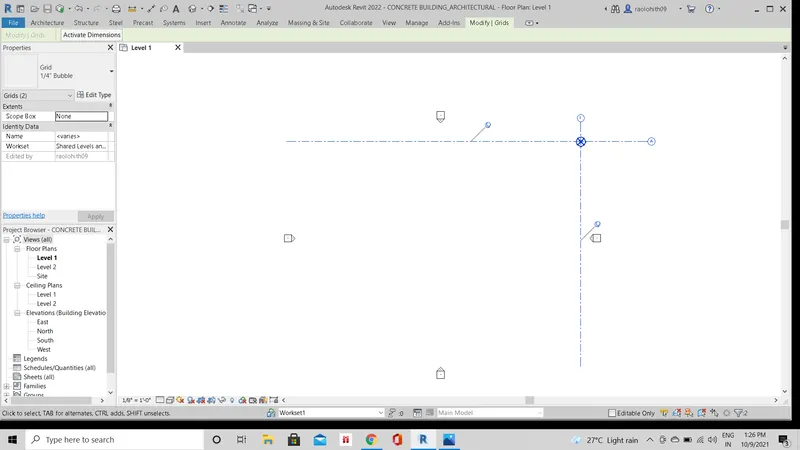
- Place the grids along longitudinal and transverse in direction.
- Now, click on the manage toolbar, under the manage toolbar, determine the specify coordinates at a point on the two grid lines, by clicking on the coordinate’s icon.
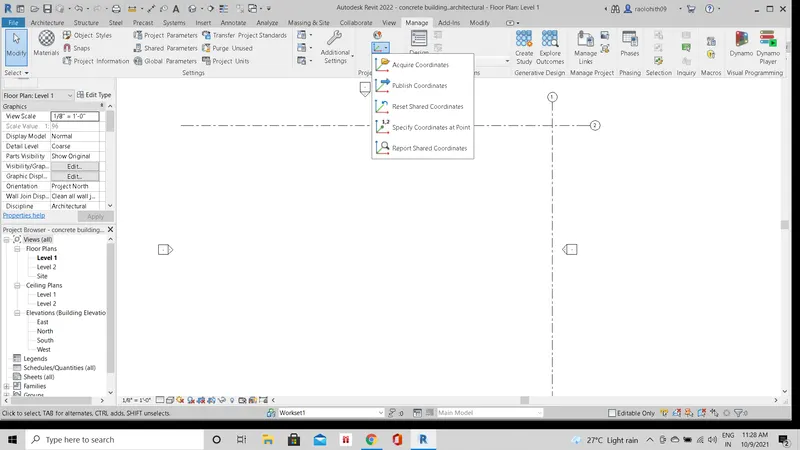
- Select the two grid lines and specify the coordinates of the grid lines at a point along east/west and north/ south as 0'.
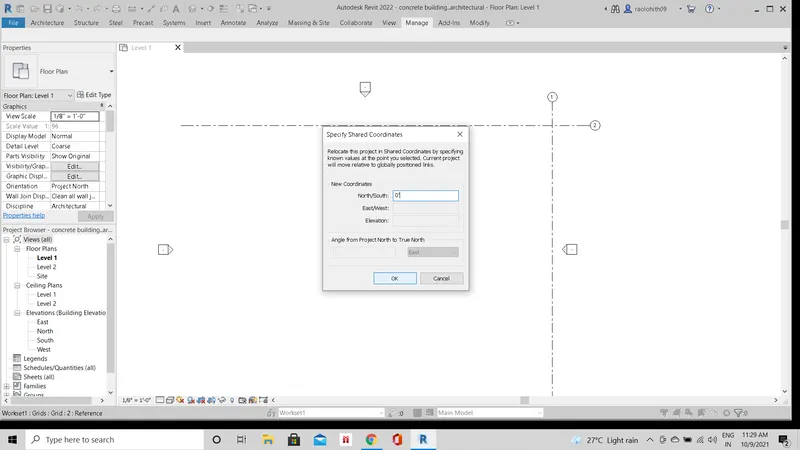
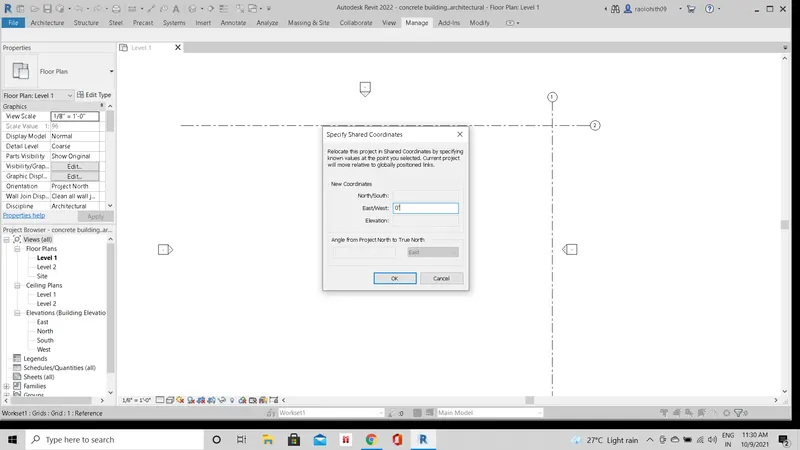
- Hence, the project shared coordinates for the project are determined as 0' which acts as the reference or datum line to the project.
- To set the project base point, open the visibility graphics dialog box by typing "VG”.
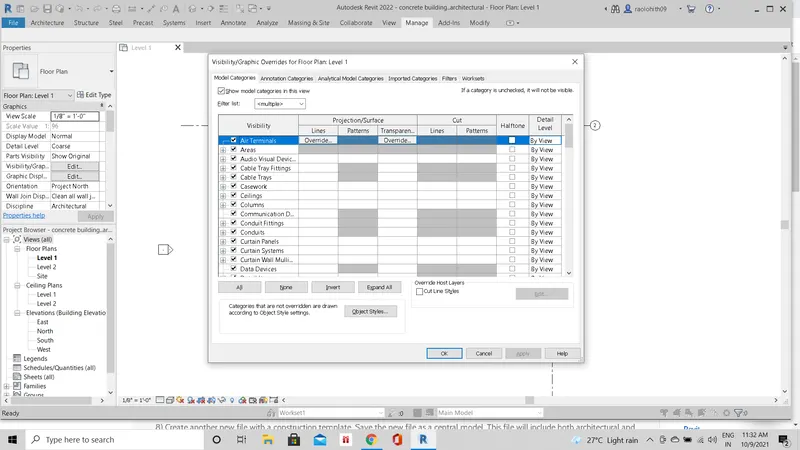
- Go to the site option and expand the site category.
- Make sure that the project base point icon is turned on to locate the base point of the project.
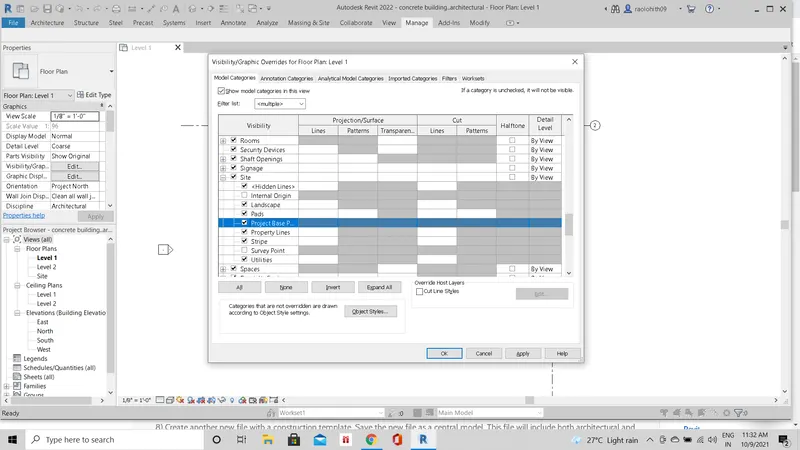
- Now the project base point icon is turned on and place at the project shared coordinates of the reference grid lines.
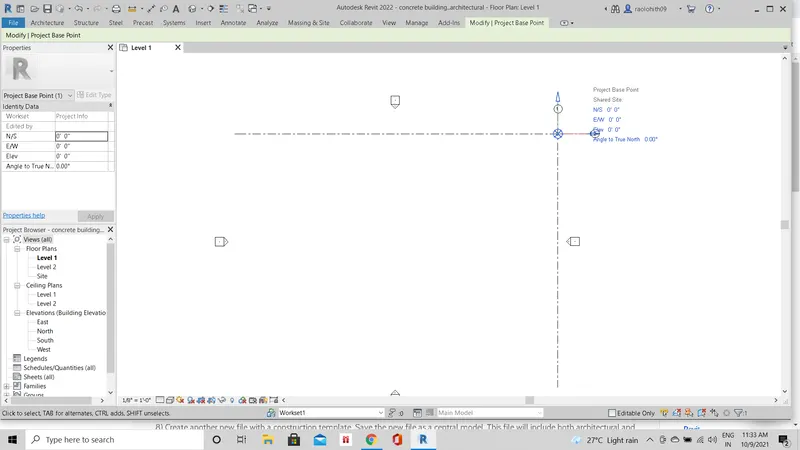
RESULT: -
The base point and the shared coordinates of the project is determined by using the manage tab.
The project shared coordinates for the project and its base point are determined and set to be at an a 0' along all the direction.
2)
Open another new file but with a structural template. Using the manage tab set project parameters the same as the architectural model. Copy the parameters from the architectural model to the structural template or enter the parameters manually into the structural model
AIM: -
To create a new structural template and to assign the project shared coordinates and its base point by using the manage tab, and thereby copying the parameters from the architectural model to the structural model.
PROCEDURE: -
- Create a new project by using a structural template.
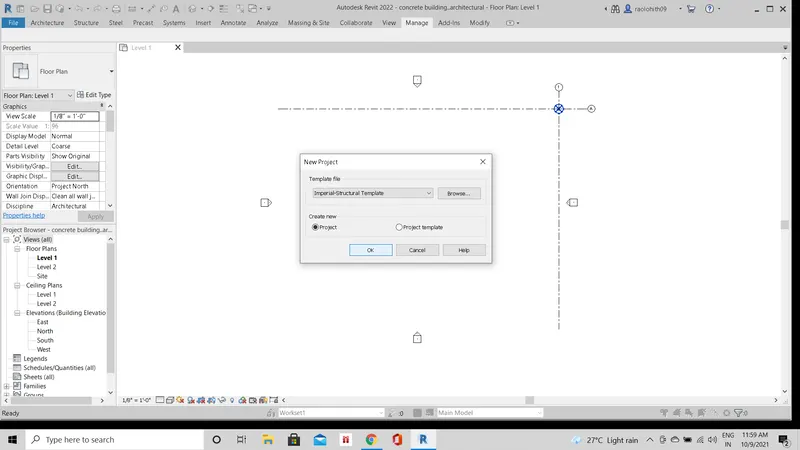
- Open the structural template.
- Save the structural template as concrete building structural template on to the specified folder.
- After saving the template, click on the structural toolbar.
- Under the structural toolbar, click on the grid icon.
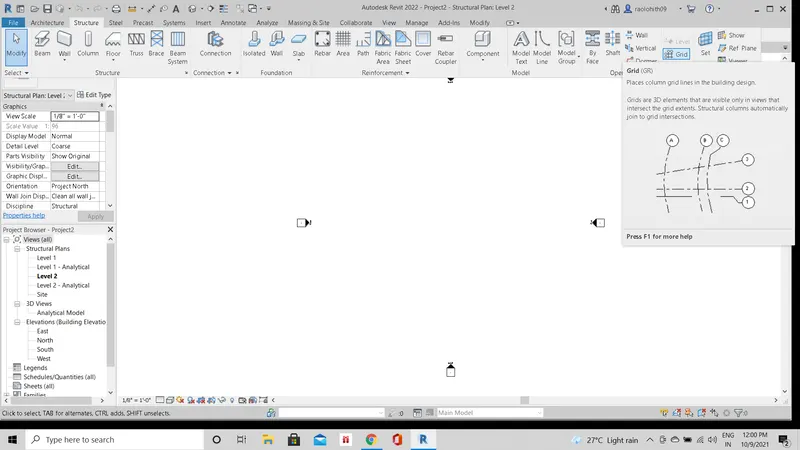
- Place the grids along longitudinal and transverse in direction.
- Now, click on the manage toolbar, under the manage toolbar, determine the specify coordinates at a point on the two grid lines, by clicking on the coordinate’s icon.
- Select the two grid lines and specify the coordinates of the grid lines at a point along east/west and north/ south as 0'.
- Hence, the project shared coordinates for the project are determined as 0' which acts as the reference or datum line to the project.
- To set the project base point, open the visibility graphics dialog box by typing "VG ".
- Go to the site option and expand the site category.
- Make sure that the project base point icon is turned on to locate the base point of the project.
- Now the project base point icon is turned on and place at the project shared coordinates of the reference grid lines.
- To copy the project parameters from the architectural model to the structural model, click on the manage tab and click on the manage link icon.
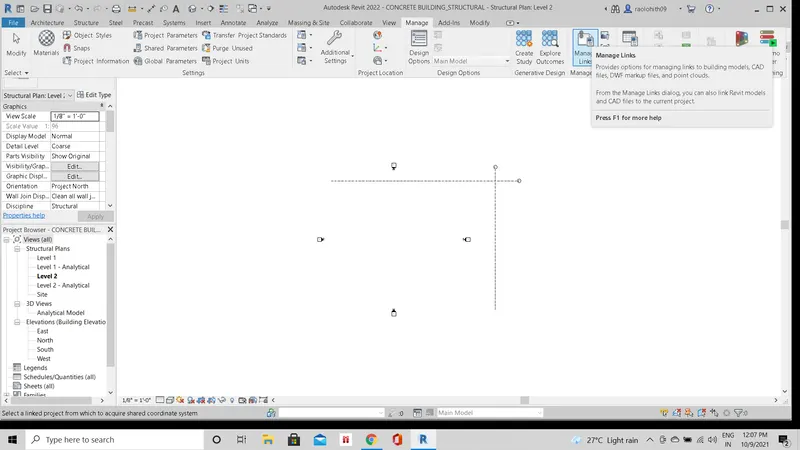
- Select the concrete building architectural revit file link and select the positioning of the link file to auto- by shared coordinates and load it to the structural template.
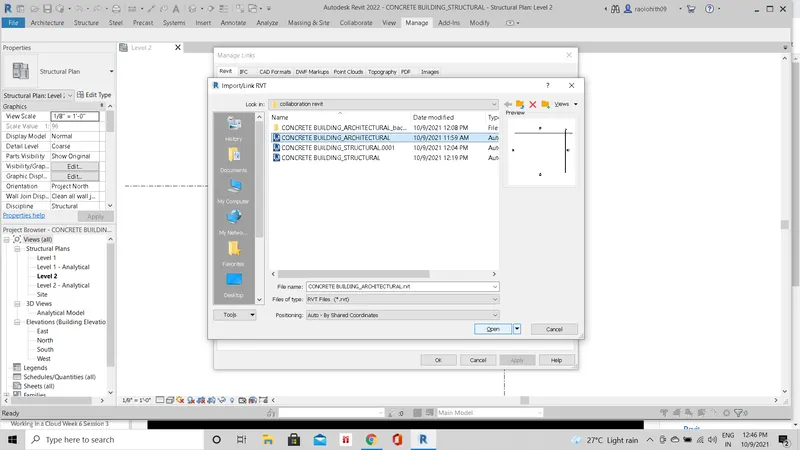
- Now, the dialog box appears stating that the host model and the linked model doesn’t share the same coordinates, since we do not acquire the coordinates.
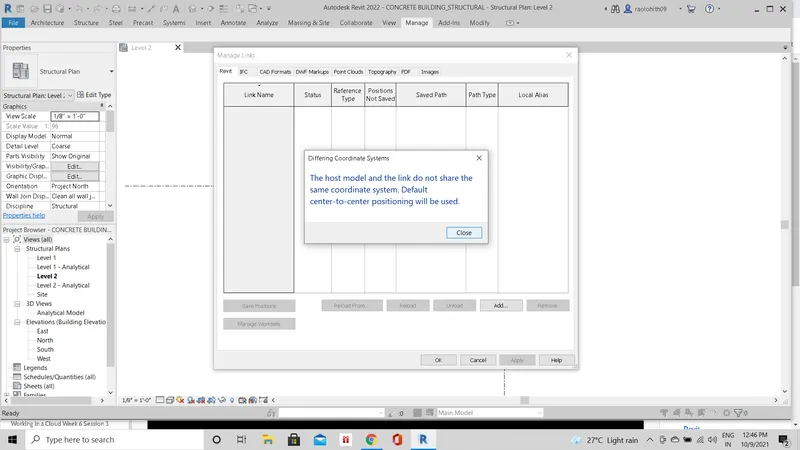
- Close the dialog box and link it to the structural model.
- Now, we can see the project coordinates and the base point location of the project is different for the link model and the host model.
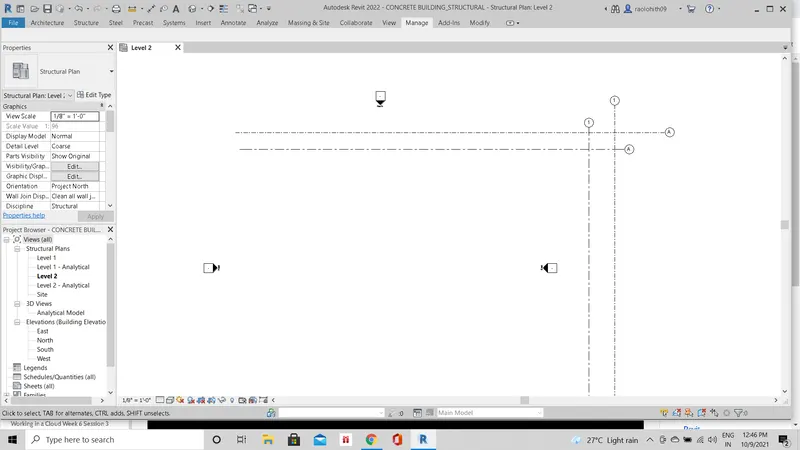
- To have the same project coordinates to both the models, acquire the coordinates of the linked model to the host model and transfer the base point of the host model to the linked model by relocating the coordinates of the host model to the linked model under the project coordinates section.
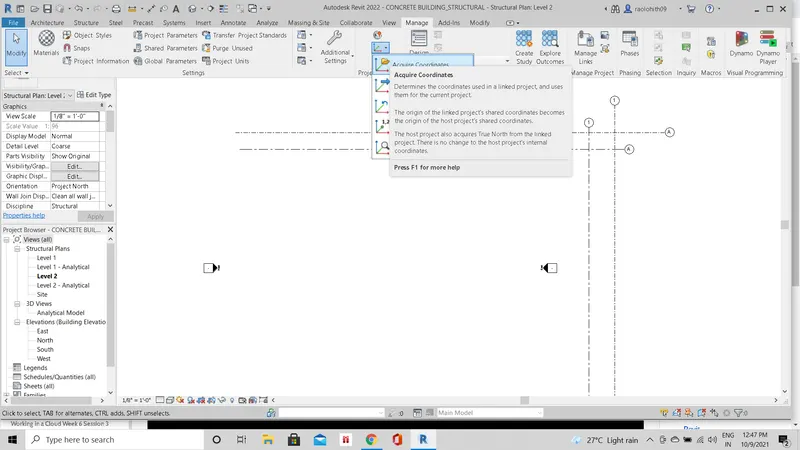
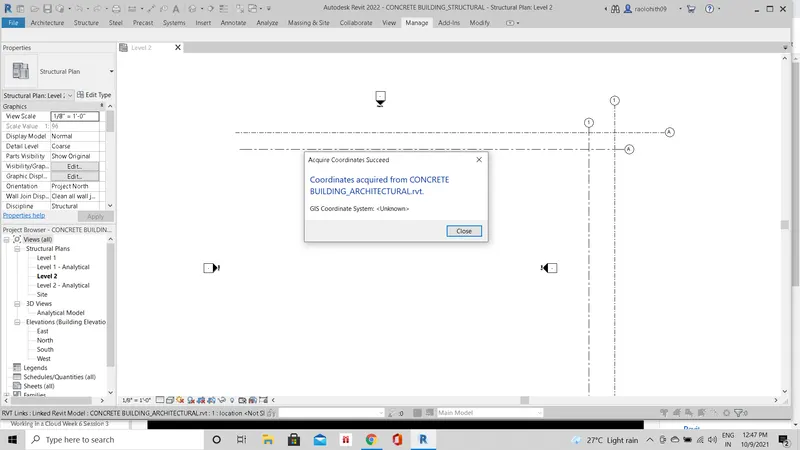
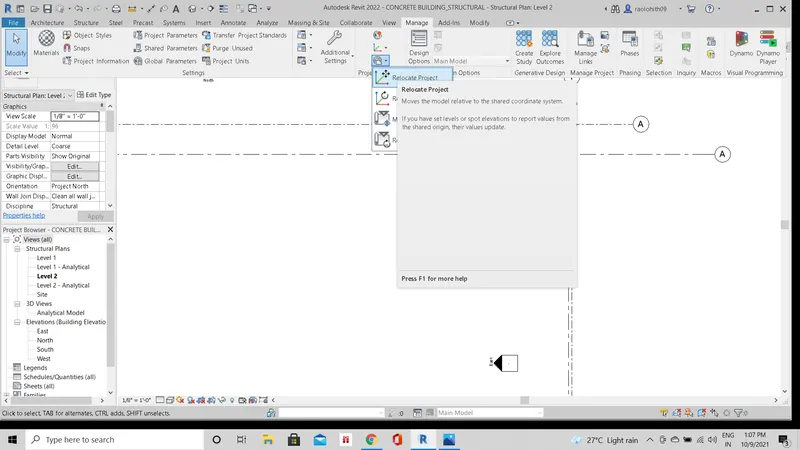
- Now, both the host model and linked model will share the same project coordinates at one base point.
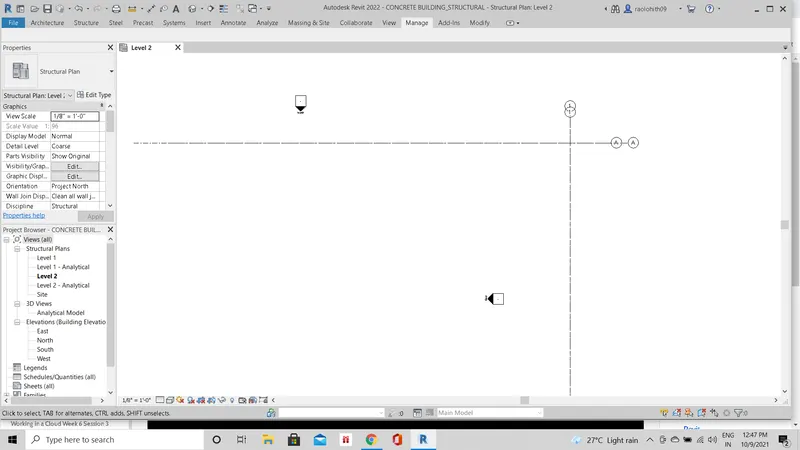
RESULT: -
The project shared parameters are copied from the architectural model to the structural model by linking the architectural model to the structural model by the help of manage links of the manage toolbar.
It is also determined that the shared project parameters of the architectural and structural model rely on the equal coordinates and the one base point.
3)
Re-open the architectural model. Using the tools under the Collaborate tab make the architectural model a central model (enabling simultaneous working on the model)
AIM: -
To re-open the architectural model and to make the architectural model as a central model by using the tools under the collaborate tab.
PROCEDURE: -
- Open the concrete building architectural model.
- Click on the collaborate toolbar.
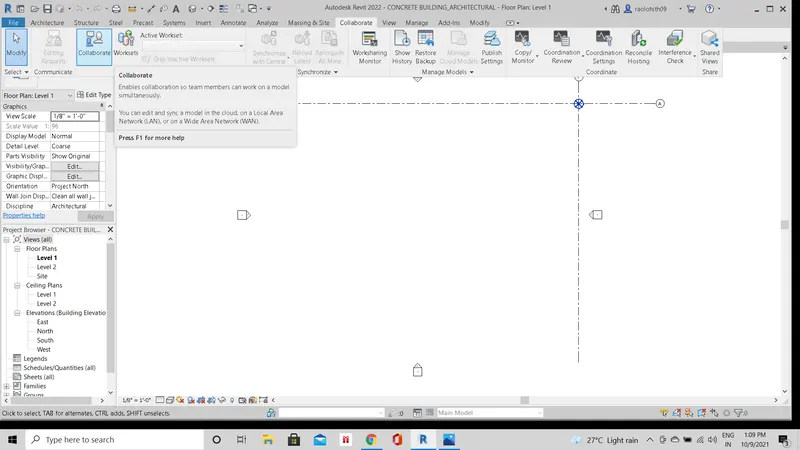
- Under the collaborate toolbar, click on the collaborate icon to allow the multiple people to work on the same project.
- The preferable way to collaborate is by collaborating within the network for the security reasons.
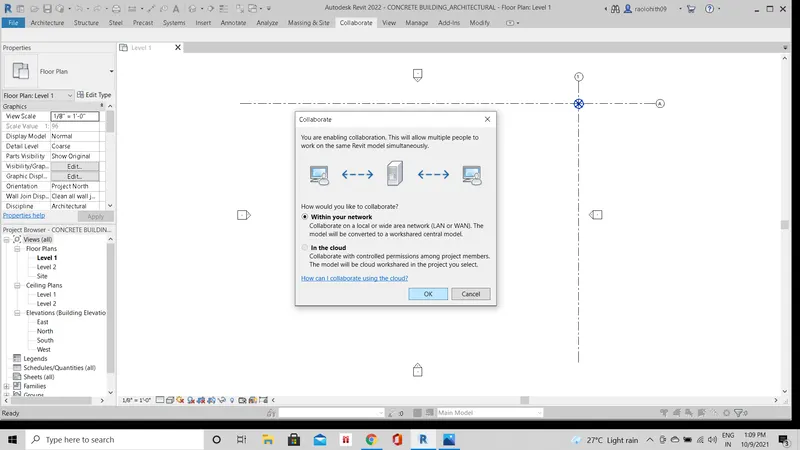
- Here, the project worksharing mode has been enabled.
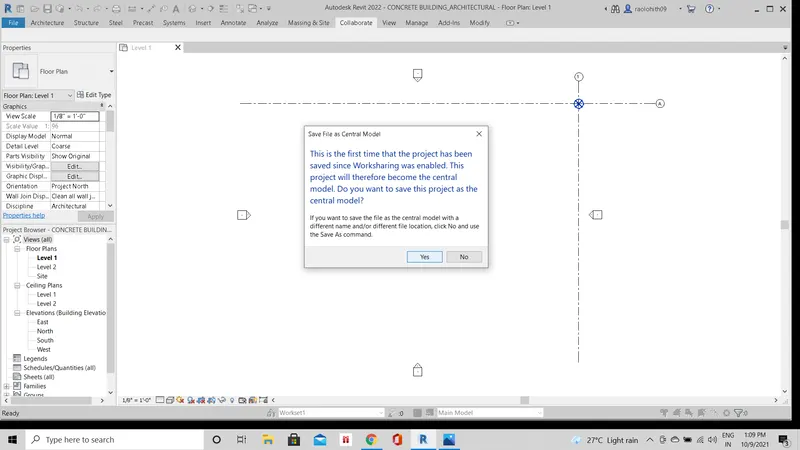
- When you save the project, for the first time after the project worksharing mode has been enabled, the project file will be saved as a central file.
RESULT: -
To save the architectural model as central file worksharing mode has to be enabled.
The project worksharing has enabled with the help of collaborative tools and hence the file is saved as a central file.
By clicking yes, the model has been saved as central file.
4)
Create the Grids Longitudinal and Transverse pattern for the project similar to the task done in Week 2
AIM: -
To create the grids along longitudinal and transverse direction in the architectural model.
PROCEDURE: -
- Open the architectural template file.
- Click on the architectural toolbar, and select the grids icon.
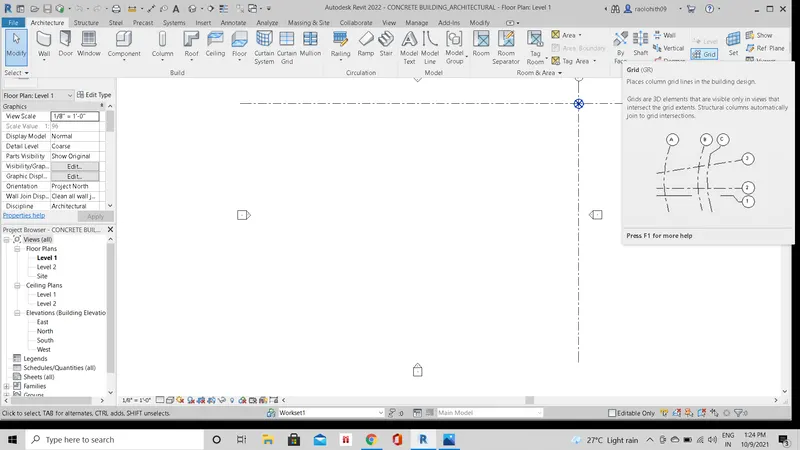
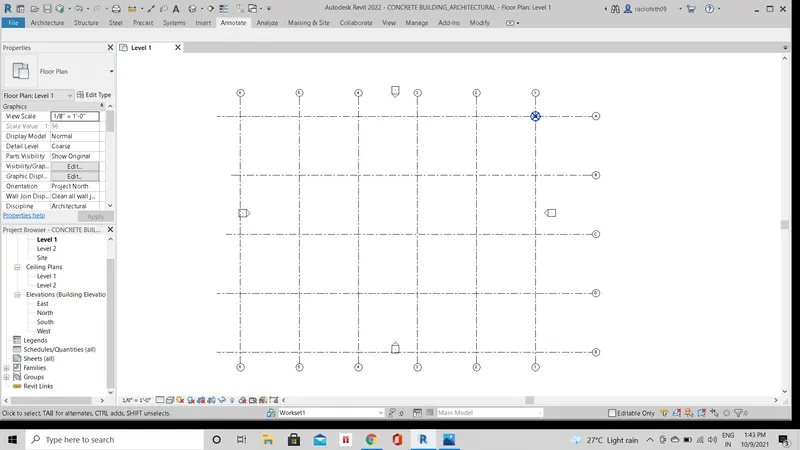
- Place the architectural grids along longitudinal and transverse direction and name the grids.
- Along longitudinal direction in alphabetic and along transverse direction in numbers.
- Here, i have placed the grids at a distance of 32' equally along longitudinal and transverse direction with reference to the grid lines created along the transverse and longitudinal direction for the project shared coordinates.
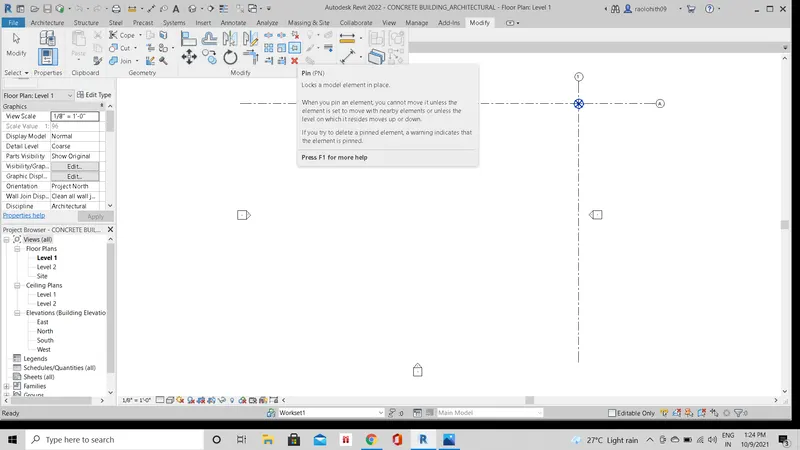
- Pin the reference grids to make sure that the reference datum grids are not disturbed. And unpin to make any modification or changes to the grids to expand or to drag it.
RESULT: -
The grids lines are placed along longitudinal and transverse in direction with reference to the datum grids.
All the grid lines are placed at an equal distance to determine the efficiency of the project.
5)
Synchronize the changes from the local copy to the central file of the architectural model.
AIM: -
To synchronize the changes made to the local copy to the central file of the architectural model.
PROCEDURE: -
- After the collaborating process is done, the file will be saved as a central file.
- We have to create a new local copy for the central file.
- Open the new local copy of the central file and here, in the local copy we have created the grid lines.
- Hence, the changes need to be made to the central file of the architectural model.
- The architectural local file is to be synchronize to the central file, for the changes to be reflected in the central file.
- In the local file, go to the collaborate tab, under the tab select synchronize icon and select synchronize now.
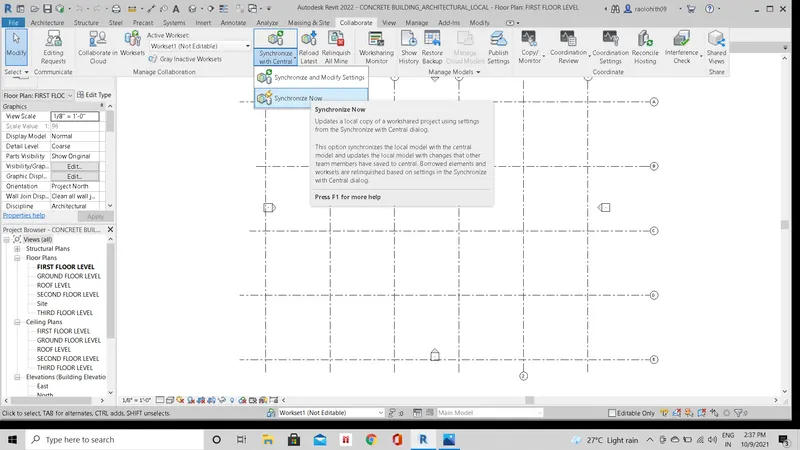
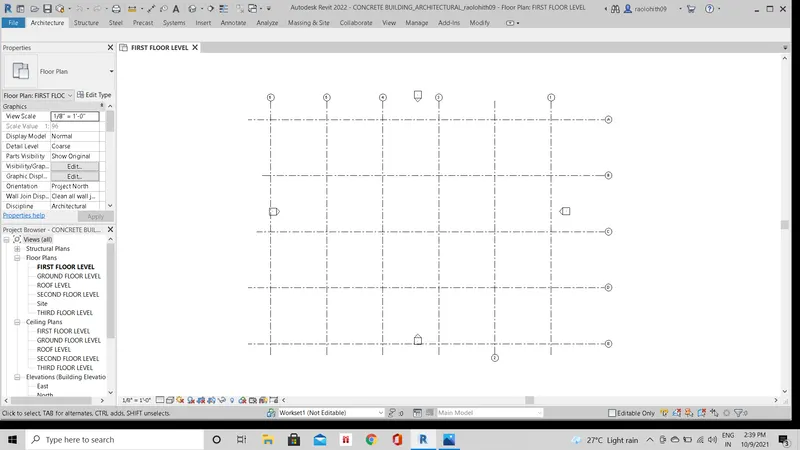
- Hence the changes from the local copy of the architectural model are synchronized to the central file.
RESULT: -
The synchronization of the local copy of the architectural file is done to its central file.
Any changes will made to the central file gets reflected to the local file of the architectural model.
6)
Open the structural model and use the collaborate tools to save the model as a central file.
AIM: -
To save the structural model as a central file by using the collaborate tools.
PROCEDURE: -
- Open the structural template.
- Click on the collaborate toolbar.
- Under the collaborate toolbar, click on the collaborate icon to allow the multiple people to work on the same project.
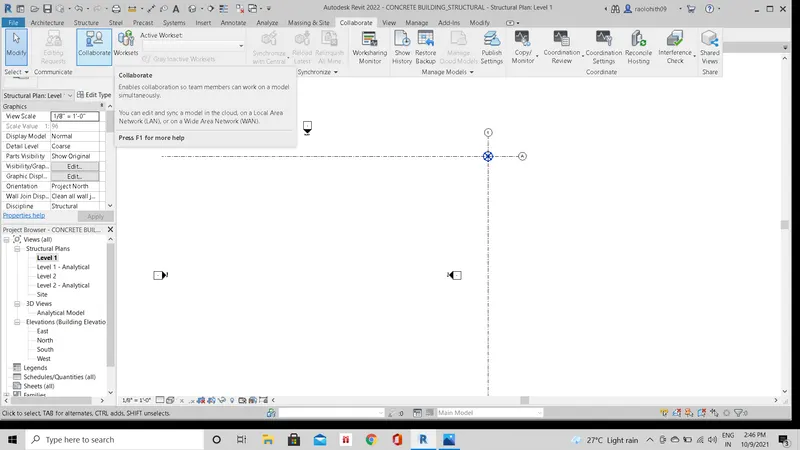
- The preferable way to collaborate is by collaborating within the network for the security reasons.
- Here, the project worksharing mode has been enabled.
- When you save the project, for the first time after the project worksharing mode has been enabled, the project file will be saved as a central file.
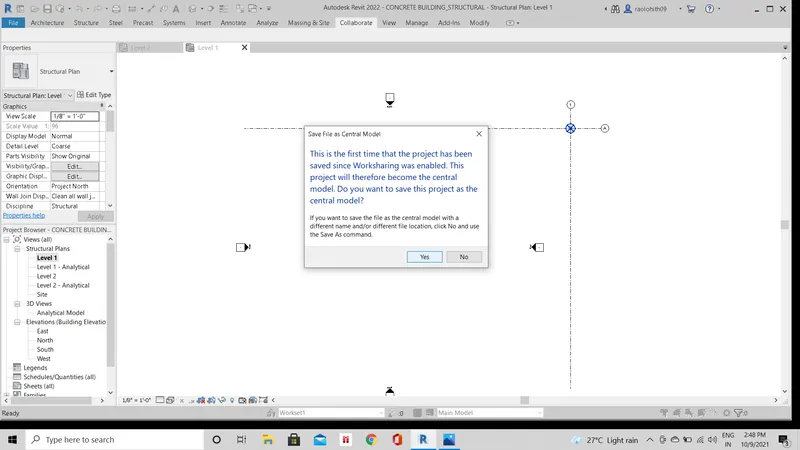
- Hence, by clicking yes, the structural model is saved as the central file.
RESULT: -
To save the structural model as central file work sharing mode has to be enabled.
The project work sharing has enabled with the help of collaboration tools and hence the file is saved as a central file.
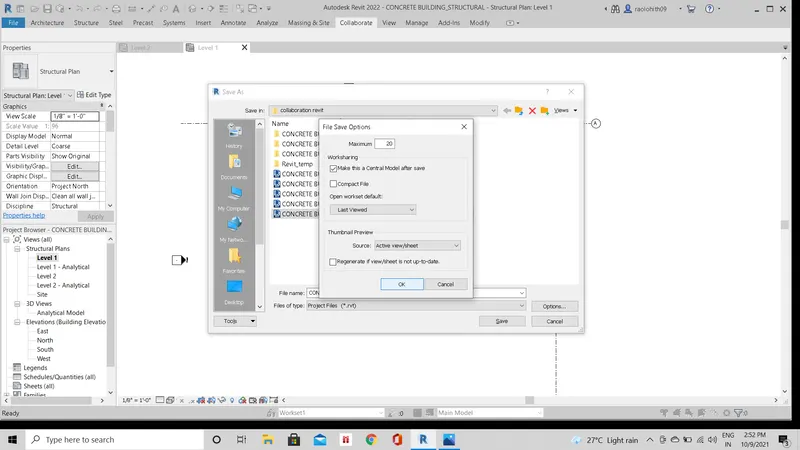
The other option to save the file as a central file is by clicking the options in the save as page.
7)
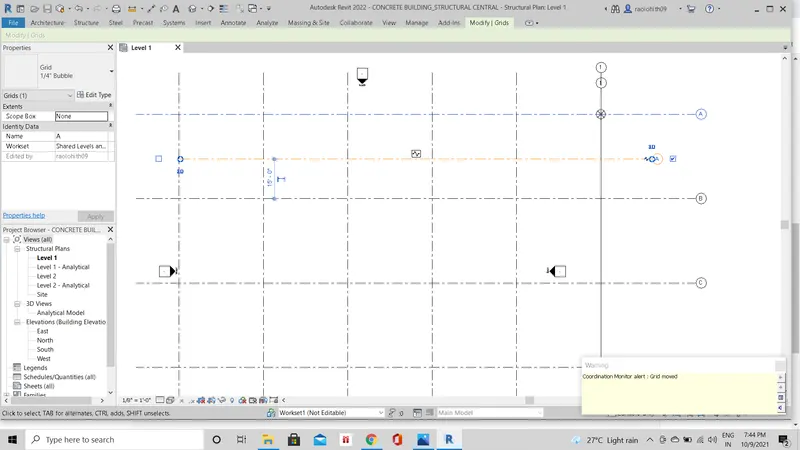
Under the Collaborate tab, select the grids and levels from the architectural model, and using Copy Monitor try to copy the grids to the structural model. See what happens when the copy monitored grid is moved around in the structural model.
AIM: -
To copy the grids from the architectural model to the structural model by using copy monitor and to identify what happens if the copy monitored grid is moved around in the structural model.
PROCEDURE: -
- Open the structural model.
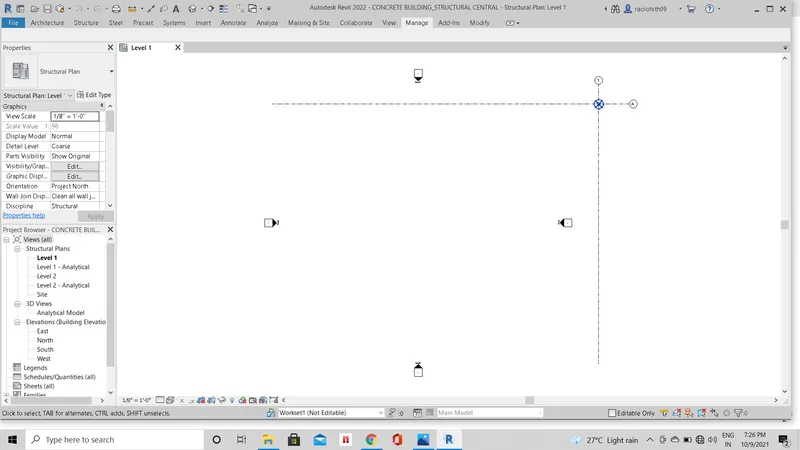
- Click on the manage toolbar, by using the manage links, link the architectural model to the structural model.
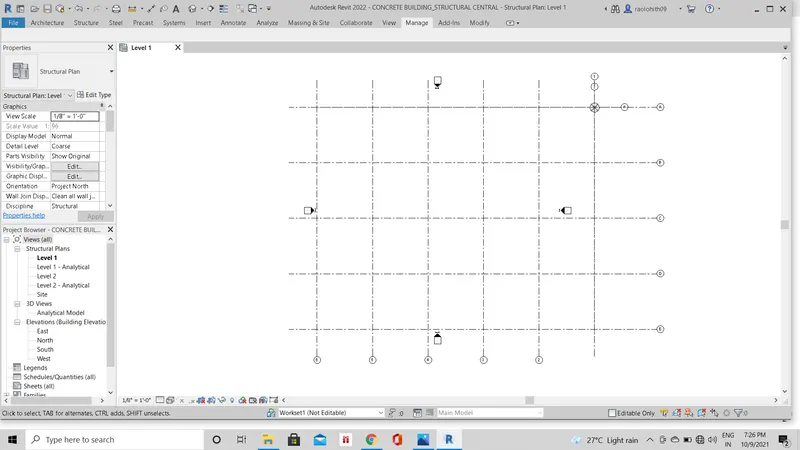
- Click on the collaborate toolbar, click on the copy monitor option and select to copy links.
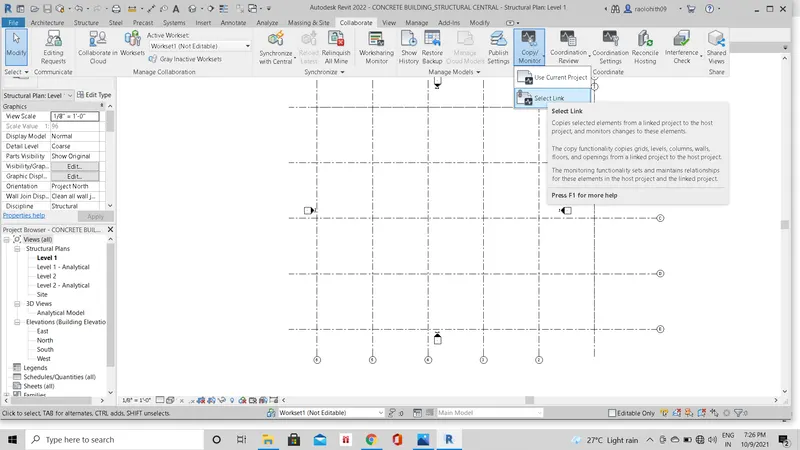
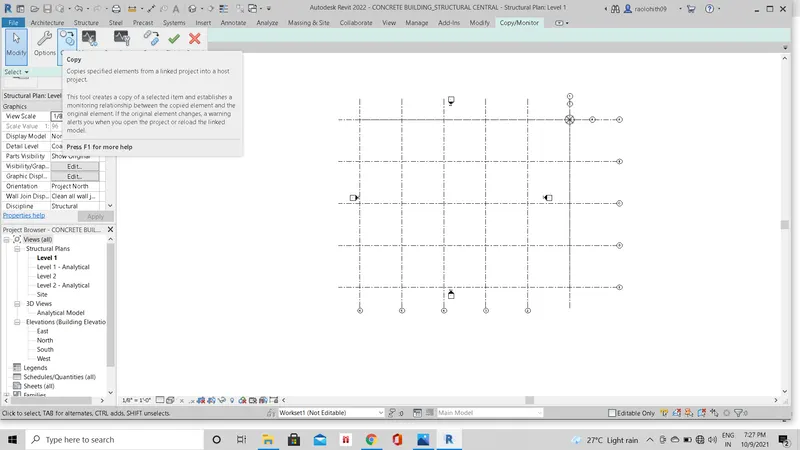
- The linked architectural model is selected.
- Click on the copy, and make sure the multiple tabs are on and select entire architecture model and make sure all the grids of architectural model are selected, click on finish.
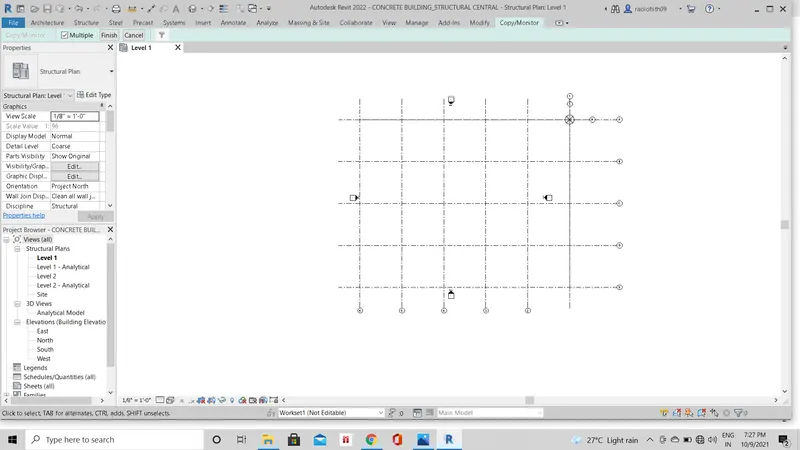
- Now, when a grid is selected it shows a monitor symbol as pointed out.
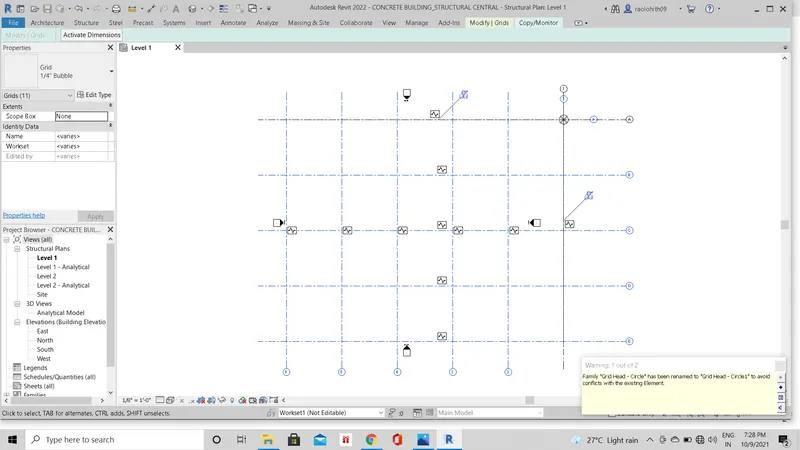
- When elements being monitored have changed in the host project, revit will show warning indicates that a coordination review is required.
RESULT: -
Hence, the architectural grids are copied by using the copy monitor to the structural model and monitors the grids, if any changes take places to the grids being monitored, a warning note displays.
8)
Create another new file with a construction template. Save the new file as a central model. This file will include both architectural and structural model. Under the manage tab, Click manage links to link both architectural and structural files. Save the file and close all the files.
AIM: -
To create a new construction template, which includes both the architectural and structural model and tom link its files to the construction template by the help of manage links and to save the model as a central model.
PROCEDURE: -
- Create a new project of a construction template.
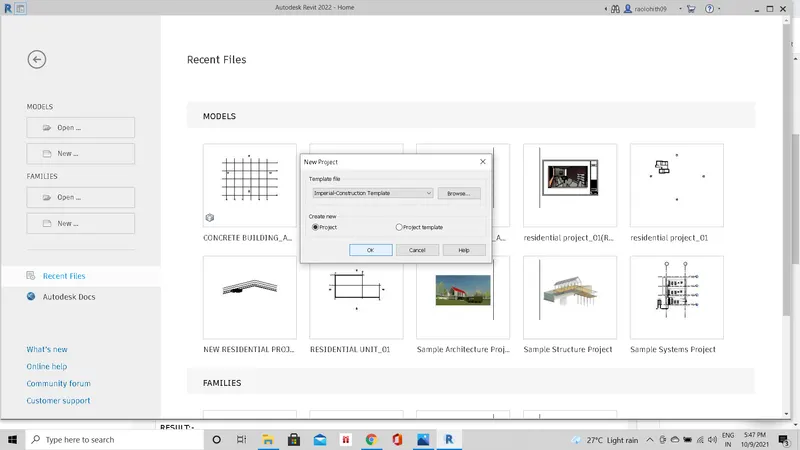
- Click on the manage toolbar, under the manager toolbar by the help of manage links add the link of architectural model to the construction template.
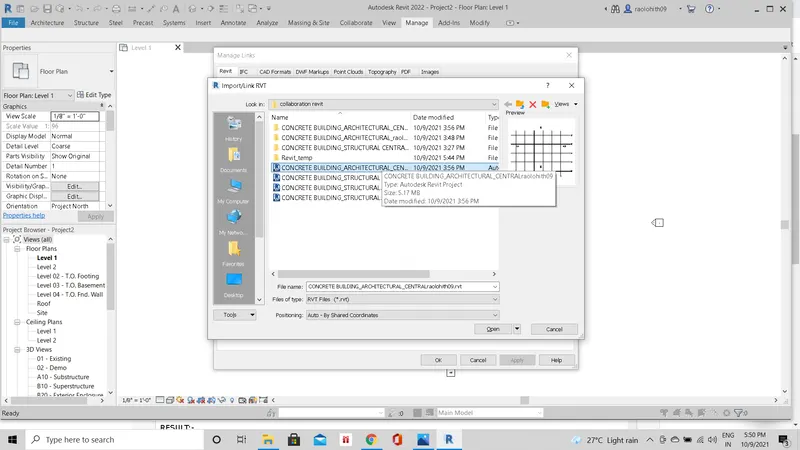
- Acquire the coordinates of the architectural template to the construction template.
- Link the structural model to the construction template, and the dialog box appears that the project does not shares the same coordinates.
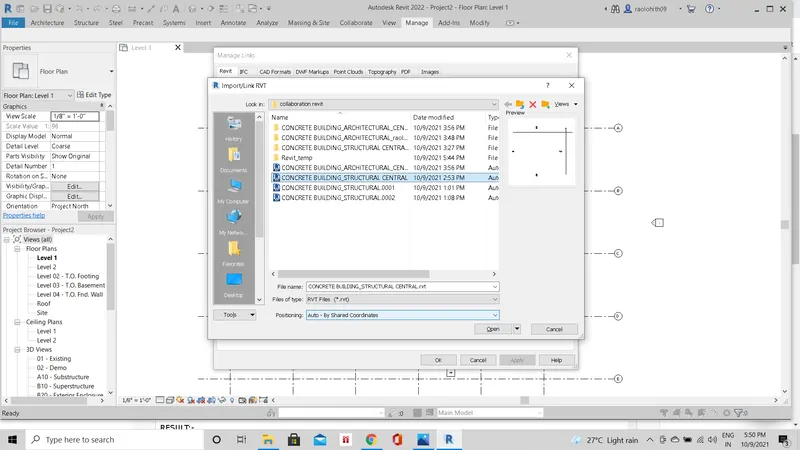
- Save the template as a construction template to the specified folder.
- Click on the collaborate toolbar, collaborate the work within the network.
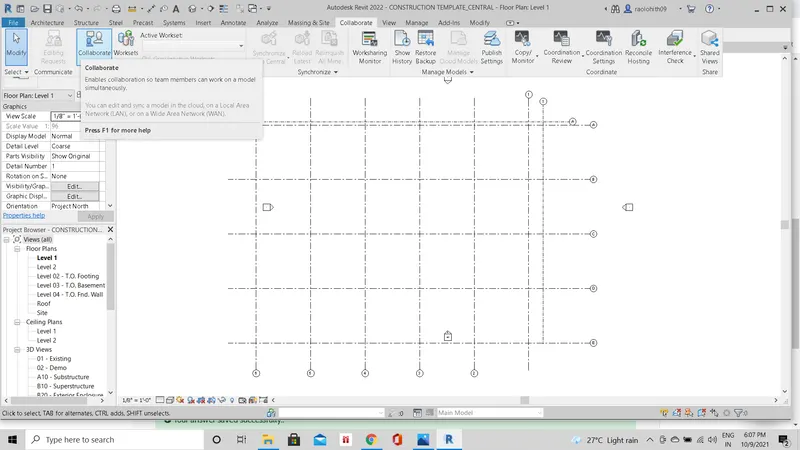
- The work sharing monitor has been enabled, and now save the model.
- The construction template saved as a central file.
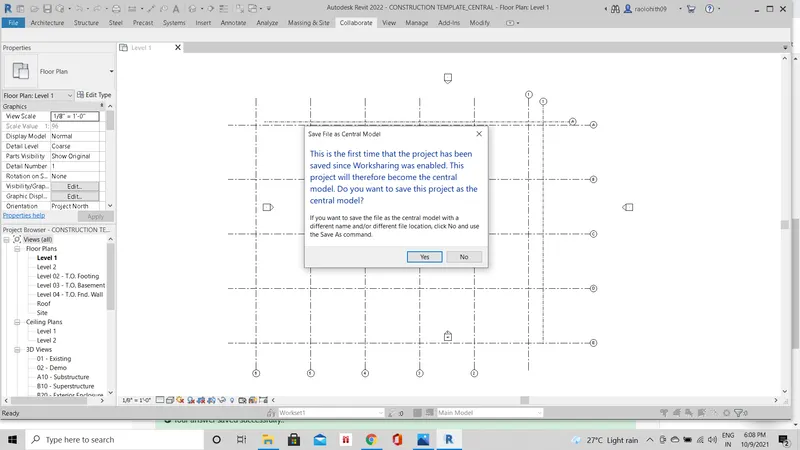
- Click yes.
RESULT: -
A new construction template has been created and consists of both the architectural and structural model links.
Here, the construction template which consists of both the links of architectural and structural model did not share the same project coordinates.
And the construction template is saved as a central file by the help of collaboration.
9)
Are the grids from structural and architectural model matching in the construction template created? If yes, the model is set up for project 2. If not work on the shared parameters and linking options under Manage links.
( Hint: origin to origin, by shared coordinates or by project base point to base point) to link the models in an appropriate manner
AIM: -
To identify whether the grids of structural model and architectural model matches in the construction template created.
PROCEDURE: -
- The grids of the structural and architectural models in the construction template did not share the same project coordinates.
- To determine the same project coordinates, click on the manage toolbar.
- Under the manage toolbar, manage links icon, remove the links of structural and architectural models loaded into the construction template.
- Now, add the links of structural and architectural models by positioning to project base point to project base point.
- Therefore, now the shared parameters of architectural and structural models are matches with respect to the project base point.
RESULT: -
The shared parameters of the architectural and structural models match by positioning the links to project base to base point in the construction template.
10)
List a flow chart of a project tree set up in terms of Construction model, Architecture & Structure model, in this exercise and understand how many people can work on the same project using Revit simultaneously.
ANSWER: -
Flow chart of a project tree set up in terms of construction model, architectural and structure model: -
ARCHITECTURAL MODEL: -
- Creating an architectural template.
- Specifying base point and shared coordinates.
- Saving the model as central file using collaborative tools.
- Placing the grids longitudinal and transverse in direction.
- Synchronizing the changes from local file to central file.
STRUCTURAL MODEL: -
- Creating a structural template.
- Specifying base point and shared coordinates.
- Saving the model as central file using collaborative tools.
- Copy/ monitoring the grids from architectural to structural model.
CONSTRUCTION MODEL: -
- Creating a construction template.
- Loading the links of architectural and structural models to the construction template.
- Make sure that the project share coordinates match.
- Saving the model as central file by the help of collaboration.
By this with the help of collaboration process through the workshare monitor, revit gives access to multiple people work on the same project simultaneously. Work sharing allows simultaneous access to a shared model through use of a central model.