Usage of Collaborate tool in REVIT
1)Aim & Introduction : To Open an architectural template. Using the Manage tab set project base point and project shared coordinates for the project
Procedure :
1) Open the New architectural Template .
2)Choose Grids From the Architectural Manage Tab.
3)Lay the Grids Longitudinally and Transversely and Add the tag Respectively
4)Using Manage tab, From Project Location Use Specify Coordinate at Points as shown below.
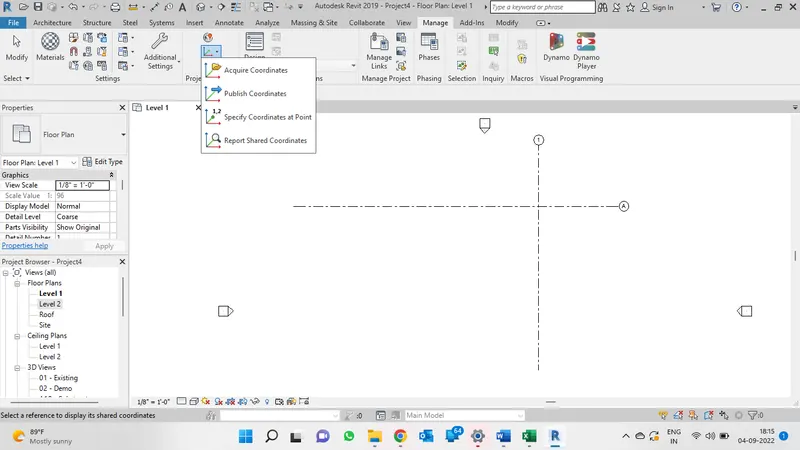
5)By Choosing Soecify Coordinate at points and Set the reference line as shown
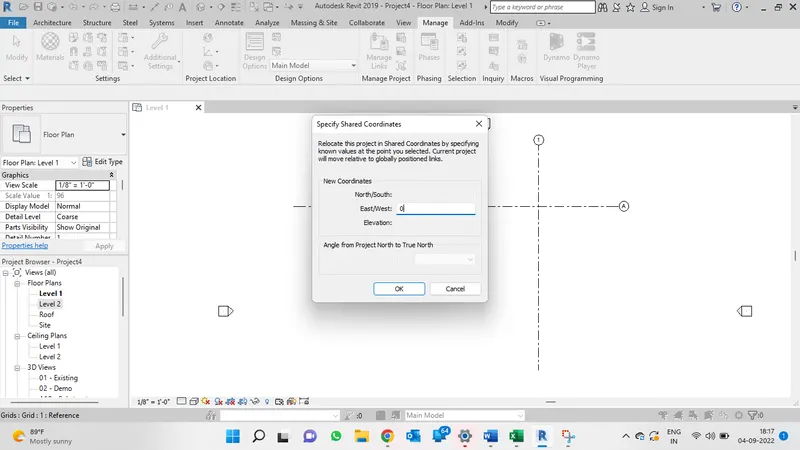
6)By clicking Ok,The reference point has been set.
7)Use Visibilty Graphics VG Command Project base point should be applied as shown below
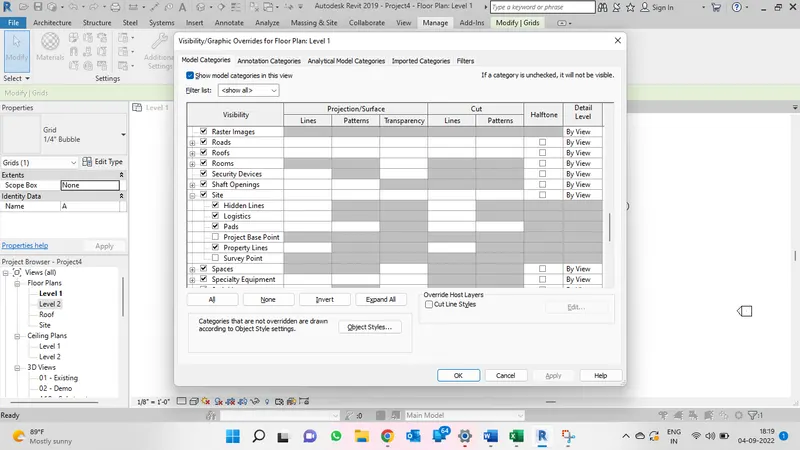
8)By clicking Ok base Point appears on the screen as shown
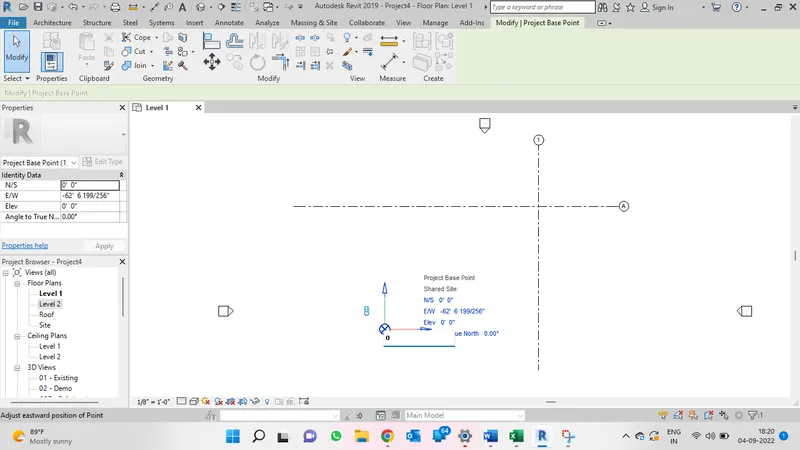
9)Align The base Point with Reference point and set the point as 0 as shown below.
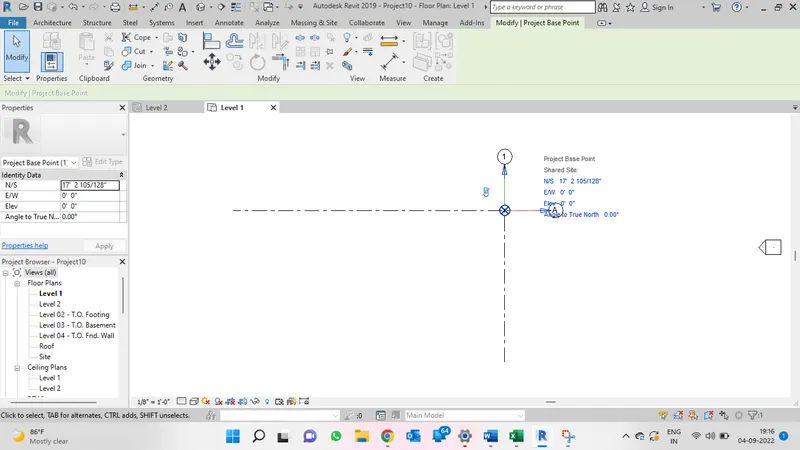
10)The final Point will appear as follows
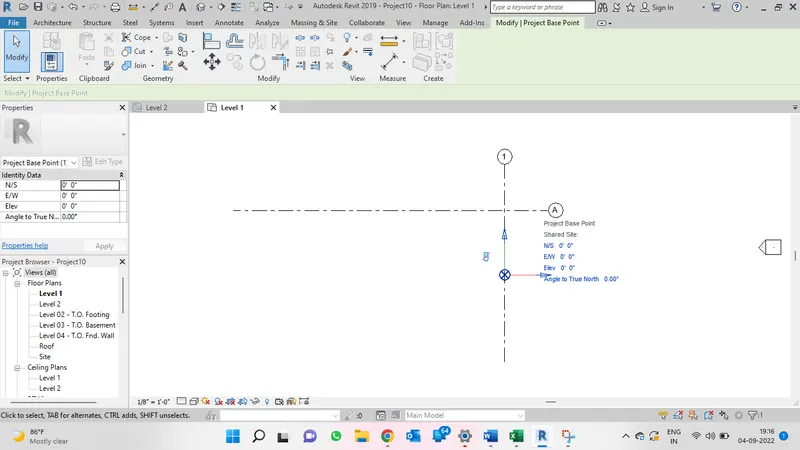
Result : from the above procedure we come to know how to set the coordinate and base point respectively in revit Software.
2) Aim & Introduction : To Open an Structural template. Using the Manage tab set project base point and project shared coordinates for the project.
Procedure :
1) Open the New Structural Template .
2)Choose Grids From the Structural Manage Tab.
3)Lay the Grids Longitudinally and Transversely and Add the tag Respectively as shown
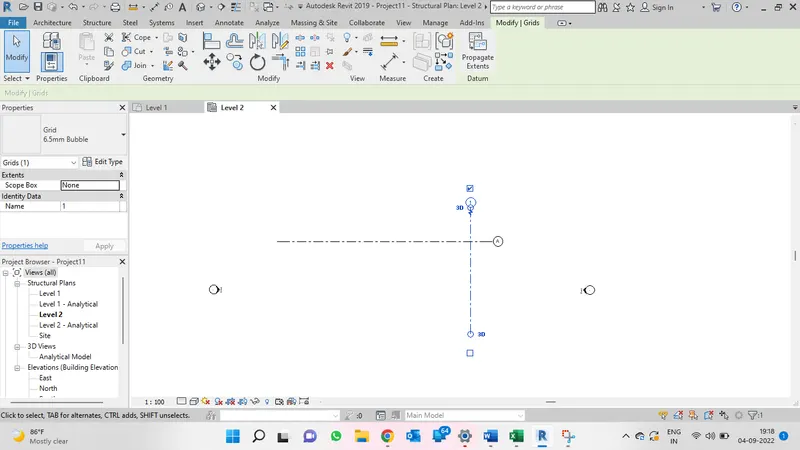
4)Using Manage tab, From Project Location Use Specify Coordinate at Points as shown below.
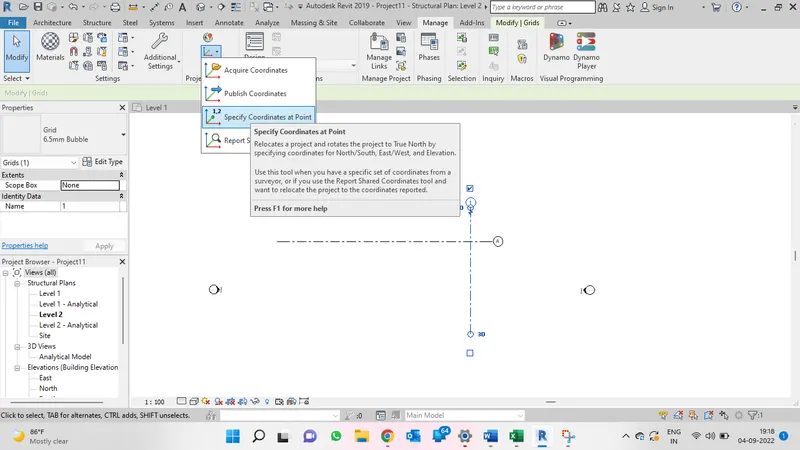
5)By Choosing Soecify Coordinate at points and Set the reference line as shown
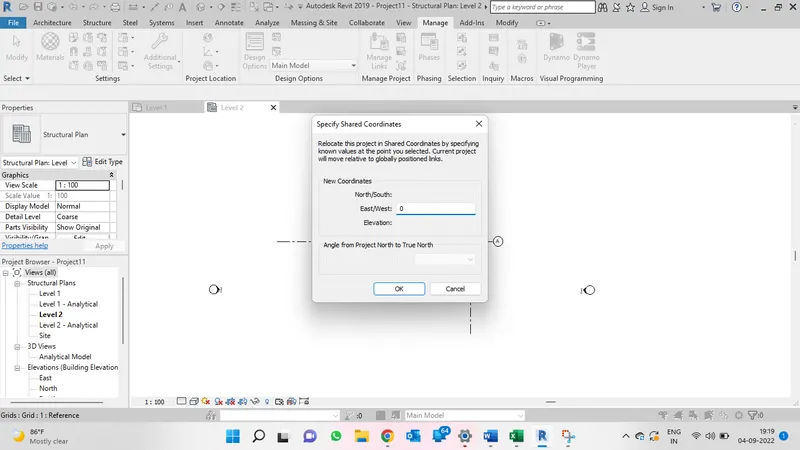
6)By clicking Ok,The reference point has been set.
7)Use Visibilty Graphics VG Command Project base point should be applied as shown below
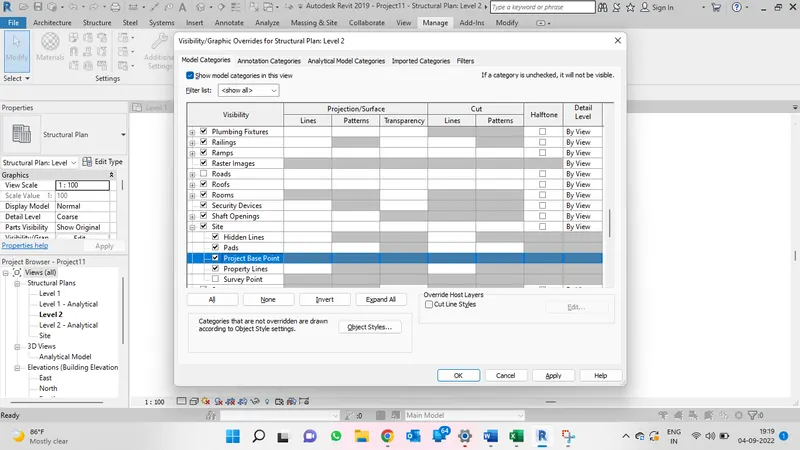
8)By clicking Ok base Point appears set the Point to Reference linw with 0 as on the screen as shown
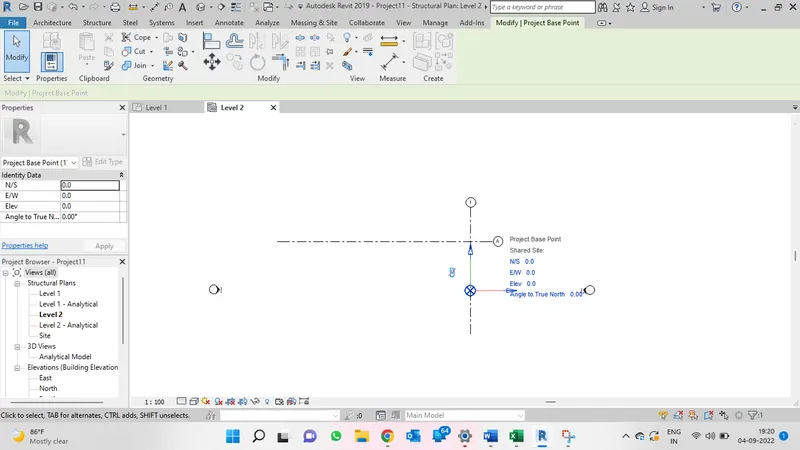
Result : From the above procedure we come to know how to create the shared coordinate and base point in structural template using revit software.
3) Aim & introduction : To Re-open the architectural model. Using the tools under the Collaborate tab make the architectural model a central model (enabling simultaneous working on the model)
Procedure :
1)Open the Exisiting Saved Architectural Model from the file.
2)From the tool Bar choose Collaborate option as shown below.
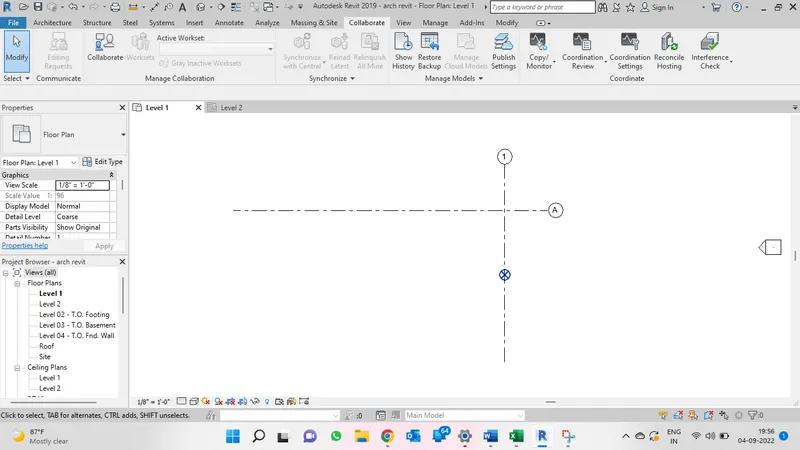
3)Click Collobrate from the tool Bar and Link it with LAN Network As Central File as shown below.
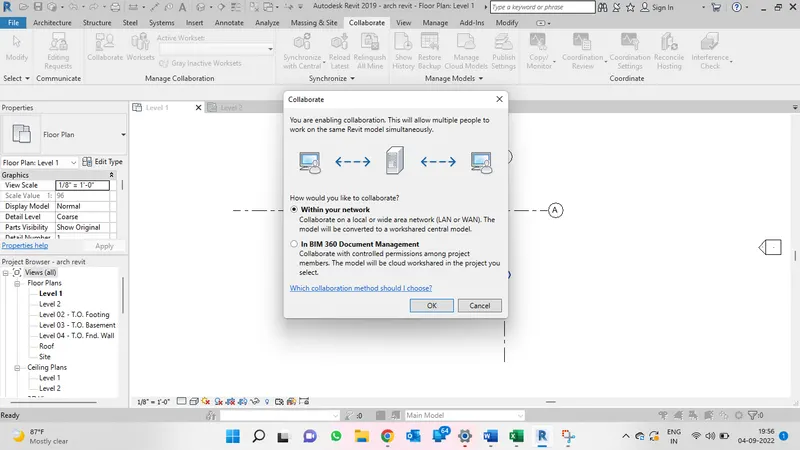
4)After the Process takes over Save the Local File as shown Below.
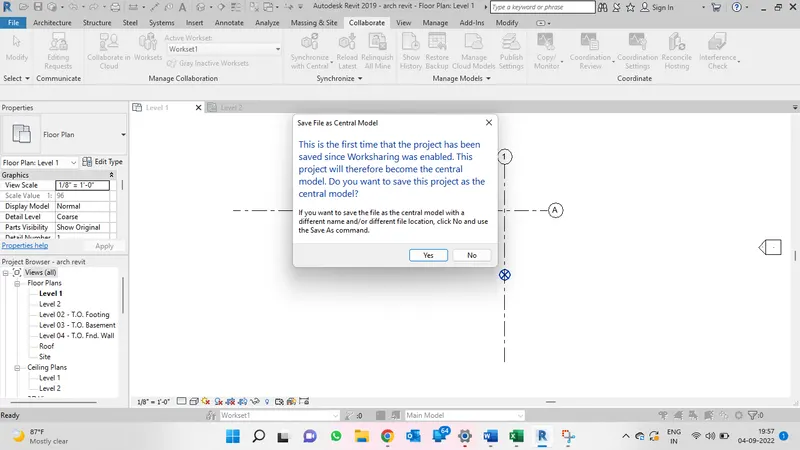
5)By clicking Ok the local file has been saved.
Result : From the above procedure we come to know how to collaborate and save the it as central file
4) Aim & Introduction : Create the Grids Longitudinal and Transverse pattern for the project similar to the task done in Week 2
Procedure :
1)from Already exisiting Architectural file choose grid Option as shown below
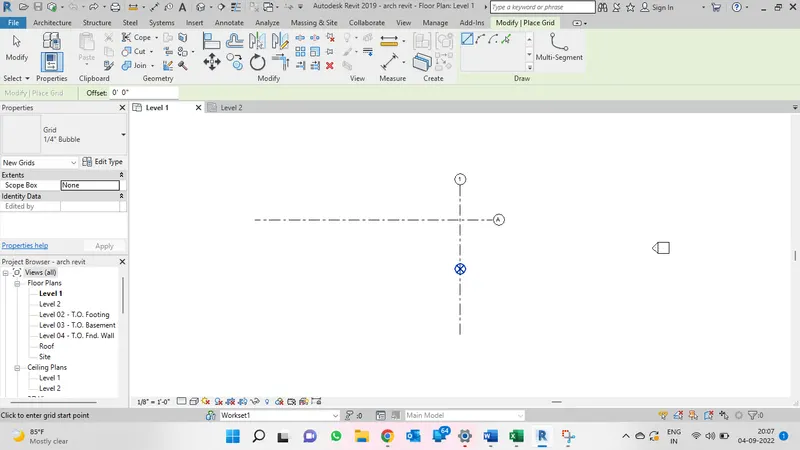
2)Choose Pickline option from the grid tab and set the offset distance at 10' as shown below.
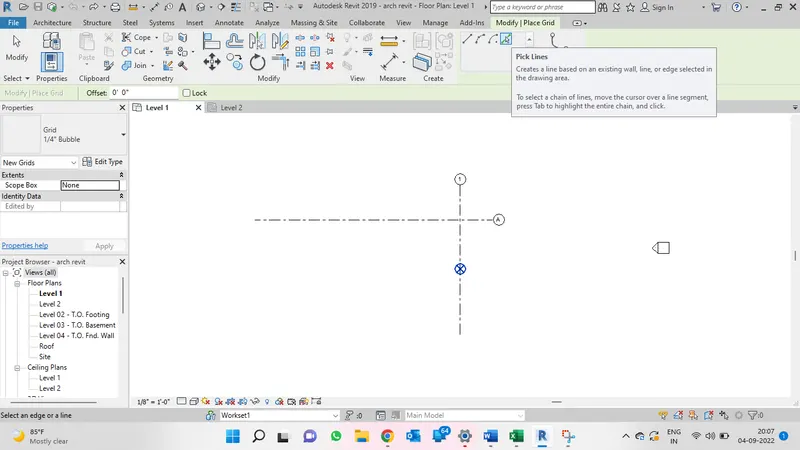
3)Set the grid Both Longitudinally and Transversely at distance of 10' and add the tag respectively as shown below.
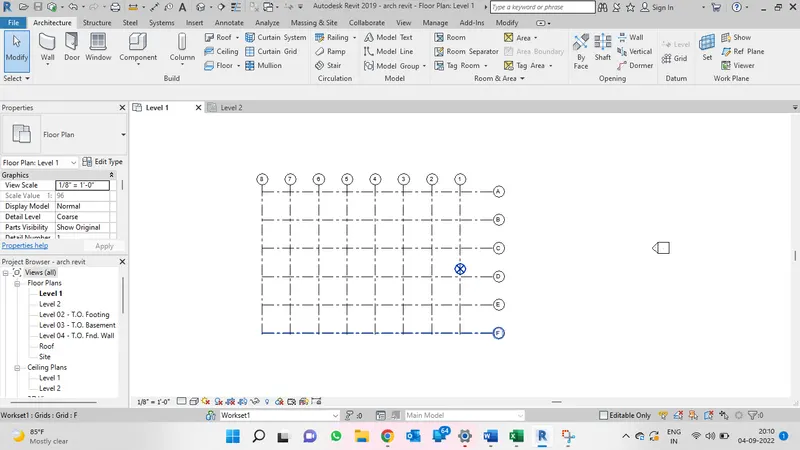
Result : From the above procedure we can come to know how to draw the grid patterns using revit software.
5) Aim & Introduction : To Synchronize the changes from the local copy to the central file of the architectural model.
Procedure :
1)Open the exisiting Architectural file that has been saved.
2)Use Colloborate option from the tool bar as shown
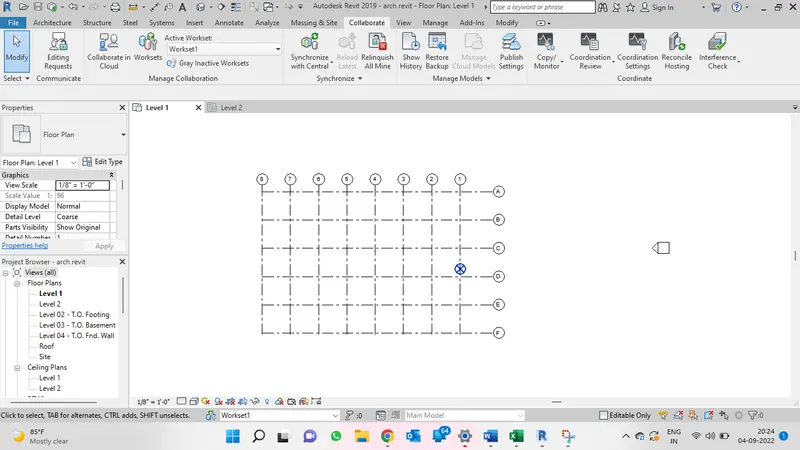
3)Choose Synchronize with central Option As shown below.
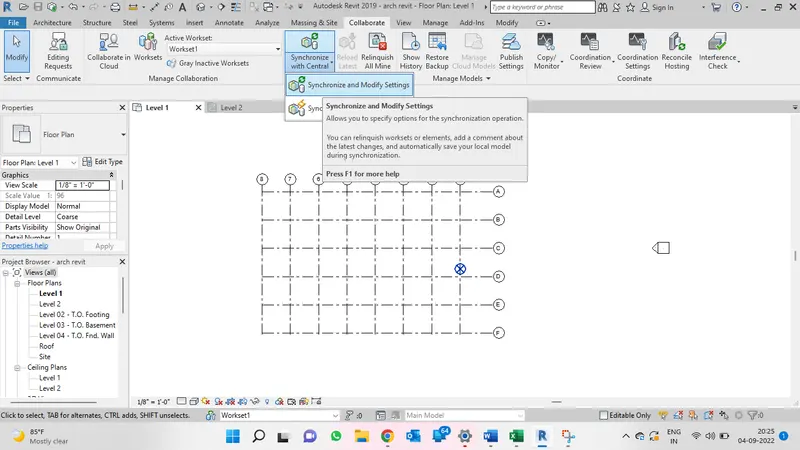
4)Choose synchronize and modify setting and the following box appears as shown make user whether your making it as central Model.
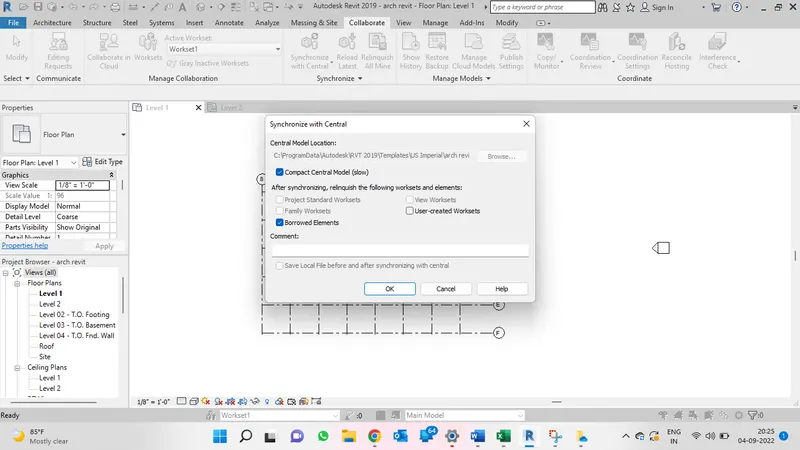
5)By Clicking Ok It has been saved as central file from local file
6)It can also be done Directly from the tool bar ysing Synchronize and modify Settings as shown
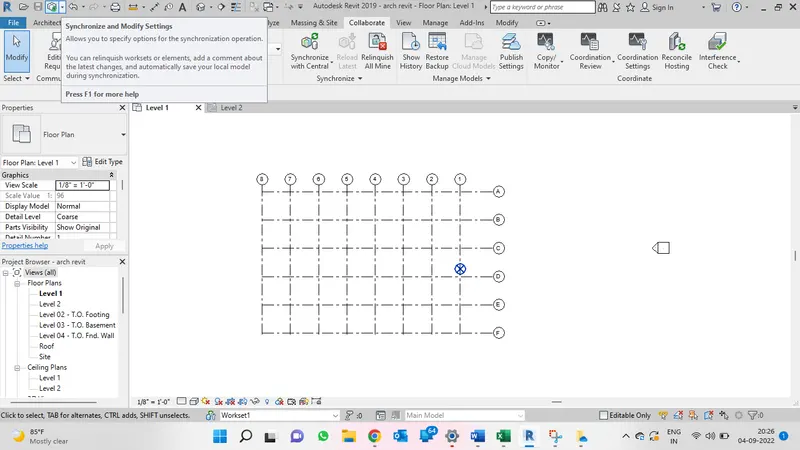
Result : From the above Procedure we come to know how to save the file as central file from local file using revit
6) Aim & Introduction : To Open Structural model and use the collaborate tools to save the model as a central file.
Procedure:
1) Open the exisiting Structural file that has been saved.
2)Choose Collaborate option from the tool bar as shown
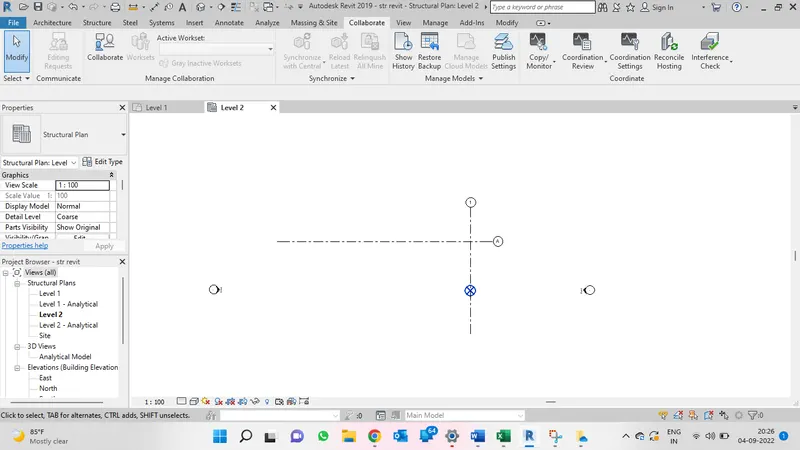
3)Choose Collaborate option and make the file connect with LAN as shown
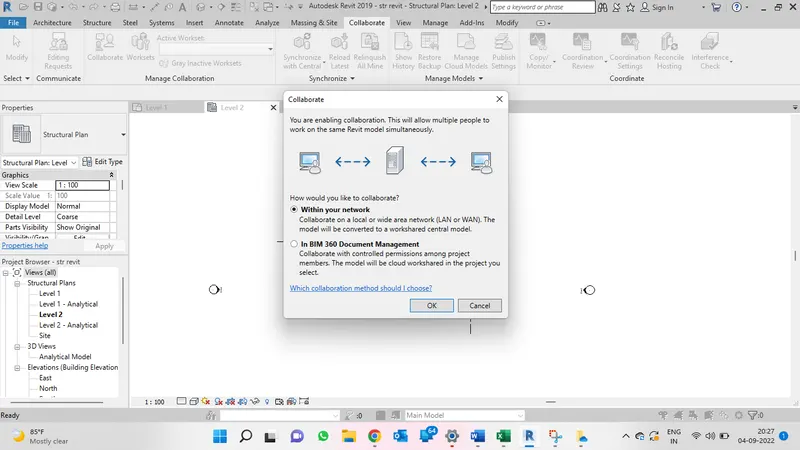
4)By Clicking Ok the file has been collaborated.
5)Save the file as shown below.
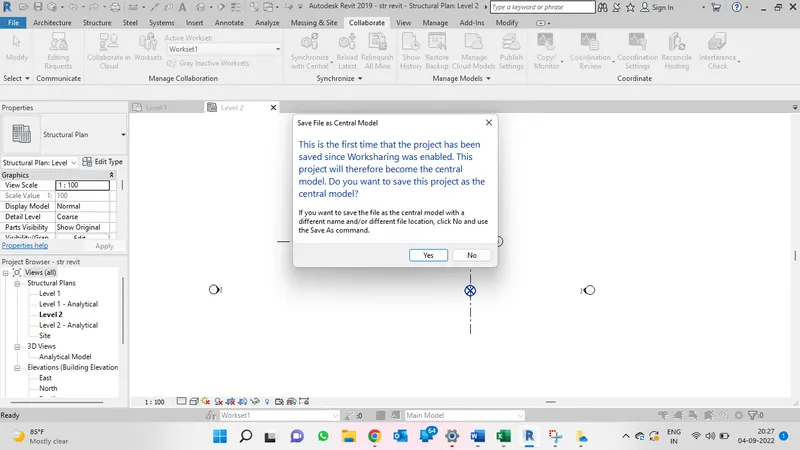
6)By Clicking Ok the file has been saved as local file
Result :From the above procedure we come to know how to collaborate the file in structural template using revit.
7) Aim & Introduction : To use the Collaborate tab, select the grids and levels from the architectural model, and using Copy Monitor try to copy the grids to the structural model. See what happens when the copy monitored grid is moved around in the structural model
Procedure :
1)Open the Exisiting Saved structural File.
2)Use Insert Option and from the tool bar choose Link revit as shown
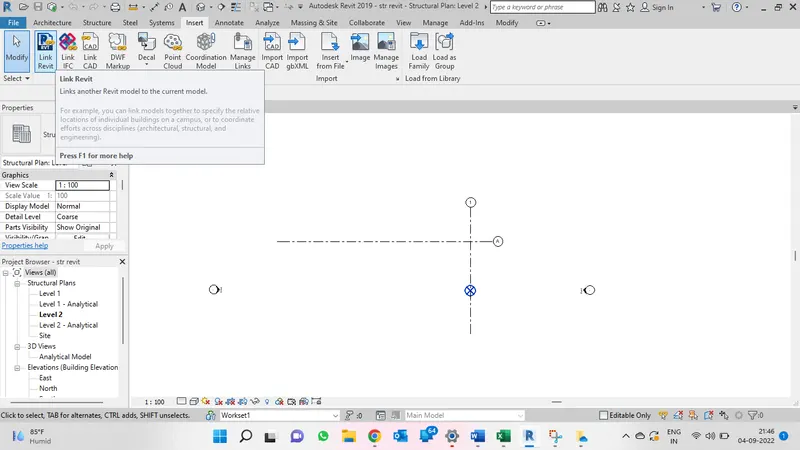
3)As soon as the files are opened choose the respective file which is to be linked as shown
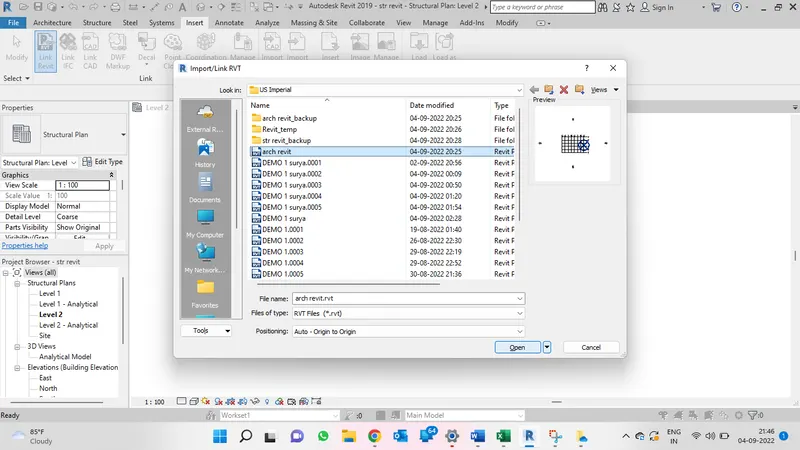
4)The file Appears as shown below
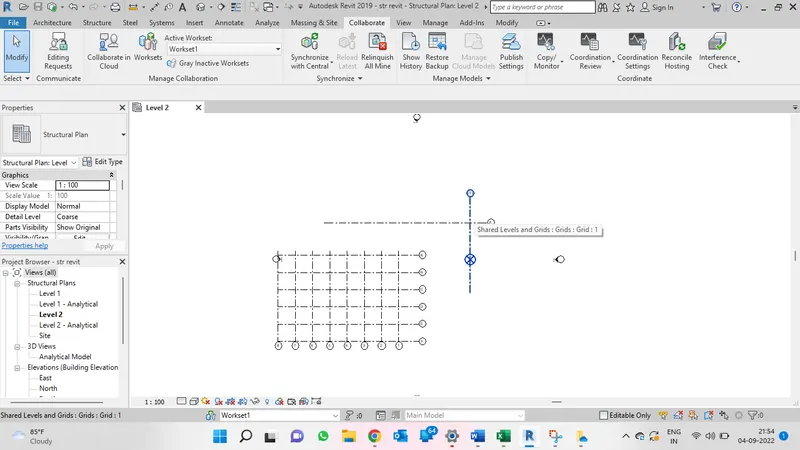
5)Use Copy Monitor Option from the tool bar as shown below
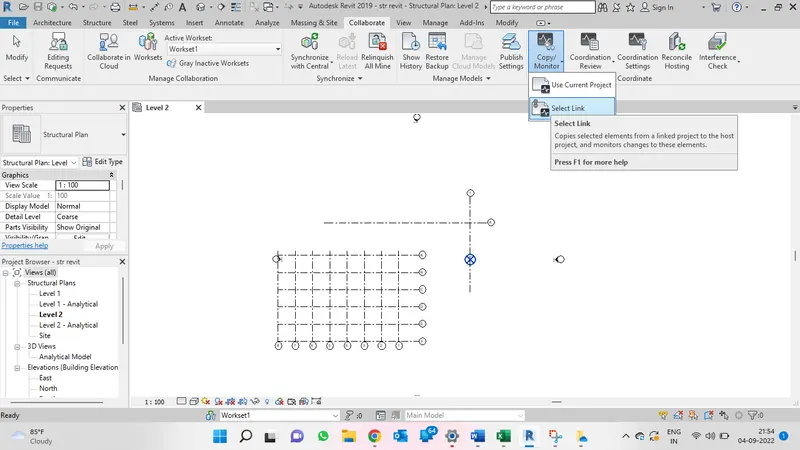
6)Use Select link from copy monitor and choose Copy option and select multiple and select the respective areas and give finish as shown
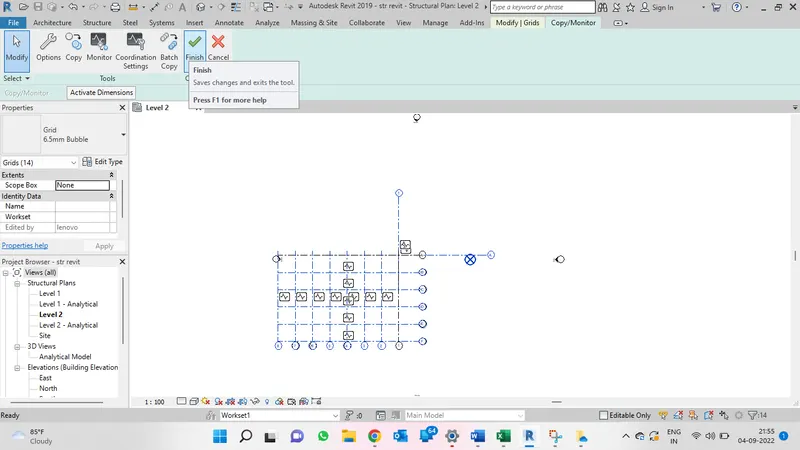
7)The Final File would look up as file shown below
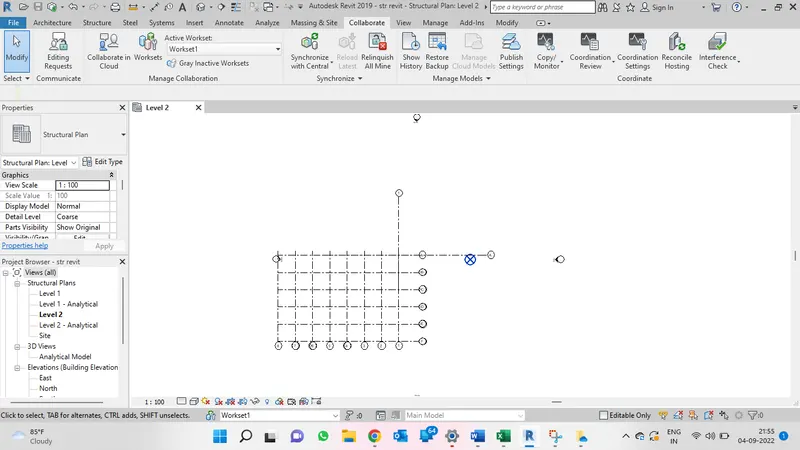
Result: From theAbove Procedure it is Known that we come to know how to link the file and copy monitor the file
8) Aim & Introduction : To Create another new file with a construction template. Save the new file as a central model. This file will include both architectural and structural model. Under the manage tab, Click manage links to link both architectural and structural files. Save the file and close all the files.
Procedure :
1)Open a New file >> Construction Template As Shown below
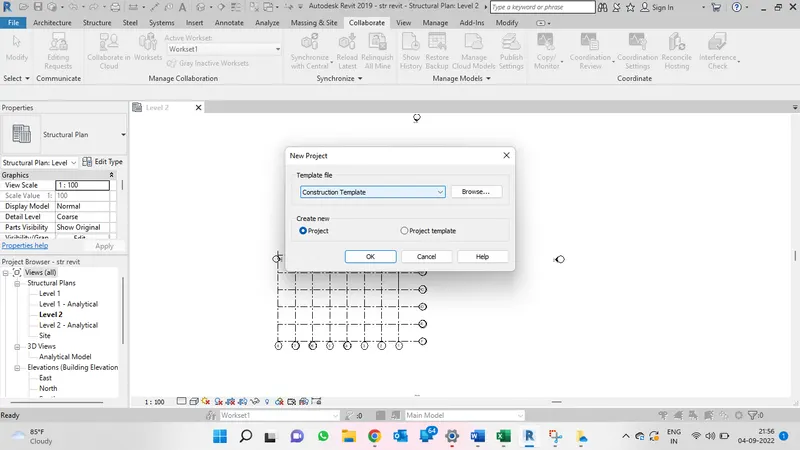
2)As the template opens ,From the tool bar use collaborate tool to link the file as shown
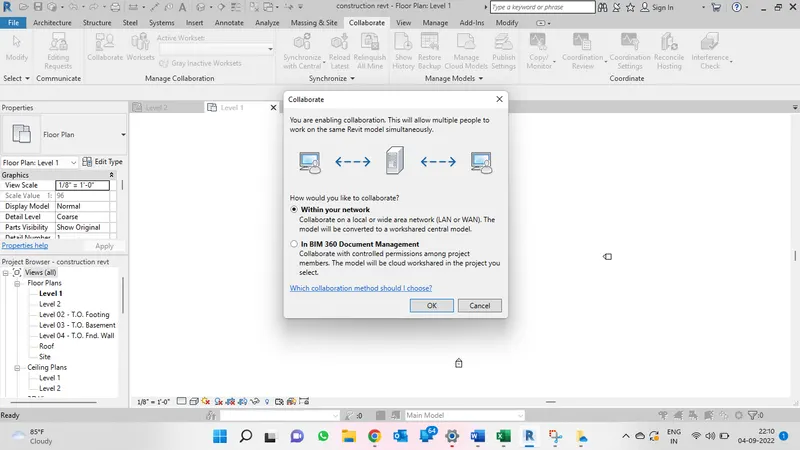
3)Savethe file
4)use Insert option from the toolbar,Link the revit structural and architectural file one by one as shown
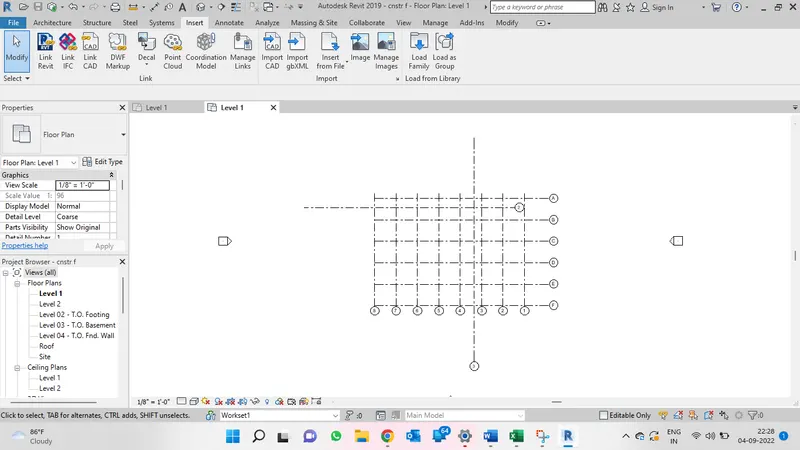
Result : from the Above Procedure we Come to Know how to link the file.
9) Aim & Introduction : Are the grids from structural and architectural model matching in the construction template created? If yes the model is set up for project 2. If not work on the shared parameters and linking options under Manage links
Procedure :
1)By using Shared Coordinates and manage links the files has been merged as shown
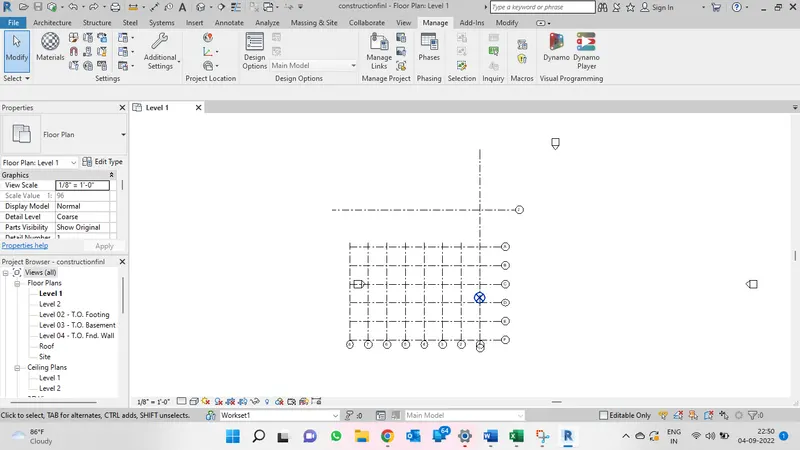
Result : From the Abpve file we have know to Combine the grids even if they do not collaborate each other.
10) Aim & Introduction : To List a flow chart of a project tree set up in terms of Construction model, Architecture & Structure model, in this exercise and understand how many people can work on the same project using Revit simultaneously
Procedure :
Works Done By Architectural Model
- Modelling Walls ,Doors,Windows
- Aesthetical Appearance of the building
- Modelling Of Floor Finishes,Paints
- Assign Materials
- Modelling The Staircase
Works Done by Structural Model
- Modelling Column,Beam
- Modelling Slab
- Modelling Staircase reinforcement
- Modelling truss works
- modelling I Sections,Grider etc
Result: From the above information we come to know about the work carried out by each discplines.