Usage of Collaborate tool in REVIT
Aim-To open an Architecure template and set project base point and project shared coordinates for the project.
Introduction-A Revit project has internal coordinates for all the elements that compose the model in a project. Those coordinates are known to this project only. This is sufficient if you have a standalone model whose position is not relevant to other models or a site. However, if you want the position of the model to be known to other linked models, you need to share coordinates.
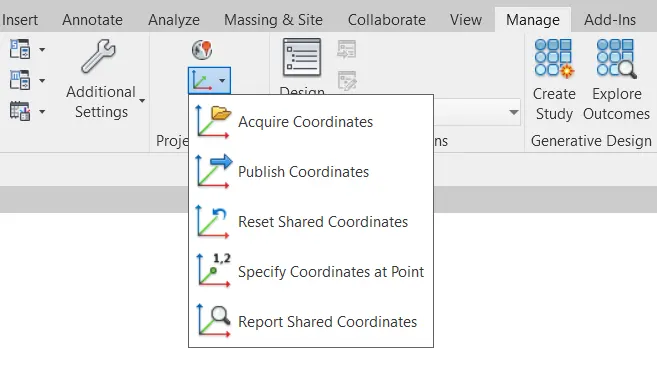
Use the Shared Coordinate tools to establish the relative positions of the different files and ensure that those relationships are maintained. Use the Acquire Coordinates tool or the Publish Coordinates tool or specify coordinte tool to establish a common coordinate position and then share that position between files.
Procedure-
-Open Revit software
-Click on New>Seelect Architecture template>Ok
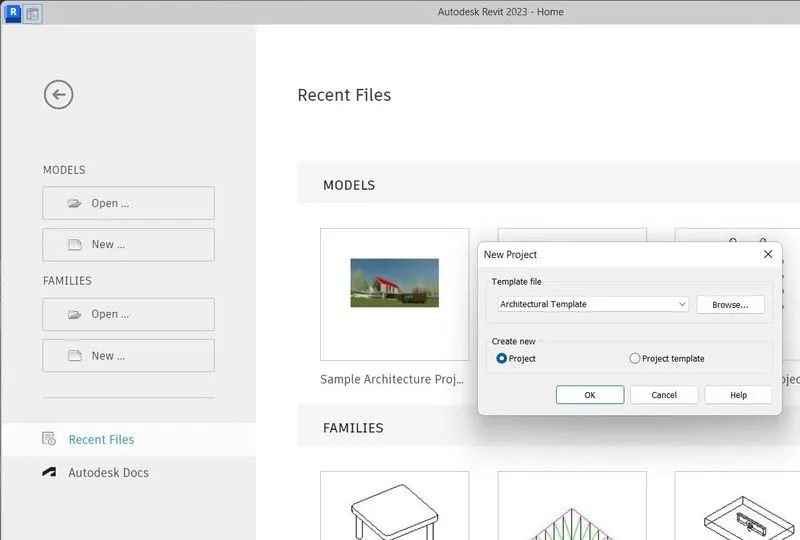
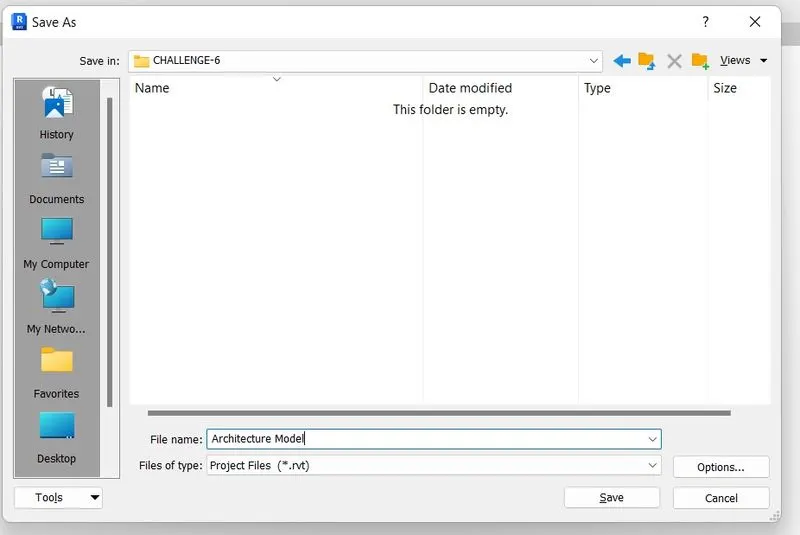
-Go to file>Save it in folder "CHALLENGE-6" as Architecture Model
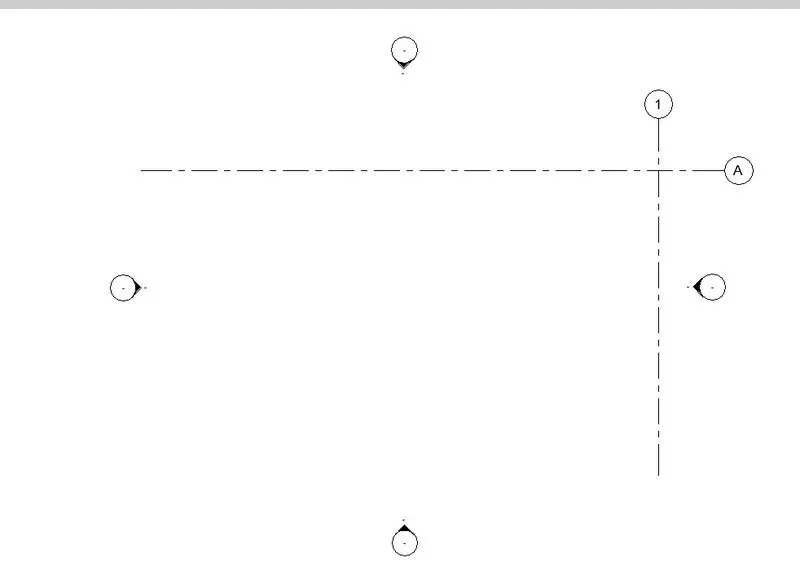
-Now Go to Architecture tab>Select Grid>Draw one horizonta and vertical grid
-Double click on grid to rename it
-To specify coordinate go to Manage tab>In project location>Select coordinate>select specify coordinate at point
-Select grid then screen shows and enter value of that coordinate
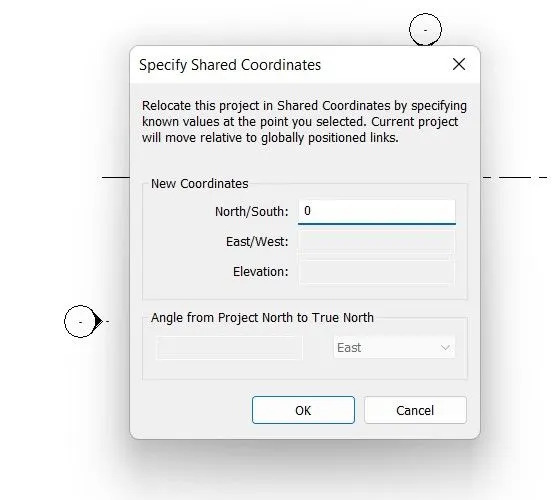
-Similarly for another grid also
-To specify project base point type VG>Explore Site option>Tick Project base option
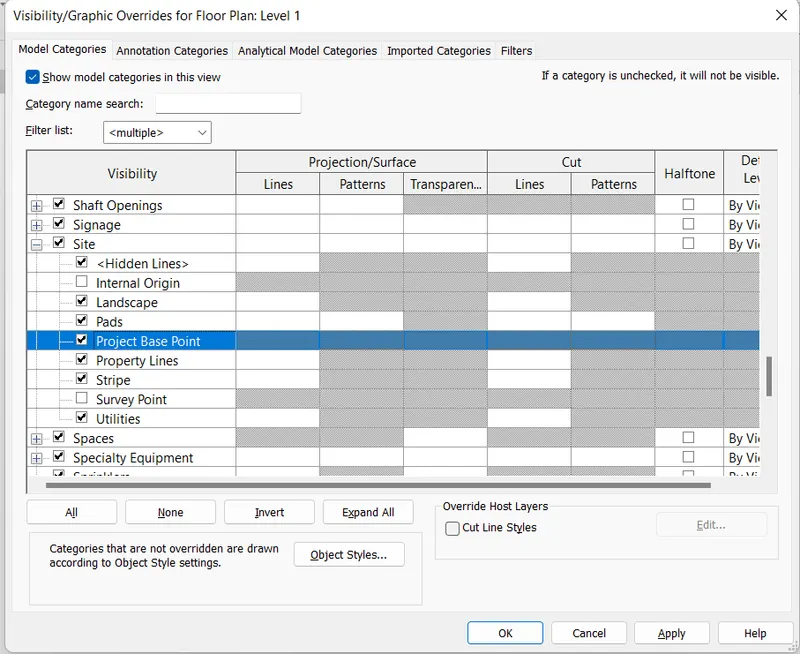
-Make sure all the value is zero as we just start the project
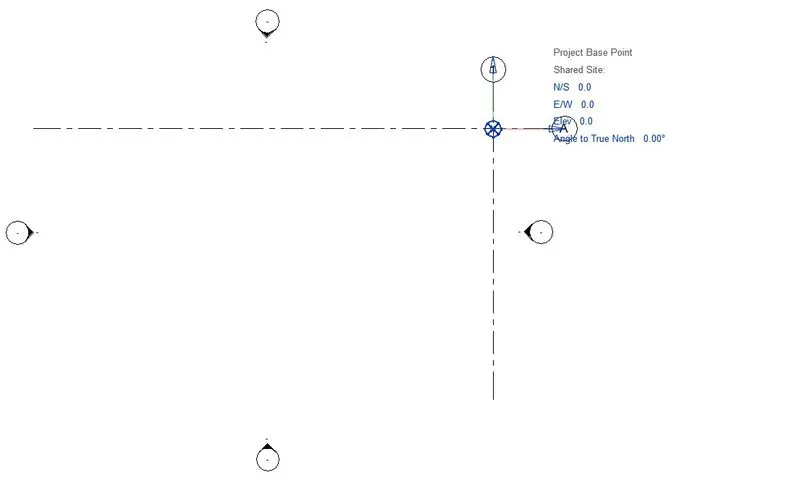
Result-
Project base point and coordinate are set for the Architectural model project.
Aim-To open Structural template and set project base point and project shared coordinates for the project similar to Architectural template.
Introduction-A Revit project has internal coordinates for all the elements that compose the model in a project. Those coordinates are known to this project only. This is sufficient if you have a standalone model whose position is not relevant to other models or a site. However, if you want the position of the model to be known to other linked models, you need to share coordinates.
Use the Shared Coordinate tools to establish the relative positions of the different files and ensure that those relationships are maintained. Use the Acquire Coordinates tool or the Publish Coordinates tool or specify coordinte tool to establish a common coordinate position and then share that position between files.
Procedure-
-Click on New>Select Structural template>Ok
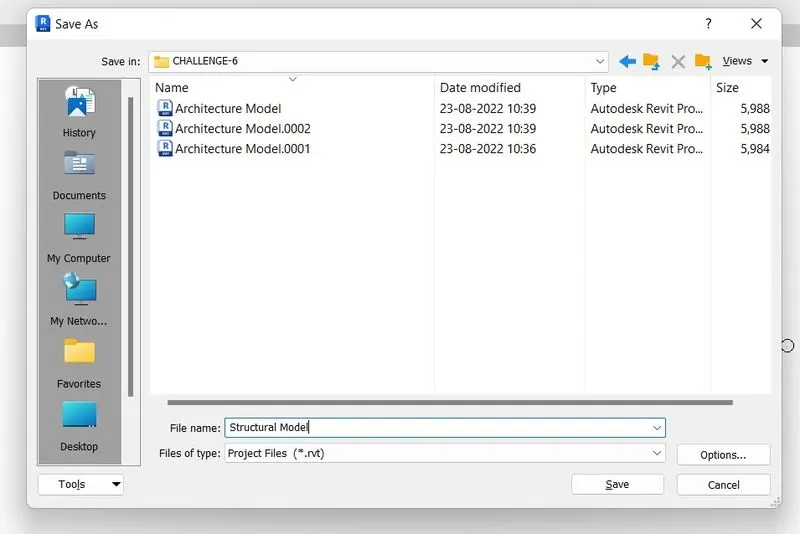
-Go to File>Save>Select CHALLENGE-6 folder and type name Structural Model> Ok
-Now Go to Architecture tab>Select Grid>Draw one horizonta and vertical grid
-Double click on grid to rename it
-To specify coordinate go to Manage tab>In project location>Select coordinate>select specify coordinate at point
-Select grid then screen shows and enter value of that coordinate
-Similarly for another grid also
-To specify project base point type VG>Explore Site option>Tick Project base option
-Make sure all the value is zero as we just start the project
Result-
Project base point and coordinate are set for the Structural model project.
Aim-To make the Architetural model a central model by using collaborate tool
Introduction-Revit provides several different ways to collaborate with team members who are also using the software.
- You can link multiple Revit models together, allowing team members to work in context.
- Through work sharing, users on the same local area network (LAN) can work together in the same Revit model.
- When collaboration needs to occur among users who are not in the same geographic location, use Revit Server or Revit Cloud Worksharing.
Revit Server connects offices that share a network but are not in the same geographic location.
Revit Cloud Worksharing is a cloud-based service that allows any Revit users inside or outside a network to collaborate on a Revit model.
Procedure-
-Re open Architectural model that we created earlier
-Go to open and select this file
-After open the file go to Collaborate tab>slect Collaborate
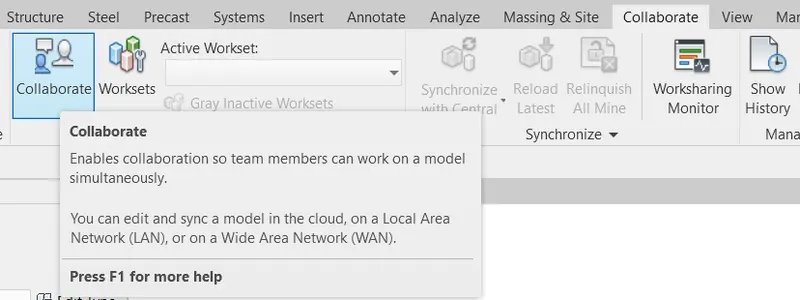
-Now the following window appear select within network for this project
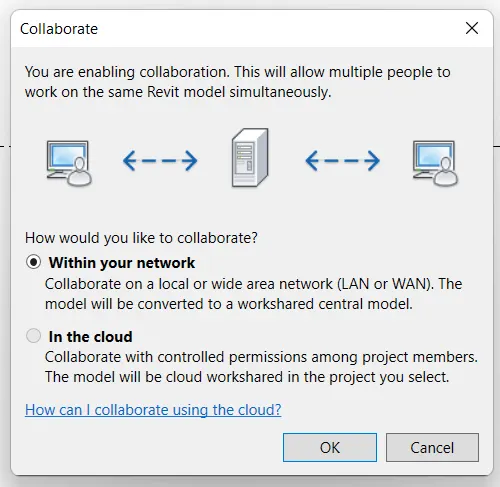
-Now save the file
-Following window appear select yes option
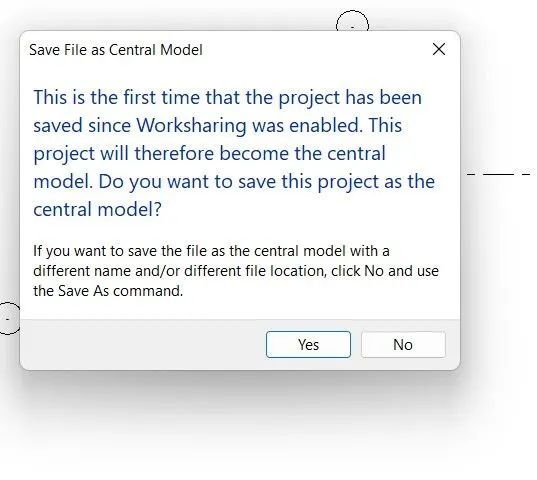
Result-
The Architectural template has been saved successfully as a Central model using collaborate tab.
Aim-To create the grids longitudinally and transversely for the Architectural template similar to the task done in Week 2
Introduction-Grids are extremely useful for plotting out your drawings and can have many uses. After creating your levels in a new project is a common second step: adding grid lines.
- Gridlines are 3-Dimensional and have a height so can exist on multiple levels
- When placing multiple grid lines Revit will follow your naming convention (1,2,3 A, B, C, etc.)
- You can hide gridlines when you don’t need to use them, more on that later.
Procedure-
-In architecture model go to Architecture tab >Select Grid>Select pick line option>Set offset as 10' and start selecting grids
-For transverse and longitudunal grids follow this same steps
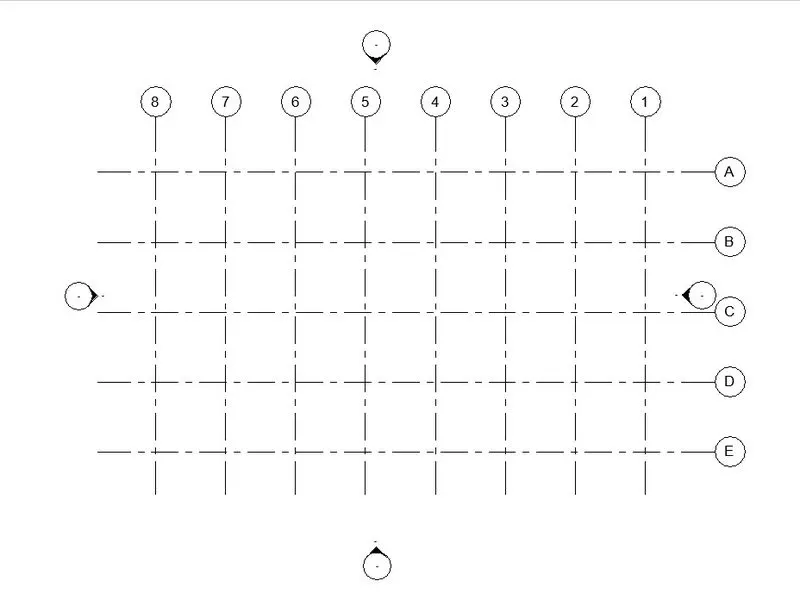
Result-
Longitudinal and Transverse grids created successfully for Architecture Model.
Aim-To synchronize the changes from the local copy to the central file of the architecture model.
Introduction-Worksharing is a design method that allows multiple team members to work on the same project model at the same time. On many projects, team members are assigned a specific functional area to work on. Revit projects can be subdivided into worksets to accommodate such environments.
When we working on work shared project, use the Synchronize with Central tool to save your local changes to the central model
Procedure-
- After doing any changes in the local copy of the architectural template, now we have to synchronize it
-Go to Collaborating tab and select the option called synchronize with central
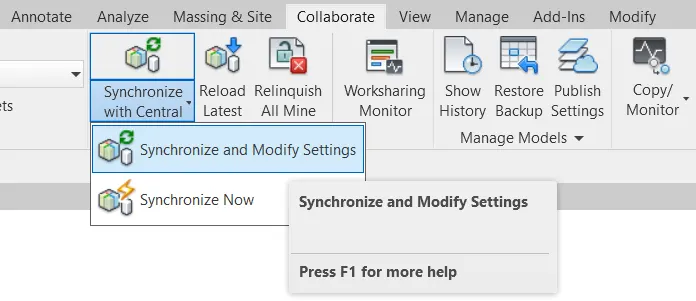
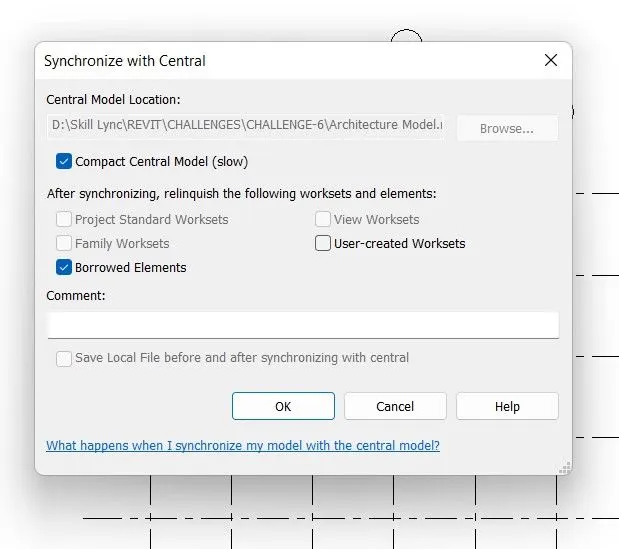
-After clicking on the synchronize with the central option, a dialog box will appear
-Select the destination location to save changes for the central model
-Tick mark the compact central model option in the dialog box
-Now click on ok to synchronize the local copy to the central model
Result-
The Architectural template of the project has been successfully synchronized from the local copy to the central model.
Aim-To make the Structural model a central model by using collaborate tool
Introduction-Revit provides several different ways to collaborate with team members who are also using the software.
- You can link multiple Revit models together, allowing team members to work in context.
- Through work sharing, users on the same local area network (LAN) can work together in the same Revit model.
- When collaboration needs to occur among users who are not in the same geographic location, use Revit Server or Revit Cloud Worksharing.
Revit Server connects offices that share a network but are not in the same geographic location.
Revit Cloud Worksharing is a cloud-based service that allows any Revit users inside or outside a network to collaborate on a Revit model.
Procedure-
-OpenStructural model that we created earlier
-Go to open and select this file
-After open the file go to Collaborate tab>slect Collaborate
-Now the following window appear select within network for this project
-Now save the file
-Following window appear select yes option
Result-
The Structural template has been saved successfully as a Central model using collaborate tab.
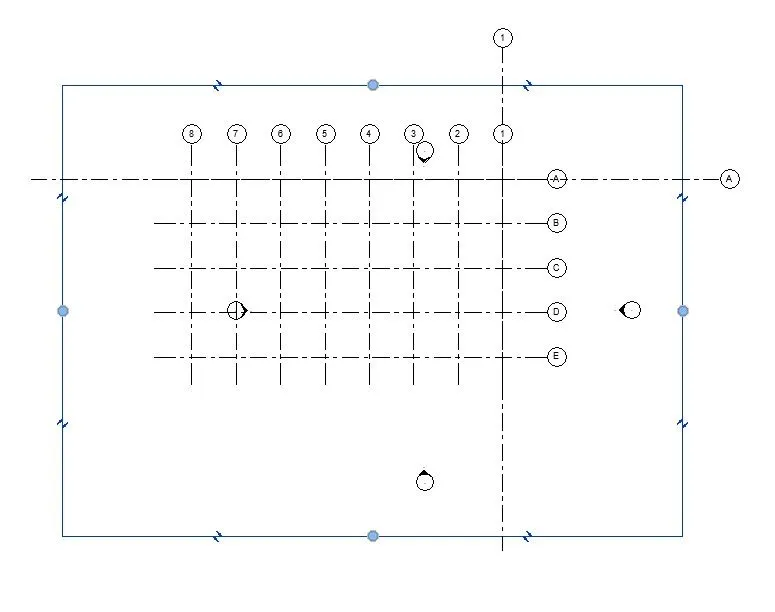
Aim-To copy the grids and levels from the architectural model to the structural model using the copy monitor tool under collaborate tab.
Introduction-The Copy/Monitor tool is designed for use with important building model elements to streamline coordination and collaboration on a project that involves multiple teams.
When you start the Copy/Monitor tool, choose Select Link, and then select Copy, you can copy elements from a linked model to the current model, and monitor changes to the original elements.
Procedure-
-Open structural model that we created earlire
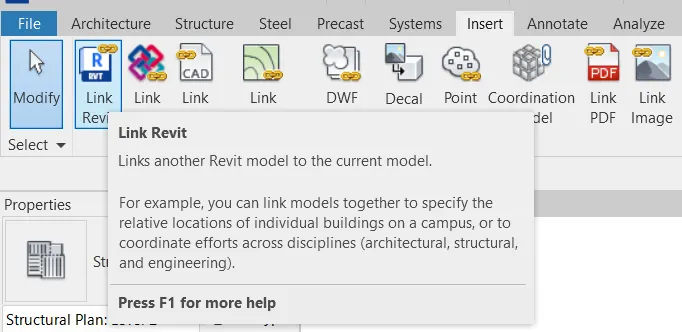
-Go to insert tab>Select Revit link>Selct archutecture model file>Ok
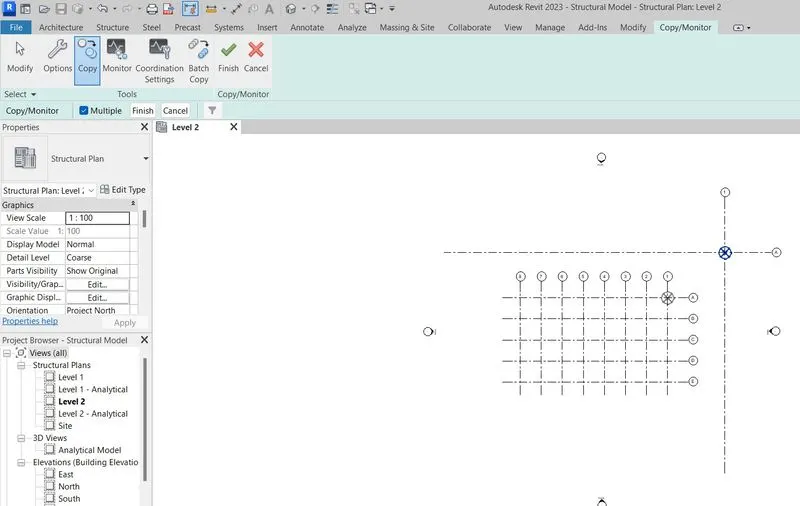
-Now go to Collaborate tool>Select copy monitor option>Select link
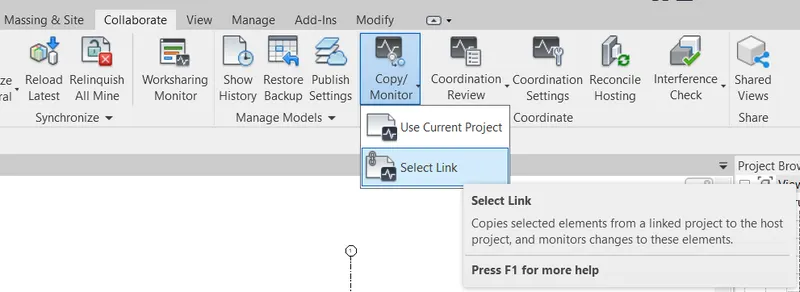
-After selecting link>Select copy option>Tick on multiple option>Select all grids of architeructre model project>Select finish
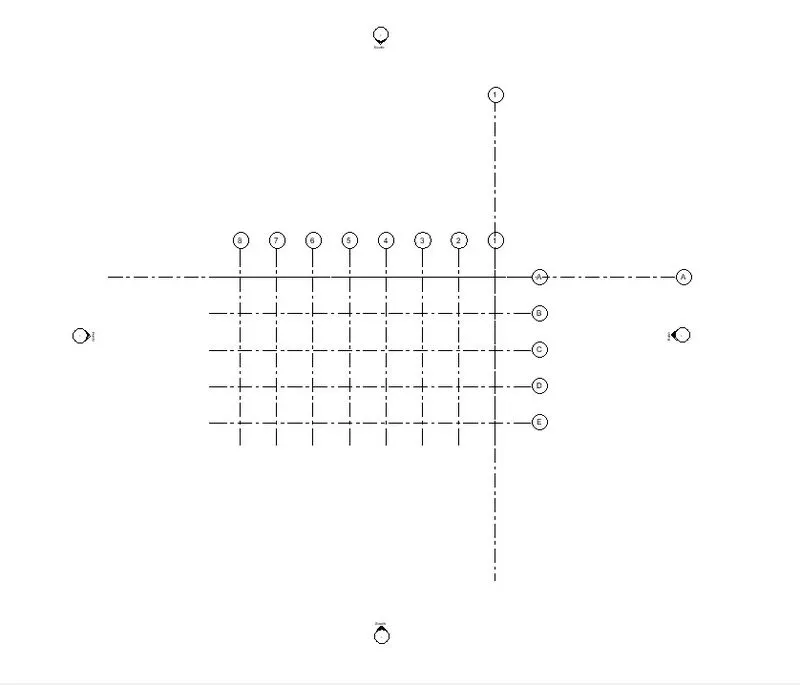
-To check the file copied or not type VG go to revit link>unitick Architecture model
Result-
The grids and levels from the architectural model to the structural model are copied using the copy monitor tool under collaborate tab.
Aim-To Create a new construction template file and link the architectural and structural model to the construction model.
Introduction-The Manage Links dialog has tabs for Revit models, IFC links, CAD Formats, DWF Markups, Point Clouds, and Topography. Under the tabs are columns that provide information about the link. The Manage Links dialog has tabs for Revit models, IFC links, CAD Formats, DWF Markups, and Topography. Under the tabs are columns that provide information about the link.
Procedure-
-Open New file as Construction template
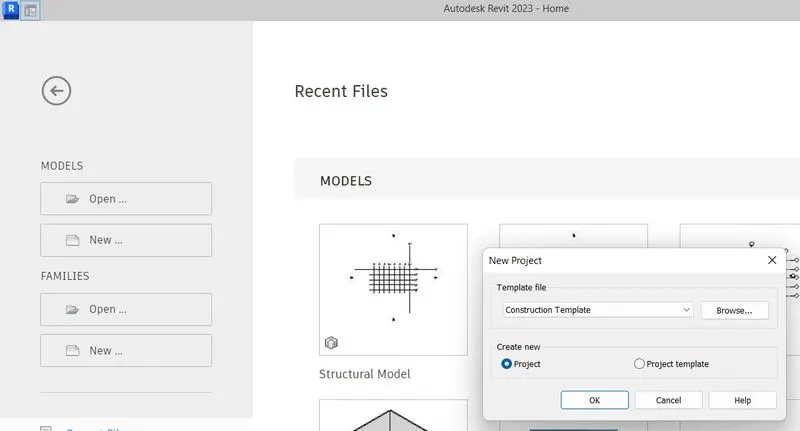
-Save in same folder CHALLENGE-6 as a Construction Model
-Now go to Collaborate tab>slect Collaborate
-Now the following window appear select within network for this project
-Now save the file
-Following window appear select yes option
-Now go to Insert>Select revit link>Select Architecture file that we created earlier
open that architecture model file
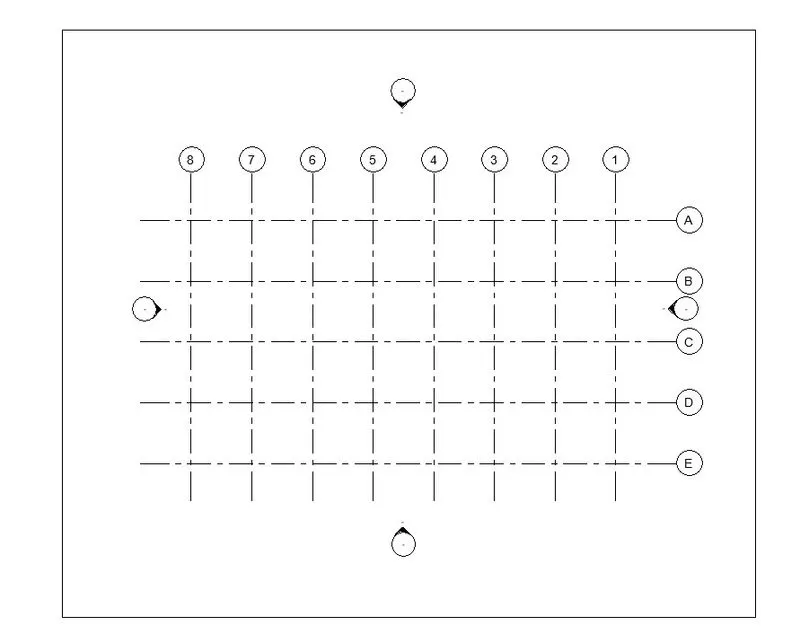
-Now again go to Insert>Select Revit link>Select structural file that we created earlier
Result-
Construction template file created and linked architectural and structural model to the construction model
9]
Answer-
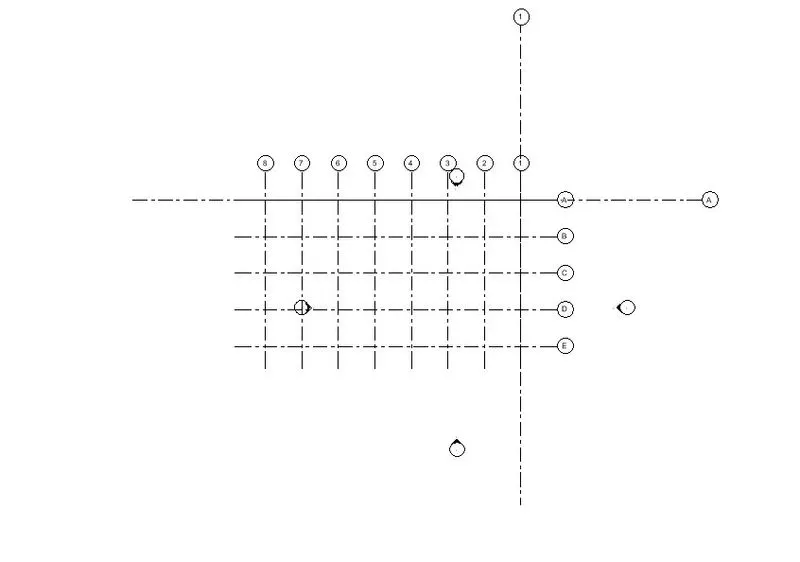
In my model Architecture and Structure grids and levels are matched.
10]
Answer-
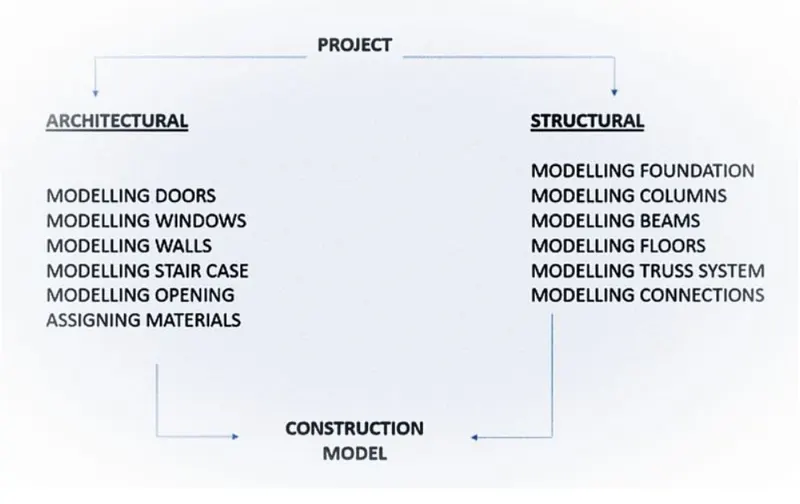
Revit provides multiple member to work on same project.