Usage of Collaborate tool in REVIT
Question :-1
Open an architectural template. Using the Manage tab set project base point and project shared coordinates for the project.
Aim :-
- To Open an architectural template and Using the Manage tab set project base point and project shared coordinates for the project.
Introduction :-
- The project base point can be used to establish a reference for measuring distances and positioning objects in relation to the model.
- Initially, in stock templates, it identifies the origin (0,0,0) of the project coordinate system. Use the project base point as a reference point for measurements across the site.
- Place it at a convenient location in the model to simplify on-site measurements.
- When you combine multiple models and files in a single project, use shared coordinates to establish the positions of the files in relation to each other.
- A Revit project has internal coordinates for all the elements that compose the model in a project.
Procedure :-
- Open Revit 2021.
- Click New from Models.
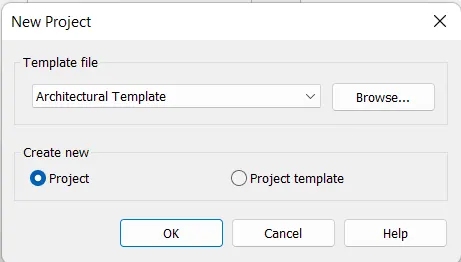
- Then new box will Pop-up named New Project.
- So choose the tempalate file Architecture Template.
- Cretae New Project.
- Click Ok.
- New Project file is Created.
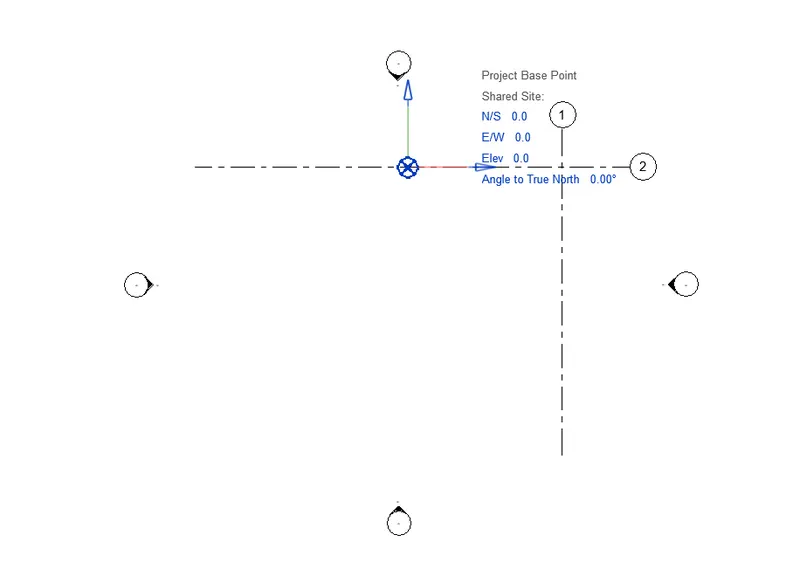
- Now draw the grids randomally in horizontal and vertical direction passing through eachother.
- Go to MAnage TAb.
- Manage Tab -> Coordinates -> Specify coordinates at Points.
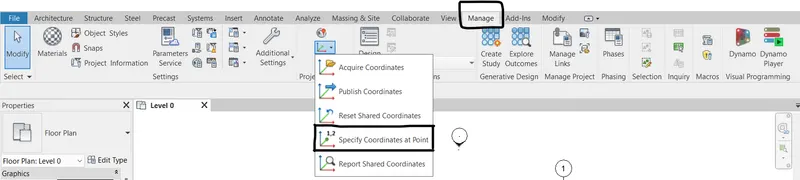
- Specify coordinates at Points where the intersection of the grids meets.
- Enter the amount 0.
- Now type VG for Visibility Graphics.
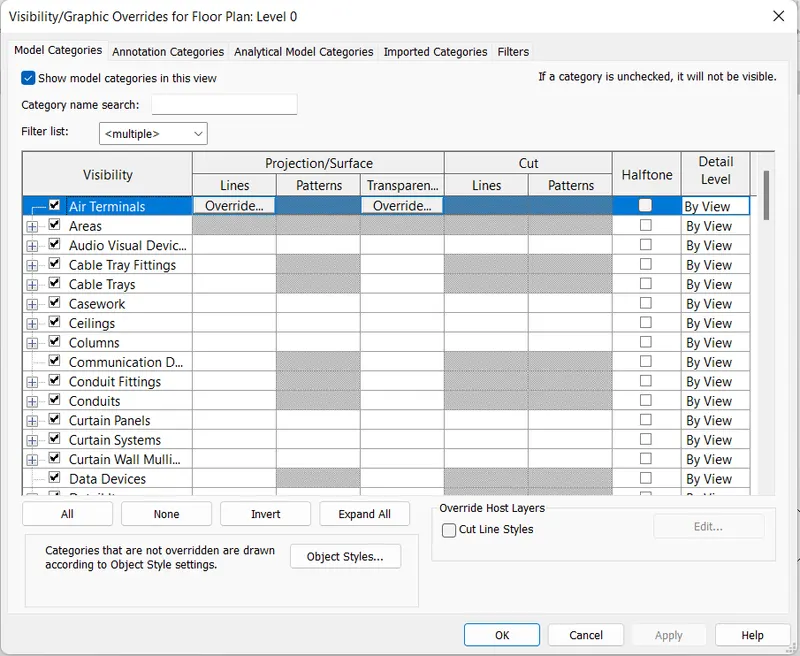
- Go to Site option in Model categories.
- Select Project base point.
- Click OK.
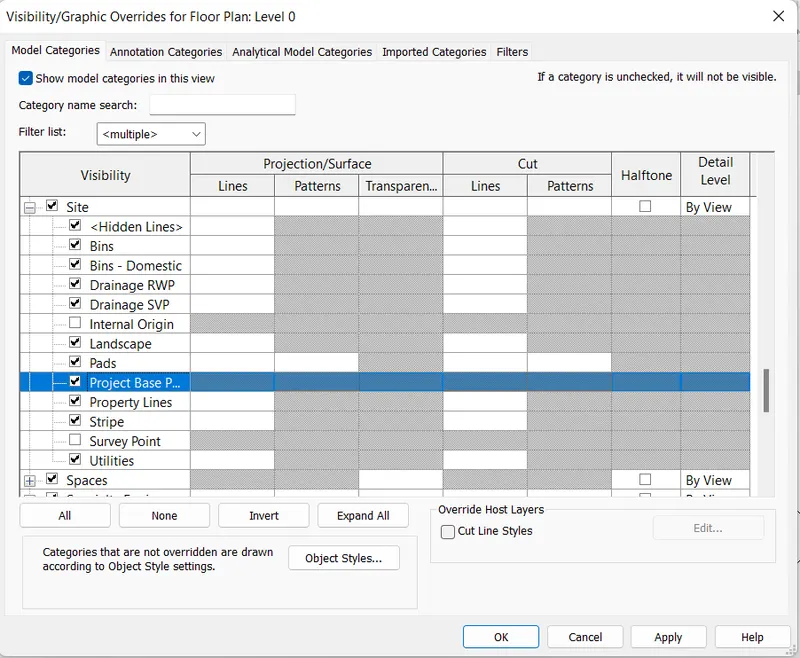
- Click on the base point circle.
- Insert 0 in all the parameters.
- Save the file as Architectural.
Result :-
- Opened an architectural template. Using the Manage tab set project base point and project shared coordinates for the project.
Question :-2
Open another new file but with a structural template. Using the manage tab set project parameters the same as the architectural model. Copy the parameters from the architectural model to the structural template or enter the parameters manually into the structural model.
Aim :-
- Open an Structural template. Using the Manage tab set project base point and project shared coordinates for the project.
Introduction :-
- The project base point can be used to establish a reference for measuring distances and positioning objects in relation to the model.
- Initially, in stock templates, it identifies the origin (0,0,0) of the project coordinate system. Use the project base point as a reference point for measurements across the site.
- Place it at a convenient location in the model to simplify on-site measurements.
- When you combine multiple models and files in a single project, use shared coordinates to establish the positions of the files in relation to each other.
- A Revit project has internal coordinates for all the elements that compose the model in a project.
Procedure :-
- Open Revit 2021.
- Click New from Models.
- Then new box will Pop-up named New Project.
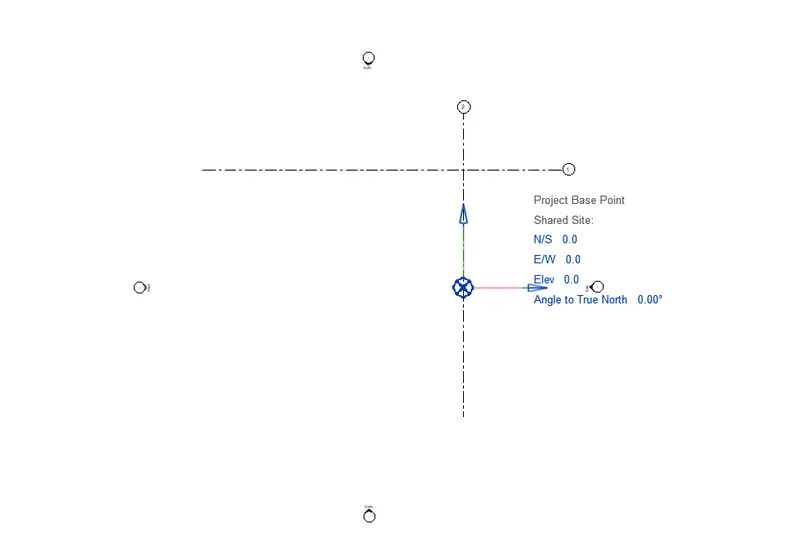
- So choose the tempalate file Structural Template.
- Cretae New Project.
- Click Ok.
- New Project file is Created.
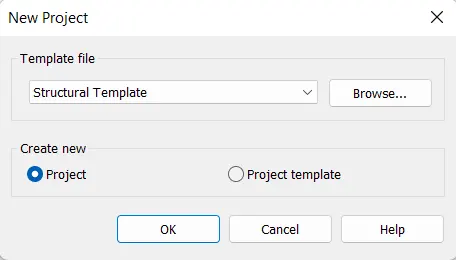
- Now draw the grids randomally in horizontal and vertical direction intersecting eachother.
- Go to Manage TAb.
- Manage Tab -> Coordinates -> Specify coordinates at Points.
- Specify coordinates at Points where the intersection of the grids meets.
- Enter the amount 0.
- Now type VG for Visibility Graphics.
- Go to Site option in Model categories.
- Select Project base point.
- Click OK.
- Click on the base point circle.
- Insert 0 in all the parameters.
- Save the file as Structural.
Result :-
- Opened an Structural template. Using the Manage tab set project base point and project shared coordinates for the project same as the Architectural template.
Question :-3
Re-open the architectural model. Using the tools under the Collaborate tab make the architectural model a central model (enabling simultaneous working on the model).
Aim :-
- To Re-open the architectural model and Using the tools under the Collaborate tab make the architectural model a central model.
Introduction :-
- Enabling worksharing involves creating a master project model, known as a central model, from an existing model.
- The central model stores the current ownership information for all worksets and elements in the project, and acts as the distribution point for all changes made to the model.
- All users should save their own local copy of the central model, edit locally in this workspace, and then synchronize with central to publish changes to the central model so that other users can see their work.
Procedure :-
- Re-open the architectural model.
- Go to Collaborate tab.

- New window will pop up named Collaborate.
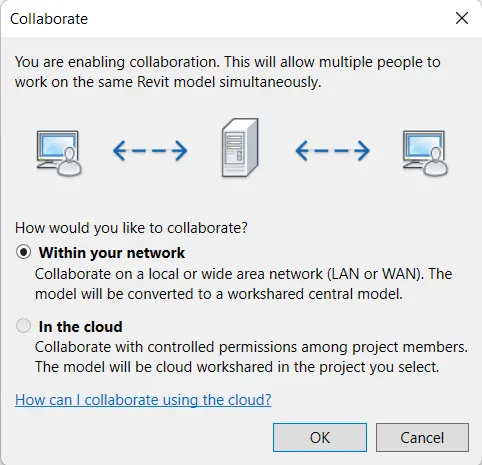
- In Collaborate window, Select the Within your Network Option.
- Click OK.
- Click File tab -> Save As (Project).
- New window will pop up named Save File As Central Model.
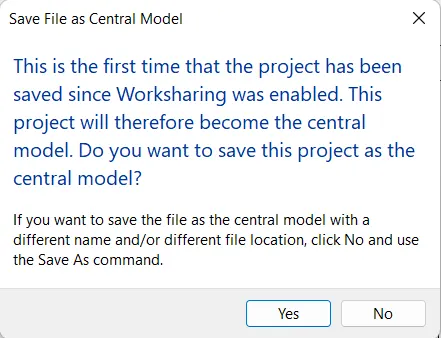
- Click Yes.
Result :-
- Re-opened the architectural model and Using the tools under the Collaborate tab made the architectural model a central model.
Question :-4
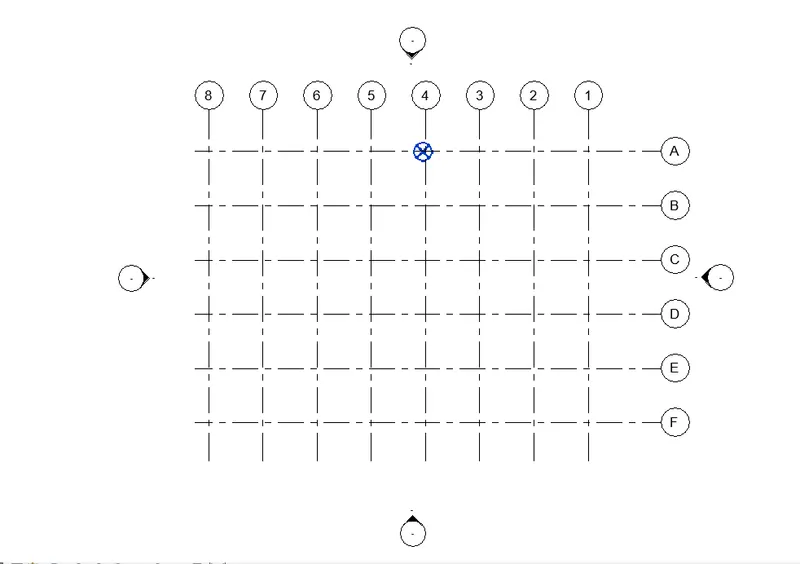
Create the Grids Longitudinal and Transverse pattern for the project similar to the task done in Week 2.
Aim :-
- To Create the Grids Longitudinal and Transverse pattern for the project similar to the task done in Week 2.
Procedure :-
- Offset the grids horizontally and vertically with some distance.
- Name the Grids properly.
Result :-
- Created the Grids Longitudinal and Transverse pattern.
Question :-5
Synchronize the changes from the local copy to the central file of the architectural model.
Aim :-
- To Synchronize the changes from the local copy to the central file of the architectural model.
Introduction :-
- When working on a workshared project, use the Synchronize with Central tool to save your local changes to the central model.
Procedure :-
- To Synchronize with Central: Click Collaborate tab -> Synchronize panel -> Synchronize with Central drop-down -> Synchronize and Modify Settings.

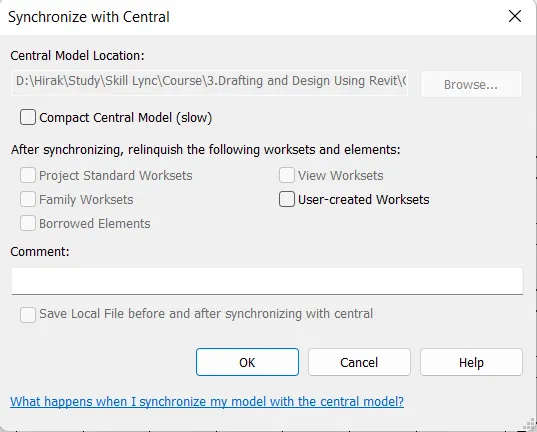
- Select Compact Central Model to reduce file size when saving.
- Verify that Save local file before and after synchronizing with central is selected to ensure your local file remains synchronized with central.
- Click OK.
Result :-
- Synchronized the changes from the local copy to the central file of the architectural model.
Question :-6
Open the structural model and use the collaborate tools to save the model as a central file.
Aim :-
- To Open the structural model and use the collaborate tools to save the model as a central file.
Introduction :-
- Enabling worksharing involves creating a master project model, known as a central model, from an existing model.
- The central model stores the current ownership information for all worksets and elements in the project, and acts as the distribution point for all changes made to the model.
- All users should save their own local copy of the central model, edit locally in this workspace, and then synchronize with central to publish changes to the central model so that other users can see their work.
Procedure :-
- Re-open the Structural model.
- Go to Collaborate tab.
- New window will pop up named Collaborate.
- In Collaborate window, Select the Within your Network Option.
- Click OK.
- Click File tab -> Save As (Project).
- New window will pop up named Save File As Central Model.
- Click Yes.
Result :-
-
Opened the structural model and used the collaborate tools to save the model as a central file.
Question :-7
Under the Collaborate tab, select the grids and levels from the architectural model, and using Copy Monitor try to copy the grids to the structural model. See what happens when the copy monitored grid is moved around in the structural model.
Aim :-
- To select the grids and levels from the architectural model and using Copy Monitor try to copy the grids to the structural model.
Introduction :-
- You can copy elements from a linked model to the current model, and monitor the elements for changes.
- Copy one type of element at a time. After copying, check to make sure that you achieved the desired result, and then copy the next type of element.
Procedure :-
- Select the Structural Template.
- Go to Insert Tab.
- Select Lenk Revit.
- Select Architectural.
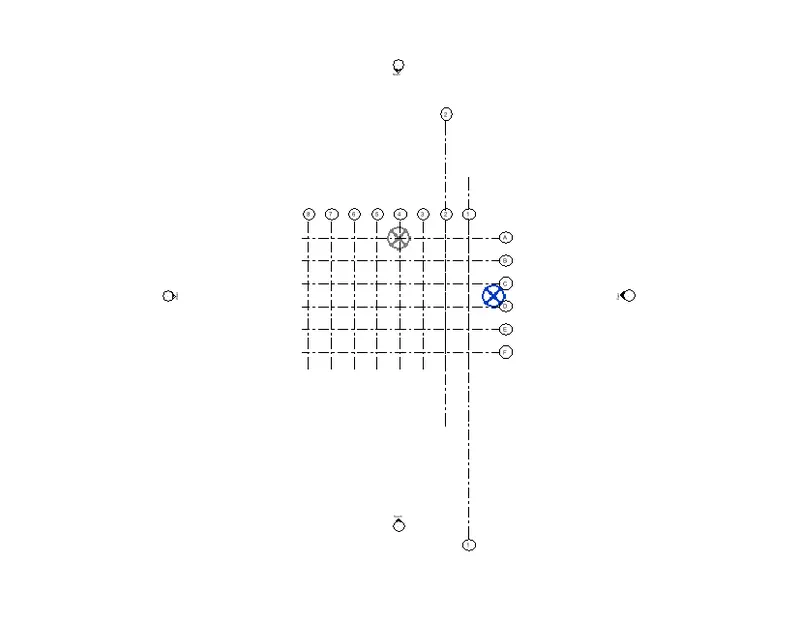
- Architectural Grids Drawing will be linked in the Structural Template, But not copied.
- To copy the Drawing, Click Collaborate tab -> Coordinate panel -> Copy/Monitor drop-down -> Select Link.
- Select the Architectural model in the drawing area.
- Click Copy/Monitor tab -> Tools panel -> Copy.
- To select multiple elements, on the Options Bar, select Multiple. Then select the elements in the drawing area, and click Finish on the Options Bar.
- Click Copy/Monitor tab -> Copy/Monitor panel -> Finish.
Result :-
- Selected the grids and levels from the architectural model, and using Copy Monitor copied the grids to the structural model.
Question :-8
Create another new file with a construction template. Save the new file as a central model. This file will include both architectural and structural model. Under the manage tab, Click manage links to link both architectural and structural files. Save the file and close all the files.
Aim :-
- To Create another new file with a construction template. Save the new file as a central model. This file will include both architectural and structural model. Under the manage tab, Click manage links to link both architectural and structural files. Save the file and close all the files.
Procedure :-
- Click New from Models.
- Then new box will Pop-up named New Project.
- So choose the tempalate file Construction Template.
- Cretae New Project.
- Click Ok.
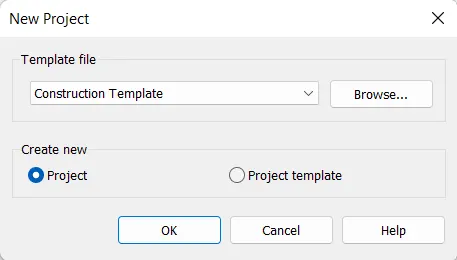
- New Project file is Created.
- New window will pop up named Collaborate.
- In Collaborate window, Select the Within your Network Option.
- Click OK.
- Click File tab -> Save As (Project).
- New window will pop up named Save File As Central Model.
- Go to Insert Tab.
- Select Lenk Revit.
- Select Architectural and Structural One by One.
Result :-
- Created another new file with a construction template. Saved the new file as a central model. This file is included both architectural and structural model. Under the manage tab, manage links to link both architectural and structural files. Saved the file and close all the files.
Question :-9
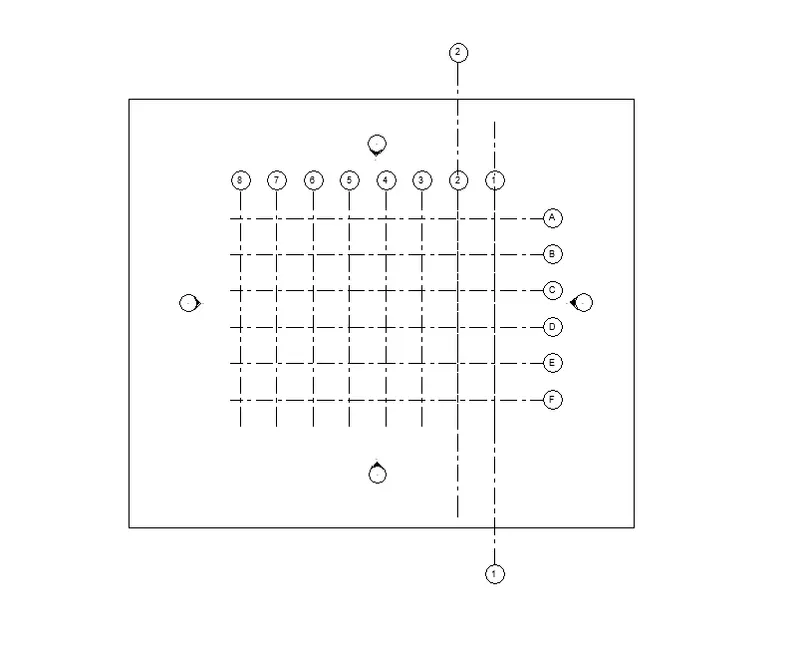
Are the grids from structural and architectural model matching in the construction template created? If yes the model is set up for project 2. If not work on the shared parameters and linking options under Manage links.
Aim :-
- To check the grids from structural and architectural model are matching in the construction template or not.
Result :-
- Yes, Structural and Architectural model are matching in the construction template created.
Question :-10
List a flow chart of a project tree set up in terms of Construction model, Architecture & Structure model, in this exercise and understand how many people can work on the same project using Revit simultaneously.
Construction model
Architecture model Structure model
Modelling Walls Modelling Column
Modelling Windows Modelling Beam
Modelling Doors Modelling Footing
Assigns Materials Modelling Slabs
Modelling Architectural Flooring Modelling Structural Floors
Modelling Staircase Modelling Truss System
Creates Opening Modelling Connections
Modelling Architectural Roofing
- From Above tree view, List of the person working on it.
- Interior Designers
- Exterior Designers
- Contractor
- Site Engineer
- 3D Modeler
- Structural Designer
- Structural Engineer