Underbody Coating
Introduction
Underbody coating is usually a dense cladding (often based on rubber) applied uniformly to the undercarriage of the automobile. It is normally sprayed or painted. The main purpose of undercoating is to check rust especially in the body components like frame rails along with other exposed metal parts. Underbody coating can also reduce wear and tear.
Types of Undercoating
1. Rubberized Underbody coating
2. Waxbased underbody coating: Wax-based undercoating puts up a big fight against moisture. It is also the most affordable option.
3. Asphalt based automotive underbody coating: Best suited for lorries, trucks and large vehicles this provides a greater degree of protection compared to rubber-based coatings. However, asphalt-based coatings contain little amounts of rubber for sound-insulation purposes. The process of applying this coating is a bit time-consuming though.
4. Polyurethane underbody coating: This coating closes up splits and fractures on the underbody of the vehicle. It offers up good protection against corrosion and also bonds with the metal. Unlike in the case of asphalt-based coating, we can paint over the polyurethane coating.
Underbody coating process
Step 1 – Cleaning the Underbody
Remove all debris and contaminants from the chassis to start with the undercoating process.
- Degreaser: A high-quality commercial-grade degreaser would be helpful in removing oil and grime from the undercarriage. Spray the degreaser, then allow it to soak for a moment, then wipe it off with a microfiber towel or shop rag.
- Grinding: Grind the existing hard contaminants and rust from the undercarriage and other components. Mild grinding pad will be used to remove the debris easily.
- Sanding: After degreasing and grinding, remove those scratches and other stubborn contaminants using a 200 to 400 grit.
- Use a Tack Rag or IPA solution: To wind up the cleaning process, wipe down the area with a tack rag or IPA solution.
Step 2 – Applying Priming
Primers serve as a basecoat. The recommended primers usually contain a high level of zinc. Zinc helps in reducing rusting, even if the protective layer is penetrated.
Step 3 – Applying Undercoating
This is the final step. The undercoating sprays are similar to bed liners. Most products are applied in two steps as dual layers. The first layer should be thin, covering the entire surface. Allow it to rest at least for an hour, especially if applying a rubberized undercoating. After this layer has been dried, apply the second coat. It will take a few hours to days for curing.
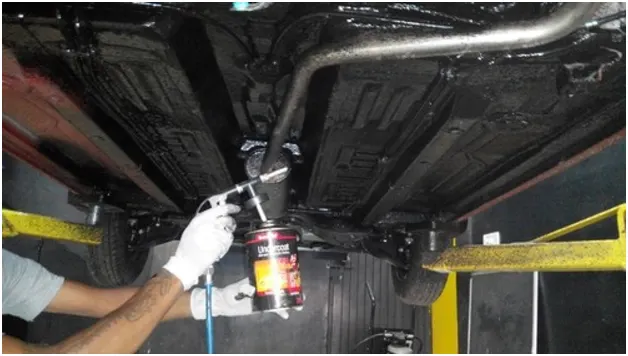
Image showing application of underbody coating
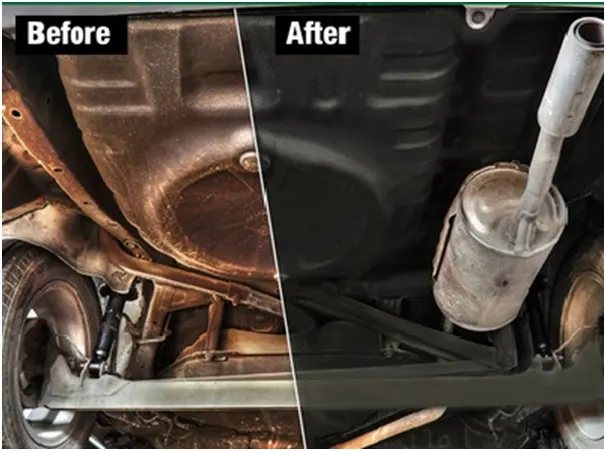
Advantages of underbody coating
- Rust Prevention: It plays an important role in prevention of corrosion. Underbody coating can come in handy especially where there is too much humidity, and rusting is just one of those everyday things.
- Absorbs noise: Very thick undercoating can soften the noises that reach the cabin. Since the undercoating is often made up of rubber it absorbs some of the rackets. The occupants of the car could spare themselves of the road noises at least up to a certain extend.
- Reinforcement: If a car comes with stock underbody coating, using another coating on top of it, is not going to hurt. It will offer additional reinforcement, protecting the underbody from water, road debris, gravel and small pebbles. There would also be a lesser chance for the factory coat to flake away.
- Prolong car's life
Disadvantages
- Additional cost
- Exposure to chemicals during application