Underbody Coating
What is underbody coating?
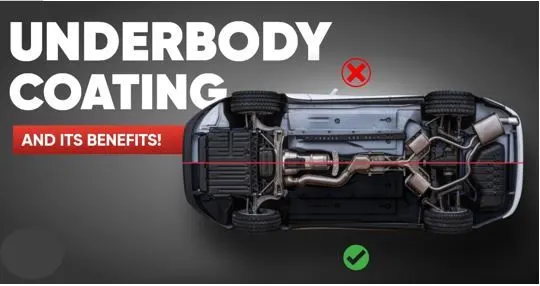
Underbody coating is usually a dense cladding applied uniformly to the undercarriage of the automobile. It is normally sprayed or painted on the bottom surface of the cars. coating provides long term protection from corrosion to car's underbody. It also protects parts like internal body panels, frame rails and other inner cavities that are not physically accessible but are prone to corrosion
Purpose of under body coating:
Protection against corrosion:
The main reason for getting an underbody coating is to prevent rusting and corrosion. This is not only required during the monsoon season but also in hot and humid climatic conditions. The coating is also a must if you tend to live in coastal regions where the humidity in these areas speeds up the process of corrosion. This can be eliminated by asking your car service professional to apply a rubberised anti-rusting coat on your car’s underbelly.
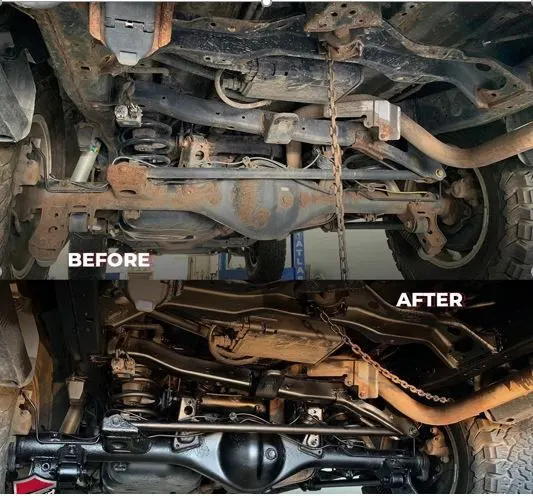
Protection of vital car components:
The car underneath holds vital components like the silencer, engine, and numerous other wires and small engine components for different purposes in the car. The car’s underneath cannot simply be led to corrosion and further damage due to the car being driven during any weather condition. To avoid further major issues, the antirust coating is a must for the underbody. This is again extremely important if you’re living in an all-year monsoon season or moderately high rainy regions as underbody coating is highly necessary for these situations.
Car’s resale value might be affected if not taken care of:
Just ensuring your car looks outside and inside is not enough. One must take great care of the underbody as well as the resale value would be greatly affected due to high corrosion. It should not be left uncared for which would lead to permanent damage and huge loss and might not be taken for resale. Therefore, regular inspection of the car’s underbody must be carried out in order to retain the car’s value.
Reduces NVH (Noise Vibration Harshness) levels:
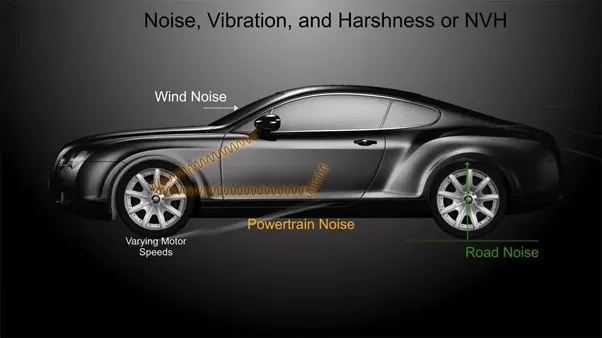
Being in a country where not all roads are smooth enough and are filled with potholes, stones, debris, and uneven road levelling, the underbody coating prevents and absorbs all noise created by the contact of the surface of the road and the car by minimising this.
Car underbody coating prevents paint from chipping:
When your car travels at high speed on a highway, the small stones and debris hit your car’s underbody in this process and may lead to chipping of the underbody paint. Hence, it is advisable to have a thick layer of underbody coating to prevent paint from chipping.
Thus, you must get your car’s underbody coating done from time to time to ensure the above factors do not affect your car. We offer underbody inspection and coating services hassle-free. We also highly recommend getting underbody coating not just for the monsoon season, but for any season throughout the year.
Types of Underbody Coating:
Now let us look at the various kinds of automotive underbody coating.
1. Rubberized Underbody Coating:
This is generally thought of as the best underbody coating for your car. It preserves the underbody well, protecting it from scratches. Applying this to the undercarriage is not much of a hassle either.
Rubberized Undercoating helps protect the undercarriage of cars, trucks, vans and recreational vehicles from corrosion and abrasion. The coating may also be used to protect wheel wells, quarter panels, interior sides of fenders, the underside of the hood, the bottom sides of floor pans and more. The rubberized undercoating also helps deaden noise, allowing for a more pleasant and quieter ride. The spray goes on as a textured black finish that resists chipping, abrasion, exterior rusting and weathering. It provides one-coat build-up with no dripping, running, or sagging. Protecting your vehicle with an application of rubberized undercoating is advised for long-term protection of the undercarriage.
Rubberized undercoating creates a protective barrier that seals out grit, grime and moisture that could otherwise corrode the metal components. This extra protection is a low-cost measure that can pay off by potentially extending the service life of a vehicle.
Advantages:
- Protects coated items against moisture, acids, abrasion, corrosion, and skidding/slipping, and provides a comfortable, controlled grip. Remains flexible and stretchy over time. Will not crack or become brittle in extreme weather conditions.
- Waterproof, non-hardening, and paintable
- The rubberized undercoating also helps deaden noise, allowing for a more pleasant and quieter ride.
2. Wax Based Underbody Coating:
This – more or less – ephemeral undercoating will wear away in a few months’ time. On the upside, wax-based undercoating puts up a big fight against moisture. It is also the most affordable option out there.
Advantages:
- Protects your paint from fading and damage.
- Applying a coat of wax to your vehicle twice a year will give your paint an extra layer of protection, helping to repel water and reduce the risk of rust.
- it keeps the surface slippery. This smooth, slippery surface prevents the dust and dirt from sticking to the car
3. Asphalt Based Automotive Undercoating:
Best suited for lorries, trucks and large vehicles this provides a greater degree of protection compared to rubber-based coatings. However, asphalt-based coatings contain little amounts of rubber for sound-insulation purposes. The process of applying this coating is a bit time-consuming though.
Advantages:
- It is used in military vehicles and on all-terrain
- Asphalt-based undercoating will last long and is the best option for vehicles that endure heavy road use.
- They are quick to enter the nooks and crannies and provide a waterproof layer.
4. Polyurethane Underbody Coating:
This coating closes up splits and fractures on the underbody of the vehicle. It offers up good protection against corrosion and also bonds with the metal. Unlike in the case of asphalt-based coating, you can paint over the polyurethane coating.
Advantages of Polyurethane underbody coating:
- Polyurethane undercoating is suitable if your car has already rusted a bit. It enters the cracks and seams of the vehicle body and displaces moisture and salt.
- oozing around rusty areas to bond with and protect oxidized metal.
Surface preparation for underbody coating:
There are several general stages that are followed to prepare a surface for coating.
1. Surface Condition Asessment:
Before any preparation can begin, it is important to assess the condition of the surface. Standards can assist with this assessment, such as with BS EN ISO 8501-1, which provides details of rust grades ranging from A-D for steel surfaces. These grades may help determine if surface preparation will be successful and what techniques are going to be required. Surface profile may also be beneficial to identify if the existing surface can provide the required mechanical key for subsequent processing steps, although in most cases, some form of surface preparation will generally be required.
2. Remove Old Coatings:
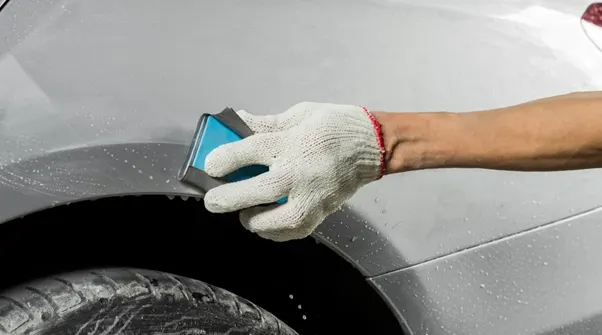
Surfaces generally require any old coatings to be removed before a new coating is applied. Applying a new coating over an old, failed coating will allow pre-existing problems like bubbling, flaking or peeling to continue beneath the covering layer. Stripping coatings back until there is a clean surface, such as white metal, will help to mitigate problems like corrosion and lengthen asset lifespans.
3. Remove Oils, Chlorides, Acids and Other Surface Contaminants:
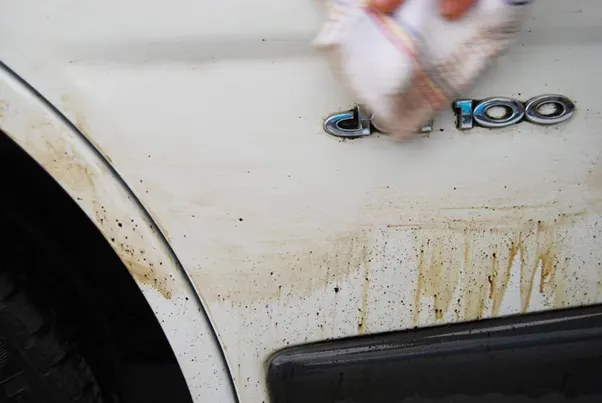
Old coatings are not the only substance that will need to be removed from a material’s surface. Many surfaces in industrial settings come into contact with oils, grease and other lubricants, all of which need to be removed so as not to compromise the bond strength between the substrate and the new coating.
Chlorides can also accumulate on a material’s surface as they travel through the air. This is particularly prevalent near the sea or other marine environments. Chlorides can cause rates of oxidation in metal to increase, meaning that corrosion damage will occur sooner; this is known as chloride induced corrosion.Because these types of surface contaminant can be invisible to the naked eye, testing may be required to determine their presence.
4. Remove Loose Parts of the Surface:
The surface of the material itself will also need cleaning of any loose parts that may flake or crumble. This can be achieved by techniques such as abrasive blasting, which will efficiently remove rust, mill scale and other loose parts from the surface of the substrate.
5. Profile the Surface:
Once any loose materials and other substances have been cleaned from the surface it is important to profile the surface itself. New coatings may require a new surface profile than the original coatings. A correctly profiled surface, tailored to the coating process / material, will offer improved adhesion and mechanical bonding.
6. Dry the Surfaces:
Coatings work best with surfaces that are dry. Wet surfaces can cause pinholes to develop during the curing process as moisture evaporates from between the surface and the coating, forming small holes. Although some coatings use a second layer to cover these pinholes, moisture can also negatively impact drying times. Flash corrosion can also occur where moisture is present on bare metal surfaces, this corrosion can continue beneath the surface of a newly-applied coating. Humidity can also be a factor, so it is worth checking whether a coating can be applied at the environment’s humidity level. The requirements are usually documented in the relevant coating and application standards. Following these six general rules will improve the chances of successfully applying a coating.
Methods of underbody coating:
Spraying:
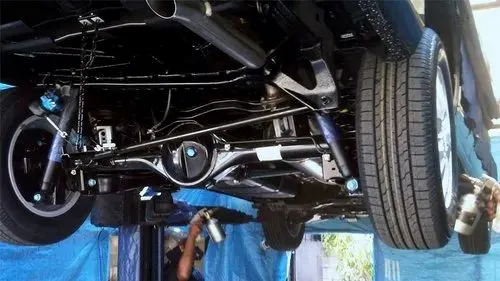
Spraying is the most prevalent paint and finish application technique among industrial manufacturers due to its versatility and economic viability. There are a variety of different types of spray methods currently in use, including:
- Air-atomized
- Airless
- Electrostatic
- High-volume, low-pressure
Air-atomized Spray:
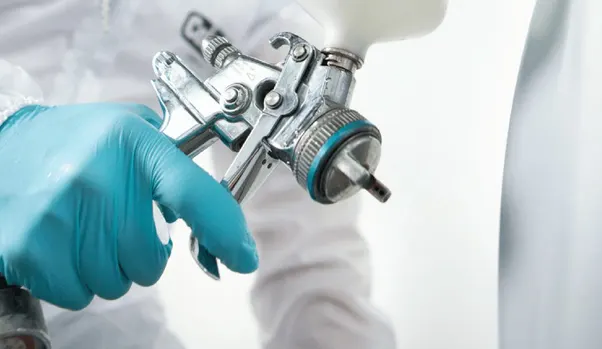
Air-atomized applications are the conventional approach to spray painting. The applicator consists of a traditional spray gun that combines compressed air with liquid flow to create a pressurized mist that coats the object. Since the equipment can be adjusted and customized to suit the needs of the operator, air-atomized applications are highly flexible and can be used on almost any kind of substrate. One of the primary drawbacks of air-atomized technology is loss of paint. The equipment has poor transfer efficiency compared to other application methods, although the relatively low labour requirements can help offset the material costs. Spray booths also need to be sufficiently exhasted to ensure workers are not exposed to dangerous levels of airborne chemicals.
Airless Spray:
Rather than mixing liquid paint with compressed air, airless application equipment simply forces the liquid coating through a narrow opening to create pressure. This method propels paint particles at a lower velocity than conventional air-atomized equipment, so there is less loss of paint through overspray. While it does offer several advantages over conventional techniques, airless spraying also requires additional equipment maintenance as well as advanced skill on the part of the operator.
Electrostatic Techniques:
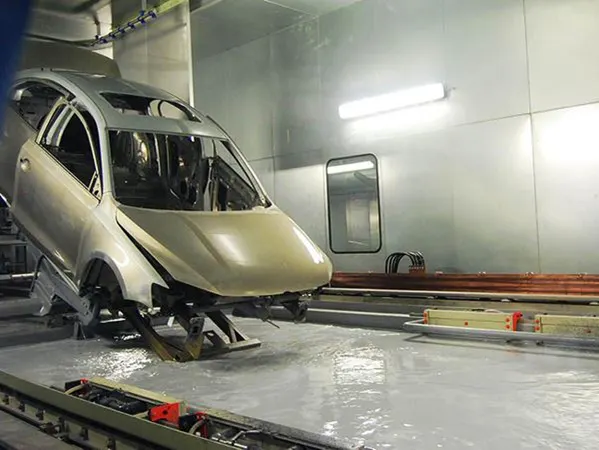
Electrostatic applications are a relatively modern innovation that offers exceptional transfer efficiency compared to other spray techniques. The equipment charges the paint particles with high voltage, causing them to be attracted to the surface of the part and will actually wrap around the part which increases transfer efficiency. This allows for a smooth and solid coat with minimal effort, even for objects with corners and contouring.
While this method can reduce wasted materials significantly, it also requires skill and precision to safely use. Electrostatic equipment is designed for specialized paints that have a specific conductivity, so the options are limited to specific chemical compositions. This technique also presents a more significant fire hazard in the workplace.
High-volume, Low-pressure (HVLP):
HVLP spray equipment utilizes spray gun atomization technology that propels large quantities of low-pressure air to the gun applicator. Since the paint is released at a lower velocity, this technique yields less overspray and blowback than conventional air-atomized equipment. While the apparent benefits seem advantageous, it’s also important to note that HVLP applications require more experienced painters due to the higher transfer efficiency.
Brushing:
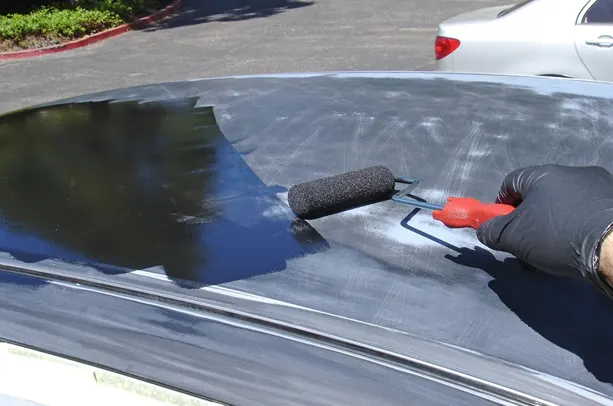
As the name implies, brushing uses a paintbrush to apply paint or finish to a component. The paint’s consistency is a key factor in successful brushing applications. Thin paints may not cover the surface adequately while thicker paints can pull and rope under the brush. Without proper consistency, brush marks will likely remain after the application is completed. The risk of a lower-quality finish means that brushing is typically not used for decorative finishes.
Brushing is most commonly used to cover areas after repairs. A small area is typically not worth an entire spray application and the dipping method is not effective for assembled components. Additionally, brushing can also be good for hard-to-reach places.
Dipping:
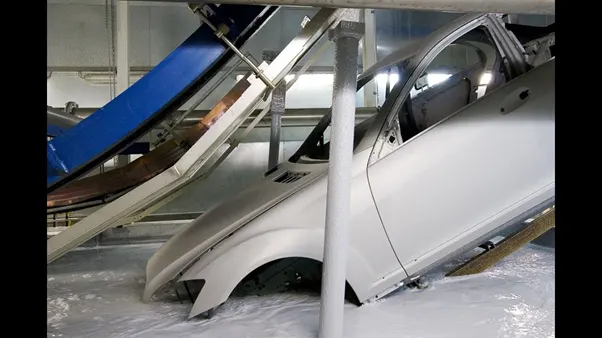
Dipping is a technique that is most often used for applying primers and involves completely submerging the parts in a tank. This is effective for fully coating components, which makes it a great choice for applying protective coatings. Fully immersing the parts ensures that all areas will be sufficiently coated; however, this typically does not provide a high-quality finish due to drips when the parts are hung to dry.
Additionally, dipping is a poor choice for finishing larger components as the size of the tank becomes cost-prohibitive. Dipping is most often used in factories and at large repair stations.
In general, the dipping paint application methods are best suited for:
- Small components
- Protective coatings
Problems and solutions in underbody coating:
Fisheyes:
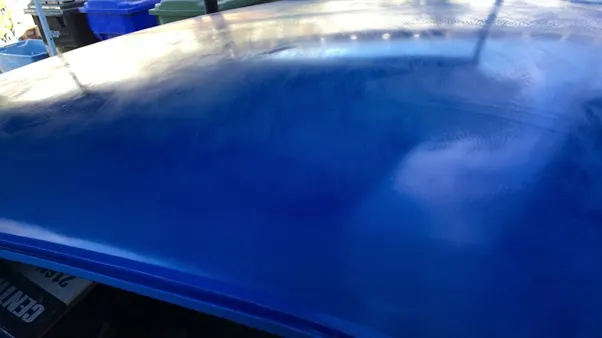
When you spray on a coating of primer or paint, fisheyes might result. These are crater-like circular openings that may appear either while you are spraying your primer or paint on or directly after it has been applied. This problem is usually caused by spraying your primer or paint onto a surface that has contamination from wax, silicone, grease or oil. The easy way to avoid this is to make certain that you use a wax and grease remover while you are preparing to paint.
Wrinkling or Lifting:
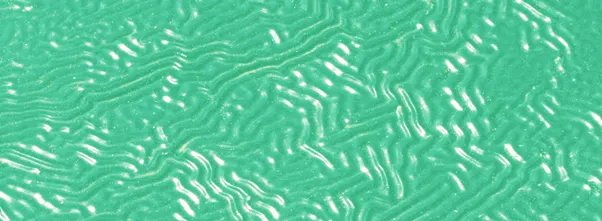
This problem occurs when a paint layer shrivels up while you are applying a new finish or while the new finish is drying. This happens when solvents in your new finish attack the old finish, causing the lifting and wrinkling. This can happen when you are recoating urethanes or enamels without allowing them to fully cure or when you wait beyond the maximum dry time during your application.
Bleeding:
Bleeding occurs when you have a discoloration that appears in your topcoat colour. It happens when the fresh topcoat’s solvent dissolves pigments that are soluble in the old finish. This may be repaired by allowing your stained topcoat to fully cure. Then, spray a sealer over it and reapply the colour.
Dulling or Hazing:
This happens when the gloss or shine of the finish dulls as it dries. There are many different causes, but it often results when you don’t allow the undercoat to adequately dry or cure.
Crow's feet:
These are cracks that sometimes appear in topcoats. Like dulling, this may result from several different causes. The most common reasons this might occur include the following:
- Using a blowgun to dry your primer
- Applying too thick of a film coat
- Insufficient drying time between coats
- Using too much catalyst or hardener in your primer or paint
To fix this, you must strip away all of the cracked paint film and redo the job.
Sags:
Sags are extremely common for do-it-yourself types. These occur when you hold your paint gun too close to the surface, double coat a spot or move it too slowly. It also sometimes happens when you reduce an area too much or trying to paint when it is too cold. To avoid this, hold your paint gun at a perpendicular angle, keep it far enough away from the surface and move it in fast, even strokes.
Orange peeling:
An orange-peeled surface has the appearance of an orange peel. This is normally a result of using too low of pressure or not reducing the paint enough. If it is not too severe, you might be able to correct it with wet sanding using 1200-grit sand paper followed by buffing or respraying of the surface. Always thin your paint according to the instructions on the label and do not overcoat your surface.
Feather-edge lifting:
Also known as edge mapping, this paint problem results from solvents in topcoats penetrating through areas of the undercoats. It looks like a wrinkling around an area that has been repaired. To avoid this, make certain to use a primer surface that is water-based, two-component or another sealer to create a good barrier layer. When this problem happens, you will need to either remove the problem area or smooth and sand it.
Air trapping:
This problem occurs when tiny air bubbles rise to the surface of the paint and pop, leaving craters behind. To avoid this, make certain that your spray gun is adjusted properly, use the correct air pressure setting and keep your gun an appropriate distance away from the surface. You can correct this problem by sanding the area with 1200-grit sandpaper and then polishing it.
Sand scratches:
These are streaks, lines or marks that appear in your paint film. They are the result of not properly sanding the body or primer, filling in scratches with primer or sanding basecoat or single-stage finishes before you clear them. You can fix these by letting it cure and then re-sanding the problem area before refinishing it.
Cracking:
With this problem, cracks of varying lengths form in your finish. This results when the film of your undercoat or topcoat is too thick. It can also happen when you are painting over a cracked surface or if you use too much hardener. This requires stripping and refinishing to fix.
Peeling:
When you lose adhesion between your paint and its substrate, sections of the colour may separate away. To avoid this, make sure that you prepare the surface properly by properly sanding, cleaning and using the correct primer.
Pin holing:
Pinholes occur when body fillers contain air bubbles that are then exposed while you sand the area, leaving small holes behind in the surface. This results from the improper mixing of your hardener with the filler. If you use too much of the hardener, pin holing is even likelier to occur.
Debris in your paint:
It is important to try to paint in an environment that is as dirt- and dust-free as possible. Wetting down the floor both before you spray your paint and between each coat can help. You should also make certain that the surface itself is thoroughly cleaned before you begin.
Softness:
This happens when your paint is soft after it is dry, making it susceptible to water spotting and fingerprints for days after your paint job. This happens when you spray the undercoat or topcoat too heavily or don’t give sufficient drying time between the coats.
Mottling:
Mottling refers to a streaked appearance that might appear in transparent or metallic finishes. It can be caused by many different things, including using a spray pattern that is not balanced, tilting the gun, over-thinning or spraying on your clear coat before the basecoat has completely dried.
Grit:
Grit refers to the problem of solid particles of varying sizes being embedded in the surface of your paint. This can happen when the paint or primer is not strained or stirred properly. It can also happen if you are using a can of old paint. It is possible to fix this issue by allowing it to cure and then sanding and re-spraying.
Pimpling:
These are swollen areas that appear in the surface months or weeks after your paint job. They result from moisture that is trapped under the surface of the paint. To avoid this, try to paint in a dry area, using a dehumidifier if the area in which you live is one with high humidity.
Discoloration:
This can happen when you paint over body filler or glazing putty, and it appears as a yellow stain in the topcoat. It can be caused by using either too much or too little hardener in your filler, not mixing the filler completely or priming before you’ve allowed the filler to cure completely.
Blushing:
In areas with high humidity levels, blushing can happen when the evaporation of the solvent reduces the surface temperature below the dew point. This can cause moisture in the paint layer, leaving a clouded look to the surface. You can fix this problem by adding retarder to the paint mixture and recoating the area. Choosing a high-quality reducer that is designed for the conditions in which you will be painting can help to avoid this problem.
Conclusion:
The main purpose of undercoating is to check rust especially in the body components like frame rails along with other exposed metal parts. Underbody coating can also reduce wear and tear of the automotive vehicles.Undercoating gives you an extra layer of protection against rust and corrosion, protecting your car. Undercoating will eventually wear out, but you can get years of protection from it. Even vehicles in warmer climates gain protection as debris is repelled and kept away from eating at the vehicle.