Underbody Coating
INTRODUCTION
In a car body there are many sub bodies that are interconnected with each other. These sub bodies constitute the whole car exterior looks. One of such sub body is the underbody. The underbody of the vehicle is responsible for keeping the car’s cabin and chassis/frame connected to each other as a single entity while making the floor of the car. The underbody is exposed to air, water, dirt and many in the surrounding environment and tends to wear, tear and corrode over a period of time. This corrosion leads to rusting of the body and damage occurs to the car. To prevent these types of wear and tear in the underbody it is coated with protective materials and the process is called underbody coating. Automotive coatings and the processes used to coat automobile surfaces exemplify the avant-garde of technologies that are capable of producing durable surfaces, exceeding customers’ expectations of appearance, maximizing efficiency, and meeting environmental regulations. These accomplishments are rooted in 100 years of experience, trial-and-error approaches, technique and technology advancements, and theoretical assessments. The critical performance factors driving the development and use of advanced automotive coatings and coating technologies are (a) aesthetic characteristics; (b) corrosion protection; (c) mass production; (d) cost and environmental requirements; and (e) appearance and durability.
AUTOMOTIVE COATING AND PAINTING
At the beginning of the automotive industry about 100 years ago, cars were painted with a varnish-like product that was brushed onto the vehicle surfaces; this coating was sanded and smoothed, and then the varnish was reapplied and refinished to establish several layers of the coating. After multiple layers of varnish were applied, vehicles were polished to produce shiny surfaces. Some manufacturers employed a combination of brushing, dipping, and even pouring to fully cover and protect various parts of a car. All of these coating steps were implemented manually, and it was not uncommon for the period between the beginning of the coating process to the end, when the coating was dry and the car was ready to sell, to take up to 40 days. Between the 1920s and 1940s, automotive coating technologies transitioned to using spray equipment and “stoving enamels” that were based on alkyd resins; these two advancements decreased application and drying times to a week or less. Because of the newly developed spray coating technologies, the surface finishes were more even and less sanding was needed.
MODERN AUTOMOTIVE COATING PROCESS
Modern automotive coating methods consist of five main steps.
- Pre-treatment: removes and cleans excess metal and forms an appropriate surface structure enabling bonding of a corrosion protection layer.
- The next step is electrodeposition (ED) of the anti-corrosion or rust prevention layer.
- A sealer like Poly Vinyl Chloride (PVC) is applied for anti-corrosion, elimination of water leaks, and minimization of chipping and vibrational noise.
- A primer is then applied to promote adhesion between the surface and the basecoat; it also imparts a smoother surface for subsequent layers and has anti-chipping properties.
- Finally, the topcoats that include a basecoat and clearcoat are applied; they provide surface properties that are sought after, including color, appearance, gloss, smoothness, and weather resistance.
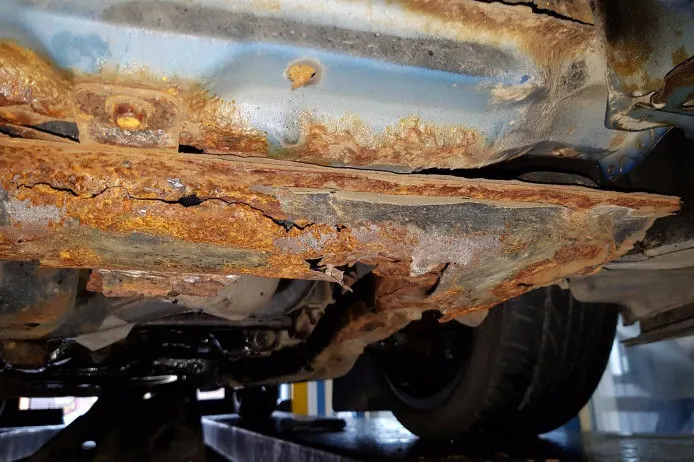
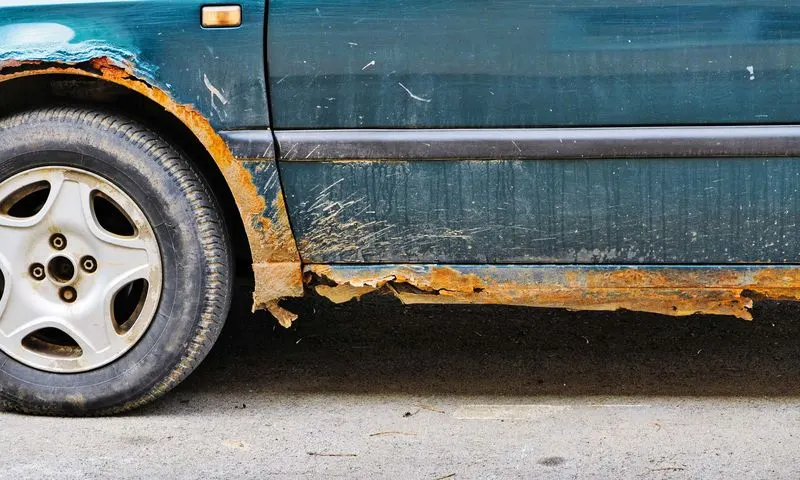
UNDERBODY COATING
This is the third step in the automotive coating process. underbody coating (UBC) and seam sealing using PVC (Polyvinyl Chloride) and urethane. This sealing has multiple purposes, as shown below.
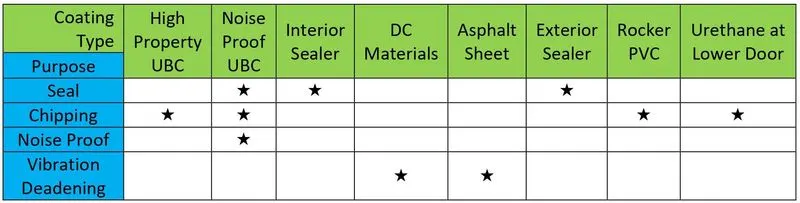
The sealant is applied around and inside the doors, hood, trunk, and front dash, and onto the exterior and interior of metal joints and outer area of the back wheel well; application of the sealant is accomplished either manually or with robots and prevents air and water ingress and inhibits rust formation. Recently, PVC and acryl/urethane sealants have also been used in the underbody areas, a process called the Dampening Coat (DC), to impart noise-proofing and vibration-deadening. The sealant is applied around and inside the doors, hood, trunk, and front dash, and onto the exterior and interior of metal joints and outer area of the back wheel well; application of the sealant is accomplished either manually or with robots and prevents air and water ingress and inhibits rust formation. Recently, PVC and acryl/urethane sealants have also been used in the underbody areas, a process called the Dampening Coat (DC), to impart noise‐proofing and vibration‐deadening. The noise and vibration are transferred from the engine, drive train, suspension system, road noise of the tires, and flowing air, and the underbody sealants reduce noise transfer into the passenger compartment of the automobile. The underbody coating also provides anti‐corrosion and chipping protection; typically, it is accomplished using robots equipped with airless sprayers. Figure 6 displays the lower door sections and rocker panel locations where PVC or urethanes are applied as an anti‐chipping protection, and shows the cross section of this layer with respect to the other coatings on the body parts. The noise and vibration are transferred from the engine, drive train, suspension system, road noise of the tires, and flowing air, and the underbody sealants reduce noise transfer into the passenger compartment of the automobile. The underbody coating also provides anti-corrosion and chipping protection; typically, it is accomplished using robots equipped with airless sprayers.
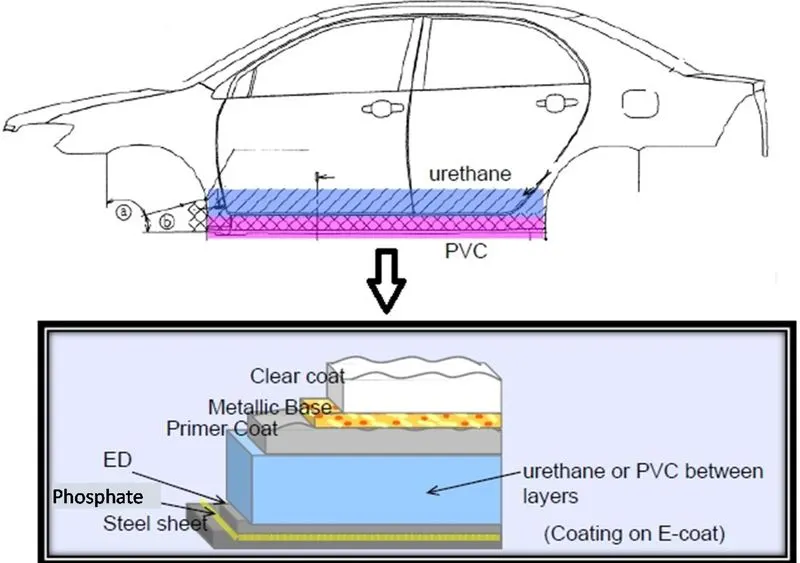
During this third step, it is also typical to apply a soft tip primer coat that improves the chipping resistance (resistance against chipping by flying stones or debris). This layer is applied to the front edge of the hood, which is an area prone to chipping shock, using a high elastic resin that resides between the ED and primer coats. Also, during the third step, the radiator supports, wheel housing, and under rear areas of the body are coated with a relatively dull black pigment called a blackout coating.
Underbody coating is a thick cladding (typically made of rubber) that is placed uniformly to the car’s underside. When the automobile is fresh off the lot and spotless, it is usually sprayed or painted on. But it’s acceptable if you apply the undercoating after a couple of years. This is because it might protect the undercarriage from additional harm.
THE DIFFERENCE BETWEEN RUST PROTECTION AND UNDERCOATING
Undercoating and rust protection often go hand-in-hand, but they are actually two different things. Rust protection generally goes inside your vehicle, while undercoating is used for protection outside of the vehicle, and there are a variety of coatings available. Depending on the level of damage and how much protection you want for your vehicle will determine which type of automotive undercoating you choose.
PURPOSE and NEED OF UNDERBODY COATING
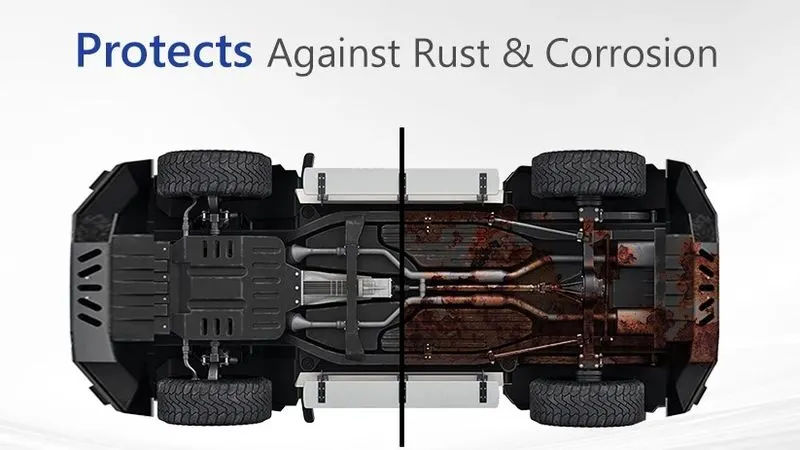
- Protects Against Rust & Corrosion
The primary objective of getting underbody coating done is preventing metal components that are exposed on the bottom side of the car to damage from corrosion. You can shut out the Adverse effects of corrosion on your car by simply applying a rubberised anti-rust coating all over the belly of your car.
- Reduces NVH (Noise Vibrations Harshness) Levels
Our country is filled with roads having uneven patches and potholes and while we manoeuvre our cars through such sections, the unpaved crumbs, and pebbles hit the car from underneath or get stuck in the wheel wells. The underbody coating’s consistency is so thick that the layer it creates absorbs all the unpleasant noises and vibrations and marginally improves the driving experience.
- Prevents Paint Chipping
Running on the highway or while pacing through a city road, you will often encounter sharp gravel or any other unattended object hitting the belly of your car with high momentum. This scrapes and chips off the metal from down below. A thick layer of Underbody Coating definitely comes to aid and minimises the effects of such contacts on the body. When your car travels at high speed on a highway, the small stones and debris hit your car’s underbody in this process and may lead to chipping of the underbody paint. Hence, it is advisable to have a thick layer of underbody coating to prevent paint from chipping.
- Protects Vital Components
Underneath a car is somewhere a lot of indispensable parts of a car are left exposed like the Engine, silencer, etc. One simply can’t afford to let these parts go bad due to rusting and hence in order to save yourself from a hefty repair bill, a considerably less expensive Anti-Rust Coating is a must.
TYPES OF UNDERBODY COATING
1. Rubberized Undercoating
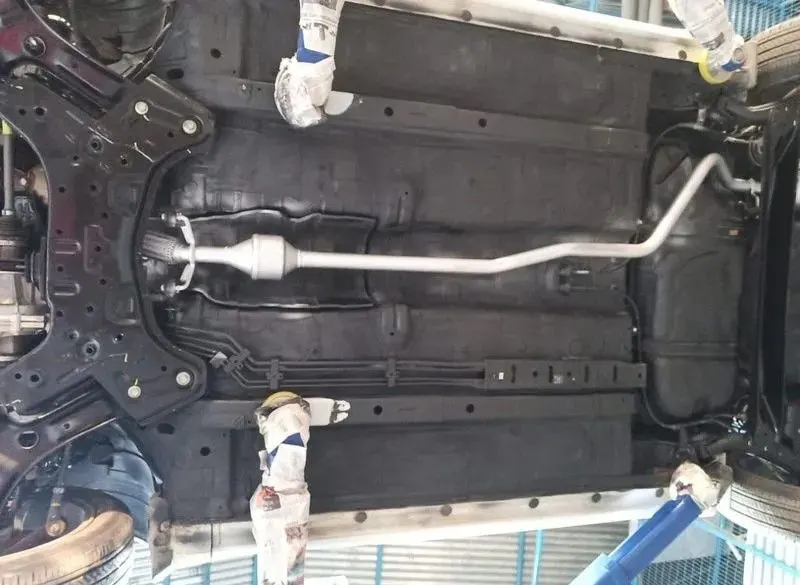
Rubberized vehicle undercoating is easy to apply and offers sound-cushioning as well as protection from dust, moisture, and dings or dents. In addition to your undercarriage, rubberized undercoating is also safe to use on wheel wells and quarter panels, and dries to a soft rubbery finish that prevents further rust, damage, or moisture seeps. The coating can be painted over and, if necessary for bodywork, can be easily removed with an undercoating removal spray. Overall, rubberized coating is generally the best option for protecting your vehicle's undercarriage, as it provides the simplest and best protective measures against rust and moisture.
2. Polyurethane Undercoating
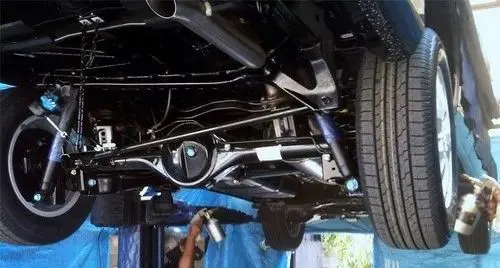
The other option for undercoating your vehicle is to use a polyurethane-based sealant. This type of vehicle undercoating is a little bit quicker and easier to apply. Oftentimes, polyurethane undercoating will come in canisters ready to preload into an application gun. This type of sealant works by seeping into all cracks and seams, displacing salt and moisture and oozing around rusty areas to bond with and protect unoxidized metal. It also sands quickly in case you'll need to perform bodywork and can be painted over. On the flipside, this type of car undercoating generally requires a little bit more surface prep work before applying -- sanding and applying an etching primer to bare metals before using are generally recommended.
3. Wax or Paraffin-Based Undercoating
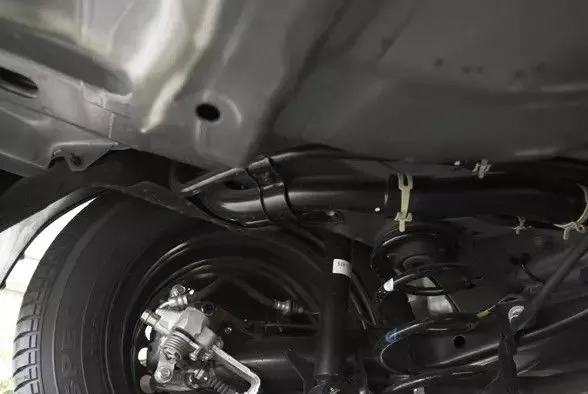
A paraffin-based undercoating will be the cheapest and quickest option available with which to protect the undercarriage of your vehicle. However, keep in mind that it will wear off quicker than other types of undercoating and will need to be stripped and reapplied at least once every year. Wax-based undercoatings never truly harden. During application, they drip or flow into seams and cracks to provide protective properties. They are usually available in a spray gun canister or in an aerosol can and offer at least a base protection in moderately humid climates.
4. Asphalt-Based Undercoating
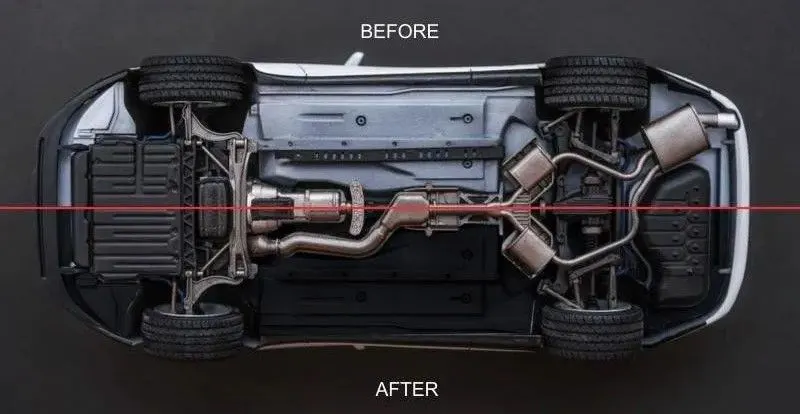
For standard vehicles, any of the aforementioned types of undercoating will provide sufficient protection. For large trucks and heavy machinery, asphalt-based undercoating provides a bit of extra durability against rocks, chips, and moisture. Asphalt-based undercoating generally contains a little bit of rubberized material that sets up firmly and also helps soften noise. This type of undercoating also needs more cure time than the other three, and is NOT paintable, making it best to use only for undercarriages.
ADVANTAGES OF UNDERBODY COATING
1 Fights Rust
It has a crucial function in preventing corrosion. Underbody coating is particularly useful if you live near the sea, where there is excessive humidity and rust is a common occurrence. If you live somewhere where it snows in the winter, you should seriously consider undercoating. During the monsoon season, cars are at high risk of getting corrosion. If you want to extend your car’s life you should get an underbody coating.
2 Absorbs Noise
Very strong undercoating, realize it or not, can attenuate noises that enter the cabin. The undercoating, which is frequently made of rubber, absorbs part of the rackets. The car’s occupants could avoid the road sounds — at least to some extent. So if you want a quite ride and pleasant experience it is always a good idea to consider getting an underbody coating.
3 Reinforcement
If your automobile already has an underbody covering, applying another one on top of it will not harm it. It will provide further protection for the underbody from water, road debris, gravel, and tiny stones. The factory coat would also have a lower risk of flaking away.
4 Prolong Car’s Life
A good undercoat protects not just the underbody from corrosion, but also the engine and gearbox! Less corrosion combined with slower wear and tear can extend the life of your car by many years. On the undercarriage, there would be fewer dents, dings, and scratches to worry about.
5 It can be self-applied
Rustproofing works best when you have this service professionally applied to your vehicle. If money is tight, however, and you have some basic car maintenance skills, then you can do the work yourself.
6 There are multiple undercoating methods that can be used
There are four different undercoating methods that are commonly used on vehicles that require this service. The electronic method is used when rust is present to stop its corrosive effect, which is a method that receives mixed reviews. A standard undercoating method applies a tar-like substance to the exposed components of the vehicle underbelly. A dripless oil spray applies a waxy substance that fills in the entire body of the vehicle, which hardens when it dries. Then there is the drip-oil method, which may cause dripping for up to 48 hours when applied. From a cost perspective, it is this final option that is most often applied at the dealership.
7 It can be applied to damaged areas
Over time, the underbelly of your vehicle is going to develop nicks, chips, and scratches because of the debris you encounter while driving. Unlike older forms of undercoating, which included the use of asphalt and animal fat, modern products provide a real layer of protection because it can morph into the various areas of small damage. A modern undercoating is usually wax-based, which creates a living barrier that your vehicle can use to promote a self-healing experience.
DISADVANTAGES OF UNDERBODY COATING
- It is less helpful if corrosion is already present.
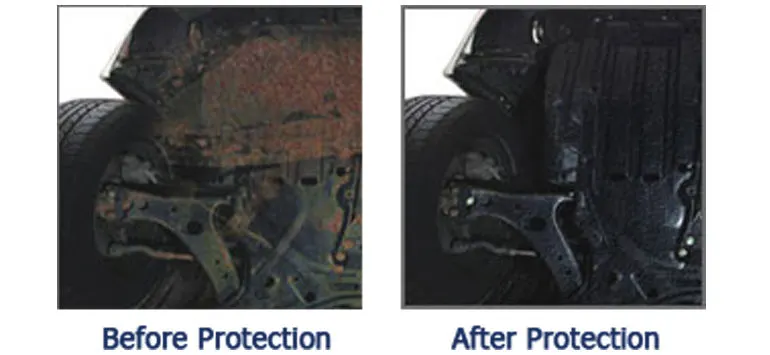
For an undercoating to be the most effective, it should be in place before the underbelly of your car begins to rust. If you apply it over corrosion, you will still isolate the metal from further moisture and airflow, which is good, but the existing oxidizing/rusting process will still continue to occur. After rust is already present, applying an undercoating will slow the continuation of the corrosion process and will make your vehicle look better… until the rust breaks its way through the layer of undercoating you’ve applied. If you have rust present, it is better to remove the rust and then apply the undercoating.
- It works best on new cars.
If you’ve purchased a used vehicle, then the cost of preparing the underbelly for an undercoating might be more than the value of the car. You must remove all the residue from the bottom before it can be applied. Failing to do so will seal in the debris that is present already, which can lead to more problems. The best time to have an undercoating applied is when a vehicle is purchased new because it offers a superior level of protection then.
- Most vehicles make it five years before corrosion begins to show.
For vehicle owners who purchase something new every 3 to 5 years, then rustproofing may not be a good use of your cash. Although an undercoating does add value to a used car, that only applies when the rustproofing product used provides a transferrable lifetime warranty. Most vehicles that are on the road today are able to make it five years before any corrosion begins to show. It may be 7 to 10 years before the functionality of the vehicle is negatively impacted by the lack of an undercoating. If you wash your vehicle regularly, especially during the winter months, then you might be able to save the time and money required for this service.
- A third-party undercoating service might void your vehicle’s warranty.
Some new cars no longer need the undercoating service provided because the structure of the vehicle has it built-in already. If you hire a third-party provider to apply an undercoating, you could void the corrosion-perforation warranty that is factory-provided. Most vehicles today that leave the factory floor are all provided with included rust-proofing. If you are purchasing a used vehicle, an undercoating to a clean underbelly could extend the life of the vehicle and give it more value. For new vehicle purchases, you should ask the dealer what rustproofing options are included before paying for a separate undercoating option. Ask for documentation of what is provided instead of taking the word of the salesperson or the service personnel. Many dealers have language in their terms and conditions that only written agreements are binding.
- It adds weight to the vehicle.
Although the amount of weight added to a vehicle with an undercoating is minimal (between 10 to 20 pounds for most vehicles), there is a small element of fuel economy to consider. When your vehicle weighs more, the distance you can travel on a single tank of fuel is reduced. The undercoating might reduce your efficiency by up to one mile per gallon, which creates a small additional fuel cost over time. Still, the effect on mileage of this additional weight is negligible compared to the effect a driver can have by the way they drive.
- An undercoating is not impervious to damage.
An undercoating can provide a hardened layer of protection against dirt and debris that may cause corrosion. Depending on where you drive, however, the lifespan of this product may be minimal. If you drive your vehicle on gravel roads or dirty areas frequently, you reduce the integrity of the protective layer. You might find that your undercoating begins to chip off in as little as 25,000 miles because of this issue. Driving in a salty environment is not the only threat to the integrity of this product.
- It must be reapplied every 3 to 5 years for the best results.
The only way for an undercoating to provide ongoing protection for your vehicle is to have the service repeated frequently. Most owners can have a new layer applied in about 5 years without worrying about their underbelly being compromised. In salty or destructive environments, however, you may need to have a new undercoating applied every 3 years for the best results.
STEP-BY-STEP PROCEDURE OF UNDERBODY COATING
It is better to leave this to auto repair shop guys. But, if you want to do it yourself, here is how to do spray undercoating at your garage.
- The first step of undercoating your car is to clean the surface. If you have been driving your car in the winter without giving the underside of your car a proper wash, use a power washer along with a 90-degree angle and give the car a nice clean wash and blow off any loose debris and dirt.
- Use a proper jack stand and lift the car. Make sure to double check the stand before you get under there. Be sure to put a drop cloth under the car in case of any accidental oil drips.
- Once you lift the car, remove the wheels to avoid over-spray and to get full access to the wheel wells. Dry the under-body of the car with a terry towel, compressed air, and a few fans to ensure the area has no moisture remaining.
- While drying, you should inspect the area for rust on sensitive electrical connectors, exhaust or other areas that get hot. They can be wired brush or taped off before applying any sort of coating.
- Tape off any electrical areas to avoid covering the connectors with undercoating. It will be tough to remove or replace parts if need to be in the future. The goal of the coating is to cover the metal frame and chassis.
- The initial step is widely considered the most important step for any paint job. It will also affect the end result. That’s why it is important to brush off any heavy oxidation and old flaking paint to ensure a solid bond with the coating. Take your time and wear safety glasses.
- If you have a rusty undercarriage, it is suggested using a rust primer to coat the oxidized surface prior to undercoating. Use a sprayer and spray a light coat so that it will dry fast.
- Now, it’s time for the rubberized undercoating. Use a larger front-end sprayer to accommodate the thicker viscosity of the primer.
- Slow your arms down when spraying thicker liquids. Whether you are using a spray can or an electric sprayer, you want to stay about six to eight inches away. Use about 50% overlapping motions and do one full coat, let it dry and then add the second one.
- After you are done with your first coat, let it dry for half an hour and apply the final coat. Make sure you read the product label for dry times as it’ll be different for each liquid.