Shell Meshing of Plastic Component using ANSA
AIM :
To generate 2D meshing for the given plastic model.
OBJECTIVES :
- For the given plastic model, check for all the geometrical errors and resolve them.
- After clearing the geometrical errors, generate a mid-surface for the model and explain the method used to obtain mid-surface, in detail.
- Finally, generate 2D meshing of given target length for the mid-surface such that all the given quality criteria are cleared and the features are captured properly.
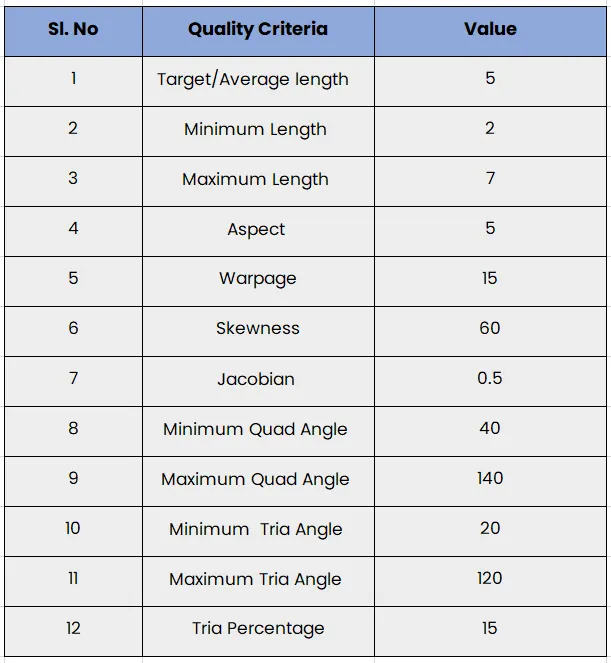
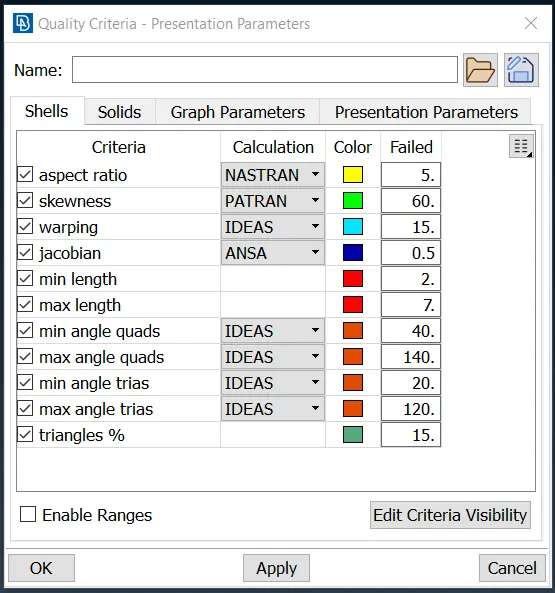
QUALITY CRITERIA :
PROCEDURE :
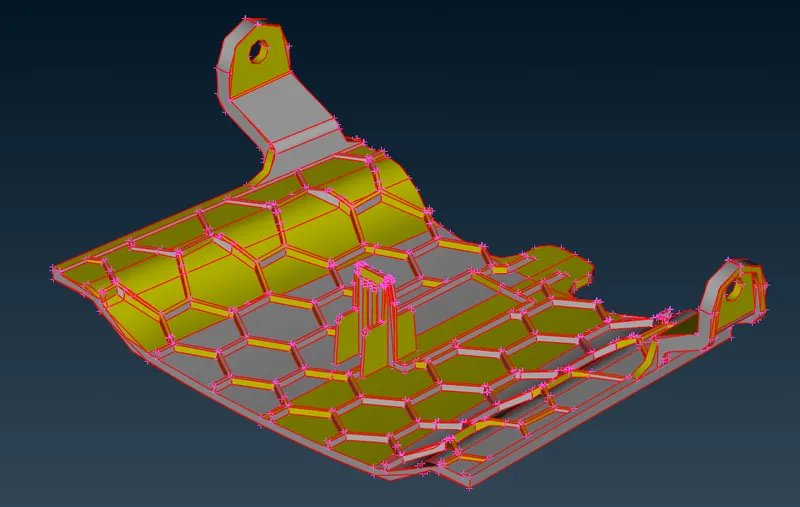
The plastic geometry is imported into ANSA as shown.
Geometry Cleanup :
For the above imported geometry, we perform geometry cleanup so as to make sure there are no errors present in the geometry and thereby preparing it for meshing. First, we increase the resolution of the CONS by using the ‘perimeters-length’ function and thereby capturing all the geometrical features properly.
We provide node spacing of 1 mm as shown.
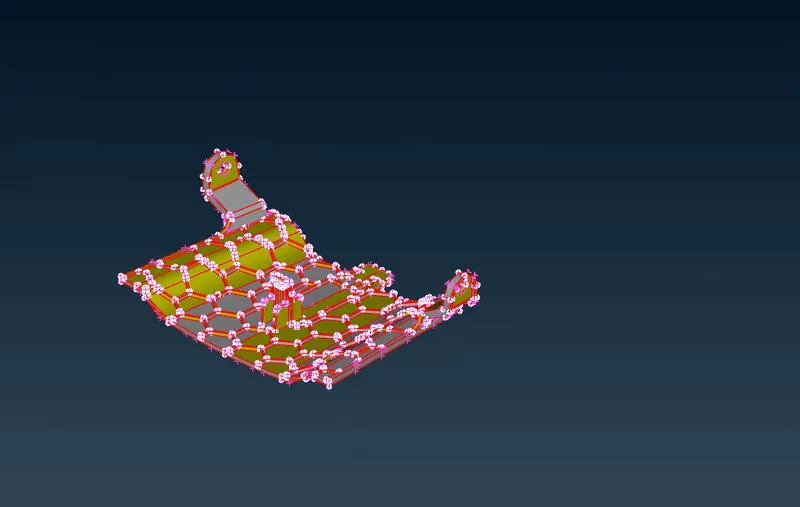
Next, we obtain connectivity between the CONS by using the ‘topo’ function. Also, we orient the surfaces such that all the surfaces are facing towards a single normal direction (grey on the outside, yellow on the inside).
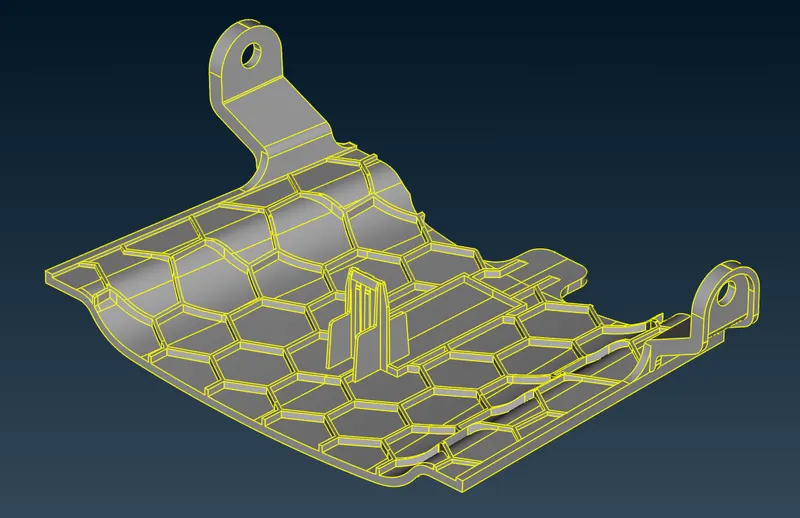
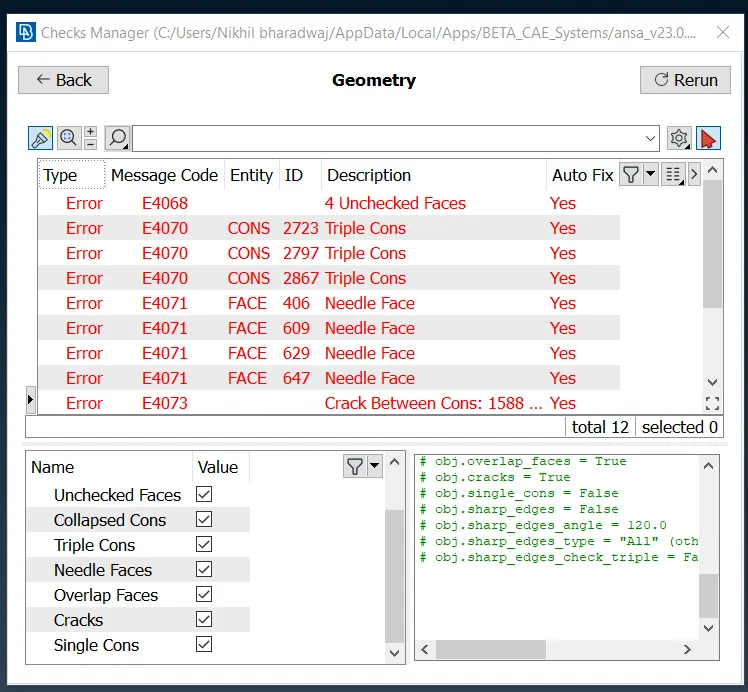
Next, we run a geometry check to identify all the errors present in the geometry and we further resolve them by using the auto-fix option.
Mid-Surface Extraction :
For the plastic geometry, we have different sections of varying thicknesses. In order to obtain the mid surface for such sections, we use various methods to extract the mid-surface as shown.
For the bottom and side faces of the geometry, we use the offset function to obtain the mid-surface extract as shown.
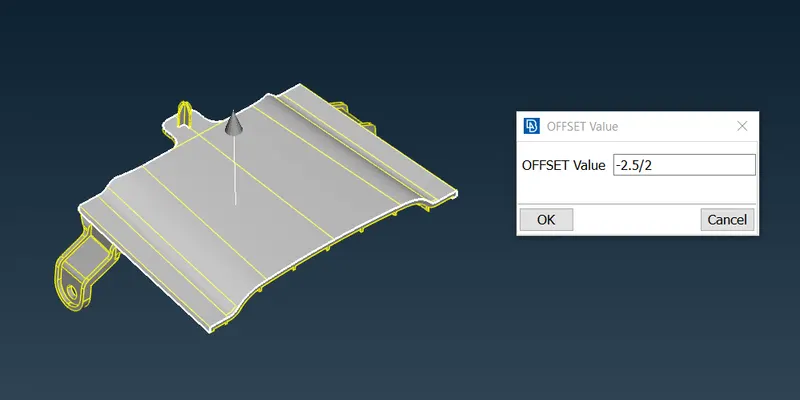
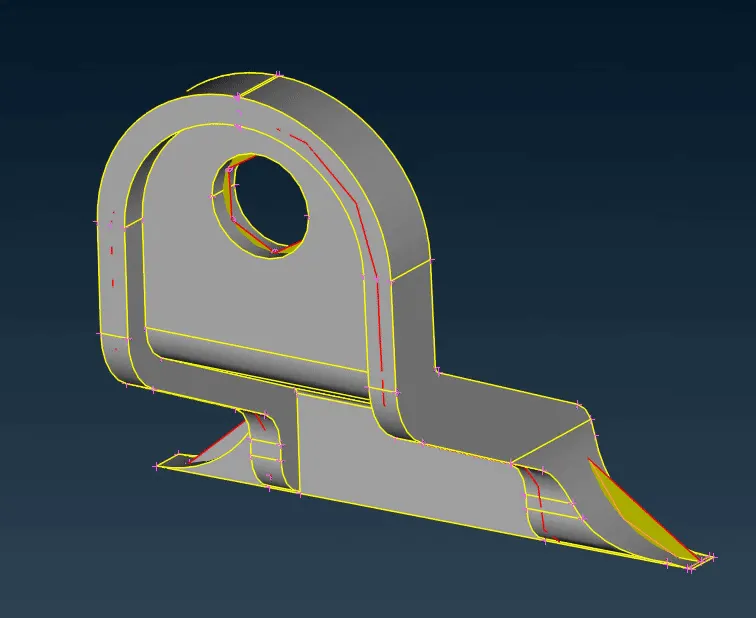
For sections of varying thickness, we manually offset each surface to a value of half its thickness. This process is repeated for all the surfaces and are joined together by using the extend option so as to obtain our final geometry.
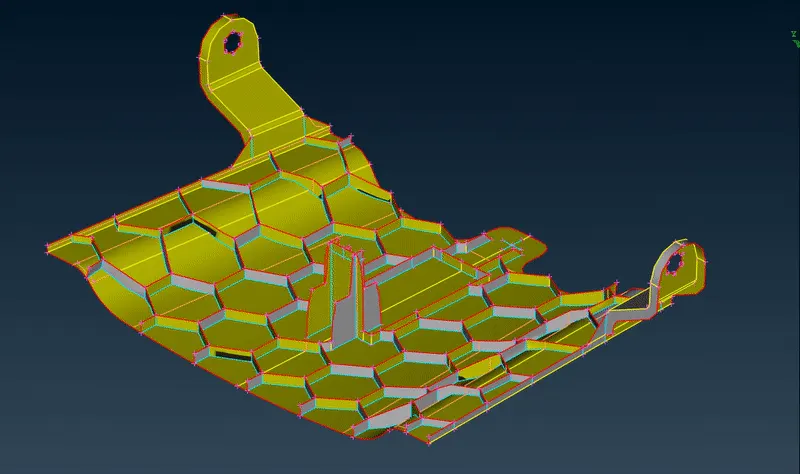
Our final mid-surface geometry is obtained as follows.
Meshing :
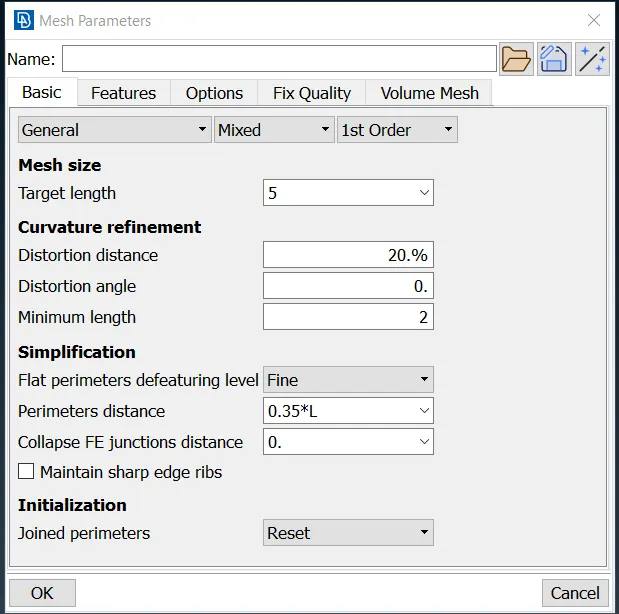
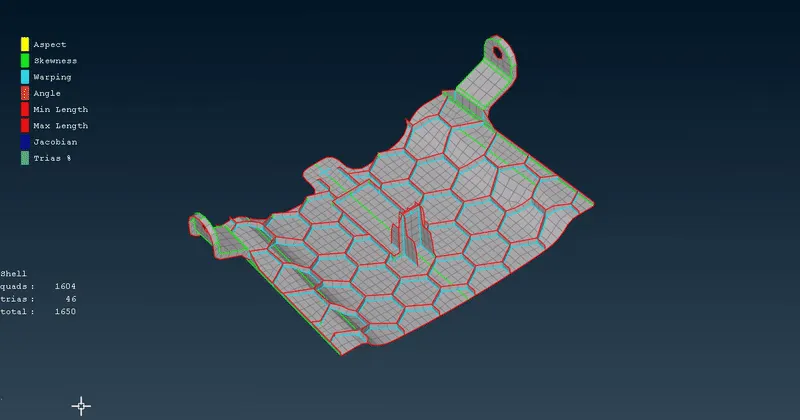
After the mid-surface has successfully been extracted for the geometry, we then move on to meshing. First, we define the target length for the required mesh element size. This is done by providing the target length value in the mesh parameters tab as 5 mm.
Next, we define the quality criteria so as to maintain the mesh quality within the required range and thereby obtaining a good mesh flow.
Finally, we manually generate mixed meshing for the geometry by using the ‘best’ meshing algorithm.
- Various trias are resolved such that they do not fall on the feature line. Care is taken such that there are no adjoining trias across the geometry.
- Rotating quads are avoided and meshing is smoothened such that there are no off elements (all mesh elements clear the quality criteria).
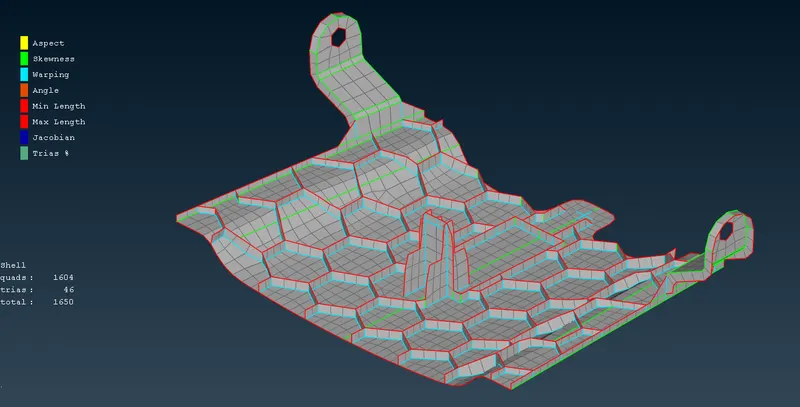
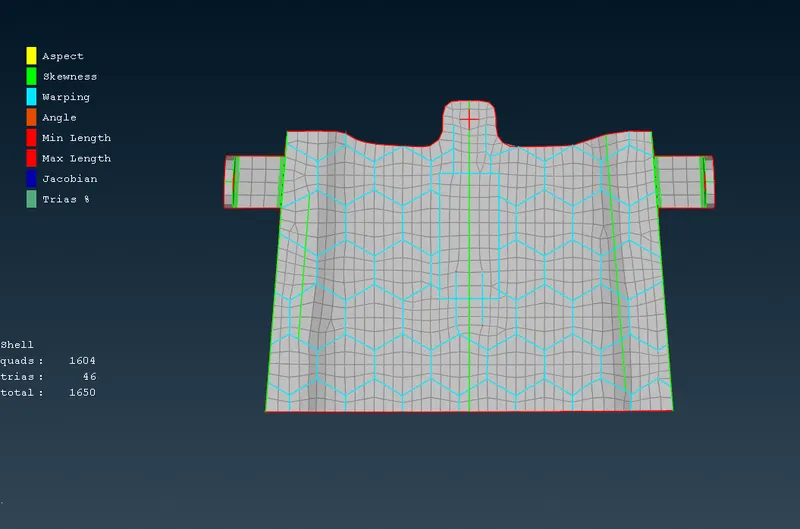
Final Meshed Model :
Assigning Thickness :
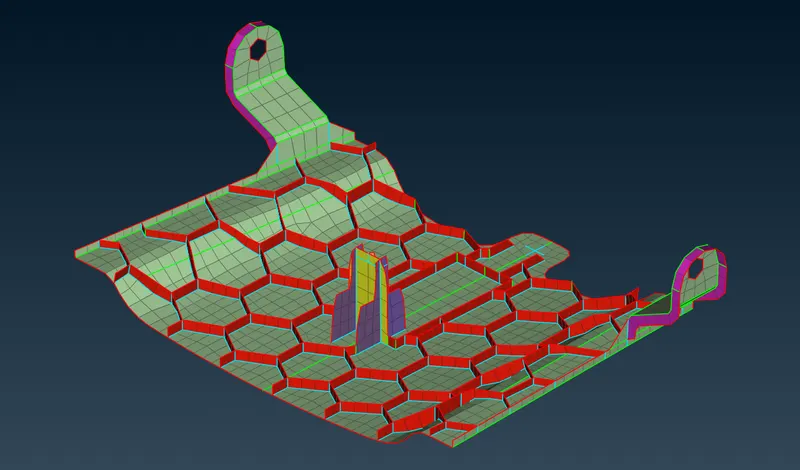
Finally, after the meshed geometry has been obtained, we then move on to assigning thickness to the various components. As different parts of the model are of different thicknesses, we create PID’s of that particular thickness values.
Thereby, the thickness values are assigned as follows.
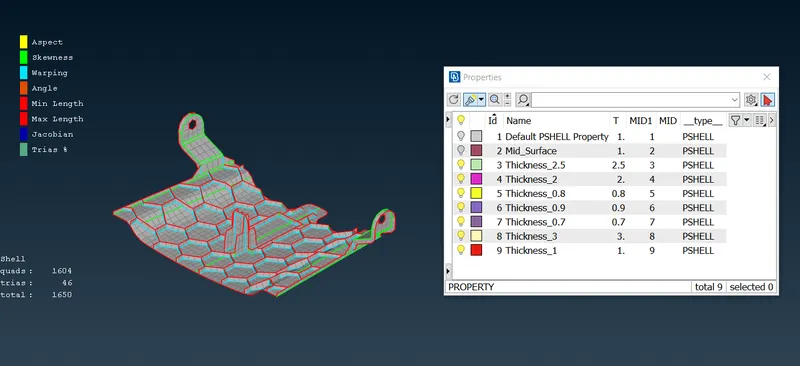
The PID view of the various assigned thicknesses is obtained as follows.
CONCLUSIONS :
For the given sheet metal component, geometry cleanup has been carried out and all the geometrical errors have been manually resolved as well as by using auto-fix.
2D mixed meshing has been generated for each section of the component such that a smooth mesh flow is obtained. The trias have been resolved as much as possible such that they do not fall on the feature lines, thereby obtaining our final mesh with all the elements clearing the quality criteria (no off elements).
Each section of the meshed geometry have been assigned to their respective thickness values by creating PID’s for the same.
Final Model File : https://drive.google.com/file/d/1KYLCT-hit-iamb24oIwZKgEU5mhiQ6pl/view?usp=share_link