REVIT_Usage of Collabrate tool_Week 6
1) Open an architectural template. Using the Manage tab set project base point and project shared coordinates for the project
AIM:TO OPEN AN ARCHITECTURAL TEMPLATE, AND TO SET PROJECT BASE POINT AND PROJECT SHARED COORDINATES FOR THE PROJECT BY USING MANAGE TAB
TOOLS AND COMMANDS USED:
- ARCHITECTURAL
- MANAGE TAB
- SHARED COORDINATES
- COLLABORATE
- GRID
PROCEDURE:
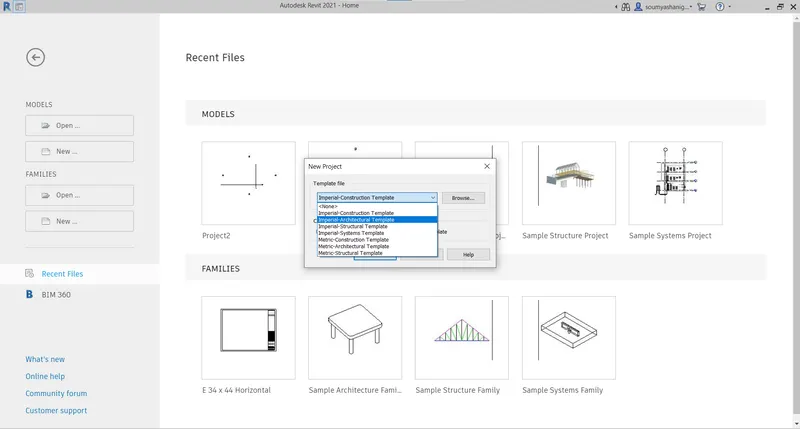
STEP-1:Open the Revit file and choose the architectural template
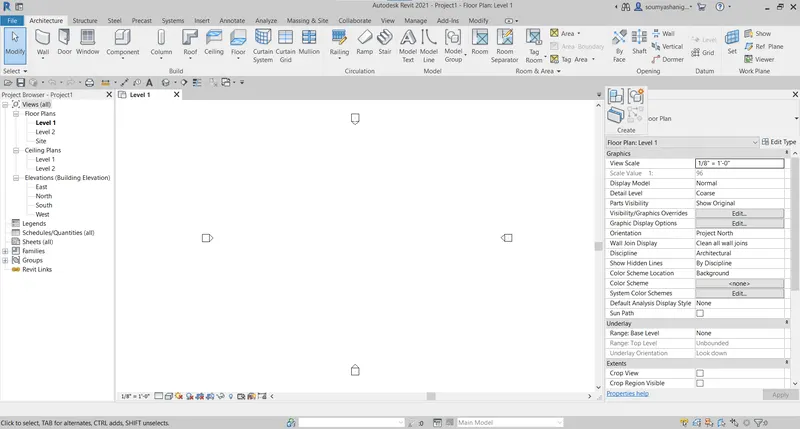
STEP-2:Select the architectural tab and choose grid option
STEP-3:draw Traverse and longitudinal grids
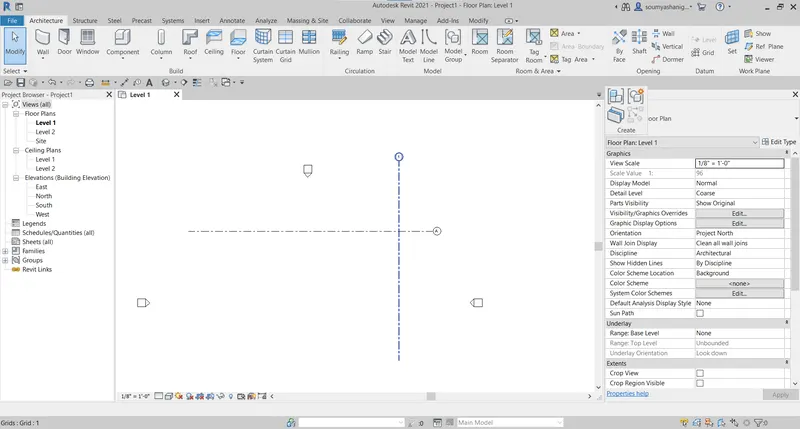
STEP-4:Name the grids as1,2,3 etc and a,b,c etc
STEP-5:Select the manage tab and seelct specify coordinates at point
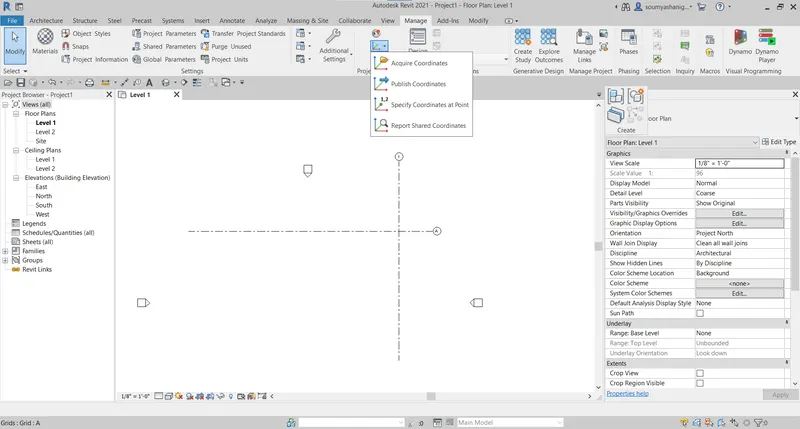
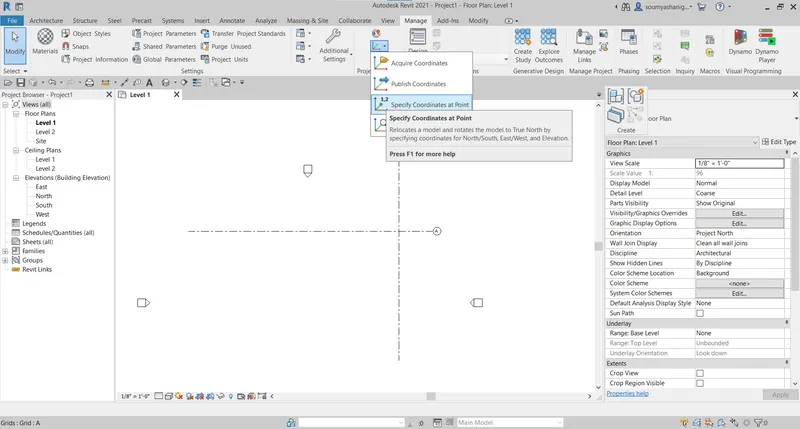
STEP-6:Select one grid then a comment box appears then make neccesary changes if required and specify the point to 0'0''.
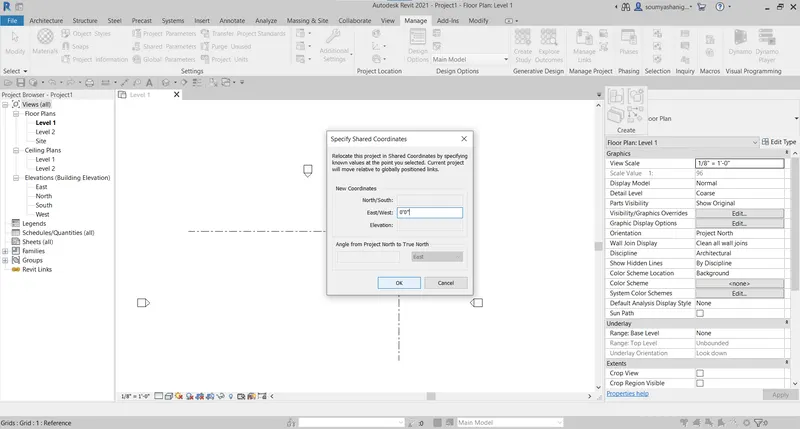
STEP-7:Select another grid and specify that to 0'0''
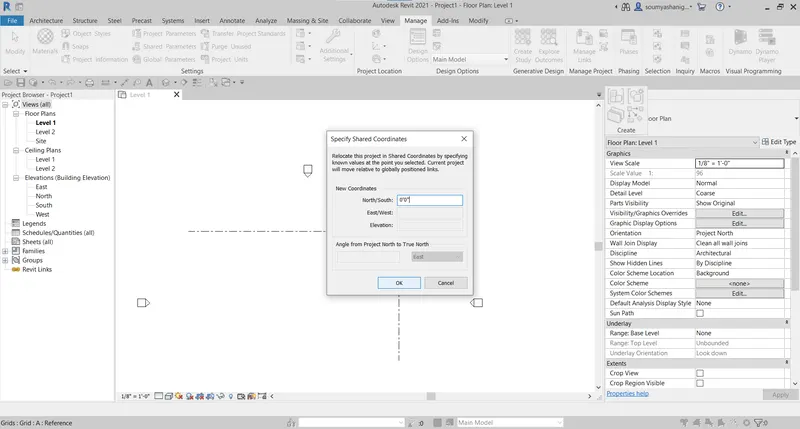
STEP-8:CLICK OK
STEP-9:Now save the model in appropriate location
STEP-10:save the model as Residential building_Arch and click save
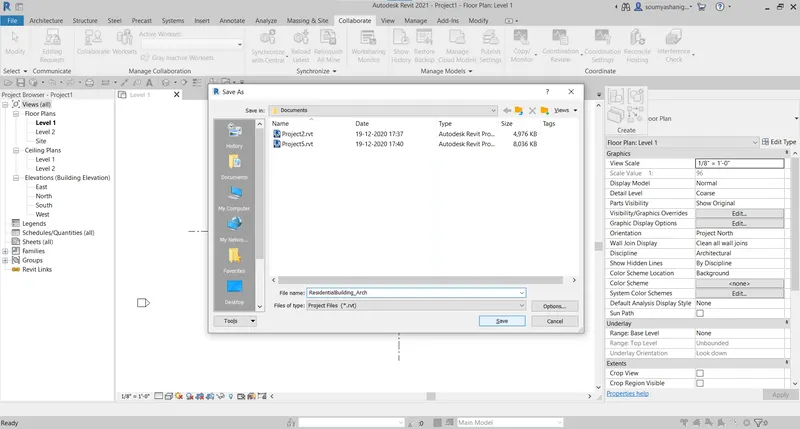
RESULT:THe project point and shared coordinates for the project is successfully created
2) Open another new file but with a structural template. Using manage tab set project parameters the same as the architectural model. Copy the parameters from the architectural model to the structural template or enter the parameters manually into the structural model
AIM:TO OPEN THE ANOTHER NEW FILE AND CREATE A STRUCTURAL TEMPLATE AND SELECT PARAMETERS SAME AS ARCHITECTURAL TEMPLATE USING MANAGE TAB
TOOLS AND COMMANDS USED:
- STRUCTURAL
- GRID
- MANAGE
- COLLABORATE
PROCEDURE:
STEP-1:Open the revit software and select structural template
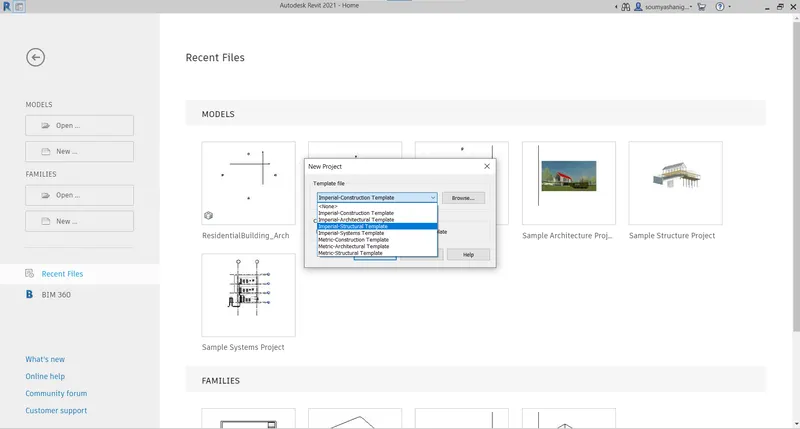
STEP-2:Now select the structural tab and select grids
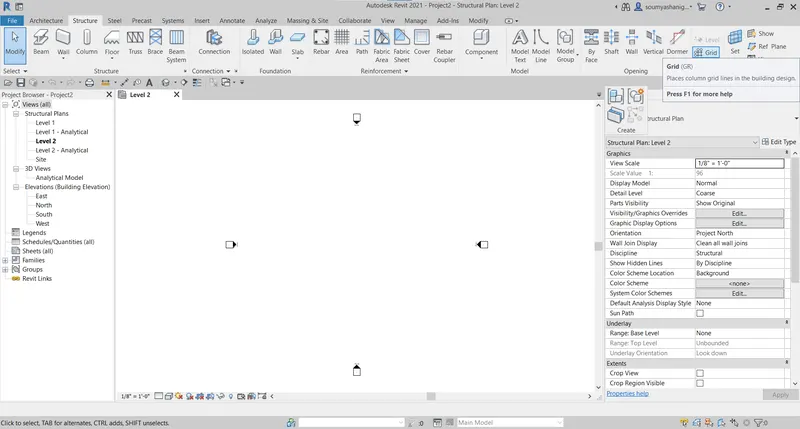
STEP-3:Now draw longitudinal and traverse grids
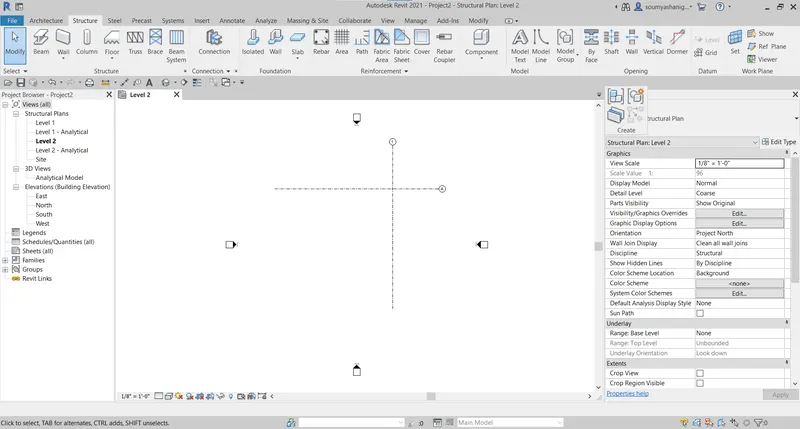
STEP-4:Rename the grids names as a etc and 1 etc
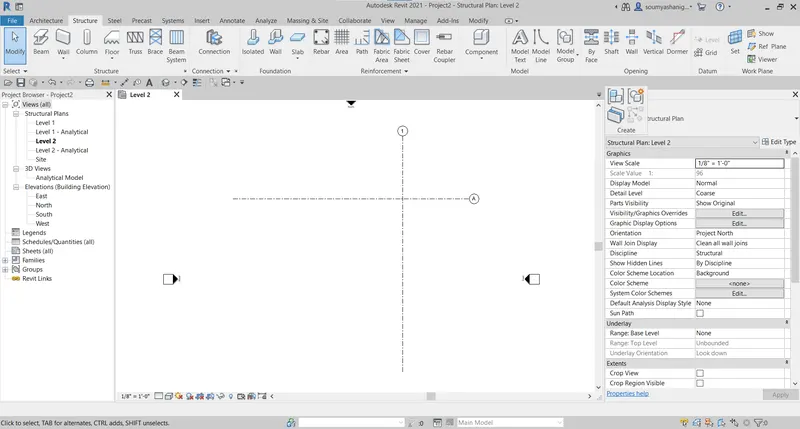
STEP-5:Select the manage tab and choose the coordinates option
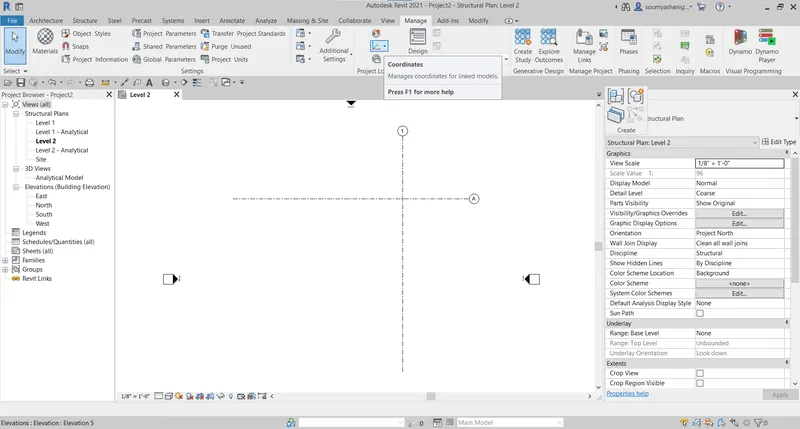
STEP-6:Now select the specify coordinates and choose grid
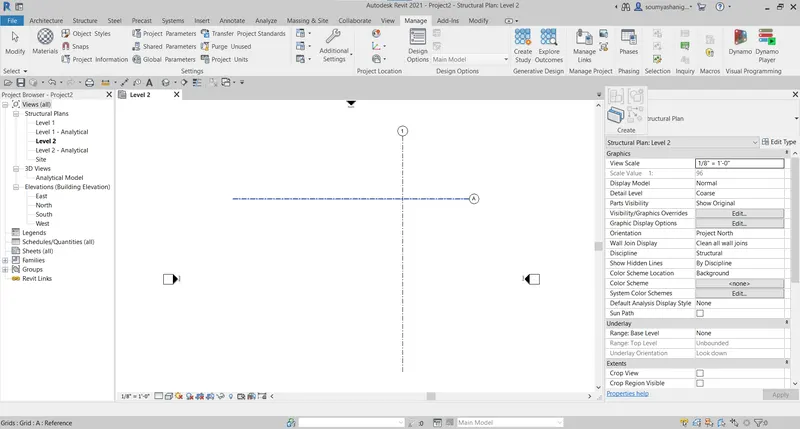
STEP-7:After selecting grid a comment box appears then change require changes
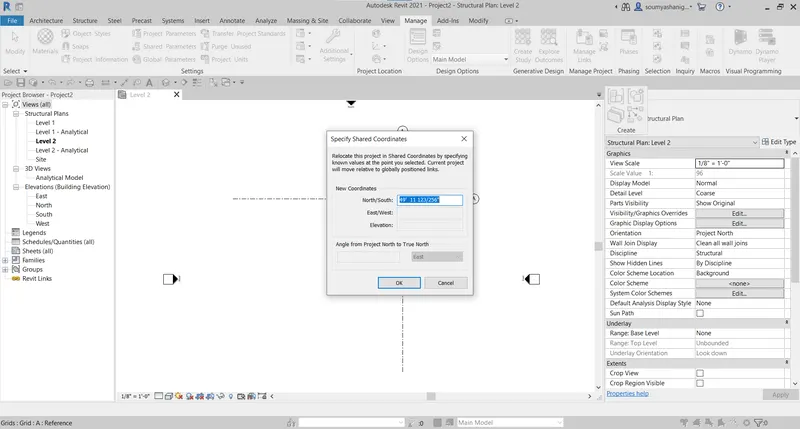
STEP-8:now change the coordinates to 0'0'' and click ok
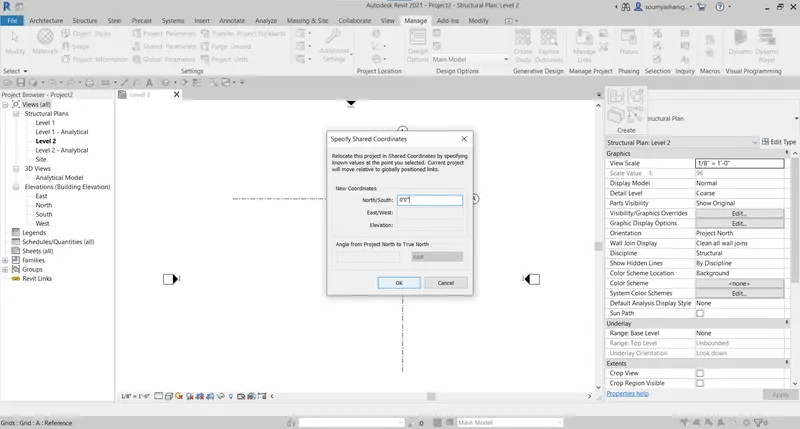
STEP-9:save the project in appropriate location
STEP-11:save the project as STRUCTURAL BUILDING _ARCH
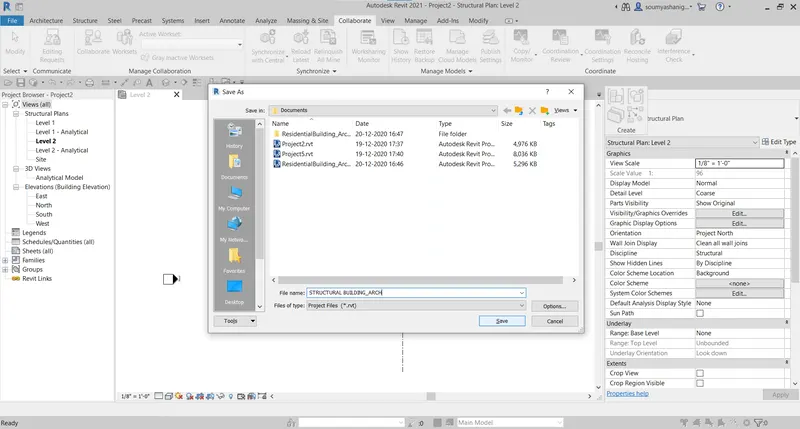
STEP-12:Click on save option
RESULT: PARAMETERS ARE ENTERED MANUALLY TO THE STRUCTURAL MODEL SUCCESFULLY
3) Re-open the architectural model. Using the tools under the Collaborate tab make the architectural model a central model ( enabling simultaneous working on the model )
AIM:TO MAKE THE ARCHITECTURAL MODEL A CENTRAL MODEL BY USING THE TOOLS UNDER COLLABORATE TAB
TOOLS AND COMMANDS USED:
- OPEN
- COLLABORATE
PROCEDURE:
STEP-1:Open revit file and open previously created architectural file by choosing open option
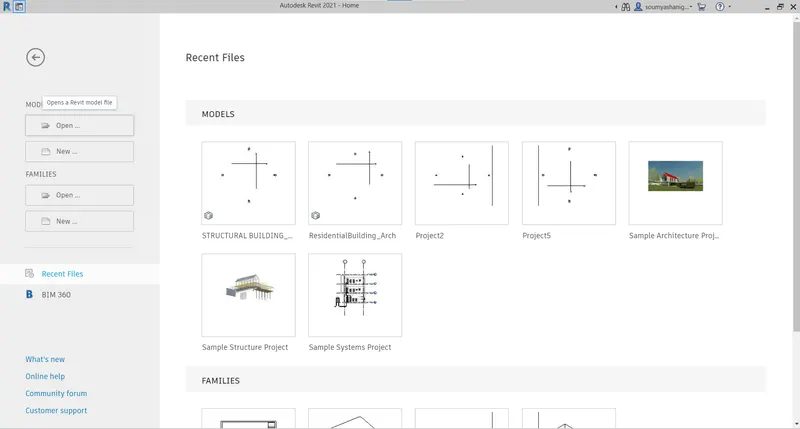
STEP-2: A group of projects are displayed then select the required model to open and click open
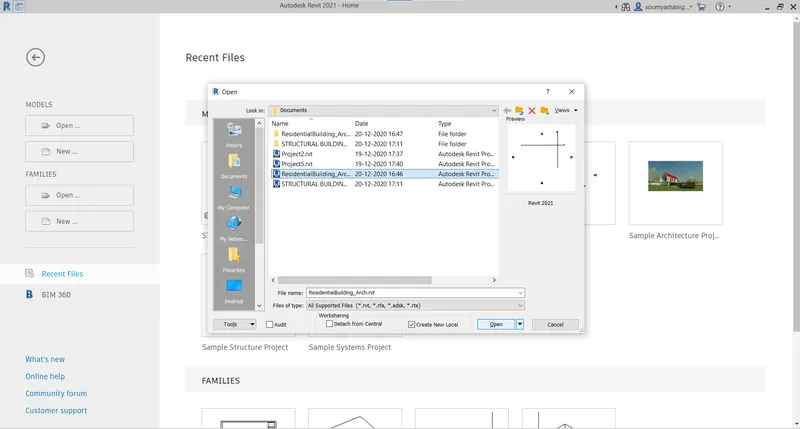
STEP-3: Now select the collaborate tab and select collaborate
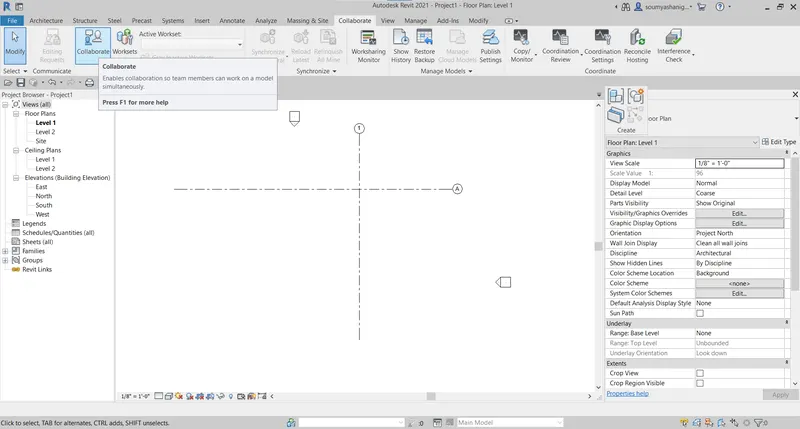
STEP-4:Now a dialog box appears to choose the file either to save in within network or in BIM360
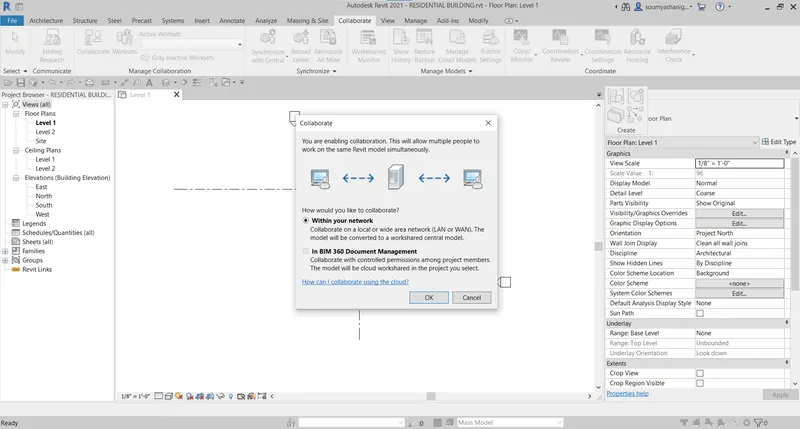
STEP-5:Now click on within network option and click ok
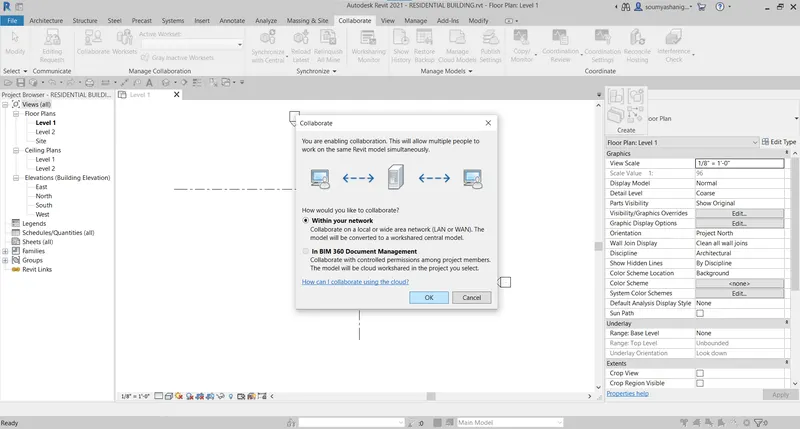
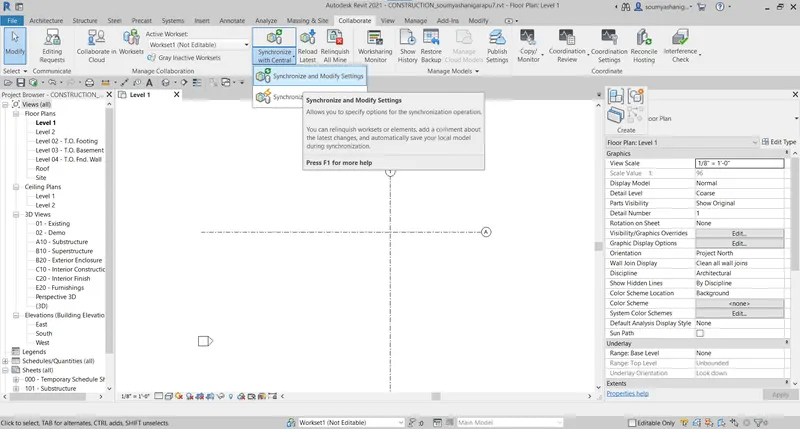
STEP-6:Now click synchronize with central tool under collaborate tab
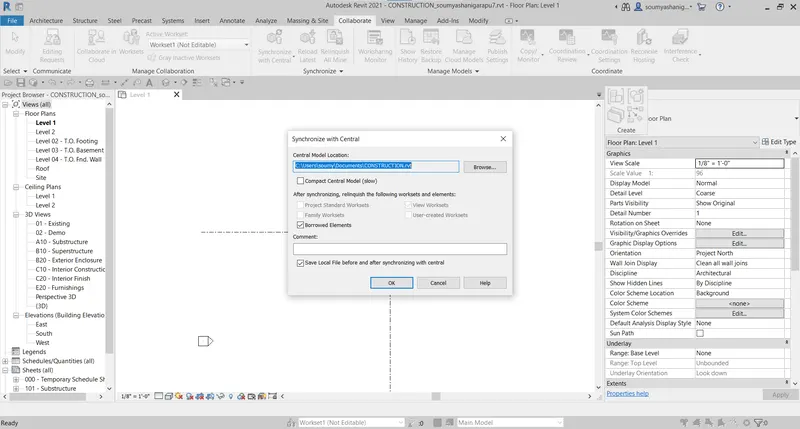
STEP-7:a dialog box appears then click ok
STEP-8:Now save the file in appropriate location by choosing save as OPTION
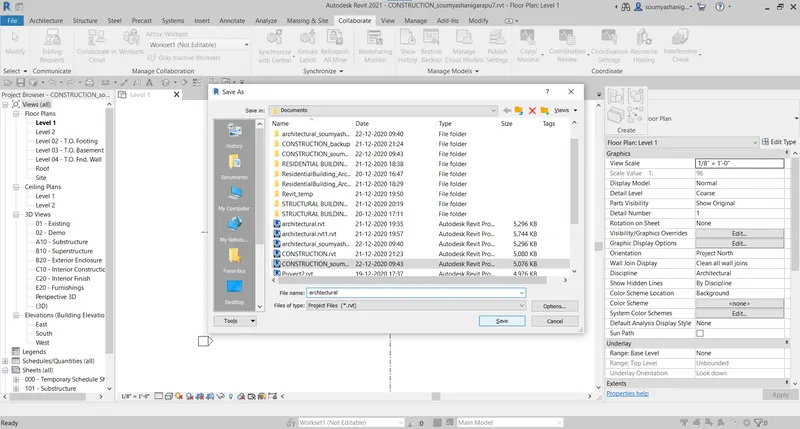
STEP-9:Save the file as with proper name and save it
RESULT:ARCHITECTURAL MODEL WAS SUCCESSFULLY MADE AS CENTRAL FILE BY USING COLLABORATE TAB
4) Create the Grids Longitudinal and Transverse pattern for the project similar to the task done in Week 2
AIM:TO CREATE THE GRIDS LONGITUDINAL AND TRANVERSE PATTERN
TOOLS AND COMMANDS USED:
- Grids
- Architectural
- Pin
PROCEDURE:
STEP-1:Open the revit file and select architectural template
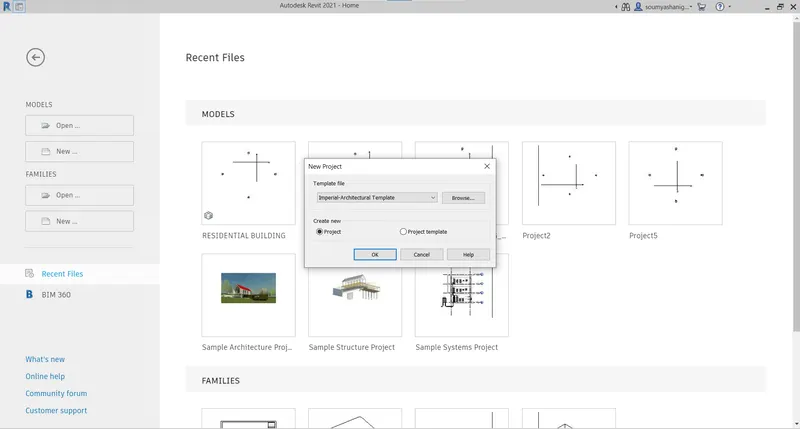
STEP-2:Click ok
STEP-3:Select the architectural tab and select grids
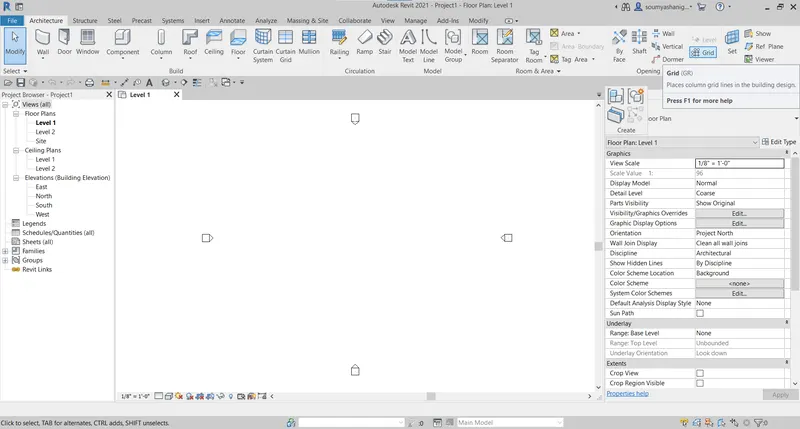
STEP-4: Draw logitudinal grids with the distance of 30 and name them as 1,2,3,4,5
STEP-5:In similar way draw traverse grids with the distance of 30 and name them as A,B,C,
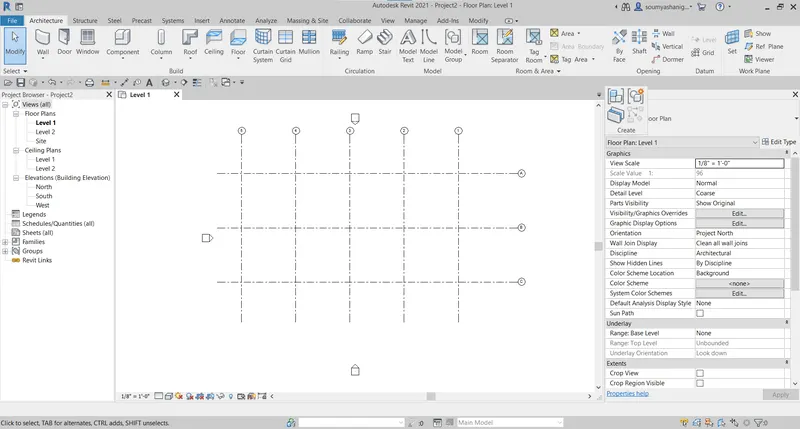
RESULT:Longitudinal and traverse grids are created successfully
5) Synchronize the changes from the local copy to the central file of the architectural model.
AIM:TO SYNCHRONIZE THE CHANGES FROM LOCAL COPY TO THE CENTRAL FILE OF THE ARCHITECTURAL MODEL
TOOLS AND COMMANDS USED:
- SYNCHRONIZE
- COLLABORATE
- TEMPELATE
- MANAGE
PROCEDURE:
Open previously created question model
STEP-1:Click colloborate tab and select colloborate tool
STEP-2:A dialogbox appears either to choose in network or BIM360 and select the required option i.e(WITHIN NETWORK)
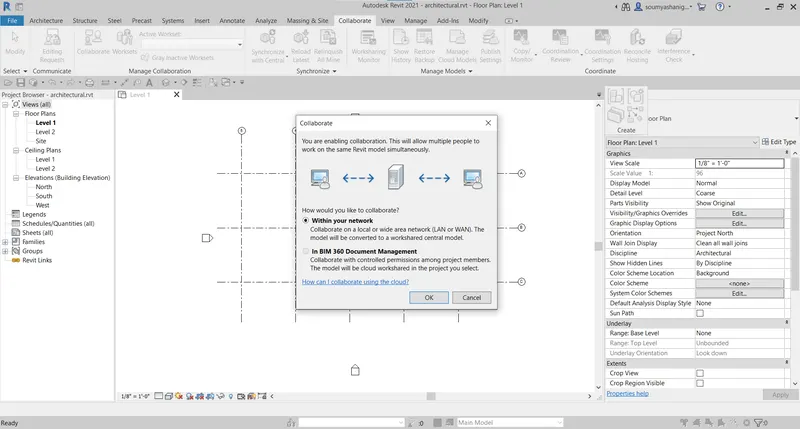
STEP-3:Click ok
STEP-4:Now choose colloborate and choose synchronize with central and select synchronize and modify settings
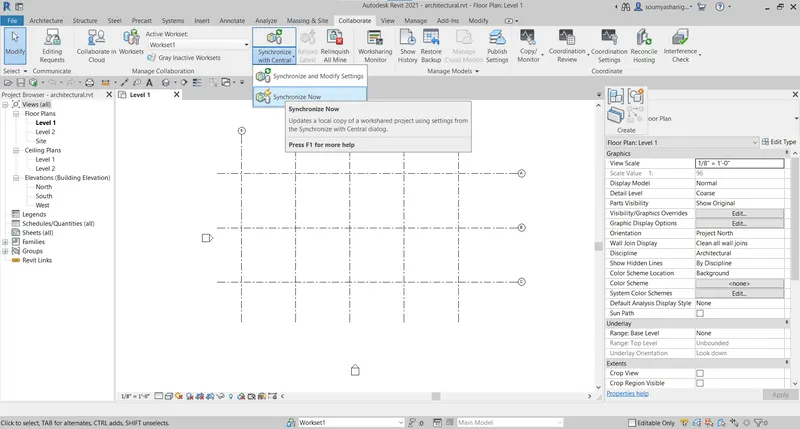
STEP-5:now a tool bar appears then make required changes and click ok
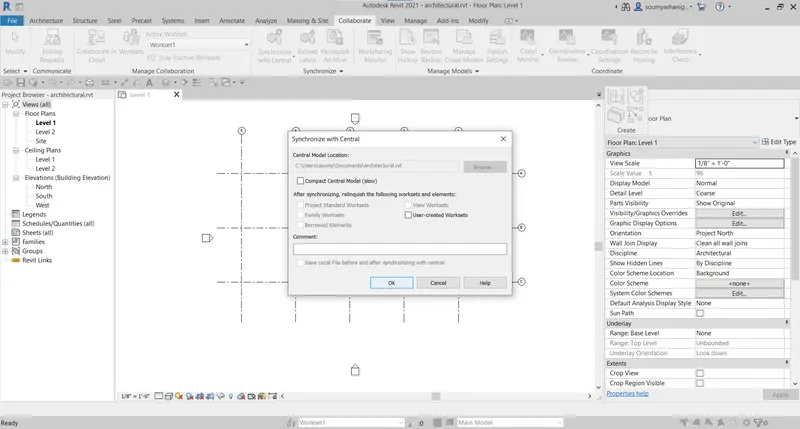
STEP-6:now save the file by choosing file option and click ok
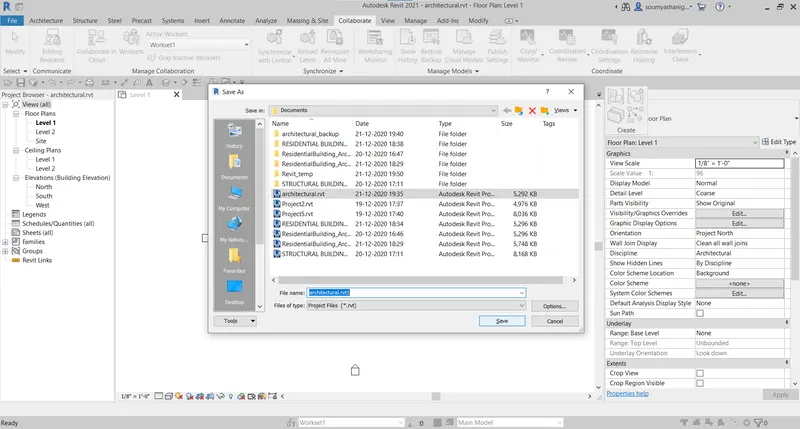
STEP-7:now save the file with appropriate file andclick on save
RESULT:The changes from the local copy to central file of the architectural model are successfully synchronized
6) Open the structural model and using the collaborate tools to save the model as a central file.
AIM:TO SAVE THE STRUCTURAL MODEL AS CENTRAL FILE BY USING THE COLLABORATE TOOL
TOOLS AND COMMANDS USED:
- Open
- Collaborate
- Synchronize
PROCEDURE:
STEP-1:Open the revit software and open the structural model in previously created question
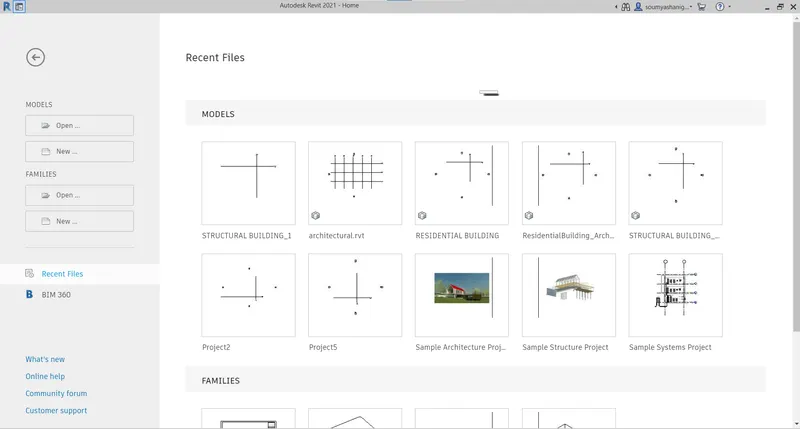
STEP-2:Select collaborate tab and click collaborate
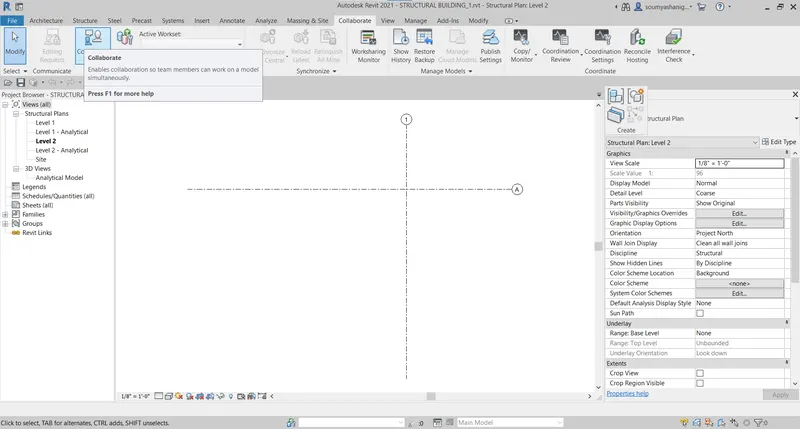
STEP-3:A comment box and select the required optiom i.e,within your network
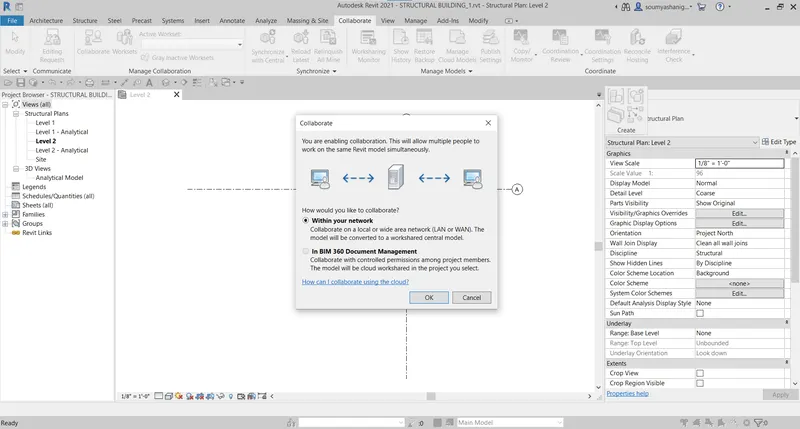
STEP-4:Click ok
STEP-5:select collaborate and click synchronize with central and choose synchronize and modify settings
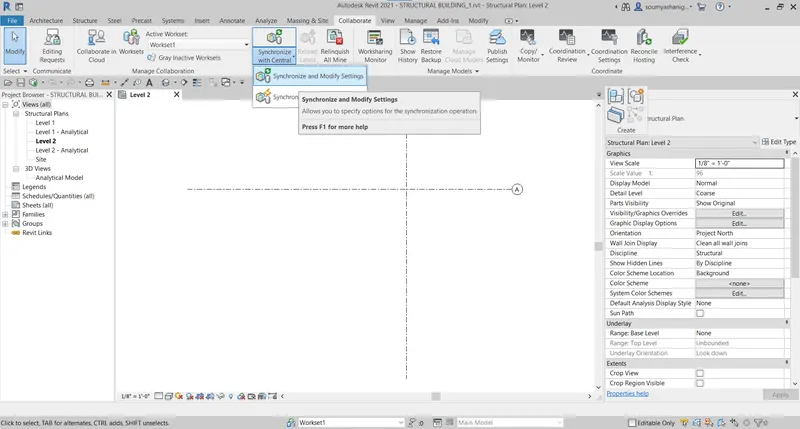
STEP-6:A dialog box appears and click ok
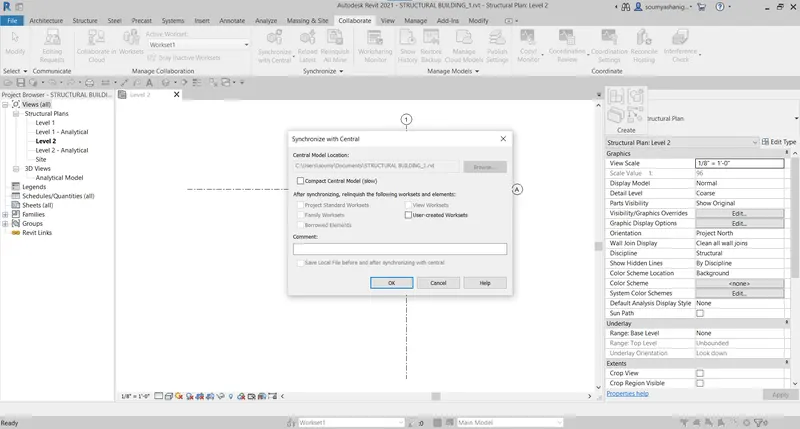
STEP-7:Now save the file in appropraite location and with proper name
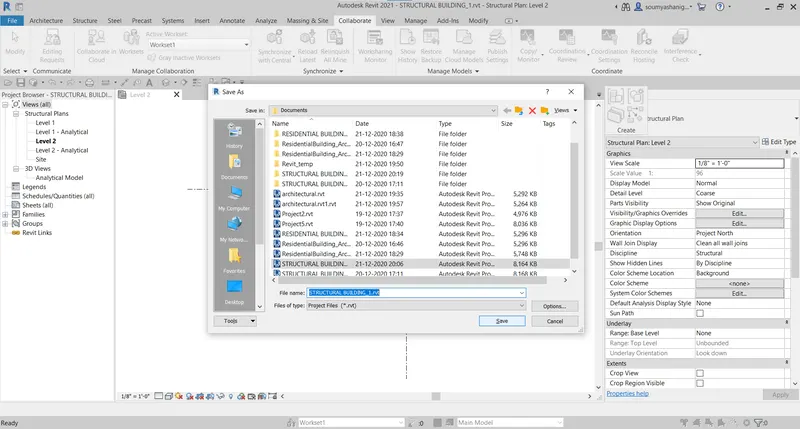
CLICK ON SAVE
RESULT:STRUCTURAL MODEL IS SAVED AS CENTRAL FILE BY USING COLLABORATE TAB
7) Under the Collaborate tab, select the grids and levels from the architectural model, and using Copy Monitor try to copy the grids to the structural model. See what happens when the copy monitored grid is moved around in the structural model
AIM:USING COLLABORATE TAB SELECT THE GRIDS AND LEVELS FROM ARCHITECTURAL MODEL AND COPY IT TO STRUCTURAL MODEL USING COPY MONITOR
TOOLS AND COMMANDS USED:
- COLLABORATE TAB
- Copy monitor
- copy
PROCEDURE:
STEP-1:Open the revit file and open the previously created grid file
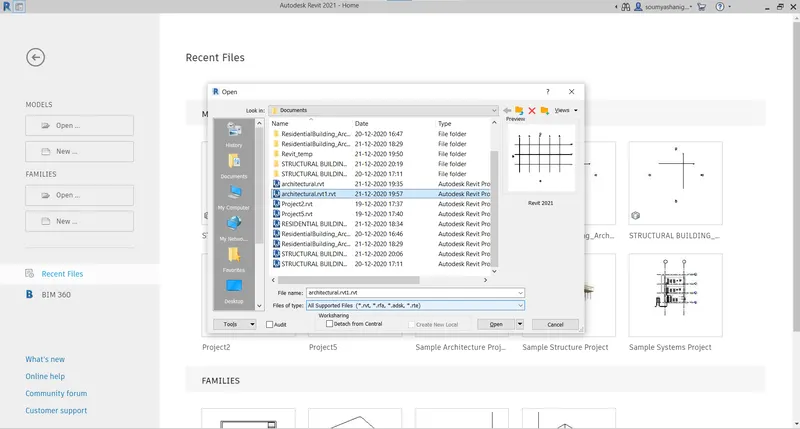
STEP-2:Select the collaborate tab and select copy monitor
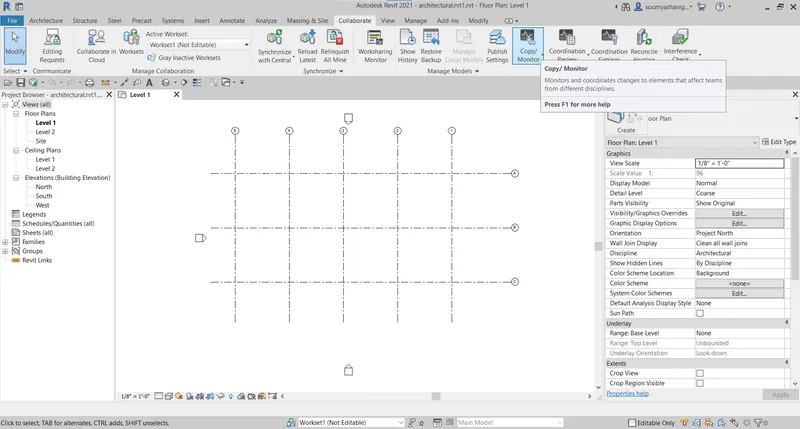
STEP-3:Now select use current project and and select copy option
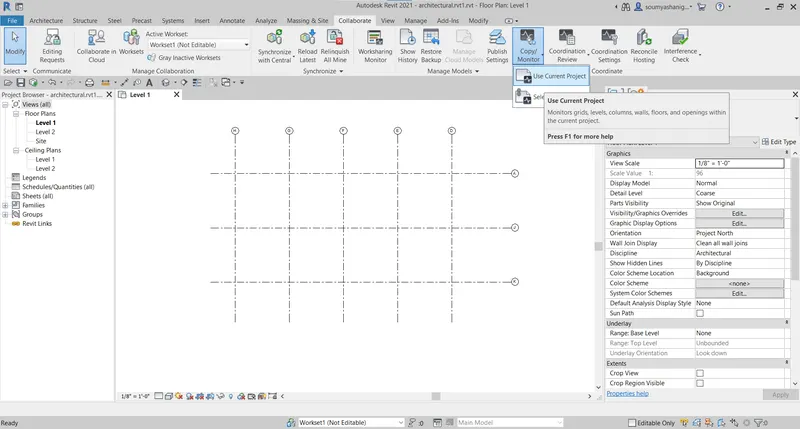
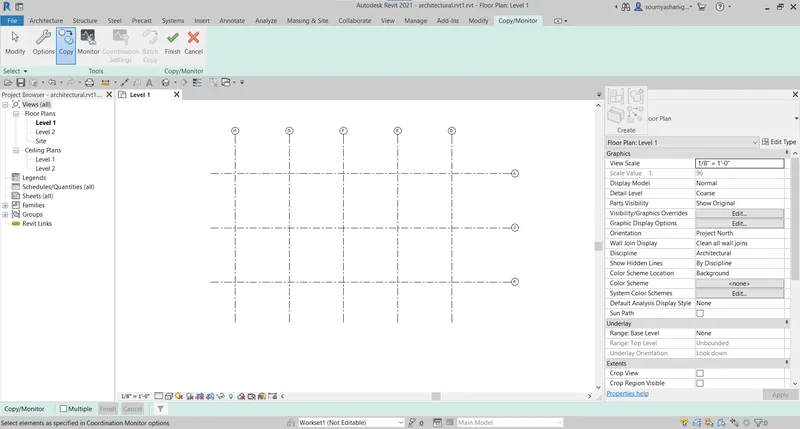
STEP-4:Click the tick mark finish button
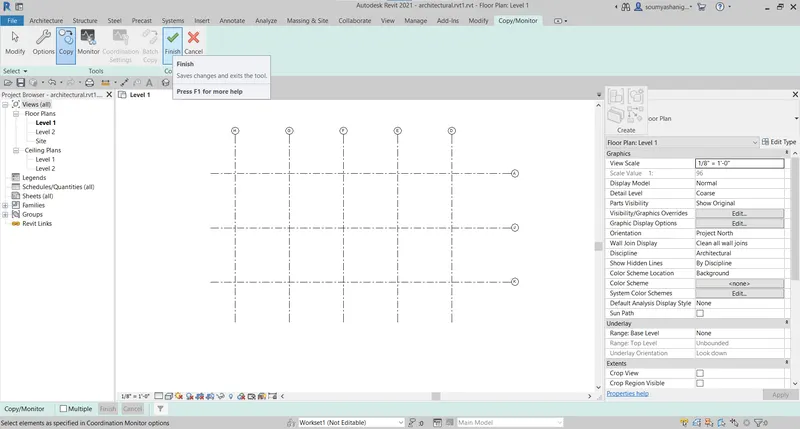
STEP-5: Now the model is change to structural
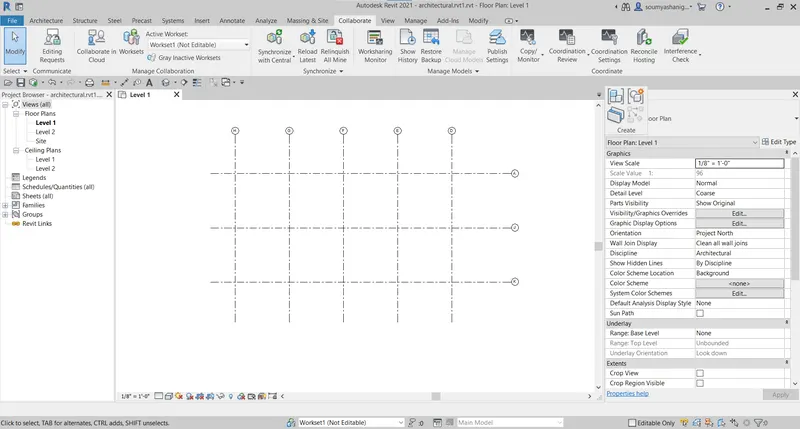
RESULT:THE objects from architecture to structural model created successfully
8) Create another new file with a construction template. Save the new file as a central model. This file will include both architectural and structural model. Under the manage tab, Click manage links to link both architectural and structural files. Save the file and close all the files.
AIM:TO CREATE A NEW FILE WITH A CONSTRUCTION TEMPLATE WHICH INCLUDE BOTH ARCHITECTURAL AND STRUCTURAL MODEL
TOOLS AND COMMANDS USED:
- construction template
- manage tab
- manage links
- save
PROCEDURE:
STEP-1: Open the revit and select the construction template
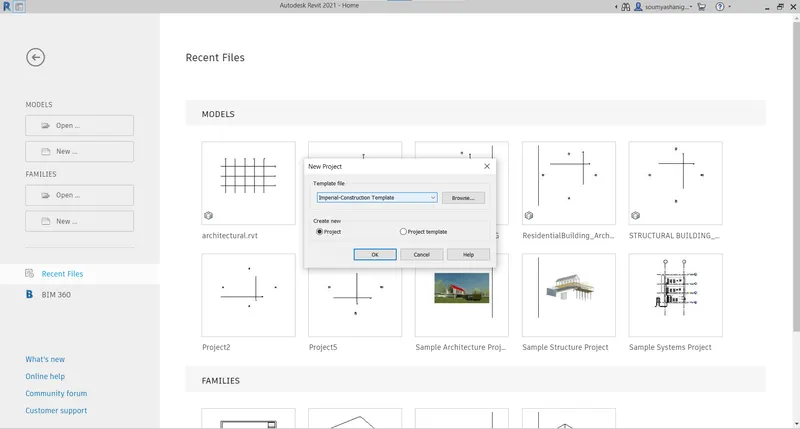
STEP-2:Select the collaborate tab and select the collaborate tab
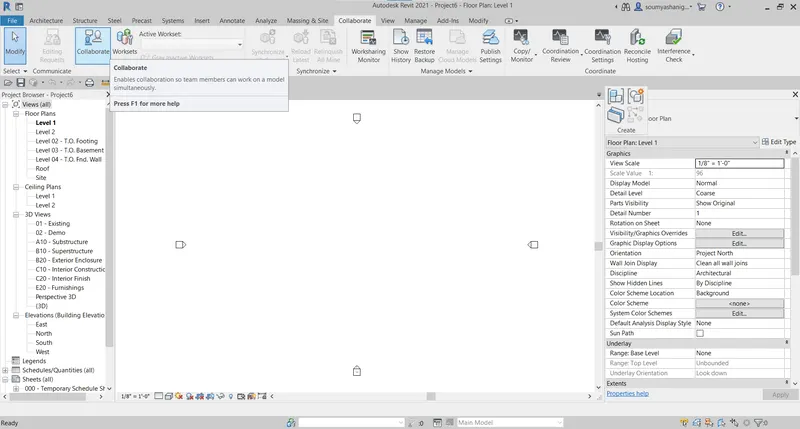
STEP-3:select within network and click ok
STEP-3:Now click on collaborate tab and select the synchronize with central tool
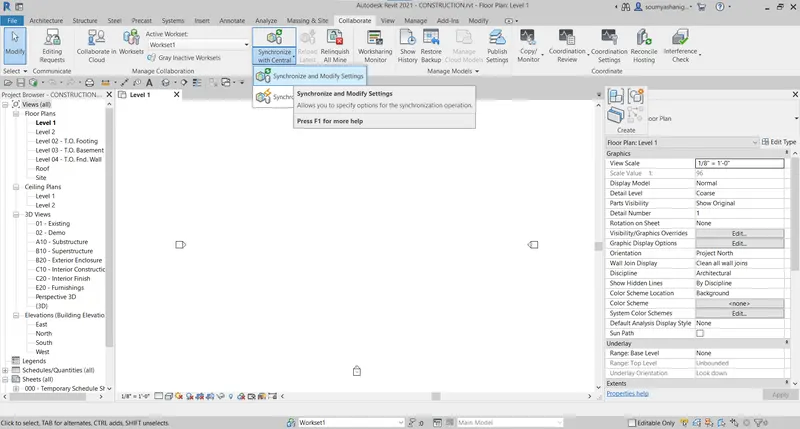
STEP-4: a dialog box appears now click ok
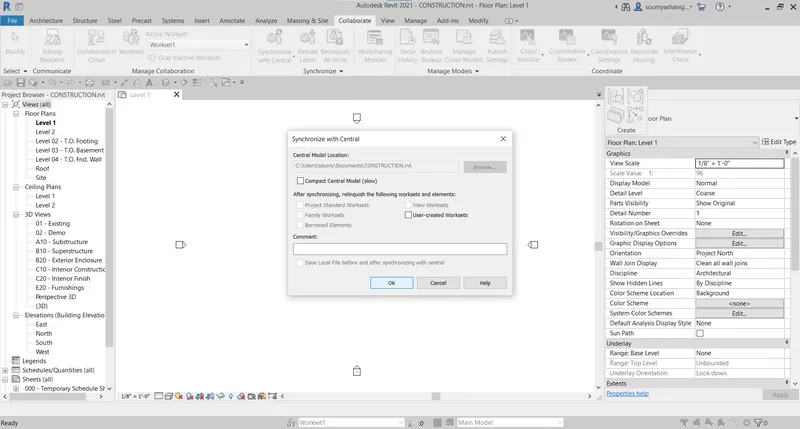
STEP-5:Select manage tab and choose manage link
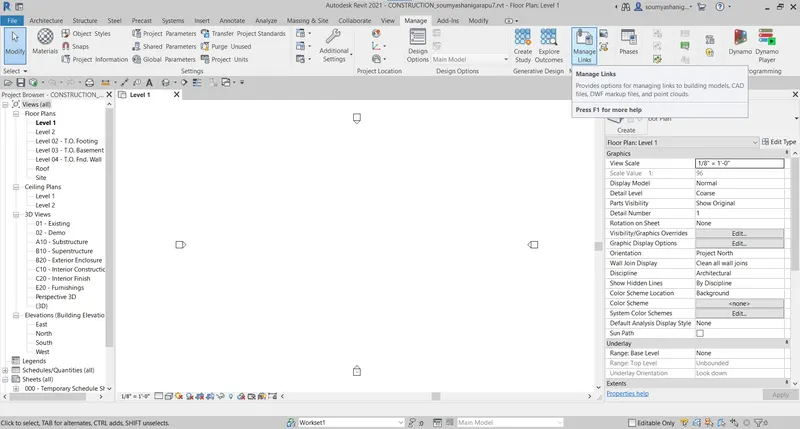
STEP-6: A dialog box appears then click on add
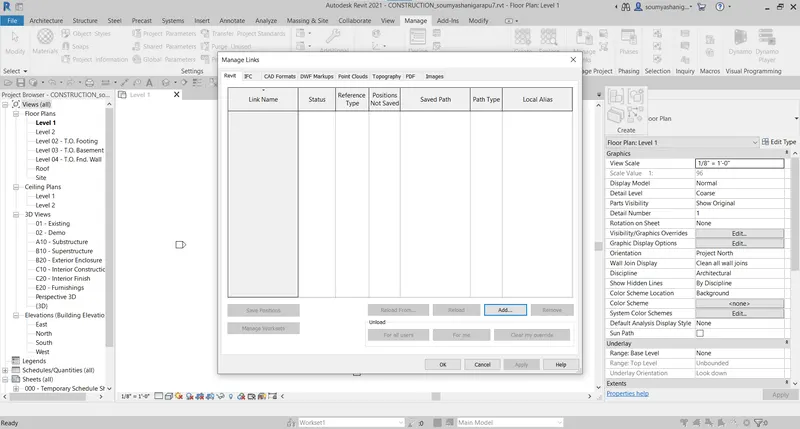
STEP-7:It takes to previously created models select architectural model
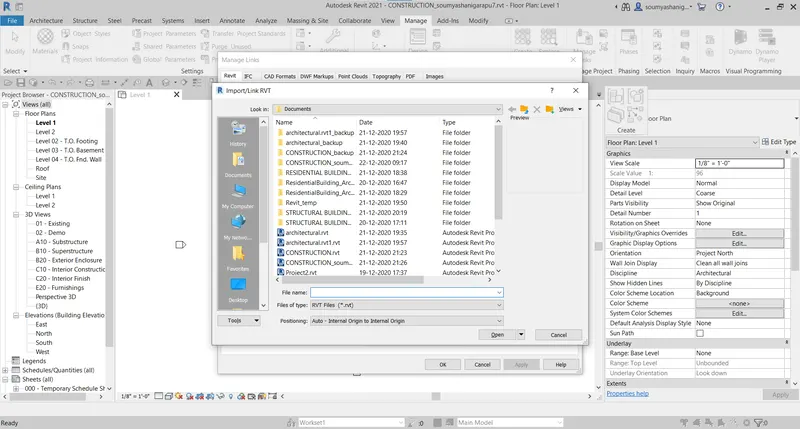
STEP-8:Open the file by clicking open option then it will be added to previously opened dialog box
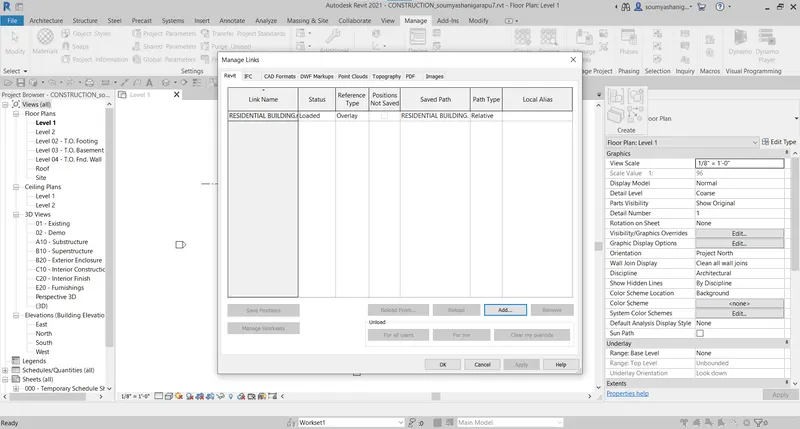
STEP-9:Click ok to open the file
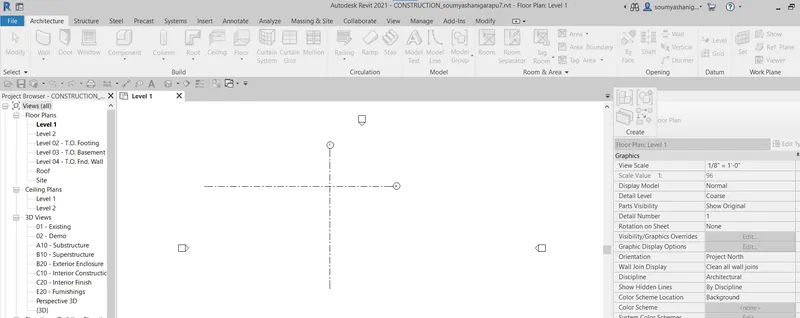
STEP-10:In similar way open the structural model(follow same procedure)
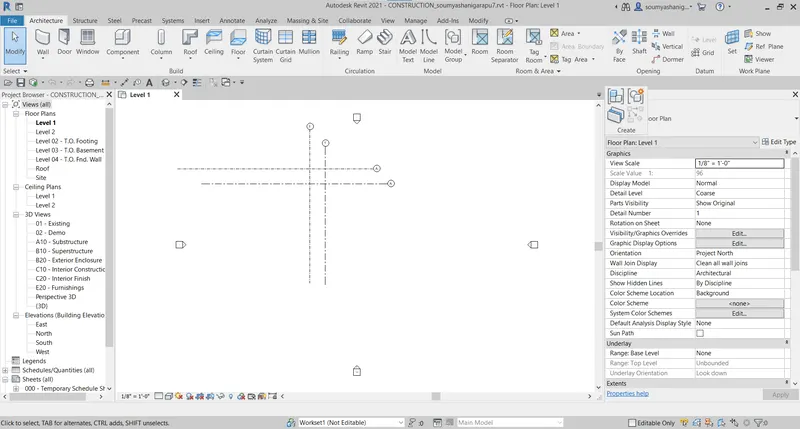
STEP-11:Both structural and architectural model are opened in one file
RESULT:A CONSTRUCTION FILE IS CREATED AND BOTH ARCHITECTURAL AND STRUCTURAL ARE PLACED IN ONE FILE
9) Are the grids from structural and architectural model matching in the construction template created? If yes the model is set up for project 2. If not work on the shared parameters and linking options under Manage links
( Hint: origin to origin, by shared coordinates or by project base point to base point ) to link the models in an appropriate manner
AIM:TO VERIFY THE GRIDS FROM STRUCTURAL AND ARCHITECTURAL MODEL MATCHING IN CONSTRUCTION TEMPLATE CREATED
TOOLS AND COMMANDS USED:
- ACQUIRE COORDINATES
- POSITION
- RELOCATE POSITION
PROCEDURE:
STEP-1:Open previously created file
STEP-2:Both the architectural and structural template will be in one file
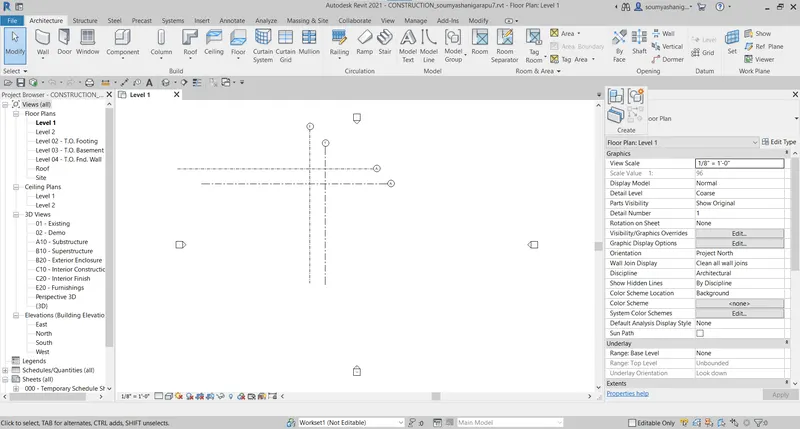
STEP-3: select manage tab and choose specify coordinates at a point
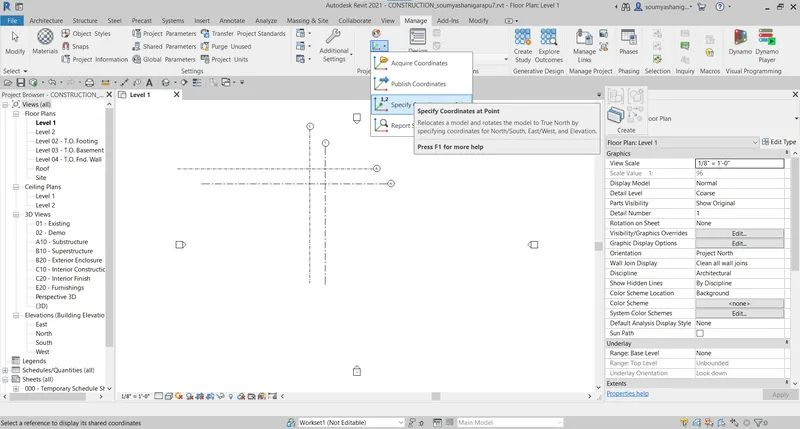
STEP-4:now select anyone coorinate and then a dialog box apperas
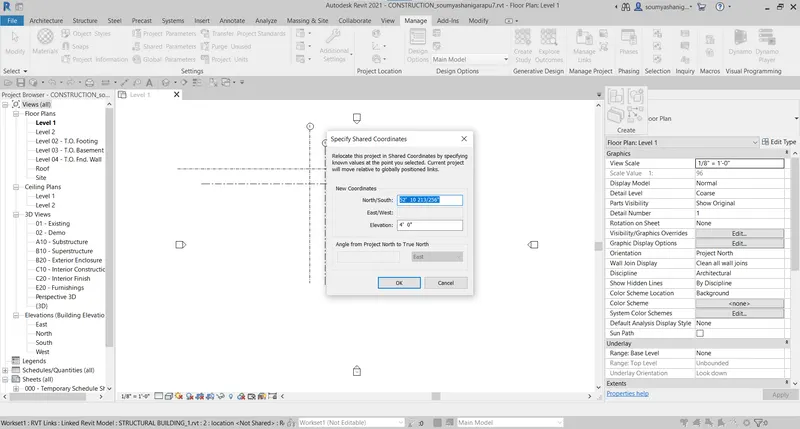
STEP-5:Specify the point to0'0''
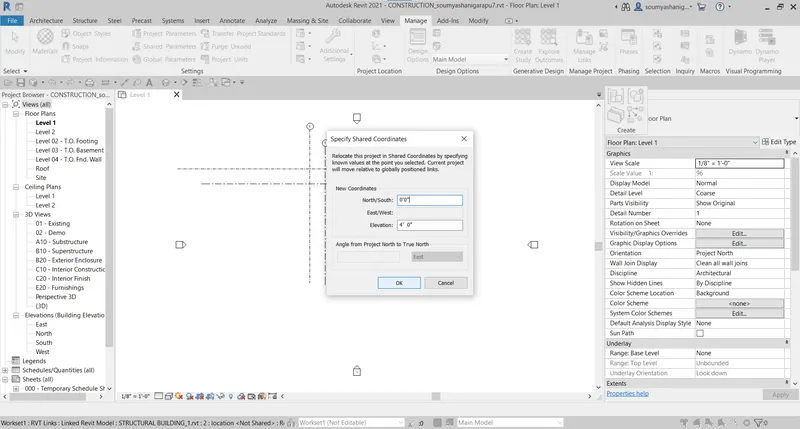
STEP-6:CLICK OK
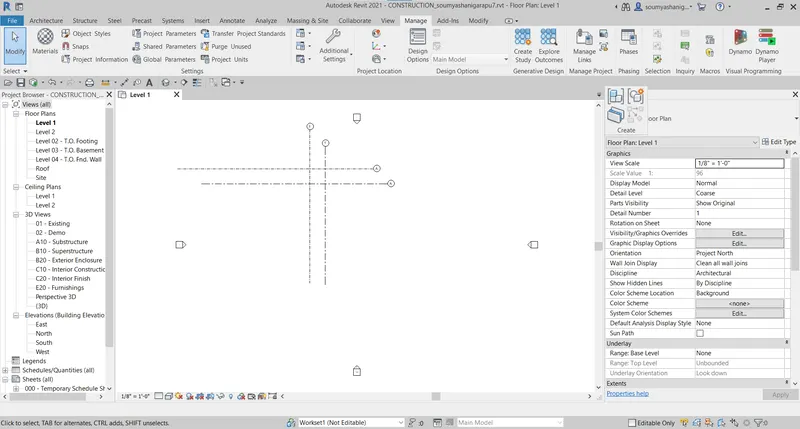
STEP-7:Do the same for all grids and set the point as 0'0''
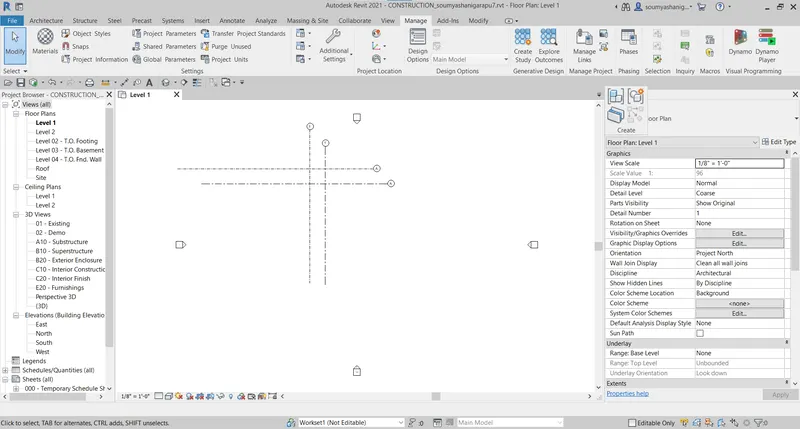
STEP8:Select the position icon from manage tab
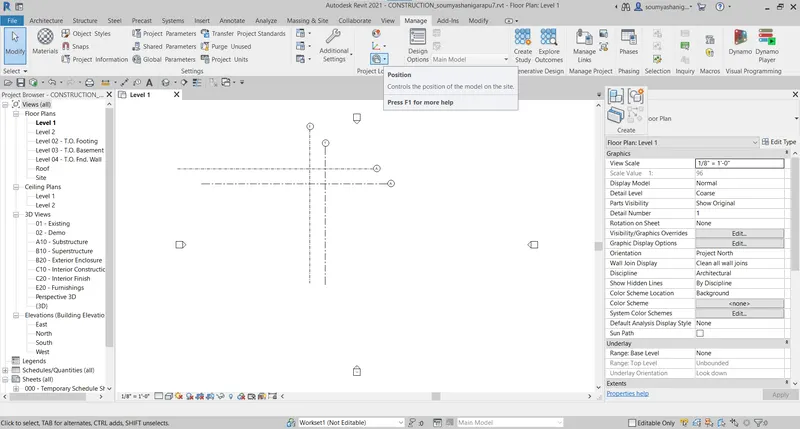
STEP-9:Click relocate position
STEP-10:now select any grid and make them postioned with other grid and do it with all grids
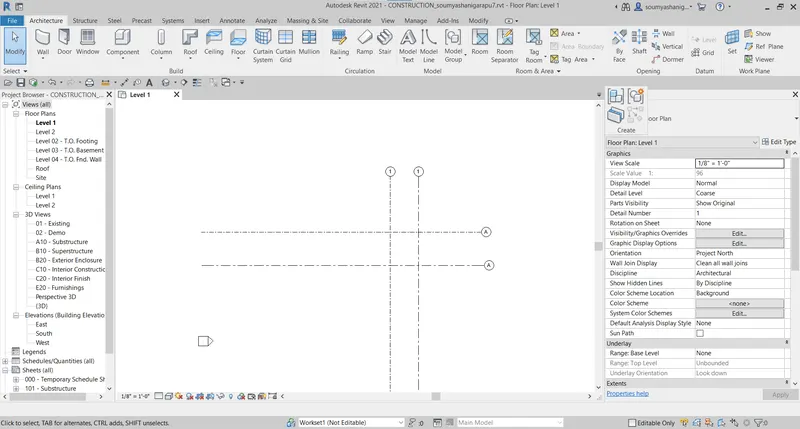
STEP-11:All grids are positioned with respect to one another
RESULT:ALL GRIDS ARE MATCHED IN CONSTRUCTION TEMPLATE
10) List a flow chart of a project tree set up in terms of Construction model, Architecture & Structure model, in this exercise and understand how many people can work on the same project using Revit simultaneously
THE FLOW CHART IS GIVEN BELOW AS
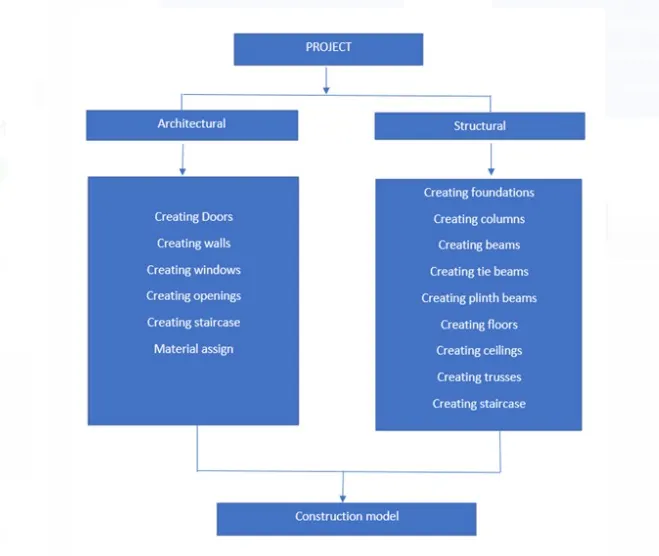
Here the construction model acts as a host and architectural and structural model acts aa a linked files
Three persons can work simultaneously,one can work in architectural one can work in structural and another in construction model