REVIT_Usage of Collabrate tool_Week 6
1A) AIM: To set the project base point and project shared coordinated for the project.
TOOLS/COMMANDS REQUIRED:
architecture
grid
manage toolbar
specifycoordinates at a point.
file
save as
project file.
PROCEDURE:
1. Select the architectural template .
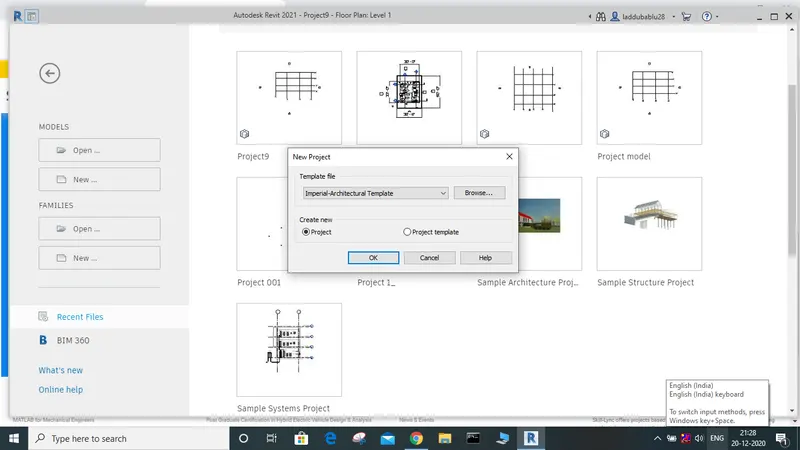
2.click on the gridlines icon and draw grids and name them.
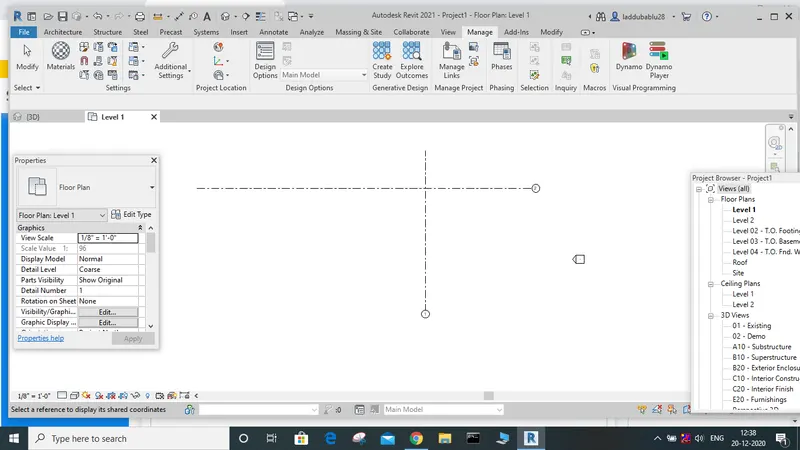
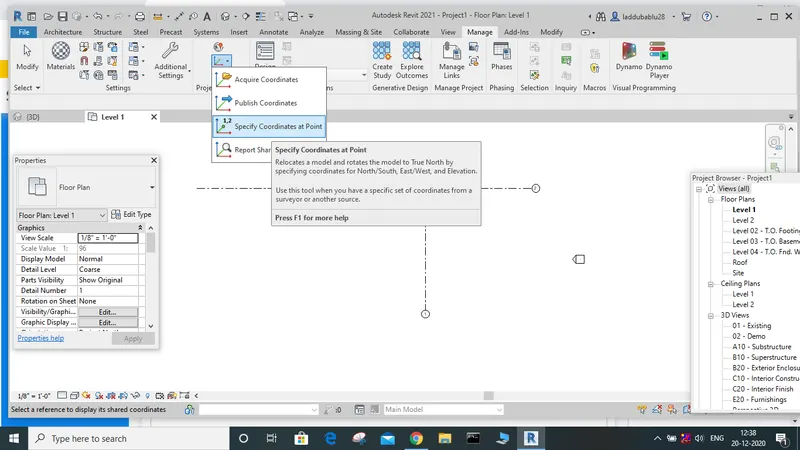
3. select specify coordinates at the point icon present in the manage toolbar.
4.specify the coordinates and select the grid where we can observe north-south coordinates when we select horizontal grid and east-west
when we select a vertical grid.
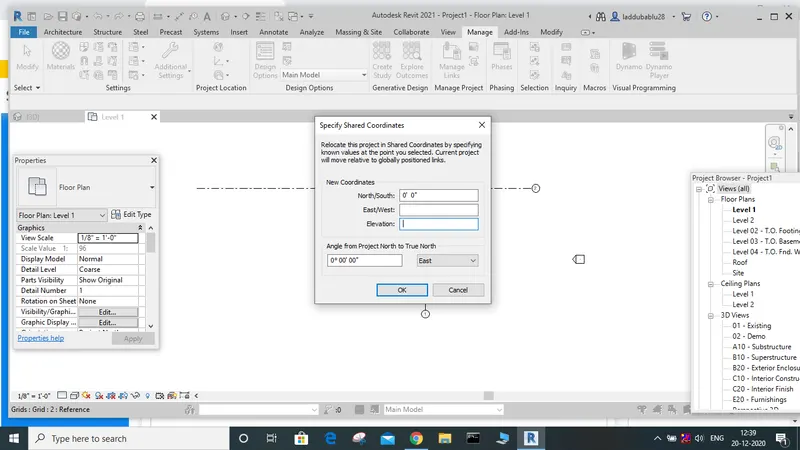
5. now we can set the coordinates as 0'0'.
6.now we can save the project in the project file by using the file icon.
RESULT:
we have set the project base point and project shared coordinates for the project
2A)AIM: create a structural template and using the manage tab for setting project parameters the same as the architectural model.
TOOLS/COMMAND REQUIRED:
structural template
manage toolbar
specify coordinates at a point
file
project file
grids
PROCEDURE:
1. create a structural template.
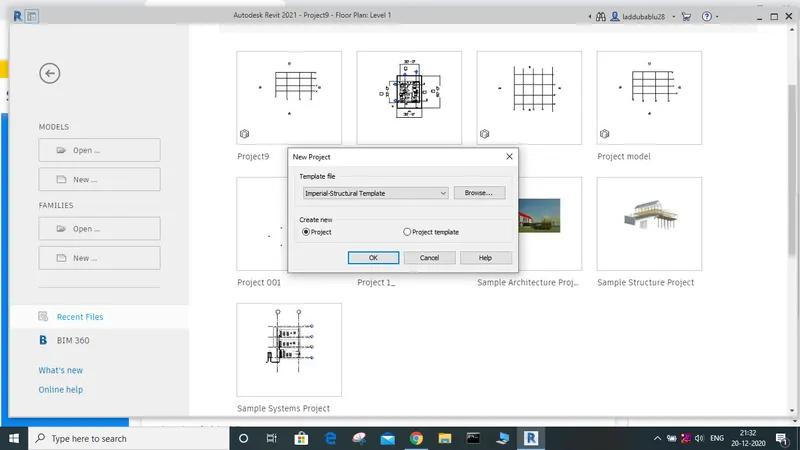
2. click the grid icon present in the architectural menu bar and draw gridlines and name the grid lines.
3. now using the specify coordinates at the point icon present in the manage toolbar.
4. now set the coordinates of the grid lines and modify them by setting their coordinates to 0'0".
5. now save the project using the file icon under the project file.
RESULT:
Parameters from the architectural model is copied to the structural model
3A) AIM:To make a architectural model to a central model using collaberate tab
TOOLS/COMMANDS REQUIRED:
file
open
architecture
collaberate tab
cillaberate menu
within your network
PROCEDURE:
1.open the architectural template.
2.select collaberate tab in the collaberate menu bar.
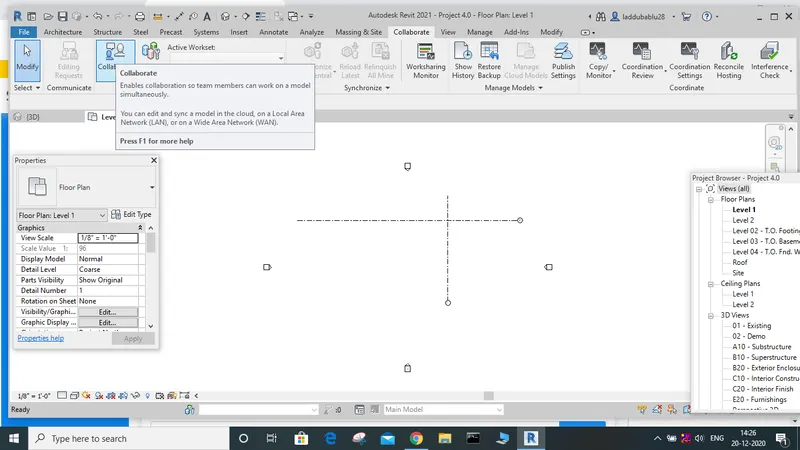
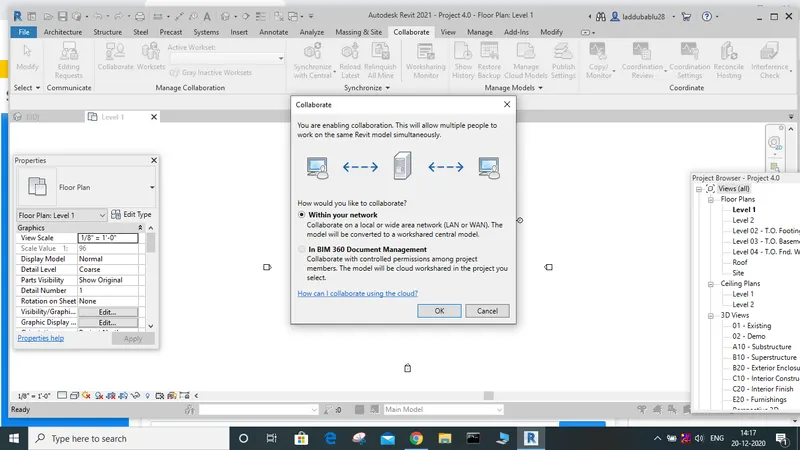
3. Then options will be appeared to colaberate file.
4. then select the option within your network and then click ok.
RESULT:
THE ARCHITECTURAL MODEL IS MADE INTO A CENTRAL MODEL.
4A) AIM: Creating longitudinal and transverse patterned grids for the project.
TOOLS/COMMAND REQUIRED:
grids
architecture tool
save as
file
PROCEDURE:
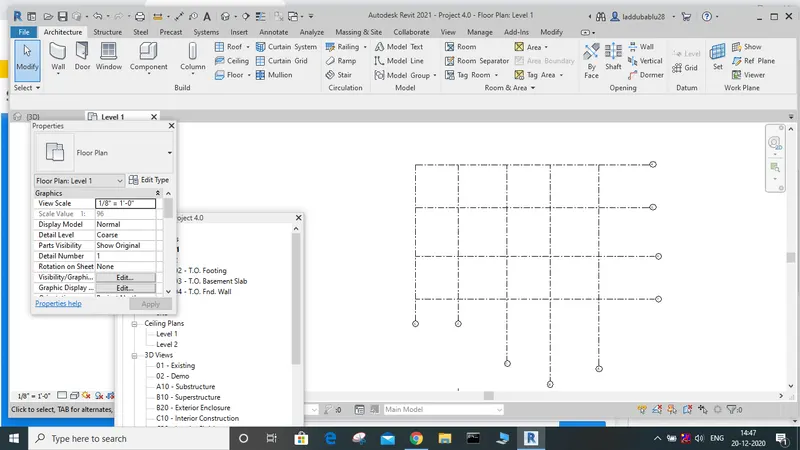
1. Open the architectural template file.
2. click on the grid icon option available in architectural tab.
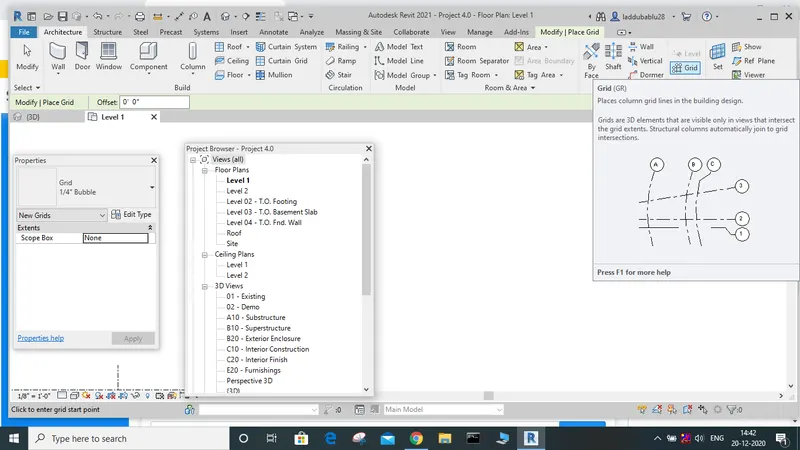
3. now draw the grid lines in both horizontally and longitudinal direction.
4. name the grid lines as per standards (i.e A,b,c,d for horizontal and 1,2,3,4 for vertical grids), and save the file.
RESULT:
THE LONGITUDINAL AND TRANSVERSE GRIDS ARE CREATED.
5A) AIM: Synchronising changes from local copy to the central file.
TOOLS/COMMANDS REQUIRED:
synchronize
collaborate menu bar
within your network
coolaborate tab.
PROCEDURE:
1. Open the file, make the file central model file by select on collaberate icon and then select within your network option.
2. click on synchronize and modify settings available in collaborate tab.
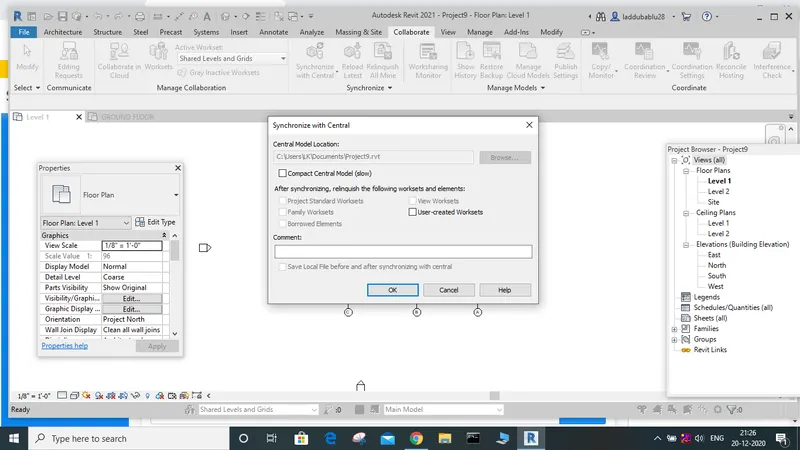
3. the drawing will synchronize with the central file.
RESULT:
THE CHANGES ARE SYNCHRONISED FROM LOCAL COPY TO THE CENTRAL FILE.
6A) AIM: MAKING STRUCTURAL MODEL INTO CENTRAL FILE.
TOOLS/COMMANDS REQUIRED:
structural template
collaborate menubar.
collaborate icon.
save
PROCEDURE:
1. Open structural template.
2. select collaborate icon present in the collaborate toolbar.
3. select the option within your network and save the project.
RESULT:
THE STRUCTURAL MODEL IS SAVED AS CENTRAL FILE.
7A) AIM: COPYING LEVELS AND GRIDS FROM ARCHITECTURAL MODEL TO STRUCTURAL MODEL.
TOOLS/COMMANDS REQUIRED:
architecture template
level
grid
copy monitor.
PROCEDURE:
1. Open the architectural model.
*draw levels and grids using grid and level icon.
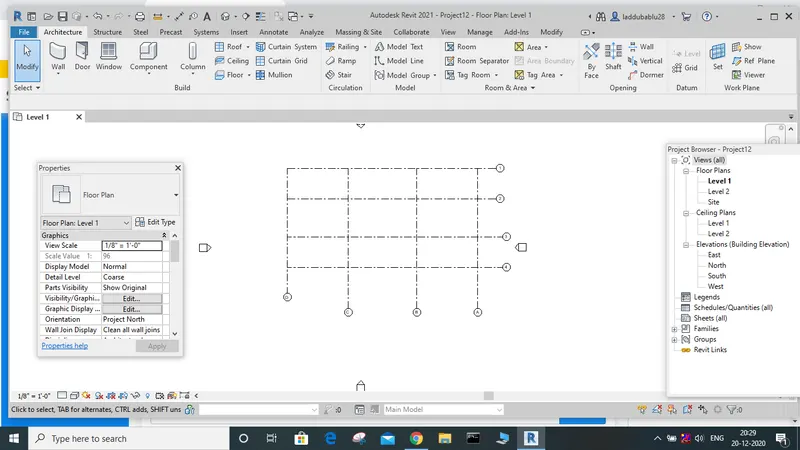
2. select copy monitor icon present in the collaborate tool bar.
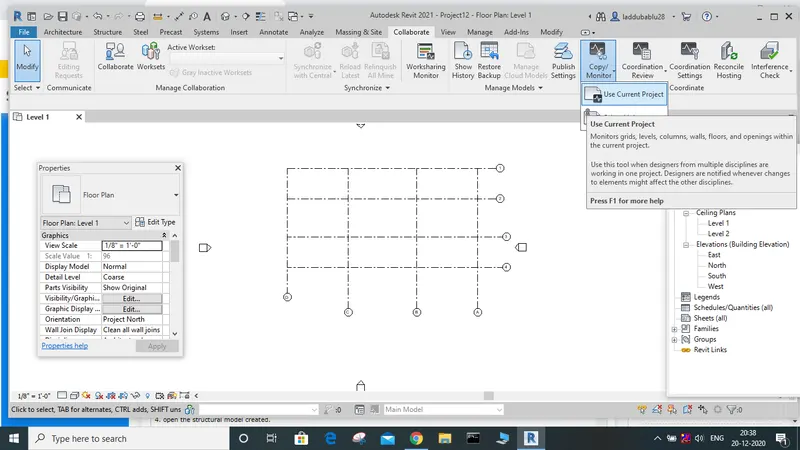
3. now copy the link to the clipboard
4. open the structural model created.
5. then paste it by using paste ico present in the modify tool bar and click on finish.
RESULT:
The levels and grids drawn in architectural model is copied to structural model.
8A) AIM: CREATING A CONSTRUCTION TEMPLATE AND SAVE IT AS CENTRAL MODEL FILE
TOOLS/COMMANDS REQUIRED:
CONSTRUCTION TEMPLATE
ARCHITECTECTURAL TOOL BAR
GRID
COLLABORATE TOOLBAR
COLLABORATE ICON
WITHIN YOUR NETWORK
SAVE
PROCEDURE:l
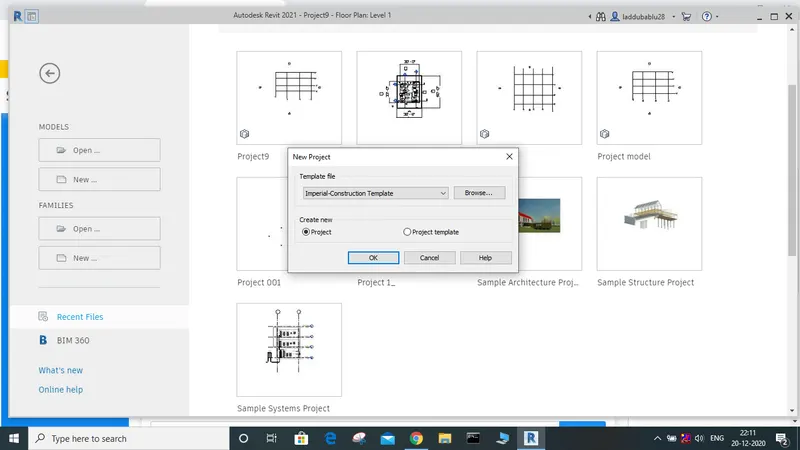
1. CREATE A FILE IN CONSTRUCTION TEMPLATE.
2. CREATE A DRAWING USING GRID ICON.
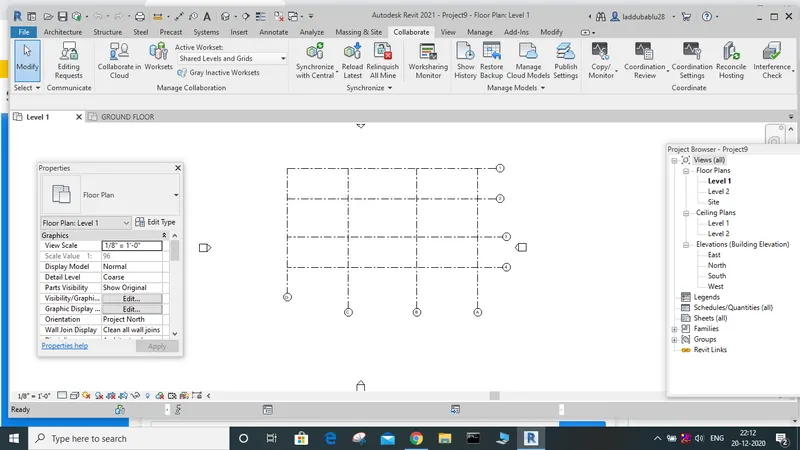
3. SELECT COLLABORATE ICON IN THE COLLABORATE TAB AND SELECT THE OPTION WITHIN YOUR NETWORK.
4. CLICK OK AND SAVE THE FILE.
9A) AIM: TO CHECK WHETHER THE ARCHITECTURAL MODELS ARE LINKED AND SHARED PARAMETERS ARE LINKED IN PROPER MANNER OR NOT.
TOOLS/COMMANDS REQUIRED:
ARCHITECTURAL MODEL
COLLABERATE TAB
COLLABERATE MENUBAR.
WITHIN YOUR NETWORK
GRIDS
PROCEDURE:
1. OPEN CONSTRUCTION TEMPLATE FILE.
2.MAKE IT CENTRAL FILE BT COLLABERATE TAB AND SELECT THE OPTION WITHIN YOUR NETWORK.
3. CLICK MANAGE LINKS ICON PRESENT IN MANAGE TAB WHERE WE CAN ADD STRUCTURAL AND ARCHITECTURAL MODEL IN IT.
4. NOW WE CAN OBSERVE BOTH ARCHIECTURAL AND STRUCTURAL MODEL LINKED.
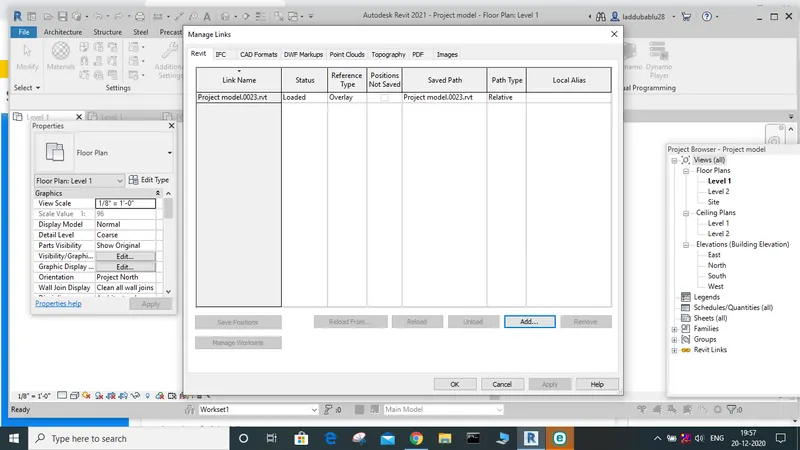
5. NOW SELECT POSITION AND CLICK RELOCATE POSITION OPTION AND INTERSECTION POINTS OF GRIDS ARE LOCATED.
6. THE GRIDS ARE POSITIONED.
RESULT:
THE GRIDS FROM STRUCTURAL AND ARCHITECTURAL MODEL ARE LINKED IN AN PROPER MANNER.
10A) construction model is a combination of architectural and structural model.
PROJECT
| ARCHITECTURE | STRUCTURE |
|
CREATING WALLS |
CREATING COLUMNS |
|
CREATING DOORS |
CREATING BEAMS |
|
CREATING WINDOWS |
CREATING FLOORS |
|
CREATING STAIRS |
CEILING |
| CREATE COMPONENTS | |
|
CREATE ROOMS |
|
CENTRAL FILE ACTS AS A DATA COLLECTION POINT OF LOCAL COPIES MULTIPLE PEOPLE CAN WORK ON SAME FILE BY CREATING LOCAL
COPIES AND CAN BE SYNCHRONISED WITH CENTRAL FILE