REVIT_Usage of Collabrate tool_Week 6
- AIM: To open an architectural template and to set project base point and project shared coordinates for project using manage tab.
TOOLS REQUIRED:
- Architectural tab
- Grids
- Manage tab
- Specify coordinate at a point
PROCEDURE:
- Open a new project with architectural template.
- In the architectural tab select the grids.
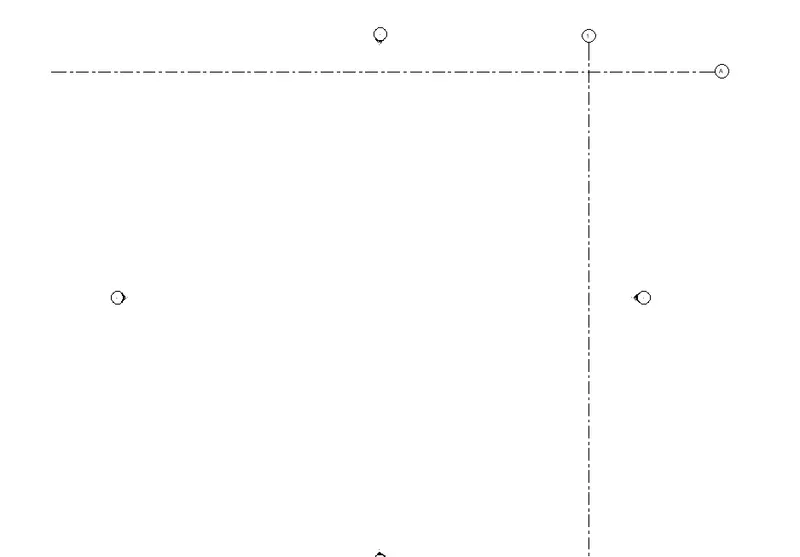
- Draw an horizontal grid and an vertical grid.
- Name horizontal grid as A and vertical grid as 1.
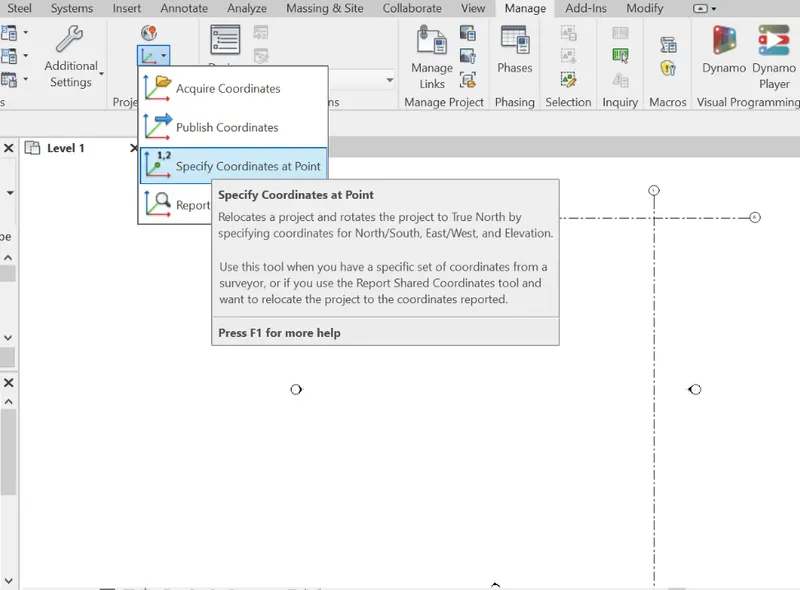
- Now go to manage tab and select specify coordinate at a point.
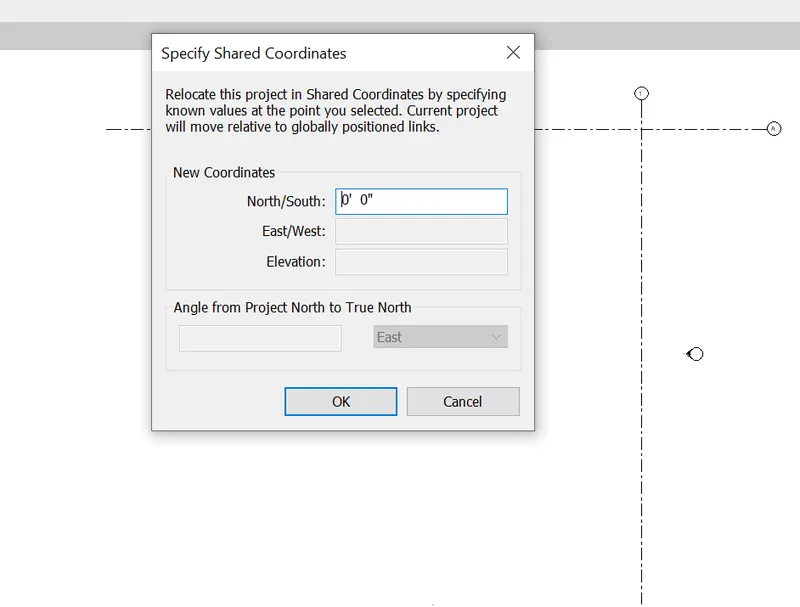
- Select vertical grid and specify it as 0’.
- Now do the same with horizontal grid.
- Save the project as architectural.
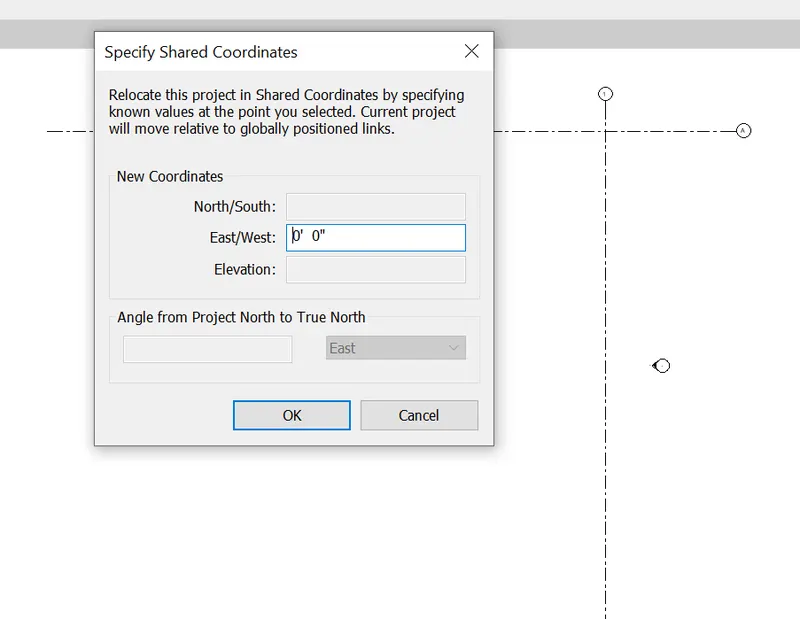
RESULT:
Base point and shared coordinates are being set to the architectural project file using manage tab .
- AIM: To open an structural template and to set project base point and project shared coordinates for project using manage tab.
TOOLS REQUIRED:
- structural tab
- Grids
- Manage tab
- Specify coordinate at a point
PROCEDURE:
- Open a new project with structural template.
- In the architectural tab select the grids.
- Draw an horizontal grid and an vertical grid.
- Name horizontal grid as A and vertical grid as 1.
- Now go to manage tab and select specify coordinate at a point.
- Select vertical grid and specify it as 0’.
- Now do the same with horizontal grid.
- Save the project as structural.
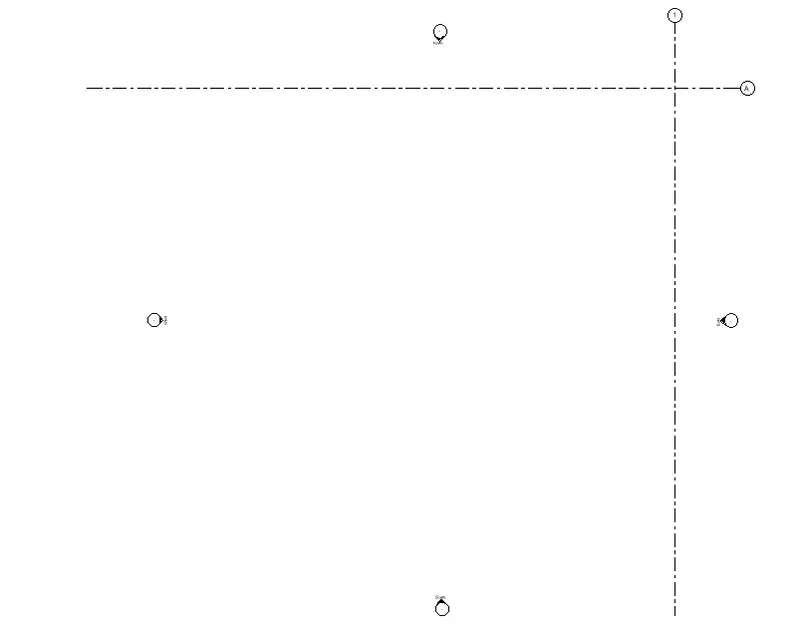
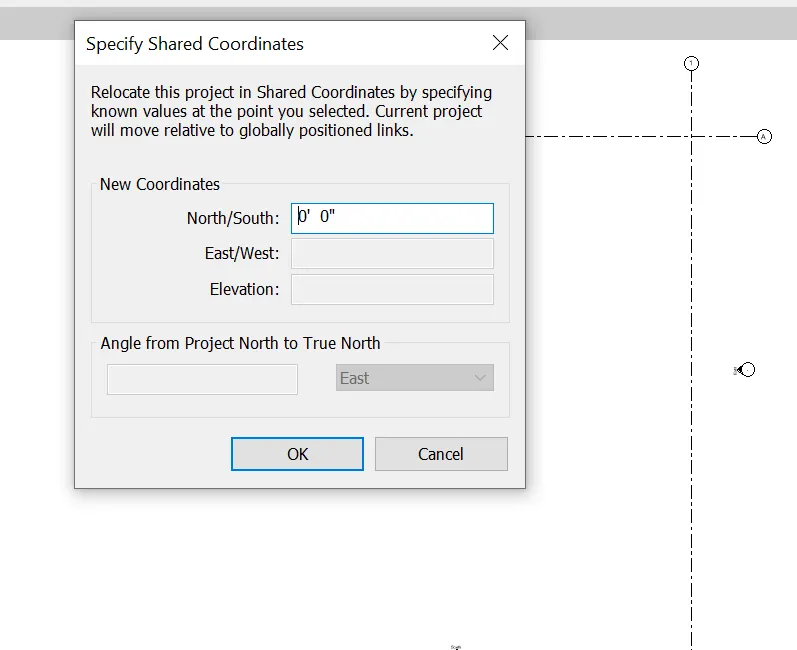
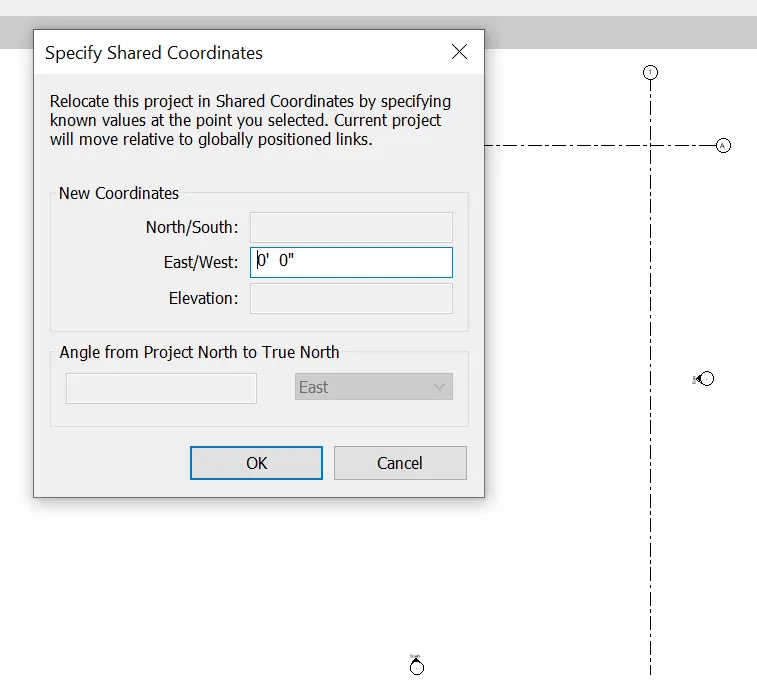
RESULT:
Base point and shared coordinates are being set to the structural project file using manage tab .
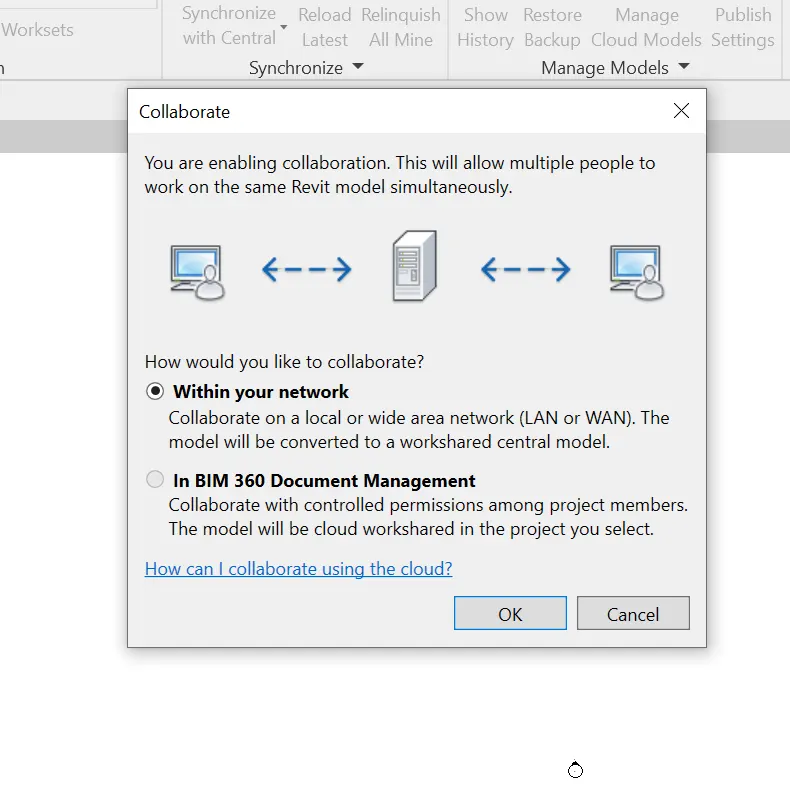
- AIM: To make the architectural model as a central model using collaborate tab.
TOOLS REQUIRED:
Collaborate tab
PROCEDURE:
- Open architectural project file.
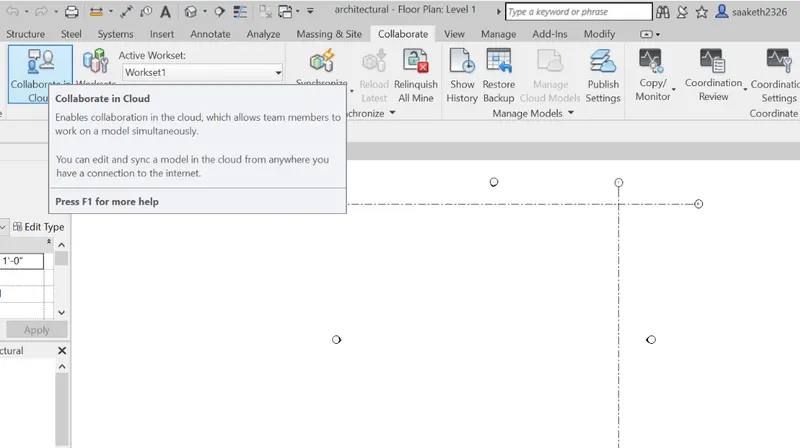
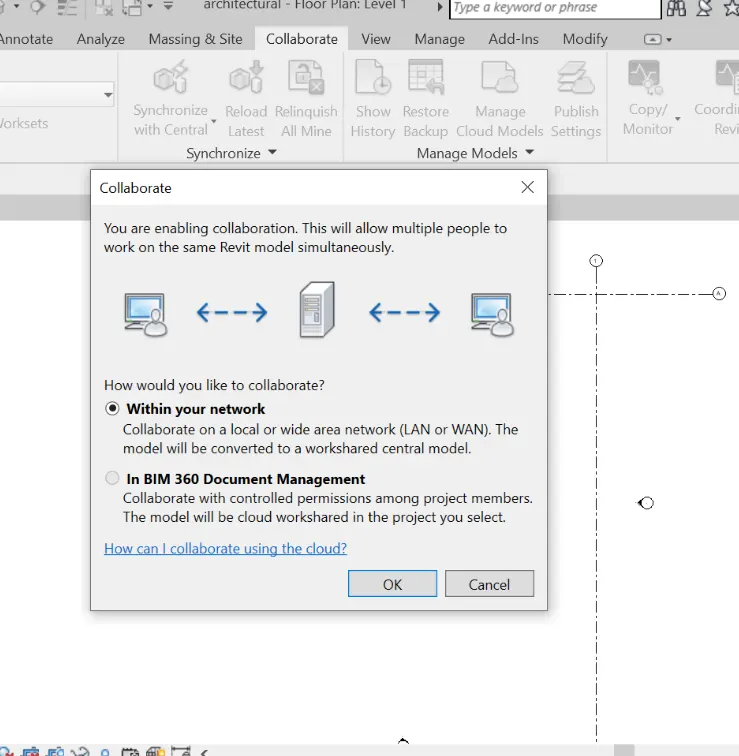
- Click on collaborate tab
- Click collaborate and then click ok.
- Now save the file as a central model.
RESULT:
The architectural model is changed in to central model using collaborate tab.
- AIM: To create the longitudinal and transverse grids in project file.
TOOLS REQUIRED:
- Architectural
- Grids
PROCEDURE:
- Open the architectural project file.
- Select grids in the architectural tab.
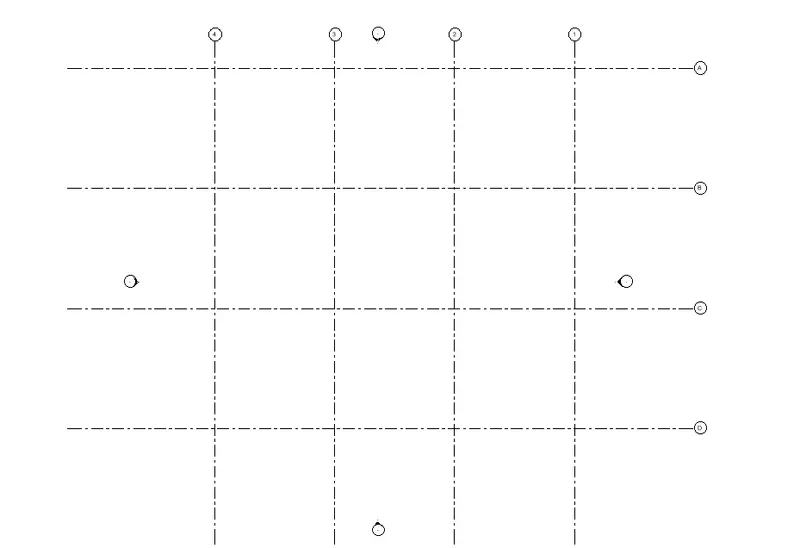
- Now draw longitudinal grids from left with a distance of 40’.
- Name them with numbers 2,3,4.
- And then draw transverse grids from top to bottom with a distance of 40’.
- Name the grids as B,C,D.
- Save the project.
RESULT:
The longitudinal and transversal grids are drawn in architectural project file.
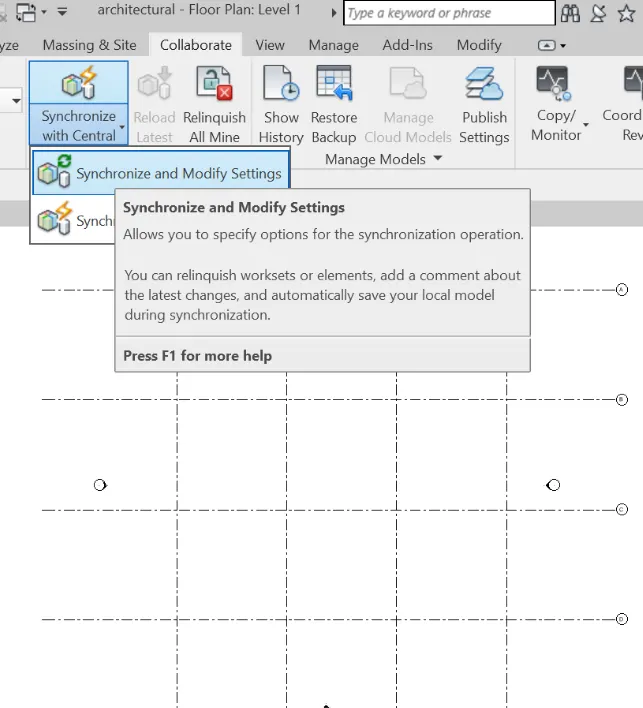
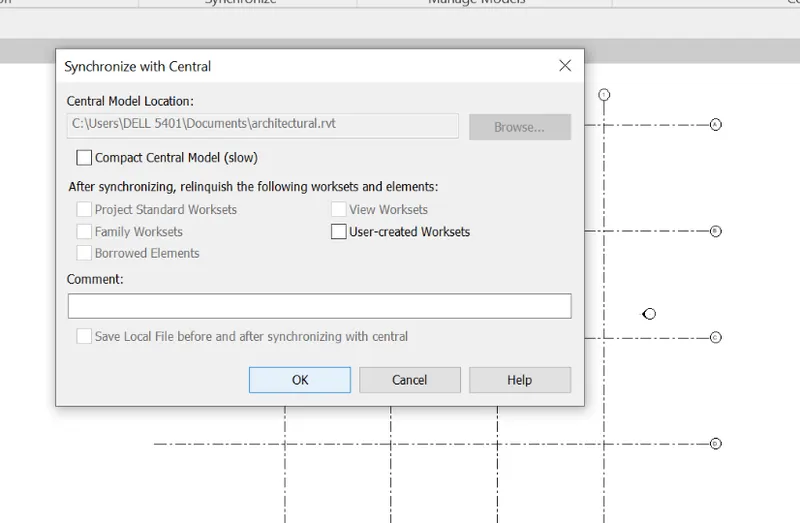
- AIM: To synchronize the changes from the local copy to the central file of the architectural model.
TOOLS REQUIRED:
- Collaborate tab
- Synchronize with central
PROCEDURE:
- To open architectural project file.
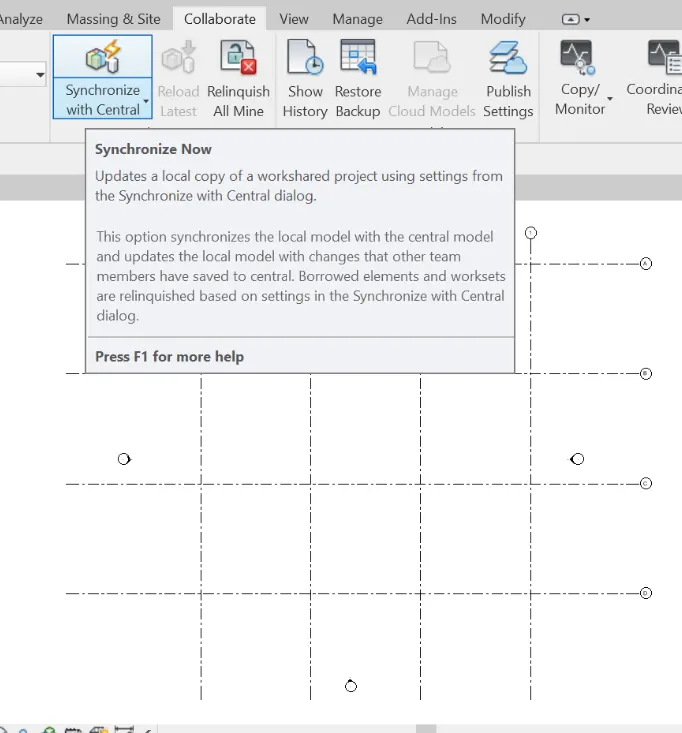
- Now click open collaborate tab.
- Select synchronize with central.
- Now select synchronize and modify and click ok.
- The file will be saved central.
RESULT:
The architectural model is changed from local copy to central file using synchronize with central.
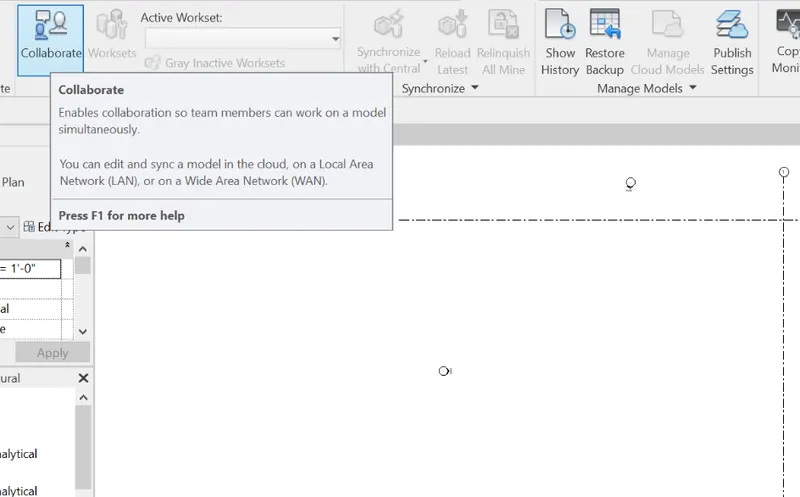
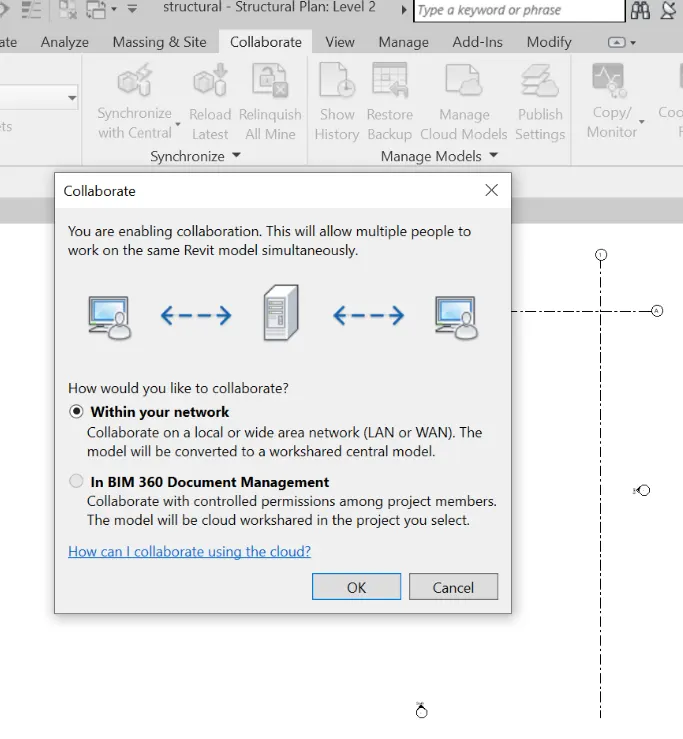
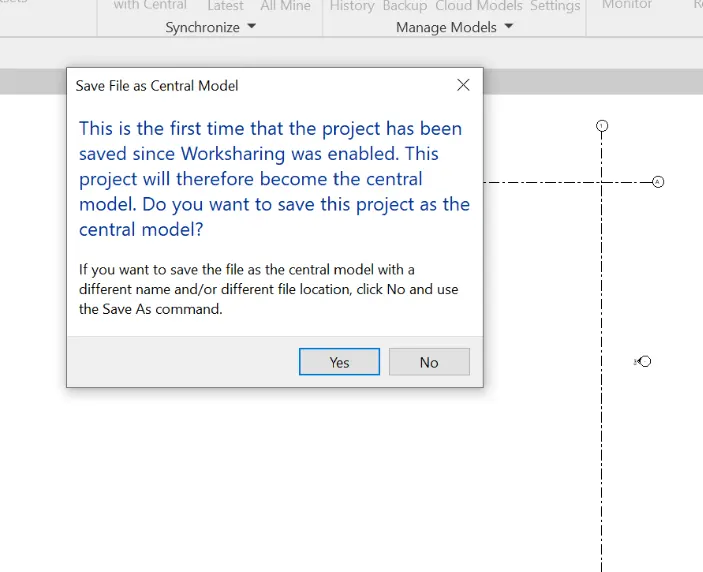
- AIM: To make the structural model as a central model using collaborate tab.
TOOLS REQUIRED:
Collaborate tab
PROCEDURE:
- Open structural project file.
- Click on collaborate tab.
- Click collaborate and then click ok.
- Now save the file as a central model.
RESULT:
The structural model is changed in to central model using collaborate tab.
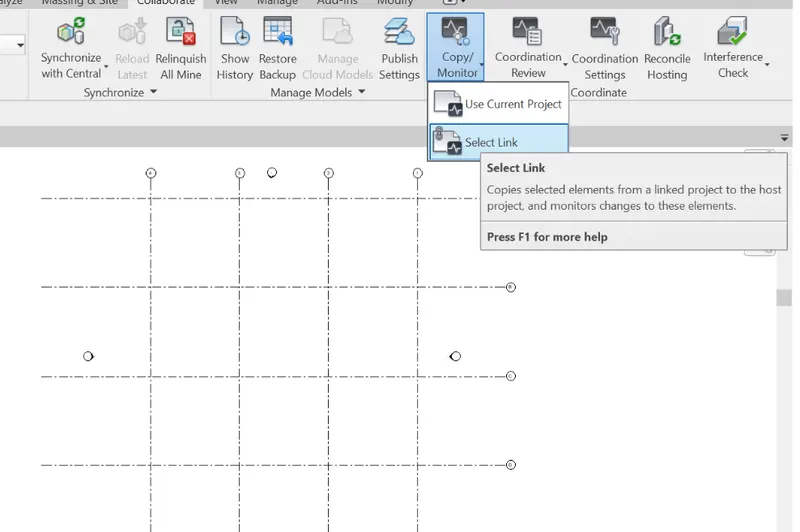
- AIM: To copy the grids to structural model from architectural model using copy monitor.
TOOLS REQUIRED:
- Collaborate tab
- Copy monitor
- Select link
PROCEDURE:
- Open the architectural project file.
- Now click on collaborate tab and select copy monitor.
- Click on select link to link the structural model.
- Now copy all grids and select finish.
- Now all the grids are copied in to structural model.
RESULT: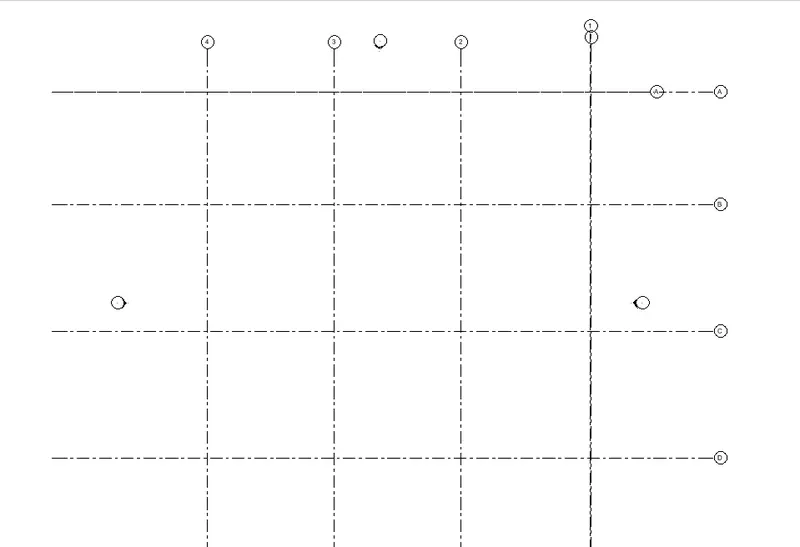
The grids from architectural model are copied in to structural model using copy monitor.
- AIM: To create a file with construction template and to link both architectural and structural model using manage links.
TOOLS REQUIRED:
- Manage tab
- Manage links
PROCEDURE:
- Open a new file with construction template.
- Save it as central file using collaborate tab.
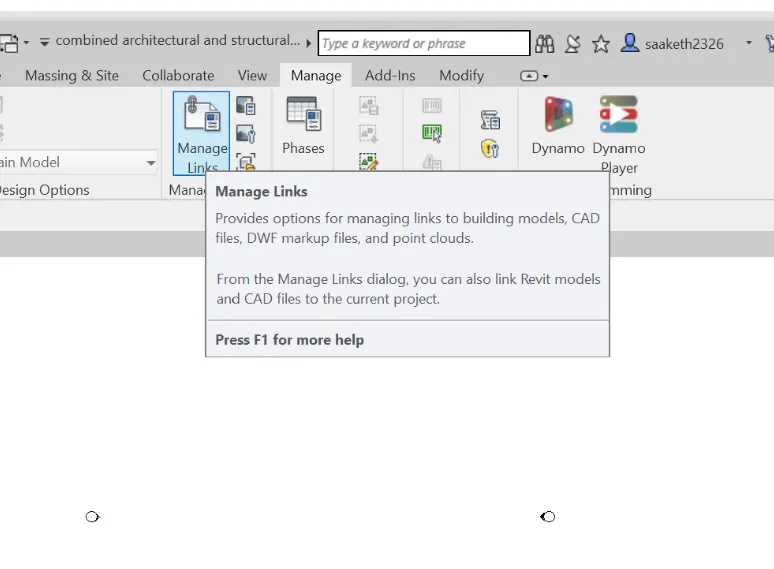
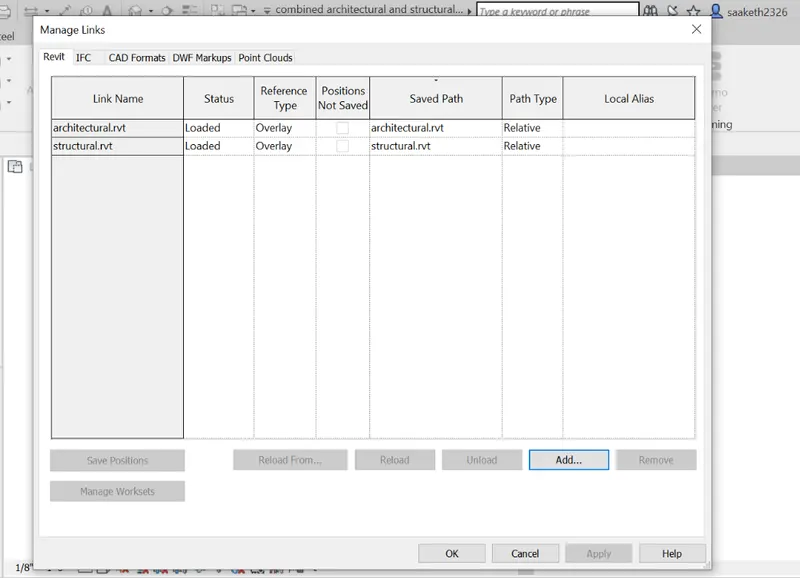
- Now click on manage tab and select manage links.
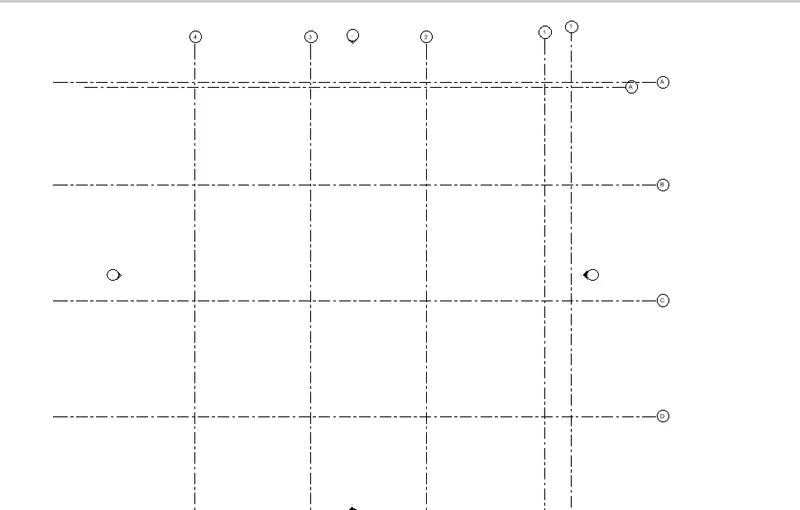
- Add both architectural model and structural model.
- Save the project as combined model.
RESULT:
The project file is created and both architectural and structural models are linked using manage links.
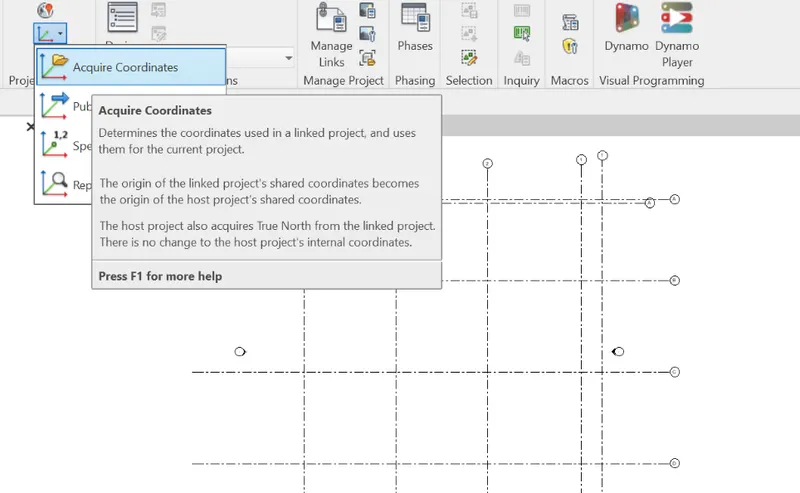
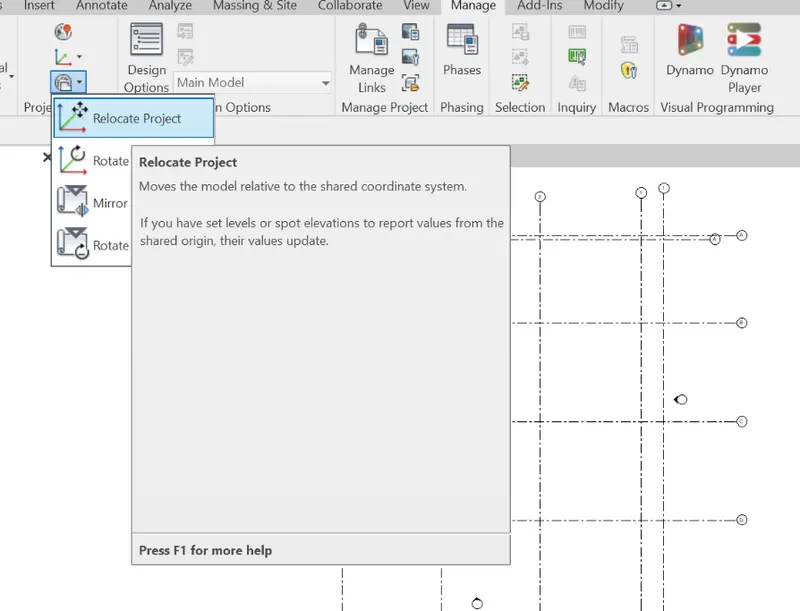
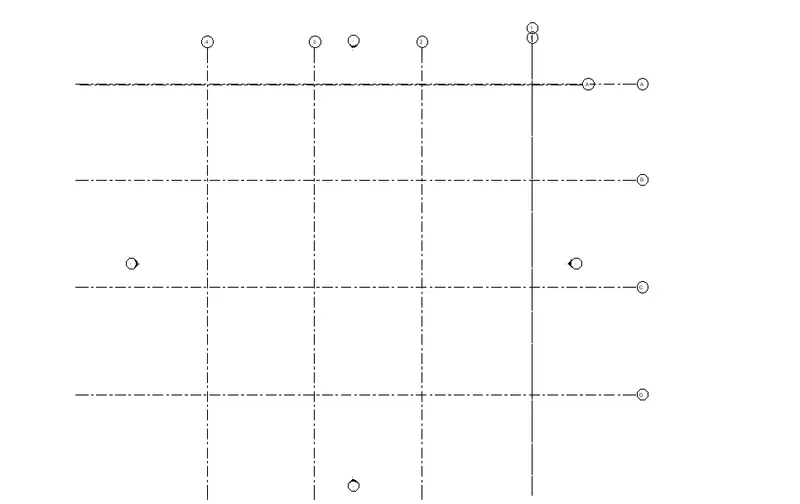
- AIM: To link the models in an appropriate manner if the grids are not coinsiding in the construction template.
TOOLS REQUIRED:
- Manage tab
- Acquire coordinates
- Relocate position
PROCEDURE:
- Open the construction template file.
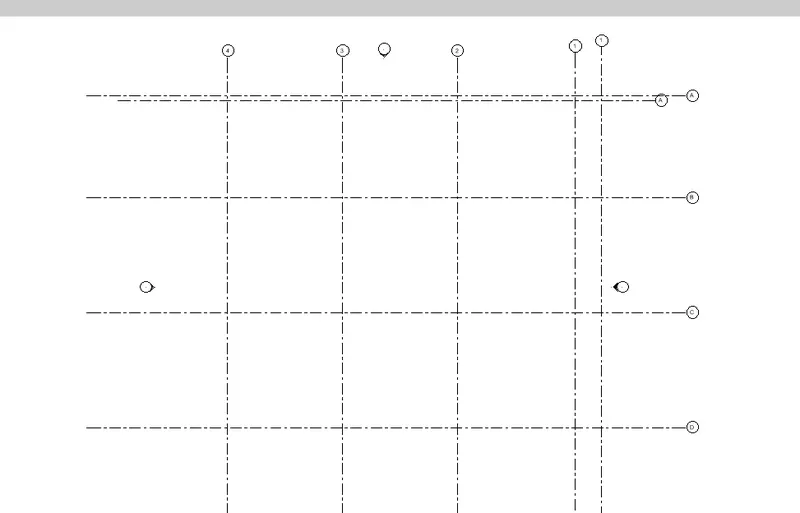
- Check whether the grids are matching in both links.
- If not click on manage tab and select acquire coordinates.
- Now select relocate position.
- Join both the points in order to coinside both the grids.
- Now both links are matching.
RESULT:
The grids are not coinsiding in the constructional template so both are matched using acquire coordinates and relocate position.
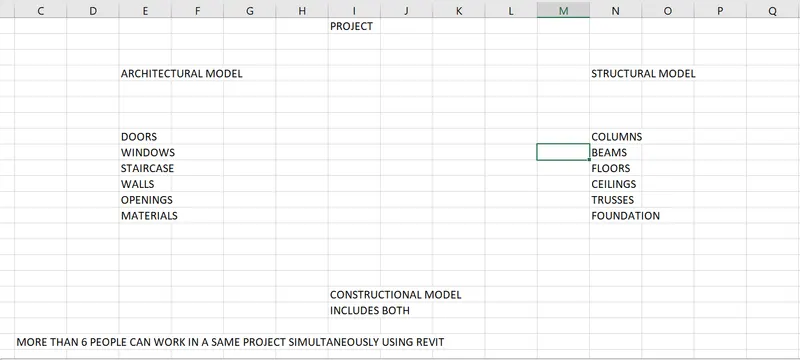
10. LIST A FLOW CHART OF A PROJECT TREE SETUP IN TERMS OF CONSTRUCTION MODEL, ARCHITECTURE AND STRUCTURE MODEL. ALSO UNDERSTAND HOW MANY PEOPLE CAN WORK IN REVIT SIMULTANEOUSLY.