REVIT_Dynamo Project- 3
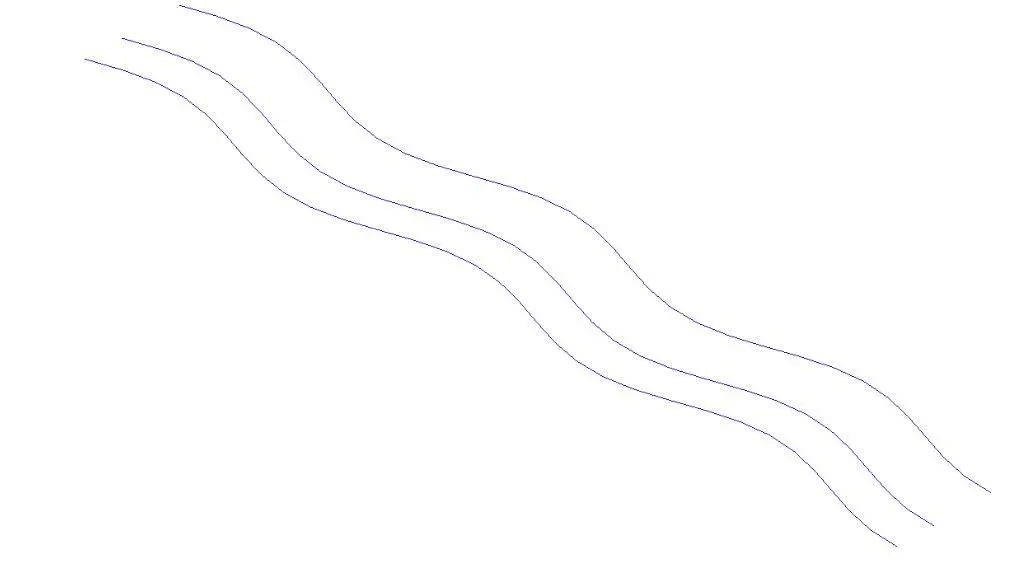
1) Using Dynamo create a set of sinusoidal points and create a curve and create a surface out of the curve.
AIM: To create a seet of sinusoidal points and create a curve and create a surface. out of the curve
TOOLS USED :
• Dynamo
• Code block
• Range • Math.sin.
• Integer slider
• Product (*).
• Add (+).
Points by coordinate
• List.
• Surface by loft.
PROCEDURE:
1. First open a new revit file and open a architectural template
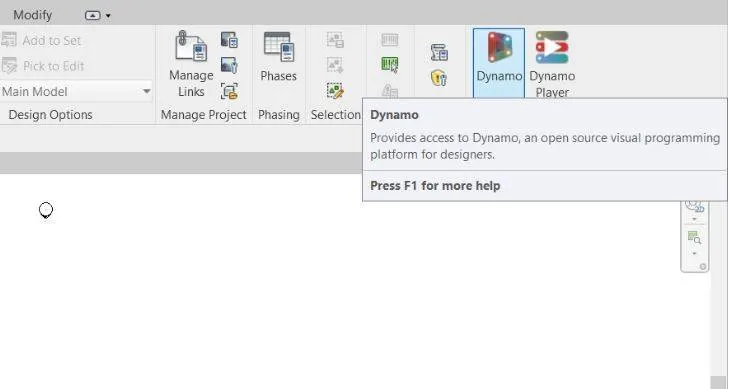
2. click on manage tab and select dynamo tool from it
3.
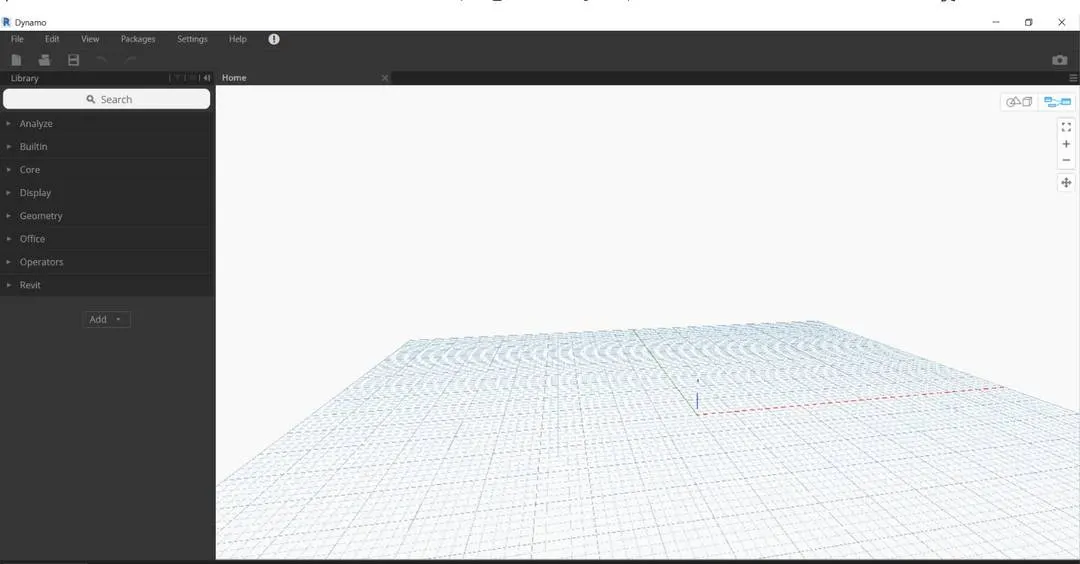
4.the work space of dynamo will be shown, then create a new ine and start working
5. +
+
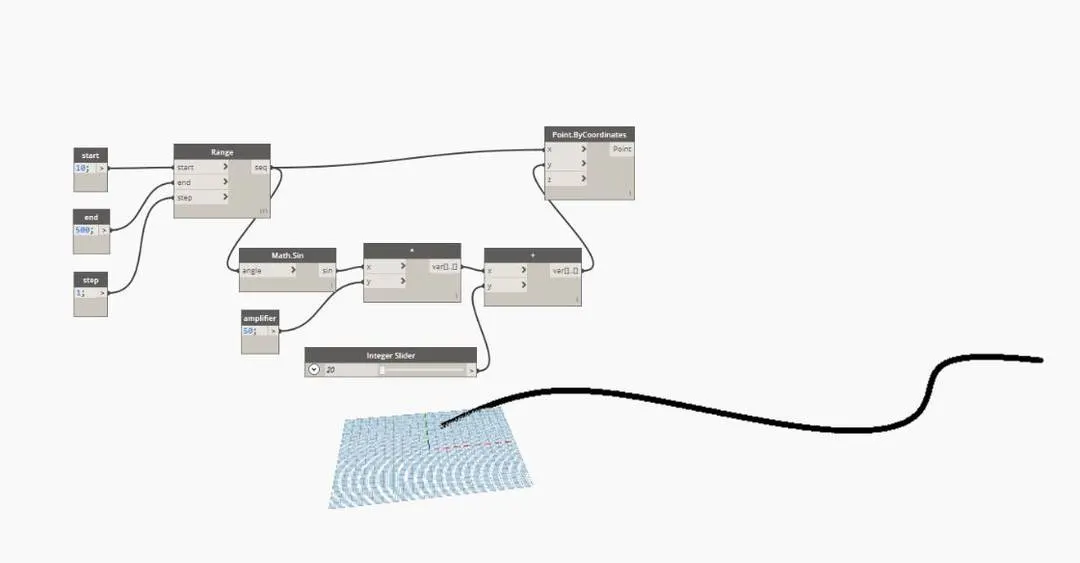
6. for creating a sinusoidal curve we need some necessary prerequities like start ,end and step of curve.
7. with the help of code block we have to assign the prerquities.
8. 
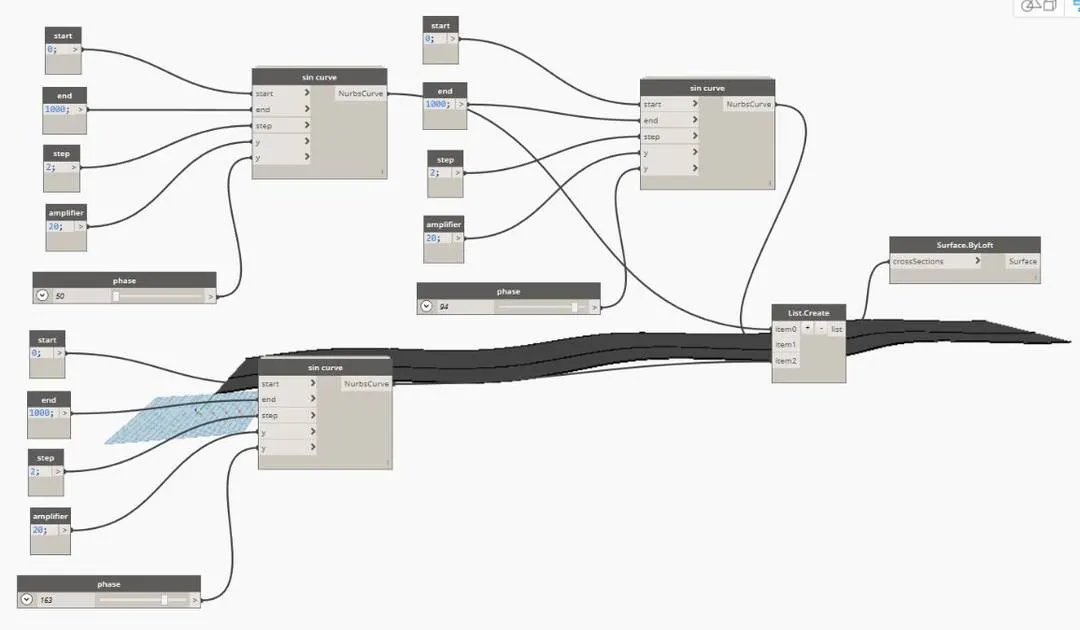
9. now we need amplifier and phase of curve, so we can use code blok and integer slider.
10.
11.Connect Math.sin to x of and amplifier to y of ".
12. Connect variable of * to x of + and interger slider to y of +.
13. Connect the variable of + to y of point by coordinate.
14.connect points to points in nurbs curve and integer slider to degree in nurbs curve.
result:
as we folllow the above steps we can create the sinusoidal points and create curve and later we could give a surface to the curve
.
2) Create a conceptual layout of floor plan in dynamo . Using the tools available in dynamo link the lines to appropriate model elements in Revit by choosing the wall types and wall parameters. Make use of the sliders to slide through the height of the wall and length of the wall.
AIM: To create a conceptual layout of floor in dynamo. Use appropriate parameters like wall types, wall paramenters and use sliders for wall height and length
TOOLS USED:
• Integer slider.
• Code block
• Point by coordinates.
• Line by start and end point.
• Lis.
• Wall type.
• Levels.
• Wall by curve and height.
PROCEDURE:
1. First open a architectural template.
2. from the manage tab select the dynamo property.
3.and select new in dynamo.
4.
5.create two integer sliders for x and y.
6.create four points by coordinates
7.connect the points by line from start to end.
8.
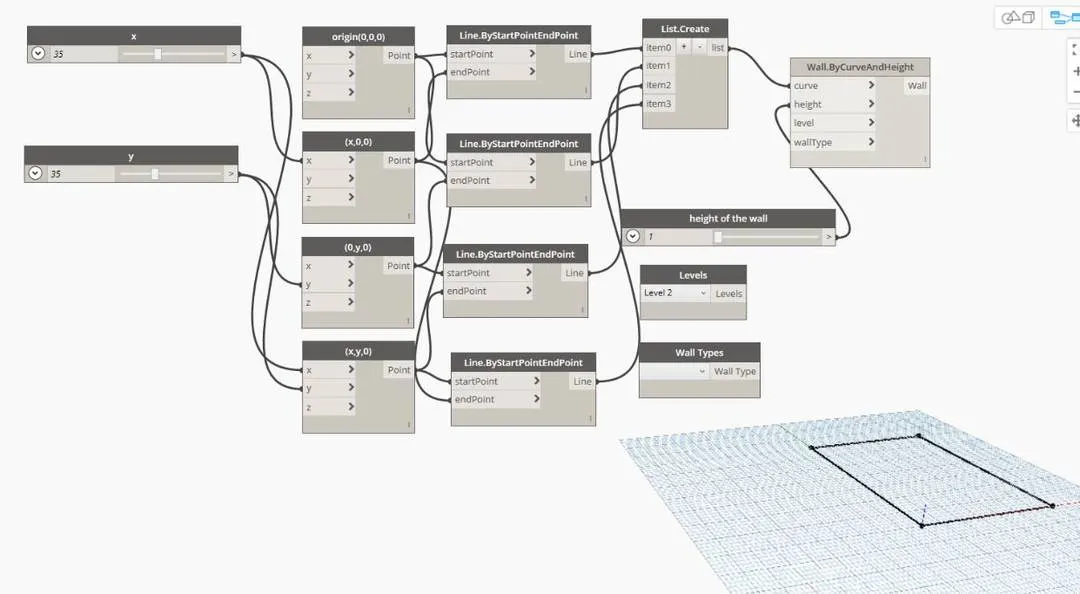
9.create level of walls, heights and parametres.
10.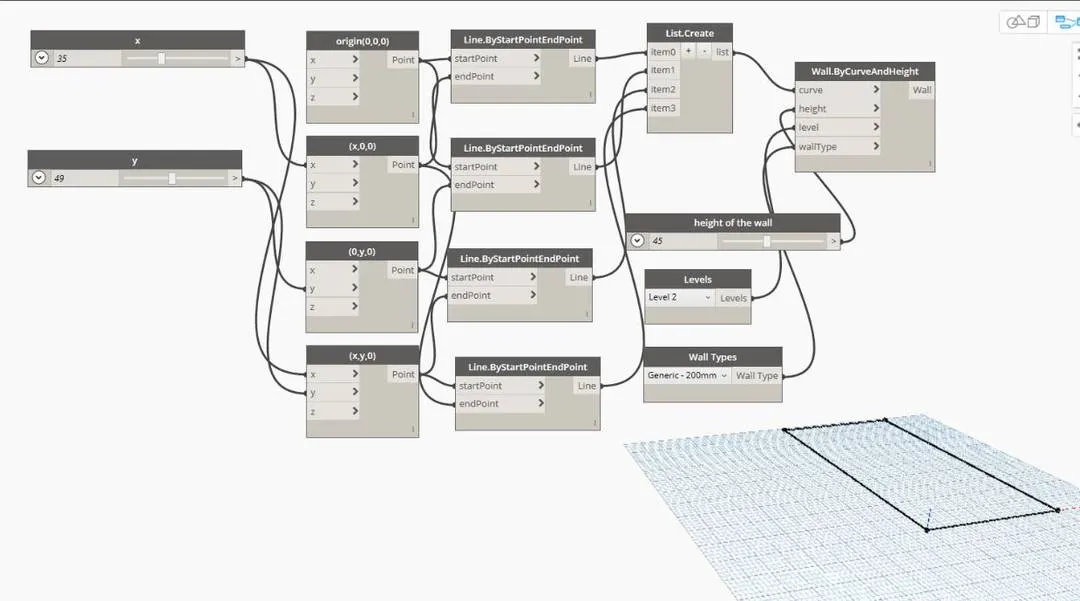
11.connect height of wall, wall types levels and list to wall by curve and heights.
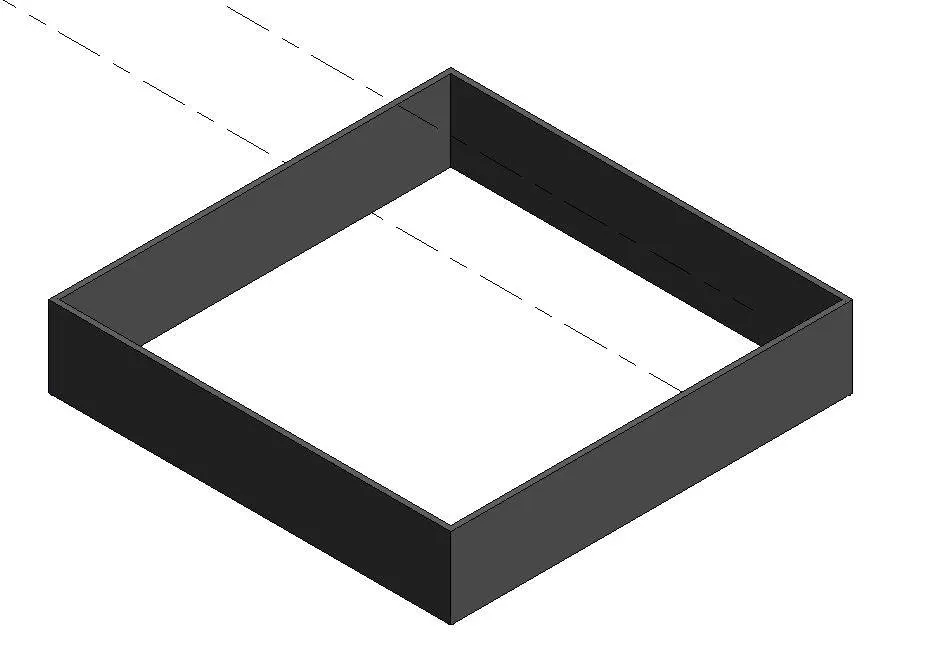
12. now we can see the 3d view of wall from the revit file.
13.
result:
we have sucessfully created a conceptual layout of plan accordingly to parametres.
3) Create an array of model elements in Revit. Use dynamo to vary the properties of model elements by using the slider or code block
AIM: To create an array of elements in revit using dynamo.
TOOLS USED:
• Architectural.
• Columns
• Dynamo.
• Set rotation
• Integer slider.
• Code block
• Select model element.
• View.
• Default 3D view.
PROCEDURE:
1. First open architecture template in revit and draw a architectural column.
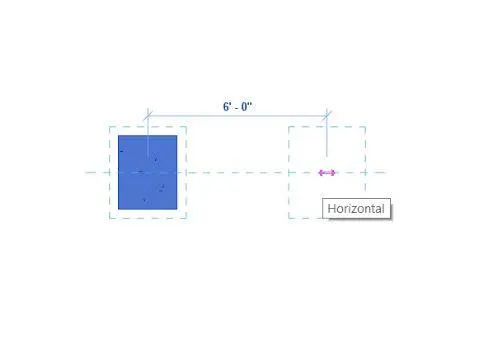
2.now select the coloumn an then copy paste it in the horizontal distance of 6'0"
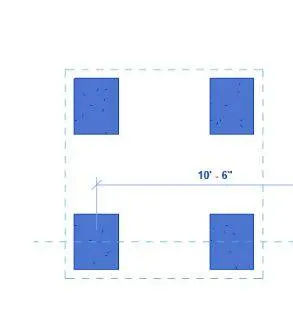
3.then select both of these and paste them vertically . hence we got 4 architectural coloumns.
4.
5.from the manage tab select the dynamo option
6. from dynamo select model elements, set rotation, code block and integer slider parametres.
7.
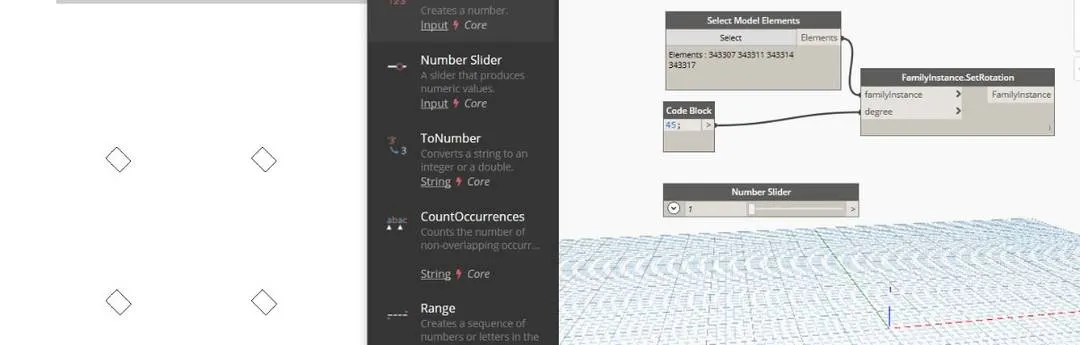
8.assign standard value to code block and connect select model elements and code block to set rotation.
9.now connect the integer slider to set rotation parametre to chnage the parametre of the coloumns.
10.
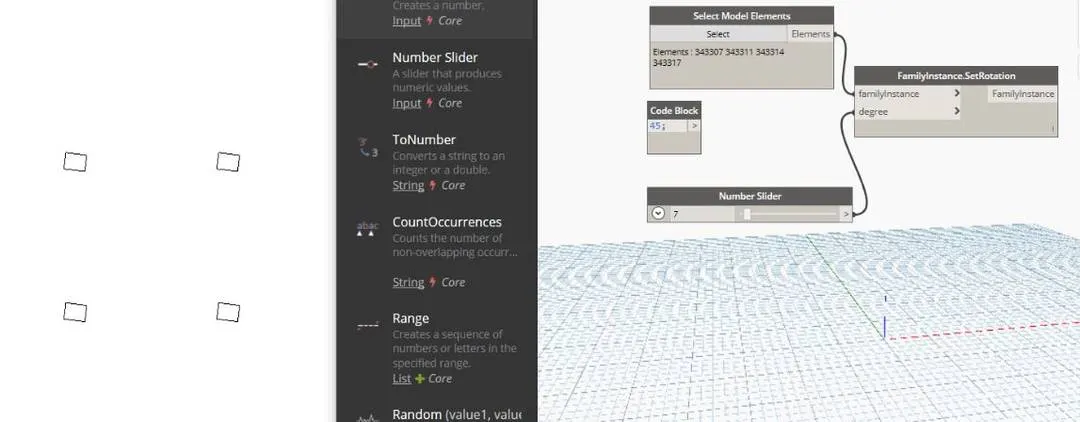
11.we can see the rotation and change the values simultaneously in the revit file and also can access 3d view
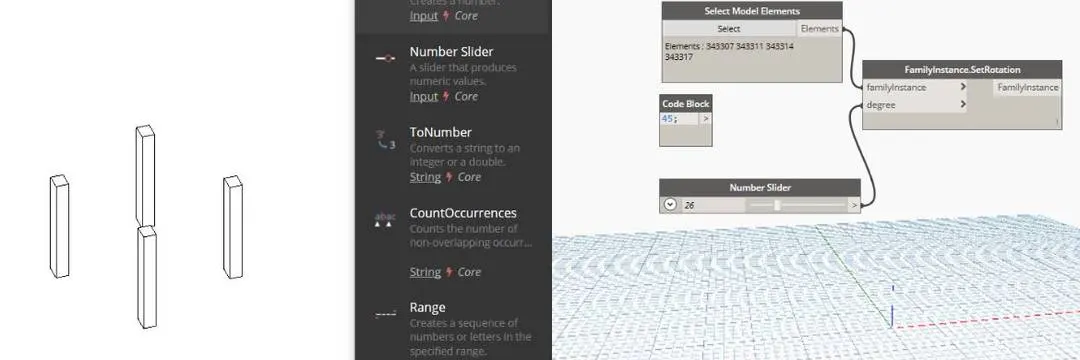
result:
we can create or change the parametres of an array in the revit with the help of dynamo.
4) Create a conceptual mass in Revit and develop a parametric column by dividing the surfaces and apply the concepts similar to used in parametric walkway modelling. Use triangular bent or square shaped panels to add finish to the parametric column
AIM: To create a conceptional mass in revit and develop a parametric column and apply surfaces similar to as used in parametric walkway modelling
TOOLS USED:
• Families
• Conceptual mass,
• Level.
• Set
• Filter
• Pattern.
• Create form
PROCEDURE :
1. First open revit and select new family, under that select conceptual mass and click ok.
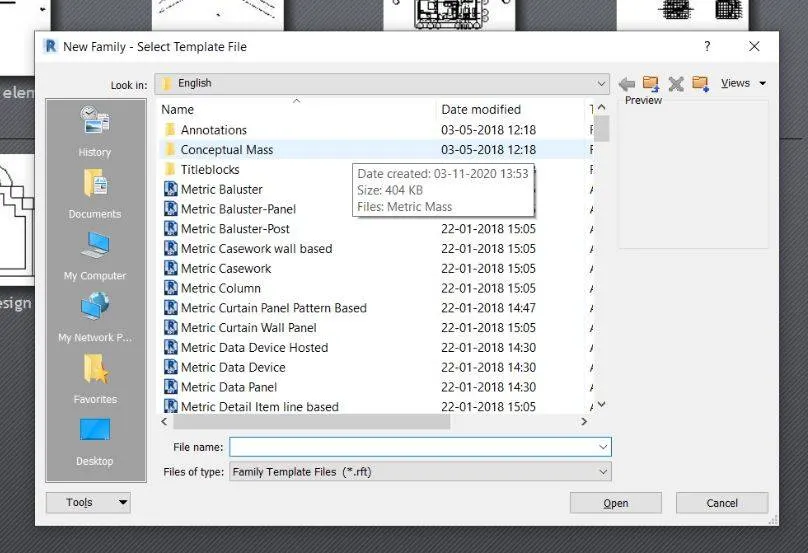
2. now conceptual mass family opens then select north and create a level say 10'

3.select line a draw a line of 10' between both the levels.
4.add reference points on line appropriately in the 3d view.
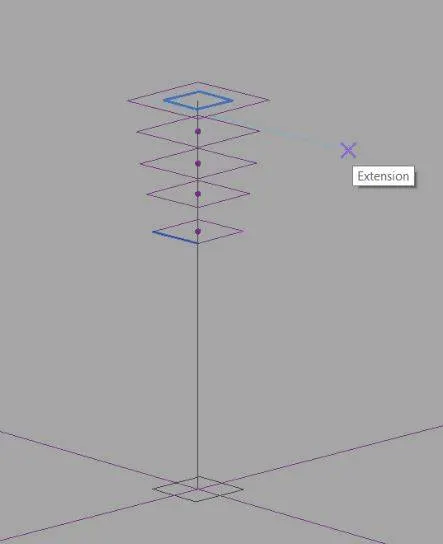
5.select set option and draw polygons at reference points.
6.select all components and click on create form.
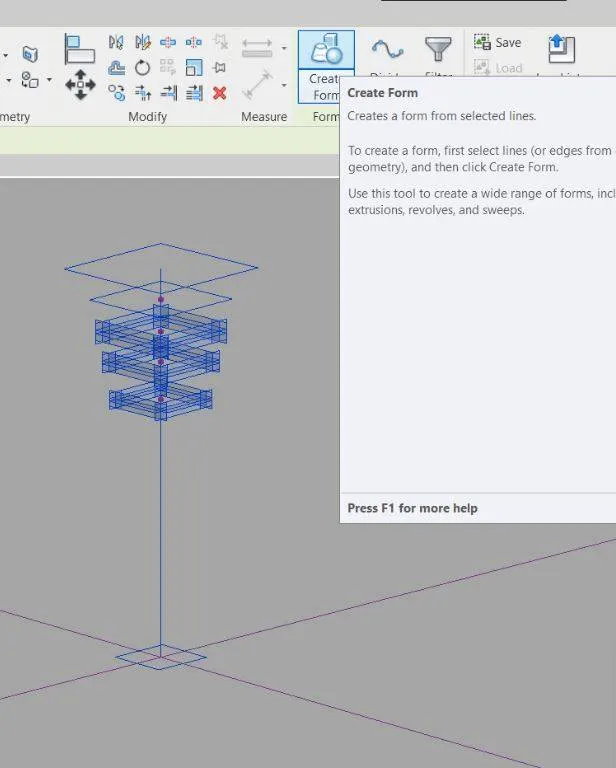
7.select the divided surface tool after selecting all the elements.
8.
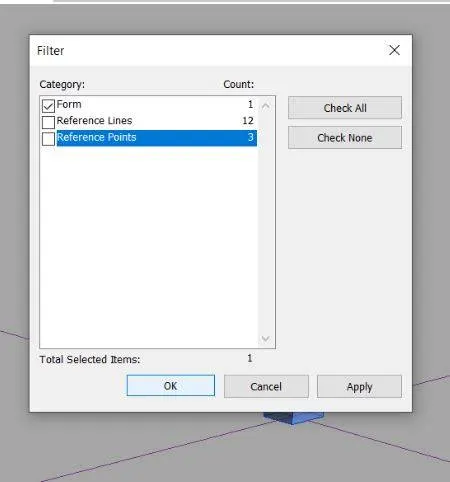
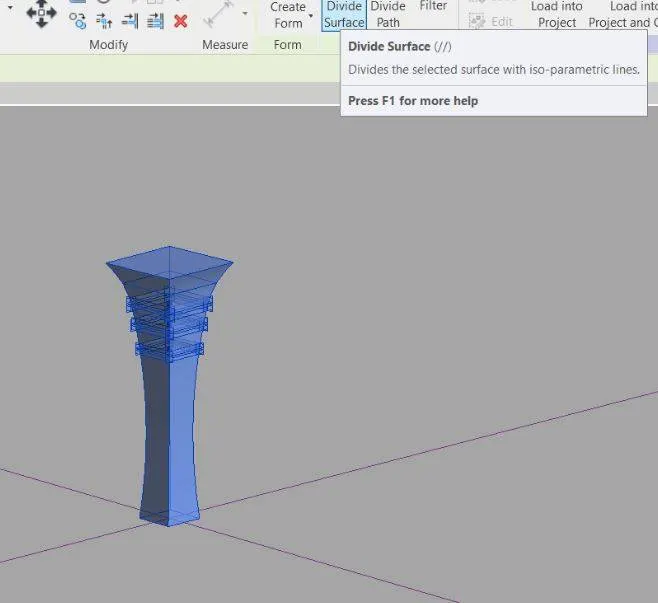
9. we can create new families by selecting the curtain panel pattern based.
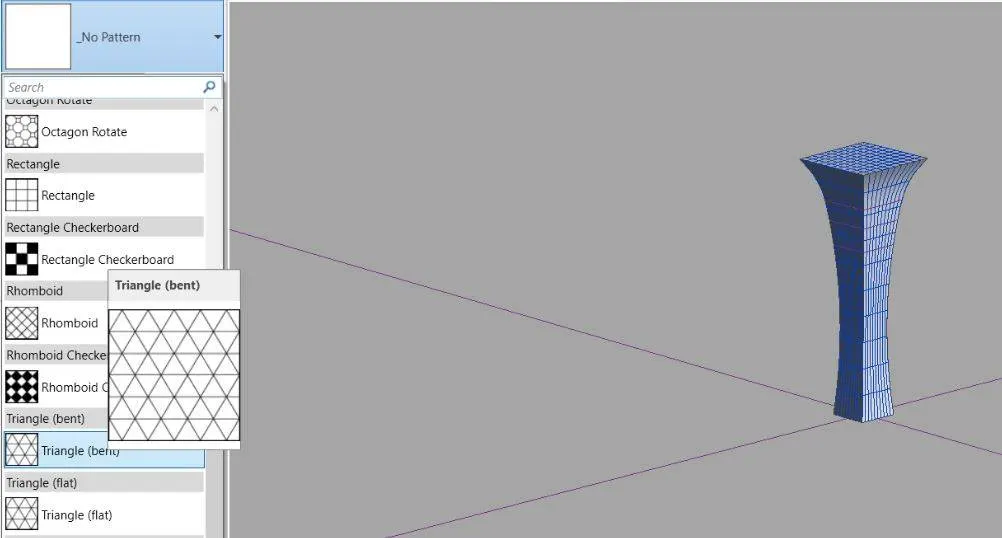
result:
by foloowing the above steps we can create conceptual mass in revit and can develop parametric coloumn by dividing the surfaces and adding triangukar bent coloumns.
5) Use Dynamo to work on developing a Parametric Stadium. List your parameters and use the visual programming approach to complete the modelling, You can use the concepts discussed in parametric high rise tower in class for reference.
- dynamo
- integer slider
- code block
- coordinate system by origin
- rectangle by length and width
Procedure:
1. select the dynamo property from the manage tab.
2.add 4 integer sliders assign them for number of levels, floor to floor distance, bottom floor rotation and top floor rotation.
3.
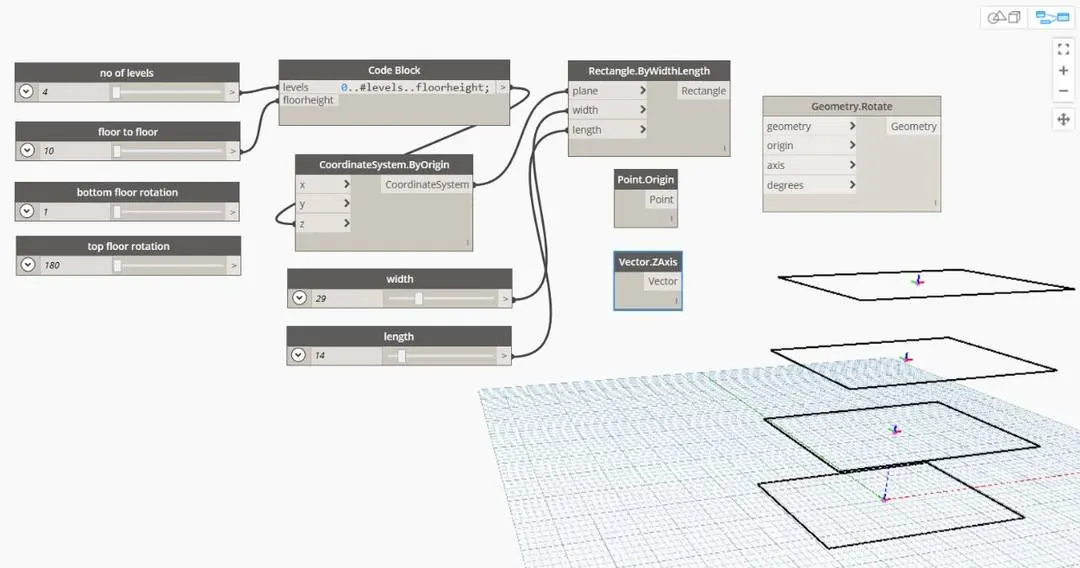
4.add code block, geometric rotation, coordinates by origin and rectangke by length and width.
5.
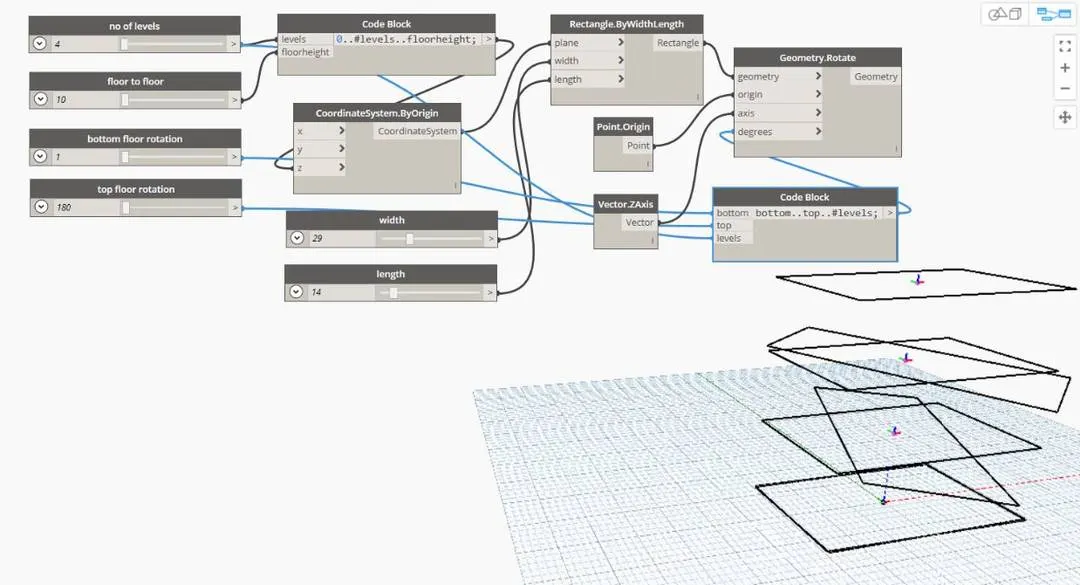
6.connect the integer sliders to code block and width and length sliders to width and length by width and length.
7.
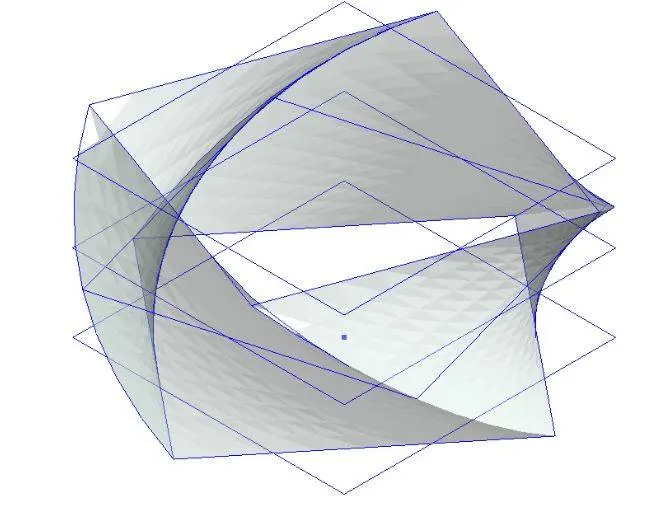
8.connect recatngle,point,axis to geometric rotate.
9.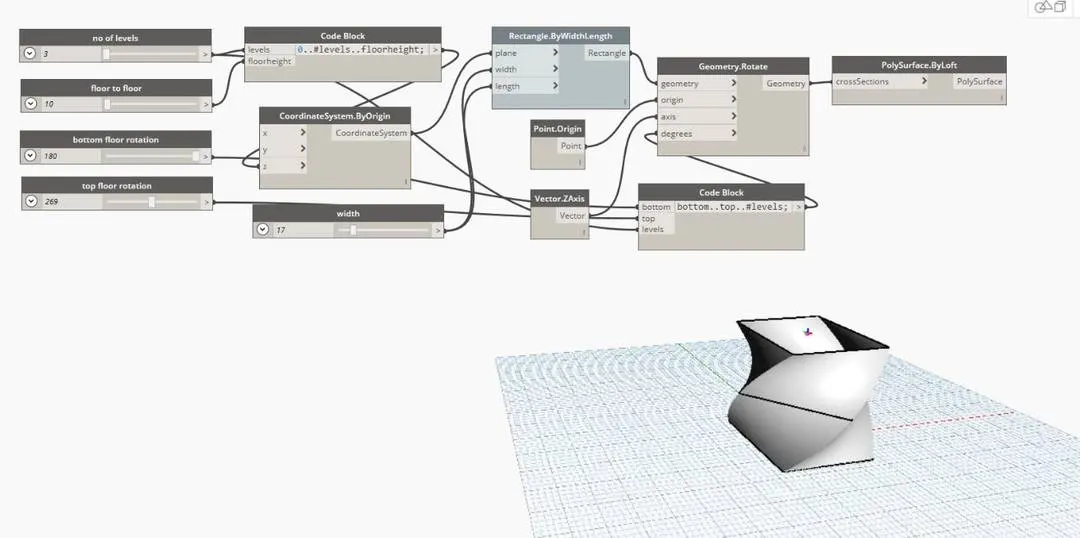
10.by changing the top and botoom rotation we can chnage the twist in the building.
11. their is a possibility to change the height of floor and number of floors.
12.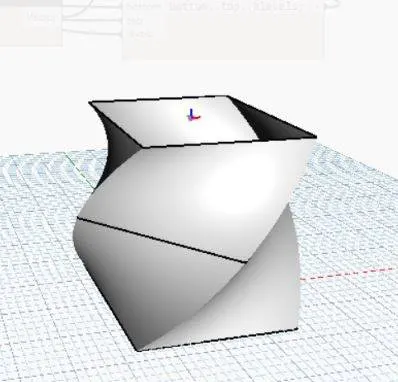
13. now we can see structure in view tab.
Result:
as we follow the above steps we can create the parametric stadium thriugh dynamo