REVIT_Creation of basic drawing_week 2.
1) What is BIM? Summarize the features of BIM and benefits of using BIM over 2D CAD tools
BIM stands for building information and modelling. Basically BIM is pretty much useful than cad in representing 3d models . The level of flexibility shown by BIm is not present in cad, the BIM edits the changes through all the views which is completely absent in cad . BIM has multidisciplinary approach to a design.The BIM software can be used to design all the disciplines such as architecture, structure, and MEP where this is not possible in 2d cad. And we also can perform estimation mapping and analyze the load of the structures using Bim but all of these are absent in cad software.
2)Understand the concept of Categories, Families, Elements, Instances in Revit. Go to Insert Tab, choose a category. Pick a family and element. Understand the instances and insert it to Revit model
Aim: To pick an element from the family which is present in the categories and insert it to the file.
Tool used:
- file
- open
- insert
- load family
- load
Proceure:
- open a saved revit file with some layout plan.
- and from the quick access toolbar select the insert panel.
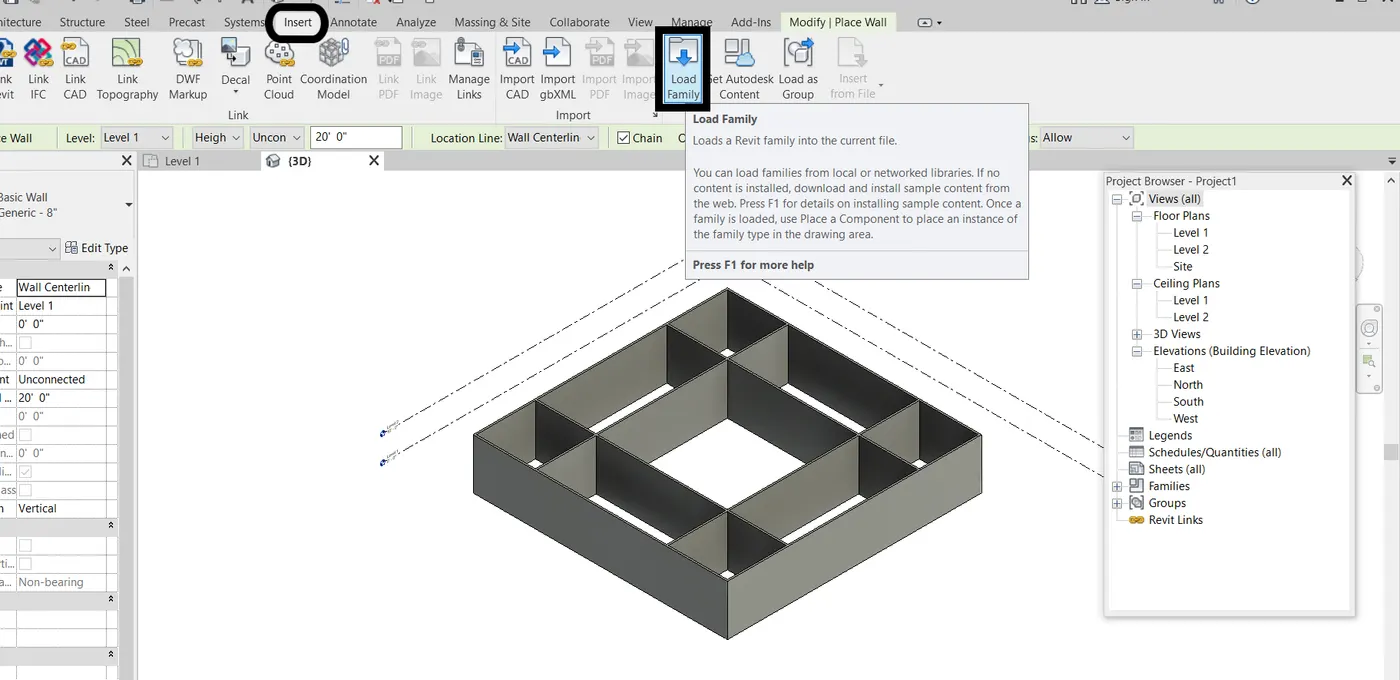
- and from the insert panel select the load family icon where you will find so many categories of elements.
- select anyone element such as doors
- insert the door to the model.
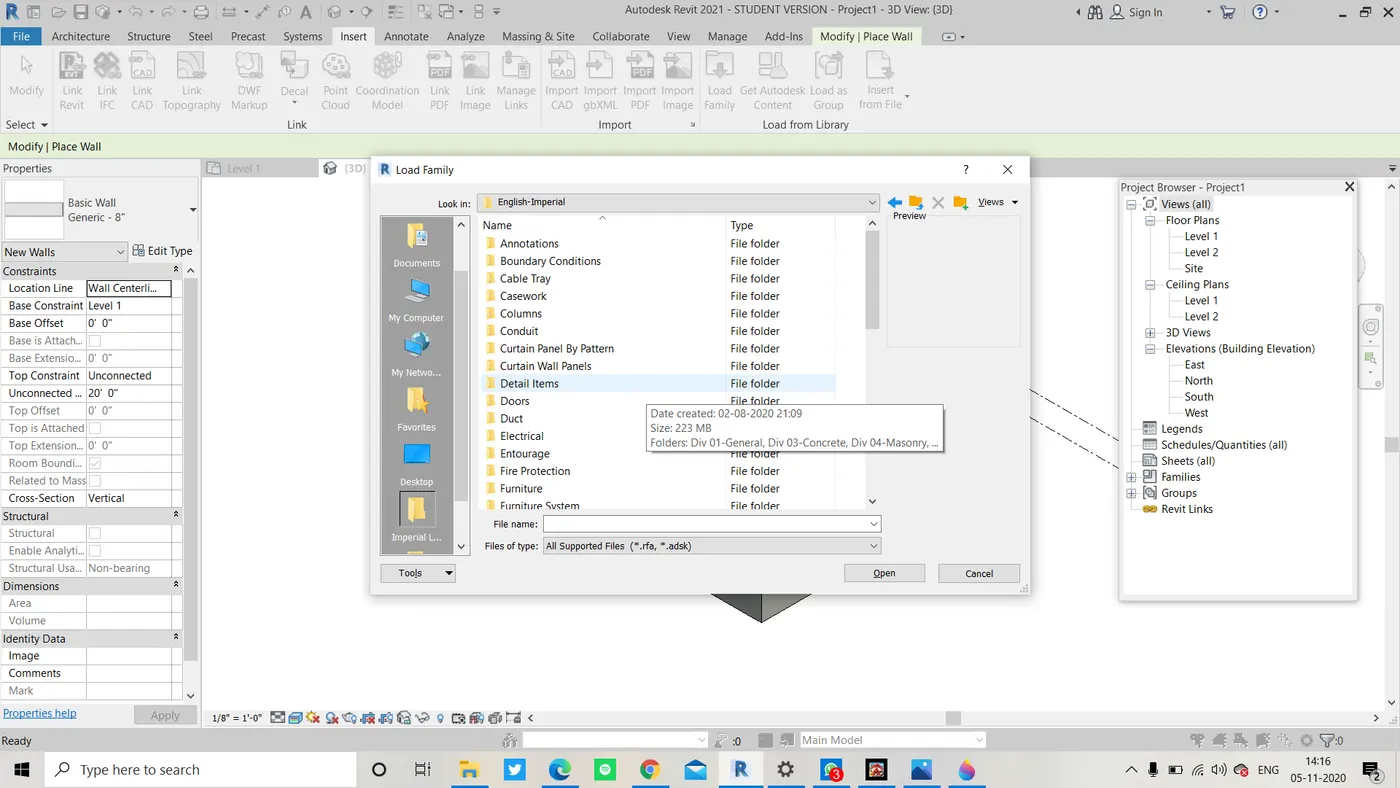
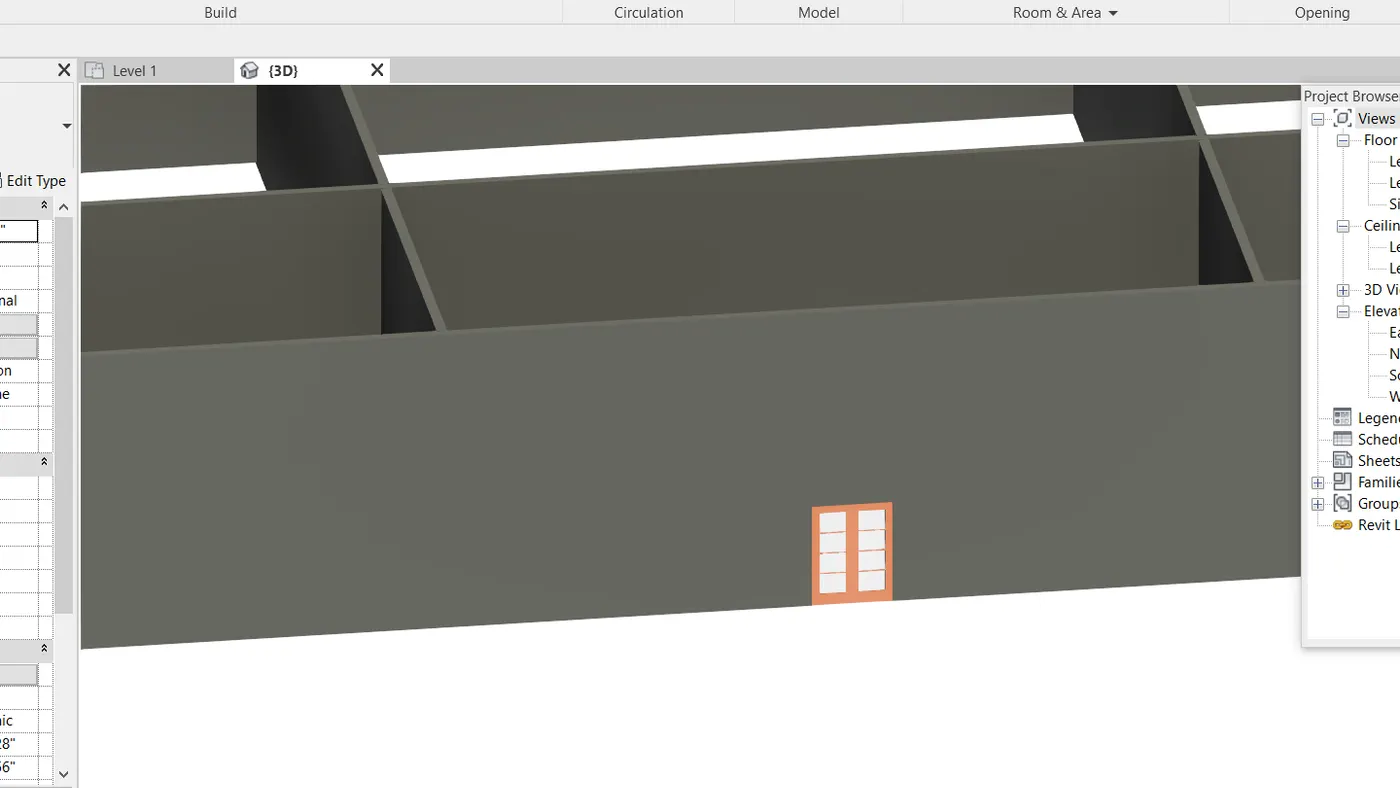
Result: The selected door element is fixed and properly adjusted in the model.
3)Setting up a Project – Open a project file with architectural template. Save the file with appropriate name. Set up the project units to Imperial / Metric based on your convenience of modelling. Complete the project information under Manage tab. Set up the maximum backups for project file to 3
Aim: To open a file with architecture template and give an appropriate name and save the file with all its information and set upto 3 backup files
Tools used:
- file
- open
- save as
- rename
- options
- maximum backups
Procedure:
- firstly open the revit file
- then from the file menu click on save as function
- select project from it
- a file location access bar would pop out
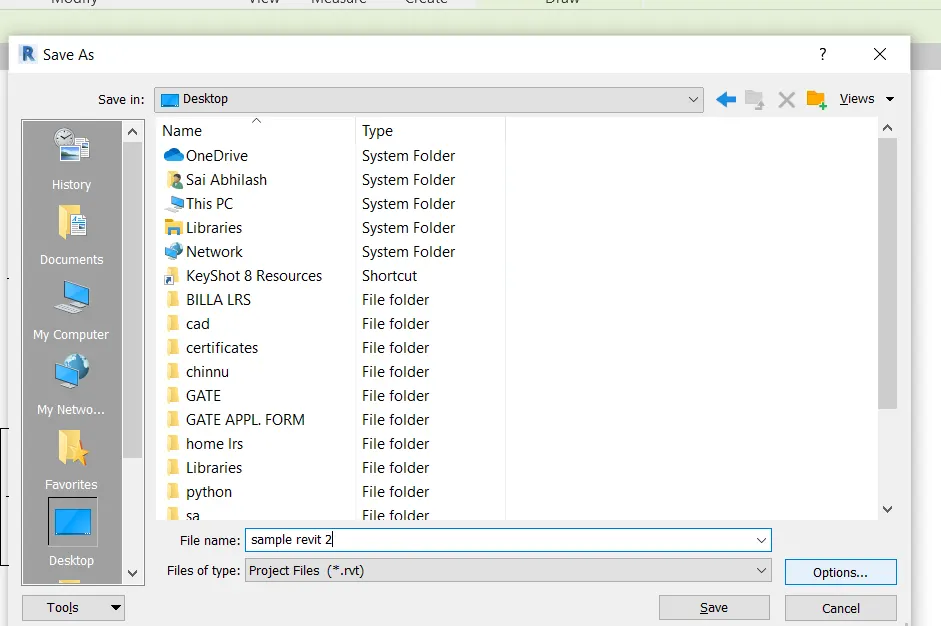
- then select options icon from the bottom right and a setting for maximum backup shows out
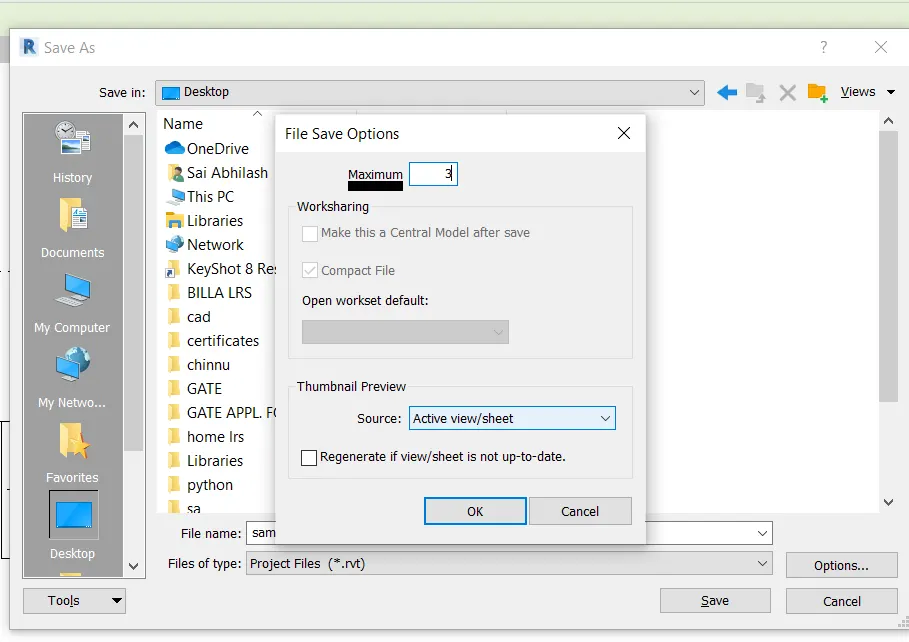
- then set the maximum no of backups as 3 as desired.
Result: the revit with appropriate name and 3 backups is saved.
4)
Understand the concept of Levels and Grids. Follow the naming and conventions. Create the following Levels: ( Convert to metric equivalents if metric is your units)
Ground Floor @ 0’
First Floor @ 10’
Second Floor @ 20’
Roof @ 30’
Grids Transverse Grids A, B,C,D, E @ 10’ spacing
Longitudinal Grids from 1 to 10 @ 20’ spacing
Aim: to draw:
Ground Floor @ 0’
First Floor @ 10’
Second Floor @ 20’
Roof @ 30’
Grids Transverse Grids A, B,C,D, E @ 10’ spacing
Longitudinal Grids from 1 to 10 @ 20’ spacing
Tools used:
- file
- open
- architectural
- wall
- project browser
- level
- grid
procedure:
- from the file menu open the revit file .
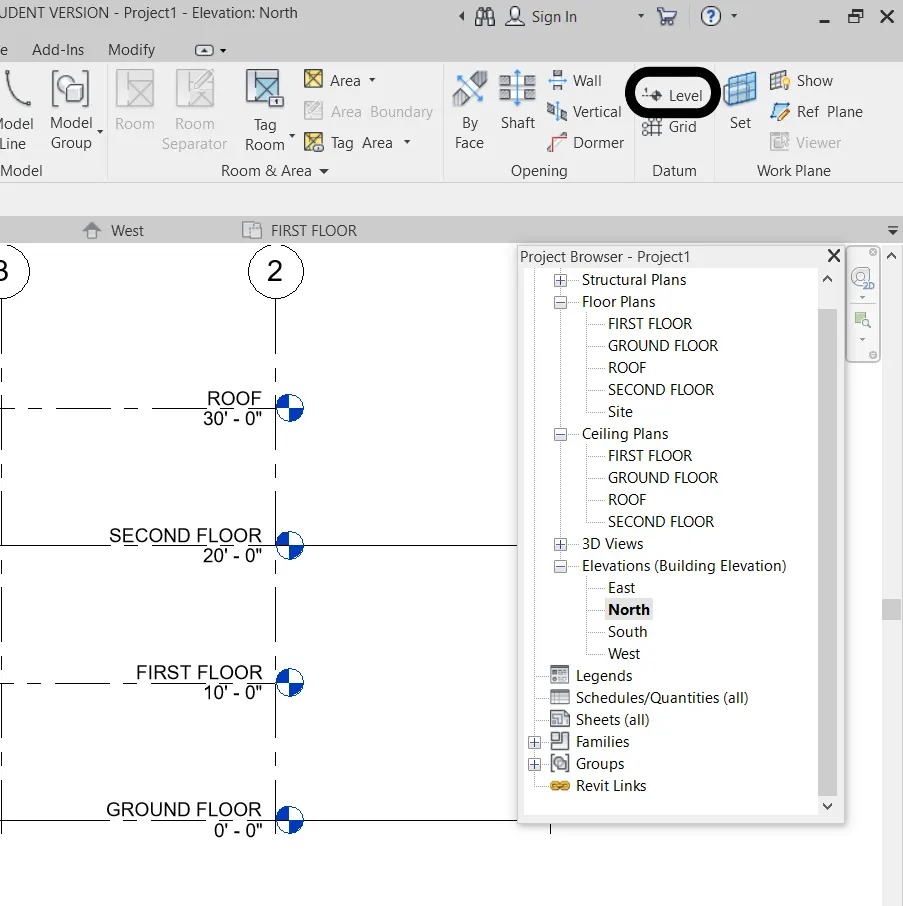
- then firstlly with the project browser open east/ north/south/west from the elevations box.
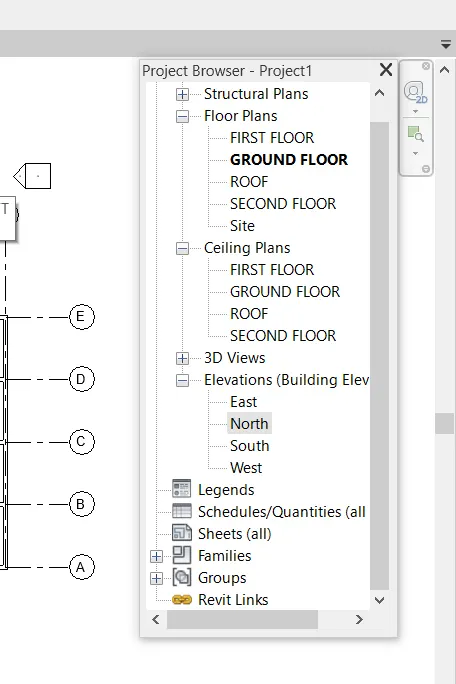
- after selecting ayone of the elevation and with the use of level property from architectural tab attach different levels to the file.
- after this go back to the ground floor view and with the use of grid property draw the grids as required .
- for an alternative firstly draw a layout of desired grid structure with wall property and then draw grids.
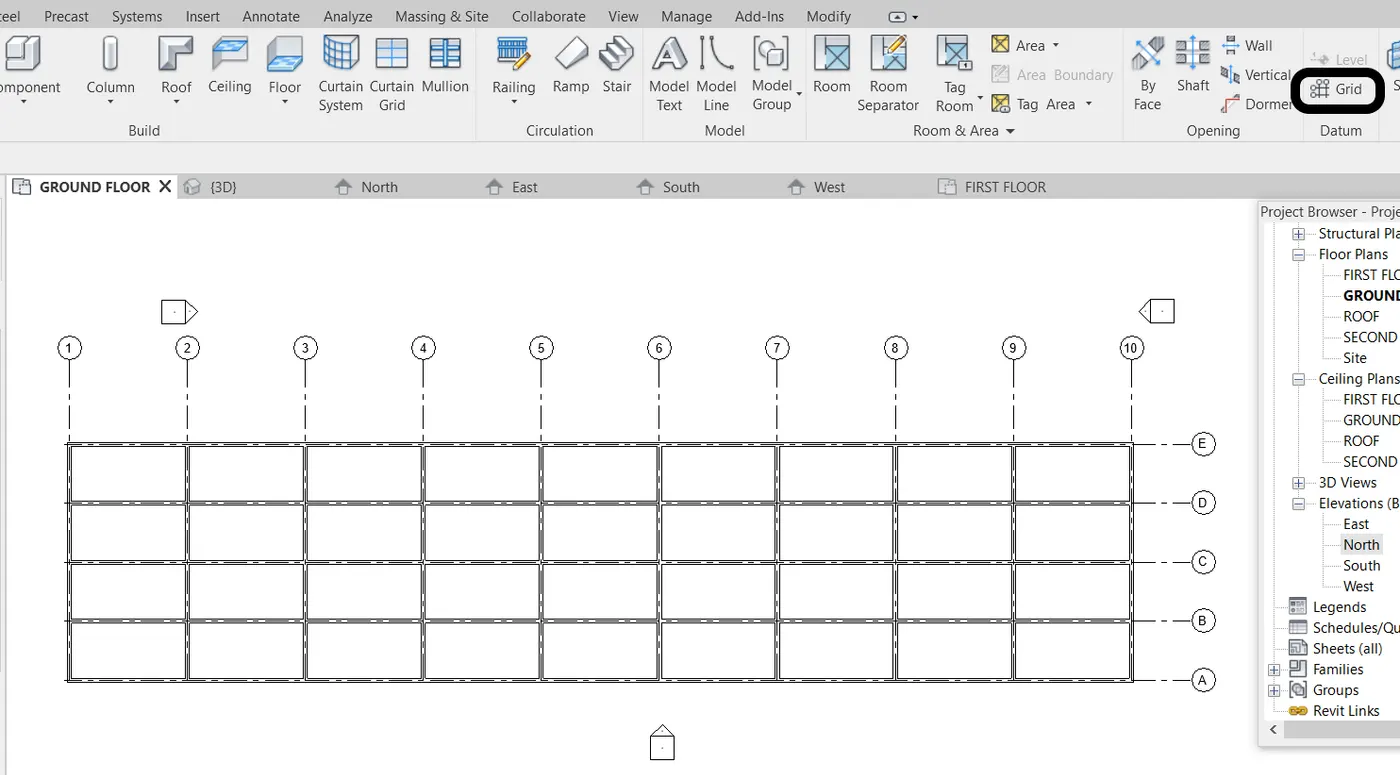
Result: Thus the required grids with traverse and longitudinal spacing has been made.
5)3D modelling of residential unit – From looking at your house / or a place you aspire. Create a conceptual layout of the residential unit. You can measure using a tape or
you can access your residential plan to create a similar layout.
Aim: to create a 3d model of residential layout.
Tools used:
- file
- open
- architetural tab
- wall
- propeties
- edit type
Procedure:
- open the revit file
- choose an architectural template for the dimensions to be feet-inches
- open the existing plan/ layout of house for reference.
- from the architectural tool bar choose wall property
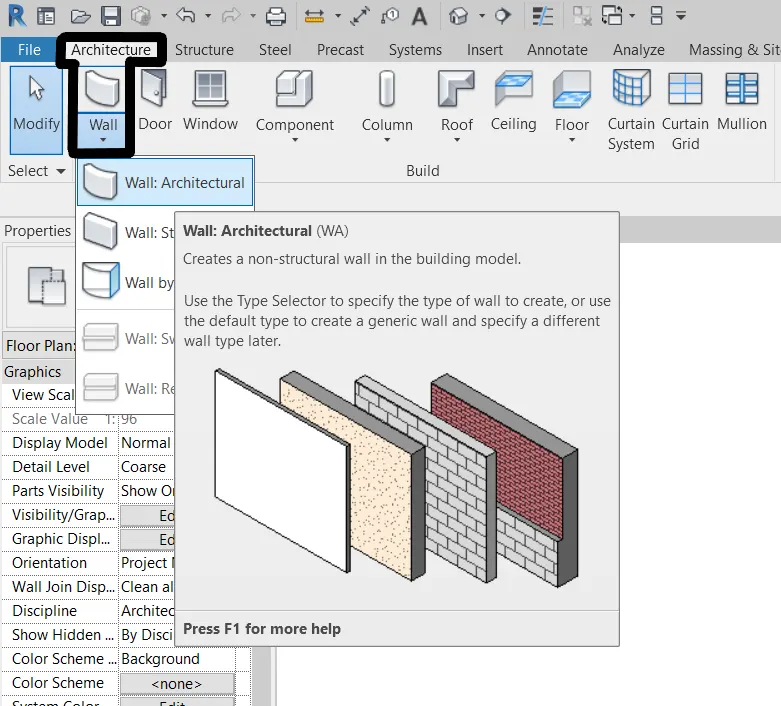
- draw the layout plan selecting the ground/first floors as required .
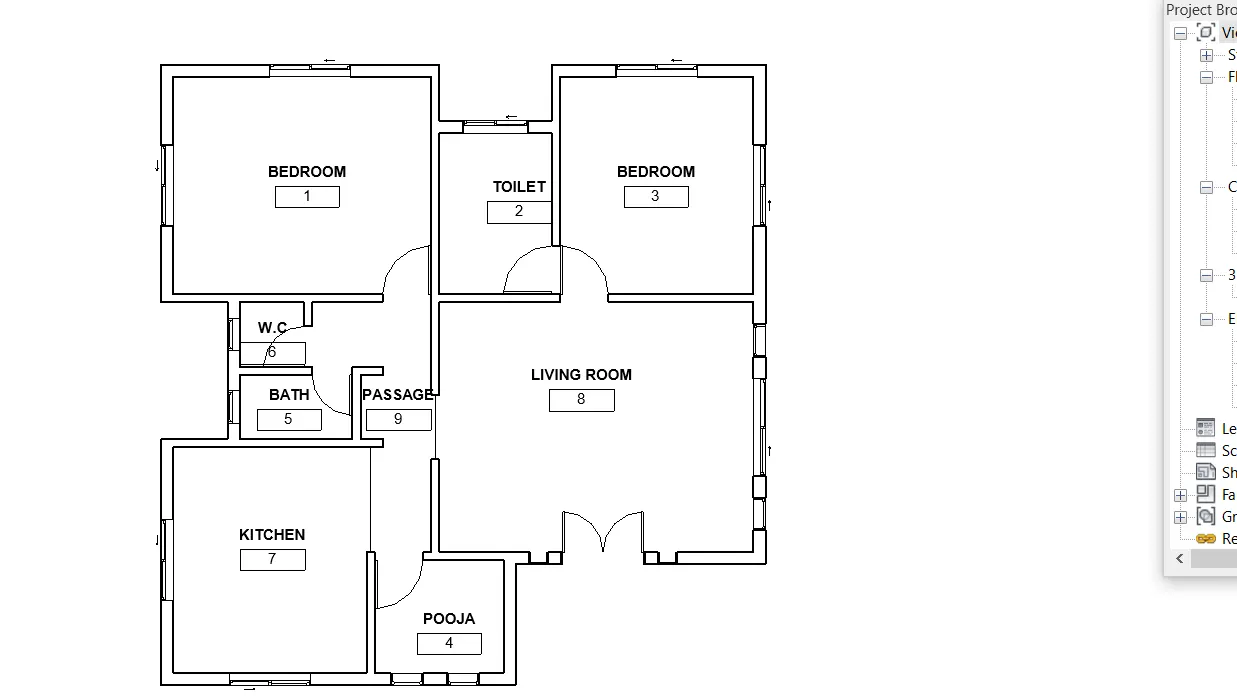
- use 3d icon to view thw layout in 3d .
Result: the required 3d view of the drawn layout is shown clearly.
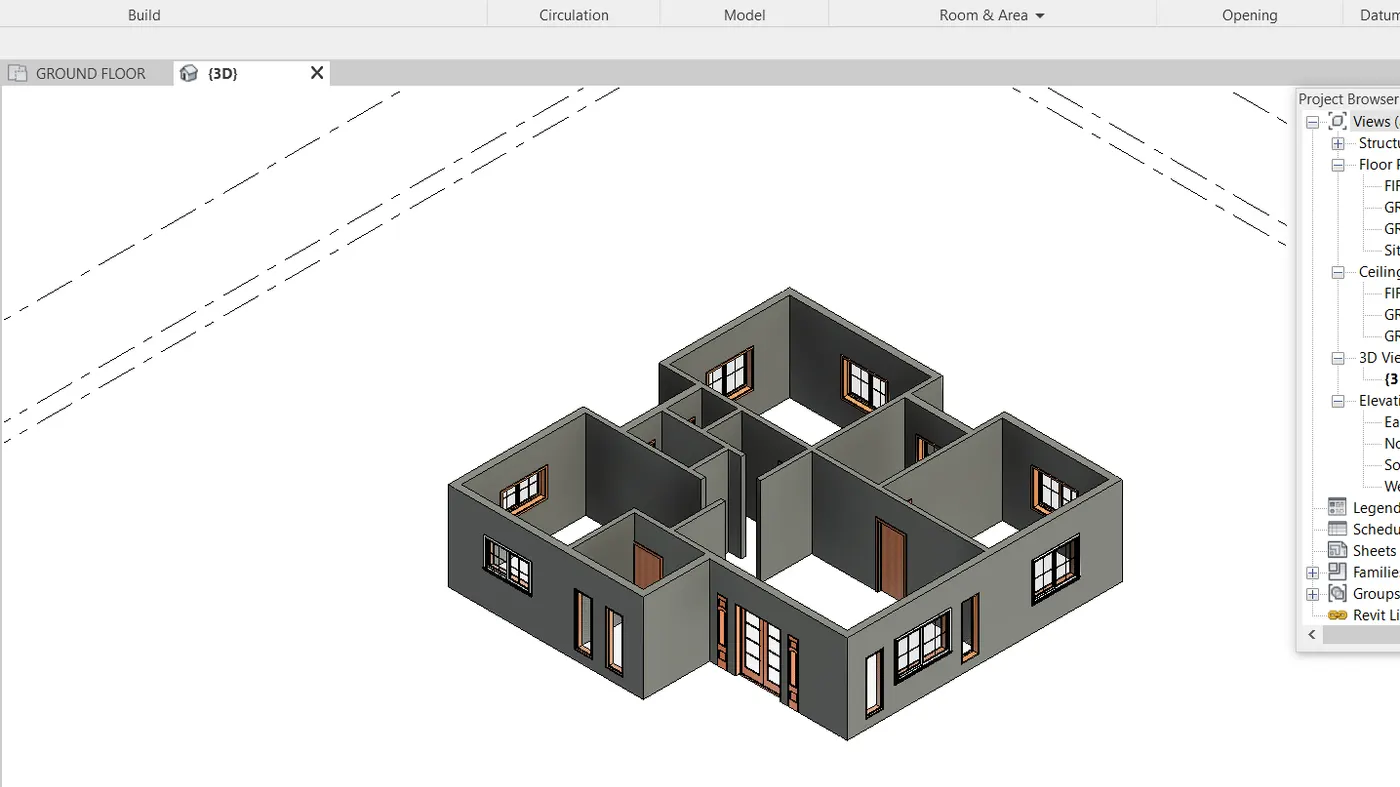
6)In the layout created draft the level of details you are planning to include – Dimensions of room, components you plan to add in the residential unit.
Aim: In the drawn layout , to give dimensions of the room and include some elements.
Tools used:
- file
- open
- annotate
- aligned
- insert
- load family
Procedure:
- firslty open a new revit file
- And draw a layout plan which is included with some rooms in the interior.
- Now the next task is to apply dimensions for the give room
- For that we use annotate bar and with the help of aligned property we measure the room dimensions and place them accordingly
- before calculating the dimensions of the room we actually need to use the room seperator from the room and are sector of the architectural menu.
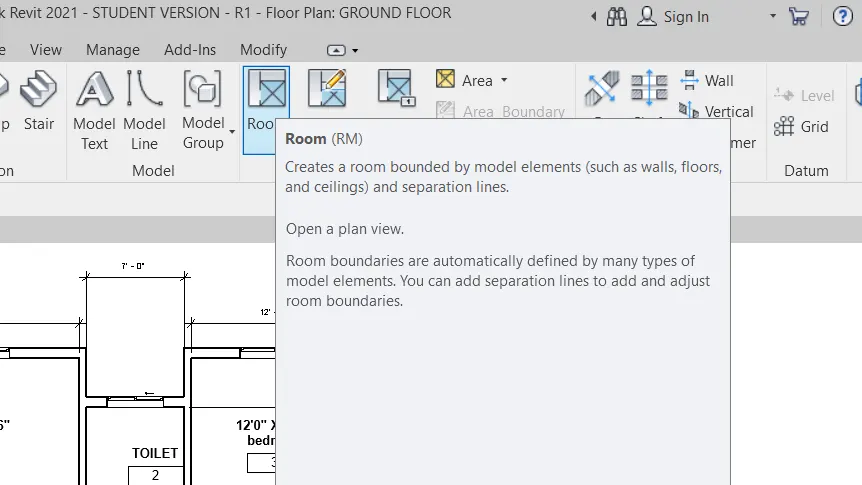
- Now it is easy to use the rooms sepeprately and flexibly.
Result: The dimensions of every room is clearly mentioned and all the rooms are seperated accordingly.
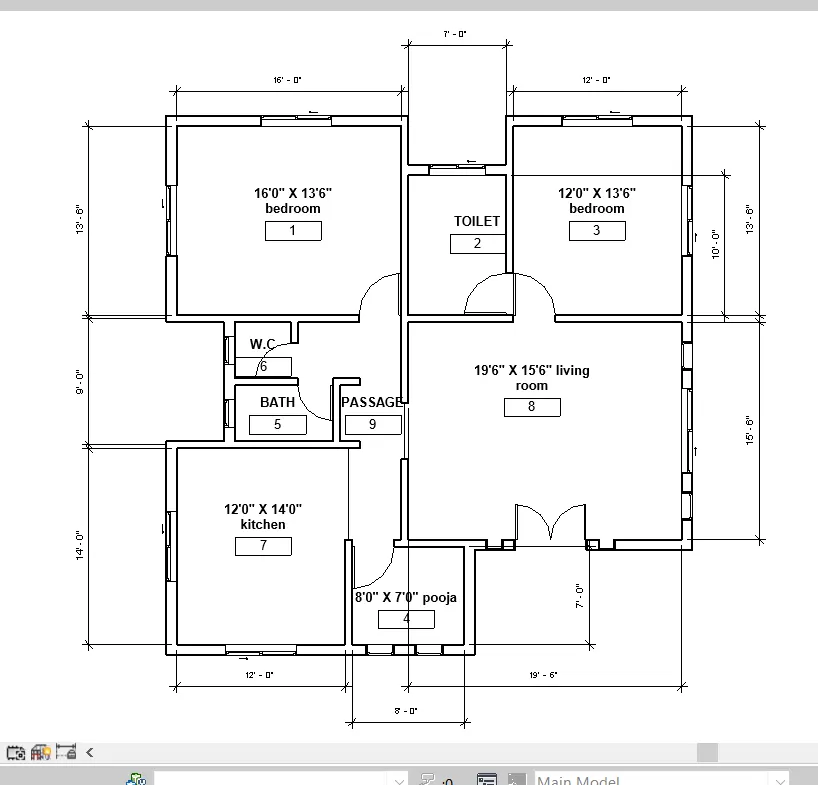
7)Identify the residential model elements such as Door, Windows, Tables, Chair, Couch, Bed, Lamps from the library and insert them to the model . Save the project for use
for Assignment 3
Aim: To find out the residential components from the revit libraries and then insert them to the layout plan created
Tools used:
- file
- open
- insert
- load family
- select categories(ex:doors)
- load
Procedure:
- open a revit file with drawn layout of revit plan
- then with the use of room seperator seperate the rooms to make the layout look flexible and appropriate while placing components
- From the insert tab use load family icon and load the revit categories from that .
- choose different categories like doors windows furnitue etc.,
- and then place them accordingly to the room which suits the best .
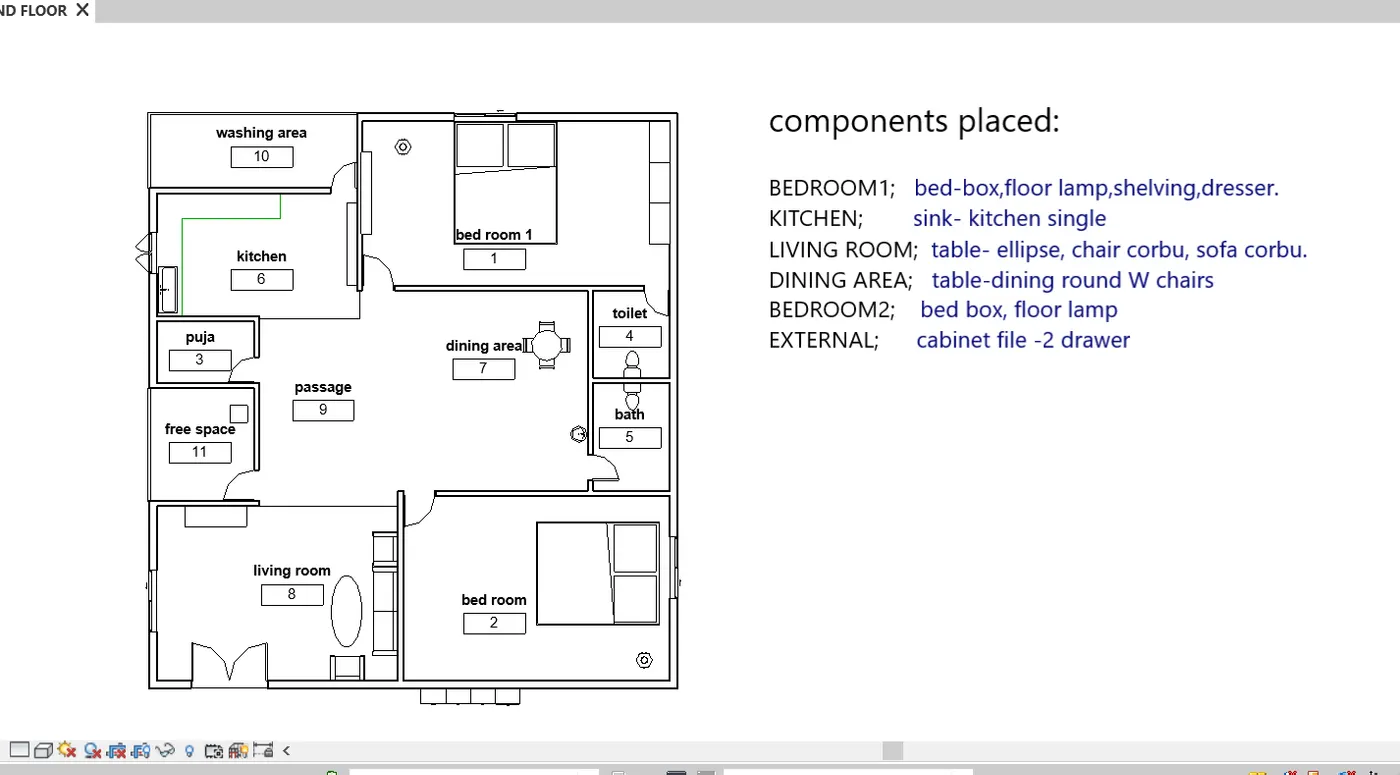
Result: The layout with inserted proper elements from revit libraries is made appropriately.
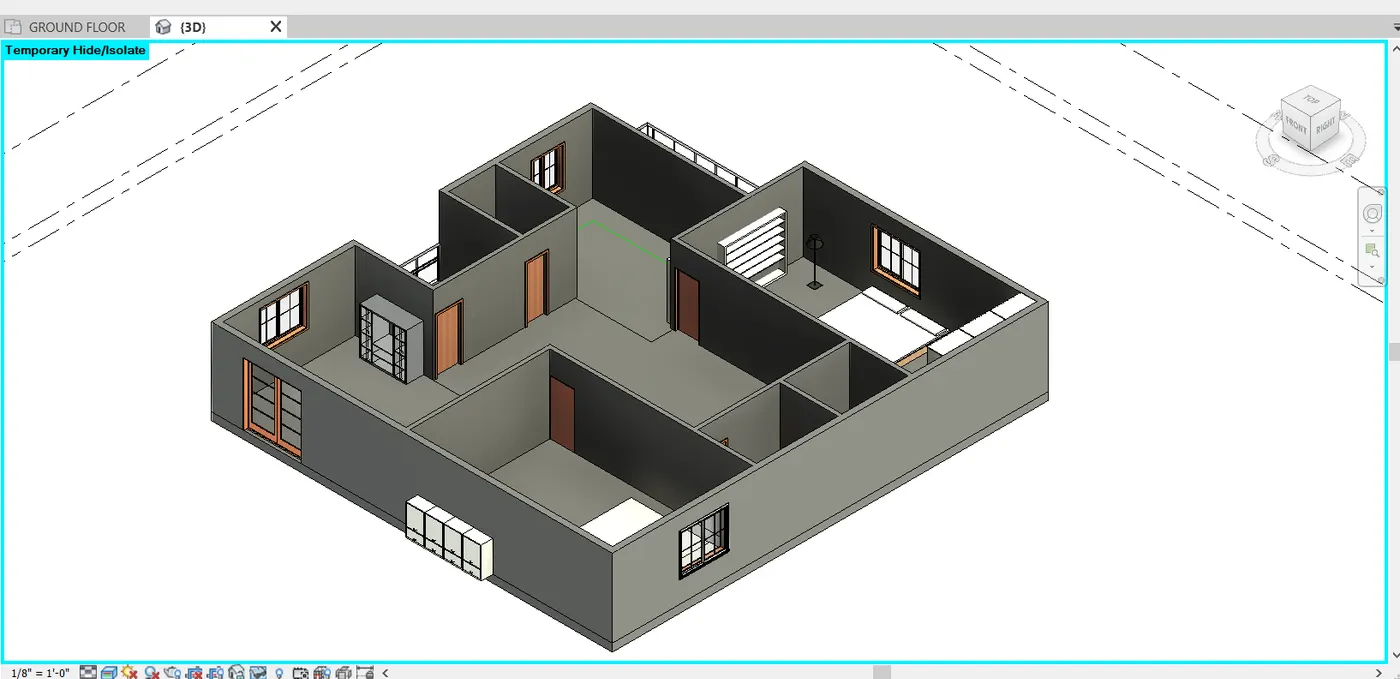
The above picture clearly shows the layout of residential 2bhk included with components from revit libraries.