REVIT_Introduction to REVIT_week 1
1)
Aim: To create a new revit project and name it
Tools used:
- file
- new
- project
- template
- save
procedure:
- firstly to create a project file we need to selec new tab from the file window.
- different kinds of file groups like project,family etc,. will pop out.
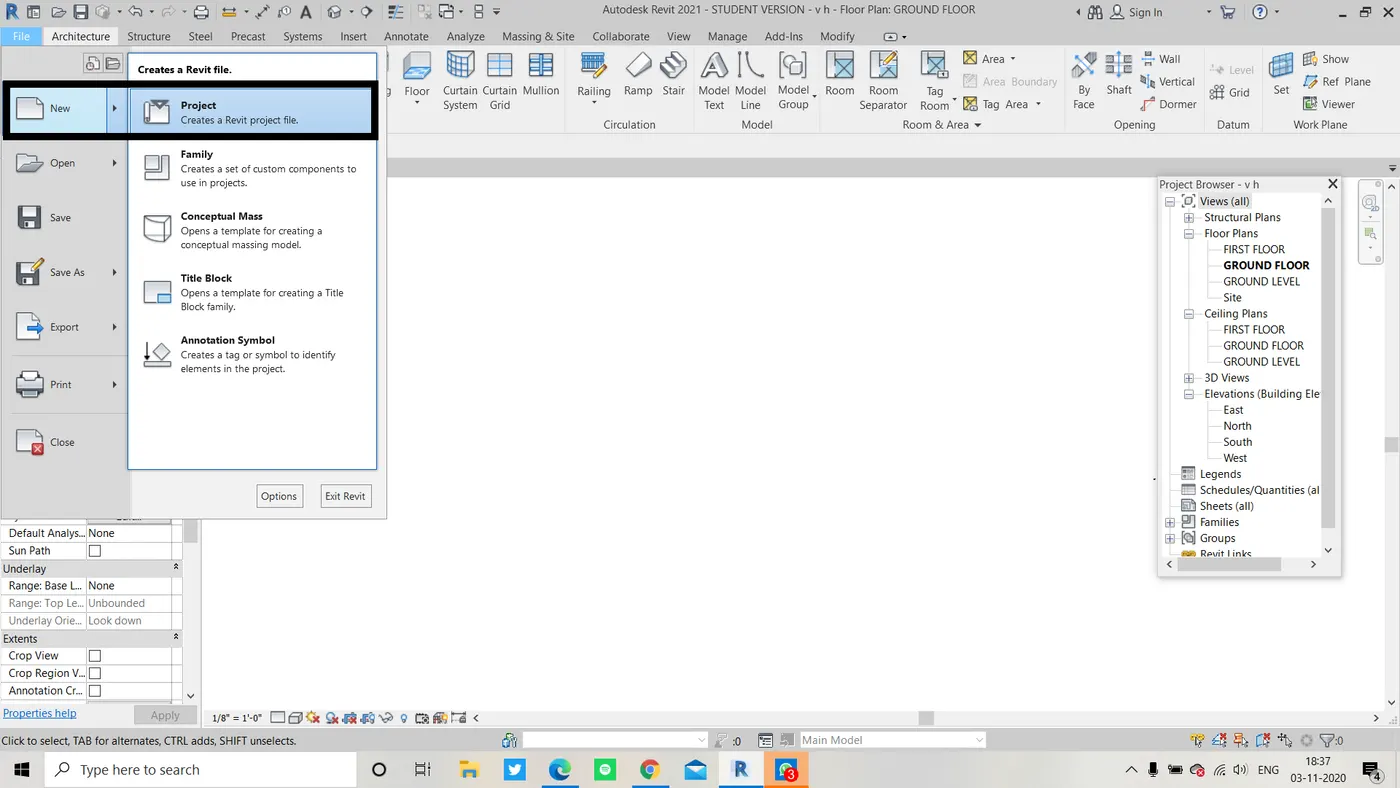
- from these file groups select project tab and continue to create a file.
- while going to next step revit software actually wants you to select the choice of your template.
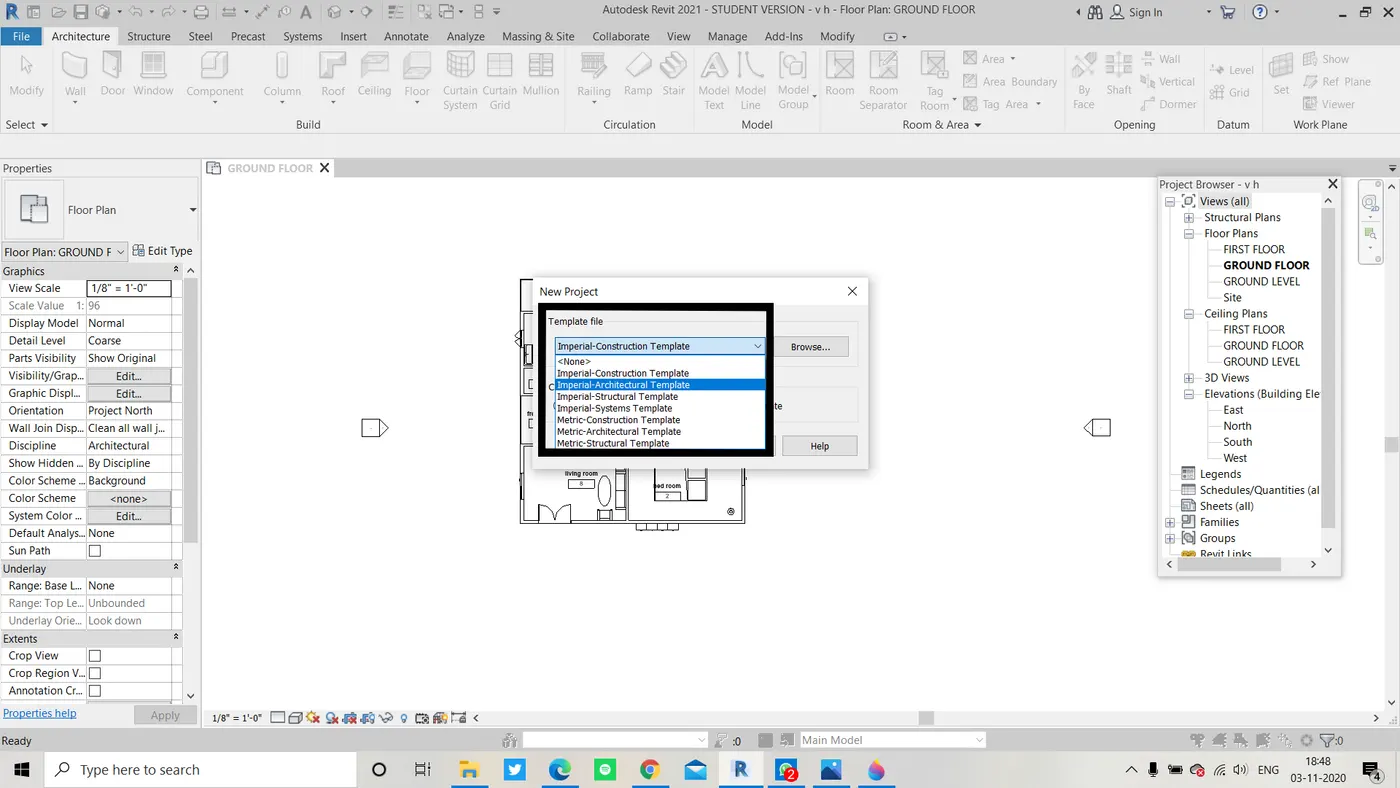
- please choose one of the template and move forward for the designing work.
- to create a name to the project file we need to use the manage tab and then in project information window we should name the file as neccessary.
Result:
- i named the file as sample revit considering the imperial-architectural template.
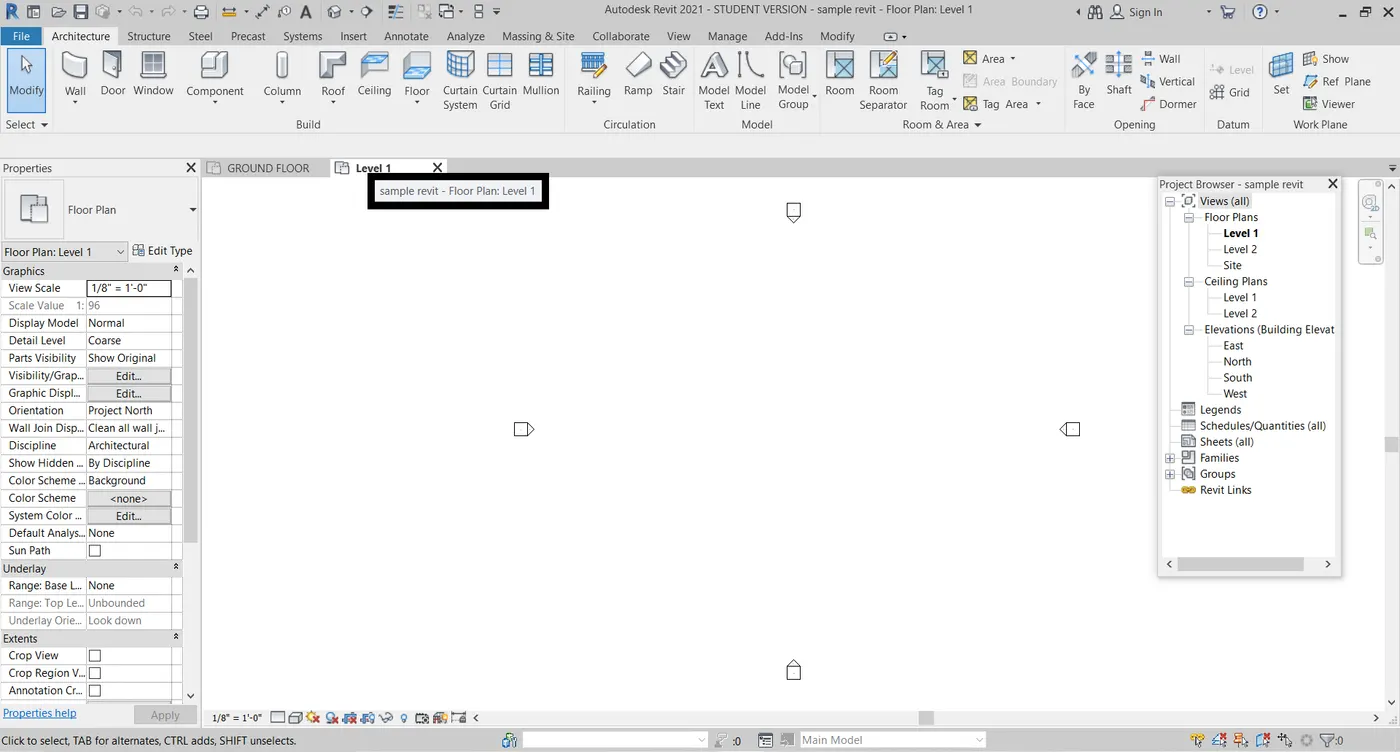
- so now we will be able to access a new revit project file named as samplerevit.rvt in our pc
2)
Aim: To save the project file and access it.
Tools used:
- file
- save as
- project
- file location
- save
procedure:
- after creating a file we need to save the file .
- for saving a file we need to access the file window and then use save as tab
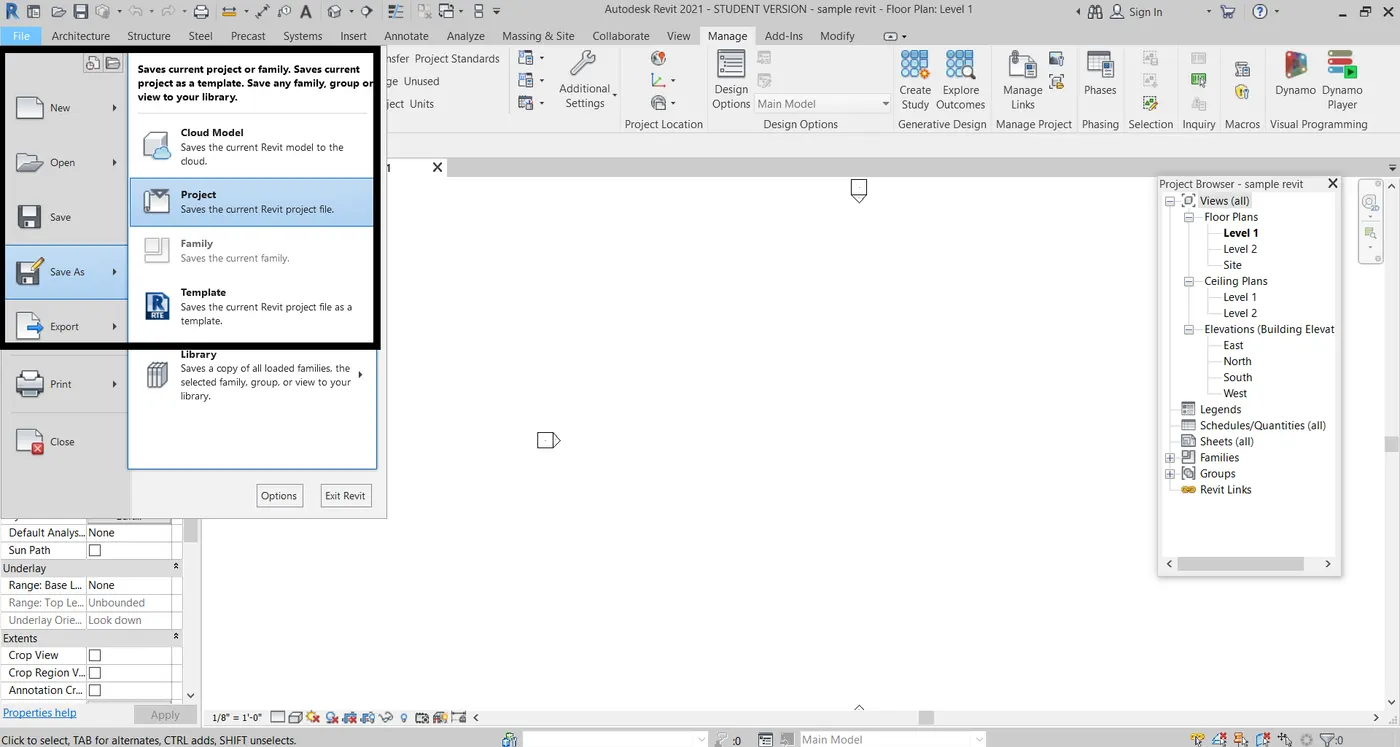
- after clicking on the save as tab save your file as a project file in your pc.
- to open and close the revit file we again need to access the file toolbar.
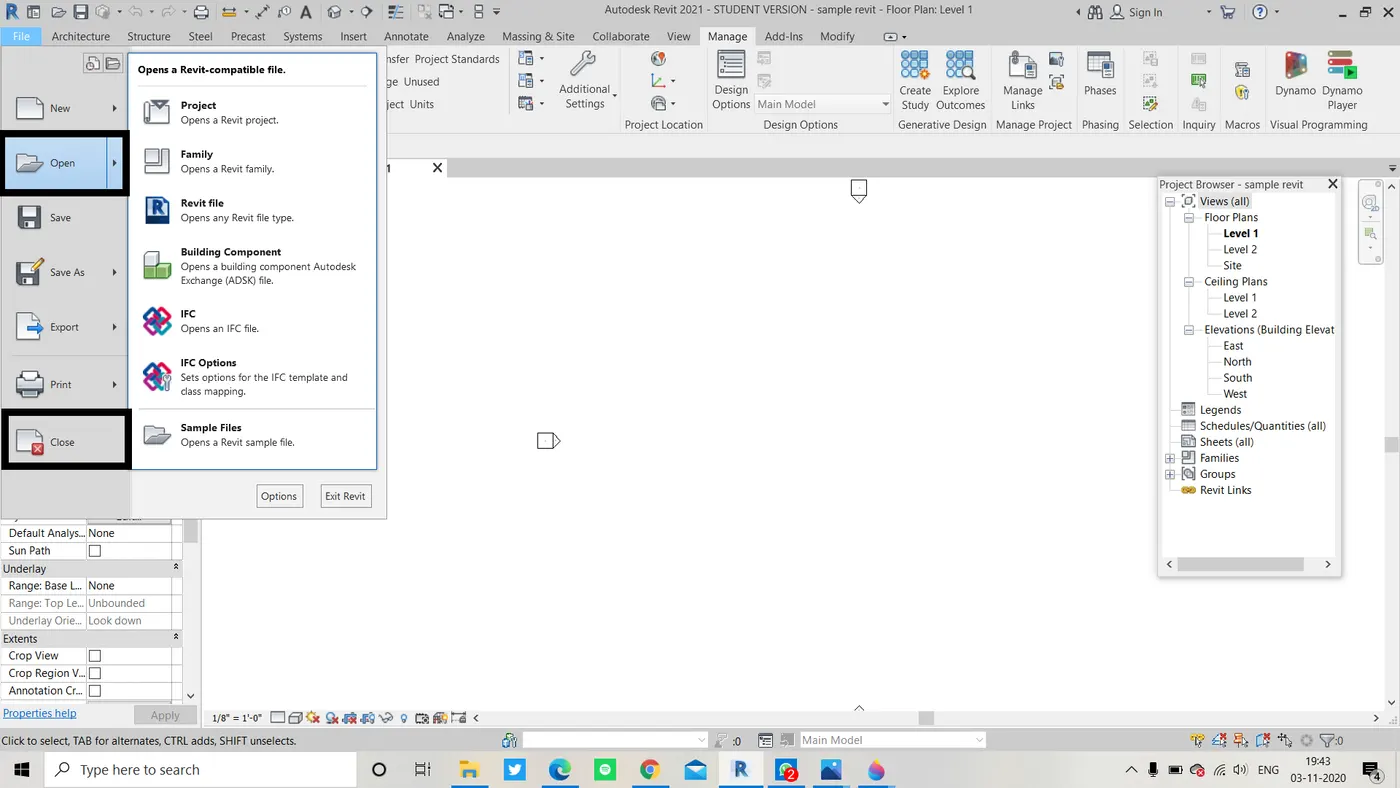
- open tab takes you to your desired file and close tab takes you to revit home page.
result: a file with required name is saved in your pc and readily accessible whenever you require.
3)
Aim: to create a rectangular layout of walls of dimensions 40'0" x 35'0".
Tools used:
- open file
- architectural tab
- wall property
- modify
- rectangle property
procedure:
- open the created revit file .
- now select the wall property from the architectural tool bar.
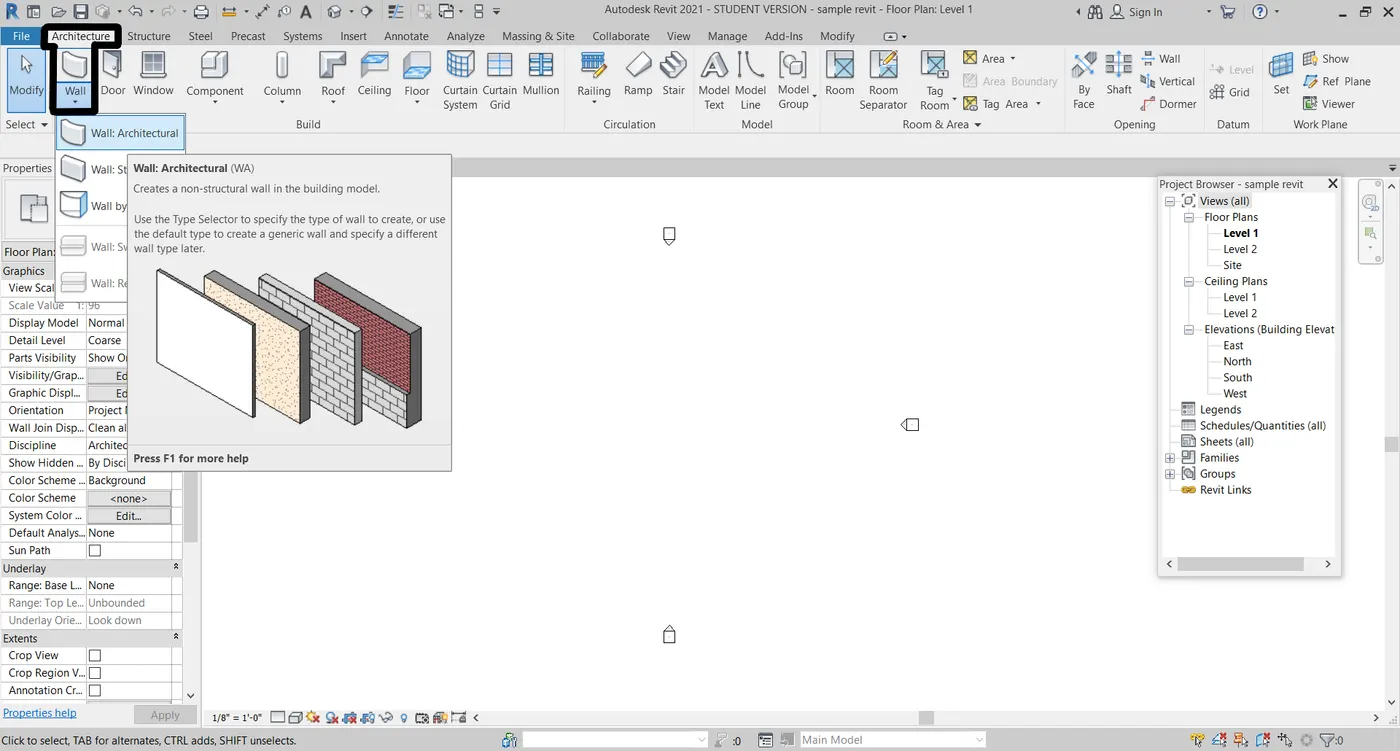
- now select a desired wall type and from the modify panel selct the rectangle command and draw the layout in required dimensions.
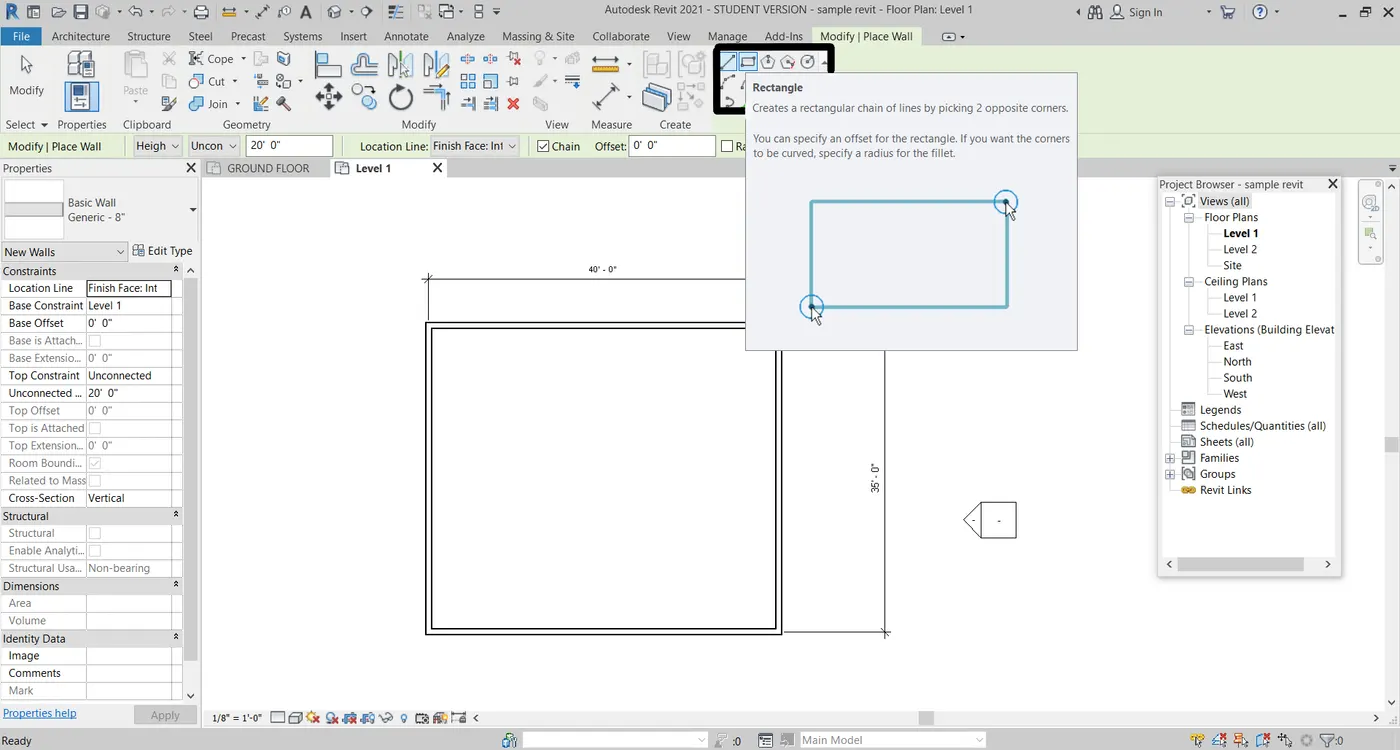
Result: rectangle with required dimensions is considered, drawn and shown in the above picture.
4)
Aim: to add dimensions to the layout
tools used:
- file
- wall
- rectangle property
- annotate
- aligned
procedure:
- after drawing any type of drawing or wall structures we need dimensions for accurate measurements.
- from the top panel we should select annotate tool bar.
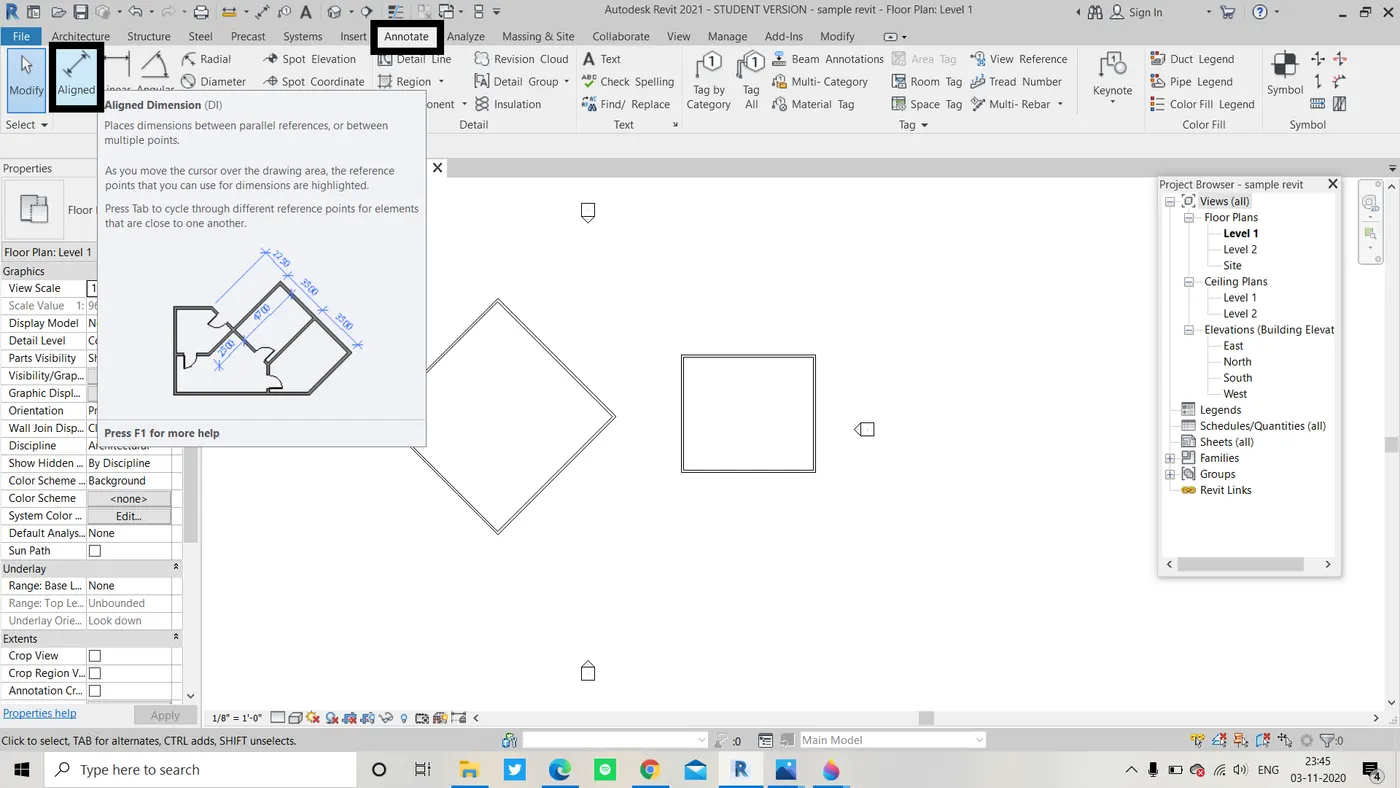
- and as per the given question select the aligned tool for marking the dimensions to the layout.
Result: The exact dimensions to the layout are marked using aligned tool from annotate tool bar.
5)
Aim: to change wall types using properties window
tools used:
- file
- open
- wall
- properties
- drop down icon
- wall types
procedure:
- firstly slect the wall command from the architectural tool bar .
- then click on the drop down button from the wall in the properties menu.
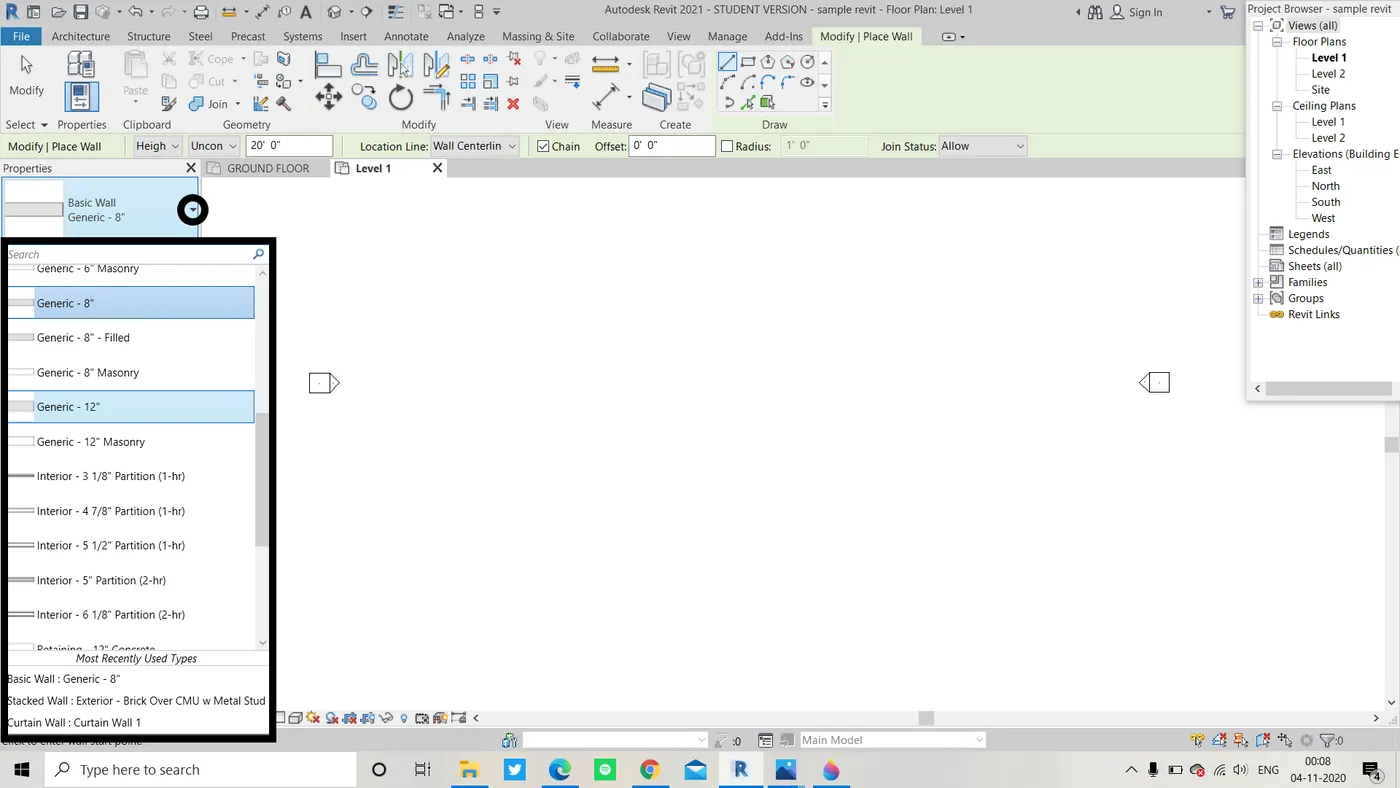
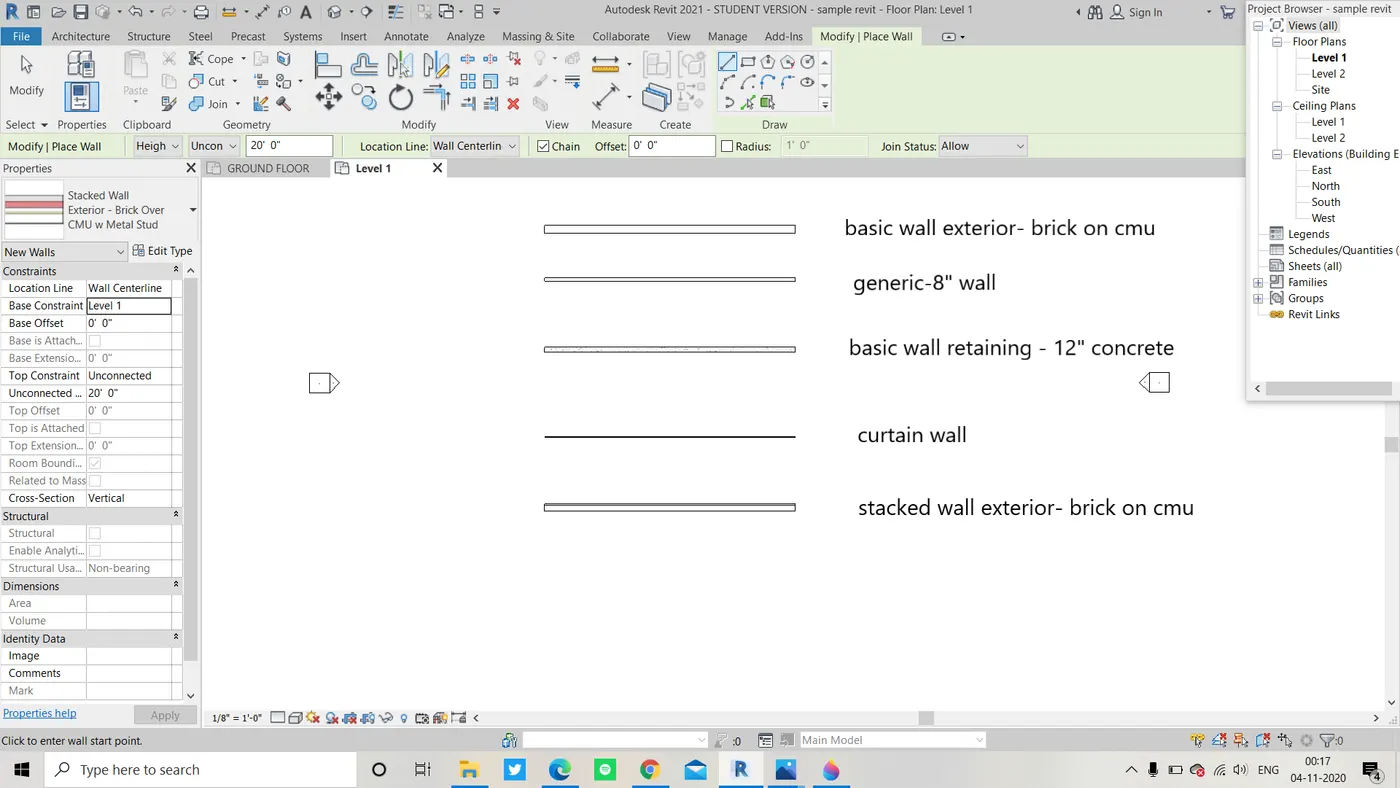
- now select the desired wall types and try drawing different wall types.
Result:
- different wall types are taken and are drawn accordingly to the figure
6)
Aim : to create a 3d view of any layout and name it
Tools used :
- file
- open
- wall
- 3d tool
- project browser
- rename
procedure:
- open a sample revit file.
- then from the wall option draw any basic plan structure through wall property.
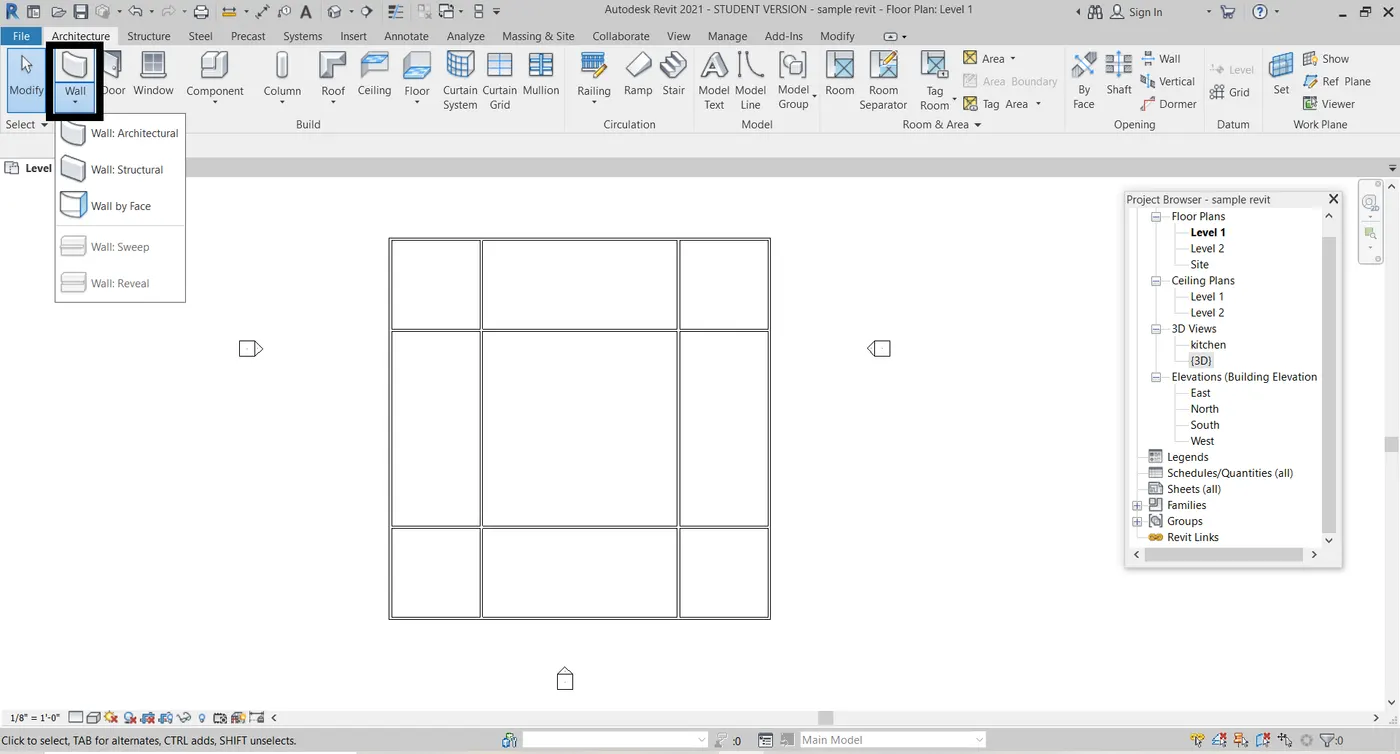
- after drawing some sort of layout click the 3d tool at the quick access tol bar.
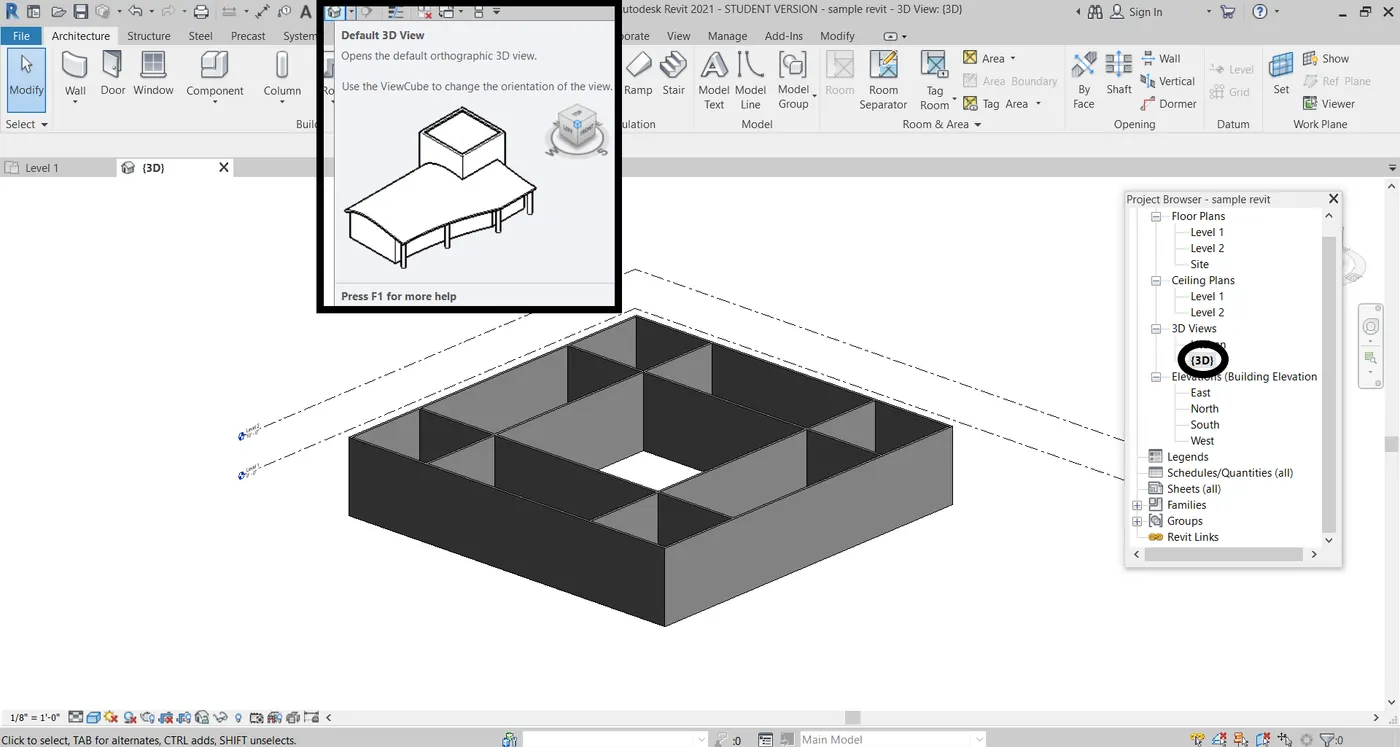
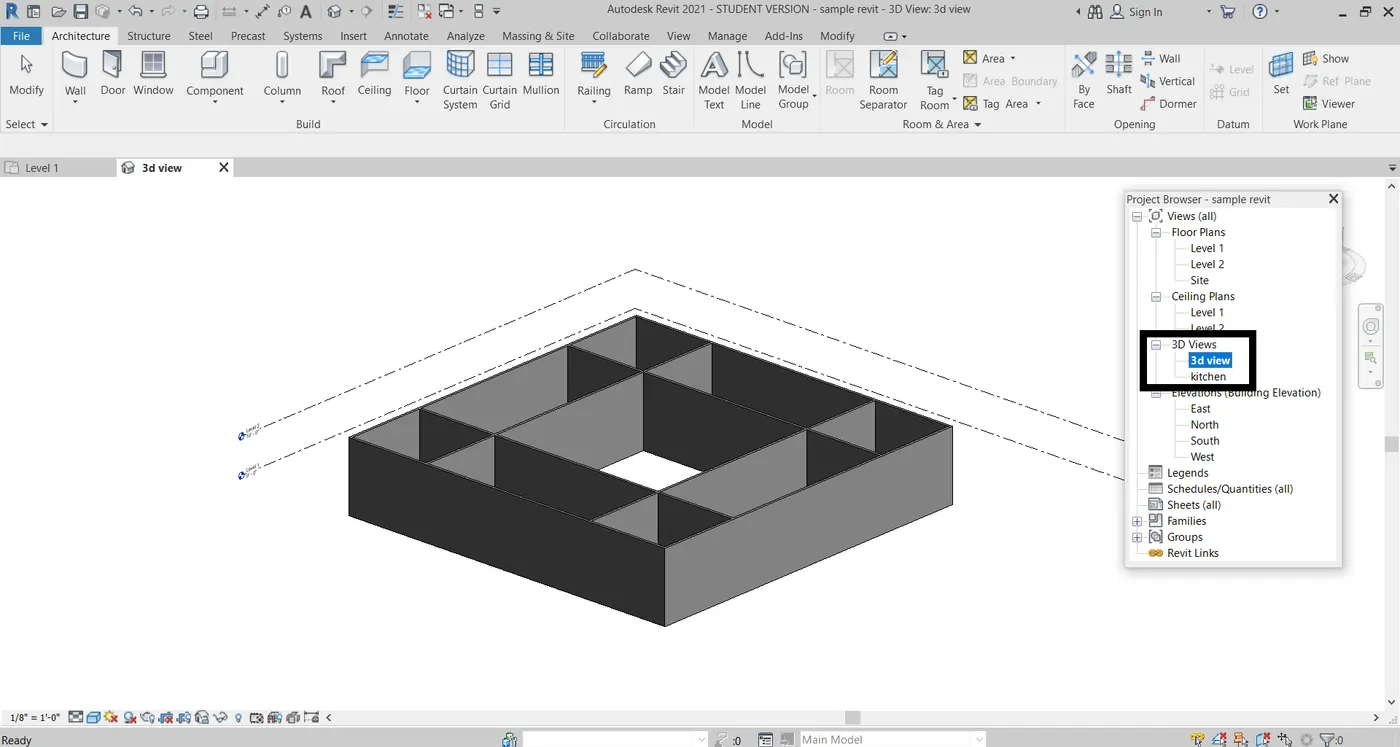
- from the project browser select the 3d views part and an view of{3d} will pop out
- Then do a right click on that so that in the options rename option will be available and then you could change your name as available
Result: and a final 3d view is created with the desired name and in a specific house plan we can create many such 3d views as desired ex; kitchen, bedroom etc.,
7)
Aim: to show pan in a 3d view and also navigate to different views using view cube
Tools used:
- wall
- layout
- 3d tool
- view cube
procedure:
- after creating some sort of layout, open the 3d view tool.
- using the view cube choose different view types to view different.
- for an alternative we can either use the all in one tool present below the view cube.
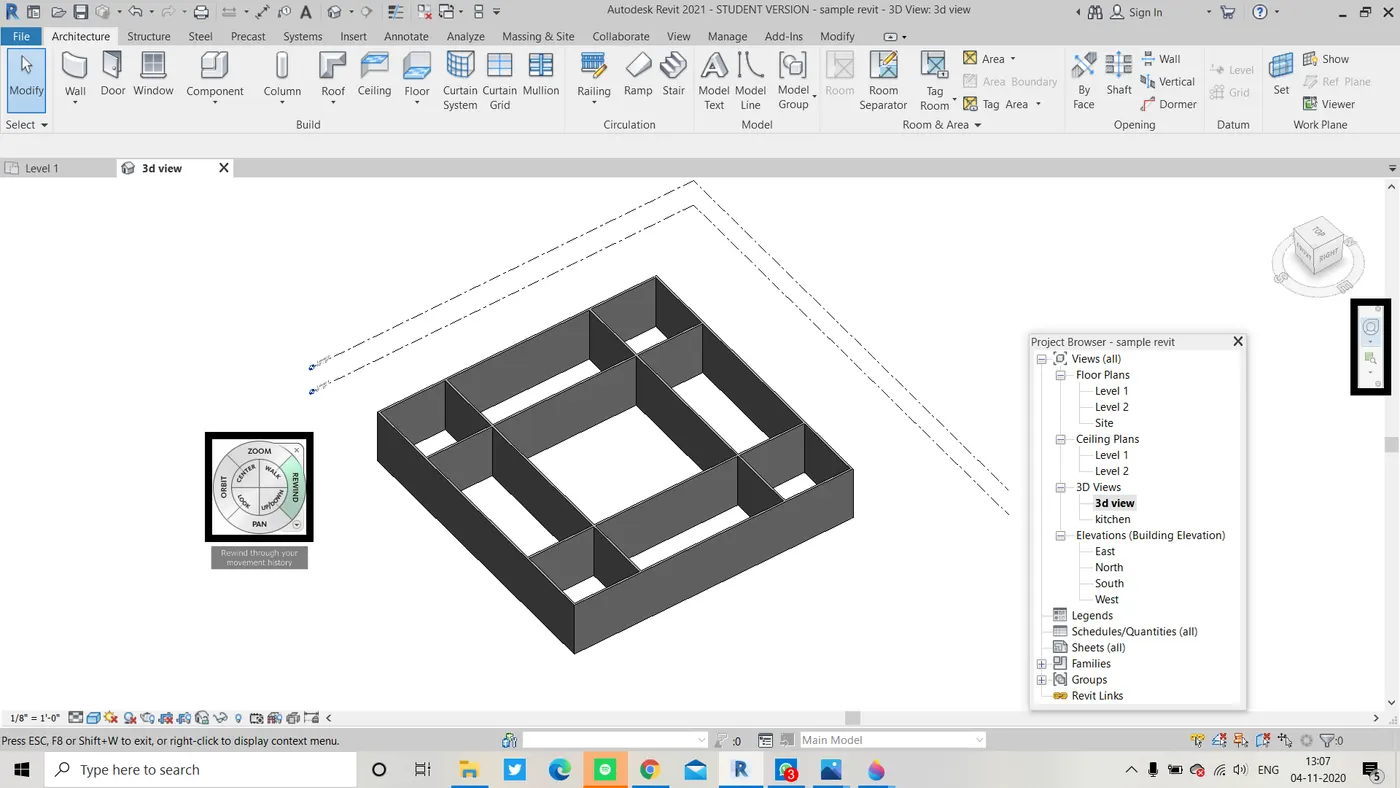
- by using this icon we can access orbit/pan
- and considering a short cut for these is:
- zoom; scroll on mouse
- rotate; shift and use scroll on mouse
Result: The required navigation for the 3d model is done using orbit and pan and is clearly depicted in the screenshot provided.
8)
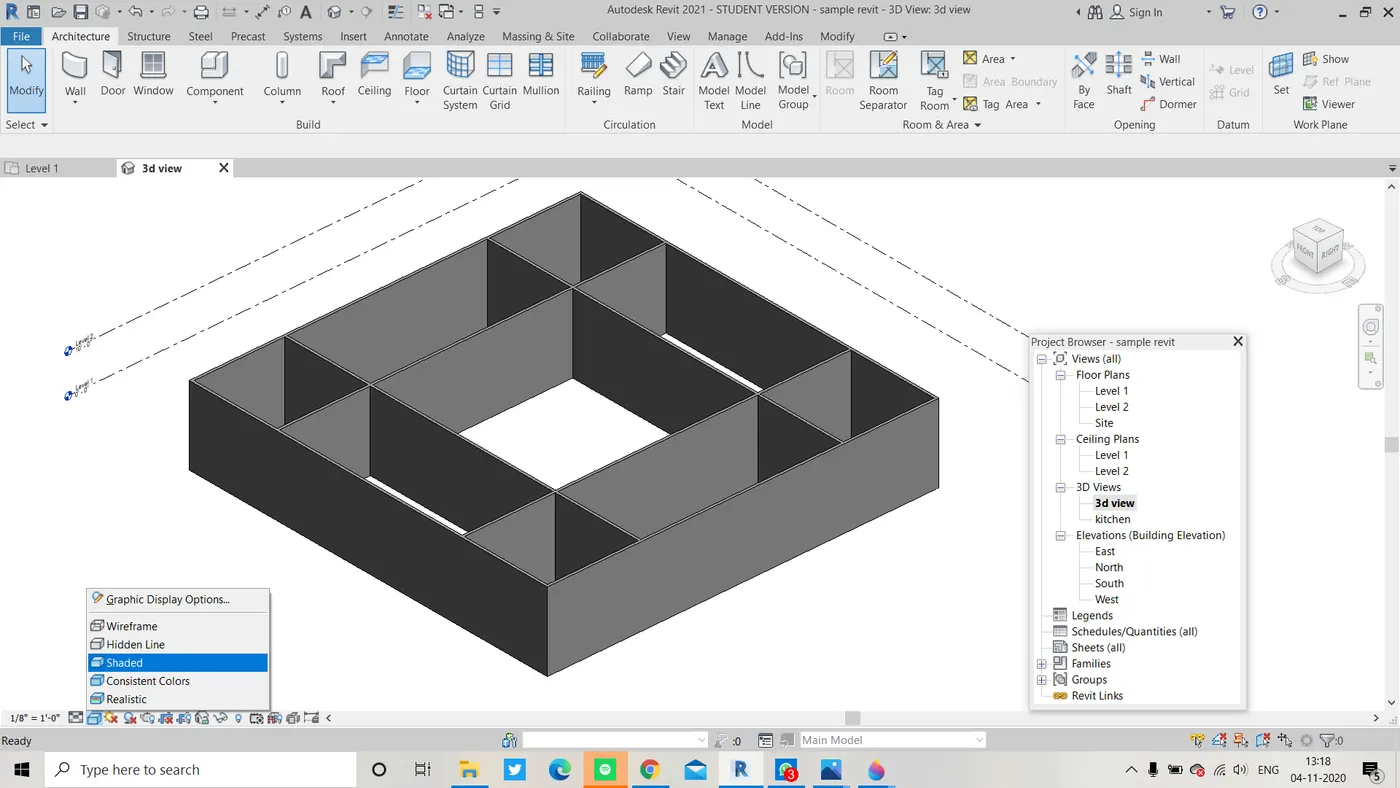
Aim: To view model in different visibility styles like realistic, shaded and hidden lines.
Tools used:
- wall
- 3d view
- graphic display options
- visual styles
Procedue:
- after creating appropriate 3d view
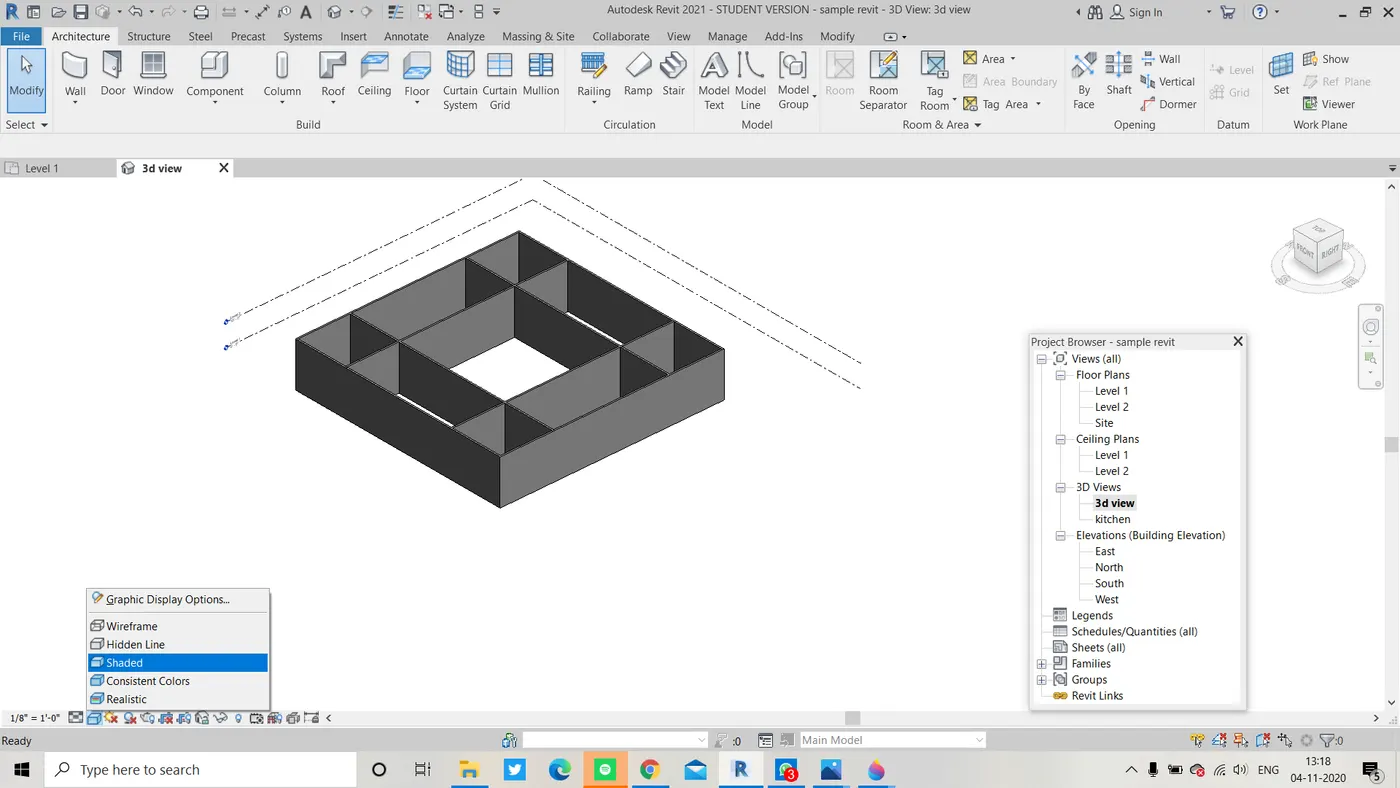
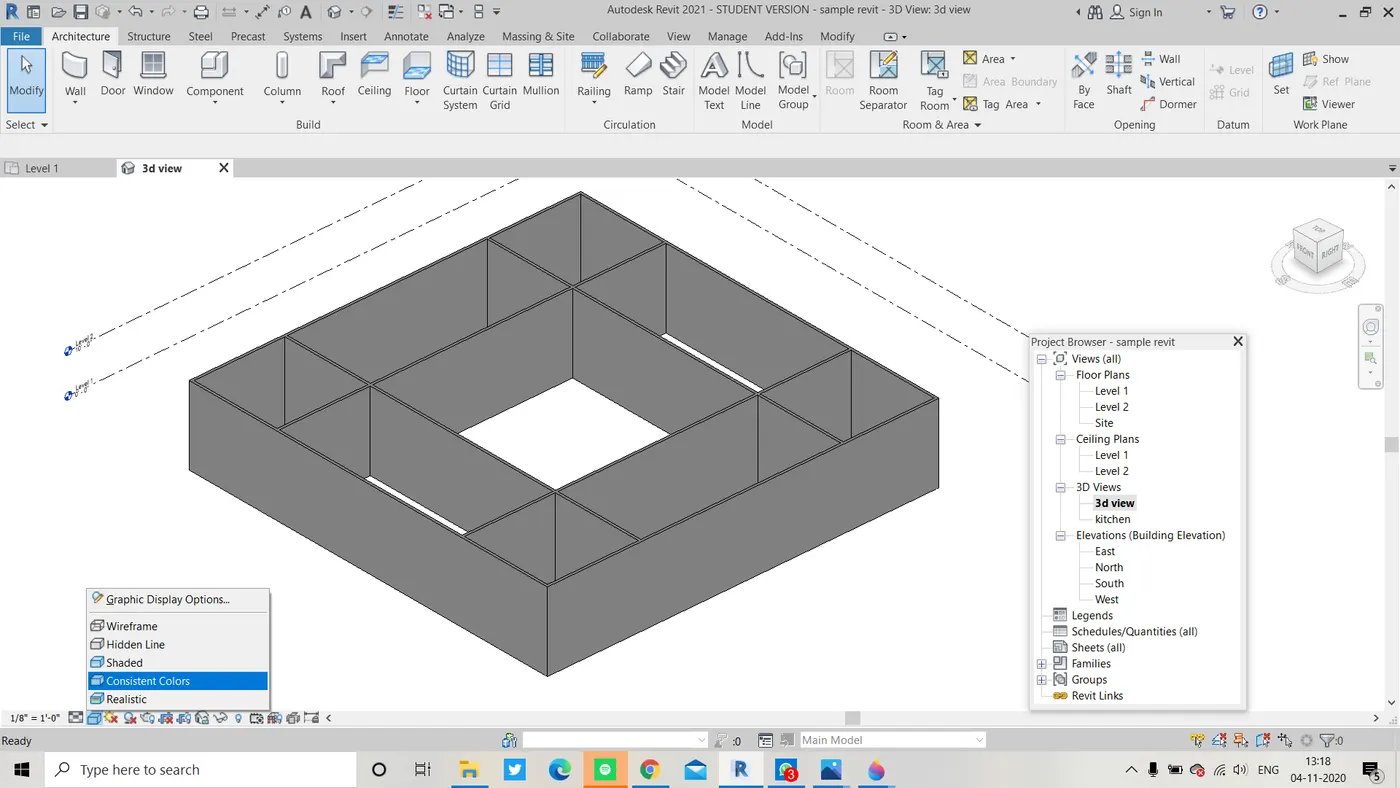
- select the graphic tool at the bottom panel which is present beside the sun.
- shaded:
- consient colours:
- realistic:
- hidden frame:
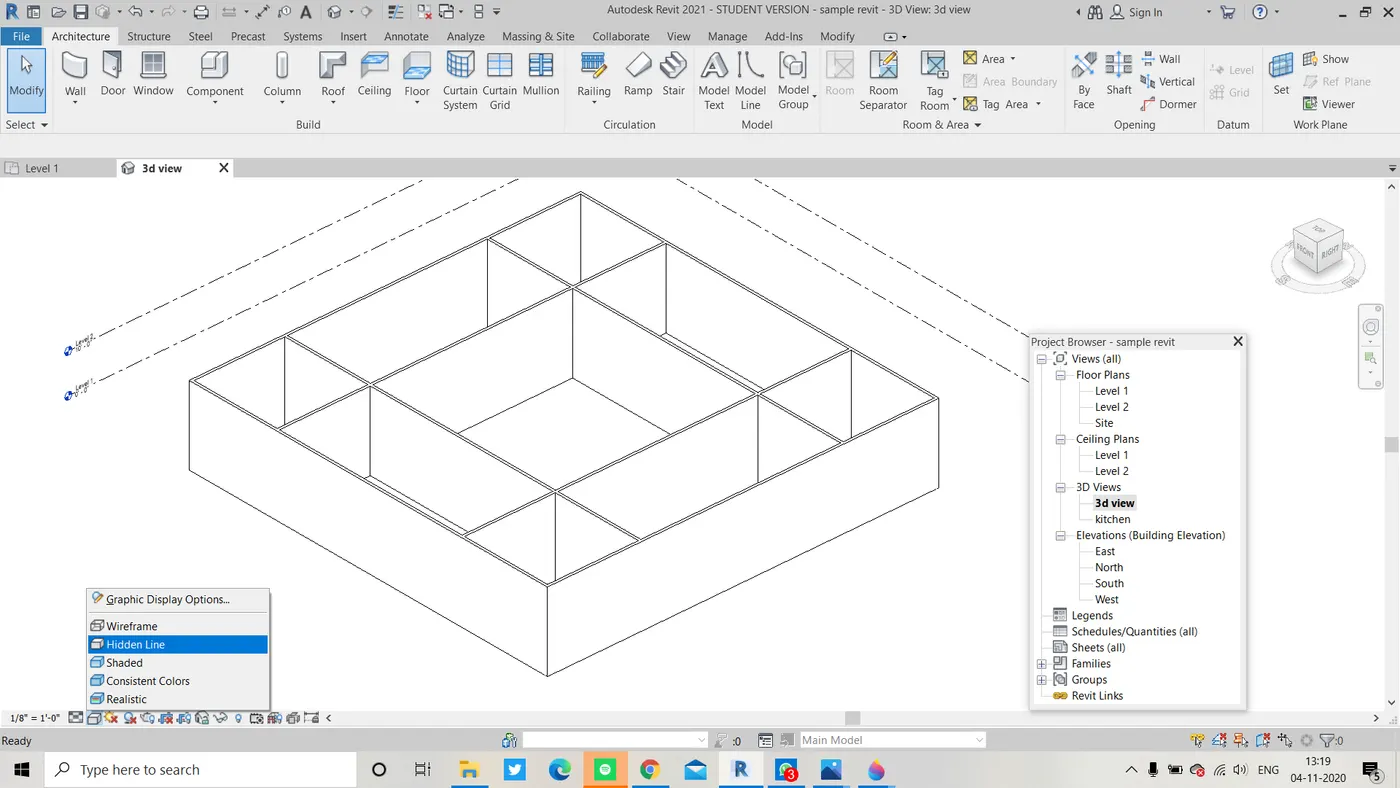
Result: the 3d view structure/ layout with different graphic visualizations
9)
Aim: to turn on/off the sun light.
Tools used:
- file
- open
- 3d view
- sun path
- on/off
procedure:
- firstly open the drawn layout
- then from the access bar present below select the sunpath icon
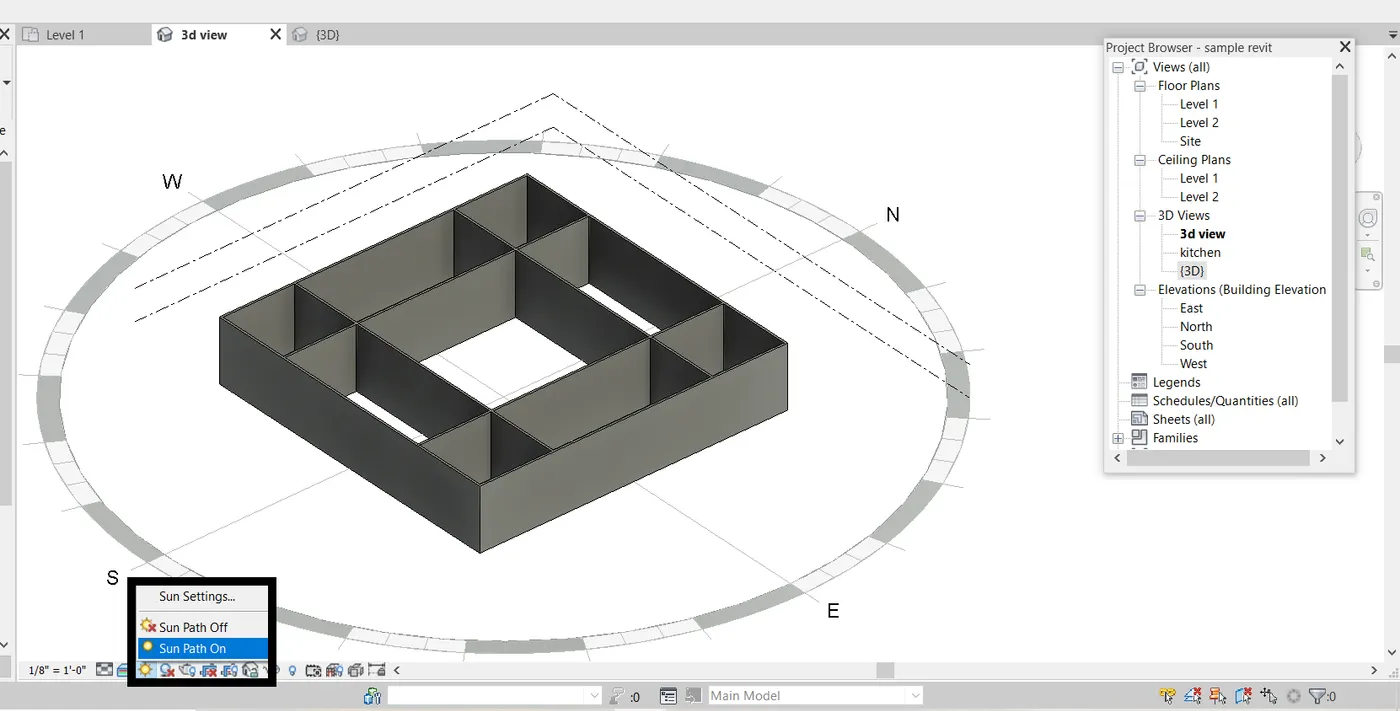
- select the sun path on and off .
Result: pictures with sun pic on and off were clearly shown in the picture.
10)
Aim: to use the manage tool bar and access.
tools used:
- file
- open
- manage
- project settings
procedure:
- open the file and then from the tool bar select manage access bar.
- you will find the project settings icon and then according to requirement specify the details of the project.
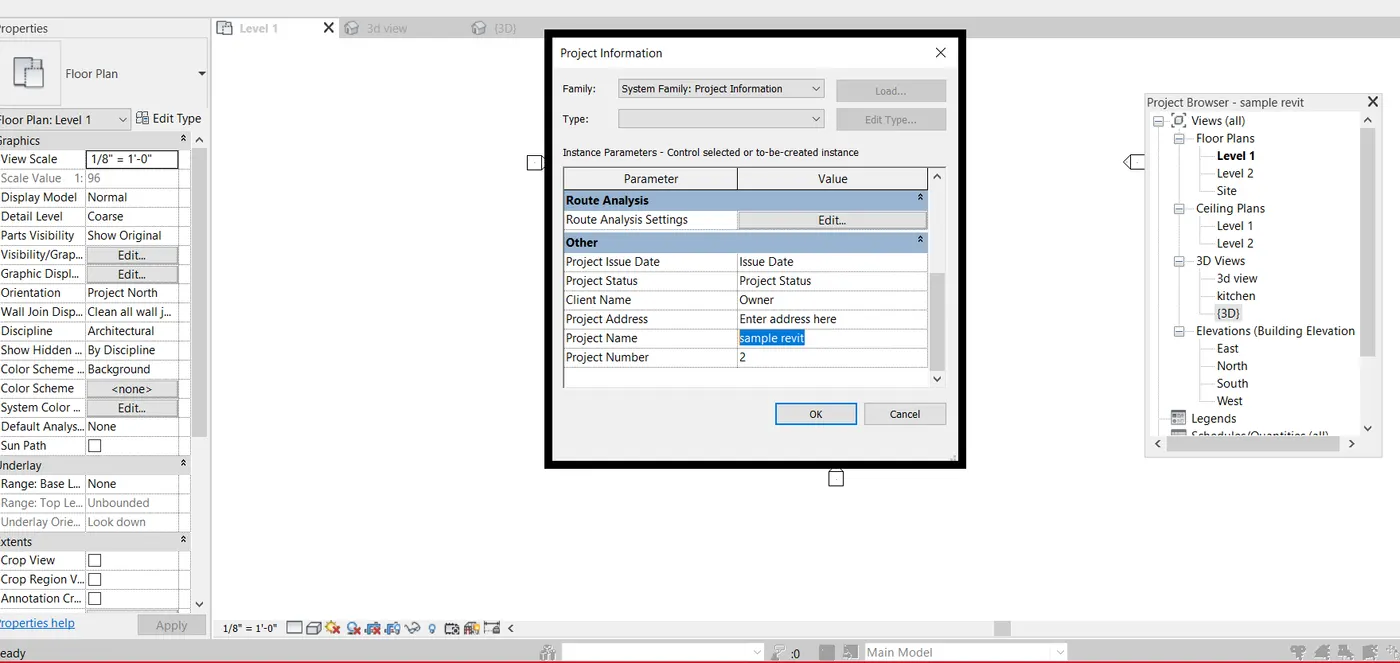
Result: thus required details for the file or project is saved succesfully.
11)
analyze tool bar is used for the analysis of the structure with reagrding to the calculation of loads and load analysis.
it also helps to analyze different kinds of loads in the structure and also load failures.
12)
The below are the several links that revit supports:
- link revit
- link IFC
- link topography
- link cad
13)
collaborate is neccesary because it functions as a cloud service and makes the working efficiecncy more flexible by allowing us to work on the same project when and where we desire.