Project 4
OBJECTIVE: Perform Lane detection for the given video by implementing the Hough transform by extracting the individual frames from the video & conclude by preparing the output video with the lane lines highlighted in the original video.
INTRODUCTION TO HOUGH TRANSFORM:
- Hough transform algorithm is used to detect the any shape, if the shape can be represented by the mathematical expression. E.g., A line can be expressed by the mathematical expression y= mx + c where the m is slope & c is the y intercept or in the parametric form as ρ = xcosϴ + ysinϴ where ρ is the perpendicular distance of the line from the origin & ϴ is the angle formed with horizontal line in the anticlockwise direction.
- The working process of the Hough transform is explained in the below steps
- A 2D array with rho & theta is created. The size of the array depends on the accuracy required, if you need 1 deg accuracy, we will have 180 columns & if you need 1 pixel accuracy for the rho, we will have diagonal length of the image as the number of rows since the diagonal is the biggest line possible.
- For every point we have, we know the x & y value, obtain the rho value by incrementing the angle from 0 to 180. Based on the rho & theta pair, increment the respective cell in the 2D array which acts as a counter.
- So, the cells which maximum count show the higher number of points in that respective line.
- From Open CV we generally use the HoughlinesP function which denotes the probabilistic Hough transform where two more additional inputs are added as inputs in addition to the basic four inputs of input image, threshold (minimum number of votes to be considered as a line), rho & theta accuracies. The additional inputs help in reducing the computational time required to perform the Hough transform hence saving time & computational power. Those inputs are minimum line length & maximum gap between two segments of the line allowed.
SOLUTION PROCEDURE:
- Program starts by taking in the video path with the name as input for the Frames function
- Frame’s function is the driving function which reads the video file with the open cv function Video Capture into an object. Output object is created to write the video with the same definitions of the input video.
- We read the video frame by frame with the help of read function on the object. The detect lane function is triggered if the frame is detected by the read function.
- Detect lane function which draws the line over the detected lane & returns the final image with the cosine distance for further processing. All the frames of the video go through below list of the operations for the final image.
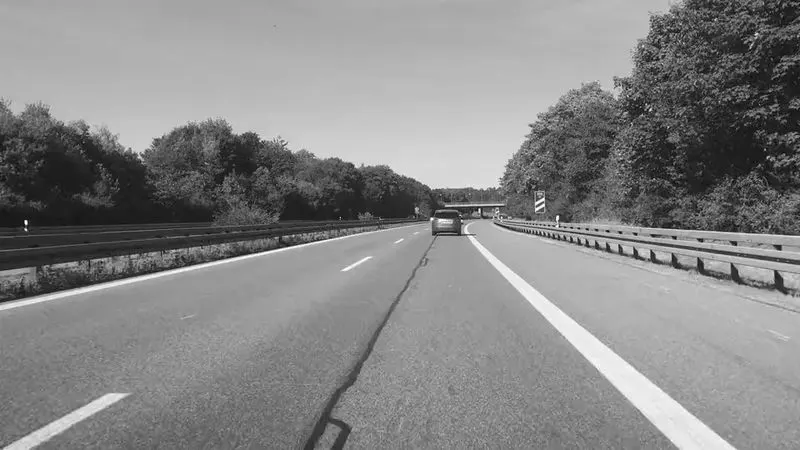
- Gray scale: First step is to convert every frame from colour to gray scale. This is performed by the cvtColor function from open cv.
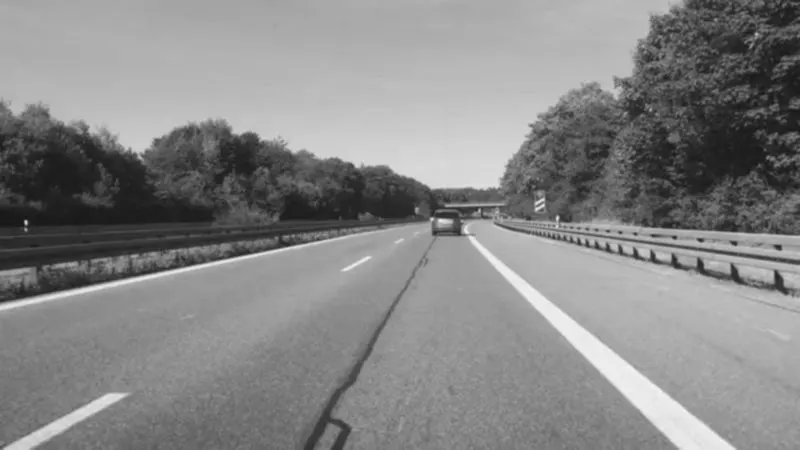
- Gaussian smoothing: Second step is to apply the gaussian filter to remove the noise in the image which will facilitate the following steps of edge detection algorithm. This is performed by the Gaussian Blur function from OpenCV over the Gray scale image
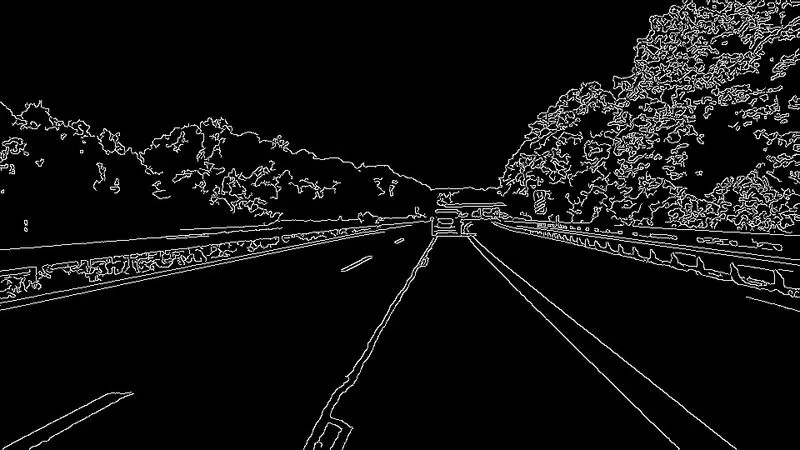
- Edge detection: Next step is to apply the Canny edge detection to identify the edges of the gaussian filtered image which will act as the one of the inputs for the Hough transformation algorithm. This is performed by the Canny function from OpenCV.
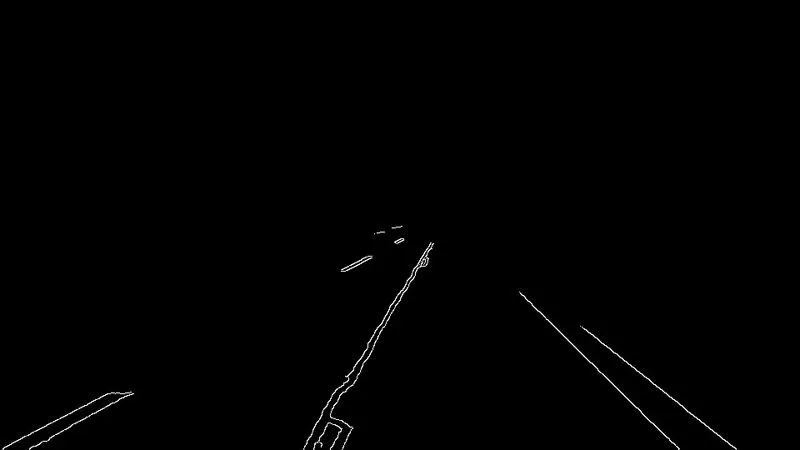
- Region of interest: Next step is to create the region of interest over the edge detected image for the Hough transformation. The region of interest is created by creating the polygon on the focus region, in this case we focus on the lanes hence the polygon coordinates are decided to narrow down that alone by fill poly function from open CV. This function creates a mesh image with desired polygon as white & rest of the image pixels as black. Finally, the masked image is created bitwise and function taking the masked image & edge detected image, hence the output is only the lanes region of interest part is processed by the Hough transform to give better detection of the lane lines.
- Hough transform: Next step is to apply Hough transform to detect the lines on the region of interest masked image. First the image data type is converted to unsigned integer since the HoughlineP function required the input image to be in this format. Inputs of the HoughlineP are as follows
- Input image: image data is needed to be converted to unsigned integer which is done by the use of convertScaleAbs function which takes the absolute values & then converts to 8-bit unsigned int.
- Rho & theta: rho is generally one & theta is generally pi/180
- Threshold: minimum number of votes to consider it as line, which depends on the number of points on the line
- minLineLength: Line segments shorter than this value is rejected
- maxLineGap: Maximum allowed gap between two segments to consider it as single line
- The next objective is determining single line for left & right lane from the list of the all the lines detected by the Hough transform. This is done by the user defined function names average_slope_intercept () which takes the input of the region of interest image & the lines predicted by the Hough transform. The steps followed by this function is described in the below steps
- Segregate the lines into left & right lines: This is done by the slope parameter of the detected line, if the slope is positive then the line is right line and vice versa.
- We filter out the lines having the slopes in between the range (-0.1 to 0.2) to remove the straight lines which might represent the crack in between.
- We get the co-ordinates of the lines with the help of another user defined function get-coordinates.
- This function takes the image & line parameters (slope, intercept as input)
- For the left lines, we take the y co-ordinates of start & end points as height & height * 0.6 respectively. we determine the x co-ordinates with line equation & line parameters & x1 is replaced with 0 for the points which are out of the image size.
- For the right lines, we take the x & y co-ordinates similar to the left line. We multiply the x1 with 0.98 to match the lane in the right side more perfectly.
- Function returns the start & end points co-ordinates of the line.
- Now we have to finalise the left & right lane by eliminating all other lines detected, we can do this by estimating the cosine distance between the all the lines. There are two possibilities from the previous step that the during turning both the lines could be either left side or right side, hence one check is done with the help of the if statement which checks whether any one of the left or right lines are empty.
- Both lanes have same slope: cosine distance is checked between all the lines by two for loops of the same list. The threshold for keeping the farther lines were decided as 80 percentiles of the entire cosine distance. Finally, the average of the all the left & right lines are taken to finalise the line co-ordinates to draw the identified left & right lanes.
- Lanes have different slope: Same method is followed as the above condition. Only change is the percentile for threshold is raised from 80 to 85 since these are converging on the top of the image.
- Cosine distance of the final selected two lines is determined & send as output along with the image which shows the lanes marked by the detected lines.
- Drawing of the detected lines over the image is done with the help of the user defined function named draw_lane_lines.
- Input to the function is the input image (frame from the video before processing) & lines co-ordinates which are output from the average_slop_intercept user defined function. We also have the colour & thickness as the additional inputs which have default values as red & 15 respectively by default.
- We draw the line with the co-ordinates as input to the line function of the open CV over the line_image which is same as the size as the input image.
- We overlap the line_image which represent the lanes by the red lines with the input image with the add_weighted function from open CV & return the output image
- Finally, the function returns the lane marked image & cosine distance between the marked lines.
- We create the output video with the images whose cosine distance are between 0.2 & 0.302 since anything less than 0.2 is detecting the middle crack as lane & anything above 0.302 is wider than the actual lane.
- Output video is created by the videowriter function from Open CV which takes the input of the video file name for the output, 4character code of codec used to compress the frames =(‘M’,’J’,’P’,’G’), frames per second =20, frame size which is used same as the input video
FUNCTION SYNTAX:
- cvtColor(image, cv2.COLOR_BGR2GRAY)
Function is used to convert the given image to another colour format, in this case we have converted the given image to grey colour
- GaussianBlur(image):
Function is used to convert remove the noise and speckles of the image with the help of the gaussian filter.
- Canny(image, lower threshold, higher threshold)
Function is used to detect the edges in the input image which does the double thresholding to reduce the false edges with the help of the lower & upper threshold inputs.
- fillPoly(image,polygon_co-ordinates,colour)
Function is used to fill the polygon co-ordinates with input colour over the given image.
- convertScaleAbs(array):
Function is used to take the absolute values & converts it to unsigned int
- addWeighted(array1, weight1, array2, weight2, gamma)
Function is used to determine the array 1 with weight 1 & array 2 with weight 2 which will be added by the gamma (additional scalar value).
- Videowriter(Output video file name, 4 work codec , frames per second, frame size)
Function is used to create an object which can be used to write a video with the given compression ratio, frames per second, frame size.
- VideoCapture(path)
Function is used to create an object which can be used to access the video in the given path like reading the video frame by frame.
CODE: Jupyter notebook attached
OUTPUT:
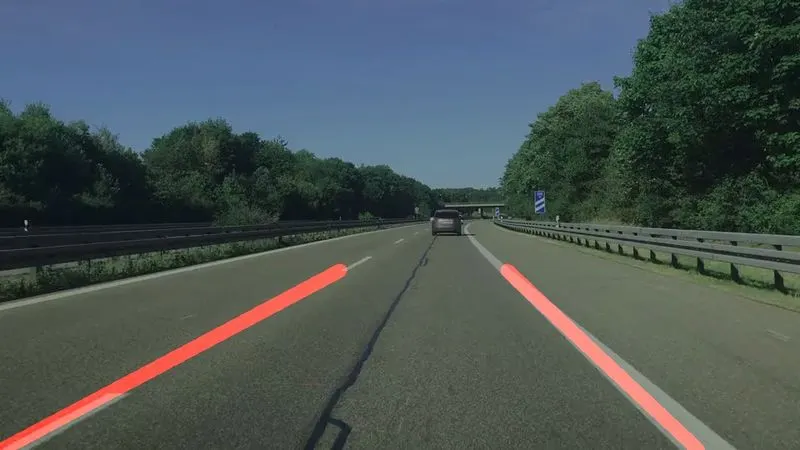
We have taken the 1st frame of the video to showcase the steps of the program with the below images.
- Grey image
- Gaussian smoothing
- Canny edge detection
- Region of interest
- Lanes marked image over the original image
- Final video link
https://drive.google.com/file/d/1EYHzQjc7lB11ZtNGK6q5DzKt0XkwuEmi/view?usp=sharing
CONCLUSION:
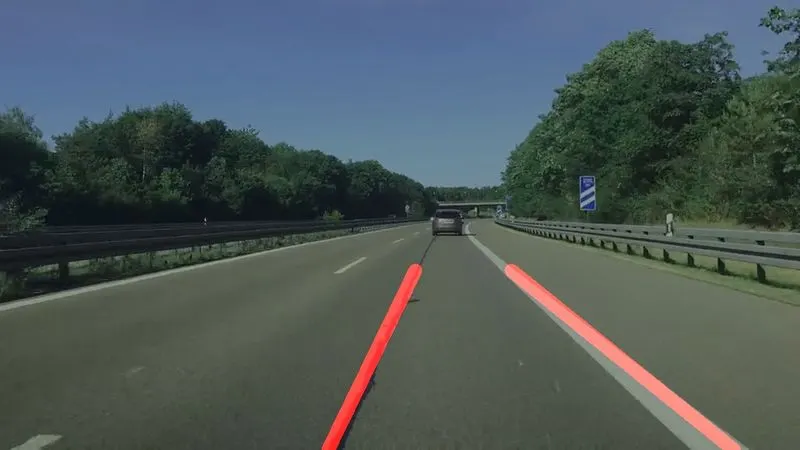
Based on the above program we are able to understand the working method of the lane detection with the help of Hough transform algorithm. We have also understood some of the practical difficulties when working with a real-life scenario such as the cracks on the road could be detected as lane.
On continuation to this study, we could try to better recognise the lanes in the regions where the lanes are separating to the service roads & also the regions where the crack is detected even after eliminating the shorter cosine distance lines since the actual one side of the lane is not seen in the fixed region of interest.
Example image for the detection of crack as lane is shown below
References:
https://www.geeksforgeeks.org/saving-a-video-using-opencv/
https://docs.scipy.org/doc/scipy-0.14.0/reference/generated/scipy.spatial.distance.cosine.html
https://www.geeksforgeeks.org/python-program-extract-frames-using-opencv/