Project-2-Meshing of Door Inner Panel Challenge
Project-2-Meshing of Door Inner Panel Challenge
Objective: Follow the Quality Criteria and mesh the following component and assign thickness:
- Target Element Length = 4 Units
- Generating Midsurface and geometry clean-up on the given component
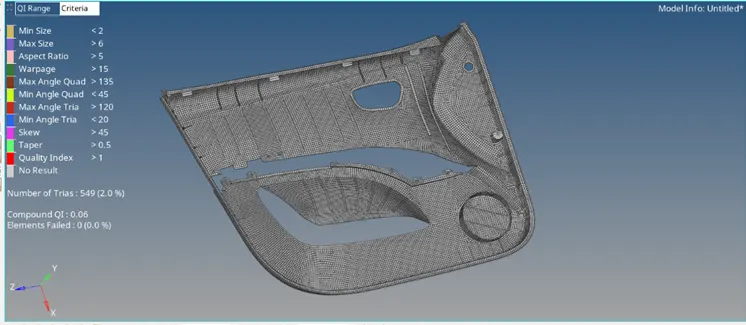
- Generating mesh on the given component with low tria concentration and proper mesh flow.
- Your model should pass all the given quality parameters.
- Assigning Thickness to the component.
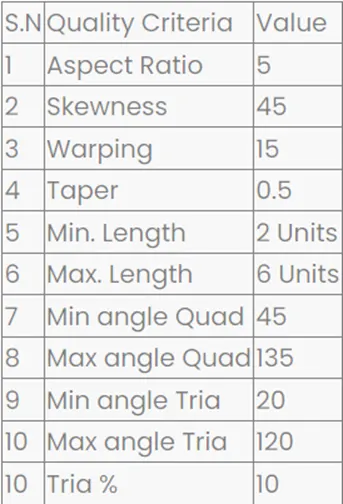
Procedure :
A. Generating the mid surface
- Import the geometry from the saved location.
- File > Import > Import Model > File type > Open File > Import File.
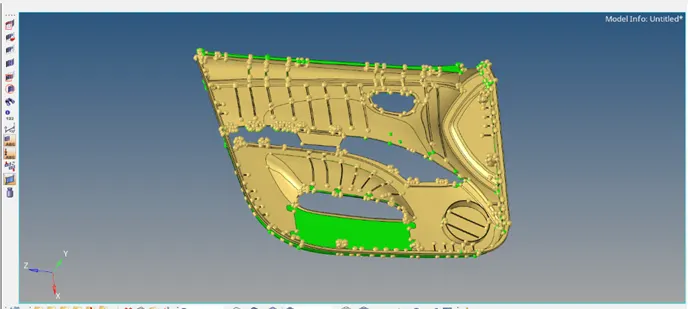
- Switch to Topo mode, and examine whether any solid component exists or not. If a solid component exists, we can delete the solids as we are performing 2D meshing of the component.
- Delete [F2] >> Solids >> Select by box selection >> Delete Entity.
- Before working on the model, we have to check its geometry for any possible errors that can hinder the midsurfacing such as damaged geometry, unnecessary free edges, and connectivity errors.
- To correct errors in the topology several editing tools are used. Some of these are Equivalence, Toggle, replace, filler surface, delete surface etc. Also, to make the mid-surface extraction easier, certain surface fillets can be removed using the remove fillets option from the surface edit panel.
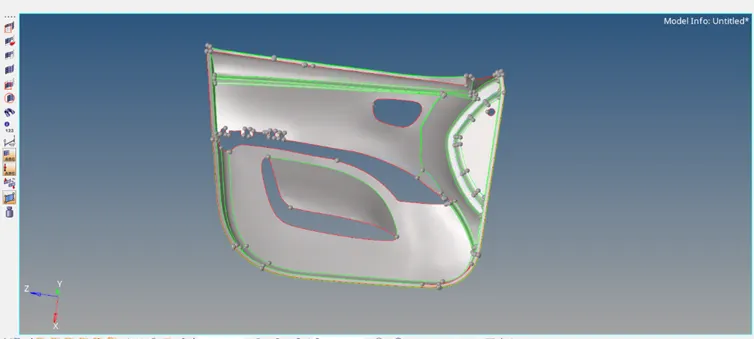
- After cleaning the topology, we can proceed to the mid-surface extraction. Since the given component is a plastic model, auto-midsurfacing can throw some errors while extraction. Hence, we proceed with the manual method of generating the mid surface using the offset feature from the surface edit panel.
- Before offsetting, measure the thickness around the model to get the offset value for the middle surface generation. Here, there are two components, namely the outer part and the inner part where the features like ribs and holes are located.
- The midsurfacing has been carried in two parts, firstly the outer surface is offset to make the midsurface of the door panel itself. Secondly, the inner portion is used to offset the features.
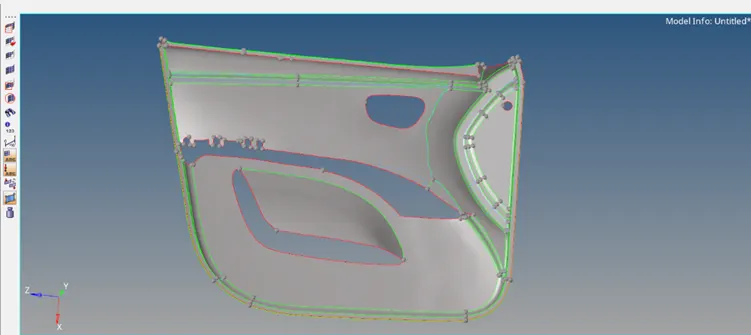
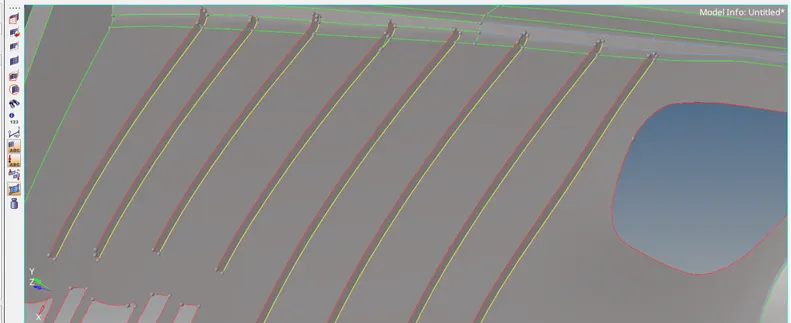
- Next, the offset features are initially separate from the mid-surface itself. Hence, we use extend option from the surface edit panel to join these features into the main mid-surface.
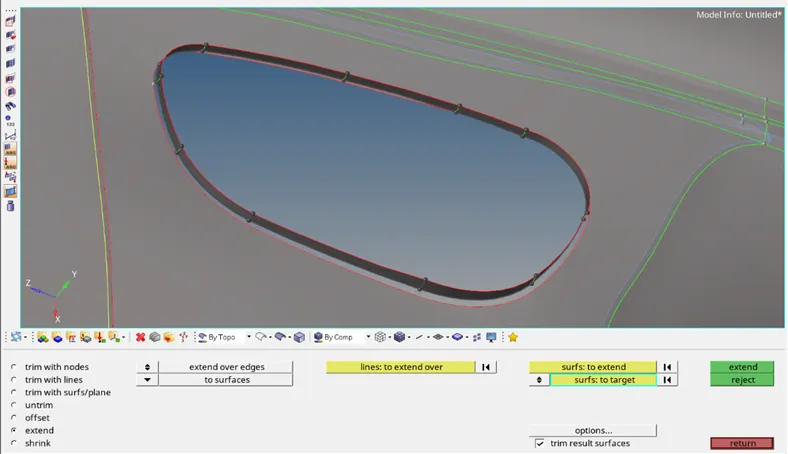
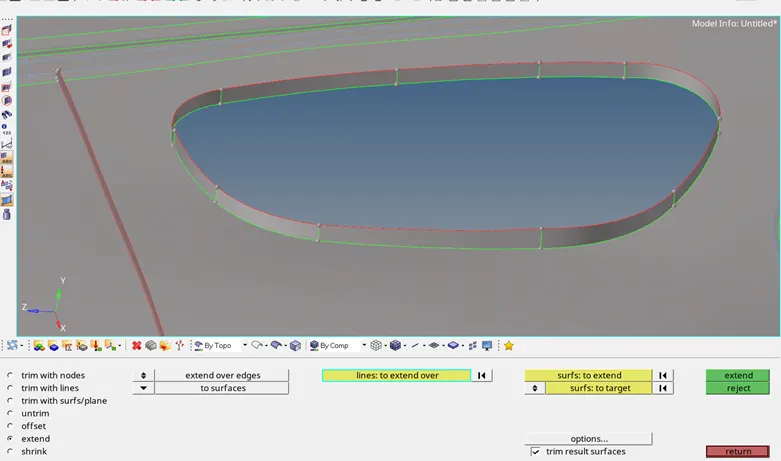
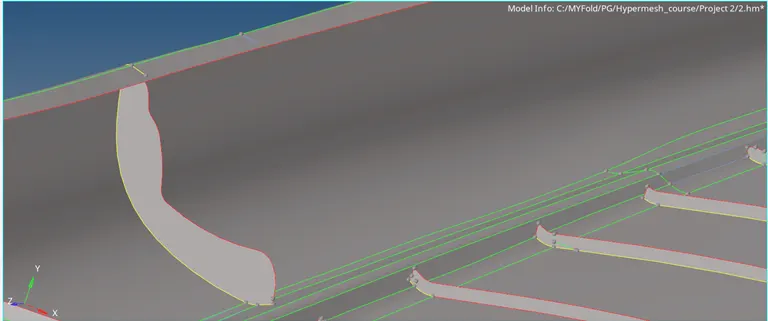
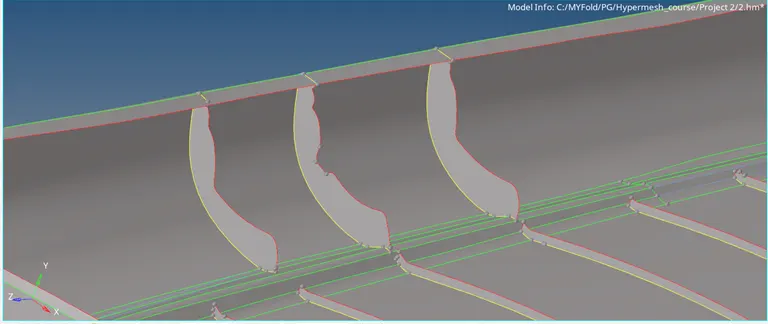
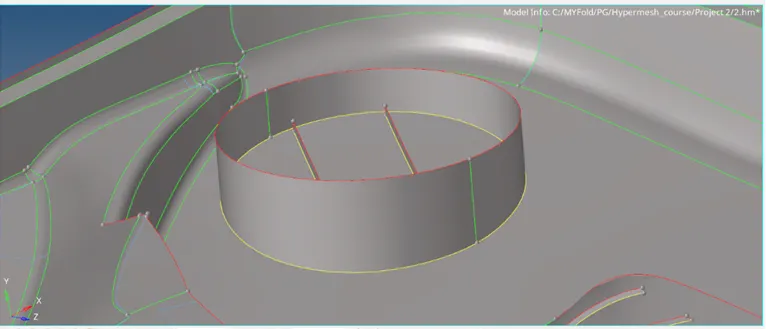
- After extending the features, the final mid-surface is obtained. Any further errors occurring in the process were removed using quick edit tools.
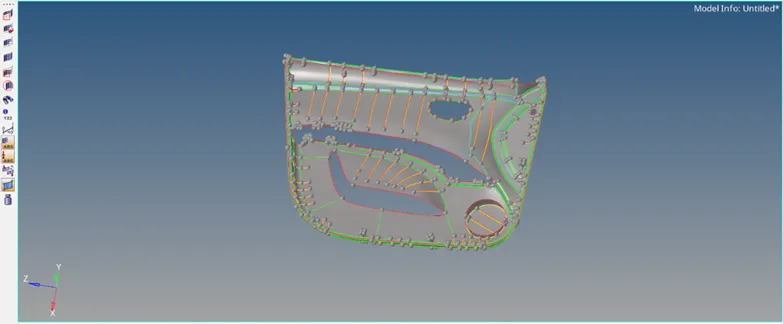
B. Generating the mesh
- To make a proper mesh flow we can divide the midsurface into different sections with reference lines. Instead of meshing the whole model altogether, it is preferred to mesh section-wise to achieve a smooth and proper mesh flow.
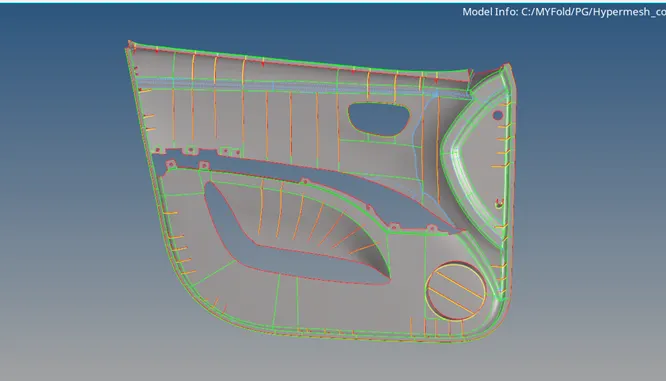
- Before starting the meshing process, enter the quality criteria provided along with the target element length.
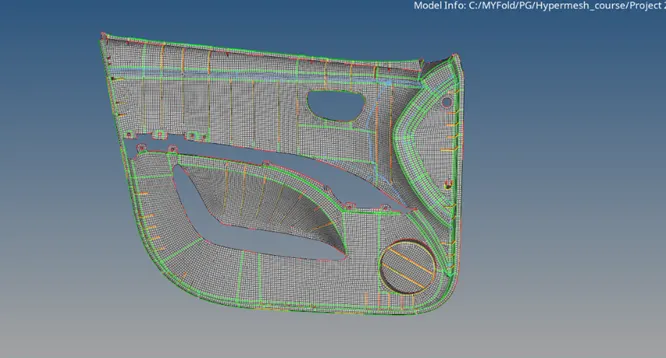
- Arrange and rearrange the mesh patterns to get a proper mesh flow and reduce the number of trias to a minimum value. This can be done by meshing element-wise or using the rebuild mesh option.
- Finally, check the element quality index to determine the element quality errors. Use the cleanup tools to remove these errors and obtain a mesh pattern with zero element failures.
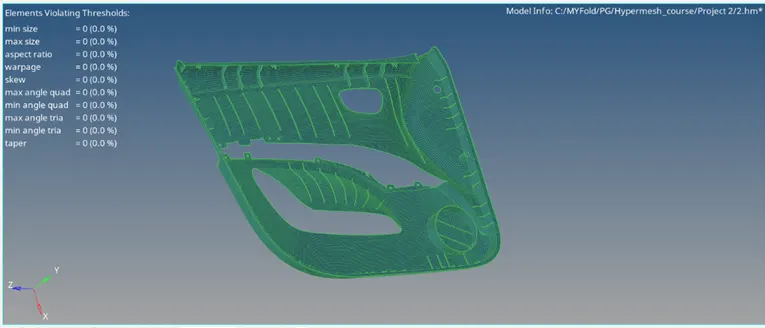
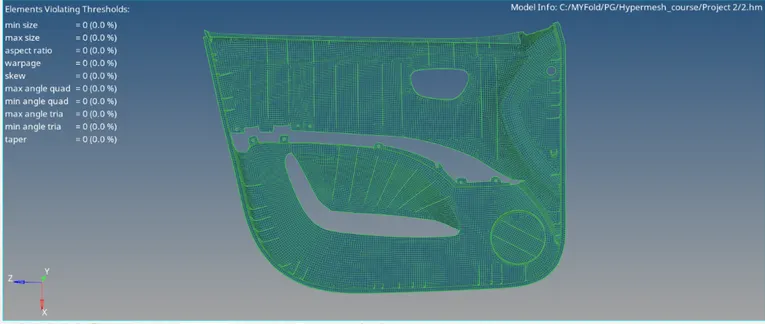
- Now that the mesh has been generated and has passed the quality parameters, the final step is to assign the thickness according to the initial geometry.
- Based on the different thicknesses, the mesh can be organized into different components using organize tool. This will help in distinguishing between various thickness components.
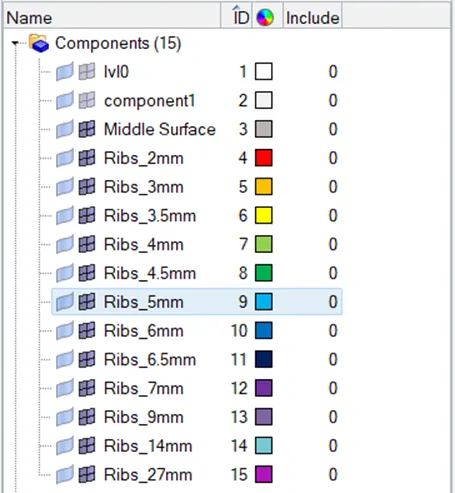
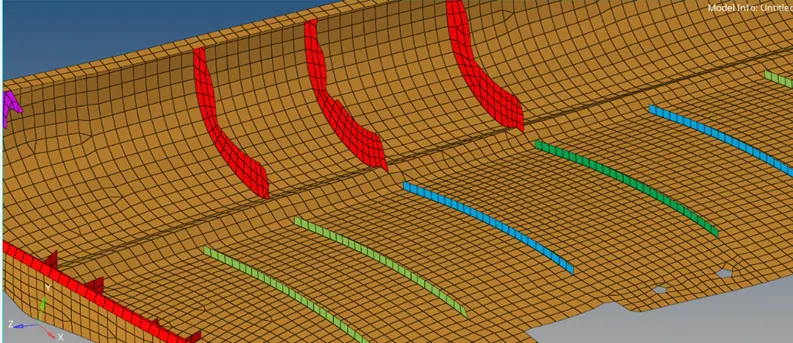
- Now, create properties for each component, and add thickness according to their respective thicknesses.
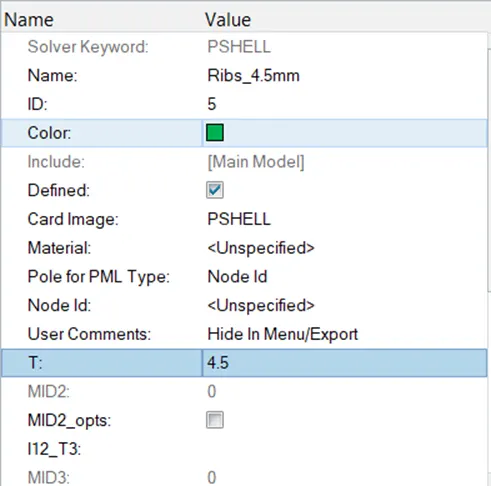
- Assign these properties to their respective components, and then turn on 2D detailed element representation to view the assigned thickness to the mesh.
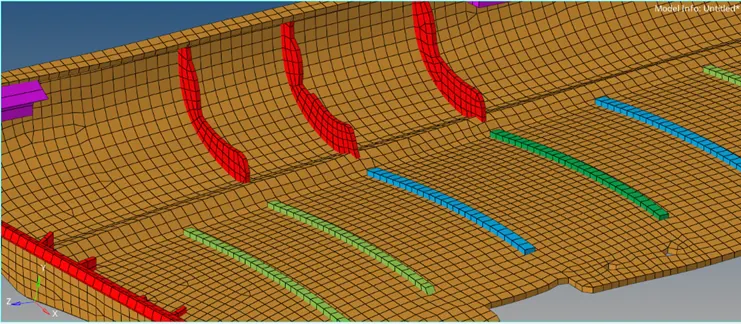
- The final Model is shown below:
Learning Outcomes: Acquired a proper understanding of mesh generation and flow patterns. The project helped me to learn to mesh in plastic models.
Conclusion: Generated a proper mesh pattern on the given door panel with given quality parameters and assigned the thickness to the same.