Project-2-Meshing of Door Inner Panel Challenge
Objective
To create the 2D meshing for the car side door panel by eliminating
geometric errors and considering the given elements quality criteria
using hypermesh.
Procedure
- Separate the component into multiple sub-components based on complexity and thickness.
- Defeature the component of its fillets using Geometry > Defeature > Surface > Fillets.
- Create a new collector to house the region that is to be organized using Create > Component.
- Extract the midsurface on each sub-component using Geometry > Surface Edit > Offset.
- Extend the edges that need to be attached to the corresponding surfaces using Geometry > Surface Edit > Extend.
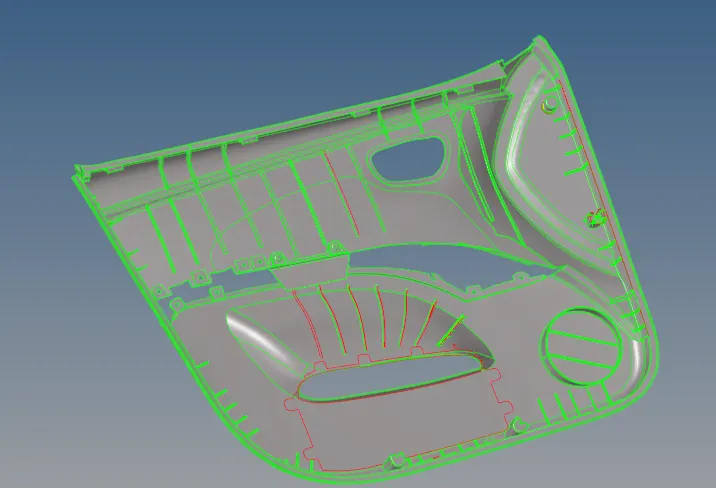
- Clean up the midsurfaces using quick edit tools like toggle, replace, and split surface node options through Geometry > Quick > Edit.
- Input the required mesh quality criteria through Preferences > Criteria File Settings.
- Mesh each sub-component one by one using 2D > Automesh with a target element length of 4mm.
- Ensure meshes between connecting surfaces are equivalenced properly.
- Correct any element failures using rebuild mesh, splitting the mesh, and element cleanup.
- Assign thickness to each part using the Property panel.
- Create a new collector for each thickness level using Tool > Organize.
- Use the Edit panel to create a mesh for each thickness level.
- Check mesh quality using the Quality Criteria tool under the 2D panel.
- Use the Mesh panel to perform manual element correction if needed.
- Use the Modify panel to add or delete nodes if needed.
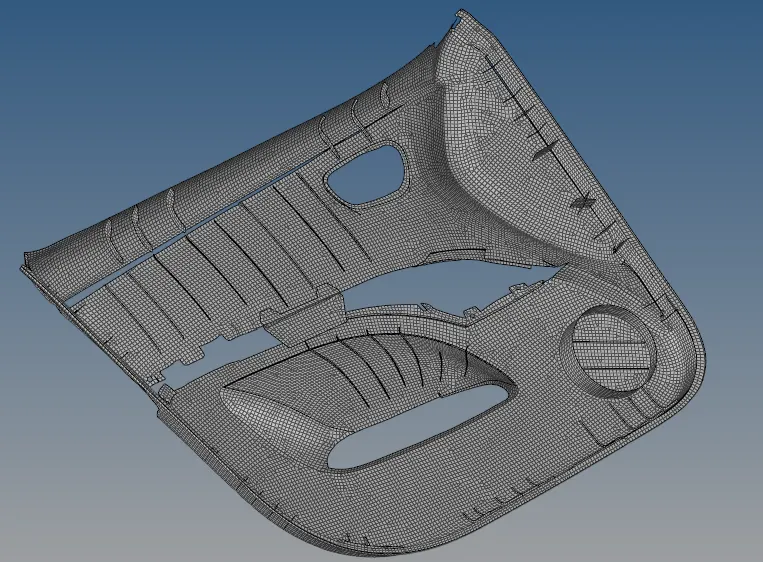
- Use the Geom panel to remove any unused surfaces or components.
- Use the Property panel to assign material properties to the component.
- Use the Load panel to apply boundary conditions to the component.
- Use the 2D panel to assign mesh controls for specific regions of the component.
- Use the Mesh panel to check for any element failures and correct them.
- Use the Save As option to save the component as a new file.
- Use the Export panel to export the component in a desired format.
- Check the exported component for any errors or deformations.
- Use the Quality Criteria tool to ensure the exported component meets the quality criteria.
- Use the Geom panel to remove any unnecessary surfaces or components from the exported component.
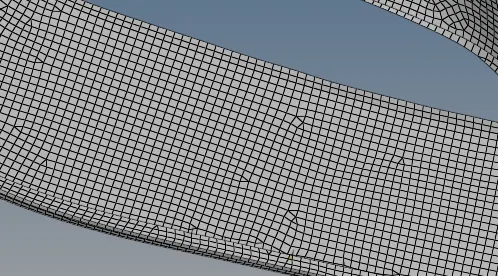
- Use the Load panel to ensure the exported component has proper boundary conditions.
- Use the 2D panel to assign mesh controls for specific regions of the exported component.
- Use the Mesh panel to ensure the exported component has good quality mesh.
- Use the Modify panel to add or delete nodes if needed.
- Use the Property panel to ensure the exported component has proper material properties.
- Use the Analysis panel to perform simulations on the exported component.
- Use the Results panel to visualize and analyze simulation results.
In conclusion, the given component, which is a B-pillar with varying thickness ribs, was successfully imported into Hypermesh and divided into multiple sub-components based on thickness and complexity. The mid-surface for each sub-component was generated using the offset option, and the thickness was assigned by defining properties and assigning them to the corresponding mid-surface component. The meshing process was carried out using the automesh tool, with a target element length of 4mm, and the mesh was cleaned and checked for quality using various tools like rebuild mesh and element cleanup. The thickness of each part was assigned, and the mesh was visualized with thickness by turning on the detailed 2D element representation option. Overall, the component was successfully meshed with good quality, ensuring minimum element length and avoiding the formation of trais wherever possible.