Project 2_Analyze and Design the RC office building as per IS standard code in TEKLA STRUCTURAL DESIGNER
1)
Aim - i) To develop general arrangement for the RC office building.
ii) Analyze and design the building as per IS standard code in TEKLA STRUCTURAL DESIGNER
Introduction -
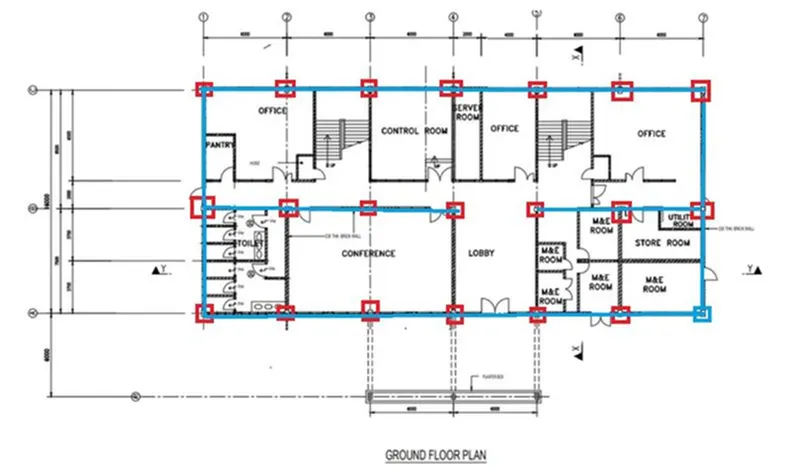
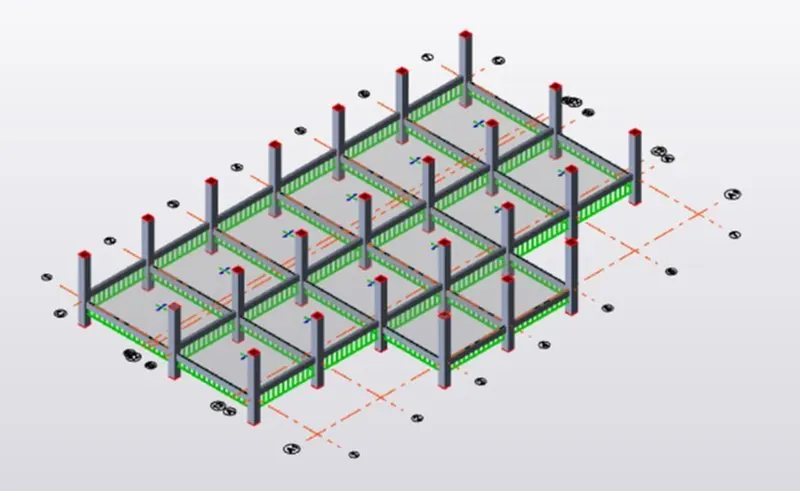
i) We have to mark the Position of Columns as shown below
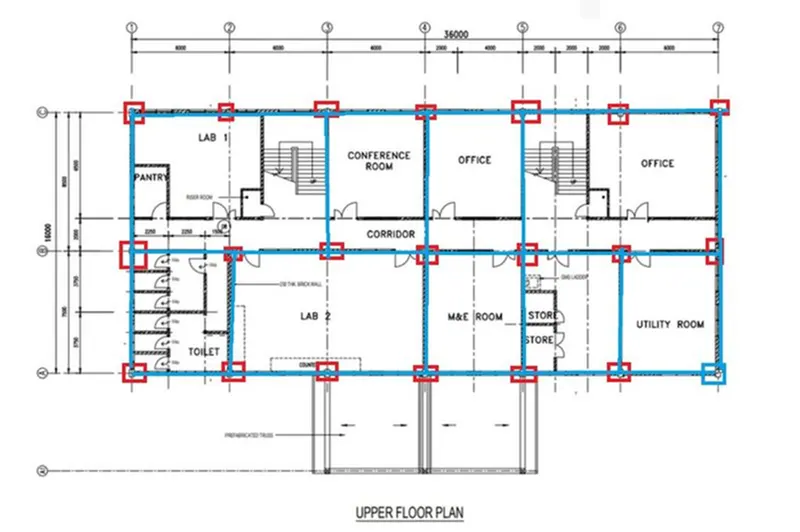
ii) Similarly mark the position of beams
Procedure -
Step 1)
i) Open the Tekla software designer.
ii) Create a construction levels.
iii) Go to section drawing to see the distance between floors
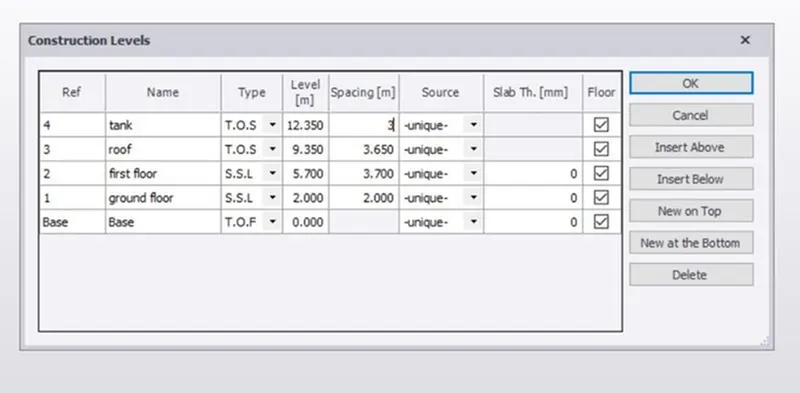
iv) Once the Construction levels are defined.
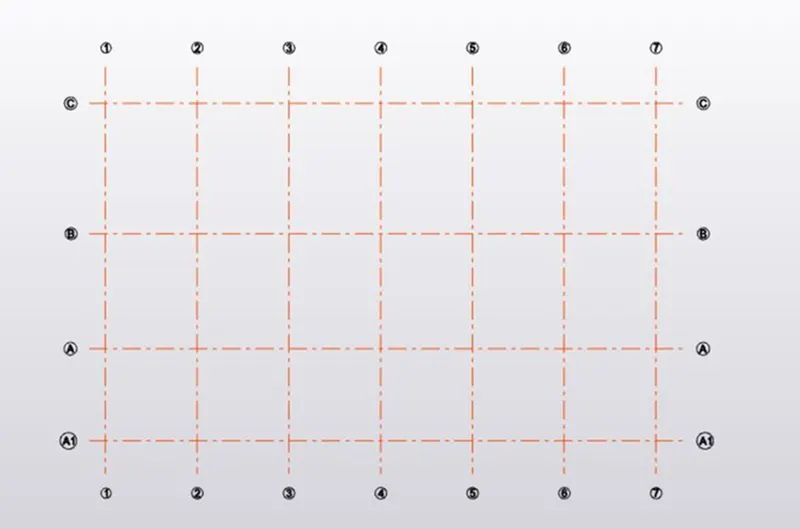
v) Next step is to create the Grids.
vi) For that refer plan drawings and create a horizontal and vertical grids by using Grid options
Step 2) Property
i) Once the grids are defined
ii) Now we have to add the temporary properties for columns and beams
iii) Go to Home - Manage Property set - New - Create beam and column properties as shown below
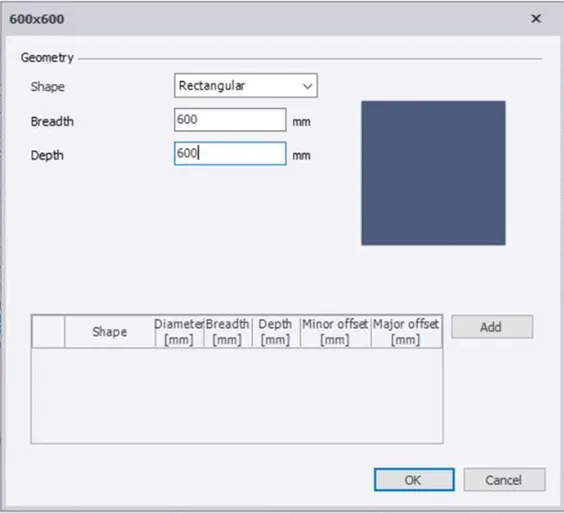
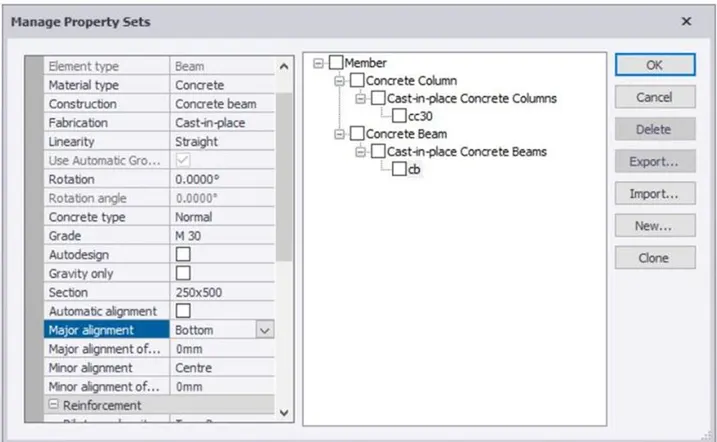
iv) Once property is defined assign it as per we have marked
v) Go to Model - Select - Concrete Column and assign it as shown below
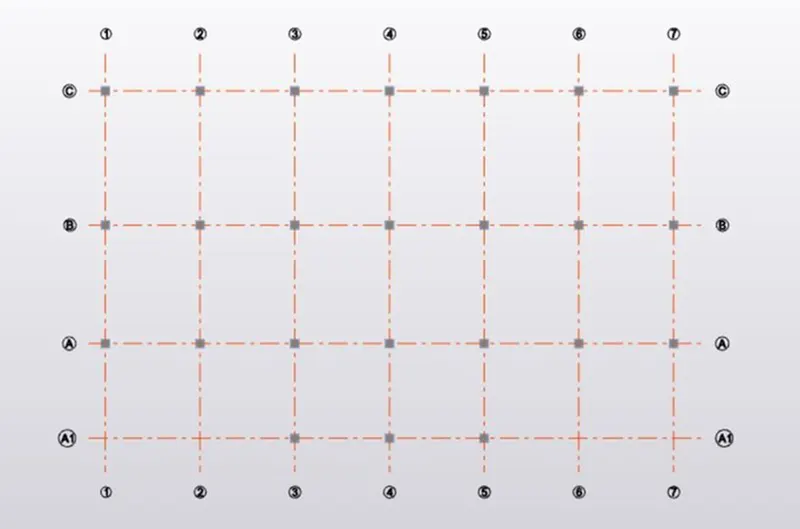
3D view
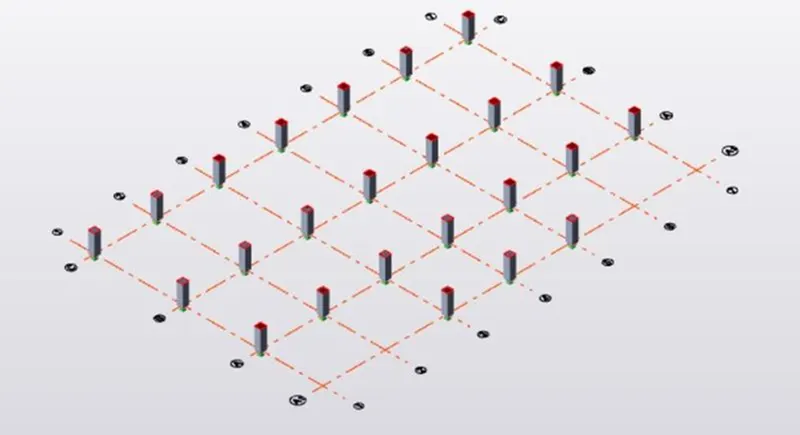
vi) Similalry assign the beam by using Beam option
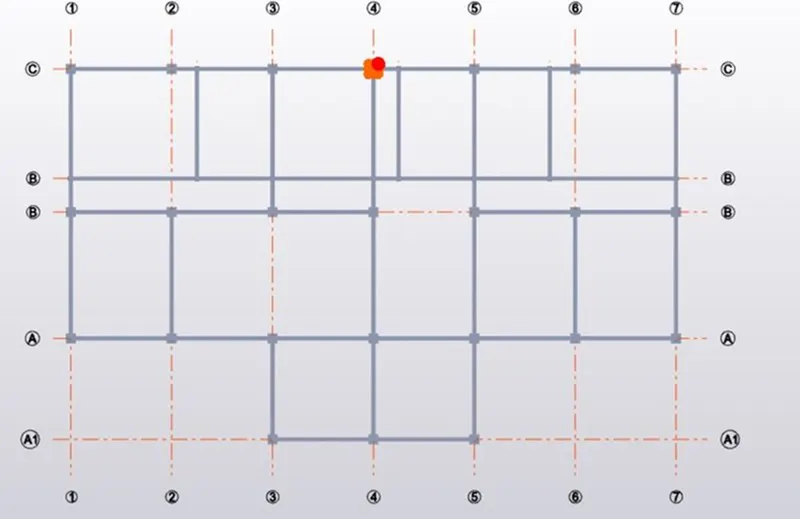
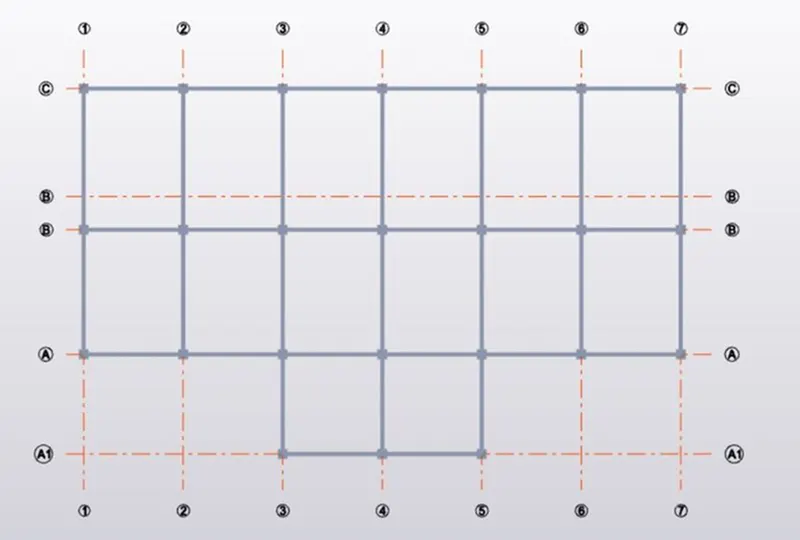
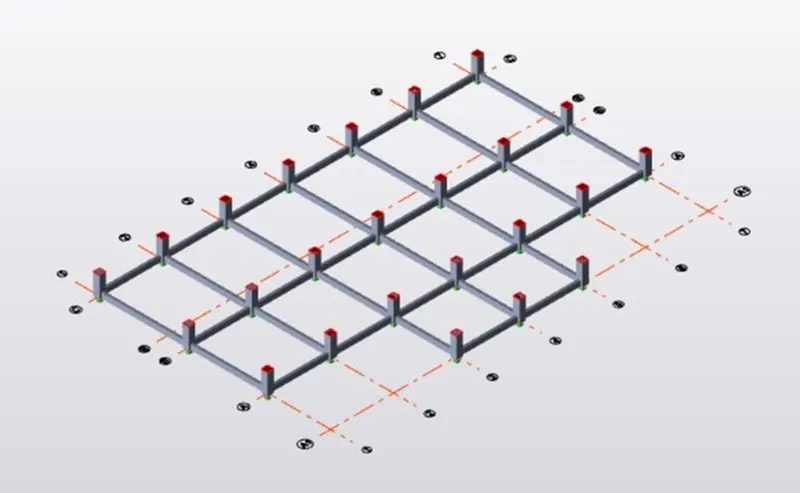
vi) Similalry repeat the same procedure for remaining levels
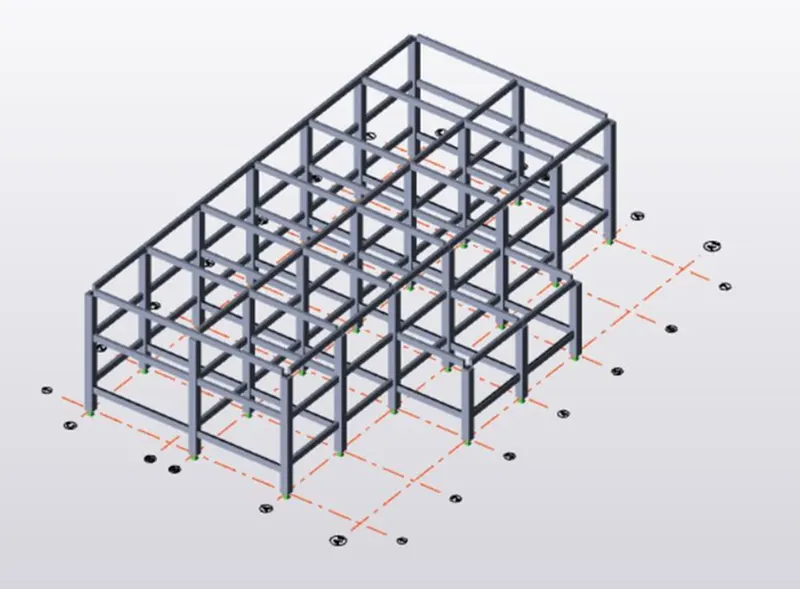
vii) Once the Column and beams are assigned
viii) Next step is to add Slabs
ix) For that Go to Home - Manage property Set - New - Slabs on beams
x) Define the property and assign as shown below ( One way or Two way slabs classify according to Ly /Lx ratio)
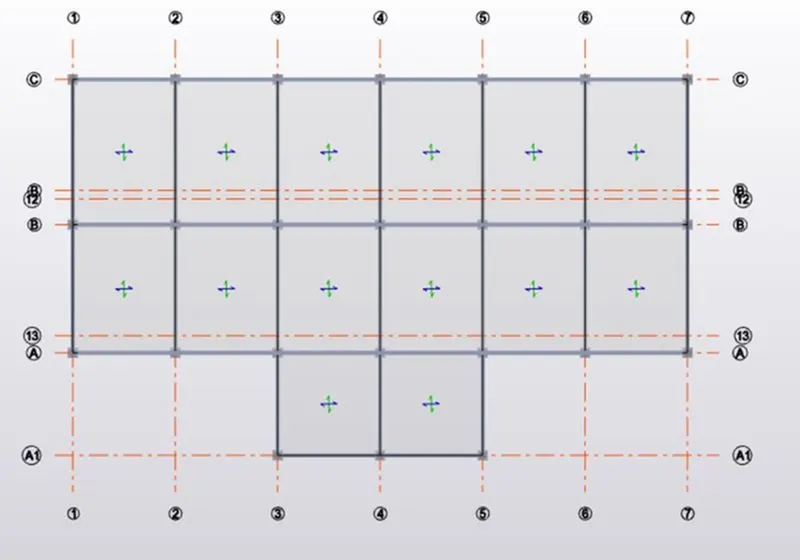
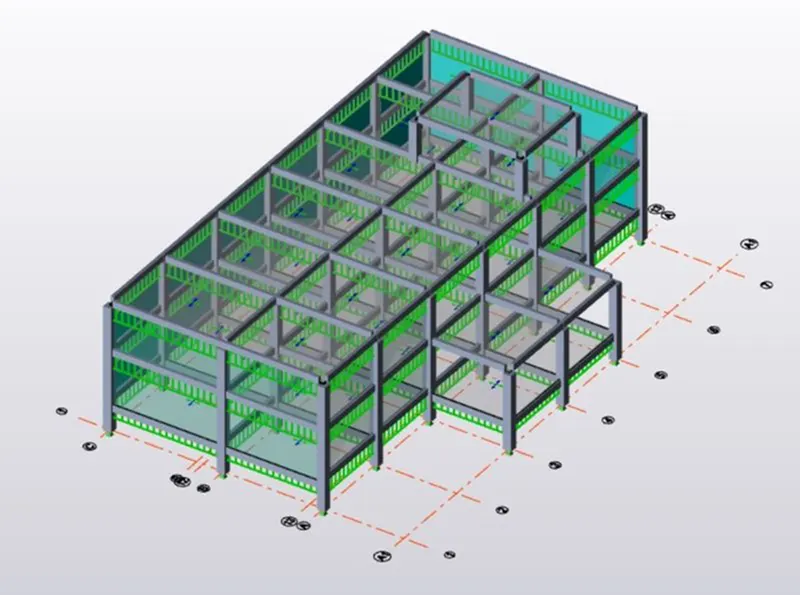
3D view
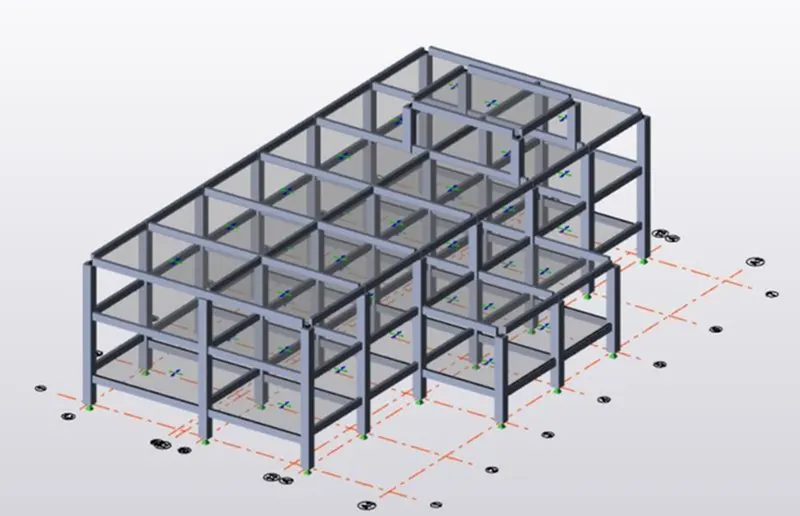
Step 4) Wall panel and Roof Panel
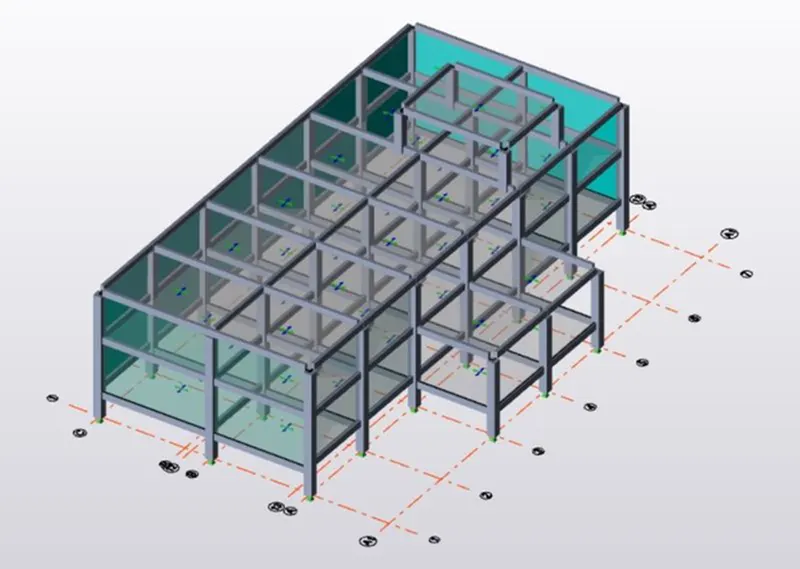
i) To add wall panel first we need to create Frames along the grids
ii) Click on frames and Select the Grids
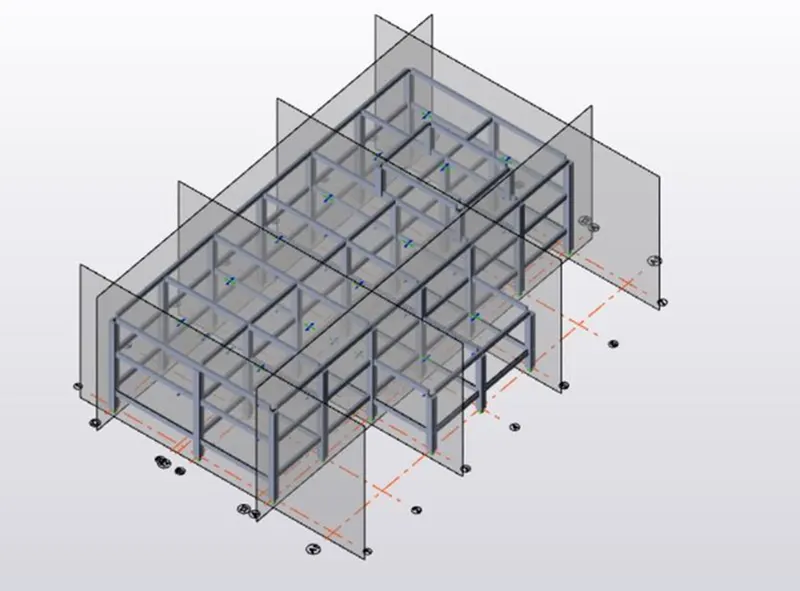
iii) Select any frames and add the wall panels
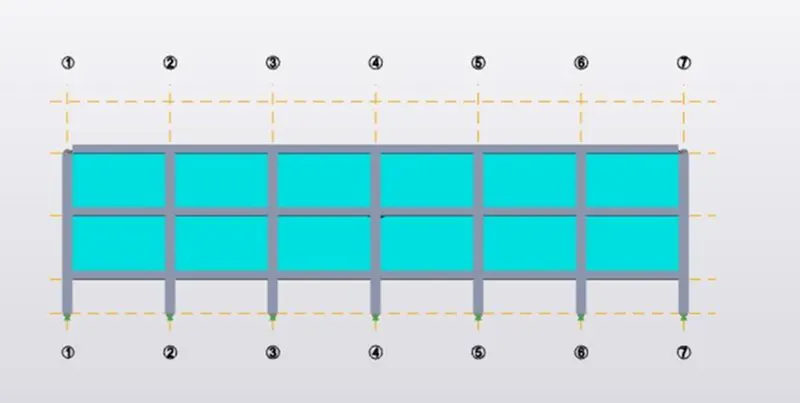
iv) Similalrly add the wall panels to all the sides
Step 5) Loads
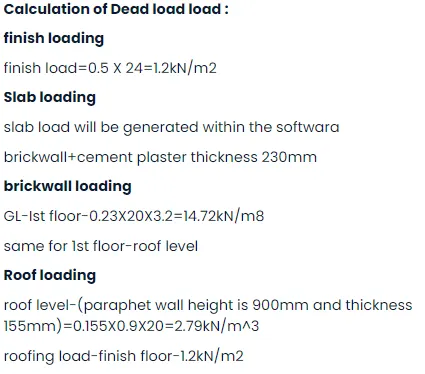
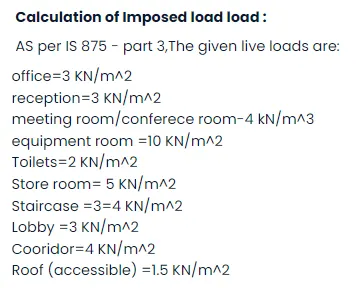
i) Once the geometry is done , then we have to add the loads and loads combination
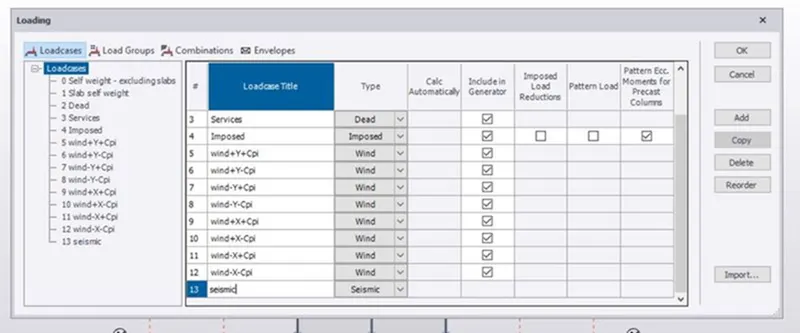
ii) First creaet a Load case.
iii) Go to Load - Loadcases Go to loads and create new load cases.
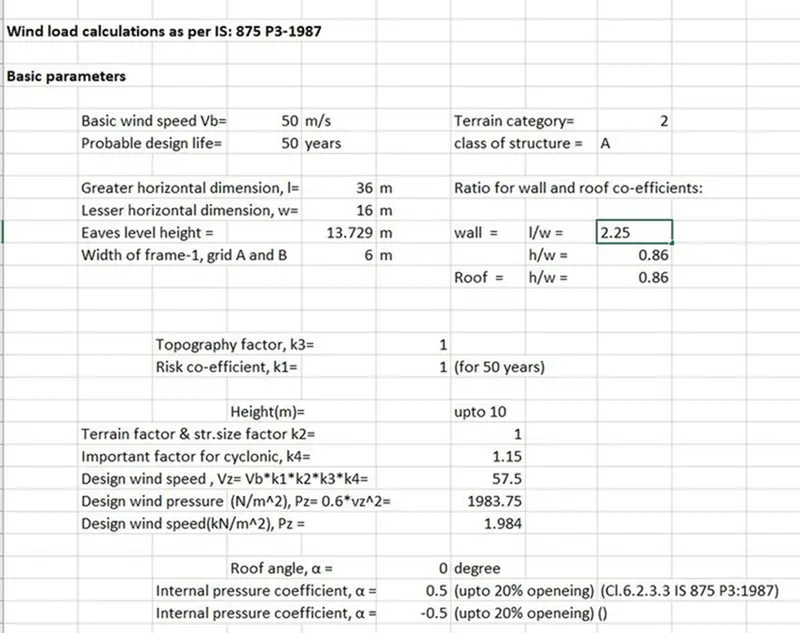
iii) Calculation of Wind Load -
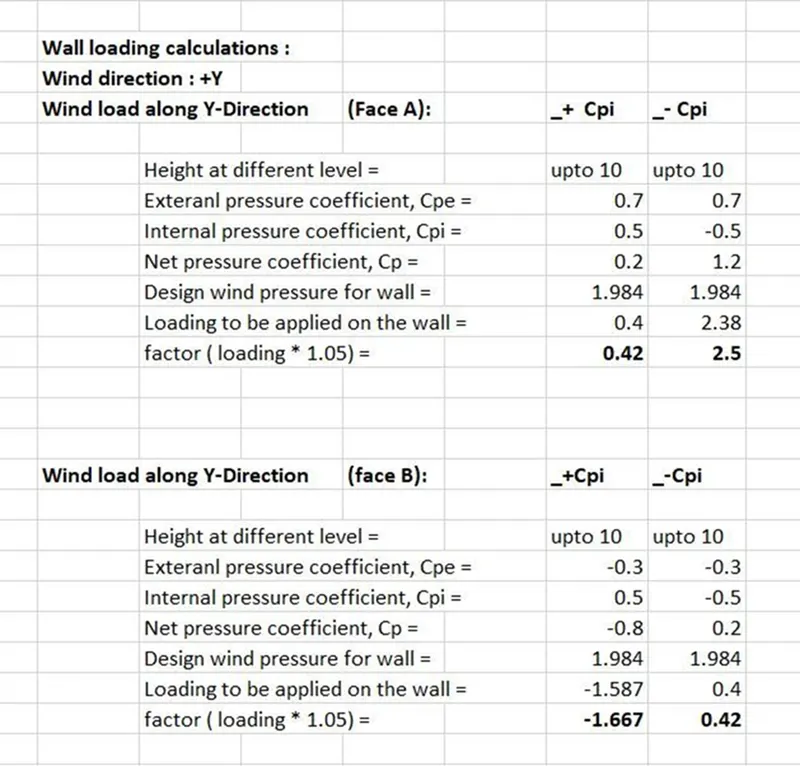
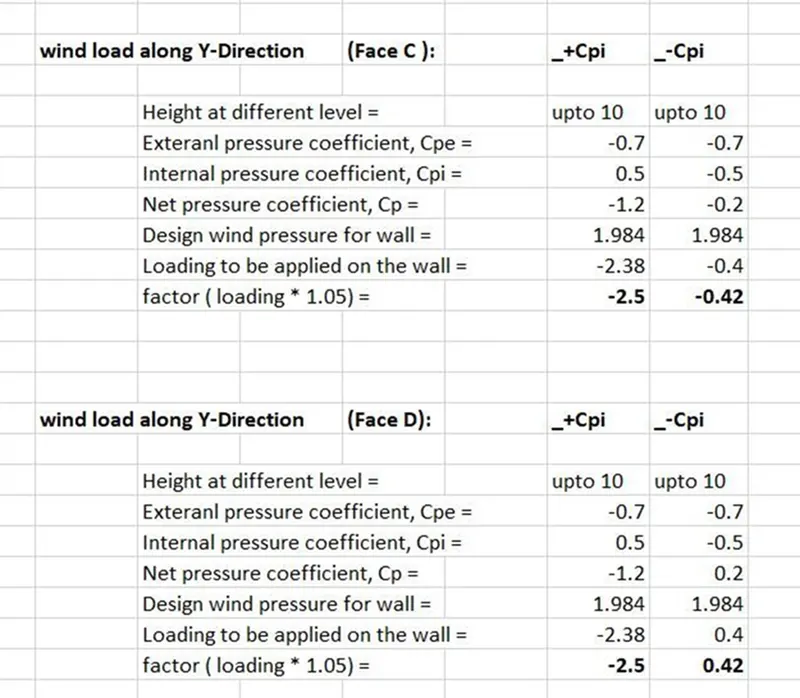
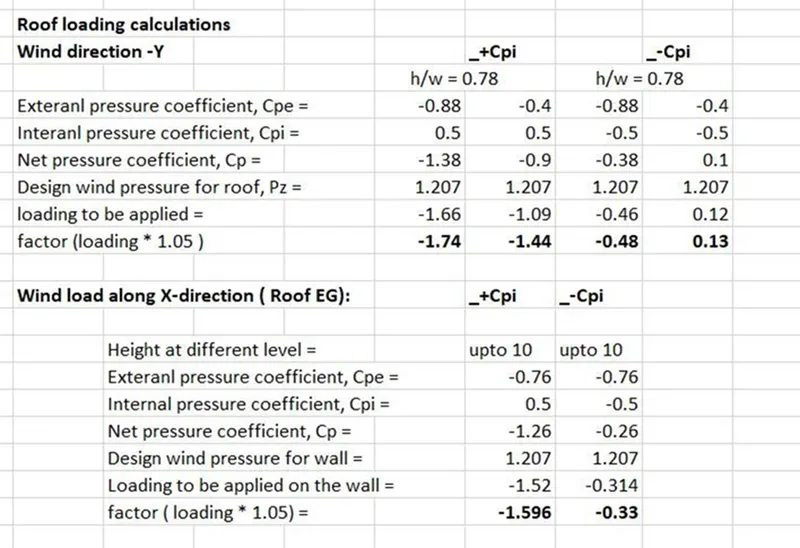
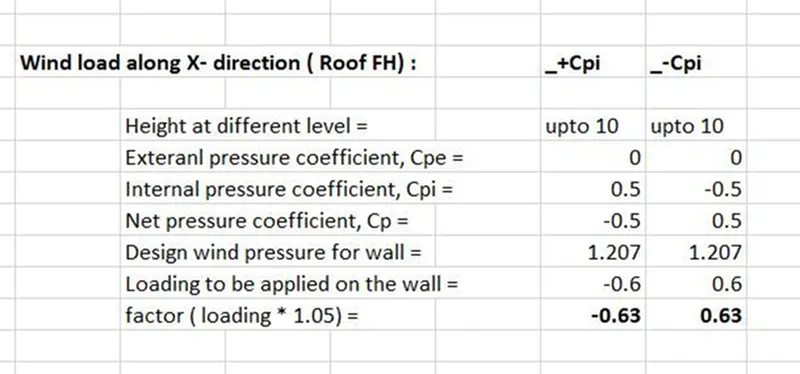
iv) Select the load case from left bottom corner and apply wind load case
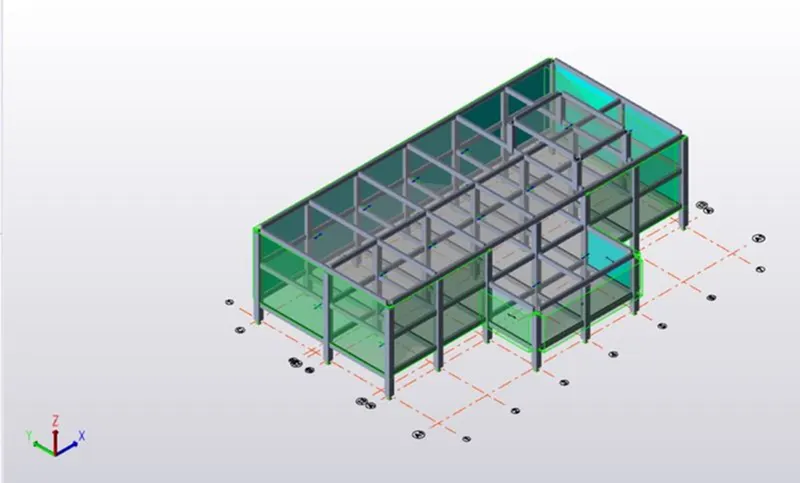
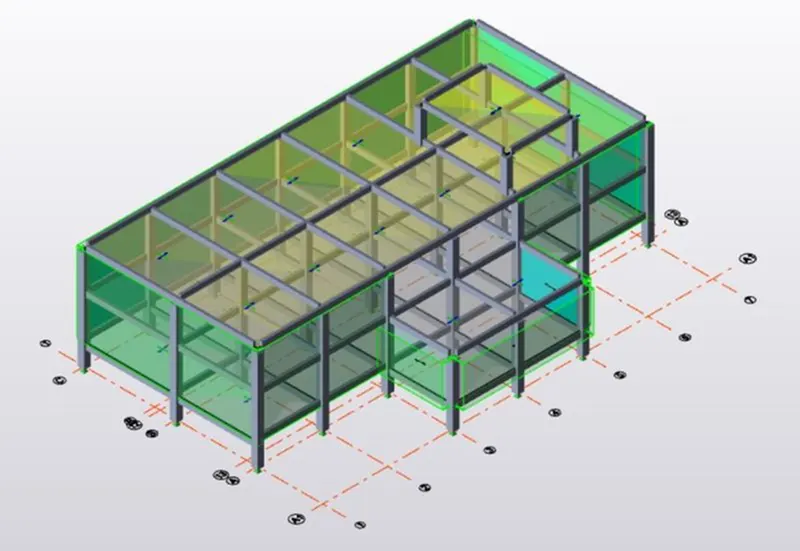
v) Seismic load - For Seismic load
vi) Go to Load - Seismic Load - Seismic Wizard and add the structure details
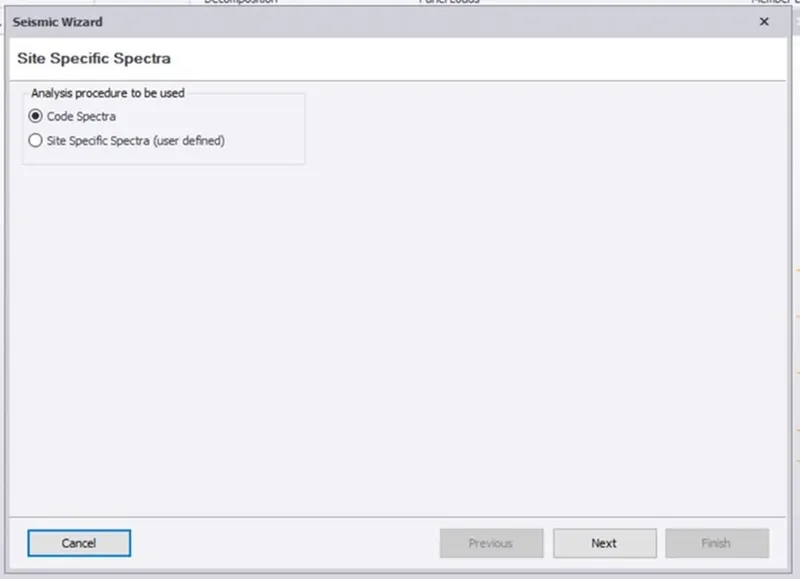
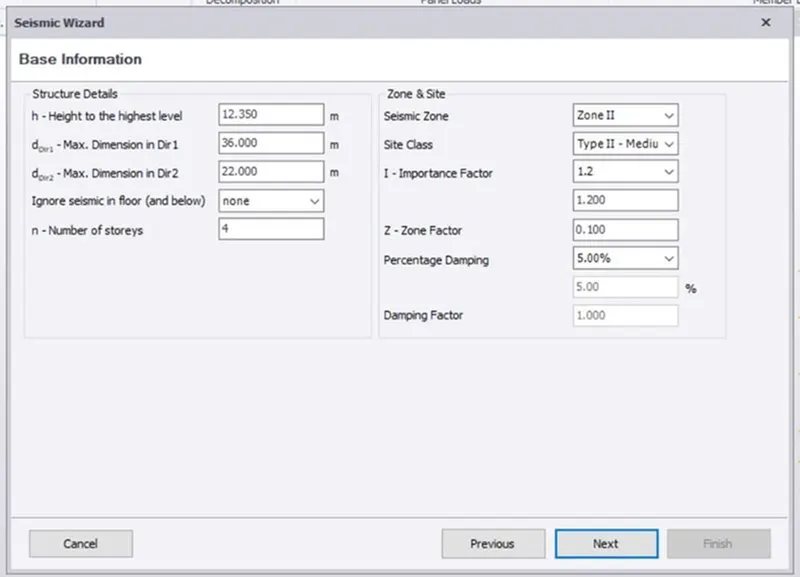
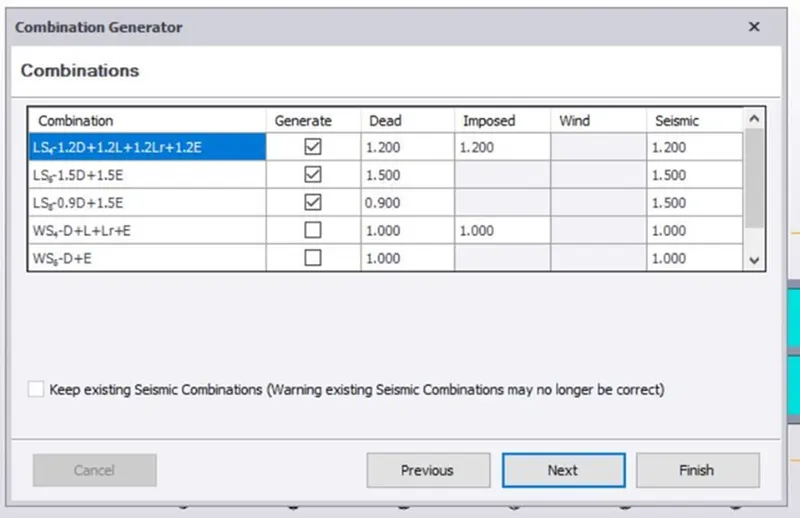
Step 6) Analysis
i) Once loading is add Check the model for any error
ii) For that Validate the model
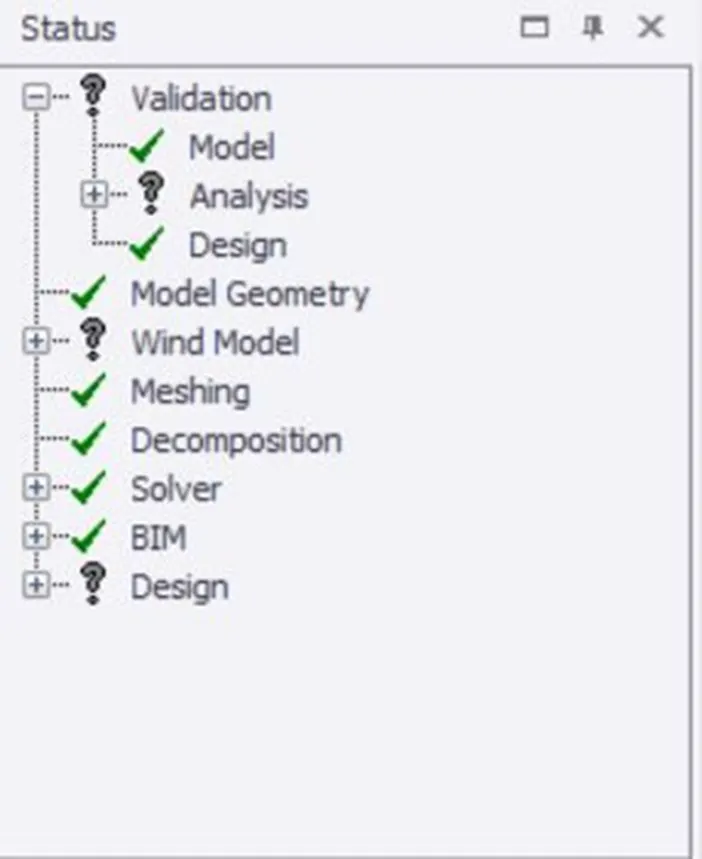
iii) Now click on Analyze - 1st order analysis
iv) select the load combinations
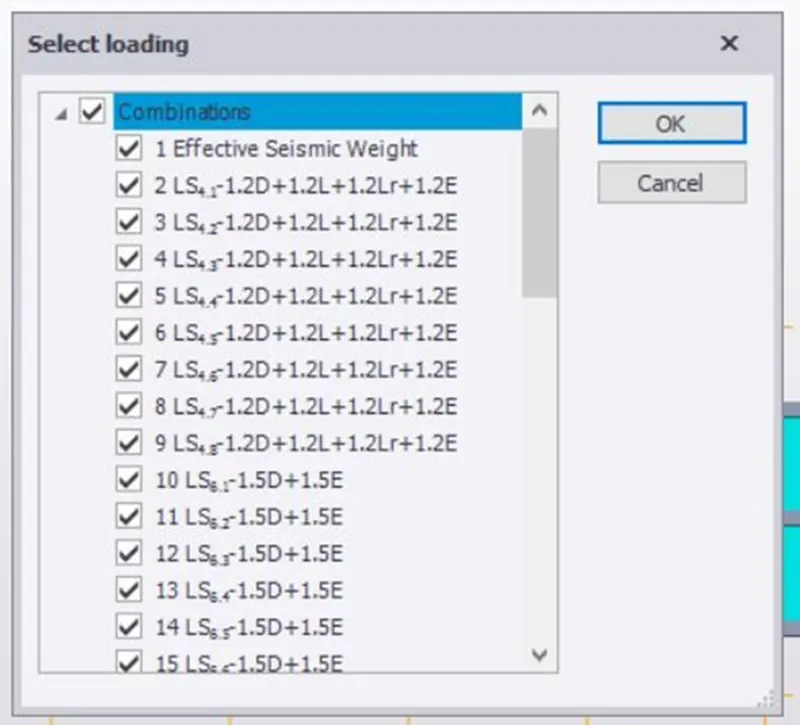
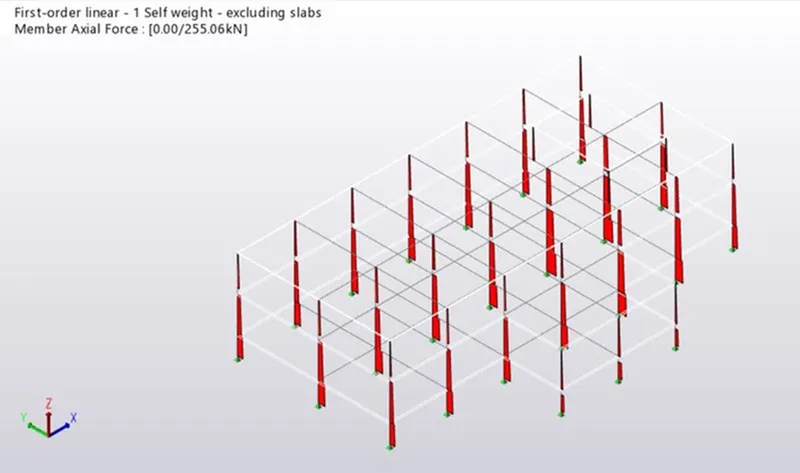
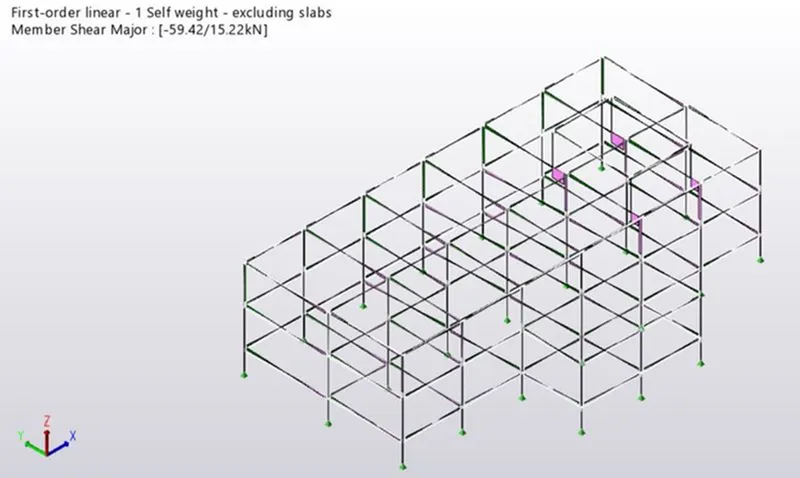
v) Now go to Result View -
a) Axial force -
b) Shear force
c) Bending Moment
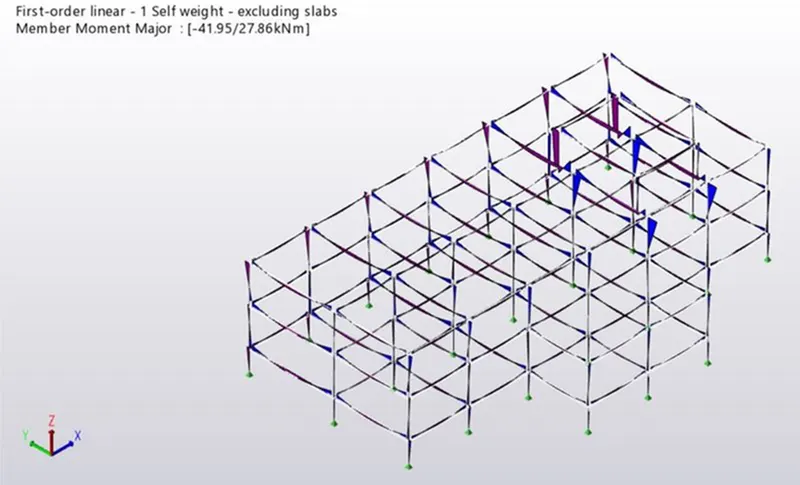
vi) Check the Design of column and beam
vii) Right Click on it and Select the Interactive design
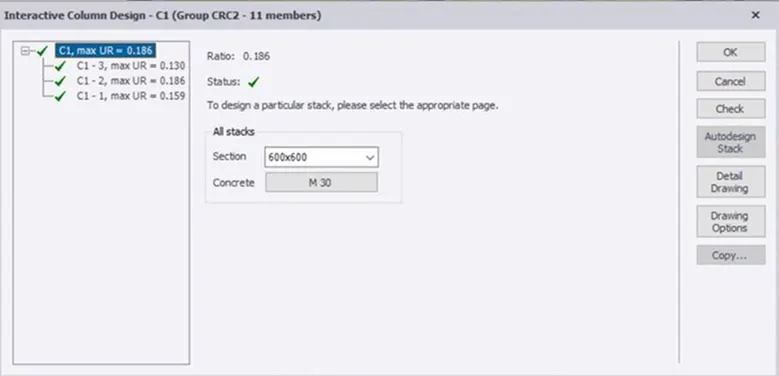
viii) Similarly check the all the members .
Step 7) Report
i) To generate report , Go to Report - Model Report
ii) Select the paramerters whichever you need to add in your report
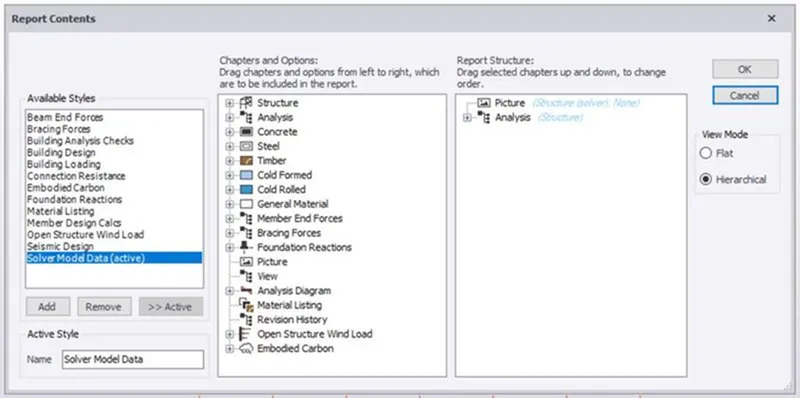
iii) Click on Okay
iv) To view the report we have to click on Show report
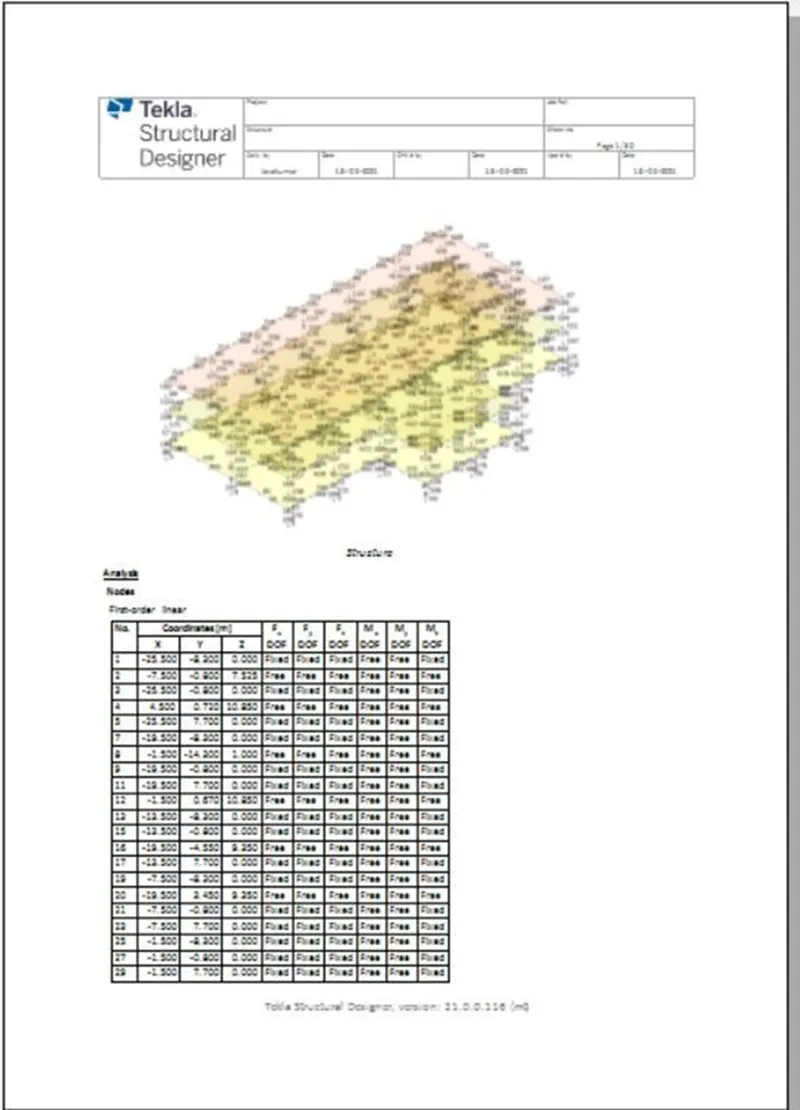
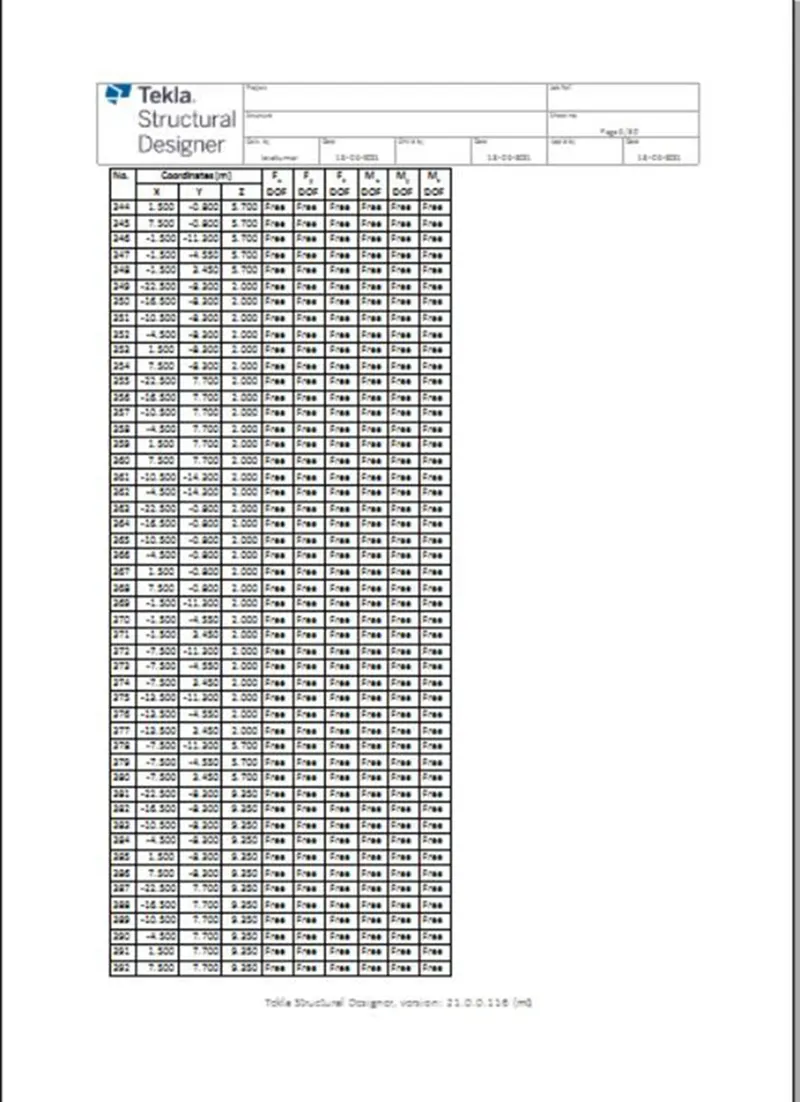
Result -
i) Model has been analyzed and designed as per IS Code and given attachments