Project 2 - 2D meshing on the instrumental Panel
Aim:
To perform mid-surface extraction and then 2D shell mesh on the mid surface of instrumentation panel.
Objective:
- To do geometry cleanup for the component.
- To generate the mid surface of the given parent component.
- To perform 2D meshing according to given quality criteria.
- To create PIDs for ribs, dog houses brackets and mid surface.
- To clear all the failing elements from quality failure.
- To assign different thickness to the FE.
Theory:
The dashboard is a control panel that is located in front of the driver in the car which controls the vehicle and its operation and indicates the features and it's working.
It indicates speed, fuel, control steering wheel, air conditioning, and now modern days it also indicates about oil pressure, weather, lights and in dashboard LED screen are given where we see the operation of parking and front camera, music system, and GPS control system are also attached. So we can see the whole working and movement of the vehicle and it's parts to control them.
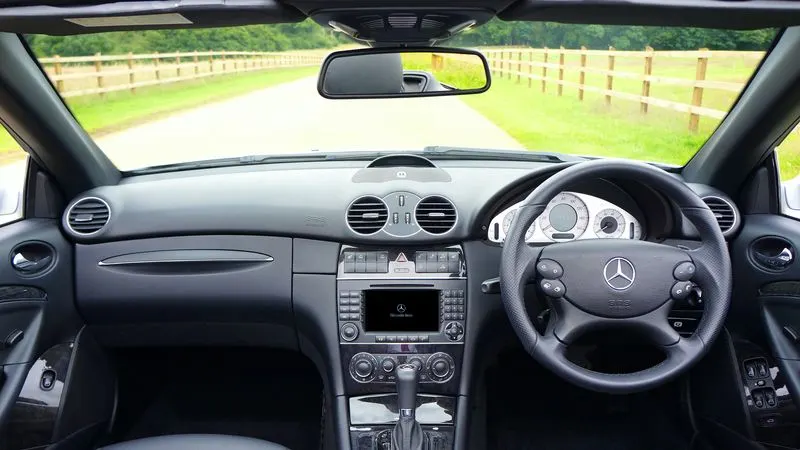
Dashboards are generally made of polyvinyl chloride, invented in the early 1920s and now used in everything from water pipes to shower curtains. PVC can be rock hard or cloth flexible. To achieve that, scientists add plasticizers to the PVC.
Polypropylene (PP), Acrylonitrile-butadiene-styrene (ABS), Styrene maleic anhydride (SMA), Polyphenylene Ether (PPE), and Polycarbonate (PC) are the materials commonly used in an automobile dashboard.
Procedure:
Importing the Model-
The file is downloaded initially. To open the file, follow the steps.
Click on File--->Open (Ctrl+O)--->Browse to the location of downloaded file--->Click to select--->Ok
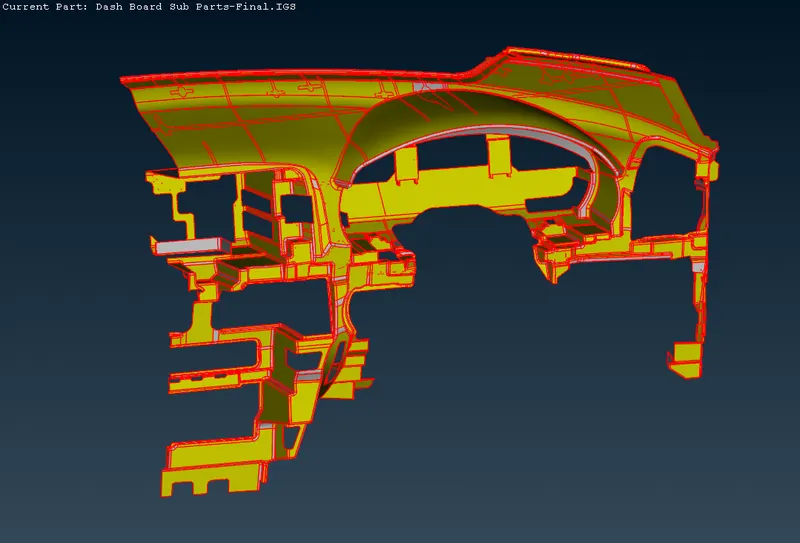
Initial check and Geometry cleanup-
- This process is used to check any errors present in the model.
- For Topology, Click Topo--->Select Model--->Middle-Click on Mouse.
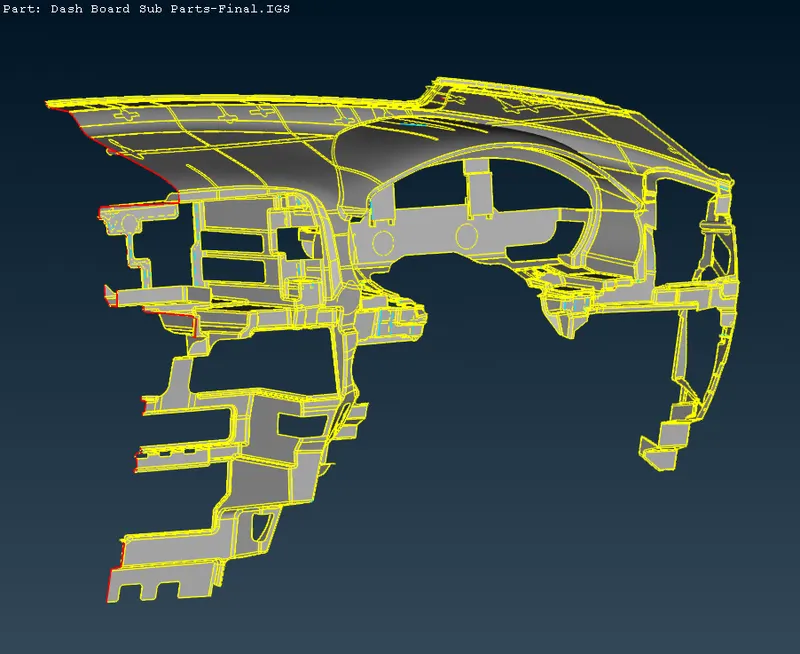
- In order to check the Topology follow the process as Tools--->Checks--->Geometry--->Execute.
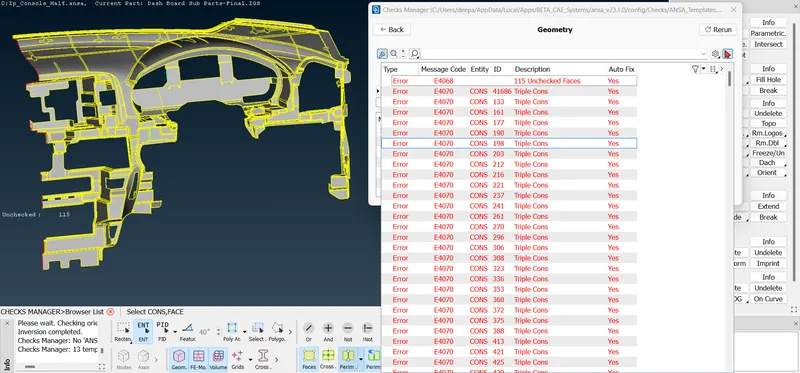
- These errors can be fixed either by working on with them individually or once Right-clicked on the mouse an additional list pops-up.
- Fix option will be present in that pop-up when it is clicked the errors which can be fixed are executed and it might contain only a few errors which should be fixed manually and if no errors are present then it will show the green bar stating executed.
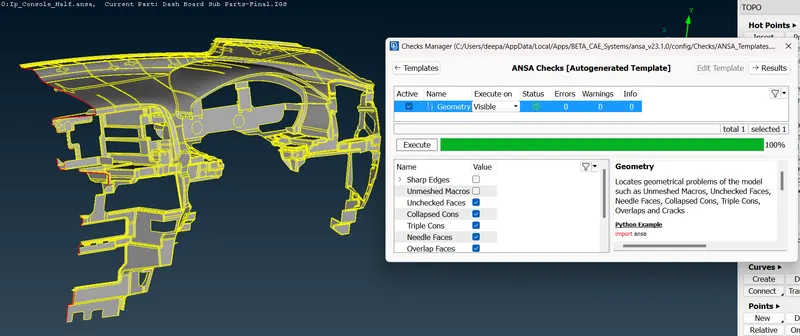
Midsurface Extraction-
Now to generate the midsurfaces. There are multiple ways to do this. We shall be using the 'middle' and the 'offset' tools for this challenge.
For the base of the panel, offset tool can be used (Faces ---> Offset), it will ask us to select the surfaces to offset. We can select the surfaces on one side of the component and select features on the bottomleft of the screen. Deselect the dlete original faces from options window. After that, we can assign the offset value (half the thickness). The offset tool will show the direction of the offset in the form of an arrow. If it is in the opposite direction of the required offset, the offset value needs to be in the negatives. If we proceed, the surface will be offset and we will have the option of keeping the parent surfaces.
As a sidenote, it is best to create properties for each of these midsurfaces as soon as you create them. Just as in the stored lock views, properties can also be helpful in facilitating your workflow and helps focus on a certain region.
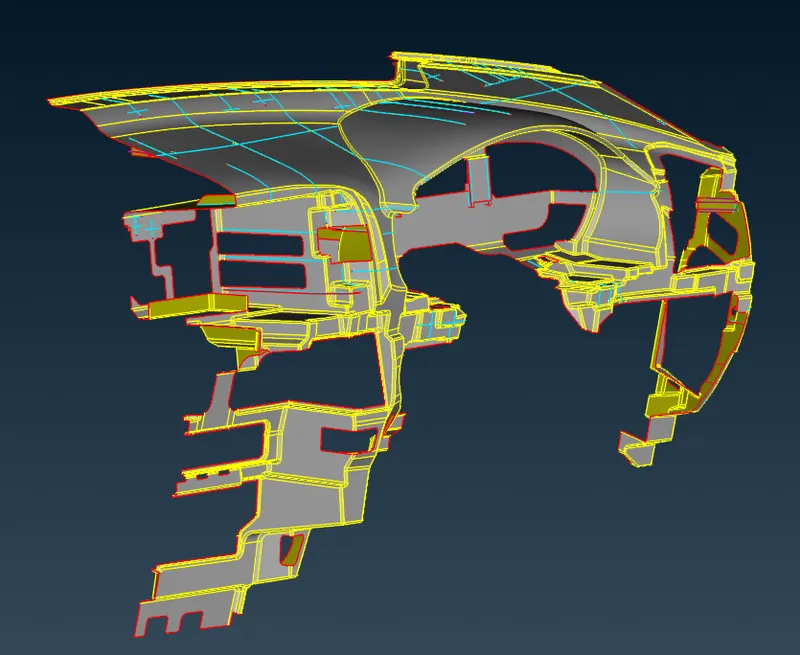
Offsetting the Ribs and Dog houses-
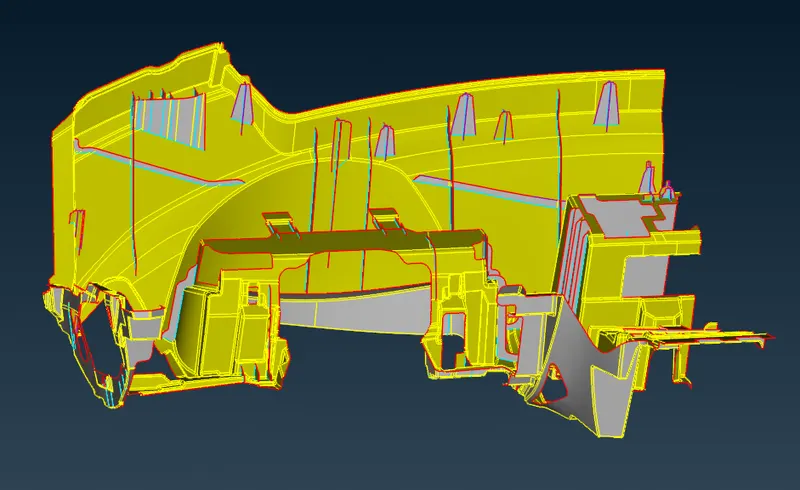
- There is lot of approaches we use to extract midsurface for Ribs and dog houses.
Creating middle curve-
- Creating a middle curve using curve tool in topo module.
- And then project those curve onto respective surface.
- And then create nes surface by selecting coons.
Offsetting the surface at mid-
- In this method we will offset the surfaces at mid.
- In case of Dog house we will get intersected surface.
- So for that we will use intersect tool to create surface intersection in faces in topo module.
Then after that we will extend those surfaces to base mid surface.
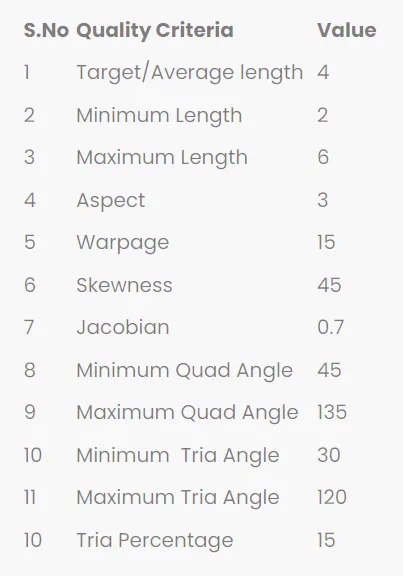
Quality Criteria:
The following quality criteria is to be used to mesh the instrument panel model.
Meshing-
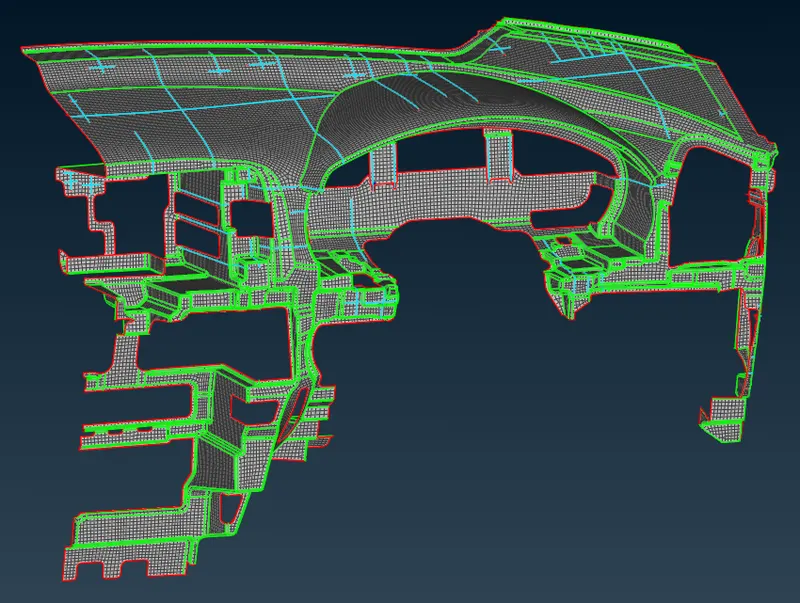
Once geometry cleanup and midsurface extraction is completed it means there should not be any unstitched surfaces, unwanted free edges etc.
Mesh module ---> Mesh generation---> Best---> Select component and mesh
- In 2D meshing with ANSA preprocessor easiest way of meshing is by Best mesh.
- After giving mesh to the surface usually we will be using Reconstruction (Recon.) from shell mesh for better mesh flow.
- Uses of some other tools also like smooth, split, swap, cut, join For better mesh flow.
Some thumb rule while meshing for better mesh flow-
- Feature capturing is must while meshing, it means all shared edges should have better nodes connectivity.
- Try to keep less number of trias.
- Avoid trias on feature line and edges and swap it.
- Avoid opposite trias, use split option and combine them.
- Try to keep less number of trias on fillets, use split or swap tool.
- Avoid rotational quads, or split into trias and move them.
- Use mixed type of elements on complex geometry means trais and quads for this 2D meshing.
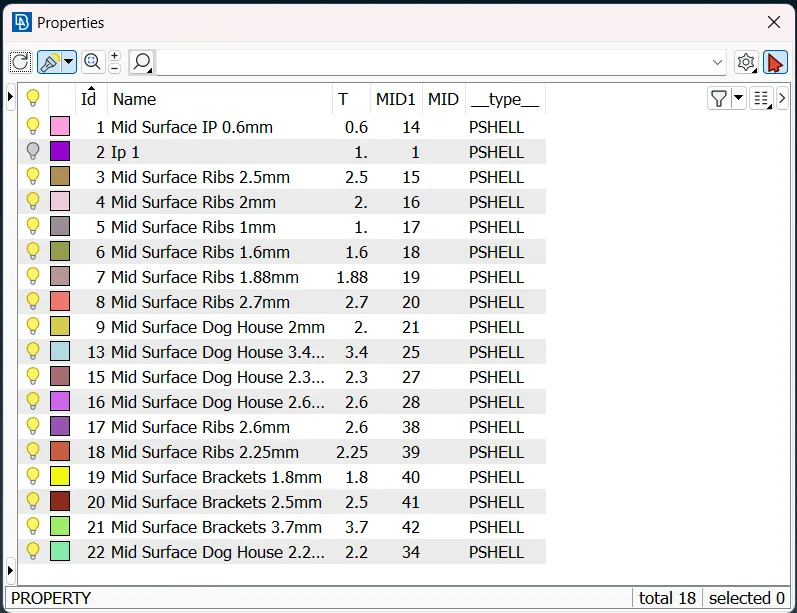
Assigning Thickness to shell mesh:
- Since here every part is having different thickness so we have to assign PID's individually and also assign the thickness for every part.
Result:
- Hence we have cleared all geometrical errors successfully over the component.
- Extracted midsurface for all the ribs, dog houses, brackets and parent geometry.
- Meshed the midsurface according to given quality criteria.
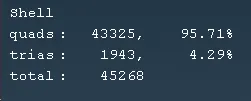
- A good mesh flow have been achived with less tria concetration.
- Thickness assigned for every part with different values according to parent body.
Learning outcome:
- How to perform geometry cleanup for complex geometry.
- The midsurface extraction for complex geometry like intrumental trim body.
- How to extract midsurface for Ribs, dog house and brackets.
- How to achive less tria concentration with proper mesh flow.
- How to clear failing elements from quality.
- How to assign different thickness for different body parts.