Project 2
AUTOMOTIVE WIRING HARNESS BACKDOOR
Statement of assignment:
Route the Wiring harness on the Given car body and Prepare to flatten the view drawing in CATIA V5. Application of all Packaging rules, Industry best practices studied in this course shall be demonstrated in design. Apply Protection coverings as required.
Available connector 3D data can be used, or you can download the connectors from www.te.com
Prepare & Submit all necessary reports like clearance, Clipping/Clamping selection, Harness fixing requirements, Harness continuity, and Assumptions if any along with CATIA 3D data.
Aim- To route the wiring harness on the given backdoor assembly and prepare the flattened view drawing in CATIA V5.
Objective-The objective of this project is to route the wiring harness and prepare to flatten the view drawing for the Backdoor of the car. All types of packaging rules have to be considered while routing the harness and industry-based practices shall be demonstrated in harness design. All necessary details like clearance, clipping/clamping selection, harness fixing requirements, and harness continuity should be provided in order to design the wiring harness.
Rules to be followed-
- The wiring harness should be routed in such a way that it is easy to assemble and access.
- Easy manufacturing, installation, removal, and maintenance have to be considered while designing the wire harness.
- The wiring Harness should be kept away from sharp environments like edges, corners, etc.
- Avoid harness routing and clipping in blind zones or hard-to-reach areas during harness assembly or service.
- Provide additional slack if needed according to the surrounding and harness bending requirement. If harnesses are passing through the closures/doors or tailgates then envelope dimensions during the opening and closing of doors shall be considered to provide the slack. Check the harness slack requirements with open and close conditions to avoid excess slack.
- Routing through small structural holes and openings shall be avoided. To minimize chaffing and handling of the wiring harness during installation.
- It should be made sure that there is no case of fouling while designing the wiring harness in the CAD environment. Additional mounting equipment like clips/clamps may be used to avoid fouling.
- The use of a rubber grommet is recommended if the harness is passing through sheet metal panels. Example- firewall, passing to door, tailgate, etc.
- The branch length should be greater than 50mm.
- The minimum distance between the clip and the branch point should be at least 25mm.
- The minimum distance between the two branch points should be at least 50mm.
- Clips/clamps used for the wiring harness should be easily available in the market to avoid extra costs for custom mounting solutions.
Steps required-
Step-1) Creating context assembly-
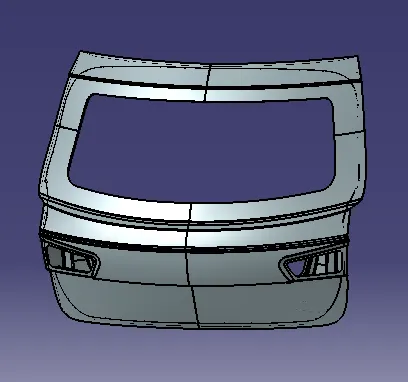
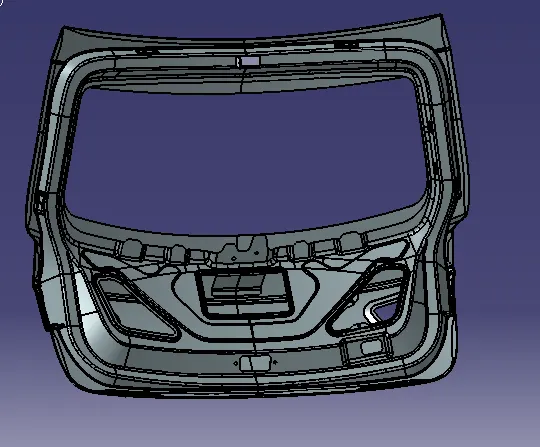
Open the Backdoor assembly in the CATIA making an assembly product file.
By using the Backdoor CAD Data create a part. Now to Create a wire harness routine create a Backdoor Context Assembly file and use a Backdoor part as one of the sub-products of Context Assembly. Create a sub-product to create a geometric bundle for Backdoor.
Step-2)Defining connectors electrically-
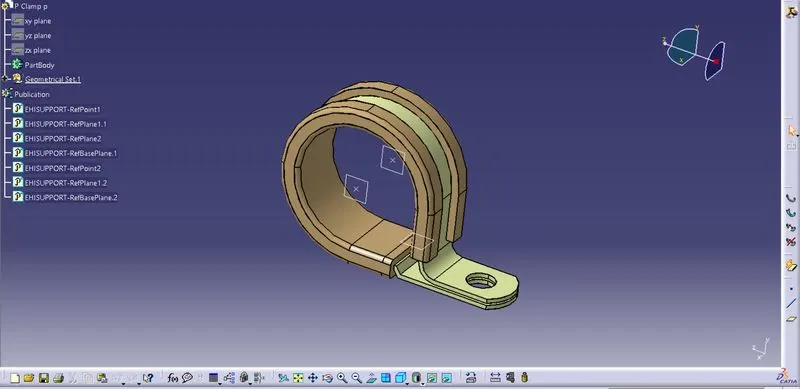
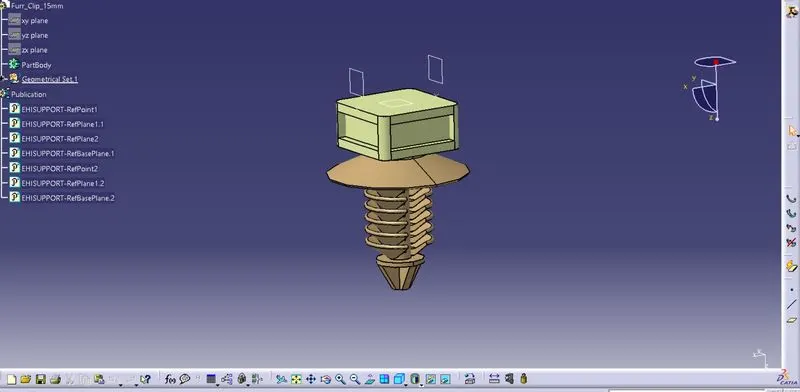
Now by creating a geometric bundle, Start Mechanical Part Design for the connectors, Storage the device using terminals, and adding Geometrical parameters like Bundle Point and Connector Connection Point the connectors can be used which are available in the connector catalog. The same follows for the different clamps and Clips which will be required for creating the Geometric Bundle.
(Connector Used: c-1563689-1-4P and a 12-Pole Interconnector, P-Clamps, and Fir Tree Clips )
Choosing the right components for the wire harness routing. here we are using the components for backdoor upper and lower lights, wiper motor, sensors, and defogging equipment. the connectors used are first electrically defined and then added to the CATIA model.
The type of connectors used are given below-
1)C-1563689-1-4P -
Here, according to the requirement we are using 'C-1563689' which is a 4-pole connector. This CAD data is downloaded from te.com. Now, to define a connector electrically we should define the geometrical parameters like bundle connection point in the Electrical Part Design workbench for the downloaded connector.
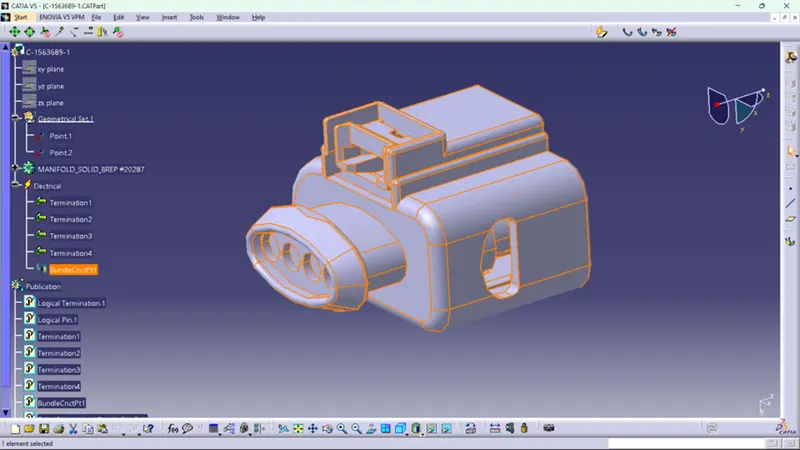
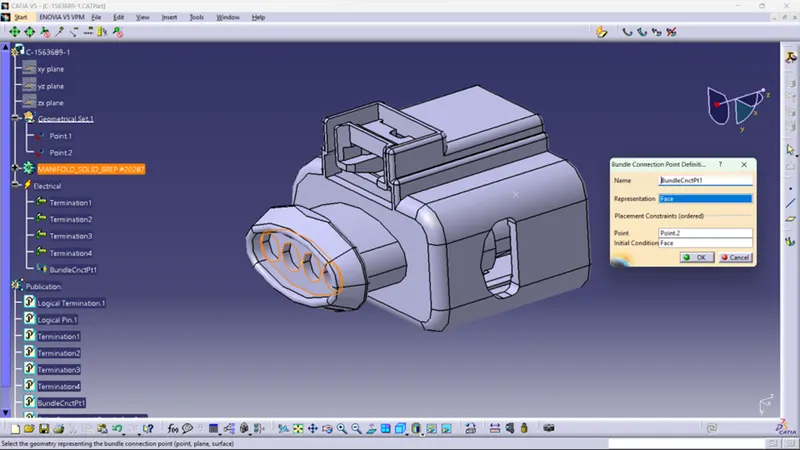
The above figure shows the bundle connection point for the 4-pole connector 'C-1563689-4P'
2)12-pole connector, C-776438-4-
Here, a 12-pole connector "C-776438-4" and mounting cavity "C-1924487-2" is together used as an interconnection connector. The required car data is downloaded from te.com. First, we have to define the 12-pole connector and mounting cavity electrically as below.
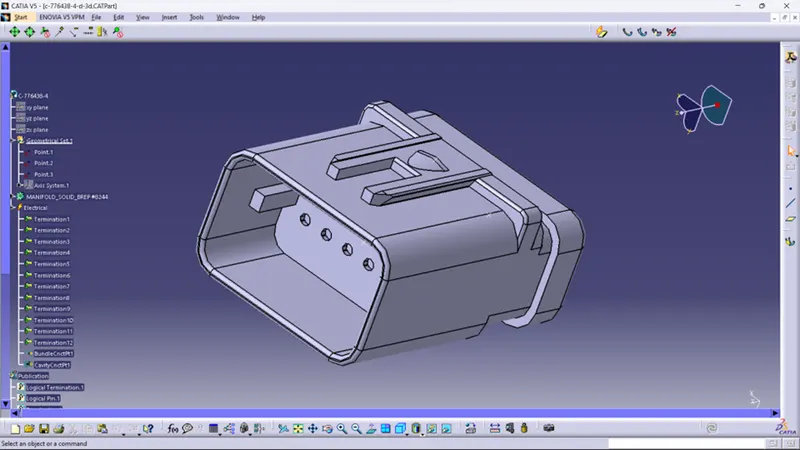
Fig: 12 pole connector "C-776438-4"
3)Clamp and Clip are used to set the location of wire-
Step-3: Position the Connectors, Clips, and Clamps at their respective position and their requirement for creating the geometric bundle and adding bundle segments.
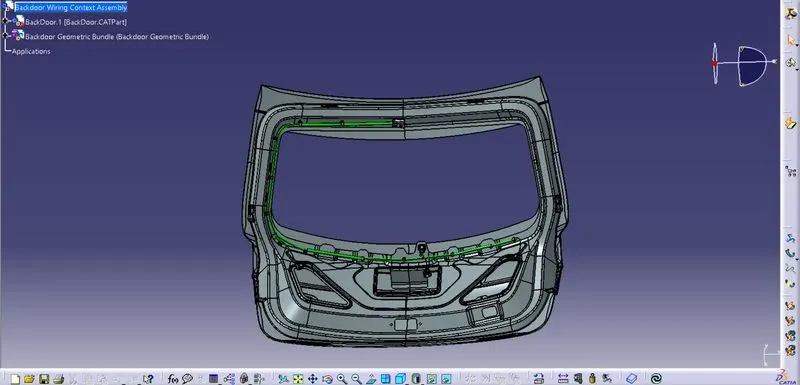
STEP 4 - Bundle routing-
The routing starts with an interconnection connector placed on the L clip.
STEP 5 - Bundle continuity check-
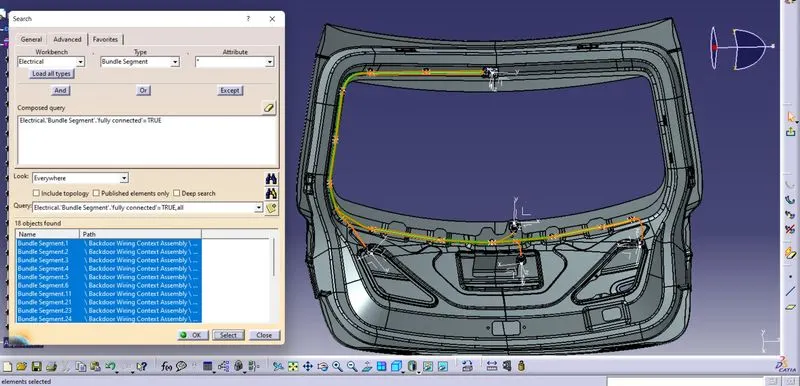
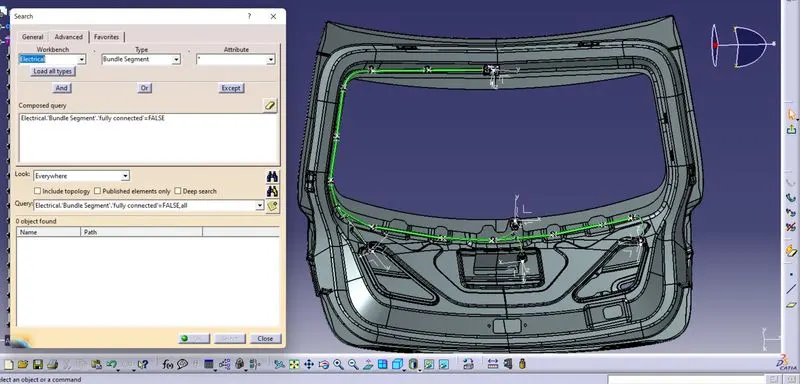
Now we check the bundle continuity check for further process.
1) The continuity checked for TRUE-
2) The continuity checked for FALSE-
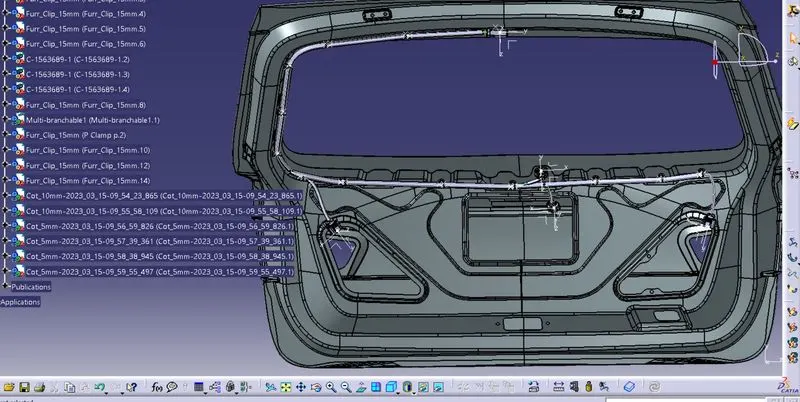
STEP 6 - Adding a protective covering to the harness bundle-
By using a protection covering tool we protect all the bundle. we have created a catalog and we add the protection cover of 10mm diameter and 5 mm diameter. here we create a gap between the Start and End extremities.
STEP 7 - Create flattened view-
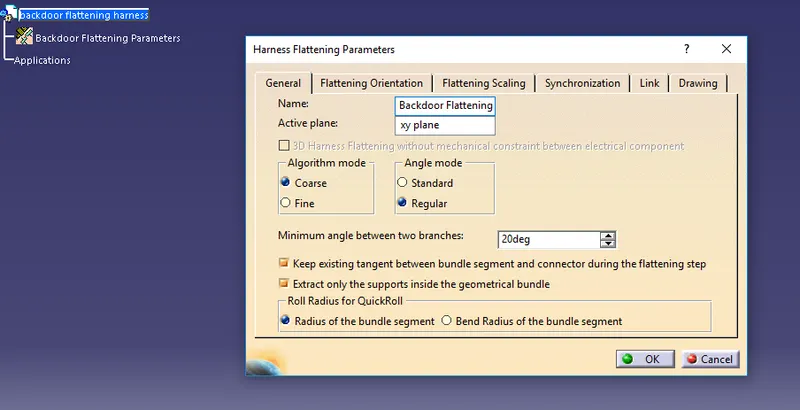
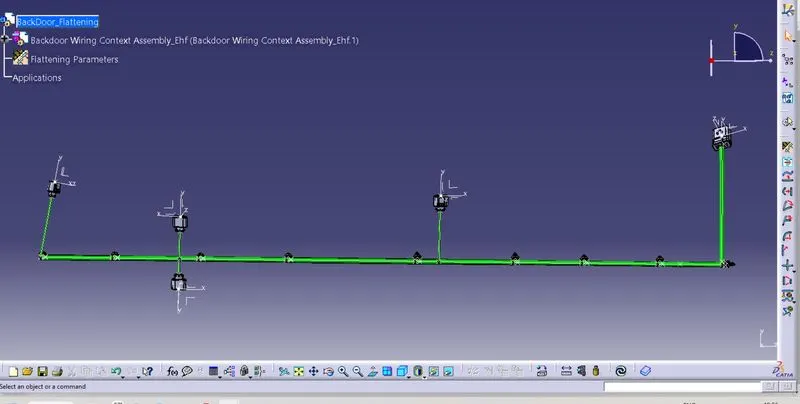
Now we open a new product file for the Electrical harness Flattening. here we save the already-made geometrical bundle segment and we extract the geometrical bundle to flatten the harness by applying flattening parameters we flatten the geometrical bundle.
once the branches are flattened we do the same modifications in the branches using the Rotate, bend, straighten, etc tools in the Electrical harness flattening.
STEP 8 - Creating a flattening view drawing-
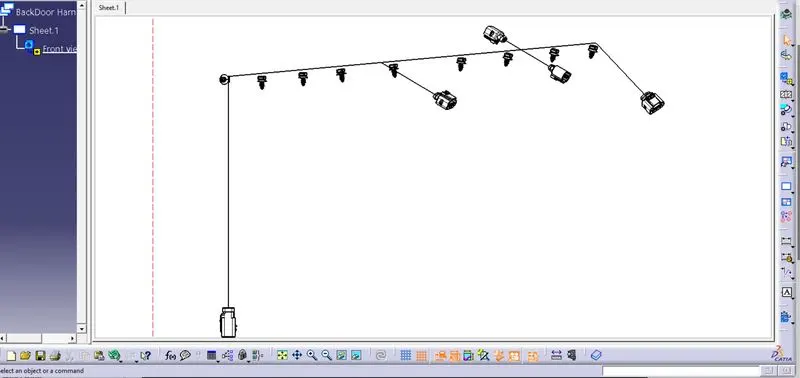
In the figure above, we're creating a new drawing file and defining all of the required drawing parameters. The front view of the Backdoor wire Harness Flattening Product file must be inserted into the Drawing file. As shown in the preceding figure, we must define drawing properties. It should be noted that the 3D wireframe is always ON in the 'Dress up settings. If this option is not enabled, the bundle segments will not be visible in the drawing view. the Backdoor wire Harness Flattens view's final Drawing view.
Conclusion - Routing of the wiring harness for the car Backdoor assembly has been successfully done and prepared flatten-view drawing in Catia V5 as per the design requirements.